How to Couple PVC Pipe: Quick Guide for Strong, Leak-Free Joints
Key Takeaway: How to Couple PVC Pipe Effectively
To achieve strong, leak-free joints when coupling PVC pipes, follow these steps:
- For Permanent, Pressure-Rated Joints:
- Cut the pipes cleanly and squarely.
- Deburr the edges to ensure a smooth fit.
- Use primer to soften the surfaces of both the pipe and fitting.
- Apply solvent cement to both pieces.
- Insert the pipe into the fitting with a quarter-turn and hold it in place for the manufacturer’s recommended cure time.
- For Quick Repairs:
- Utilize push-fit or flexible couplers.
- For Removable Joints:
- Use threaded adapters and PTFE tape for a secure seal.
- Final Check:
- Always test the joint at working pressure after the curing process to ensure integrity.
This guide provides clear steps for effectively coupling PVC pipes, whether for permanent connections or quick repairs.
Quick: Best Way to Couple PVC Pipe
For a fast, reliable join, the best method to couple PVC pipe is a solvent-weld joint using the correct primer and PVC solvent cement sized to the pipe schedule; this provides a permanent, watertight bond by chemically fusing the fitting and pipe.
The technician guarantees clean, square-cut pipe ends, deburred and dry.
Primer softens surfaces, solvent cement wets and dissolves PVC, then components are pushed together with a quarter-turn alignment.
Apply consistent pressure, hold briefly, and wipe excess.
Cure time varies by temperature and diameter; follow manufacturer instructions.
Proper sizing, surface prep, and curing prevent leaks and maintain joint strength.
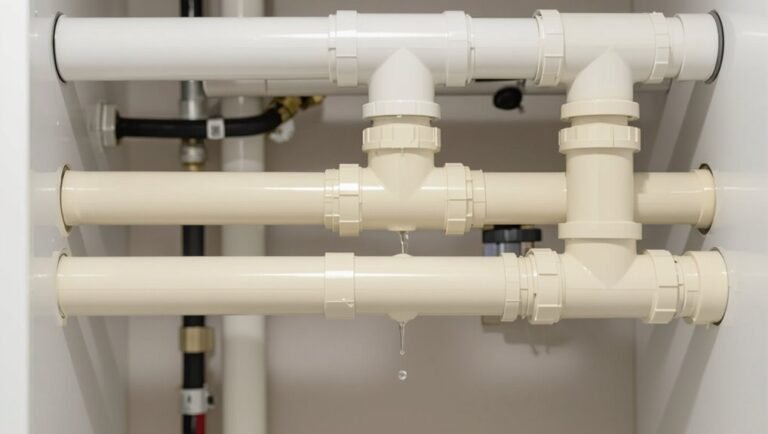
What “Coupling” PVC Means and When to Use It
Coupling PVC refers to joining two pipe sections using a short fitting that restores alignment and flow.
It is used when extending runs, repairing damaged sections, or changing pipe sizes or materials.
Couplings come in several types—slip, threaded, compression, and specialty adapter fittings—each suited to specific installation needs.
What Coupling Means
A coupling is a short fitting designed to join two lengths of PVC pipe in a straight line, creating a continuous run for fluid, venting, or conduit. It provides alignment, mechanical continuity, and a surface for solvent or gasket seals.
Couplings vary by connection type—slip, threaded, or gasketed—and by dimensions to match pipe schedules. Properly selected couplings maintain flow characteristics and system strength while minimizing leak paths. Installers note material compatibility and pressure ratings to guarantee longevity.
- Restores continuity after cutting or damage
- Accommodates slight misalignment
- Matches pipe schedule and diameter
- Supports solvent or gasket sealing
- Preserves internal flow profile
When To Use Couplings
When joining two runs of PVC pipe—whether to extend a line, repair a cut section, or changeover between fittings—installers select couplings to restore mechanical continuity and maintain a leak-tight path. Couplings are used when alignment must be corrected, when a section is replaced after damage, or when routing changes require a simple connection. Selection depends on pressure rating, size match, and working space. Proper surface preparation, primer and solvent cement, and full insertion guarantee strength. Visualize common scenarios:
| Scenario | Purpose |
|---|---|
| Extension | Lengthen a run |
| Repair | Replace damaged segment |
| Reroute | Change layout and fittings |
Types Of Couplings
Different coupling types serve distinct mechanical and sealing roles in PVC systems, ranging from simple slip fittings to flexible adaptor joints. The term “coupling” denotes any device joining two pipe ends, chosen for size, pressure rating, chemical compatibility, movement allowance, and installation method. Proper selection guarantees durability and leak prevention.
Common categories address repair, expansion, changeover, and alignment needs, while material and seal type affect performance in buried, exposed, or pressurized applications.
- Slip couplings for solvent-welded, permanent joins
- Compression couplings for tool-free sealing
- Fernco-style flexible couplers for misalignment
- Reducing couplings for size changeovers
- PVC-to-metal adapters for system integration
Choose: Solvent‑Weld, Push‑Fit, or Threaded Couplings
For selecting a coupling, consider the joint’s permanence, ease of installation, and service conditions to determine whether solvent‑weld, push‑fit, or threaded options are best. The writer outlines trade-offs: solvent‑weld for permanent, pressure‑rated runs; push‑fit for rapid repairs with moderate pressure; threaded for disassembly or metal conversions. Corrosion, thermal movement, and accessibility influence choice. The table below summarizes key attributes succinctly.
| Type | Best use | Notes |
|---|---|---|
| Solvent‑weld | Permanent runs | Strong, leak‑resistant |
| Push‑fit | Repairs/retrofit | Tool‑free, reversible |
| Threaded | Removable joints | Requires tapes/sealant |
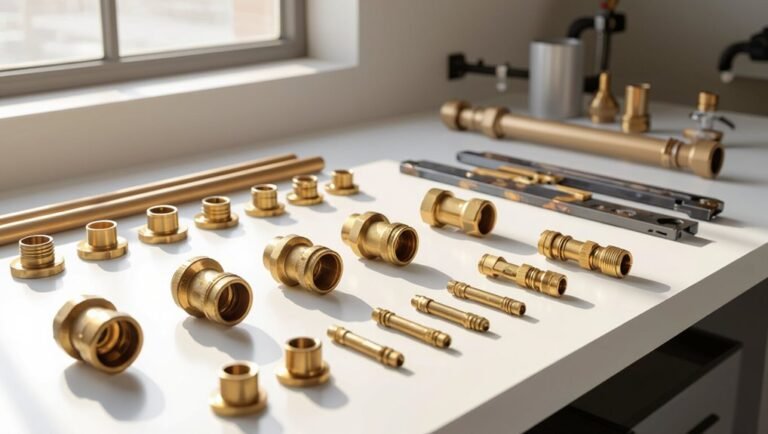
Tools & Materials for Durable PVC Couplings
A concise inventory of essential hand tools, required materials, and safety gear sets the foundation for durable PVC couplings.
Typical tools include a PVC cutter, deburring tool, file and tape measure; materials list comprises couplings, primer, cement, and appropriate thread sealant when needed.
Personal protective equipment such as gloves, safety glasses, and a respirator for solvent fumes should be specified before work begins.
Essential Hand Tools
When preparing to create durable PVC couplings, a compact set of hand tools guarantees accurate cuts, clean joints, and reliable fittings. Essential hand tools enable precise cutting, deburring, alignment, and secure assembly without covering adhesive or material choices. The operator benefits from instruments that fit the pipe sizes and workspace: measuring, cutting, finishing, and holding tasks are streamlined. Proper tool selection reduces rework and leak risk while improving joint strength and appearance. Regular maintenance of these tools preserves accuracy and safety during repetitive coupling tasks.
- Tape measure
- PVC pipe cutter
- Deburring knife or reamer
- Adjustable clamp or vise
- Quick-grip handscrew
Required Materials List
The compact set of hand tools listed previously pairs with specific materials that determine coupling strength and longevity.
Required items include schedule-appropriate PVC pipe and matching solvent-weld fittings, plus PVC primer and an industry-grade cement formulated for the pipe’s schedule and application.
Use compatible O-rings or elastomeric gaskets for mechanical couplings, and stainless steel hose clamps or corrosion-resistant fasteners where specified.
Provide clean, lint-free wipes and a deburring tool or reamer to prepare joint surfaces.
Threaded adapters require PTFE tape or pipe dope rated for PVC.
Quantity should match run length and include spare fittings for unforeseen damage.
Safety Gear Needed
Several essential personal protective items protect installers during PVC coupling tasks: chemical-resistant nitrile gloves for handling primer and cement, ASTM-rated safety glasses or a full-face shield to guard against splashes and flying debris, and a respirator with organic-vapor cartridges when working in confined or poorly ventilated spaces.
Additional protective measures reduce injury risk and improve workmanship. Proper footwear and clothing prevent cuts and chemical contact. Hearing protection may be necessary when using power tools. Inspect and replace damaged gear regularly to maintain effectiveness.
- Nitrile gloves (chemical-resistant)
- Safety glasses or face shield
- Organic-vapor respirator
- Cut-resistant work gloves
- Steel-toe boots
Safety Essentials (Ventilation, Gloves, Eye Protection)
In confined or poorly ventilated spaces, adequate airflow is essential to prevent inhalation of solvent fumes and dust generated while cutting, sanding, or solvent-welding PVC. Work outdoors when possible or use exhaust fans and open windows to create cross-ventilation.
Nitrile or chemical-resistant gloves protect skin from primers, solvents, and sharp edges; change torn gloves immediately.
Safety glasses with side shields or splash goggles prevent particles and liquid contact with eyes.
A respirator with organic-vapor cartridges is recommended when ventilation is limited or when using heavy solvents.
Maintain a tidy workspace to reduce trip hazards and accidental contact with hazardous materials.
Measure & Mark PVC for a Perfect Fit
Before cutting, the installer measures each pipe segment twice to confirm final lengths and avoid waste.
Alignment points are marked clearly on both the pipe and fitting to guarantee correct orientation during assembly. These simple steps reduce errors and speed up the coupling process.
Measure Twice, Cut Once
At the layout stage, precise measurements and clear marks determine whether a PVC run fits as planned or requires costly rework.
The installer measures lengths from fixed reference points, accounts for socket depth and fittings, and rechecks critical dimensions before cutting.
A reliable method reduces waste and alignment problems, especially on long runs or complex assemblies.
Measuring twice confirms allowances for coupling insertion and chamfering.
Tools should be calibrated and accessible, and cuts planned to enable dry-fit verification.
- Use a tape and square for straight runs
- Record measurements on the pipe surface
- Allow insertion depth per fitting specs
- Reconfirm at both ends
- Mark cut lines clearly
Mark Alignment Points
When laying out alignment points, the installer transfers measured dimensions onto the pipe with clear, repeatable marks that indicate cut lines, socket insertion limits, and rotational orientation for fittings.
The installer uses a fine-tip permanent marker and a straightedge to mark cut locations and depth lines at sockets.
Alignment marks on both pipe and fitting show rotation reference for keyed or directional joints.
For solvent-weld assemblies, a reference line across joint faces verifies full insertion before curing. Marks are placed visibly but minimally to avoid interfering with adhesive.
Consistent marking reduces rework, guarantees concentricity, and speeds accurate assembly.
Preparing Pipe Ends: Deburr, Chamfer, Clean
To make certain strong, leak-free joints, the installer prepares each PVC pipe end by deburring, chamfering, and cleaning so surfaces fit and bond correctly; this prevents seal damage and promotes proper adhesive penetration. The technician removes burrs from the cut edge, lightly bevels the OD to ease insertion, and wipes away dust, grease, and moisture with a lint-free cloth.
Attention to uniformity and dry fit verification guarantees consistent joint geometry. Clean, square, and slightly chamfered ends reduce alignment stress and sealing gaps. Proper preparation shortens assembly time and improves long-term joint reliability.
- Remove internal and external burrs
- Lightly chamfer outer edge
- Verify squareness and length
- Wipe with clean, dry cloth
- Inspect for cracks or defects
How to Apply PVC Primer Correctly
The correct primer selection begins with using a product rated for the specific PVC type and local code.
The primer should be applied as an even, generous coat to both pipe and fitting surfaces to soften and prepare the material.
After priming, a brief flash time must be allowed until the surface appears tacky before applying cement.
Choose The Right Primer
Selecting the correct primer is the critical first step for a durable PVC joint; primers soften and prepare the pipe surface so solvent cement can form a strong chemical bond. One must match primer type to pipe material (PVC, CPVC, or ABS), confirm approval for pressure or potable systems, and choose color-coded formulas when regulations require. Consider drying time, shelf life, and compatibility with ambient temperature. Proper container condition and manufacturer instructions influence effectiveness. Safety data should be reviewed for ventilation and PPE requirements.
- Match primer to material and application
- Verify regulatory approvals
- Check drying time and shelf life
- Confirm compatibility with temperature
- Read safety and handling data
Apply Even, Generous Coat
With the correct primer chosen and surface prepared, attention turns to applying an even, generous coat that guarantees full softening and solvent action along both pipe and fitting surfaces. The applicator should load the brush or applicator pad adequately, then brush around the pipe circumference and inside the fitting in continuous strokes.
Overlap passes to eliminate missed spots and make certain uniform coverage; avoid drips that pool. Apply the primer to both mating surfaces promptly and evenly, maintaining a wet film without excess runoff. Work efficiently to cover all bonding areas while keeping debris away from the wet primer film.
Allow Proper Flash Time
After brushing, allow the primer to flash until the surface is tacky but no longer wet; this brief waiting period—typically 30 seconds to 2 minutes depending on temperature and solvent—permits solvents to evaporate and the PVC surface to soften for ideal solvent welding.
The practitioner observes tack, not dryness, before applying cement; insufficient flash leaves pooled solvent that weakens bond, while over-flashing can harden the surface and reduce fusion.
Environmental conditions alter timing, so brief tests on scrap material inform judgment.
Consistent technique guarantees predictable joints and reduces leaks.
- Check tack with a fingertip touch cautiously
- Adjust time for humidity and cold
- Avoid reapplying primer excessively
- Use manufacturer timing guidelines
- Test on scrap for confidence
Step‑By‑Step Solvent‑Cement Coupling Technique
Begin by laying out all required materials and confirming pipe dimensions and fitting types to guarantee compatibility; this prevents errors once the solvent is applied.
Clean pipe ends and fittings with a cloth, removing burrs and debris.
Chamfer edges slightly to ease insertion.
Apply primer evenly to both surfaces; allow it to dry per product instructions.
Brush solvent cement onto the pipe end and inside the fitting in a single swift motion, ensuring full coverage.
Immediately push pipe into fitting with a quarter-turn twist to distribute cement.
Hold alignment and steady pressure for the manufacturer’s set time.
Wipe excess cement and inspect the joint.
Install Push‑Fit PVC Couplings Quickly and Securely
While solvent‑cement couplings rely on primer and adhesive, push‑fit PVC couplings offer a tool‑free alternative that speeds installation and simplifies repairs.
The installer measures, deburrs, and cleans pipe ends, then marks insertion depth to guarantee full engagement of the O‑ring seal. Push firmly until the depth mark meets the coupling face; a tactile click or resistance confirms seating. Inspect alignment and test under low pressure before returning to service. For removal, follow manufacturer guidance to avoid damaging the ring.
- Verify pipe OD and material compatibility
- Remove burrs and chamfer edges
- Mark insertion depth
- Push fully until seated
- Perform leak test before use
Threaded PVC Couplings for Pressure Systems
In threaded PVC couplings for pressure systems, the connection relies on precisely cut threads and compatible sealing methods to maintain pressure integrity and resist leaks. The installer selects tapered or straight-thread couplings rated for the system’s pressure and fluid.
Threads must be clean, undamaged, and properly aligned; cross-threading or over-tightening can crack fittings. Use thread sealant tape or an approved pipe dope compatible with PVC and the conveyed fluid; avoid excessive tape that prevents full engagement.
Test assembled joints at working pressure and inspect for leaks. Replace any coupling showing deformation, hairline cracks, or persistent seepage to guarantee system safety.
Installing Couplings for Buried or Underground PVC
For buried or underground PVC, couplings must be installed to resist soil loads, groundwater, and thermal movement while guaranteeing long-term watertightness. Installers should select buried-rated couplings, provide uniform bedding, and orient joints to minimize stress.
Surfaces must be clean, dry, and properly primed and cemented per manufacturer instructions. Backfill in lifts with compacted, non-sharp material to prevent point loads.
Allow adequate expansion space or use flexible couplings where differential movement is expected.
- Use couplings rated for burial and applicable pressure class
- Guarantee pipe alignment and proper gap for solvent welds
- Protect joints from groundwater infiltration
- Compact backfill in 6–8 inch lifts
- Mark buried lines for future access
Testing Coupled PVC Joints for Leaks & Curing Times
Begin testing coupled PVC joints only after adhesives have set to the manufacturer’s minimum cure time and ambient conditions are confirmed suitable; pressure or water tests should proceed methodically to detect leaks without overstressing newly bonded joints. The inspector fills the run slowly, watches fittings, and monitors for softening, seepage, or audible hisses. Record test pressure, duration, and ambient temperature. Allow extended curing if solvent cement instructions require it before full system pressurization. Any dampness near joints indicates further drying time or re-evaluation. Final acceptance follows stable pressure with no loss over the specified test interval.
| Test step | Parameter | Observation |
|---|---|---|
| Fill | Rate | Leak signs |
| Pressurize | PSI | Pressure drop |
| Hold | Time | Joint condition |
Removing and Repairing PVC Couplings
After verifying that solvent joints have cured and tests show persistent leaks or damage, attention turns to removing and repairing the defective coupling. The technician isolates the section, depressurizes the line, and evaluates whether joint replacement or in-place repair is appropriate. Careful cutting preserves pipe ends; deburring and cleaning prepare surfaces. Replacement couplings or repair sleeves must match pipe material and diameter. Reassembly follows manufacturer procedures with proper primer and cement, or mechanical couplings if permitted. Post-repair testing confirms integrity before returning the system to service.
- Isolate and depressurize
- Inspect remaining pipe for damage
- Use proper cutting tools
- Prepare surfaces thoroughly
- Follow curing and test procedures
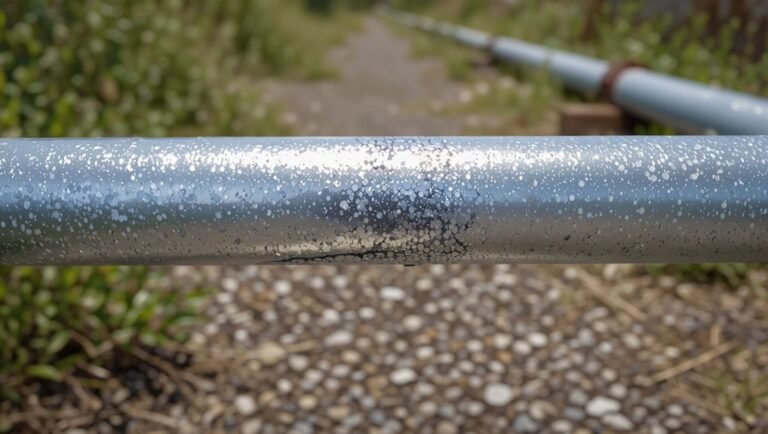
Common Causes of Leaks and How to Fix Them
Frequently, leaks in PVC piping stem from a small set of predictable issues: improper solvent-weld technique, damaged or contaminated pipe ends, mechanical stress or misalignment, degraded seals in mechanical couplings, and chemical or UV degradation.
To fix solvent-weld failures, cut back to clean, square pipe, deburr, reapply primer and solvent cement per manufacturer directions. Replace cracked or scratched sections; make certain mating surfaces are clean and dry.
Correct alignment and add proper supports to eliminate stress. Replace worn gaskets or O-rings in mechanical couplings and use compatible materials where chemical exposure or sunlight has compromised PVC.
Pro Tips for Long‑Lasting, Code‑Compliant PVC Joints
Having addressed the common causes of leaks and their repairs, attention shifts to techniques and practices that guarantee PVC joints remain durable and meet code requirements over time.
The guide emphasizes correct solvent selection, pipe and fitting compatibility, precise cutting and deburring, and proper curing times.
Installers are urged to follow manufacturer instructions and local codes, document joint methods, and inspect assemblies before backfill or concealment.
Routine pressure testing and labeling improve safety and traceability. Training and periodic requalification assure consistent workmanship across projects.
- Use only code-approved solvent cements and primers
- Verify pipe/fitting material and schedule
- Square, chamfer, and clean cuts
- Observe manufacturer cure and test protocols
- Record inspections and pressure test results
Conclusion
Sunlight gleams off a newly joined PVC run, each coupling snug like a seam on a sailor’s coat. Whether solvent‑weld, push‑fit, or threaded, correct prep, fit, and cure turn plain pipe into an unbroken ribbon guiding water safely onward. Vigilant testing and simple repairs keep the flow steady, while careful work and proper safety gear build joints that stand like small, reliable bridges—quiet guardians of plumbing that rarely call attention, yet perform unfailingly.