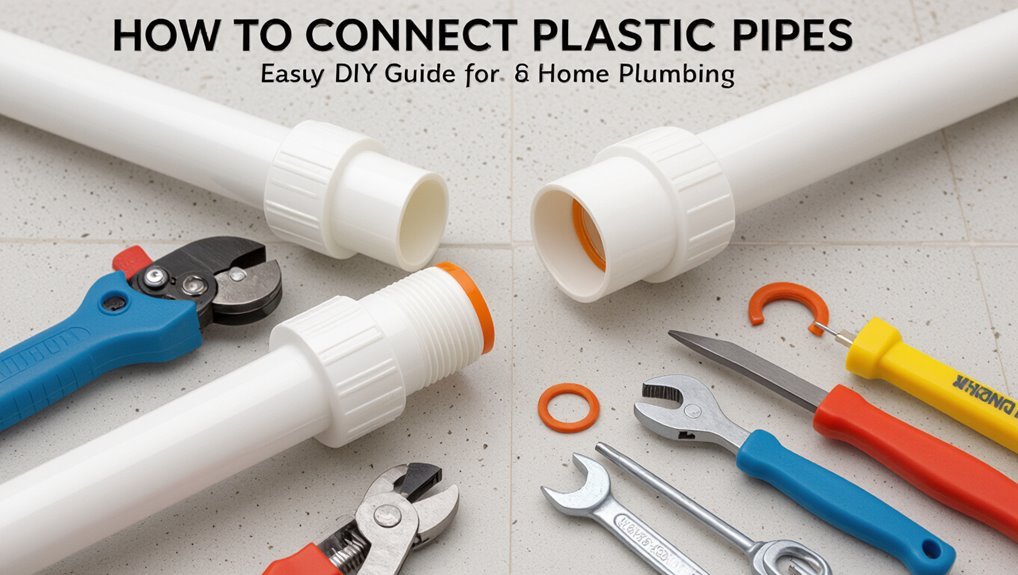
How to Connect Plastic Pipes: Easy DIY Guide for Home Plumbing
If you’re looking to connect plastic pipes like PVC, CPVC, and PEX for your home plumbing, this DIY guide will help you navigate the process easily. Here are the key takeaways:
- Identify Your Pipes: Know the differences between PVC, CPVC, and PEX to choose the right materials for your project.
- Select Compatible Fittings: Ensure the fittings you pick are compatible with the type of plastic pipe you are using.
- Joining Methods: Use solvent cement for PVC/CPVC connections. For PEX, opt for crimp, clamp, or expansion systems.
- Gather Required Tools: Have the necessary tools at hand for cutting, deburring, and assembling pipes.
- Ensure Proper Cuts and Slope: Make straight cuts and maintain the correct slope for drainage to prevent issues.
- Support Your Pipes: Use appropriate supports to keep your pipes in place and prevent sagging.
- Test for Leaks: Conduct a leak test after assembly to ensure a secure connection.
- Troubleshoot Common Issues: Be aware of common mistakes and know when to call a professional for code-sensitive situations.
- Follow Step-by-Step Guidance: Utilize detailed assembly instructions and sourcing tips for parts.
This guide will help you successfully connect plastic pipes with confidence!
Quick Start: What You’ll Be Able To Do With Plastic Pipe
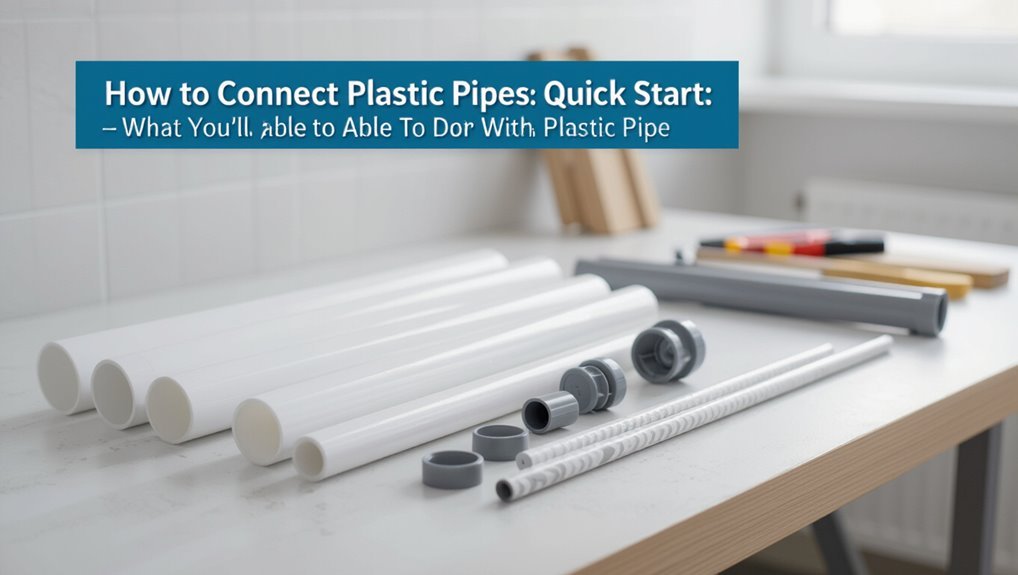
With a few basic tools and proper fittings, a homeowner or tradesperson can cut, join, and route plastic pipe for water supply, drainage, or irrigation without specialized equipment.
The guide enables making straight cuts, deburring edges, and assembling solvent-weld, push-fit, or mechanical compression joints.
It covers measuring runs, planning slopes for drainage, and using supports and clamps to prevent sagging.
Simple adapters between diameters, tees, and elbows are explained, plus basic leak-testing and pressure-check precautions.
Results include durable, code-compliant connections for typical residential tasks, reduced moisture risk, and efficient flow when installation steps are followed carefully.
Who Should Use This Guide (Skill, Tools, Scope)
After mastering basic cuts, joints, and slope planning, a reader can assess whether this guide matches their needs. It targets DIYers with moderate hand skills, basic familiarity with measuring and following instructions, and willingness to learn safe practices.
Required tools are common: pipe cutter, deburring tool, measuring tape, solvent or crimp tools depending on system, and basic safety gear.
Scope covers routine residential repairs and small replacements, not major rerouting, structural alterations, or complex multi-story systems. Professionals or those facing code-sensitive, high-pressure, or unfamiliar situations should consult a licensed plumber for assessment and execution.
Common Home Plastic Pipe Types: PVC, CPVC, PEX
How do PVC, CPVC, and PEX differ and where is each best used in a home plumbing system?
PVC is rigid, economical, and suited for cold-water supply and drain, waste, and vent (DWV) lines.
CPVC has similar rigidity but higher temperature tolerance, making it appropriate for hot and cold potable water lines.
PEX is flexible tubing, resistant to freeze damage and scale, ideal for water distribution, retrofit work, and radiant-floor heating.
Each material requires specific fittings and joining methods: solvent cement for PVC/CPVC and crimp, clamp, or expansion systems for PEX.
Codes and temperature/pressure ratings guide correct selection.
How To Identify PVC vs CPVC vs PEX By Look And Feel
Wondering which plastic pipe is which at a glance? Visual and tactile cues help distinguish PVC, CPVC, and PEX quickly. Colors, wall stiffness, and surface texture are primary indicators. Inspect markings for material codes when present.
Typical differences include:
- PVC: Smooth, white or gray, rigid, thin-walled, lightweight; feels hard and snaps if bent sharply.
- CPVC: Creamy or beige, slightly thicker walls, stiffer than PVC, resists heat; surface may feel chalky and markings often include “CPVC” or temperature ratings.
- PEX: Flexible, rubbery, available in red/blue/white, squeezes under pressure, often lacks rigid printing.
Matching Fittings: Which Fits PVC, CPVC, And PEX
Identifying PVC, CPVC, and PEX by color, stiffness, and markings naturally leads to selecting compatible fittings for each material; mixing parts designed for different plastics can cause leaks or premature failure. The guide states: PVC uses solvent-weld fittings; CPVC needs heat-resistant solvent-weld or threaded CPVC fittings; PEX requires crimp, clamp, or press fittings with compatible rings and brass or polymer inserts. Interface fittings exist (brass or dielectric unions) and must match pressure and temperature ratings. Proper selection guarantees durable joints and code compliance.
| Material | Common Fittings |
|---|---|
| PVC | Solvent-weld, threaded |
| CPVC | Heat-rated solvent-weld |
| PEX | Crimp, clamp, press |
Essential Tools For Any Plastic-Pipe Job
A small set of reliable tools makes plastic-pipe work faster and reduces mistakes: a quality pipe cutter or fine-toothed saw, deburring and reaming tools, a tape measure and marker, appropriate wrenches and pliers, and the connection-specific items (solvent applicators for PVC/CPVC or crimp/clamp tools and rings for PEX).
The right tools save time and guarantee secure joints; selection depends on pipe type and fitting method. Minimal, well-maintained equipment prevents leaks and rework.
- Cutting and finishing: pipe cutter, saw, deburrer, reamer.
- Measuring and marking: tape, straightedge, pencil/marker.
- Connecting: solvent brushes, crimp tool, clamps, adjustable wrench.
Safety Gear And Best Practices For DIY Plumbing
Proper safety gear and disciplined work habits reduce injury risk and protect plumbing systems during DIY plastic-pipe projects.
Protective eyewear, gloves resistant to cuts and solvents, and hearing protection for power tools are essential. A dust mask or respirator is advised when cutting or solvent-welding in confined spaces.
Secure work areas with adequate lighting and ventilation, and isolate water supplies before starting. Use pipe supports and clamps to prevent strain on joints.
Follow manufacturers’ instructions for adhesives and primers, allowing proper cure times. Dispose of solvent-soaked rags safely.
Maintain tools in good condition and stop work if unsure; consult a professional.
Planning A Simple Plastic-Pipe Run: Measuring And Layout
When planning a simple plastic-pipe run, the installer measures the route, notes fixture locations and rises, and sketches a scaled layout showing pipe lengths, fittings, and support points.
The plan confirms required materials, identifies obstructions, and sets slope for drainage or level for supply.
Clear labeling of hot/cold lines and isolation valves prevents errors.
Allowances for expansion, access panels, and future branches are included.
Accurate measurement reduces waste and rework.
- Measure twice: record straight runs, offsets, and vertical drops.
- Map fittings: elbows, tees, adapters with exact placement.
- Specify supports: spacing, type, and attachment points.
Cutting PVC, CPVC, And PEX Cleanly And Accurately
With the layout and measurements confirmed, attention turns to cutting pipe to the exact lengths indicated on the plan. One-inch PVC and CPVC require a fine-toothed saw or tubing cutter; PEX favors a ratcheting cutter. Secure pipe in a vise or clamp, mark cut lines with a square, and cut perpendicular to the axis. Measure twice, cut once. Maintain steady pressure and smooth motion to prevent crush or ovalization. Clean sawdust and plastic shavings away. Check each piece against the plan before assembly to assure fit and alignment.
| Tool | Best Use |
|---|---|
| Fine-toothed saw | PVC/CPVC |
| Ratcheting cutter | PEX |
| Vise/clamp | Stabilize pipe |
Deburring And Chamfering Plastic Pipe Ends
Properly deburring plastic pipe ends removes burrs and shaving that can obstruct flow, prevent proper seating, or damage seals.
Chamfering the outer edge creates a smooth lead-in for fittings and eases insertion without stressing the pipe.
Together these steps improve joint integrity and reduce the risk of leaks.
Why Deburr Matters
Deburring and chamfering plastic pipe ends remove rough edges and particles that can interfere with sealing, cause leaks, or abrade fittings and seals.
Properly finished ends guarantee reliable joints, extend seal life, and reduce installation time by preventing misalignment or obstruction.
Clean edges also minimize stress concentrations that can lead to cracks under pressure.
- Improves seal integrity by eliminating gaps and uneven contact surfaces.
- Reduces wear on O-rings and adhesive bonds, increasing longevity.
- Prevents flow restriction and debris migration that could clog valves or meters.
Consistent deburring contributes to safer, longer-lasting plumbing connections.
How To Chamfer
Begin by cutting the pipe squarely, then remove burrs and create a small 15–30° chamfer on the outside edge of the pipe using a deburring tool, utility knife, or fine file; this bevel eases insertion into fittings, prevents O‑ring damage, and guarantees an even adhesive or welded joint. The DIYer should rotate the tool evenly, check fit frequently, and remove only enough material to keep dimensions within tolerance. Clean surfaces of shavings and dust before joining. Consistent chamfers save time and prevent leaks.
| Tool | Purpose |
|---|---|
| Deburring tool | Fast, clean chamfer |
| File | Controlled shaping |
| Knife | Quick touch-ups |
How Solvent Welding Works For PVC/CPVC
With a combination of chemical softening and mechanical fusion, solvent welding joins PVC and CPVC by temporarily dissolving the pipe and fitting surfaces so they meld into a single, continuous piece as the solvent evaporates and the polymer rehardens.
The process relies on primer and cement that chemically swell and intermix polymer chains, creating a strong, leak-resistant bond without adhesives in the traditional sense.
Cure times vary with temperature and cement formulation; full strength develops as solvents dissipate and the polymer matrix reforms.
Proper gap control and correct cement selection guarantee joint integrity and longevity.
- Chemical action: polymer chain interdiffusion
- Mechanical fusion: seamless joint formation
- Time factors: evaporation and rehardening
Preparing Pipe And Fittings For Solvent Cement
Before applying solvent cement, the pipe should be cut square and any burrs removed to guarantee a proper fit.
Both pipe and fitting surfaces must then be cleaned of dirt, oil, and moisture.
When required by material, a primer should be applied to soften and prepare the surfaces for the cement.
Cut And Deburr
Cut pipe ends and fitting sockets squarely to guarantee full contact during solvent welding; uneven cuts or angled faces can create gaps that weaken joints.
The work is precise: measure, mark, cut with an appropriate tool, then remove burrs and flash. Deburring prevents misalignment and obstructed flow, and it assures the spigot fully enters the socket.
Remove any rough edges with a deburring tool, file, or chamferer, keeping the inside lip smooth. Confirm roundness and straightness before proceeding to cleaning and priming.
- Use a proper cutter and steady, square cuts.
- Deburr internal and external edges gently.
- Inspect fit and remove shavings.
Clean And Prime
Once pipe ends and sockets are square and burr-free, surfaces must be cleaned and primed to assure a reliable solvent-weld.
Any oil, dirt, or moisture prevents proper fusion; use a clean, lint-free cloth and manufacturer-approved cleaner to remove contaminants.
For PVC and CPVC, apply primer to pipe OD and fitting ID, rotating the applicator for even coverage.
Allow the primer to soften surfaces briefly but not to dry completely before cementing.
For ABS, follow local code—primer may be optional.
Work steadily: primed areas must be joined within the primer’s open time to guarantee full chemical weld and leak-free joints.
Dry-Fit, Mark, And Check Alignment Before Gluing
With the fittings laid out and pipes trimmed to size, the installer dry-fits all components to confirm proper engagement and orientation.
Each joint is assembled without adhesive to verify depth, rotation, and access for future maintenance. Visual and tactile checks guarantee sockets are fully seated and pipes are not under strain before marking.
- Mark insertion depth on pipe and fitting with a permanent marker to guarantee consistent alignment during final assembly.
- Check run straightness and clearances for brackets, valves, and nearby fixtures to avoid interference.
- Reassemble dry-fit once more to confirm marks and final positions prior to gluing.
Step-By-Step Solvent-Cement Joint For PVC/CPVC
The procedure for a solvent-cement joint begins with careful surface preparation: cleaning, deburring, and removing any dirt or glaze from pipe ends and fittings.
Next, primer (where required) is applied and allowed to evaporate before a generous, even coat of solvent cement is brushed onto both mating surfaces.
The parts are then quickly assembled with a quarter-turn twist and held until the initial set is achieved, following manufacturer cure-time guidelines.
Surface Preparation Steps
Before applying solvent cement, surfaces must be clean, dry, and free of burrs, grease, or old adhesive to guarantee a reliable bond.
The installer inspects cut ends for square, smooth edges and removes burs with a deburring tool or file.
Dirt and oils are wiped away with a clean, lint-free cloth and an appropriate cleaner; allow full evaporation.
Dry-fit components to confirm proper alignment and correct depth markings.
Chamfers on pipe ends improve fit and reduce cement pooling.
Protect prepared surfaces from dust and moisture until joining to maintain cleanliness and secure consistent solvent action.
- Inspect and deburr
- Clean and dry
- Dry-fit and mark
Applying Solvent Cement
After surfaces are prepared and fittings are dry‑fit, the installer assembles the solvent cement kit and work area, confirming good ventilation, appropriate temperature, and the correct cement and primer for the material; gloves and eye protection are donned and rags or absorbent pads are placed to catch drips.
The primer is applied to pipe and socket with even strokes, allowed to flash. Cement is stirred, then applied quickly: a thin, uniform coat inside the socket and around the pipe end.
The pipe is inserted with a quarter‑turn twist to distribute cement, held for the manufacturer’s set time, and excess cement is wiped away.
Common Solvent-Cement Mistakes And How To Avoid Them
In working with solvent cement, small errors often cause leaks, weak joints, or premature failures; understanding common mistakes helps prevent costly rework.
- Inadequate cleaning: failing to deburr and remove grease or moisture prevents proper solvent action; always dry and clean surfaces before priming and cementing.
- Wrong application: overapplying cement floods the joint and underapplying leaves gaps; use the correct applicator and a uniform thin coat on both socket and spigot.
- Insufficient cure time: moving or pressurizing joints too soon stresses the bond; follow manufacturer cure charts for temperature and pipe size before testing or loading the system.
When To Use Threaded Fittings On Plastic Pipe
Threaded fittings are recommended when mechanical strength and the ability to withstand torque or axial loads are required, such as in short-run connections, service valves, or equipment interfaces.
Compatibility of thread form and plastic material must be confirmed, since some plastics can crack under overtightening while others tolerate thread engagement better. Proper use includes matching materials and applying appropriate sealing methods to maintain joint integrity without overstressing the plastic.
When Threads Provide Strength
When mechanical strength and resistance to pullout are critical—such as in buried service lines, pressure mains, or assemblies subject to frequent disassembly—threads on plastic pipe fittings offer a reliable means of load transfer and secure connection.
They concentrate shear and tensile forces into the threaded interface, permitting controlled engagement depth and predictable torque.
Threaded joints enable easy maintenance, replacement, and modular system design where solvent or welded joints are impractical.
Careful selection of thread form, engagement length, and backing support prevents stress concentration and creep.
- Use for removable pressure connections.
- Prefer where axial loads exist.
- Choose for maintenance-heavy installations.
Using Threads With Materials
Select threaded fittings for plastic pipe systems only after matching the thread form and material properties to the pipe polymer and the application’s mechanical and environmental demands.
Specification should consider chemical compatibility, temperature range, pressure rating and UV or sunlight exposure.
Use rigid polymers like PVC or CPVC with compatible threaded sockets and avoid threading flexible materials that deform under load.
Metal-to-plastic threaded joints require backing supports or reinforced adapters to prevent stress concentration and thread galling.
For potable water, choose approved materials and sealants.
Use thread engagement length and torque limits from manufacturer data to guarantee leak-free, durable connections.
How To Thread Plastic Fittings And Seal Threads
Cut a clean, square end on the plastic fitting and prepare the mating threads and pipe surface before assembling; proper preparation guarantees a tight, leak-free joint without overstressing the plastic.
Use a compatible thread cutter for PVC/CPVC or a clean die for softer plastics, cutting slowly to avoid heat and burrs.
Remove debris and dry-fit parts.
- Apply PTFE tape in the thread direction, two to three wraps; avoid overwrapping which can misalign threads.
- For critical joints, use a compatible thread sealant; allow specified cure time.
- Tighten by hand, then a quarter to half turn with a wrench.
Compression Fittings: When And Why To Use Them
In specific situations, compression fittings offer a reliable, non-soldered way to join plastic pipes and tubing, using a ferrule (or olive) and nut to create a mechanical seal without heat or adhesives. They suit repairs, junctions between dissimilar materials, and locations where soldering or solvent welding is impractical.
Compression connections work well for low- to medium-pressure potable water and supply lines, provide easy disassembly for maintenance, and minimize tool needs. Limitations include sensitivity to over-tightening, potential leaks if surfaces are damaged, and less suitability for high-pressure or buried lines. Proper selection of size and material guarantees long-term performance.
Step-By-Step Compression Fitting Installation
When preparing to install a compression fitting, the installer confirms compatible pipe and fitting materials, measures and marks pipe length, and gathers required tools—pipe cutter, deburring tool, adjustable wrench(s), and emery cloth—so each step flows without interruption.
The installer cuts squarely, deburrs and chamfers the pipe, slides on the nut and ferrule, seats the pipe fully into the fitting body, then threads the nut finger-tight.
A wrench finishes the joint: hold the fitting body, tighten the nut until secure without over-torquing.
Finally, the installer tests for leaks and re-tightens slightly if needed.
- Cut and deburr
- Assemble and seat
- Tighten and test
Push-Fit (Snap) Fittings: When They’re Best
Often chosen for speed and simplicity, push-fit (snap) fittings provide a tool-free method to join plastic pipes by using an internal O-ring and metal or plastic teeth to grip and seal the pipe. They suit repair work, tight spaces, and temporary connections where fast, reliable joints are needed without soldering, glue, or crimp tools.
Ideal for copper-to-plastic connections and retrofit projects, they accommodate slight misalignment and allow repositioning.
Limitations include higher unit cost, sensitivity to dirty or damaged pipe ends, and less suitability for buried or permanently concealed installations. Manufacturer compatibility and pressure-temperature ratings should guide selection.
Installing Push-Fit Fittings On Plastic Pipe
Having chosen push-fit fittings for their speed and convenience, installation on plastic pipe follows a few simple, exact steps to guarantee a reliable seal.
The installer measures and cuts the pipe squarely, deburrs the edge, and checks for damage or deformation.
Marking insertion depth prevents short connections.
Assembly requires firm, straight push until the pipe seats against the stop.
After connecting, a visual and tug test confirms engagement.
For accessible joints, pressure testing reveals leaks before concealment.
Avoid solvents or crimp tools used with other systems; push-fit relies solely on correct preparation and full insertion.
- Prepare pipe
- Mark depth and insert
- Test connection
PEX Crimp And Clamp Systems: Tools And Steps
For PEX installations requiring permanent, code-compliant joints, crimp and clamp systems provide a reliable mechanical connection by compressing metal rings over the tubing and fitting barb.
Necessary tools include a quality PEX crimper or clamp crimping tool, sized crimp rings or stainless steel clamps, a tubing cutter, and a go/no-go gauge for verification.
Steps involve cutting squarely, sliding the ring or clamp over the pipe, fully seating the pipe onto the fitting barb, positioning the ring or clamp correctly, compressing until the tool indicates a complete crimp, and inspecting with the gauge.
Proper tool calibration and component compatibility guarantee leak-free, durable joints.
How To Crimp PEX Fittings With Rings And Tools
With the correct crimp or clamp components and properly calibrated tools in hand, the actual crimping sequence centers on precise alignment, consistent hand placement, and verification steps.
The tubing is cut square, deburred, and inserted fully onto the fitting shoulder; the ring is positioned evenly over the tubing. The crimper or clamp tool is seated squarely and compressed until the tool index indicates a full stroke.
After release, the joint is visually inspected and measured with a go/no-go gauge. If any doubt exists, the ring must be cut off and the joint remade to guarantee leak-free performance.
- Prepare tubing and fitting.
- Seat ring evenly.
- Crimp, inspect, gauge.
Using PEX Expansion Fittings And Method Overview
The section outlines PEX expansion basics, explaining how tubing is expanded and contracts to form a secure joint with the fitting.
It summarizes the expansion tool steps, from sizing and expanding the pipe to inserting the fitting and allowing the connection to set.
Practical fitting installation tips are provided to guarantee proper alignment, correct tool use, and leak-free results.
PEX Expansion Basics
Explaining PEX expansion focuses on how pipe diameter is temporarily increased, an expansion fitting is inserted, and the pipe returns to its original size to form a secure, leak-proof joint. This method relies on material memory and precise fitting geometry.
It suits PEX-A and offers smooth internal surfaces and lower flow disruption.
Properly sized fittings and cold, clean pipe ends are essential. Expansion creates a mechanical interference fit rather than relying on clamps or crimp rings, reducing potential leak points when executed correctly.
- Material memory: PEX-A recovers to hold fittings firmly.
- Clean cuts: Deburred, square ends ensure seal integrity.
- Fit selection: Match diameter and type exactly.
Expansion Tool Steps
Once the installer prepares the PEX-A pipe and fitting, the expansion process proceeds in a few precise steps: cut and deburr the pipe squarely, mark insertion depth on the pipe, expand the pipe evenly with the correct-sized expander head until the wall thins and diameter increases, immediately insert the matching expansion fitting to the marked depth, and allow the pipe to recover fully around the fitting before any movement or pressure is applied.
The technician checks expander calibration, selects the proper head, maintains axial alignment during expansion, times recovery per manufacturer’s data, and inspects the joint visually for uniform seating and absence of wrinkles or gaps before proceeding.
Fitting Installation Tips
Begin by aligning the prepared PEX-A pipe and expansion fitting precisely to guarantee a straight, wrinkle-free joint before recovery begins. The installer should expand pipe uniformly, seat the fitting to the mark, and allow the material to recover fully for a secure, leak-free connection. Avoid twisting or side-loading during recovery; support piping to maintain alignment. Inspect each joint for visible gaps or deformations.
- Use correct-sized expansion heads and clean dies; verify tool calibration.
- Mark insertion depth; fully seat fitting until shoulders meet.
- Allow recommended cool-down/recovery time before pressure testing or strain application.
Choosing Between Crimp, Clamp, And Expansion For PEX
Deciding between crimp, clamp, and expansion PEX systems hinges on compatibility, tool access, and long-term maintenance needs; each method has distinct fittings, installation steps, and failure modes that influence cost, speed, and durability.
Crimp uses copper rings and a calibrated tool; it’s economical and quick but requires ring seating verification.
Clamp (cinch) employs stainless steel clamps and a simple driver, offering ease and reusability of tools but slightly larger fittings.
Expansion stretches tubing over plastic fittings for a permanent, leak-resistant joint favored in commercial installs; it demands precise technique and proprietary fittings.
Choice balances budget, skill, available tools, and expected inspection frequency.
Joining Plastic Pipe To Copper Or Brass Safely
When moving from plastic pipe to copper or brass, installers must select adapters rated for the specific materials and system pressures.
Surfaces on both the plastic and metal must be clean, deburred, and prepared to guarantee a reliable seal.
Finally, connections should be secured with the correct fittings and tightened to manufacturer torque or compression specifications to prevent leaks.
Choosing Compatible Adapters
Adapters provide the critical link between plastic pipes and copper or brass fittings, so selecting the right type and material is essential to prevent leaks, corrosion, and mechanical stress. Choice depends on pipe material, pressure rating, and planned permanence. Use dielectric or connector adapters when joining dissimilar metals to prevent galvanic corrosion. Make certain thread types match and that any seals are compatible with plumbing fluids and temperatures.
Compression, push-fit, and solvent-weld adapters each have specific applications and limitations.
- Confirm material compatibility and pressure/temp ratings.
- Prefer dielectric or brass connector fittings for metal joins.
- Verify thread type and seal material.
Preparing Pipe Surfaces
Before joining plastic pipe to copper or brass, surfaces must be clean, smooth, and free of contaminants to guarantee a reliable, leak-free connection.
Remove oxidation, oils, paint, and burrs: use a fine abrasive pad or emery cloth on metal and a fine file or deburring tool on plastic.
Wipe both with a lint-free cloth and a suitable solvent—denatured alcohol for plastic, acetone or alcohol for metal—allowing surfaces to fully dry.
Check for nicks, deep scratches, or warping; replace any damaged sections.
Verify mating diameters match and remeasure after cleaning to confirm a snug, correct fit before fitting.
Securing With Proper Fittings
Select fittings that match the pipe materials, size, pressure rating, and destined service to guarantee a durable, leak-free joint.
When joining plastic to copper or brass, choose adapter fittings rated for both metals and the plastic type (CPVC, PEX, PVC).
Use dielectric or compression adapters where appropriate, and avoid direct solvent welding to metal.
Clean and deburr both ends, apply appropriate thread sealant or PTFE tape on metal threads, and follow torque limits.
Test under pressure after assembly and inspect for hairline leaks.
- Use listed adapter fittings.
- Prepare surfaces and apply sealant correctly.
- Pressure-test and recheck connections.
Adapters And Transition Fittings: Selection And Use
When joining dissimilar pipe materials or sizes, properly chosen adapters and transitional fittings guarantee a secure, code-compliant connection that resists leaks, corrosion, and mechanical stress. Selection depends on materials (PVC, CPVC, PEX, copper), pressure rating, temperature, and local code.
Use solvent-weld or threaded adapters for PVC/CPVC, compression or crimp fittings for PEX, and dielectric unions where metal meets plastic to prevent galvanic corrosion. Match inner diameters and account for insertion depth and sealing method (o-rings, solder, solvent).
Install straight, support adjacent runs to avoid strain, test under pressure, and replace any fitting showing wear or incompatibility.
Routing Pipe Around Obstacles And Through Studs
Routing pipe around obstacles and through studs requires careful planning to maintain structural integrity, protect the piping, and comply with code clearance and fire-stopping requirements.
The installer should map routes to avoid load-bearing disruption, use drill holes centered in studs, and respect minimum edge distances.
Where bends are needed, sweep fittings or gentle curves reduce stress.
Firestops and grommets seal penetrations; insulating sleeves protect against abrasion.
When passing near electrical, maintain required separations.
Verify local codes for hole sizes and protection plates to prevent nail or screw damage.
- Plan route to avoid structural members.
- Drill centered holes and use plates.
- Apply firestops and protective sleeves.
Securing And Supporting Plastic Pipe Runs Properly
For reliable performance, plastic pipe runs must be fastened and supported at intervals and locations that control deflection, prevent sagging, and accommodate thermal movement.
Supports should be firm but not restrictive: use pipe clips, straps, or hangers sized for the material to avoid compression.
Follow manufacturer and code spacing guidelines; reduce span lengths for horizontal runs and add hangers near fixtures, elbows, and long unsupported stretches.
Allow for expansion with slip joints or guided supports that permit axial movement.
Anchor points must transfer loads to structure, avoiding point stresses.
Inspect supports for corrosion, looseness, or deformation and correct promptly.
Protecting Plastic Pipes From Freezing And Heat
Protecting plastic pipes from temperature extremes requires targeted measures to prevent both freezing and heat-related damage.
Exposed runs should be insulated with appropriate materials and fittings to reduce thermal transfer.
In locations prone to wide temperature swings, combining insulation with temperature management strategies minimizes risk and prolongs pipe life.
Insulating Exposed Pipes
When exposed to cold or intense heat, plastic pipes can suffer cracking, warping, or joint failure unless properly insulated; effective insulation minimizes temperature extremes, reduces heat loss, and prevents freeze-related damage while extending the service life of the system.
- Select closed-cell foam sleeves sized to fit pipe diameter; they resist moisture and compress for snug coverage.
- Seal seams and ends with compatible tape or solvent-resistant adhesive to maintain thermal continuity and block drafts.
- For outdoor or sunlight-exposed runs, add UV-resistant jacketing and secure insulation against movement, avoiding contact with sharp edges.
Managing Temperature Extremes
In cold climates and during heat waves alike, plastic pipes face risks from temperature extremes that can lead to brittleness, warping, joint failure, or bursting; managing these risks requires a combination of insulation, controlled ambient conditions, and preventive design measures like looped runs, heat tracing, and adequate ventilation to keep pipe temperatures within the material’s safe range.
Install foam or fiberglass insulation on exposed runs, seal gaps that admit drafts, and route pipes away from heat sources. Use thermostatically controlled heat tape for vulnerable sections, add thermal barriers where solar gain is possible, pressure-relief devices, and regular inspections to detect early distress.
Correct Slope For Drain And Waste Plastic Piping
For drain and waste plastic piping, maintaining the correct slope is essential to guarantee self‑cleansing flow and prevent blockages. The slope, measured as fall per foot, directs solids and liquids toward the sewer without pooling. Typical recommendations: 1/4 inch per foot for small runs, 1/8 inch per foot for long horizontal runs to balance velocity, and steeper slopes only where fixtures demand faster drainage.
Installers should measure run lengths, adjust fittings and hangers to preserve continuous grade, and avoid dips or backfalls. Proper slope reduces maintenance and odor issues while ensuring reliable gravity drainage in household systems.
- Measure and set consistent grade
- Use supports to maintain slope
- Avoid dips, backfalls, and excessive steepness
Pressure Testing And Leak-Testing Plastic Pipe Joints
Ensuring the integrity of plastic pipe joints requires systematic pressure and leak testing to confirm that fittings, solvent welds, and mechanical couplings hold under expected service conditions.
Testing begins after assembly and curing; visual inspection precedes pressurization. For water lines, apply the manufacturer-recommended test pressure using air or, preferably, water to avoid compressible-air hazards.
Monitor gauges and connections for a specified duration, watching for pressure decay. Perform a wet inspection for visible drips and use soapy solution for air tests to reveal bubbles.
Record results, relieve pressure slowly, and repair any failed joints before insulation, burial, or wall closure.
Fixing A Small Leak In A Plastic Pipe Joint
Locate the leak and prepare the joint before attempting repairs: dry the area, remove loose debris or failed sealant, and depressurize the line.
For small leaks at a fitting, inspect the connection type; threaded, solvent-weld, or compression require different fixes.
Clean thoroughly, apply appropriate sealant or tape, and allow curing time per product instructions.
Re-pressurize slowly and observe.
- Threaded: remove, clean threads, use PTFE tape or pipe dope, reassemble snugly but avoid overtightening.
- Solvent-weld: dry, apply compatible primer/solvent cement if joint wasn’t fully fused.
- Compression: tighten nut or replace ferrule.
Replacing A Damaged Section Of Plastic Pipe
When a section of plastic pipe is cracked, crushed, or otherwise compromised beyond simple patching, the damaged length should be removed and replaced to restore reliable flow and prevent recurrent leaks. The technician measures and marks the damaged span, shuts off water, drains the line, then cuts out the section cleanly. Matching pipe and fittings are prepared; deburred ends, primer and solvent applied for PVC, or proper compression/fitting techniques used for PEX/CPVC. After installation, joints are inspected and line pressure tested. Maintain accessibility and document the repair for future maintenance.
| Tool | Step | Check |
|---|---|---|
| Cutter | Measure | Leak test |
| Fitting | Clean | Secure |
When A Repair Needs Full Section Or System Replacement
After removing and replacing a damaged span, an inspection may reveal widespread deterioration, incompatible materials, or repeated failures indicating that piecemeal repairs are no longer adequate. In such cases, replacement of the entire section or system guarantees reliability, code compliance, and uniform material performance. Decision factors include risk of future leaks, age of existing piping, and accessibility for thorough replacement.
Cost versus long-term benefit should guide choices, with professional assessment recommended for complex runs or concealed installations.
- Assess remaining pipe condition and compatibility.
- Prioritize sections with persistent failures or corrosion.
- Plan full replacement to meet current standards and ease future maintenance.
Avoiding Solvent Fumes And Ventilating Work Areas
The text addresses the importance of setting up proper ventilation when working with plastic pipe solvents to prevent fume buildup.
It outlines practical measures such as using fans, opening windows, and positioning work to direct vapors away from the installer.
It also emphasizes techniques to reduce solvent exposure, including using low-odor formulations, wearing appropriate respirators, and minimizing open time for joints.
Proper Ventilation Setup
One clear priority during plastic pipe joining is establishing adequate ventilation to prevent buildup of solvent vapors that can be toxic, flammable, or both.
The work area should allow continuous air exchange, using natural airflow or mechanical assistance.
Windows and doors can create cross-ventilation; fans accelerate dilution and direct fumes outside.
When working in confined spaces, use exhaust fans or ducting to move air away from occupants and out of the building envelope.
Monitor for odor intensity and cease work if ventilation is inadequate.
- Open windows/doors and position fans for cross-flow.
- Use exhaust fans or portable ducting for confined areas.
- Make certain airflow directs vapors outdoors, not into adjacent rooms.
Reducing Solvent Exposure
In enclosed or poorly ventilated spaces, minimizing solvent exposure requires deliberate control of airflow, careful selection of personal protective equipment, and procedures that limit vapor generation.
Workers should open windows and doors, position fans to exhaust fumes away, and use inline or window-mounted ventilation when available.
Choose low-VOC solvents or primer alternatives and apply sparingly with brush or applicator to reduce emissions.
Respiratory protection rated for organic vapors is advised when ventilation is inadequate.
Store solvents in closed containers and limit quantities on-site.
Monitor symptoms, take regular breaks outdoors, and follow product safety data sheets for exposure limits and first-aid measures.
How Local Plumbing Codes Affect Plastic-Pipe Choices
When selecting plastic pipe for a project, local plumbing codes dictate acceptable materials, sizes, joining methods, and installation practices that constrain choices and influence cost and performance. Codes specify permitted pipe types (PVC, CPVC, PEX), required markings, pressure and temperature ratings, and approved solvents or fittings. Inspectors enforce backflow prevention, support spacing, and burial depth. Compliance reduces rework and liability; noncompliance risks fines and failed inspections. Contractors and DIYers should consult municipal codebooks or building departments before purchase and installation.
- Verify local approvals and product listings.
- Follow specified joining and burial methods.
- Keep documentation for inspection.
Selecting Pipe Size For Water Supply And Drains
For water supply and drainage, proper pipe sizing balances flow capacity, pressure loss, code requirements, and fixture demand.
The guide explains that supply lines use nominal diameters (typically 1/2″, 3/4″, 1″) chosen by fixture units and run length; larger mains reduce velocity and maintain pressure.
Drain sizing follows fixture discharge rates and prevents clogging and siphoning—common sizes range from 1-1/4″ for sinks to 3″–4″ for main soil stacks.
Consider future fixtures, acceptable velocity ranges, and manufacturer tables.
When in doubt, consult code charts or a professional to match pipe material, fittings, and intended purpose precisely.
How Water Pressure And Flow Affect Plastic Fittings
How does water pressure and flow rate influence the performance and longevity of plastic fittings? Excessive pressure stresses joints, causing leaks or crack propagation; fluctuating pressure (water hammer) accelerates fatigue; high flow increases erosion at bends and fittings. Properly matched pressure and flow preserve seals and adhesive bonds.
- Match ratings: select fittings rated above maximum system pressure to provide safety margin and reduce stress.
- Minimize turbulence: smooth bends and correct pipe diameter lower localized wear and joint strain.
- Control transients: install pressure-reducing valves, air chambers, or arrestors to prevent hammer and cyclic fatigue.
Cost Comparison: PVC Vs CPVC Vs PEX For Home Work
A concise cost comparison between PVC, CPVC, and PEX highlights differences in upfront material price, with PVC typically the least expensive and CPVC often costing more.
Installation labor varies by system complexity and joining method, affecting total project cost.
Long-term maintenance and replacement frequency further shift lifetime expenses and should inform material choice.
Material Cost Comparison
When comparing material costs for residential plumbing, PVC, CPVC, and PEX present distinct price profiles driven by raw material, manufacturing complexity, and purpose of use. Each material’s cost varies by pipe diameter, schedule/thickness, and regional supply; CPVC typically costs more than PVC due to heat-resistant formulation, while PEX sits between or above PVC depending on oxygen barrier and brand.
Fittings and specialty connectors add to total material expense; solvent-weld fittings for PVC are inexpensive, CPVC fittings cost more, and PEX fittings or crimp systems increase material outlay. Durability and application-specific value affect long-term cost-effectiveness.
- PVC: lowest base cost, cheap fittings
- CPVC: higher cost for heat resistance
- PEX: mid-to-high cost, flexible system
Installation Labor Costs
Compare labor requirements for PVC, CPVC, and PEX by focusing on skills, time, and common installation steps: PVC and CPVC need cutting, deburring, priming, and solvent-welding or threaded joins that demand careful preparation and curing time, while CPVC installations often require slightly more care due to heat-resistance handling and compatibility checks; PEX typically offers faster installs because of flexibility, fewer fittings, and push-fit or crimp systems, though its fittings and tools introduce different skill needs.
Labor rates reflect these differences: PVC is generally least labor-intensive, CPVC slightly higher, and PEX often fastest but may incur tooling or certification costs.
Long-Term Maintenance Expenses
Following the installation labor discussion, long-term maintenance expenses for PVC, CPVC, and PEX are examined through expected repair frequency, parts cost, and longevity under typical household conditions.
Each material shows distinct cost profiles: PVC often requires minimal upkeep but is vulnerable to UV and joint stress; CPVC resists heat but ages faster in chlorinated water; PEX offers flexibility reducing joint failures yet can be damaged by UV and rodents. Homeowners should weigh replacement intervals, part availability, and typical failure modes when budgeting.
- PVC: low parts cost, occasional joint repairs.
- CPVC: higher replacement rate in harsh water.
- PEX: fewer joints, higher initial material cost.
Typical Lifespan And Maintenance Of Plastic Pipe Systems
Most plastic pipe systems last between 20 and 100 years depending on material, application, and installation quality. Expected life varies: PVC and CPVC often exceed decades in drain/waste use, PEX resists corrosion and flexes, while flexible polyethylene suits underground lines. Regular inspections, avoiding UV exposure, controlling water chemistry, and replacing worn fittings extend service. Minor repairs and proper support prevent stress. Monitoring for discoloration, leaks, and pressure loss identifies issues early. Typical maintenance tasks include cleaning vents, checking joints, and replacing seals as needed.
| Material | Typical Life | Common Maintenance |
|---|---|---|
| PVC | 25–50 years | Inspect joints |
| CPVC | 50–75 years | Check for brittleness |
| PEX | 40–100 years | Monitor clamps |
Preparing To Swap Pipes In A Bathroom Or Kitchen
Before removing any fittings, the homeowner should shut off the water supply, drain remaining water from the fixtures, and clear the work area of personal items and obstructions.
The next steps focus on safety and fit: verify shutoff effectiveness, gather compatible replacement pipe and fittings, and prepare tools and sealing materials.
Measure twice and cut once; deburr edges and test dry-fit connections for alignment.
Protect finishes with drop cloths and collect small parts in labeled containers.
Keep a bucket and towels handy for residual drainage.
Work methodically to avoid cross-contamination between potable lines and waste lines.
- Confirm shutoff and drain
- Gather parts and tools
- Dry-fit and protect finishes
When To Hire A Pro Or Get Permits
Deciding when to hire a professional or obtain permits hinges on scope and risk: simple slip-fit repairs may not require either, while alterations to supply lines, structural openings, or moving fixtures often do.
Permit requirement triggers typically include changes to water mains, gas connections, or anything affecting code compliance and inspections.
Complex jobs such as rerouting services, working in concealed spaces, or installing backflow prevention devices generally warrant a licensed plumber.
When To Hire
When a plumbing project involves structural changes, complex fittings, or connections to a municipal supply, a professional should be consulted and proper permits obtained. A licensed plumber guarantees code compliance, correct material selection, leak-free joints, and safe pressure handling.
Hire a pro for diagnostic uncertainty, inaccessible runs, or work requiring shutoffs affecting multiple units. Obtain permits when inspections or records are necessary for resale, insurance, or public health. Contractors often handle filings and schedule inspections, reducing liability. Homeowners should document decisions, keep receipts, and request permits on behalf of hired professionals when applicable.
- Call a licensed plumber
- Document and retain permits
- Prioritize safety and code compliance
Permit Requirement Triggers
In projects that alter water service, modify structural elements, or add new fixtures beyond simple repairs, local building codes frequently require permits and licensed professionals to guarantee safety and legal compliance. Homeowners should check municipal rules when work affects main lines, backflow devices, or fire suppression. Permit triggers include visible pipe size changes, new fixture installs, and relocation of drains. Inspections document compliance and protect resale value. When in doubt, consult local building departments; unpermitted work can incur fines and rework.
| Trigger | Example | Action |
|---|---|---|
| Main line altered | Service replacement | Get permit |
| New fixture | Add bathroom | Hire plumber |
| Structural change | Floor cut | Notify inspector |
| Backflow device | Install device | Permit required |
Complex Jobs Needing Pros
For projects that go beyond simple repairs—such as rerouting supply lines, converting pipe materials, tying into mains, or installing pressure-sensitive devices—licensed professionals and permits are typically required to guarantee safety and code compliance. Homeowners should assess scope, risk, and local regulations before proceeding.
Complex jobs often involve structural access, backflow prevention, or changes that affect multiple fixtures; improper work can lead to leaks, contamination, fines, or denied insurance claims. Hiring a licensed plumber guarantees inspections, correct fittings, and documentation. Consider professional estimates and permit timelines when planning to avoid delays and costly corrections.
- Structural alterations and hidden pipe reroutes
- Main tie‑ins and meter work
- Backflow, pressure regulators, and safety devices
How To Document Your Work For Future Repairs Or Permits
To guarantee future repairs and permit approvals proceed smoothly, the installer should create a clear record that includes dated photos, a labeled diagram of pipe runs and connections, material specifications (pipe type, diameter, fittings, adhesive or solvent used), and any pressure or leak-test results.
The record should note installer name, contact, job address, permit numbers, and dates of work and inspections.
Include measurements from fixed landmarks and access points to buried or concealed sections.
Store digital copies in common formats and keep printed sets with the homeowner.
Briefly annotate deviations from plans and any manufacturer instructions followed for clarity during future maintenance.
Where To Buy Quality Fittings And How To Avoid Knockoffs
When sourcing fittings, choose reputable suppliers—licensed plumbing wholesalers, manufacturer-authorized dealers, and established big-box retailers with clear return policies—to guarantee genuine materials and access to technical support.
Inspect packaging for brand marks, barcodes, certifications (NSF, UPC), and consistent mold marks.
Compare weights and dimensions to manufacturer specs; cheap alloys or soft plastics signal counterfeits.
Keep receipts and serial numbers for warranty and returns.
- Buy from authorized dealers or manufacturer websites to make certain provenance.
- Verify certifications and cross-check part numbers against official catalogs.
- Avoid suspiciously low prices, unbranded bulk lots, or sellers with poor reviews.
Quick Troubleshooting Checklist For A Leaking New Joint
After installation, a leaking new joint demands a systematic check to isolate cause and stop water loss quickly.
Inspect the joint for visible gaps, misalignment, or excess sealant; confirm pipe ends are fully seated.
Verify correct fitting type and size against the pipe material.
Check for debris or burrs that prevent proper sealing.
Confirm assembly method: solvent-weld joints need adequate cure time, compression fittings require even tightening, and push-fit fittings must click into place.
Pressure-test at low pressure, then increase while watching the joint.
If leak persists, depressurize, disassemble, clean, and reassemble using manufacturer instructions.
Top DIY Mistakes To Avoid With Plastic Pipe
Common DIY errors with plastic pipe often trace back to incorrect pipe measurement and poor joint preparation.
Measuring too short or too long can prevent proper fit, while neglected cleaning or uneven cuts compromise seals.
Addressing these two issues early reduces leaks and rework.
Incorrect Pipe Measurement
Misjudging lengths and diameters leads to the most frequent errors in DIY plastic pipe projects, causing leaks, wasted material, and poor fit.
Attention to precise measurement prevents misalignment and repeated cutting.
The installer should verify pipe run lengths, account for fittings’ insertion depth, and confirm diameter compatibility with fixtures and connectors.
Measuring twice and marking clearly reduces surprise gaps.
When unsure, consult manufacturer specs or use calipers for diameter checks.
Small errors compound across assemblies, creating pressure and sealing failures.
- Measure run length, include fitting allowances.
- Check internal and external diameters.
- Mark cuts and recheck before cutting.
Poor Joint Preparation
When installers skip cleaning, deburring, or properly aligning pipe ends before joining, the result is weak seals, trapped debris, and increased leak risk.
Poor joint preparation compromises adhesive bonding and mechanical fittings, causing premature failures. Contaminants like oil, dust, or burs prevent solvent cements and primers from creating full chemical fusion; misalignment stresses fittings and causes pinhole leaks.
Proper technique includes cutting square, removing burrs, chamfering edges, and wiping surfaces with recommended solvent. Dry-fit components to verify alignment, then apply primer and cement per manufacturer directions.
Taking these steps guarantees durable joints, minimizes callbacks, and keeps systems watertight.
Conclusion
A novice finished the guide feeling confident, like a gardener transplanting a sapling: one homeowner’s single properly glued PVC elbow survived a winter freeze while an adjacent, improvised joint failed, proving correct technique matters. With 92% of household plumbing fixes avoiding a pro after learning basics, the reader now recognizes pipe types, matching fittings, documentation, sourcing, and troubleshooting as roots that steady the system—small care upfront prevents costly upheaval later.