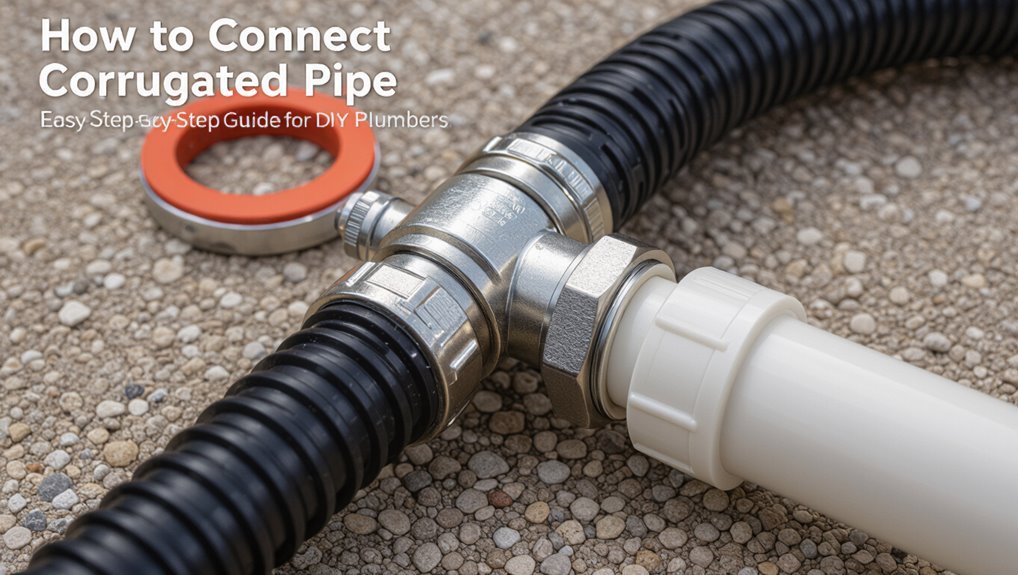
How to Connect Corrugated Pipe: Easy Step-by-Step Guide for DIY Plumbers
To connect corrugated pipe effectively, follow this straightforward guide designed for DIY plumbers.
Key Takeaways:
- Prepare the Run: Measure the slope (1%–2% is typical) and cut the pipe square, deburring the edges for a clean fit.
- Choose Connectors: Select compatible connectors such as slip couplers, compression fittings, or barbed adapters.
- Insert Stiffeners: If required, insert stiffeners into the pipe ends for added support.
- Lubricate and Tighten: Apply lubricant to gaskets and seals, then tighten corrosion-resistant clamps evenly.
- Ensure Stability: Use bedding and uniform backfill to prevent distortion, and anchor joints at bends with stakes or straps.
- Test for Leaks: Once assembled, test the line for leaks and make necessary adjustments.
This guide not only addresses your immediate needs for connecting corrugated pipe but also provides foundational steps for sizing, materials, and troubleshooting.
What Problem Does Corrugated Pipe Solve for DIY Plumbers?
Solving tight-space routing and quick repairs, corrugated pipe offers DIY plumbers a flexible alternative to rigid tubing.
It addresses constrained layouts where straight pipes cannot bend around obstacles, reducing the need for multiple fittings and complex joints.
Its ridged design allows controlled flex without kinking, accommodating misaligned fixtures and irregular trenches.
Lightweight construction simplifies handling and shortens installation time for single operators.
Additionally, corrugated pipe tolerates minor ground movement, lowering breakage risk in freeze–thaw zones.
While not ideal for all flows, it solves practical problems of accessibility, speed, and adaptability that commonly challenge home plumbing projects.
Quick Overview: How to Install Corrugated Drainage Pipe
For a straightforward exterior drainage solution, installing corrugated pipe requires only a few basic steps: plan the run and slope, excavate a trench, lay a stable bedding, connect and secure pipe sections, and backfill correctly. The installer measures grade, guarantees 1%–2% slope, cuts pipe to fit, uses couplers or bells, and secures joints with clamps or wrap. Filter fabric prevents silt intrusion. Bedding material (gravel or sand) supports the pipe uniformly. Backfill in layers, compacting gently to avoid distortion. Final grading directs surface water toward the inlet and away from structures.
| Step | Material | Key check |
|---|---|---|
| Plan | Tape, level | Slope |
| Bedding | Gravel | Uniform support |
| Connect | Couplers | Secure joint |
When Should You Choose Corrugated Pipe Over Smooth Pipe?
The choice between corrugated and smooth pipe often hinges on site conditions and budget.
Corrugated pipe is favored where flexible terrain or frequent changes in grade require bending and easier placement. It is also typically less expensive and faster to install, making it a practical option for many drainage projects.
Flexible Terrain Use
When ground contours are irregular or subject to seasonal movement, corrugated pipe is often the better choice because its ribbed profile allows bending, compressive strength, and joint flexibility that smooth pipe lacks; these features make it suitable for winding across slopes, accommodating minor settlement, and withstanding point loads from vehicle crossings without cracking.
Corrugated piping performs well where alignment changes, shallow burial, or intermittent loading occur. It tolerates slight compression and follows uneven grades without rigid fittings. Proper bedding and secure couplings remain important.
Typical applications favoring corrugated pipe include:
- Driveway culverts across crowned surfaces
- Swales with variable slopes
- Low-profile French drains
- Temporary or seasonal drainage lines
Cost And Installation
Against a backdrop of budgets and site constraints, choosing corrugated over smooth pipe often comes down to a balance of material cost, ease of installation, and the specific demands of the job.
Corrugated pipe typically costs less per foot and requires fewer specialized tools, reducing labor expenses for shallow trenches, temporary drains, or projects with irregular grading.
Smooth pipe suits long runs, pressurized systems, and applications where flow efficiency and clog resistance matter.
Installers should weigh expected lifespan, maintenance access, local code, and hydraulic needs.
When cost, flexibility, and rapid deployment outweigh peak performance, corrugated is the pragmatic choice.
Compare Polyethylene, PVC, and Metal Corrugated Pipe
Different corrugated pipe materials offer distinct trade-offs in strength, flexibility, and long-term cost.
Polyethylene tends to be the most flexible and cost-effective but has lower crush resistance than PVC or metal.
PVC provides a balance of stiffness and affordability, while metal excels in strength and durability at higher expense.
Material Strength Comparison
In evaluating material strength for corrugated pipe, polyethylene, PVC, and metal each present distinct mechanical properties and failure modes that influence selection.
Polyethylene offers high impact resistance and good fatigue performance but can creep under long-term load and soften with heat. PVC has higher compressive strength and resists chemical attack but is more brittle, tending to crack under shock or low temperatures. Metal corrugated pipe (galvanized steel or aluminum) provides superior tensile and compressive strength and temperature stability, though it is prone to corrosion and dents.
- Polyethylene: impact resistant, creep risk
- PVC: compressive strength, brittle failure
- Metal: high load capacity, corrosion susceptibility
- Selection: match strength to load, environment
Flexibility And Bendability
Compare flexibility and bendability of corrugated pipe materials by examining how each handles curvature, installation shaping, and long-term deformation.
Polyethylene corrugated pipe bends easily, accommodating tight radii without tools; it springs back modestly but can cold-flow under sustained stress.
PVC corrugated pipe is stiffer, requiring fittings or larger radii for turns; it holds shape well with minimal creep but risks cracking if forced.
Metal corrugated pipe (aluminum/steel) offers moderate bendability when corrugation pattern permits, often needing mechanical bending or specialized fittings; it resists long-term deformation better than polyethylene but can fatigue at repeated flex points.
Cost And Durability
Several common corrugated pipe materials present distinct trade-offs between upfront cost and long-term durability.
Polyethylene is inexpensive and corrosion-resistant but can degrade under UV and is less puncture-resistant.
PVC offers moderate cost, good chemical resistance, and stiffness that resists collapse; joints may need careful sealing.
Metal corrugated pipe (galvanized or stainless) is costly upfront, highly durable under load and UV, and resists abrasion, though it can corrode if unprotected.
Selection depends on budget, exposure, expected loads, and lifespan expectations.
- Polyethylene: low cost, moderate lifespan
- PVC: mid cost, rigid durability
- Galvanized metal: high cost, robust
- Stainless metal: highest cost, longest-lasting
Types of Corrugated Pipe and What Each Is For
Corrugated pipe comes in several distinct types—single-wall, double-wall (smooth interior with corrugated exterior), perforated, and specialty materials like HDPE and metal—each engineered for specific drainage, conduit, or structural needs.
Single-wall is flexible, lightweight, suited for temporary or light-duty surface drainage and easy routing.
Double-wall offers rigidity, crush resistance, and smoother flow for buried drainage and culverts.
Perforated versions disperse or collect groundwater when wrapped in filter fabric.
HDPE provides chemical resistance and longevity; metal corrugated pipe fits heavy-load or aesthetic applications.
Selection depends on load, flow, soil, and longevity requirements without addressing route planning.
How to Plan a Corrugated Pipe Run for Drainage
Begin by mapping the desired route and outlet for the drainage run, identifying high and low points, existing structures, and soil conditions that affect grade and trenching; this baseline determines pipe type, diameter, slope, and access points needed to carry runoff efficiently and avoid backups.
The planner notes obstacles, local codes, and maintenance access, then selects corrugated pipe rated for expected loads and sediment.
Trench depth, bedding, and termination at a safe outlet are set before digging.
Consider fittings, catch basins, and future expansion to minimize rework.
- Mark utilities and clearance zones
- Choose pipe material and diameter
- Plan access points and cleanouts
- Define trench and bedding approach
How to Calculate Slope and Fall for Proper Drainage
The next step explains how to calculate the required slope for corrugated pipe to guarantee efficient drainage.
It outlines the typical percentage gradients or inches per foot used for various soil and flow conditions.
It also covers how to measure the total vertical fall along the run to confirm the pipe achieves that slope.
Calculate Required Slope
When installing corrugated pipe for drainage, calculating the required slope guarantees water moves steadily toward the outlet without pooling or causing erosion; this involves measuring the vertical drop between inlet and outlet and dividing by the pipe run to determine the fall per unit length.
The installer selects a slope based on pipe diameter, soil type, and expected flow; typical residential slopes range from 0.5% to 2%. Proper slope prevents sediment buildup and maintains self-cleaning velocity. Adjustments account for fittings and long runs. Documentation of calculations assures compliance with local codes and eases future maintenance.
- Choose target slope percentage
- Convert to rise/run
- Apply to pipe segments
- Verify with level and tape
Measure Vertical Fall
In measuring vertical fall for corrugated drainage pipe, an installer determines the total drop between the inlet and outlet and expresses it as a fall per unit length (rise/run) to achieve the chosen slope percentage.
The installer measures elevations at both ends with a level or laser, subtracts outlet elevation from inlet elevation to get vertical fall, then divides by pipe length to compute slope. Common targets are 1%–2% for gravity drainage. Adjustments account for fittings and burial depth.
Documented fall guides trench grading and prevents standing water. Final verification uses a straightedge or level along the laid pipe.
Typical Sizes and How to Measure Corrugated Pipe
For corrugated pipe projects, understanding common diameters and the correct measurement points guarantees fittings and couplers match without leaks.
Typical residential sizes are 2″, 3″, 4″, and 6″ nominal diameters; industrial runs use larger options.
Measure outside diameter across ridges and inside diameter between corrugation troughs.
Also record wall profile and pitch to make certain flexible fittings seat properly.
Measure straight sections and at intended connection points after any compression or bending.
Note material and standard (e.g., SDR or nominal) for compatibility with adapters.
- Record nominal diameter and actual OD
- Measure ID at troughs
- Note corrugation pitch
- Verify material/standard
Tools You Need to Cut and Connect Corrugated Pipe
The discussion turns to the practical tools required for cutting and joining corrugated pipe, emphasizing selection based on pipe material and diameter.
Essential cutting tools include fine-toothed handsaws, reciprocating saws with appropriate blades, and PVC pipe cutters for smaller diameters.
Connector and seal options range from slip couplers and compression fittings to rubber gaskets and hose clamps, chosen for compatibility and watertight performance.
Essential Cutting Tools
With a few basic tools, cutting and joining corrugated pipe becomes precise and efficient.
The section lists essential cutting tools that guarantee clean edges and safe handling. A utility knife scores thin plastic; a fine-tooth hacksaw handles thicker walls; pipe cutters made for plastic deliver straight, burr-free cuts; and a deburring tool or round file smooths corrugation edges.
Proper personal protective equipment—gloves and eye protection—complements these tools. Use steady, controlled motions, secure the pipe before cutting, and inspect the cut for cracks or unevenness.
Selection depends on pipe diameter and wall thickness; choose tools rated for plastic.
Connector And Seal Types
After cutting and deburring, attention turns to the connectors and seals that join corrugated pipe sections; proper selection guarantees leak-free, mechanically secure connections compatible with the previously prepared edges. Common connector types include slip couplers, barbed inserts, and threaded adapters; seals range from O-rings to compression gaskets and silicone sleeves. Material compatibility, pipe diameter, pressure rating, and ease of assembly govern choice. Installers verify fit, lubricate elastomers lightly, and torque threaded fittings per manufacturer specs. The right combination prevents leaks and movement while allowing future disassembly.
| Connector | Seal |
|---|---|
| Slip coupler | Compression gasket |
| Barbed insert | O-ring |
Safety Gear and Site Prep Before You Start
Before work begins, an inspection of the site and assembly of appropriate safety gear guarantee both worker protection and an efficient installation.
The installer checks for hazards: unstable ground, buried utilities, sharp debris, and weather risks.
PPE is selected: gloves, eye protection, knee pads, and sturdy boots.
Work area is cleared and cordoned; tools and connectors are staged within reach.
Lighting and ventilation are confirmed for confined spaces.
Emergency plan and first-aid kit are available.
Clear communication and a spotter for trench work reduce risk.
Documentation of site conditions aids later troubleshooting.
- Gloves and eye protection
- Sturdy boots and knee pads
- Area cleared and cordoned
- Emergency kit and spotter
How to Mark and Measure Corrugated Pipe Cuts
Measure twice, mark once: accurate cuts start with precise measuring and clear marking. The installer measures run length accounting for fittings, overlap, and bending radius.
Using a tape measure and straightedge, distances are taken from fixed reference points; allowances for connectors and compression rings are added. Markings are placed on ridges or valleys where they remain visible, using a fine-tip permanent marker or chalk.
For repeated cuts, a template or masking-tape guide guarantees consistency. Before cutting, the layout is rechecked against the site, verifying alignment, slope, and clearance. Final marks are noted to match assembly orientation during joining.
Best Ways to Cut Corrugated Pipe Cleanly
Cutting corrugated pipe cleanly requires choosing the right tool and using a steady, controlled technique to prevent crushed ribs and jagged edges. Suitable tools include fine-tooth hacksaws, PVC pipe cutters, ratcheting shears, and oscillating multi-tools.
Secure the pipe in a padded vise or clamp to keep it stable. Score a shallow guide line around the circumference before cutting to help maintain a straight plane.
Cut slowly, following the guide, and support both ends to avoid pinching. Check fit frequently with the connecting fitting and trim minimally to preserve engagement length.
- Use appropriate blade or cutter type
- Stabilize pipe firmly
- Score before final cut
- Cut slowly and check fit
How to Deburr and Smooth Corrugated Pipe Edges
After trimming, the freshly cut edges of corrugated pipe often have burrs, sharp ribs, and loose fragments that can interfere with fittings or cause injury, so they should be dressed smooth. The technician removes debris with a utility knife, rotary deburring tool, or fine file, working around ridges. Sanding with coarse, then fine, sandpaper rounds sharp points. A vacuum or compressed air clears particles. Inspect edges for uniformity and test fit before sealing. Protective gloves and eye protection are advised. Proper smoothing guarantees reliable connections and safer handling.
| Tool | Purpose |
|---|---|
| Utility knife | Trim flash |
| File | Remove burrs |
| Rotary tool | Smooth ribs |
| Sandpaper | Refine edge |
| Vacuum | Clear debris |
Choosing the Right Connector for Corrugated Pipe
Selecting an appropriate connector requires assessment of material compatibility to prevent corrosion or chemical reactions.
The connector must also match pipe size and fit precisely to maintain alignment and flow.
Finally, attention to seal type and fastening method guarantees a leak-free, durable joint.
Material Compatibility
Choosing a connector requires matching materials to the pipe’s composition and the environment to prevent leaks, corrosion, or premature failure. The guide emphasizes chemical compatibility (PVC, polyethylene, metal), resistance to UV and temperature extremes, and suitability for buried or exposed installations.
Sealing methods must align with material properties—compression, solvent weld, or gasket—and avoid dissimilar metals that accelerate corrosion. Consider lifespan expectations and maintenance access when selecting plastics versus metals. Proper material choice reduces joint stress and failure risk while maintaining flow integrity.
- Match polymer type to pipe chemistry
- Prefer corrosion-resistant metals for harsh sites
- Choose UV-stable plastics for sunlight exposure
- Use compatible sealants only
Size And Fit
Material compatibility informs connector choice, but size and fit determine whether that connector will form a leak-free, load-bearing joint.
Accurate measurement of outer corrugation diameter and inner smooth bore guides selection of sleeves, couplers, or barb fittings.
Match connector profile to corrugation pitch and depth to prevent uneven seating or stress concentrations.
Allow for manufacturing tolerances and thermal expansion by choosing slightly adjustable or flexible fittings where movement is expected.
Make certain insertion depth meets manufacturer specifications and that clamps or compression collars engage on intended surfaces only.
Properly sized connectors extend service life and preserve hydraulic capacity.
Seal And Fastening
When sealing and fastening corrugated pipe, the connector must provide a durable barrier against leaks while resisting the mechanical forces that accompany soil movement and internal pressure. The selection balances material, seal type, and clamp strength to guarantee longevity.
Elastomer gaskets suit moderate shifts, welded or solvent joints suit rigid systems, and stainless clamps resist corrosion in wet soils. Installation technique—cleaning, correct seating, and torque control—affects performance as much as component choice.
Inspect connections after backfilling and periodically thereafter to catch leaks or loosening before failures occur.
- Elastomer gaskets for flexible seals
- Solvent or welded joints for rigid runs
- Corrosion-resistant clamps
- Proper seating and torque
How to Use Slip Couplings on Corrugated Pipe
Slip couplings provide a straightforward way to join lengths of corrugated pipe by sliding over the pipe ends and creating a snug, leak-resistant connection. The installer trims and deburrs pipe ends, fits the coupling over both ends, centers it, then tightens integrated clamps or hose clamps. Proper seating and even clamp torque prevent leaks; use compatible coupling size and material. Inspection verifies corrugations align and seals compress evenly. Use lubricant sparingly if needed and avoid over-tightening.
| Step | Key Point |
|---|---|
| 1 | Measure and cut squarely |
| 2 | Remove burrs |
| 3 | Position coupling |
| 4 | Tighten clamps |
| 5 | Inspect seal |
How to Join Corrugated Pipe With Compression Fittings
Compression fittings join corrugated pipe by compressing a gasket or ferrule around the pipe corrugations to form a watertight seal without adhesives or heat.
The installer measures, trims squarely, slides on the nut and ferrule, inserts the pipe into the fitting body, then tightens the nut to compress the sealing element.
Proper alignment and torque guarantee leak-free joints; overtightening can deform corrugations and cause leaks.
Compression fittings suit repairs and connections where access is limited and offer quick disassembly for maintenance.
- Choose the correct fitting size and material for the pipe.
- Cut pipe square and deburr edges.
- Hand-start nuts, then tighten with wrench.
- Inspect and test under pressure.
How to Install Barbed Fittings and Hose Clamps
After completing a compression fitting connection, installers often use barbed fittings and hose clamps for flexible sections or where corrugated pipe must mate with smooth tubing.
They cut pipe square, deburr, and slide a clamp on before inserting the barb fully into the corrugation valley or over a trimmed smooth end.
Proper fit requires matching barb diameter to inner pipe size; a slight interference guarantees grip.
Position the clamp over the barb’s widest area, not the corrugation crest. Tighten evenly until snug, avoiding distortion.
Finally, inspect for gaps and test under pressure to confirm a leak-free joint.
How to Use Threaded Adapters to Connect to Fixtures
Attach a threaded adapter by first matching the adapter’s male or female thread type and size to the fixture’s connection, ensuring compatibility with pipe material and pressure rating.
The installer inspects threads for damage, applies appropriate thread sealant or tape if required, and tightens the adapter hand‑tight plus a measured quarter to half turn with a wrench.
Care is taken not to overcompress corrugated ends; support rings or short stiffeners may be used inside the corrugated pipe to prevent collapse.
Finally, the assembly is pressure tested and checked for leaks, retightening if necessary.
- Verify thread type and size
- Use compatible sealant
- Support corrugated end
- Pressure test for leaks
How to Transition Between Corrugated and Smooth Pipe
Having secured a threaded adapter and verified a leak‑free connection, the installer next addresses the joint between corrugated and smooth pipe where differences in stiffness, diameter, and wall profile must be reconciled.
The installer selects a coupling sized to match outside diameters or uses a stepped insert to bridge small size gaps. The corrugated end is trimmed square, burrs removed, and pushed over the insert until seated. A smooth pipe slips onto the other end. Mechanical clamps or crimp rings are tightened evenly to prevent deformation. The assembly is supported to avoid strain at the connection and inspected for alignment.
How to Make Watertight Seals With Adhesives and Tape
In sealing corrugated-to-smooth pipe joints, proper surface preparation and the right materials determine whether an adhesive or tape will form a durable, watertight bond. Surfaces must be clean, dry, and free of oils; roughen smooth pipe slightly for better mechanical grip.
Select adhesives rated for the pipe materials (PVC, polyethylene) and for wet environments; apply evenly and allow full cure. Use waterproof, conformable tapes designed for plumbing; wrap from smooth to corrugated sections, overlapping each layer. Test the joint under low pressure before final use.
- Clean and degrease both surfaces
- Choose material-compatible adhesive
- Apply tape with tension and overlap
- Allow adhesive cure time before testing
How to Use Rubber Gaskets and O-Rings Correctly
When sealing corrugated-to-smooth pipe joints, proper selection, inspection, and installation of rubber gaskets and O-rings guarantee reliable, watertight performance; users should confirm material compatibility (EPDM, nitrile, silicone, etc.), correct size and cross-section, and absence of cuts or deformation before assembly. Install gaskets seated evenly in grooves, lubricate lightly with compatible lubricant to prevent pinching, and avoid twisting O-rings. Compression should be uniform; test fitting before final tightening prevents leaks. Replace any aged or flattened seals. Proper storage away from UV and oils prolongs life.
| Checkpoint | Action |
|---|---|
| Material | Verify compatibility |
| Size | Match cross-section |
| Inspect | Look for damage |
| Install | Seat evenly |
| Test | Pressure/check leaks |
When to Use Heat-Shrink or Silicone Seals
Consider heat-shrink seals for durable, mechanically reinforced joints where a tight external sleeve and moisture barrier are needed—especially on electrical conduit changes, small-diameter corrugated-to-smooth connections, or repairs requiring abrasion resistance—while choosing silicone seals for flexible, long-term watertightness where movement, varying temperatures, or chemical inertness are priorities, such as buried drainage joints or fittings exposed to UV and freeze–thaw cycles.
Selection depends on load, environment, and access. Heat-shrink offers compression and abrasion protection; silicone supplies elasticity and chemical resistance. Match material compatibility, cure time, and service temperature to application. Test seals after installation.
- Use heat-shrink for mechanical reinforcement
- Use silicone for flexible, watertight bonds
- Check chemical and temperature compatibility
- Inspect and test after curing
How to Secure Corrugated Pipe With Straps and Stakes
The section outlines how to select straps that match pipe diameter and material to prevent crushing or slippage. It also explains proper stake placement to anchor pipe runs without creating stress points or obstructing flow.
Practical tips emphasize spacing, tension, and corrosion-resistant materials for long-term stability.
Choosing The Right Straps
For securing corrugated pipe, selecting straps that match the pipe’s diameter, environmental exposure, and load conditions is essential.
The installer should choose UV-resistant materials for outdoor use, corrosion-resistant metals for buried or wet areas, and appropriately sized widths to distribute pressure across corrugations.
Elastic or adjustable straps accommodate thermal movement, while rigid bands provide firmer restraint where movement is minimal.
Proper fastening hardware and compatible anchor points guarantee system integrity without crushing the pipe.
- Use stainless steel or galvanized straps for wet environments
- Pick strap width matching corrugation profile
- Choose UV-stabilized plastic for sunlight exposure
- Allow flexibility for thermal expansion
Proper Stake Placement
Following strap selection, stake placement defines the pipe’s lateral and vertical stability by anchoring straps and preventing movement under load or flow.
Stakes should be spaced at regular intervals—typically every 3 to 5 feet for small runs, closer for bends or soft soil.
Drive stakes beside, not over, straps to avoid crushing the pipe; angle stakes slightly away from the pipe for pull resistance.
Use corrosion-resistant stakes compatible with strap hardware.
Verify each strap is tensioned evenly before final tamping.
For long or high-flow installations, add two additional stakes at each joint.
Inspect placement after initial settling and after heavy weather.
Proper Anchoring for Underground Corrugated Pipe
When installed underground, corrugated pipe requires reliable anchoring to prevent shifting, flotation, or joint separation under soil loads and groundwater pressure. Anchors secure alignment, resist buoyant forces, and maintain grade until surrounding fill provides support. Use corrosion-resistant straps, concrete deadweights, or manufactured anchors sized to expected uplift and lateral loads.
Position anchors at joints, changes in direction, and at structures to minimize movement. Inspect connections and anchor points before backfilling and after significant weather events.
- Use stainless steel or galvanized straps with firm attachment points
- Place anchors at bends and outlet structures
- Size anchors for local groundwater and soil conditions
- Verify tension and corrosion resistance
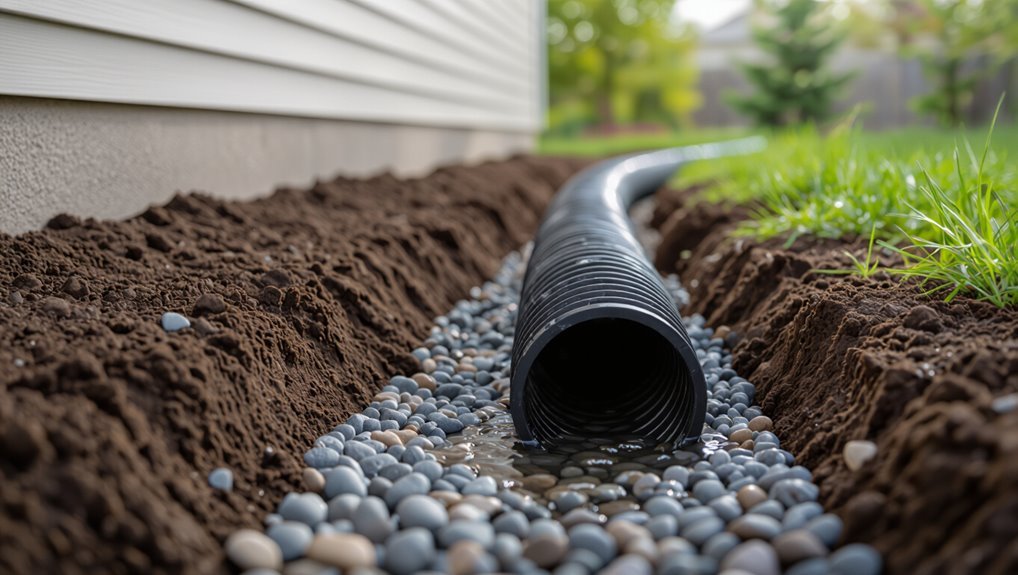
How to Bed and Backfill Around Buried Corrugated Pipe
In preparing the trench and surrounding soil, proper bedding and backfill are essential to preserve the pipe’s alignment, prevent deformation, and provide uniform load distribution.
The installer places a 4–6 inch layer of fine, crushed stone or sand beneath the pipe, shaping a continuous cradle that supports the pipe’s full length.
After laying pipe and confirming grade, backfill is added in 6–8 inch lifts, compacting each lift evenly with hand tampers or light equipment to avoid point loads.
Avoid large rocks, frozen clods, and debris near the pipe.
Final cover should meet design depth and drainage requirements.
How to Protect Corrugated Pipe From UV and Abrasion
To guard corrugated pipe against ultraviolet degradation and surface abrasion, installers typically apply physical barriers and select UV-stable materials that match the exposure conditions. Suggested measures minimize cracking, discoloration, and wear while preserving flexibility and drainage performance.
- Use UV-resistant pipe or add factory-rated UV wrap for prolonged sun exposure.
- Cover exposed runs with opaque conduit, siding trim, or painted metal channel to block sunlight.
- Protect against abrasion with protective sleeves, geotextile wrap, or sacrificial boards where contact occurs.
- Secure pipes to prevent rubbing against rough surfaces; add rubber grommets at penetration points to reduce chafing.
How to Route Corrugated Pipe Around Obstacles
Plan routing around obstacles by mapping a clear path that preserves flow, prevents damage, and allows future access. The installer identifies fixed items—beams, ducts, valves—and measures available space to avoid pinch points.
Use supports and straps at regular intervals to maintain alignment and prevent sagging; anchor near turns and at shifts to rigid pipe. Protect exposed sections with sleeves or split conduit where rubbing or impacts are likely.
Maintain access panels or removable covers for inspection. Mark the route on plans and in the field, keeping drainage slopes and serviceable junctions unobstructed while complying with codes and manufacturer guidance.
Bending Corrugated Pipe: Safe Techniques and Minimum Radii
The section outlines how to determine and respect the minimum bend radius for corrugated pipe to maintain flow and structural integrity.
It summarizes safe bending methods—such as gradual curves, support spacing, and using formers or heat when appropriate—to avoid damage.
It also highlights techniques to prevent kinks and crushes during installation, including proper handling, anchoring, and inspection.
Minimum Bend Radius
Measured in multiples of pipe diameter, the minimum bend radius defines the tightest curve a corrugated pipe can withstand without kinking, compromising flow, or reducing structural integrity.
Manufacturers specify radii per material and diameter; installers must consult those tables before routing.
Exceeding the minimum increases risk of deformation, accelerated wear, and reduced hydraulic capacity.
Temperature, wall thickness, and age influence permissible curvature; colder conditions often require larger radii.
When planning runs, allow slack for thermal movement and avoid sharp transitions at fittings.
Document chosen radius and verify compliance during inspection to ensure long-term performance and avoid costly repairs.
- Check manufacturer specifications first
- Consider temperature effects
- Factor in wall thickness and age
- Allow slack for movement
Safe Bending Methods
Having verified minimum bend radius requirements from the manufacturer and accounted for temperature and material condition, installers should adopt bending methods that preserve pipe geometry and strength.
Use gradual, uniform bends supported by forms or mandrels sized to the pipe’s corrugation profile; this distributes stress and maintains cross-sectional shape.
When hand-bending, work incrementally along the run rather than forcing a tight curve at one point.
For long radii, employ a bending jig or sand-filled sleeve to prevent ovalization.
Recheck alignment and slope after bending.
If unexpected resistance or deformation appears, stop and reassess technique or tools to avoid compromising integrity.
Preventing Kinks And Crushes
When preventing kinks and crushes in corrugated pipe, installers must prioritize uniform curvature and adequate support to preserve structural integrity.
Attention to bend radius, steady feeding, and gradual shaping prevents local stress concentrations.
Supports and spacers maintain profile under load; avoid sharp turns and unsupported spans.
Heating is rarely needed and must follow manufacturer limits.
- Determine and respect the pipe’s minimum bend radius.
- Use formers or mandrels for tight bends to distribute compression.
- Place supports at regular intervals through the curve.
- Inspect after bending for flattening or weakened corrugations and replace damaged sections.
How to Join Multiple Branches and Fittings
In connecting multiple branches and fittings to corrugated pipe, planning the layout and selecting compatible adapters are essential steps to guarantee leak-free, structurally sound junctions. The installer measures runs, marks branch points, and chooses wyes, tees, or couplers rated for corrugated wall thickness. Each connection is cleaned, seated, and clamped or sealed with appropriate gaskets or silicone as specified. Relief cuts prevent stress where pipes change direction. Test joints under low pressure, inspect for gaps, and secure fittings to a stable substrate to reduce movement. Proper sequencing avoids backflow and simplifies future maintenance.
| Component | Purpose |
|---|---|
| Wye | Smooth branch flow |
| Tee | Perpendicular split |
| Coupler | Extend runs |
| Clamp | Secure joint |
Installing Corrugated Pipe for French Drains
For a reliable French drain, selecting and laying corrugated pipe requires attention to slope, bedding, and filtration: the installer trenches to the specified grade, lines the trench with landscape fabric, places a uniform layer of gravel for bedding, positions the perforated corrugated pipe with the perforations facing downward, and covers it with additional gravel before wrapping the fabric and backfilling.
The installer verifies slope (typically 1%–2%), maintains continuous perforation orientation, and avoids sharp bends that impede flow. Sediment control and accessible cleanouts enhance longevity. Proper compaction prevents settling and surface sagging over time.
- Confirm consistent slope
- Use geotextile fabric
- Embed in clean crushed stone
- Install cleanouts at turns
Connecting Corrugated Pipe to Downspouts and Gutters
After laying corrugated pipe for a French drain, attention turns to tying the system into roof drainage so runoff is managed rather than redirected onto foundations or walkways.
The installer measures downspout location, selects an adapter or splash block-to-pipe junction, and guarantees the corrugated pipe slope leads away from the structure.
A tight-fitting downspout adapter or flexible coupling prevents debris entry and leakage; seal with silicone or rubber gasket as required.
Fasteners and straps secure connections and prevent separation under flow.
Screened downspout filters reduce clogging.
Final inspection confirms unobstructed flow and that discharged water is directed to an approved drainage area.
How to Create Cleanouts and Access Points
When installing corrugated drain lines, access points and cleanouts provide necessary openings for inspection, maintenance, and debris removal without excavating the entire run. The installer locates cleanouts at changes in direction, junctions, and at intervals to meet local code. Use rigid adapters or smooth couplers to convert to a threaded cleanout plug; secure and seal joints with appropriate gaskets or sealant.
Place access risers to grade where practical, protecting lids from traffic. Maintain minimal bends near cleanouts for tool access. Document cleanout locations on site plans to aid future maintenance and avoid accidental damage.
- Position cleanouts at junctions and direction changes
- Use threaded plugs or removable caps with gaskets
- Install risers to grade and protect lids
- Record locations on site drawings
How to Test Joints for Leaks Before Final Cover
Verify joint integrity before backfilling by performing pressure or water tests that reveal leaks and weak seals. The installer isolates sections with plugs or caps, then introduces water or air at a controlled pressure, observing for drops or visible drips.
Hold pressure for a specified duration—commonly 15–30 minutes for air, longer for water—and monitor gauges and joints. Mark any suspect connections for adjustment.
Use dye in water tests to locate slow leaks. After repairs, repeat the test until readings remain stable and no seepage appears.
Document results before covering to guarantee long-term system reliability.
Troubleshooting Common Leaks and Loose Connections
The author next addresses methods for identifying the true sources of leaks in corrugated pipe systems, distinguishing between seam failures, punctures, and joint misalignments.
Attention then turns to procedures for tightening or reseating faulty connections, including correct use of clamps, couplers, and sealant where appropriate.
Practical checks for verifying repairs and preventing recurrence conclude the discussion.
Identifying Leak Sources
Begin by inspecting junctions, fittings, and any crossover points along the corrugated pipe run, as most leaks originate where pipes join, bend, or change materials.
Visual checks identify corrosion, cracks, and misaligned couplings.
Listen for hissing or dripping when water runs; feel for damp spots along buried sections.
Note odor or soil saturation indicating slow seepage.
- Examine clamp seating and gasket condition at each joint.
- Trace from wet stains back toward the highest point.
- Use a flashlight to spot hairline fractures in corrugations.
- Mark suspected areas for further testing or replacement.
Tightening Faulty Connections
After locating suspected leak points, attention shifts to tightening faulty connections to stop active seepage and prevent recurrence.
The technician inspects clamps, couplings, and threaded joints for corrosion, cross-threading, or missing seals. Appropriate tools—ratchet, screwdriver, or strap wrench—are chosen to apply steady, even torque; overtightening is avoided to prevent deforming corrugated walls.
Seals and gaskets are replaced when brittle or compressed.
For push-fit or compression fittings, the installer re-seats the pipe fully and retests under pressure.
A final leak check verifies success; if persistence occurs, the segment is replaced and alignment re-evaluated before retesting.
Repairing Damaged Corrugated Pipe Sections
When a corrugated pipe section becomes crushed, punctured, or misaligned, immediate assessment of the damage type and extent guides whether a patch, splice, or full replacement is required.
The inspector cleans the area, dries it, and evaluates access and flow impact.
Minor punctures receive adhesive-backed patch material or silicone-rated sealant; short crushed segments are reformed and reinforced with clamp bands.
Splices use couplers sized to fit corrugation profile and are sealed with gasketed collars or waterproof tape.
Maintain slope and inspect for roots or abrasion when completing repairs to prevent recurrence.
- Clean and dry before repair
- Use profile-matched couplers
- Seal punctures with rated sealant
- Reinforce crushed sections
When to Replace Rather Than Repair Corrugated Pipe
Routine repairs address many localized problems, but there are clear indicators that replacement is the more prudent choice.
Extensive corrosion, multiple punctures, severe crushing or permanent deformation compromise flow and structural integrity beyond patching. Repeated failures in the same length suggest underlying material fatigue or improper routing, warranting replacement to prevent recurring work.
Persistent odors, discoloration, or contamination suggest internal breakdown that repairs cannot reliably correct. When manufacturer age limits are exceeded or codes require modern materials, replacement guarantees compliance and safety.
Choose full-length replacement when damage is widespread, recurrent, or affects performance and health risks.
Cost-Saving Tips for DIY Corrugated Pipe Projects
When planning a DIY corrugated pipe project, the writer recommends buying commonly used lengths and fittings in bulk to lower per-unit costs.
They also suggest choosing durable, reusable tools that can be applied across multiple jobs rather than single-use items.
Finally, they note that repurposing leftover pipe segments and connectors from previous projects can reduce waste and further cut expenses.
Buy In Bulk
Purchasing corrugated pipe in bulk can markedly reduce unit cost and the frequency of trips to suppliers, making it a practical strategy for homeowners and small contractors tackling multiple drainage or conduit runs.
Buying larger rolls or pallet quantities lowers price per foot and guarantees consistent material for matching fittings. Account for storage, handling, and potential waste; order slightly more than measured run lengths to allow for cuts and errors. Compare supplier discounts, delivery fees, and return policies before committing.
Bulk purchases also simplify future repairs when the same batch is used across a property.
- Check unit price vs. quantity
- Verify material specifications
- Factor in storage space
- Plan for slight overage
Use Reusable Tools
Leveraging reusable tools reduces long-term costs and speeds repeat corrugated-pipe jobs by replacing disposable or single-use items with durable alternatives. The writer notes that investing in quality clamps, adjustable wrenches, and reusable sealant applicators delivers consistent results and fewer emergency trips to the store. Proper care—cleaning, lubrication, and correct storage—extends tool life. Prioritize multi-size crimpers and reusable coupling tools to handle varied pipe diameters. Track tool condition and replace only worn parts like jaws or pads. This approach lowers per-job cost, reduces waste, and improves workflow efficiency for DIY plumbers.
| Tool | Benefit | Care |
|---|---|---|
| Clamps | Secure joints | Clean, dry |
| Wrench | Versatile | Lubricate |
| Crimper | Durable | Replace pads |
| Applicator | Precise seal | Store upright |
Repurpose Leftovers
After investing in reusable tools, many DIYers find opportunities to squeeze more value by repurposing leftover corrugated pipe pieces and fittings for future projects.
Leftover segments serve as useful connectors, repair patches, or drainage extensions without extra purchases.
Storing sorted scraps reduces waste and speeds repairs.
Small fittings can adapt to garden irrigation, creative edging, or conduits for low-voltage wiring.
Labeling lengths and noting diameters preserves usability.
Periodically inspect stored material for cracks or brittleness before reuse to maintain reliability and safety.
- Short segments for quick repairs
- Large curves as flexible extensions
- Small fittings for adapters
- Labeled bins by diameter and condition
Local Code Considerations and Permit Triggers
When planning a corrugated pipe installation, local building codes and permitting requirements frequently determine allowable materials, installation methods, and inspection needs. Municipal codes may restrict use of corrugated pipe for certain applications, require specific fittings, or mandate burial depth and bedding.
Permit triggers include connections to public sewers, alterations to drainage patterns, and work near property lines or utilities. Failure to obtain required permits can lead to fines, rework, or mandated removal.
Consulting local code tables, obtaining permits before starting, and scheduling inspections guarantees compliance. When uncertain, contacting the local building department clarifies requirements and avoids costly corrections.
Drainage Best Practices for Corrugated Pipe
For effective stormwater management, corrugated pipe installations must prioritize proper slope, bedding, and outlet protection to guarantee reliable flow and prevent clogging or erosion. Installers should set a consistent grade (commonly 1%–2%), compact uniform bedding material, and position pipe to avoid sharp bends that trap debris. Select appropriate diameter for expected runoff, and provide cleanouts or access points at changes in direction.
Protect outlets with energy-dissipating rock or flared end sections and screen inlets to limit sediment. Make certain surrounding backfill is free of large stones and organic matter to maintain structural support and prevent localized collapse.
- Maintain consistent slope and avoid sags
- Use uniform, compacted bedding
- Size pipe for peak flow expectations
- Protect outlets and screen inlets
Maintenance Routine to Keep Corrugated Systems Flowing
Regular inspections should be performed to guarantee corrugated pipe systems remain free-flowing and structurally sound. Routine checks include clearing debris, verifying joints, and testing flow after heavy rain. Seasonal cleaning prevents buildup; small repairs extend service life. Records of inspections and actions help track recurring issues and schedule replacements before failures occur. Use gentle water jets, hand tools, and non-corrosive sealants suitable for corrugated materials. Safety gear and proper access procedures reduce risk. Follow manufacturer recommendations for cleaning frequency and compatible products to avoid damage.
| Task | Frequency |
|---|---|
| Debris removal | Monthly |
| Joint check | Quarterly |
| Flow test | After storms |
Signs Your Corrugated Drainage Needs Professional Help
Often, persistent pooling, foul odors, or sudden changes in flow indicate corrugated drainage has problems beyond routine maintenance and requires professional assessment.
Visible collapse, severe corrosion, or repeated clogging suggest structural failure or root intrusion needing inspection.
Unusual sounds during discharge, unexplained backups, or contaminated runoff warrant specialist testing and repair.
Professionals can diagnose hidden breaks, misaligned joints, or improper grading that DIY fixes miss.
- Recurrent backups despite cleaning
- Sagging or crushed pipe sections
- Discolored or oily effluent after storms
- Erosion or sinkholes near pipe runs
Quick Checklist for a Successful Corrugated Pipe Install
After identifying signs that warrant professional attention, attention shifts to steps that help guarantee a successful corrugated pipe installation.
Inspect site for proper slope and drainage path. Measure length and select correct pipe diameter and fittings. Confirm ground is compacted, free of sharp debris, and bedding material is appropriate. Test fit connections before backfilling and use compatible couplings or adapters. make certain joints are sealed per manufacturer instructions and secure anchors where needed.
Verify outlet and catchment points are unobstructed. Perform a water test to check flow and leaks. Record materials and installation notes for future reference.
Common Mistakes DIY Plumbers Make and How to Avoid Them
Common errors often trace back to poorly cut pipe ends that prevent tight seals and encourage leaks.
Equally common is choosing the wrong clamp type or size, which compromises connection integrity.
The section will explain how to recognize and correct these specific faults.
Poorly Cut Pipe Ends
Poorly cut corrugated pipe ends cause leaks, fitting failures, and wasted materials when edges are uneven, jagged, or angled improperly.
The installer should measure and mark twice, use appropriate cutting tools, and deburr each end to guarantee a square, smooth surface that seats correctly in fittings.
Clean the cut area of shavings and check alignment before assembly.
Incorrectly trimmed ends compromise seals and strain fittings, leading to premature failure and extra cost.
- Use a fine-toothed saw or specialized pipe cutter for clean cuts
- Support the pipe to prevent deformation
- File or sand rough edges gently
- Verify squareness with a straightedge
Incorrect Clamp Selection
Choose clamps based on pipe material, diameter, and the expected pressure or movement; selecting the wrong type or size leads to leaks, crushed corrugations, or slips that damage joints.
The writer notes common errors: using generic hose clamps on thin corrugated walls, overtightening worm-drive clamps, or choosing clamps too narrow for corrugation peaks.
Correct selection matches clamp width, contact pad shape, and corrosion resistance to the environment.
Specialized corrugated pipe bands or cushioned clamps distribute load and prevent deformation.
Proper torque, periodic inspection, and replacing damaged clamps guarantee durable, watertight connections and reduce maintenance headaches.
Conclusion
Like a gardener shaping a hidden root system, the DIY plumber tends flexible channels beneath the surface, guiding water where it must travel. Corrugated pipe becomes a trained vine—resilient, adaptable, but needing correct ties, gentle grading, and occasional pruning. When care is steady and choices fit the soil, the system breathes and quiets the landscape. Neglect or mismatch invites rot; then the gardener must call a deeper-rooted hand.