How to Clear Toilet Drain Pipe Fast: DIY Plumbing Tips & Tricks
Key Takeaway: Quick Steps to Clear a Clogged Toilet Drain
To clear a clogged toilet drain quickly and safely, follow these steps:
- Stop Flushing: Immediately cease any further flushing to prevent overflow.
- Close the Tank Valve: This will stop water from entering the tank.
- Remove Excess Water: Use a bucket to scoop out any excess water from the toilet bowl.
- Use a Flange Plunger: Ensure a firm seal and use thrusts of 6–8 inches to dislodge soft blockages.
- Try a Toilet Auger: If plunging fails, insert a toilet auger into the trapway, rotating it to break up or hook debris.
- Protect Yourself: Always wear gloves and goggles for safety, and disinfect any tools used afterward.
These steps will help you quickly address the clog and restore your toilet’s function.
Immediate Action: 3 Fast Steps to Unclog a Toilet Now
Begin by stopping additional water flow to prevent overflow: close the toilet tank’s fill valve or lift the float to halt incoming water, then remove excess water from the bowl with a small container or cup until levels drop below the rim.
Next, employ a flange plunger with firm, controlled thrusts to break the obstruction; maintain a seal and repeat until suction loosens debris.
If plunging fails, use a toilet auger to reach and retrieve or push through the blockage, turning the handle clockwise while advancing.
After clearing, flush gently to confirm flow and restore the tank valve to resume normal operation.
Immediate Signs a Toilet Is Clogged (And What to Do Now)
Slow or rising water in the bowl often indicates a partial blockage restricting flow.
Gurgling or other strange noises from the drain or nearby pipes signal trapped air moving past an obstruction.
When these signs appear, prompt measures—such as stopping additional flushing and using a plunger—should be taken to prevent a full clog.
Slow Or Rising Water
When toilet water drains sluggishly or rises toward the rim after flushing, it signals a partial blockage that requires immediate attention; leaving it unchecked can lead to overflow or more severe clogs.
The correct immediate response is to stop additional flushing, remove excess surface water with a small container, and employ a flange plunger with firm, steady thrusts to clear the obstruction.
If plunging fails, a toilet auger can reach farther into the trap to dislodge debris.
Avoid chemical drain cleaners that may damage porcelain and seals.
If DIY attempts fail after repeated tries, contact a professional plumber to prevent fixture damage.
Gurgling Or Strange Noises
Often a gurgling sound coming from a toilet indicates air trapped in the drain line due to a partial blockage or a venting problem. Such noises often accompany slow drainage, bubbling in nearby fixtures, or intermittent flushing issues.
Immediate checks include running water in adjacent sinks to see if bubbles appear, inspecting roof vents for debris, and testing other drains for similar symptoms. For DIY response, use a plunger first; if unresolved, a toilet auger can dislodge obstructions.
Persistent gurgling after basic measures suggests a blocked vent or sewer line requiring professional inspection and possible camera diagnosis to locate the fault.
Safety Checklist Before You Start (Gloves, Goggles, Shutoff)
Before beginning, confirm basic protective measures are in place: wear chemical-resistant gloves and splash goggles, guarantee adequate ventilation, and locate the toilet’s water shutoff valve.
Make certain flooring is covered with absorbent towels to catch spills.
Turn off the shutoff and test by flushing; note if water flow stops.
Keep a bucket and disposable rags nearby.
If chemical cleaners were previously used, ventilate longer and avoid mixing products.
Use a flashlight to inspect inside the bowl and around fittings for leaks.
If sewer gas odors, significant corrosion, or visible cracks exist, stop and consult a professional before proceeding.
Choose the Right Tool to Clear a Toilet Drain
Select the correct tool based on the type and severity of the clog to maximize effectiveness and minimize damage. For minor blockages, a toilet auger with a short, curved head reaches the trap without scratching porcelain.
For deeper obstructions, a closet auger or plumbing snake offers greater reach and torque; choose a diameter suited to the toilet drain. Enzyme or chemical cleaners are options for organic buildup but require caution and manufacturer guidance.
A wet/dry vacuum can extract blocked material if used with proper seals. Avoid metal tools that can chip the bowl and always inspect tools for cleanliness before use.
How to Use a Plunger Effectively to Unclog a Toilet
The reader is advised to select the correct plunger—flange models for toilets and cup types for flat drains—to guarantee a proper seal.
Attention to technique follows: submerge the plunger head, maintain a tight seal, and use steady, forceful thrusts with controlled suction rather than rapid jerks.
Repeating the push-pull cycle while periodically checking water movement usually clears most clogs without tools.
Choose The Right Plunger
A properly matched plunger can cut unclogging time and prevent damage to porcelain and seals; for most household toilets a flange (bell) plunger is the best choice because its extended rubber collar forms a seal inside the bowl’s outlet, producing stronger, more directed pressure than a flat cup plunger. Selection depends on toilet type, seal quality, and storage needs. A sink (flat) plunger suits flat drains; a flange plunger suits toilets; accordion plungers force strong pulses but risk seals.
| Plunger Type | Best Use |
|---|---|
| Flange (bell) | Most toilets |
| Cup (flat) | Sinks, shallow bowls |
| Accordion | Strong force, careful use |
Proper Plunging Technique
Begin by positioning the flange plunger so its rubber sleeve fits snugly into the toilet’s outlet, creating a tight seal; then maintain a firm grip on the handle with both hands and keep the plunger shaft vertical to direct pressure straight down the trap.
The user should start with slow, controlled pushes to displace air and water, then shift to steady, forceful thrusts and pulls without breaking the seal. Each stroke should be about 6–8 inches.
After 10–15 cycles, pause to see if water drains. If resistance remains, repeat.
Clean and sanitize the plunger and surrounding area afterward.
How to Unclog a Toilet Without a Plunger
When a toilet becomes clogged and no plunger is available, simple household tools and basic techniques can often restore flow quickly; evaluating the blockage and choosing a safe method—like hot water, dish soap, a wire coat hanger, or a homemade drain snake—reduces the chance of overflow and damage.
Start by pouring a bucket of hot (not boiling) water from waist height to encourage movement. Add a generous squirt of dish soap, let sit 10–15 minutes, then retry flushing.
For stubborn obstructions, fashion a hook from a wire coat hanger to fish debris gently. Repeat steps before calling a professional.
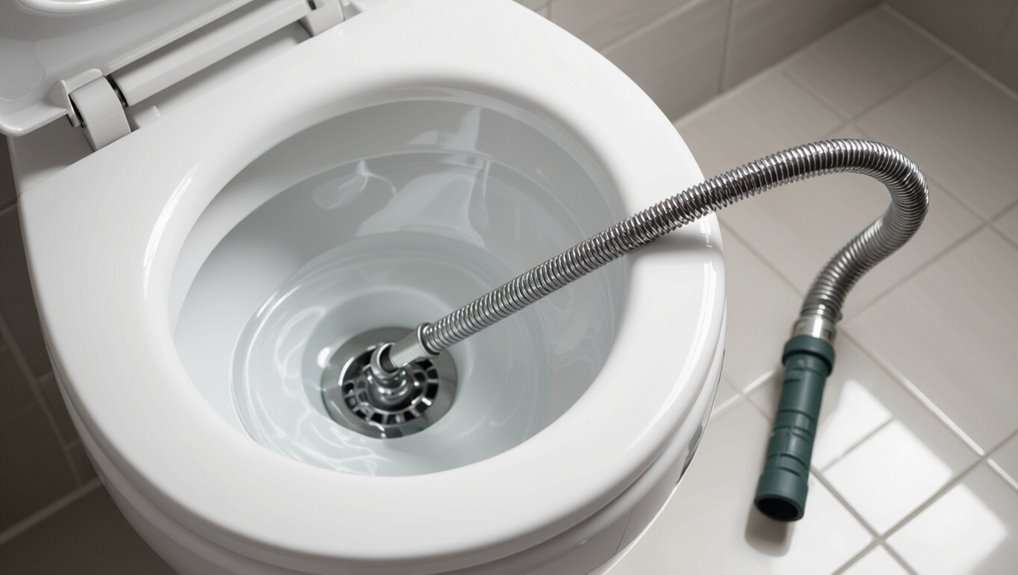
Using a Toilet Auger Without Damaging the Bowl
After attempting gentler methods like hot water and dish soap, attention turns to a toilet auger to clear more stubborn clogs without harming the porcelain.
The user should protect the bowl by fitting the rubber boot over the rim and slowly extending the flexible shaft into the trap.
Rotate the handle clockwise to feed the coil, feeling for resistance; avoid forceful jerking.
When resistance eases, retract while continuing to rotate to capture debris.
Clean the coil and rubber boot after use, sanitize hands and tools, and inspect the bowl for scratches or chips.
If resistance persists, consult a professional rather than escalating force.
When and How to Use a Wet/Dry Vacuum on a Toilet
Employ a wet/dry vacuum cautiously as an effective option for removing liquid clogs or retrieving objects from a toilet when plunging and augering have failed or are unsuitable. Make certain the vacuum is rated for wet use, disconnect power before adjustments, and wear gloves and eye protection.
Create a seal over the bowl with a foam adapter or duct tape around the hose to maximize suction. Start on low power, alternating between suction and brief bursts to avoid damage.
Empty the canister promptly, inspect for debris, and sanitize the vacuum and toilet after use. If resistance persists, consult a professional plumber.
Homemade Solutions That Actually Work to Clear a Toilet Drain
Try straightforward household mixes before calling a plumber: several simple, safe combinations reliably break down common toilet clogs.
A cup of baking soda followed by a cup of vinegar creates fizzing action that loosens soft blockages; wait 15–30 minutes, then flush with hot (not boiling) water.
A tablespoon of dish soap poured into the bowl lubricates and helps slide greasy obstructions; follow with hot water after 10 minutes.
For paper-heavy clogs, repeat the baking soda–vinegar cycle and add manual agitation with a plunger.
Always avoid mixing bleach with other cleaners and test small amounts first to protect porcelain.
Chemical Drain Cleaners: Pros, Risks, and When to Avoid Them
Chemical drain cleaners can quickly dissolve organic clogs but their effectiveness varies with the type and severity of the blockage.
They pose significant health and safety risks, including chemical burns, toxic fumes, and damage to pipes or septic systems.
They should be avoided for thin PVC or old metal pipes, when a sewer line issue is suspected, or after multiple prior chemical treatments.
Chemical Cleaner Effectiveness
Evaluating drain-cleaner effectiveness requires balancing speed and simplicity against safety and long-term impact.
Chemical cleaners dissolve organic clogs quickly, often restoring flow within minutes for hair, soap scum, and toilet paper. Effectiveness varies by formulation: acidic products act on mineral buildup; alkaline and oxidizing formulas break down organic matter. Concentration, contact time, and mechanical agitation influence results; severe or solid obstructions may resist chemicals. Repeated use can degrade plumbing materials and hinder future mechanical clearing.
Manufacturers’ instructions, pipe type, and clog composition determine suitability. For best outcomes, test minimally, allow recommended dwell time, and confirm flow before reuse.
Health And Safety Risks
Having reviewed how cleaners perform against common blockages, attention turns to the health and safety implications of using chemical drain products.
Chemical drain cleaners can dissolve organic blockages quickly and require no special tools, but they pose acute hazards: corrosive burns to skin and eyes, toxic fumes that irritate respiratory tracts, and dangerous reactions with other household chemicals.
Improper use risks pipe damage, especially older PVC or metal, leading to leaks and structural issues.
Protective gear, good ventilation, and strict adherence to label instructions mitigate risk.
Consider safer alternatives when exposure risk is unacceptable or plumbing integrity is uncertain.
When Not To Use
When is a chemical drain cleaner more hazard than help? The detached appraisal notes clear scenarios to avoid them: fragile porcelain, old plumbing, or suspected sewer-line issues.
Chemical reactions can worsen cracks, corrode pipes, and create toxic fumes. Professionals caution against use when the obstruction is visible, when a plunger or auger can reach the clog, or when plumbing history includes previous repairs.
Safer mechanical or professional methods preserve fixtures and health. Consider these red flags:
- Cracked or thin ceramic fixtures and seals
- Aging metal pipes or prior corrosion
- Recurrent or large-scale sewer backups
Enzyme and Bio Cleaners for Slow Toilet Drains
Using naturally occurring bacteria and enzymes, enzyme and bio cleaners break down organic matter that commonly causes slow toilet drains—such as toilet paper, waste residue, and biofilm—without harsh chemicals.
They work over hours to days, so expect gradual improvement rather than instant clearing. Suitable for routine maintenance and septic systems, products vary in concentration and targeted organisms; follow manufacturer dosing and contact times.
Benefits include reduced corrosion risk and safer handling compared with caustic cleaners.
Limitations include ineffectiveness on inorganic debris, mineral scale, or complete blockages.
For persistent slow drains, consult a plumber to diagnose and recommend appropriate mechanical or chemical options.
How to Remove Visible Blockages by Hand Safely
Reach into the toilet bowl only after putting on waterproof gloves and protective eyewear to minimize exposure to bacteria and contaminants.
The technician inspects the obstruction visually, uses a flashlight and a rake-like grabber or gloved fingers to grasp non-paper items, and avoids excessive force that could damage porcelain or seals.
Waste removal focuses on solid, visible objects only; chemical or water-pressure methods are reserved for other subtopics.
After extraction, debris is bagged, tools disinfected, and hands washed.
If resistance persists or pipes rattle, a professional is contacted to prevent further damage.
- Use a flashlight for clear sight.
- Bag and seal removed debris.
- Disinfect tools immediately.
Quick Techniques to Clear Paper and Waste Clogs
Begin by evaluating water level and visible material to choose the safest, most effective method for loosening paper and organic waste clogs.
If water sits high, remove excess to prevent overflow.
Start with a flange plunger, sealing the bowl and using firm, consistent thrusts to dislodge soft obstructions.
For persistent resistance, try a closet auger: feed slowly, rotate, then retract to break and pull material.
Enzymatic drain cleaners can aid organic breakdown overnight; avoid harsh chemicals that may damage pipes.
After clearing, flush several times and inspect for residual slow draining, repeating mechanical methods if necessary.
How to Dislodge Hard Objects (Toys, Phones) From a Toilet
Carefully assess the object’s size, material, and location before attempting removal to choose the least invasive method.
One person should shut off the water, don gloves, and use a flashlight to confirm visibility. If reachable, use long nylon-tipped grabbers or a coat hanger bent with padded ends to avoid porcelain scratches.
For deeper objects, create a seal with a wet rag and try gentle suction using a toilet plunger; avoid excessive force. If these fail, stop and call a professional to prevent damage.
- Prioritize noninvasive retrieval
- Protect porcelain and plumbing
- Know when to call a plumber
Clearing the Toilet Trapway in Under 10 Minutes
After failed attempts to retrieve a lodged item, attention should shift to clearing the toilet trapway quickly and safely.
A plunger with a flange seal is placed over the bowl and firm, even pumps are applied for one to two minutes; suction and pressure often dislodge blockages.
If ineffective, a toilet auger is fed into the trapway until resistance is felt, then rotated and pushed gently to break or hook the obstruction. After withdrawal, the bowl is flushed to confirm flow.
Protective gloves and eye protection are worn, and tools are sanitized after use to prevent contamination.
What to Do If Water Keeps Rising in the Bowl?
If water in the bowl continues to rise despite plunging or augering, stop flushing and assess whether the rise stems from a full sewer line, a partial blockage, or a venting issue.
A calm, methodical approach reduces risk: avoid adding more water, check other drains for simultaneous backups (indicating mainline problems), and listen for gurgling that suggests vent blockage.
If obstruction persists, prepare to remove water manually or call a professional.
- Confirm if multiple fixtures back up — likely main sewer.
- Note odors or slow drains — possible partial blockage.
- Observe gurgling — venting or trapped air issue.
Preventing Sewage Backups While You Work
Before starting work, the technician should take steps to prevent sewage from backing into the bathroom: cap or seal the toilet bowl with a heavy plastic bag or a sturdy rubber cover, close any cleanout plugs on the sewer line, and turn off water to nearby fixtures to eliminate accidental flushing.
Next, deploy absorbent towels or disposable pads around the base and place a shallow container under the flange to catch drips.
Use a backflow prevention device or a temporary check valve on downstream access points when available.
Monitor the work area continuously, and keep a dedicated waste bag and disinfectant nearby for immediate cleanup.
When to Shut Off Water to the Toilet
The homeowner should locate and turn the shutoff valve when work involves the tank, flapper, or any component that could allow continuous flow or leaks.
For routine snaking or minor drain clearing, leaving the valve open is usually acceptable, but it should be closed during major repairs or when removing the tank.
Shutting the water prevents unwanted filling and limits water damage if a connection fails.
When To Turn Valve
When a toilet requires repair, replacement, or prolonged inactivity, shutting off the water supply at the shut-off valve prevents flooding and uncontrolled flushing. The valve should be turned off before disconnecting supply lines, replacing components, or when leaks appear; it also stops water flow during extended absences.
Confirm the tank drains after turning the valve and test by lifting the flush lever. If the valve is stiff, use gentle force and apply penetrating lubricant later. If unsure about hidden shutoffs, close the main water supply and call a professional.
- Turn off before disassembly
- Close on visible leaks
- Verify tank empties
During Major Repairs
During major toilet repairs, shutting off the water prevents accidental flooding and allows safe removal of tank components and seals. The repairer locates the shutoff valve—usually on the wall or floor—turns it clockwise until it stops, then flushes to empty the tank.
For extensive work or valve failure, the main water supply is closed at the house shutoff. After repairs, the valve is reopened slowly to avoid pressure surges while checking for leaks around the base, supply line, and tank fittings.
If leaks appear or the valve resists, service by a licensed plumber is advised before restoring full water flow.
How to Check the Main Sewer Line Quickly
To check the main sewer line quickly, a homeowner should begin by locating the cleanout access and visually inspecting for obvious blockages or backups; clear, methodical steps reduce the time spent diagnosing problems.
The homeowner removes the cap carefully, watches for standing water, and smells for sewage indicators.
If flow looks normal, brief tests from multiple fixtures help isolate issues.
When unsure, documenting findings and photos aids communication with pros.
Safety: wear gloves and eye protection.
- Inspect cleanout for standing water or debris.
- Run water tests at several fixtures to confirm flow.
- Note odors, slow drains, or gurgling for technicians.
How to Tell If the Clog Is Outside Your Home
How can a homeowner determine whether a clog lies outside the house rather than inside the plumbing? Signs include multiple fixtures backing up, slow drains across the property, and sewage odors near the yard. Inspect the cleanout and yard for pooling. If clearing one fixture doesn’t restore others, suspect external blockage. Call the utility or a pro for camera inspection before excavating.
| Indicator | Meaning |
|---|---|
| Multiple backups | Likely external |
| Yard pooling | Possible sewer line break |
| Cleanout overflow | Downstream clog |
| Persistent odor | External sewer issue |
| Multiple floors affected | Main line problem |
Fast Fixes for Recurrent Toilet Clogs
A brief set of quick plunger techniques can restore flow in minutes when clogs recur, focusing on proper seal and steady pressure.
Routine preventive maintenance tips—like limiting flushable items and occasional enzyme treatments—reduce repeat blockages.
Together these simple actions cut downtime and lower the need for professional service.
Quick Plunger Techniques
Rapid plunging methods restore flow quickly by creating focused pressure pulses that dislodge common blockages near the trap and drain throat. The technique emphasizes a firm seal, steady rhythm, and short, powerful thrusts rather than long pulls.
Begin with enough water to cover the cup, position centrally, and maintain seal integrity. If single-action plunging fails, alternate few deep pumps with quick bursts. Wear gloves and protect flooring.
- Establish a strong seal before each push to maximize pressure transfer.
- Use controlled, rhythmic thrusts: three to five sharp pumps, then test.
- Avoid excessive force that risks porcelain damage or seal displacement.
Preventive Maintenance Tips
Regularly inspecting and addressing minor causes of recurring clogs prevents most emergencies and keeps toilets flowing reliably.
Homeowners are advised to run periodic checks: test flush performance, inspect the bowl and trap for residue, and verify tank components for proper fill and flapper operation.
Limit paper use and avoid flushing wipes, feminine products, or grease.
Use enzyme-based cleaners monthly to break organic buildup without harming pipes.
Tighten loose bolts and replace worn seals to prevent leaks that attract debris.
Keep a small auger and plunger accessible.
Prompt small repairs and mindful habits reduce repeated blockages and service calls.
Temporary Toilet-Use Rules After Clearing a Clog
Often homeowners should treat the toilet with caution for a short period after a clog is cleared. Use the fixture sparingly, avoid heavy loads, and refrain from using chemical cleaners immediately; patience prevents reoccurrence and protects seals. Observe for leaks, slow drain, or gurgling and keep the bathroom ventilated. Record any unusual sounds or smells and note the time of the repair.
- Limit use to essentials for 24–48 hours to allow residue to settle.
- Avoid flushing non-biodegradable items or excessive paper until confidence returns.
- Check adjacent drains; shared lines may still harbor partial blockages.
Follow these steps to reduce risks.
How to Test Flush Performance After Repair
After observing the fixture for the recommended 24–48 hours, proceed to evaluate flush performance systematically.
Begin by running several test flushes with clear water, noting bowl evacuation speed, siphon completion, and any residual pooling.
Measure water level after each flush; it should return to normal within a minute.
Listen for unusual gurgling or slow refill, indicating vent or trap issues.
Test with varying loads: one flush, two consecutive flushes, and a simulated heavier load (toilet paper only).
Record observations and compare to pre-repair performance.
If problems persist, schedule further inspection or professional plumbing service.
How to Clean and Sanitize After Unclogging a Toilet
Cleaning and sanitizing a toilet after unclogging is essential to remove contaminants, control odors, and prevent microbial spread. The area should be ventilated and gloves, eye protection, and a mask worn. Remove visible debris, flush, then apply a disinfectant suitable for bathroom surfaces and follow label contact time. Clean tools used and disinfect the plunger and auger. Dispose of or launder contaminated rags and gloves safely.
- Disinfect surfaces: seat, rim, handle, floor near base.
- Clean tools: soak metal parts in bleach solution; rinse and dry.
- Waste disposal: seal and discard contaminated waste promptly.
Routine Habits That Prevent Future Toilet Clogs
Maintaining simple routines can markedly reduce the risk of future toilet clogs.
Users should adopt regular flushing practices—multiple flushes for large loads—to prevent buildup in the trap and drain.
Choosing appropriate, septic-safe toilet paper and limiting quantity per flush further minimizes blockage risk.
Regular Flushing Habits
Regularly flushing with an intentional, single strong flush helps keep the trap and drain clear by moving waste and paper promptly through the bend and into the sewer line.
Consistent flushing habits reduce residue buildup, limit slow-drain incidents, and reveal early signs of partial blockage. Users should adopt predictable routines to protect pipe flow and conserve water.
Simple checks after flushing catch gurgles or delayed drainage before escalation. Habitual attention pairs with maintenance to extend system reliability.
- Observe flush performance and note changes.
- Flush only once per use; avoid repeated short taps.
- Run an occasional full tank flush to test flow.
Proper Toilet Paper Use
Often, choosing the right amount and type of toilet paper prevents clogs before they start: thin, septic-safe sheets and moderate use dissolve more readily and pass through traps without accumulating.
The article emphasizes selecting fast-dissolving, single-ply or labeled septic-safe brands.
Users are advised to avoid wads and repeated flushes for a single use; instead, use measured amounts and flush once per reasonable volume.
Sanitary wipes, paper towels, and non-dissolvable items are strictly discouraged.
Regularly checking roll size and educating household members reduces risk.
Consistent, mindful paper habits markedly lower blockage frequency and simplify drain maintenance.
Cost vs. Time: DIY Unclogging vs. Calling a Plumber
When a toilet drain slows or stops, homeowners must weigh the upfront costs and time commitment of DIY unclogging against the higher fees but quicker resolution offered by a professional plumber.
A DIY approach saves money on service calls and can resolve simple blockages with plungers or augers, but it consumes time and risks incomplete fixes or damage. Hiring a plumber costs more but delivers expertise, specialized tools, and faster restoration of function.
Decision factors include blockage severity, homeowner skill, available time, and risk tolerance.
- Money saved vs. potential repair costs
- Time investment vs. immediate resolution
- Skill level vs. likelihood of success
How to Choose a Plumber for Tough Drain Issues
When selecting a plumber for stubborn toilet drain problems, priority should be given to those with proper license and insurance to protect the homeowner and guarantee code compliance.
Proven experience specifically with drain issues and appropriate equipment indicates the contractor can diagnose and resolve complex clogs.
Clear, itemized pricing estimates help compare options and prevent unexpected charges.
License And Insurance
Regarding license and insurance, consumers should verify that a plumber holds current state or local licensing that covers drain and sewer work, since licenses confirm required training and legal authorization to perform complex repairs.
Proof reduces liability and guarantees adherence to codes.
Insurance protects homeowners from accidental damage or injury during interventions.
Always request documentation and verify with issuing agencies.
Written estimates should reference license numbers and insurance carriers.
- Request copies of license and insurance certificates before work begins.
- Confirm coverage limits for property damage and worker injury.
- Note expiration dates and verify active status with regulators.
Experience With Drains
Evaluate a plumber’s track record with drains to make sure they have the specific skills needed for stubborn clogs and pipe repairs.
The homeowner should request examples of past work, asking about types of blockages handled, experience with sewer lines, and familiarity with augers, hydro-jetting, and camera inspections.
Confirm whether the plumber routinely diagnoses root intrusion, collapsed pipes, or grease buildup and can propose long-term solutions rather than quick fixes.
Reviews and references that describe similar problems offer reliable insight.
Preference should go to technicians who document findings, explain repair options, and demonstrate consistent successful outcomes on challenging drain jobs.
Clear Pricing Estimates
Clear, itemized pricing is essential for homeowners comparing plumbers for tough drain work, as it reveals whether estimates cover diagnosis, equipment use (auger, camera, hydro-jet), parts, permits, and potential additional repairs.
The homeowner should request written estimates, timed scopes, and clear hourly vs flat fees; transparency reduces surprises and enables fair comparison across bids. Verify warranty terms and ask how unseen conditions (root intrusion, pipe collapse) change costs.
Prefer firms that outline disposal fees and permit responsibilities. Use references and online reviews to confirm billed practices match delivered work.
- Ask for line-item breakdowns.
- Confirm exclusions and contingencies.
- Compare total projected costs.
Quick Checklist: Steps to Clear a Toilet Drain Fast
Start by assembling the essential tools and safety items—plunger, toilet auger, rubber gloves, bucket, and disinfectant—so each step proceeds without delay; this preparation minimizes repeated trips and reduces contamination risk.
Turn off water supply and remove excess bowl water into a bucket if needed.
Use a flange plunger with firm, steady thrusts; test drainage.
If slow, insert a toilet auger carefully to break or retrieve the obstruction.
Flush to confirm clearance, avoiding multiple flushes if resistance persists.
Clean and disinfect tools and surfaces.
Restore water, monitor for leaks, and document any recurring clogs for professional assessment.
Conclusion
When a toilet clogs, the homeowner should act fast but stay calm, following the three immediate steps and safety checklist outlined. Choosing the right tool — plunger, auger, or enzyme cleaner — pays off, and routine habits keep pipes flowing. If stubborn blockages persist, weighing cost versus time helps decide whether to call a pro. In short, a little elbow grease now can save headaches later, turning a mountain back into molehill.