How to Clean Drain Pipe: Simple DIY Steps for Clogs & Odors
Key Takeaway: Simple DIY Steps to Clean Clogged or Smelly Drain Pipes
A clogged or smelly drain can often be resolved with straightforward DIY methods. Follow these steps for effective cleaning:
- Remove Debris: Clear any visible debris and strainers from the drain.
- Use a Plunger: Apply a plunger to dislodge any blockages.
- Probe with Tools: Utilize a plumber’s snake or a straightened hanger to extract hair and gunk from the pipe.
- Flush with Hot Water: Pour staged hot water down the drain to help clear any remaining residue.
- Apply Enzyme Cleaner: Finish by using a biodegradable enzyme cleaner to digest any organic buildup.
Safety Precautions:
- Always wear gloves and eye protection.
- Avoid mixing different chemicals.
- Regularly inspect traps for leaks.
These simple steps can help maintain clear and odor-free drains.
Quick Checklist: Clear Most Clogs in 5 Steps
Looking for a fast way to clear a common clog? The checklist outlines five concise steps: remove visible debris from the drain opening, use a plunger to dislodge the obstruction, apply a plumber’s snake or wire coat hanger to break up and extract hair or residue, flush the drain with hot water to clear loosened material, and finish with a biodegradable enzyme cleaner to digest remaining organic buildup.
Each step is presented for safe DIY use: wear gloves, avoid mixing chemicals, and work gradually to prevent pipe damage. Follow steps in order to resolve most minor blockages efficiently and prevent recurrence.
How to Tell If Your Drain Needs Cleaning Now
How can a homeowner quickly tell whether a drain needs cleaning now? Indicators include slow drainage despite recent use, water pooling around the drain, gurgling sounds as fixtures empty, and persistent odors emanating from the sink or shower.
Multiple fixtures affected suggests a main line issue; a single fixture points to a localized clog. Backflow or sewage smell signals immediate attention. Visible debris or hair near the grate confirms buildup.
Testing with a small amount of water can reveal slow emptying. If remedies like plunging or a quick snake restore flow, cleaning was needed; if not, professional inspection may be required.
Safety First: PPE and Plumbing Precautions
Before any work begins, appropriate personal protective equipment—gloves, eye protection, and, if needed, a mask—should be selected to guard against chemicals and contaminated water.
The water supply and affected fixtures must be shut off and isolated to prevent spills and accidental use.
Following these precautions minimizes injury and property damage during drain cleaning.
Personal Protective Equipment
When working on a drain pipe, wearing appropriate personal protective equipment (PPE) reduces the risk of chemical exposure, cuts, and infection.
The guide stresses selecting gloves resistant to cleaners, splash goggles, and durable clothing that covers arms and legs.
Proper footwear prevents slips and punctures; respirators suit strong fumes or mold.
Inspect PPE before use and replace compromised items.
Clean reusable gear after each job and dispose of contaminated single-use items responsibly.
Awareness of fit and compatibility with task chemicals guarantees protection without impeding movement.
- Chemical-resistant gloves
- Splash goggles
- Closed-toe, non-slip footwear
- Respirator or mask
Shutoff And Isolation
Turn off water sources and isolate the work area to prevent flooding and accidental exposure to contaminants. The technician verifies main shutoff and relevant fixture valves, drains residual water, and secures adjacent rooms. Signs and barriers mark the zone; nonessential occupants are kept away. Electrical sources near the drain are identified and switched off if risk exists. Proper PPE remains on. After work, valves are slowly reopened while checking for leaks and proper flow. Documentation notes valve positions and steps taken for future maintenance.
| Item | Action |
|---|---|
| Main valve | Shut off |
| Fixture valve | Close |
| Drain residual | Open taps |
| Electrical | Isolate |
| Barriers | Place |
Tools & Supplies for Drain Cleaning
Equipped with the right tools and supplies, a drain-cleaning task becomes quicker, safer, and more effective.
The following essentials prepare one for common blockages and odor issues while minimizing risk and mess.
Protective gear prevents exposure; basic hand tools access and remove debris; specialty items address persistent buildups; and cleaning agents sanitize without harming pipes when used correctly.
Selecting quality, compatible products reduces repeats and repairs.
Storage in a labeled kit saves time for future maintenance.
Proper disposal methods and material safety data guidance complete a responsible approach to routine drain care.
- Gloves, goggles, and masks
- Pipe wrench, bucket, and brushes
- Drain snake or auger, hose attachment
- Enzyme cleaner, baking soda, vinegar
Clear a Shallow Clog With a Plunger
A shallow clog can often be cleared with a plunger if the correct technique is used.
First, select a plunger sized and shaped for the fixture to guarantee effective suction. Position it to form a tight seal and pump firmly and evenly until the blockage loosens.
Choose The Right Plunger
Selecting the correct plunger determines how effectively a shallow clog can be cleared without damaging the fixture. The choice depends on drain type and seal needs.
A cup plunger suits flat sinks and showers; a flange plunger fits toilets. Soft rubber offers flexibility on delicate porcelain; stiff rubber yields more force for stubborn clogs. Size matters: larger heads move more water but require space.
Consider a wooden handle for durability and a vinyl grip for control. Inspect for cracks before use and keep a spare. Proper selection reduces effort and the risk of surface damage during plunging.
- Cup plunger for flat drains
- Flange plunger for toilets
- Soft rubber for delicate fixtures
- Stiff rubber for tougher clogs
Create A Tight Seal
Before plunging, position the plunger so its lip fully contacts the drain opening and the surrounding surface to form an airtight seal.
Make sure the sink or tub contains enough water to cover the plunger’s cup; absence of water breaks the seal and reduces pressure transfer.
Angle the plunger to eliminate gaps around pipe edges and press down gently to confirm contact without dislodging the lip.
For double sinks, block the unused drain to maintain vacuum.
Inspect the plunger for cracks or deformations that compromise sealing.
A reliable seal concentrates force into the clog, improving the chance of successful clearing.
Pump Firmly And Evenly
Begin pumping with steady, even strokes, driving the plunger cup inward and then pulling back without breaking the seal; rapid or jerky motions reduce pressure transfer and can dislodge the lip.
One reliable rhythm generates alternating compression and suction that loosens debris without harming fixtures.
The operator watches for subtle movement or gurgling as indicators of progress.
If resistance persists after a dozen pumps, pause to re-seat the plunger or add water to improve coverage.
Upon breakthrough, flush hot water to clear loosened material and debris from the trap, ensuring the pipe flows freely and odors diminish.
- Maintain steady rhythm
- Use full strokes
- Re-seat if needed
- Flush after breakthrough
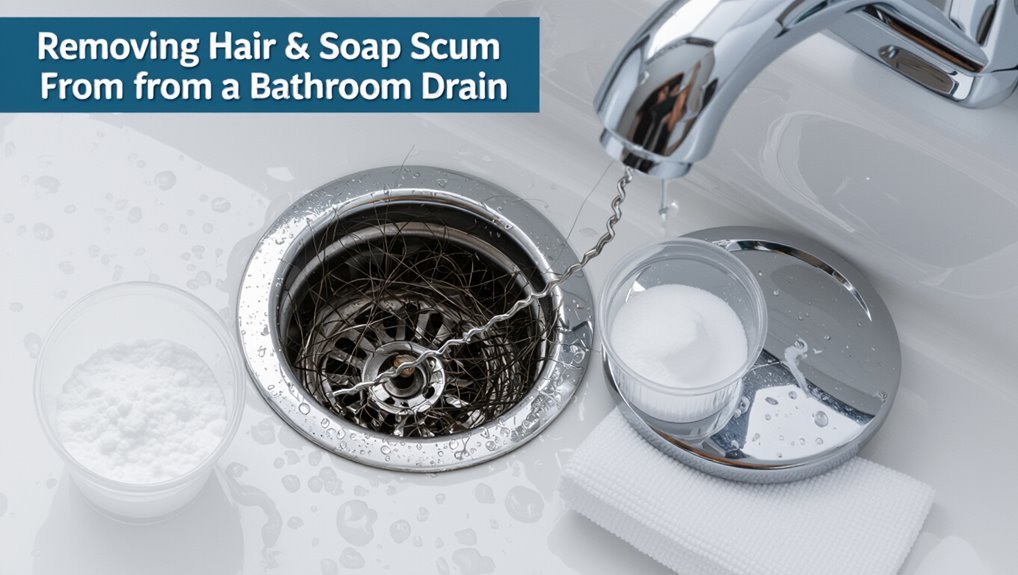
Remove Hair Clogs From Bathroom Drains by Hand
To remove hair clogs from a bathroom drain by hand, gather basic tools—gloves, a flashlight, a straightened wire hanger or a plastic drain snake, and a small bowl for debris—and work methodically:
inspect the drain with the light, use the tool to hook and lift out hair, and deposit it in the bowl to prevent re-clogging.
After initial removal, rinse with hot water to clear loosened residue.
Repeat inspection and extraction until water drains freely.
Sanitize the area and tools, then dispose of collected hair in trash.
Regular manual checks prevent buildup and reduce reliance on chemical cleaners.
Use a Drain Snake (Auger): Step‑By‑Step
Often the quickest way to clear a stubborn bathroom drain is to use a hand-held drain snake (auger); it reaches clogs beyond the reach of fingers and lifts or breaks them without chemicals.
A user inserts the coiled cable into the drain, extends it while turning the handle, then feels for resistance and works the head to either snag or sever the obstruction.
Withdraw slowly, removing debris into a disposable towel.
Repeat until flow returns.
Sanitize the snake and workspace afterward.
- Wear gloves and eye protection.
- Feed cable gently; avoid forcing.
- Rotate to engage the clog.
- Clean and disinfect tools.
Flush a Drain With Hot Water & Dish Soap
How much difference can a simple mix of hot water and dish soap make for a slow drain? A practitioner boils or heats water safely, pours a generous squirt of grease‑cutting dish soap down the drain, then follows with the hot water in stages. The soap loosens oily residue clinging to pipe walls while the heat melts and flushes softened grime.
After a few minutes, cold water is run to solidify and push remaining debris. This technique suits kitchen sinks clogged by fats and mild buildup; it is noncorrosive, inexpensive, and a recommended first response before mechanical or chemical options.
Baking Soda + Vinegar: Safe Homemade Cleaner
After using hot water and dish soap for greasy buildup, a baking soda and vinegar combination offers a gentle, non‑toxic alternative for many slow drains.
It loosens minor clogs, neutralizes odors, and avoids harsh chemicals. Use it when water still moves slowly and buildup seems light.
- Pour 1/2 cup baking soda into the drain.
- Follow with 1/2 cup white vinegar; cover the drain to force reaction downward.
- Wait 15–30 minutes, then flush with boiling water to clear residues.
- Repeat monthly or as needed; do not use after commercial drain cleaner without rinsing.
Use Enzymatic Cleaners for Organic Buildup
Enzymatic cleaners use specific proteins to break down organic matter like hair, grease, and food residue at a molecular level.
Selecting a product requires checking enzyme types (protease, lipase, amylase), purpose-built use for sinks or tubs, and manufacturer instructions for contact time and temperature.
For safe usage, follow label directions, avoid mixing with bleach or acids, and allow enzymes adequate dwell time for best results.
How Enzymes Work
In treating organic buildup in drain pipes, naturally occurring enzymes break down fats, proteins, and carbohydrates into smaller molecules that wash away with water.
Enzymatic cleaners introduce microbes or purified enzymes that target specific bonds, accelerating natural decomposition without harsh chemicals. Action is gradual; enzymes persist while substrate remains, making them ideal for maintenance.
They reduce odors by consuming malodorous compounds and minimize residue that attracts future buildup.
Performance depends on contact time, temperature, and pH; users should allow dwell time and avoid disrupting biological activity with strong acids or oxidizers.
- Targeted bond cleavage
- Microbial augmentation
- Time-dependent action
- Odor reduction
Choosing The Right Product
When selecting a cleaner for organic buildup, prioritize formulations that contain active enzymes or live microbial cultures specifically labeled for drains and grease.
Choose products suited to the drain type—kitchen, bathroom, or laundry—and check temperature and pH ranges for peak enzyme activity.
Prefer powdered or concentrated liquid strains with clear usage instructions and measurable dosing.
Verify biodegradable ingredients and absence of harsh caustics if pipes are older or sewage-connected.
Look for reputable brands, third-party efficacy claims, and user reviews addressing odor reduction and maintenance rather than immediate chemical clearing.
Store per label to maintain enzyme viability.
Safe Usage Tips
Regularly following label directions guarantees enzymatic drain cleaners work safely and effectively while minimizing risk to pipes and people. The user should verify compatibility with pipe materials and avoid mixing enzymes with bleach or caustic chemicals.
Application timing and temperature influence activity; warm water and overnight contact often improve results. Store products away from children and pets, and wear minimal protection if recommended.
- Confirm pipe material and product compatibility before use.
- Do not combine enzymatic cleaners with chemical alternatives.
- Allow recommended dwell time; repeat if necessary.
- Store securely and follow disposal instructions.
Clean the P‑Trap to Stop Recurring Clogs
After removing the trap arm, the P-trap should be inspected and cleaned to remove hair, grease, and mineral deposits that cause recurring clogs.
The curved section is emptied into a bucket, then disassembled completely if sealed rings or buildup persist.
Residue is scraped or rinsed with a stiff brush and warm, soapy water; stubborn deposits may respond to a vinegar soak.
Check washers and slip nuts for wear and replace if brittle.
Reassemble ensuring proper alignment and hand-tightening followed by a slight wrench snug.
Finally, run water to confirm a watertight seal and normal drainage.
Test & Flush a Mainline or Deep Clog
Clearing the P‑trap removes many common blockages, but a persistent slow drain or multiple fixtures backing up indicates a mainline or deep clog that requires more aggressive testing and flushing. The technician checks cleanouts, runs a wire or snake to locate resistance, and notes whether water backs into other drains.
If reachable, a mechanical auger breaks and extracts the obstruction; a camera inspection confirms position and severity. High-pressure flushing or hydrojetting clears remaining debris and tests flow. After flushing, the plumber rechecks fixtures and cleanouts for proper drainage and documents findings for preventative maintenance.
- Inspect cleanouts
- Snake to locate clog
- Camera verify
- Hydrojet flush
Remove Grease, Soap Scum, and Mineral Scale
The inspection should first identify where grease enters the system—kitchen sinks, floor drains, and food-prep areas are common sources.
Next, appropriate treatments and cleaners are selected to dissolve accumulated soap scum without harming pipes.
Finally, mineral scale is addressed with descalers or mechanical removal to restore flow and prevent future buildup.
Identify Grease Sources
Grease buildup is often traced to specific household activities and fixtures: kitchen sink use, disposal of cooking fats, and repetitive rinsing of oily pans contribute the largest share, while bathroom drains accumulate soap scum from shampoos and body washes and hard-water areas develop mineral scale from dissolved calcium and magnesium.
- Cooking oils and bacon fat poured or wiped into sinks.
- Food scraps and starchy residues that bind grease inside P-traps.
- Dishwashing practices: rinsing greasy cookware directly under running water.
- Overflow or shared lines from dishwashers and garbage disposals that introduce emulsified fats.
Dissolve Soap Scum
Tackle soap scum, mineral scale, and residual grease by using targeted dissolving agents that break bonds and flush residues without damaging pipes.
A person selects enzyme cleaners or alkaline solutions compatible with pipe material; enzymes digest organic films, while alkaline cleaners emulsify grease. Apply according to label, allow dwell time, then flush with hot water to carry loosened material.
For persistent buildup, repeat applications or combine mechanical agitation with a brush or flexible drain tool.
Avoid corrosive acids and excessive heat that harm seals.
Dispose of removed residues per local regulations and ventilate the area during treatment.
Remove Mineral Scale
Following enzyme or alkaline treatments for soap scum, attention shifts to mineral scale, which requires different chemistry and techniques.
Hard water deposits—calcium and magnesium—build stiff, crusty layers inside pipes.
Acidic cleaners (vinegar, citric acid, or diluted muriatic solutions used cautiously) dissolve scale; mechanical scraping with a brush or plumbing snake removes stubborn patches.
Flush thoroughly afterward to prevent corrosion and neutralize acid.
Regular softening or periodic descaling prevents recurrence.
- Inspect pipe sections for visible buildup and access points.
- Apply appropriate acid-based descaler per instructions.
- Mechanically agitate stubborn scale with brush or snake.
- Rinse, neutralize, and repeat as needed.
Eliminate Stubborn Drain Odors
Tracing the source of persistent drain odors requires methodical inspection and targeted cleaning rather than repeated surface rinses.
Inspect visible traps and accessible pipe sections for hair, grease, or biofilm buildup; remove debris manually or with a plumber’s snake. Flush with hot water, then apply a baking soda and vinegar reaction to dislodge organic residue, followed by a thorough hot-water rinse.
For metal or deep-seated problems, use an enzyme-based drain cleaner that digests organic matter without damaging pipes.
If odors persist, check vent stacks and call a professional to inspect seals, hidden blockages, or faulty traps that permit sewer gas.
Weekly Habits to Prevent Clogs & Smells
Routine weekly maintenance markedly reduces buildup and odors in household drains.
A simple hot water flush helps loosen grease and soap residue, while a quick strainer cleaning prevents hair and debris from entering the pipe.
Together these habits keep flow steady and minimize the need for stronger interventions.
Weekly Hot Water Flushes
Regularly pouring boiling or very hot water down a drain helps dissolve grease buildup and loosens organic matter before it bonds to pipe walls. A weekly hot-water flush prevents gradual accumulation, reduces odors, and maintains flow without chemicals.
Execute slowly: pour in stages, allowing heat to reach deeper bends. Caution with PVC—use very hot, not scalding, water if manufacturer warns. Combine with cold-water run from fixtures afterwards to push loosened debris.
Monitor sinks and tubs for slow drainage; repeat sooner if flow falters. Consistent flushing complements other maintenance for simple, low-cost clog prevention.
- Heat source: kettle or pot
- Pour in stages
- Follow with cold water
- Check for slow flow
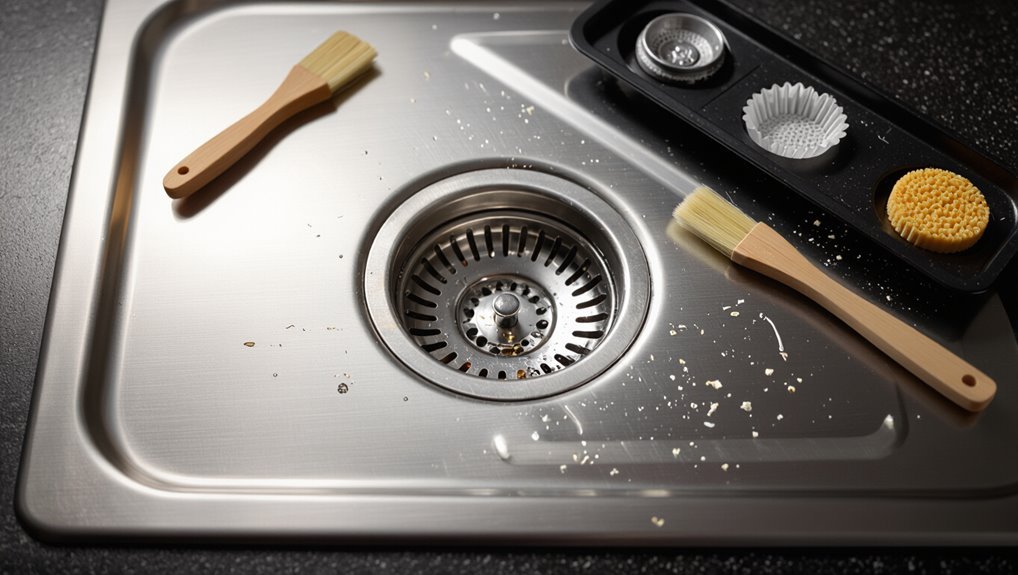
Strainer Cleaning Routine
Weekly attention to sink and shower strainers prevents hair, food scraps, and debris from entering pipes and forming clogs.
Each week, strainers should be removed, emptied into trash, and rinsed under hot water to dislodge residue. A soft brush clears trapped particles; persistent grime benefits from a mild detergent or vinegar soak. Inspect rubber seals and replace damaged units to maintain a tight fit.
After cleaning, secure strainers firmly to prevent gaps. Regular routine reduces odor, slows buildup, and minimizes required deep cleaning.
Documenting dates encourages consistency and helps identify recurring problems early, prompting targeted fixes.
When to Call a Plumber (And What to Tell Them)
Occasionally a homeowner will reach the limit of safe DIY fixes and need a plumber; signs that call for professional help include persistent clogs that reappear after snaking, slow draining across multiple fixtures, sewage odors, gurgling sounds, repeated backups, visible leaks in exposed piping, or water pooling near the drain line.
When contacting a plumber, provide clear details: symptom history, when issues began, recent work or tree planting nearby, and actions already attempted. Useful specifics speed diagnosis and may reduce call-out time.
- Describe symptoms and timeline.
- Note recent DIY attempts.
- Mention affected fixtures.
- Report visible leaks or odors.
Protect Old or Fragile Pipes During Cleaning
Taking care when cleaning older or fragile drain pipes prevents damage that can lead to leaks, corrosion, or costly replacements. One should choose gentle cleaners, avoid high-pressure tools, and use padded supports when accessing exposed pipework. Gloves and eye protection protect the cleaner; soft brushes and diluted solutions remove buildup without abrading surfaces. Work steadily, testing small areas before broader application. If unsure, limit intervention and document conditions for a professional. Visual cues guide restraint: discoloration, flaking, or soft fittings signal fragility.
| Surface | Tool | Caution |
|---|---|---|
| Cast iron | Soft brush | Low pressure |
| PVC aged | Cloth | Mild soap |
| Copper thin | Diluted vinegar | Spot test |
Inspect for Leaks or Damage After Cleaning
After cleaning, one should promptly inspect the drain pipe and surrounding joints for signs of leaks or structural damage.
The inspector checks for dampness, corrosion, loose fittings, hairline cracks, and misaligned sections. Small drips may require tightening or sealant; larger damage needs professional repair.
Verification includes running water to observe flow and leak onset, and smelling for persistent odors that indicate hidden breaches.
Document findings and address issues before restoring regular use to prevent worsening damage.
- Check joints and washers for moisture or gaps.
- Look along pipe length for corrosion or cracks.
- Run water to reveal intermittent leaks.
- Note odors or stains signaling hidden damage.
Maintenance Schedule: Keep Drains Clear
Having confirmed the drain is intact and leak-free, establish a regular maintenance schedule to keep drains clear and prevent recurring blockages.
Monthly tasks include flushing with hot water, removing visible debris from strainers, and checking traps for buildup.
Quarterly actions involve a deeper clean: use a plumber’s snake or enzyme cleaner, inspect accessible pipe joints, and refresh odor traps.
Immediately address slow drainage or unusual smells.
Record dates and actions to spot patterns and adjust frequency.
Seasonal checks before heavy use periods (holidays, gardening) reduce risks.
Consistent, documented maintenance prevents clogs, extends pipe life, and limits emergency repairs.
Conclusion
Clear, careful cleaning can consistently curb clogs and curbling odors. Following simple steps, sensible safety, and selected supplies secures smoother sewerage flow, while spot inspections and steady scheduling stave surprise stoppages. Promptly pausing to protect porous pipes prevents pricey, pervasive problems; prudently plunging shallow obstructions and recognizing when professional plumbers prove preferred preserves plumbing performance. Ultimately, sustained small steps save stress, spare streams, and strengthen system stability.