How to Cap a Water Pipe: Easy DIY Guide for Shutoff & Repair
Key Takeaway: How to Quickly Cap a Water Pipe
To stop a leak quickly, follow these steps:
1. Shut Off Main Water Supply: Immediately turn off the main water supply to halt the flow.
2. Relieve Pressure: Open nearby faucets and drains to relieve any remaining pressure in the system.
3. Identify Pipe Specifications: Determine the material (galvanized, PEX, PVC, or copper) and size of the pipe.
4. Select the Right Cap: Choose a compatible cap:
- Threaded for Galvanized
- Push-fit for PEX/PVC
- Solder or Compression for Copper
5. Prepare the Pipe: Cut the pipe cleanly, deburr the edges, and clean the surface.
6. Install the Cap: Follow the installation method specific to the cap type. Use sealant or tape for threaded joints.
7. Test for Leaks: Turn the water back on at low pressure to check for leaks. Monitor the area and plan for a permanent repair.
By following these steps, you can effectively cap a leaking water pipe and prevent further water damage.
Emergency First Step: Stop Leaks Fast
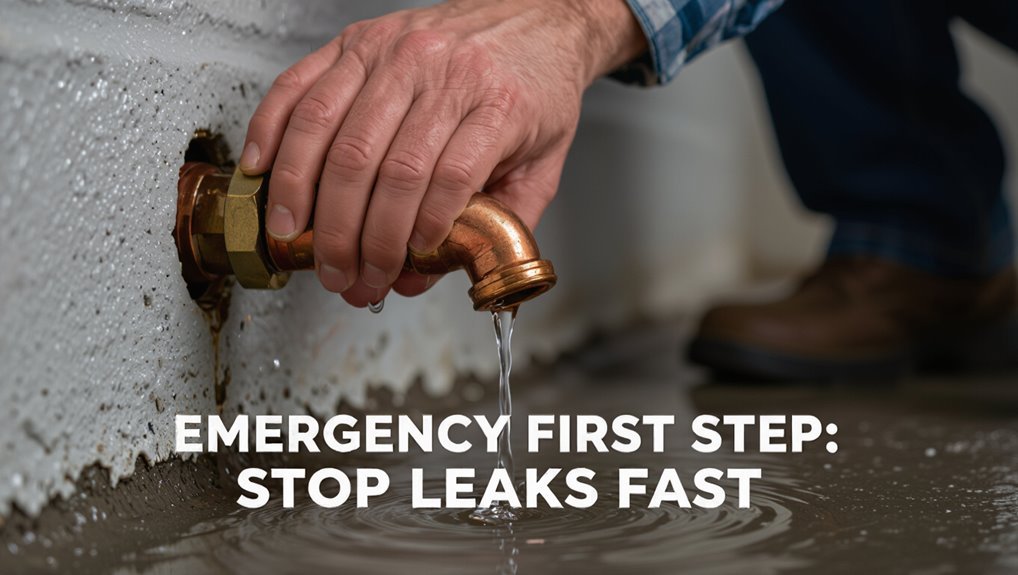
In an emergency, the immediate priority is to stop the leak to prevent water damage and hazards.
The person assesses the leak source, shuts the nearest supply valve if accessible, and isolates affected fixtures.
If valves are stuck or unknown, the main shutoff is used.
Temporary containment follows: buckets catch drips, towels protect surfaces, and water flow is reduced with adjustable clamps or rubber patches paired with hose clamps.
Electrical risks are noted and power to nearby outlets is cut if needed.
After stabilization, documentation of location and severity aids next steps and professional repair planning.
When to Cap a Pipe Now (Emergency Scenarios)
When a pipe bursts or a major leak is clearly visible, immediate capping can stop rapid water loss and limit property damage.
Capping is also appropriate as a temporary measure before crews perform long-term repairs. The decision should prioritize safety, minimizing water exposure, and preserving the plumbing for final restoration.
Bursting Pipe Immediate Response
If a pipe bursts and water is spraying or flooding a space, shutting off the main water supply and capping the affected pipe immediately are critical to limit damage and prevent injury. The person assesses safety, cuts power if needed, towels to contain flow, and caps with a temporary plug or hose bib cap. Call a professional after stabilization. Prioritize preventing electrical hazards and mold by drying once flow stops.
| Action | Purpose |
|---|---|
| Shut off main | Stop water source |
| Wear protection | Avoid injury |
| Temporary cap | Stop remaining flow |
| Call plumber | Permanent repair |
Visible Major Leaks
Recognize a visible major leak by the volume and speed of water escaping, the size of the breach, and any immediate threat to people, electrical systems, or structural elements; such leaks demand capping now rather than waiting, because rapid intervention limits flooding, electrical hazards, and structural damage.
Identify the leak source quickly, shut the main water supply if safe, and disconnect nearby electrical circuits or evacuate the area.
Use temporary caps, pipe clamps, or compression fittings sized to the pipe material to stop flow.
Prioritize personal safety, call emergency services for hazards beyond DIY capability, and document conditions for professionals.
Before Long-Term Repairs
In emergency scenarios that threaten property or safety, capping a pipe immediately can stabilize conditions until professional or long-term repairs begin. The action is temporary: it stops flow, limits water damage, and preserves structure until a licensed plumber assesses permanent fixes. Decisions favor speed and safety—shut main valves first, wear protection, and document the situation.
Temporary caps or plugs suit sudden bursts, exposed pipe ends, or when access is limited. Notify occupants and schedule prompt professional follow-up; do not rely on temporary measures long term.
- Sudden burst or major leak
- Flooding risk in living spaces
- Exposed open pipe end
- Delayed professional access
- Structural or electrical hazard nearby
Should You DIY or Call a Plumber?
When deciding whether to cap a water pipe personally or hire a plumber, the key considerations are the homeowner’s skill level, the pipe type and location, and the potential consequences of a mistake.
DIY may suit those comfortable with basic plumbing, hand tools, and local codes, especially for accessible copper or PVC capped temporarily.
Call a plumber for soldered, galvanized, cast iron, hidden, or pressurized systems, complex fittings, or if permits are required.
Professional work reduces risk of leaks, water damage, code violations, and wasted materials.
Cost, time, and confidence should guide the choice; safety and long-term reliability are priorities.
Before You Start: Turn Off the Main Water Supply
Before any capping work begins, the main shutoff valve should be located and identified.
The valve is commonly found near the water meter, basement wall, or where the service line enters the house.
After closing the valve, open a nearby faucet to verify that the water supply is fully off.
Locate Main Shutoff Valve
Where is the main shutoff valve and how to find it quickly? The homeowner locates the main shutoff by checking typical areas and using visible clues: follow the incoming water line from outside, listen for pipe direction, and inspect common access points. Utility maps or landlord notes can help. If unsure, trace from the water meter. Carry a flashlight and gloves.
- Check near the water meter at the property boundary
- Inspect the basement where supply enters the house
- Look in utility closets or crawl spaces
- Examine exterior hose bib areas for buried valves
- Refer to utility records or landlord documentation
Verify Water Is Off
How can one be certain the house is dry before cutting or capping a pipe?
The person should open a faucet at the lowest and highest points in the house to relieve pressure and drain remaining water.
Check the meter: no movement confirms supply off.
Inspect visible fixtures and hose bibs for drips.
Use a bucket under the work area and towel to catch residual runs.
If dealing with hot water, open the water heater drain or temperature-pressure valve briefly to clear the tank.
Re-check the main shutoff for full closure.
Proceed only when gauges, faucets, and visual checks show no flow.
Relieve Pressure and Drain the Line
Why is relieving pressure essential when capping a water pipe? It prevents sudden sprays, reduces risk of injury, and avoids damaging fittings during removal or installation.
After confirming the main shutoff, open nearby faucets and any low drains to let trapped water escape. For longer runs, open the highest and lowest points to promote full drainage.
Use a bucket or towel to catch residual water and wear eye protection. Verify flow stops before proceeding to cap.
- Open a faucet nearest the capped section
- Release water from lowest drain
- Use towels to contain drips
- Check pressure at fixture
- Wear safety glasses
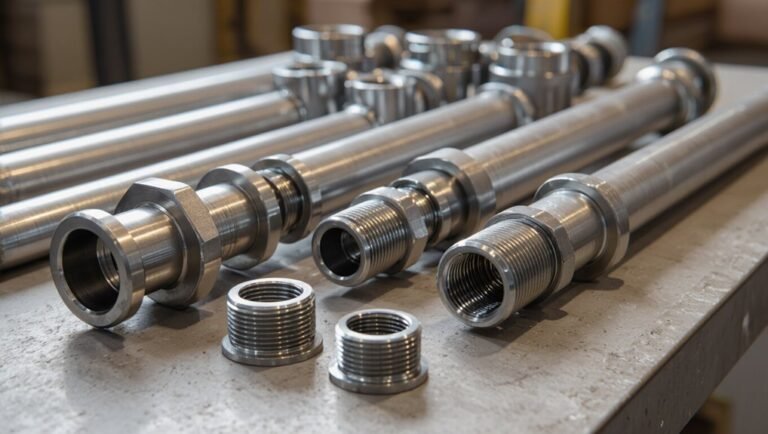
Identify Your Pipe Material: Copper, PVC, PEX, Galvanized
Before selecting a cap, identify the pipe material—copper, PVC, PEX, or galvanized—since each requires a different fitting type and joining method. Visual inspection and simple tests reveal clues: color, flexibility, markings, and threads. Match cap style: soldered or compression for copper, solvent-weld for PVC, crimp or push-fit for PEX, and threaded for galvanized. Use appropriate cleaners, primers, or sealant recommended for the material. When uncertain, consult a hardware spec or supplier. Record material type before buying parts.
| Material | Clues | Common Cap Type |
|---|---|---|
| Copper | Rigid, reddish | Solder/compression |
| PVC | White/gray | Solvent-weld |
| PEX | Flexible | Crimp/push-fit |
| Galvanized | Threaded, dull | Threaded cap |
Measure Pipe Size: Quick OD and Nominal Size Method
Measuring the pipe’s outside diameter (OD) provides a quick way to determine its size for capping.
The measured OD is then used to identify the corresponding nominal pipe size, which may differ from the actual OD.
Correctly matching OD to nominal size guarantees the selected cap fits securely.
Measure Pipe Outside Diameter
How can a quick outside diameter (OD) check speed up identifying a pipe’s nominal size? A simple OD measurement narrows options before consulting charts. Using calipers or a ruler, record the widest external span. Note material and visible fittings; plastics and metals differ slightly in wall thickness. Clean the pipe first for accuracy. Compare the OD to reference tables later to select the correct cap type.
- Use vernier calipers for best accuracy.
- For rough checks, a steel ruler suffices.
- Measure at multiple points for ovality.
- Record measurements in millimeters and inches.
- Clean debris before measuring.
Match Nominal Pipe Size
Matching a pipe’s nominal size to its measured outside diameter converts a quick field measurement into a usable specification for selecting caps and fittings. The technician records the OD with calipers or a tape, then consults a conversion chart because nominal size (e.g., 1/2″, 3/4″) does not equal OD for iron, copper, or PVC.
For copper DWV and CTS, OD may match nominal; for schedule 40 PVC and black iron, OD differs. Use material-specific tables to find the nominal designation and corresponding thread or slip cap size. Confirm by comparing wall thickness or attempting a trial-fit before final installation.
Choose the Right Cap Type for That Pipe
Selecting the correct cap begins with identifying the pipe material, size, and pressure rating so the closure will form a secure, code-compliant seal. Choice depends on compatibility with pipe composition, working pressure, temperature, and whether the cap will be temporary or permanent.
Proper selection prevents corrosion, leaks, and code violations while enabling future access or complete abandonment per local rules. Consider sealing method, available fittings, and whether tools or heat will be used. Verify markings and certification for potable water.
- Confirm pipe material and connection type
- Match nominal diameter and thread standard
- Verify pressure and temperature ratings
- Choose permanent vs. temporary closure
- Check local code and approvals
Cap Types: Threaded, Compression, Push‑Fit, Soldered
The section compares common cap types and their suitability for different pipe materials and situations. It highlights threaded cap options for metal and threaded fittings, and contrasts push‑fit fittings with soldered caps regarding speed, permanence, and skill required.
Practical factors such as leak resistance, tool needs, and future access are introduced to guide the choice.
Threaded Cap Options
For sealing exposed pipe ends, threaded caps offer a durable, mechanically secure option that screws onto male threads and relies on metal-to-metal contact or sealing tape/compound to stop leaks. Various materials and finishes suit different systems and pressures. Brass caps resist corrosion for potable lines; stainless steel fits high-pressure or outdoor use. Plastic (PVC/CPVC) caps work for low-pressure cold water and are lightweight. Hex and slotted shapes allow easy wrench or screwdriver installation. National pipe threads (NPT) remain common; make certain matching taper and size for a proper seal.
- Brass capped option
- Stainless steel option
- Plastic (PVC/CPVC) option
- Hex vs slotted heads
- NPT size/taper matching
Push‑Fit Versus Soldered
Moving from threaded cap choices, attention shifts to joining methods that don’t rely on mating threads: push‑fit and soldered caps represent two common approaches with different skills, tools, and performance profiles. Push‑fit caps install quickly, require no heat, and suit DIYers and temporary work. Soldered caps create permanent, high‑temperature seals on copper but demand proper cleaning, flux, and a torch. Selection depends on pipe material, permanence desired, and local code. Consider accessibility, leak risk, and future removal. Professionals prefer soldering for longevity; homeowners favor push‑fit for speed and safety.
| Method | Skill | Permanence |
|---|---|---|
| Push‑fit | Low | Moderate |
| Soldered | High | High |
| Compression | Medium | Moderate |
Tools to Grab for a Safe Capping Job
Before beginning any capping work, assemble a compact kit of essential tools and safety gear to guarantee the job is controlled and efficient.
The technician selects items that enable clean cuts, secure connections, leak testing, and personal protection.
Tools are chosen for compatibility with pipe type and cap method; portability and durability are prioritized.
Proper selection reduces rework and exposure to hazards. Inspect tools before use and replace damaged items.
- Pipe cutter or tubing cutter sized for the pipe
- Adjustable wrench or basin wrench for fittings
- Deburring tool or file for clean edges
- Pressure gauge or bucket for leak test
- Safety glasses and gloves
Materials and Supplies Checklist
A concise list of essential materials and compatible cap types should be assembled before beginning the job.
Required safety gear and the specific tools introduced earlier are noted to guarantee a secure, code-compliant cap installation.
The following checklist clarifies what to have on hand and why each item matters.
Essential Materials List
For capping a water pipe, a concise list of materials and tools guarantees the job is done safely and efficiently. The list focuses on components that achieve a leak-free, durable seal and accommodate common pipe types. Choice depends on pipe material and access; threaded caps suit metal lines, while push-fit caps match copper, PEX, or PVC. Sealants and cleaners make certain proper adhesion.
Small extras like replacement fittings and pipe cutters reduce delays. Quantities should match the number of caps planned, with one spare of each critical item to address unforeseen damage or fit issues.
- Threaded brass or galvanized cap
- Push-fit PVC/PEX cap
- PTFE (Teflon) tape
- Pipe cleaner/degreaser
- Replacement fitting (adapter or coupling)
Safety Gear And Tools
Usually, appropriate safety gear and the right tools prevent common hazards and make capping a water pipe straightforward.
Protective eyewear, gloves, and a dust mask guard against debris, chemical splashes, and rust.
Knee pads and a work light improve comfort and visibility in tight spaces.
Essential tools include an adjustable wrench, pipe cutter or hacksaw, deburring tool, and thread sealant or plumber’s tape.
For soldered joints, a propane torch, flux, and lead-free solder are necessary, plus a fire extinguisher.
A bucket, rags, and utility knife handle cleanup.
A voltage tester confirms pipes aren’t electrically live before starting.
Remove a Damaged Section Before Capping
Before cutting, inspect the run to identify the damaged section and mark clear cut points that extend into sound pipe on both sides.
The technician isolates water, clears nearby fittings, and measures twice.
A tubing cutter or fine-toothed saw is chosen for a clean, square cut.
Debris and burrs are removed with a file or deburring tool.
Remaining pipe ends are checked for corrosion or fractures that would interfere with a cap seal.
Proper disposal of the removed section and any contaminated materials follows local regulations.
- Verify water is fully shut off
- Measure and mark cut locations
- Use steady, even cutting pressure
- Deburr and clean cut ends
- Inspect ends before capping
Prepare Copper Pipe for Soldering
When ready to solder, the technician cleans and fits the copper pipe to guarantee a reliable joint.
The pipe end is deburred with a reamer, ensuring a square, smooth face.
Surfaces are cleaned with abrasive cloth or a wire brush until bright copper appears.
The technician fits the cap dry to check alignment and clearance, marking depth to seat the fitting correctly.
Flux is applied sparingly to the cleaned male and female surfaces to promote solder flow; excess is avoided to prevent contamination.
Final inspection confirms tight fit, clean surfaces, and proper access for the soldering torch.
Solder a Cap to Copper: Step by Step
The next steps cover preparing the cleaned pipe and cap, applying flux, and positioning the joint for soldering.
The procedure explains the soldering technique, including heating sequence and how to feed solder to form a reliable fillet.
Basic safety measures—ventilation, heat protection, and fire watch—are emphasized before and during the operation.
Prep Pipe And Cap
With clean, deburred ends and a properly sized cap selected, the copper surface must be prepared to guarantee a reliable solder joint. The technician cleans both pipe and cap with abrasive pads until bright copper appears, then applies flux evenly to mating surfaces.
Fit is checked to confirm full contact without gaps. All debris and oil are wiped away before assembly. Proper preparation prevents cold joints and leaks.
- Inspect cut for square, smooth edge
- Sand pipe OD and cap ID to bright copper
- Remove dust with a lint-free cloth
- Apply appropriate flux sparingly
- Test fit before heating
Soldering Technique And Safety
After confirming clean, fluxed surfaces and a snug fit, attention shifts to the soldering process and safety practices that produce a leak-free joint.
The torch is lit and adjusted to a controlled flame; heat the joint evenly, moving the flame around the cap and pipe without directly touching the solder. When flux sizzles and metal glows, touch solder to the heated joint—allow capillary action to draw solder into the seam.
Avoid overheating, which degrades flux and risks burns. Wear eye protection, heat-resistant gloves, and keep a fire extinguisher nearby. Quench only if recommended; inspect the cooled joint for complete, smooth solder coverage.
Install a Compression Cap on Copper/Brass
When working on copper or brass supply lines, installing a compression cap provides a durable, non-soldered seal that can be fitted quickly with basic tools.
The procedure begins by cutting the pipe square, deburring, and sliding on the compression nut and ring (ferrule).
The cap seats over the pipe, the nut hand-tightened, then snugged with a wrench until the ferrule compresses and seals.
Verify alignment and avoid over-tightening to prevent damage.
Test under low pressure first, then full pressure.
Remove and replace ferrules if leaks occur; compression fittings are serviceable and reversible without heat.
- Cut pipe square and deburr
- Slide nut then ferrule onto pipe
- Seat cap and hand-tighten
- Wrench-snug; avoid over-torquing
- Pressure-test and inspect for leaks
Use a Threaded Cap on Iron/Galvanized Pipe
On iron or galvanized pipe, a threaded cap provides a reliable, mechanical seal that can be installed without heat or soldering.
The procedure requires cutting the pipe square, cleaning threads or cutting new male threads with a pipe die, and applying pipe thread sealant or PTFE tape to the male threads.
The cap is tightened with a pipe wrench until snug; avoid overtightening to prevent thread damage.
For permanently unused lines, consider applying sealant liberally and testing under pressure for leaks.
If threads are severely corroded or damaged, replace the fitting or use a short nipple and new cap for a secure connection.
Install a Push‑Fit Cap on Copper, PEX, or PVC
The pipe end is first prepared by cutting square, deburring, and cleaning to guarantee a secure seal.
For copper, PEX, or PVC, measurements and alignment are checked before seating the push‑fit cap.
The cap is then pushed on firmly until it clicks or reaches the stop, and the connection is tested for leaks.
Preparing The Pipe
Why prepare the pipe carefully before installing a push-fit cap? Proper preparation guarantees a secure, leak-free seal and prevents damage to the cap or pipe. The surface must be clean, cut square, and free of burrs or corrosion.
Correct preparation minimizes the chance of future leaks and simplifies installation.
- Cut pipe square with appropriate tool for copper, PEX, or PVC.
- Deburr and remove sharp edges; sand or ream as needed.
- Clean surfaces: wipe with cloth; use appropriate cleaner for material.
- Measure and mark insertion depth on the pipe.
- Dry-fit the cap to confirm alignment before final installation.
Installing The Push‑Fit Cap
With the pipe prepared and marked, a push-fit cap can be installed quickly by aligning the pipe with the cap’s inlet and pushing firmly until the insertion depth mark meets the cap shoulder.
The installer should clean debris, confirm the correct cap size and material compatibility, and guarantee the pipe is square-cut. Rotate slightly while pushing to engage the O‑ring evenly. After seating, pull back gently to test retention.
For PEX, copper, or PVC, avoid lubricants unless manufacturer allows; for PVC, primer/adhesive is not needed with push-fit. Finally, restore pressure slowly and inspect for leaks at ambient temperature.
Cap PEX With Crimp or Clamp Fittings
Several reliable methods exist to cap PEX using crimp or clamp fittings, each requiring a specific toolset and technique to assure a watertight seal.
The technician measures and trims the PEX square, slips on a copper or stainless steel crimp ring (or stainless clamp), inserts the PEX cap fitting fully, then compresses the ring with a crimp tool or cinch clamp tool to manufacturer torque.
After crimping, a go/no-go gauge verifies proper compression; a visual inspection ensures the ring sits evenly.
Test with a low-pressure water fill to confirm no leaks before restoring normal service.
- Measure and square the PEX end
- Select correct ring or clamp size
- Fully seat the cap fitting
- Crimp or cinch to specification
- Verify with gauge and pressure test
Seal PVC Ends With Solvent‑Weld Caps
After explaining crimp and clamp methods for PEX, attention turns to PVC, which relies on solvent-weld caps to form a permanent, leak-proof joint.
The process requires clean, square-cut pipe, deburred edges, and a matching cap sized for the pipe.
Apply primer to pipe and cap sockets where required, then use solvent cement sparingly and evenly.
Insert the pipe fully into the cap with a quarter-turn to spread the cement, hold briefly to set, and wipe excess.
Cure time varies by product and temperature; follow manufacturer specifications.
Solvent-weld caps are permanent and best for long-term, pressurized systems.
Temporary Caps for Buried or Outdoor Lines
For temporary burial or outdoor shutdowns, the installer selects a cap suited to the pipe material and expected pressure, such as threaded plugs, compression caps, or mechanical grip fittings.
The exposed pipe is cleared and dried, with thread tape or an appropriate gasket applied to guarantee a clean mating surface. After securing the cap with the recommended torque or clamps, the connection is pressure-tested and inspected for leaks before backfilling.
Choose Temporary Cap Type
When selecting a temporary cap for a buried or outdoor water line, priority should be given to materials and designs that resist soil moisture, corrosion, and physical impact.
The choice depends on pipe material, expected duration, and access needs.
Rubber compression caps suit irregular ends and short-term use; threaded metal caps match durable threaded pipes; PVC caps with solvent weld provide a more rigid seal on plastic lines; mechanical clamp caps allow quick installation without cutting threads; and test plugs expand to seal larger diameters.
Consider visibility (flagging) and easy removal when choosing a temporary solution.
- Rubber compression caps
- Threaded metal caps
- PVC solvent-weld caps
- Mechanical clamp caps
- Expanding test plugs
Prepare Buried Line
In preparing a buried water line for a temporary cap, workers expose the pipe end, clear soil and debris, and inspect the cut or fitting for damage before selecting and installing the chosen cap. They remove corrosion, square the cut, and dry the surface. Protective measures prevent contamination and allow safe access. Appropriate cap material and size are confirmed, and threads or plain ends are prepared. Small backfill adjustments ensure cap clearance and visibility. Documentation of location and condition is recorded for future work.
| Task | Tool | Note |
|---|---|---|
| Expose pipe | Shovel | Mark surface |
| Clean end | Brush | Remove soil |
| Inspect | Light | Check cracks |
| Prepare end | File | Square cut |
| Record | Tag | Date/location |
Secure And Test Connection
Before pressure is applied, the temporary cap assembly is secured and verified to guarantee a leak-tight seal and safe short-term service.
The capped joint is hand-tightened, then tightened with appropriate tools to manufacturer torque limits.
A short hydrostatic or air pressure test at low psi confirms integrity; audible and visual checks for seepage follow.
Exposed caps are wrapped with protective tape and buried lines get a marker post.
Final documentation notes cap type, date, test pressure, and inspector.
- Hand-tighten then torque per specs
- Low-pressure test (hydrostatic/air)
- Inspect for visible or audible leaks
- Protect cap with tape or boot
- Record installation and test details
Capping Vertical Stubouts and Risers Safely
For vertical stubouts and risers, secure and reliable capping is essential to prevent leaks, backflow, and pressure damage in multi-story plumbing systems. The installer selects caps rated for vertical pressure and compatible with pipe material (copper, PEX, CPVC, or galvanized). Supports or braces are added below caps to relieve stress from thermal expansion and column load. Threaded connections receive proper sealant; soldered or crimped joints follow manufacturer procedures and are pressure-tested.
For exposed risers, install accessible shutoff valves above the cap. Document capped locations and update building plans to guarantee safe future access and maintenance.
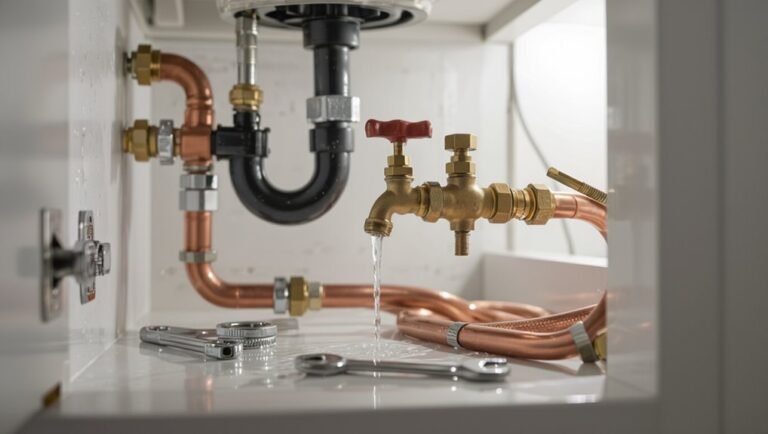
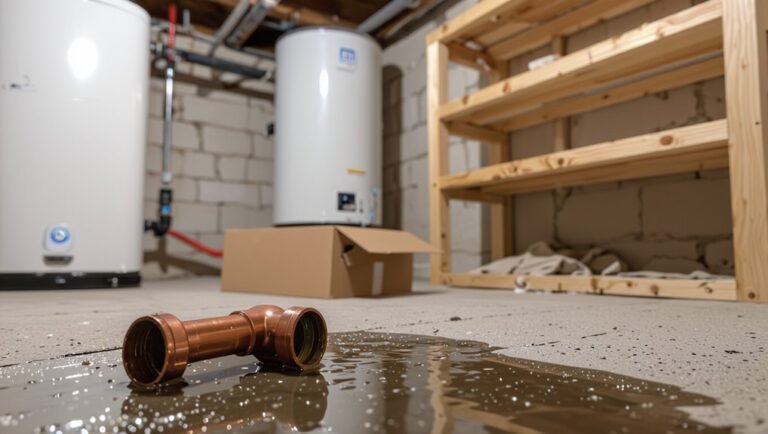
Cap Water Heater Supply Lines During Replacement
Before replacing a water heater, the supply must be shut off at the appropriate valve to prevent flow.
The lines should be drained and depressurized to remove residual water and reduce spill risk.
Temporary caps or plugs are then installed on the hot and cold supply fittings to secure the system until reconnection.
Turn Off Water Supply
Shut the water supply to the heater by closing the shutoff valve on the cold inlet, then drain the unit enough to lower the water level below the supply connections.
The operator confirms the valve is fully seated and watches nearby faucets for flow to stop.
Make sure power or gas is off per manufacturer guidance before working on lines.
Verify no pressure remains at fittings using a towel or small opening.
Prepare caps, fittings, and tools rated for the pipe type.
Follow local code and manufacturer instructions; if unsure, consult a licensed plumber to prevent leaks or damage.
- Confirm shutoff valve closed
- Check faucets for flow
- Turn off power/gas
- Test fittings for pressure
- Gather rated caps and tools
Drain And Depressurize
With the shutoff valve confirmed closed and power or gas rendered safe, the technician opens a hot-water faucet and attaches a hose to the heater’s drain valve to lower the water level below the supply connections; this controlled draining relieves stored pressure and clears the lines for safe capping.
Air is admitted via open faucets to prevent a vacuum and speed draining. The drain hose directs water to a safe disposal point.
Once flow diminishes, the technician checks pressure with a gauge at an accessible fitting. Residual pressure is slowly bled until gauges read zero before proceeding to any further work.
Install Temporary Caps
Having confirmed zero pressure and drained the heater lines, the technician proceeds to install temporary caps on the supply connections to prevent contamination and accidental flow during the replacement. The technician selects caps sized to the fittings, cleans threads, applies thread sealant or tape, and tightens caps securely with appropriate tools. Caps are inspected for leaks and compatibility with pipe material; protective covers prevent debris entry. Caps remain until permanent fittings are installed and line pressure is gradually restored while monitoring for leaks.
- Choose correct cap type and size
- Clean and prep threads
- Use appropriate sealant
- Tighten carefully with tools
- Inspect and monitor for leaks
Capping Branch Lines During Remodels: Temp vs Permanent
When remodeling a bathroom or kitchen, deciding whether to cap branch lines temporarily or permanently hinges on planned future use and code requirements. Temporary caps preserve options for future fixtures; they should be accessible, labeled, and secured against leaks. Permanent caps seal lines when removal simplifies layout, reduces freeze risk, or meets code. Documentation and inspection guarantee compliance. Consider material compatibility, pressure testing, and ease of restoration.
| Consideration | Recommendation |
|---|---|
| Future use | Temporary if likely reuse |
| Accessibility | Temporary caps accessible |
| Code/inspection | Follow local rules |
| Long-term risk | Cap permanently if unused |
Capping Sprinkler and Irrigation Lines Correctly
For sprinkler and irrigation lines, proper capping prevents water loss, contamination, and damage from freezing or root intrusion.
A professional approach isolates the system at the mainline or zone valve, cleans pipe ends, and uses compatible fittings: PVC solvent weld caps, threaded adapters, or mechanical clamps for polyethylene.
Make certain depth and marking for future access, test for leaks, and relieve pressure before finalizing.
Permanent caps must resist UV and soil movement; temporary caps should be clearly labeled.
Record the cap location on the irrigation map.
- Use compatible materials
- Clean and dry pipe ends
- Test at working pressure
- Bury and mark cap locations
- Label temporary caps
Dealing With Frozen Pipes Before Capping
Before capping, the presence of frozen water in a pipe must be addressed to prevent bursts and pressure damage.
The homeowner or technician should thaw the pipe using safe, controlled methods and verify water flow before installing a cap.
Taking these precautions reduces the risk of leaks and structural failure after capping.
Preventing Pipe Bursts
Facing freezing temperatures, a frozen section of pipe can expand and rupture unless addressed prior to capping. The article outlines preventive measures to reduce burst risk when working with cold plumbing. It emphasizes isolating water supply, relieving pressure, and checking exposed runs for ice accumulation. Insulation and heat-tracing options are recommended where accessible. Avoiding sudden temperature changes and removing nearby drafts helps protect vulnerable fittings. Documentation of system status before capping supports later troubleshooting.
- Isolate and shut off the relevant supply valve
- Drain residual water from the line
- Inspect exposed piping for ice buildup
- Insulate accessible pipe sections
- Record conditions and take photos
Thawing Safely Before Capping
When a section of pipe is frozen prior to capping, the safest approach is a controlled, gradual thaw to avoid sudden pressure spikes or concealed leaks; technicians should confirm isolation of the supply, relieve any trapped pressure, and locate the frozen segment before applying heat.
Thawing begins with safe, local heat sources: electric heat tape, warm air from a heat gun on low, or portable heaters; open nearby faucets to vent melting water. Avoid open flames.
Monitor joints and fittings for signs of leakage as ice melts.
After full thaw and dry-down, inspect pipe integrity, then proceed with standard capping procedures.
Test a Capped Pipe for Leaks (Pressure Test)
Rarely should a capped pipe be left without a pressure check, since a proper test quickly verifies the seal and reveals hidden leaks.
The tester isolates the capped section, pressurizes it with water or air within safe limits, and monitors for pressure drop.
Readings are recorded over the recommended interval; any decline indicates a leak or faulty cap.
If pressure holds, the cap is confirmed secure.
Safety precautions include using a calibrated gauge and avoiding overpressurization.
If a leak appears, depressurize, inspect joints, reseal or replace the cap, and repeat the test until stable.
- Isolate section
- Apply safe pressure
- Use calibrated gauge
- Monitor for drops
- Repair and retest
Insulate and Protect Capped Pipes in Cold Climates
When capping a water pipe in cold climates, the installer should choose insulation rated for the local minimum temperatures to reduce heat loss.
All penetrations and joints must be sealed with compatible tape or sealant to prevent drafts and moisture ingress.
Additional protection, such as heat tape or placing the cap inside a sheltered enclosure, helps prevent freezing during extreme cold.
Choose Appropriate Insulation
In cold climates, selecting the right insulation for a capped water pipe prevents freezing and minimizes heat loss by matching material type, thickness, and installation method to the pipe’s location and exposure. The choice depends on indoor vs. outdoor placement, accessibility, and expected temperature extremes. Closed-cell foam, fiberglass with vapor barrier, and foam pipe sleeves offer different R-values and moisture resistance.
Consider ease of installation, durability, and compatibility with capped fittings. For exposed outdoor runs, use thicker, weatherproof insulation and cover with protective tape or conduit. Regular inspection guarantees integrity and performance across seasons.
- Closed-cell foam for moisture-prone areas
- Foam sleeves for quick installation
- Fiberglass with vapor barrier indoors
- Weatherproof coverings for outdoor pipes
- Match thickness to local freezing risk
Seal Penetrations And Joints
After choosing appropriate insulation, attention must turn to sealing every penetration and joint so the capped pipe remains protected from drafts, moisture, and thermal bridging. Apply foam sealant at wall or floor penetrations, wrap joints with high-quality plumber’s tape, and cover seams with self-fusing silicone tape. Use vapor-resistant jacket or foil tape for added moisture control. Inspect fittings after curing and re-seal gaps. Maintain access by marking sealed caps for future service. The table below summarizes common methods and suitable locations.
| Method | Typical Use |
|---|---|
| Foam sealant | Wall/floor penetrations |
| Silicone tape | Pipe joints and seams |
| Foil tape | Vapor barrier reinforcement |
Protect From Freezing Temperatures
Against freezing temperatures, capped pipes require deliberate insulation and protection to guarantee burst lines and frost damage. The procedure includes selecting appropriate insulation, sealing gaps, and adding heat where necessary.
Attention to exposed caps, joints, and short pipe runs reduces risk. Exterior and unheated spaces need closed-cell foam, pipe wrap, or rigid insulation paired with weatherproof sealing. Temporary electric heat cables or thermostatic tape may be justified for extreme cold. Periodic inspection during cold snaps ensures integrity. Proper labeling and documentation help future maintenance and avoid accidental removal of protections.
- Choose closed-cell or foam pipe insulation
- Seal gaps with caulk or tape
- Wrap caps and joints securely
- Install heat cable when needed
- Inspect during cold spells
Hide or Box In a Capped Pipe in Finished Spaces
When finishing a room, concealing a capped water pipe preserves aesthetics while keeping the plumbing accessible for future work. Install a removable access panel or build a small drywall box secured with screws rather than permanent adhesive.
Make certain the box allows clearance for fittings and a wrench, and label inside with pipe information. Use moisture-resistant materials in damp areas and provide ventilation if condensation is possible.
Match trim and paint to surrounding finishes for a seamless look. For exposed pipes, consider a decorative cover or cabinet that complements the room. Maintain easy removal to facilitate inspections, repairs, or cap replacement.
Permanent vs Temporary Caps: Pros and Cons
In choosing between permanent and temporary pipe caps, homeowners and plumbers must weigh durability, cost, future access, and code compliance; permanent caps (such as soldered or welded fittings) offer long-term reliability but complicate later alterations, while temporary caps (like threaded plugs or mechanical caps) simplify reactivation or repairs yet may be less secure or leak-prone if not properly installed.
The decision depends on projected service life, inspection requirements, and willingness to sacrifice accessibility for permanence.
Consider material compatibility, installation skill, and expected pressure.
Temporary solutions suit short-term work; permanent methods serve long-term decommissioning.
- Durability vs reversibility
- Cost differences
- Leak risk comparison
- Code and inspection issues
- Installation skill needed
Document Capped Lines for Future Work
For future maintenance and safety, capped lines should be clearly documented immediately after work is completed: record the pipe location, type and size, cap method, pressure rating, date of capping, installer name, and any relevant permit or inspection numbers. A concise record prevents accidental activation, guides repairs, and aids inspectors. Include photos and mark plans or digital files. Store documentation with property maintenance records and notify occupants or owners. Use standardized labels at access points to match records.
| Item | Example |
|---|---|
| Location | Basement, north wall |
| Cap Type | Threaded brass cap |
Undo a Cap Later: Safe Reconnection Steps
Frequently, reconnecting a previously capped water pipe requires deliberate preparation to guarantee safety and system integrity. The person verifies water supply is shut off, relieves pressure by opening a downstream faucet, and inspects the cap and mating threads or fittings for damage.
Appropriate tools and replacement seals are selected. The reconnection proceeds slowly, testing for leaks, then the supply is restored gradually while monitoring joints.
Final checks confirm normal pressure and no seepage before restoring insulation or access covers.
- Shut off main and drain line pressure
- Inspect cap and pipe condition
- Use correct sealant or gasket
- Tighten fittings to spec
- Test slowly and monitor
Common Capping Mistakes and How to Avoid Them
Often overlooked, a few common mistakes when capping a water pipe—improperly cleaned threads, wrong sealant, under- or over-tightening, and failing to test under pressure—lead to leaks, corrosion, or damaged fittings. The guide highlights proper thread cleaning, correct sealant selection (PTFE tape vs. pipe dope), and tightening to manufacturer torque. It stresses pressure testing after installation and inspecting for hairline leaks. Avoid makeshift caps, mismatched materials, and skipping thread engagement checks. Follow steps precisely to prevent failures and future repairs.
| Mistake | Cause | Prevention |
|---|---|---|
| Dirty threads | Debris | Clean, inspect |
| Wrong sealant | Incompatibility | Use correct type |
| Improper torque | Leak/damage | Follow torque/specs |
| No pressure test | Undetected leaks | Perform test |
Fixing Corroded Pipes or Damaged Threads
Facing corroded pipes or damaged threads requires evaluating the extent of deterioration before proceeding: visual inspection should determine whether corrosion is superficial, warranting cleaning and protective coating, or structural, necessitating section replacement or thread repair.
The technician cleans with a wire brush, removes loose material, applies anti-corrosion primer, and tests threads with a gauge. Damaged threads may be chased with a die, re-tapped, or restored using thread repair inserts.
After repair, fittings are trial-fit, sealed with appropriate tape or compound, and pressure-tested. Safety gear and shutting off water are mandatory.
- Inspect visually and probe for pitting
- Clean corrosion with brush and solvent
- Chase or re-cut damaged threads
- Use thread inserts when needed
- Apply primer and pressure-test
When to Replace a Whole Section Instead of Capping
When is it necessary to replace an entire pipe section rather than cap it? Replacement is advised when damage, contamination, or structural failure makes capping unsafe or unreliable. Consider extent of corrosion, multiple leaks, compromised joints, or history of recurring failures. Emergency patches can be temporary; lasting integrity requires replacement when internal scale, cracks, or misalignment persist. Use the table to evaluate common triggers and outcomes.
| Trigger | Recommended action |
|---|---|
| Extensive corrosion | Replace section |
| Multiple adjacent leaks | Replace section |
| Contaminant intrusion | Replace section |
| Compromised fittings/joints | Replace section |
Local Code Must‑Knows for Permanent Capping
In many jurisdictions, permanent capping of a water pipe is governed by specific plumbing and building codes that dictate materials, methods, inspection, and documentation.
Practitioners must follow code-defined cap types, backflow and drainage considerations, and labeling requirements.
Compliance prevents leaks, contamination, and future work complications.
Local codes may require approved fittings, corrosion-resistant materials, accessible shutoffs, and confirmation that abandoned lines are isolated from active systems.
Recordkeeping and visible marking often accompany permanent closures.
- Use approved cap materials and fittings.
- Verify proper drainage and avoid trapped water.
- Maintain accessibility for future inspections.
- Mark and document capped lines clearly.
- Follow corrosion and compatibility rules.
Permits, Inspections, and When to Hire an Inspector
After ensuring a permanent cap meets local material and labeling requirements, attention shifts to permits and inspections that legally validate the work. The homeowner verifies whether a permit is required, submits simple plans if needed, and schedules inspections after installation. If pressure tests, venting, or structural work are involved, a licensed plumber or inspector should be hired. Failure to obtain permits can complicate resale and insurance claims. Use local building department resources to confirm steps and timelines. Below is a quick reference table to summarize common permit triggers and professional involvement.
| Permit needed? | Typical inspector | When to hire pro |
|---|---|---|
| Minor cap | Building/plumbing | Optional |
| Pressure test | Plumbing | Recommended |
| Structural tie-in | Building | Required |
Estimate Time and Cost for a DIY Capping Job
A straightforward DIY water‑pipe capping job typically takes 30 minutes to two hours for an accessible, non-pressurized line. Time varies with pipe material, corrosion, and workspace access. Cost depends on chosen cap type, fittings, sealant, and tools already owned.
- Materials: cap, adapters, thread sealant — $5–$30
- Tools: wrench, cutter, torch (if soldering) — owned or $10–$80 to buy
- Prep and cleanup: 10–30 minutes extra
- Complications: corrosion, hidden valves, or damage add time and parts
- Total rough estimate: $10–$120 for most homeowner DIY jobs
Choosing Between DIY and Hiring a Plumber
Who should handle a pipe capping job depends on the specific risks, skills, and consequences involved. The homeowner evaluates complexity, code requirements, and comfort with tools. Simple, accessible shutoffs suit DIYers with basic plumbing experience; concealed, pressurized, or code-sensitive systems favor licensed plumbers. Cost, time, and liability weigh in: DIY saves labor but may void warranties or cause damage; professionals guarantee permits, testing, and reliable seals.
| Factor | DIY | Plumber |
|---|---|---|
| Cost | Lower upfront | Higher upfront |
| Risk | Moderate | Low |
| Time | Variable | Predictable |
Safety Checklist: PPE, Ventilation, Fire Safety
Often, a brief safety checklist prevents the most common hazards when capping a water pipe: personal protective equipment for eye, hand, and respiratory protection; adequate ventilation to disperse fumes from flux, solder, or trapped gases; and fire precautions including spark control, a fire extinguisher rated for combustible and electrical fires, and a cleared work area.
The practitioner should confirm equipment condition, clear combustibles, and maintain an escape route. Verify gas is isolated before work and test for vapors. Keep a fire watch during and after any heat application until cooling is complete.
- Safety glasses and face shield
- Heat-resistant gloves
- Respirator or mask
- Portable fan or open windows
- Class ABC extinguisher
Troubleshoot Leaking Caps and Persistent Drips
With safety measures in place, attention shifts to diagnosing leaks at capped water lines: pinpointing the source, evaluating seal methods, and determining whether repair or replacement is required.
Inspect fittings, threads, solder joints, and nearby valves for moisture. Wipe dry, apply pressure or turn water on briefly to reveal seep paths. For threaded caps check tape or compound integrity; for sweat or soldered caps assess joint appearance and cold solder lines.
Consider corrosion, damaged threads, hairline cracks, or improper cap seating. If leak source is clear, re-seat, retape, or re-solder; if uncertainty persists, plan for component replacement.
Salvage a Failed Capped Joint Without Cutting Too Much
When a capped joint begins to fail but the surrounding pipe and fittings remain largely intact, the goal shifts to repairing the connection while removing the least material possible.
The technician assesses leak source, shuts water, and tests pressure.
Surface corrosion and solder condition determine whether to re-solder, replace the cap, or use a compression stop.
Small grinding or careful desoldering preserves length.
Proper cleaning, flux, and heat control enable a secure rejoin without excess cutting.
If failure is at the cap face, a new cap or mechanical stop can often restore integrity.
- Inspect joint and surrounding pipe
- Drain and isolate water
- Clean and flux surfaces
- Re-solder or install new cap
- Pressure-test before finishing
Reuse, Recycle, or Dispose of Old Caps and Cut Pipe
After removing failed caps and clipped pipe sections, the technician evaluates which parts can be reused, recycled, or must be discarded based on material, condition, and local regulations.
Metal caps in good condition may be cleaned, pressure-tested, and stored for future use. Corroded fittings and damaged seals are earmarked for disposal.
Copper and brass scrap is separated for recycling; PVC and CPVC are sorted per municipal rules.
Contaminated pieces—lead-lined, chemically exposed, or heavily corroded—are handled as hazardous waste where required.
Documentation of disposal and receipts from recycling centers helps assure compliance and supports responsible, traceable material management.
Quick Packing List: What to Grab for a Capping Job
Having sorted reusable parts and set aside waste, the technician assembles a compact kit tailored to the capping task: caps and plugs in the correct materials and sizes, compatible gaskets or sealant, a selection of wrenches and socket drivers, pipe cutters and deburring tools, thread tape and compound, a portable pressure gauge, protective gloves and eye protection, a flashlight or headlamp, and a labeled bag for removed components and disposal-bound pieces.
The kit is organized for speed: items are grouped by use, critical seals are double-checked, and spares included. This preparation reduces downtime and prevents unexpected trips for missing parts.
- Verify cap material and size
- Include spare gaskets
- Pack thread sealant and tape
- Bring a pressure gauge
- Keep PPE accessible
Conclusion
When the wrench finally stills and the last bead of water pauses, the quiet is only temporary. The reader knows the line is capped for now, but a careful ear remembers every faint drip. This guide ends with a choice: accept the temporary seal or return later, tools in hand, to inspect, reinforce and replace. Something in the pipes may demand attention again—because plumbing never truly sleeps, and neither should preparedness.