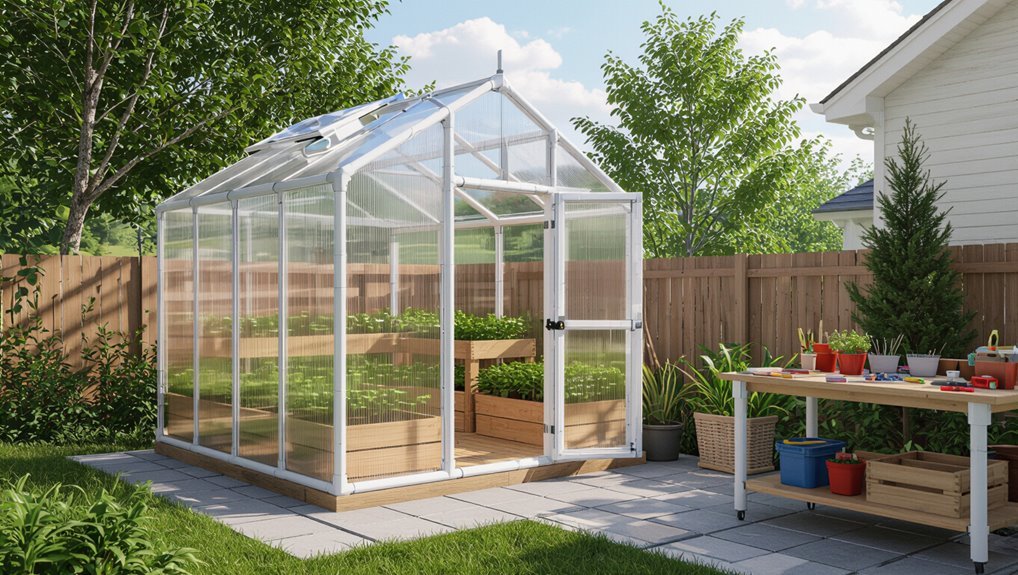
DIY PVC Greenhouse: Easy Step-by-Step Guide to Build Yours
Building a simple PVC greenhouse is an affordable way to extend your gardening seasons, protect seedlings, and create a controlled microclimate.
Key Takeaways:
- Materials Needed: Use 1″–1½” PVC ribs, two longitudinal spines, anchored base stakes, and UV-resistant polyethylene sheeting secured with batten tape.
- Assembly: This greenhouse can be put together in a weekend with basic tools.
- Important Considerations: Pay attention to anchor stability, ventilation needs, and sun exposure to prevent overheating or storm damage.
Continue reading for a detailed step-by-step guide and a materials checklist to help you build your greenhouse effectively.
What a PVC Greenhouse Can and Can’t Do
When evaluating a PVC greenhouse, it should be understood that its strengths lie in affordability, ease of assembly, and effective short-term protection from wind, light frost, and pests.
It provides a controlled microclimate for seedlings, extends growing seasons modestly, and shelters plants from heavy rain and casual animal damage.
Limitations include poor insulation for sustained cold, vulnerability to strong storms, UV degradation of plastic, and restricted size and load-bearing capacity.
Ventilation can be basic, risking overheating.
Good for hobby gardeners and temporary use; unsuitable as a permanent, high-performance structure for large crops or extreme climates requiring rigid materials and insulation.
Quick Weekend PVC Greenhouse Plan
Having acknowledged the strengths and limits of PVC greenhouses, the plan focuses on a compact frame that can be completed over a single weekend using common tools and materials.
The design is a 6×8-foot hoop-style structure: 1-inch PVC ribs spaced 24 inches apart, two longitudinal PVC spine pipes, and simple ground stakes.
Covering uses UV-resistant polyethylene secured with batten tape.
Materials list, cut lengths, and a parts layout fit on one page.
Assembly requires a drill, saw, measuring tape, and clamps.
Steps: cut, dry-fit, glue joints, install ribs, attach cover, and anchor.
Test stability and ventilation before planting.
Is a PVC Greenhouse Right for Your Garden? (Use Cases & Limits)
A PVC greenhouse suits gardeners with limited space who need a compact, movable structure for seedlings and a few crops.
Its lightweight design and low cost make it ideal for seasonal use but limit durability and climate control in extremes.
Prospective builders should weigh short-term benefits against reduced insulation and lifespan compared with heavier greenhouse materials.
Small-Space Gardening
Could a PVC greenhouse fit into a compact yard, balcony, or rooftop raised bed?
A lightweight PVC frame and clear plastic sheeting adapt to small footprints, enabling vertical growing and movable microclimates.
Kits or custom builds can hug railings, fit narrow pathways, or cover single raised beds.
Consider weight limits for balconies, wind exposure, and local codes.
Access for watering and harvesting, ventilation strategies, and compact shelving maximize yields.
While ideal for seedlings, herbs, and a few vegetables, limited space constrains larger crops and complex systems.
Practical planning guarantees a functional, space-efficient greenhouse solution.
Seasonal Limitations
During colder months or during heat waves, a PVC greenhouse offers a limited but useful buffer against seasonal extremes for small-scale gardeners. It extends growing seasons, shelters seedlings, and moderates temperature swings but has clear limits.
Lightweight framing and plastic glazing provide modest insulation and poor thermal mass, requiring supplemental heating in sustained freezes and ventilation during prolonged heat. Wind, heavy snow, and hail can damage inexpensive structures; location and reinforcement matter.
Humidity and disease risk rise without proper airflow. For perennial or commercial production in extreme climates, sturdier materials and engineered designs are preferable; PVC units suit hobbyists and short-season uses.
Key Benefits of PVC Pipe Frames
With lightweight strength and readily available components, PVC pipe frames offer an efficient, cost-effective skeleton for small to medium DIY greenhouses.
They are simple to assemble with basic tools, enabling rapid construction and easy modifications.
Corrosion resistance and moisture tolerance reduce maintenance, while jointed systems permit modular expansion or disassembly for storage.
Smooth surfaces limit pest harborage and simplify cleaning.
Low material cost and widespread availability make replacements affordable.
Their flexibility absorbs light wind loads without permanent deformation, and compatibility with various coverings—polyethylene film, polycarbonate panels, or shade cloth—provides adaptable light and thermal management for diverse gardening needs.
PVC Greenhouse Limits and Expected Lifespan
The PVC greenhouse’s longevity is constrained by the pipe and film’s resistance to UV, temperature swings, and mechanical stress.
Typical DIY PVC structures often last 3–7 years before significant degradation or replacement of parts is needed, though careful material choices and maintenance can extend that range.
Evaluating specific pipe types, wall thicknesses, and covering materials helps set realistic lifespan expectations.
Material Durability Limits
Against fluctuating weather and constant UV exposure, PVC greenhouse components exhibit clear durability limits that determine useful lifespan. The material resists moisture and rot but degrades under prolonged sunlight, temperature cycling, mechanical stress, and chemical exposure. Designers should note joints, fittings, and thin-walled tubing as weak points. Maintenance, UV-resistant coatings, and shade reduce deterioration rates; relocation and replacement of stressed parts preserves structure. Monitoring for brittleness, cracking, discoloration, and warping informs timely repairs. The table summarizes common stressors and typical failure modes to aid inspection and maintenance planning.
| Stressor | Typical failure mode |
|---|---|
| UV radiation | Surface embrittlement |
| Temperature cycles | Cracking at joints |
| Mechanical load | Bending or collapse |
| Chemicals | Softening or crazing |
| Moisture | Joint loosening |
Expected Lifespan Estimates
Many small PVC greenhouse frames last between 5 and 15 years depending on exposure and maintenance.
Lifespan varies with UV exposure, temperature swings, load from snow or wind, and quality of fittings and joints. Thin-schedule pipe and low-grade plastic film degrade faster; thicker pipe, UV-stabilized coverings, and proper anchoring extend service life.
Routine inspection, replacement of brittle sections, re-tensioning covers, and metal reinforcement at stress points delay failure.
Expected replacement intervals: coverings every 3–7 years, structural PVC every 7–15 years under moderate conditions, sooner in harsh climates.
Plan for periodic repairs rather than indefinite permanence.
DIY PVC Greenhouse Cost Estimate
A straightforward cost estimate for a DIY PVC greenhouse breaks expenses into materials, tools (if not already owned), and optional extras like ventilation or shelving. Typical small builds range $50–$200 materials: PVC, connectors, plastic sheeting, stakes. Tools might add $20–$100 if purchasing basics. Optional items—vent fans, shelving, seed trays—raise costs. Labor is usually personal time. Contingency of 10–15% covers replacements. Regional prices vary; recycled materials lower costs. Budgeting by category helps compare options and prioritize upgrades without committing to unnecessary expenditures.
| Item category | Typical cost |
|---|---|
| Materials | $50–$200 |
| Tools | $0–$100 |
| Extras | $10–$150 |
| Contingency | 10–15% |
Choose the Right Size for Your Space and Goals
When planning a DIY PVC greenhouse, start by matching size to available space and intended use: measure the planting area or patio, account for access and sunlight patterns, and decide whether the structure will serve seed starting, overwintering, or full-season production.
Balance footprint with ease of construction and ventilation. Consider bench heights, aisle width, and roof height for tall plants or shelving. Estimate materials and budget for the chosen dimensions. Use modular design for future expansion.
- Small (seed trays, compact shelving)
- Medium (vegetable seedlings, few mature plants)
- Large (multiple beds, walk-in space)
- Modular expandable sections
Pick the Best Location in Your Yard
The builder should evaluate sunlight exposure, choosing a spot that receives full sun for most of the day to maximize plant growth.
Attention to ground level drainage is essential to prevent standing water and root problems.
Combining sun and good drainage will determine the most practical location for the PVC greenhouse.
Sunlight Exposure Needs
In selecting a site, sunlight availability determines plant choice, season length, and structure orientation.
The ideal spot receives unobstructed light from mid-morning to late afternoon; note seasonal sun angles and nearby shade sources.
Consider microclimates: reflected heat from walls boosts warmth, while low-lying cold pockets reduce light intensity.
Orientation affects light distribution and ventilation paths; prioritize south-facing exposure in northern latitudes, adjust for local conditions.
Assess duration and intensity before building.
- Record sun hours across seasons.
- Map nearby trees, buildings, fences.
- Choose a flat, unobstructed area.
- Favor southern exposure for maximum gain.
Ground Level Drainage
Sunlight considerations inform site choice, but ground-level drainage ultimately determines whether a PVC greenhouse will remain dry and structurally sound.
The ideal location slopes gently away from the structure, preventing pooling around the base. Soil type matters: sandy or loamy soils shed water faster than clay, which may require raised beds or compacted gravel underfoot. Avoid low spots, depressions, and areas below downspouts. Test drainage by digging a small hole, filling with water, and timing percolation.
If drainage is slow, install a simple French drain, raise the floor, or choose a new site to protect PVC fittings and plant health.
How to Check Sunlight, Shade, and Microclimates
When planning a PVC greenhouse, assess how light moves across the designated site throughout the day and season to match plant needs and locate the structure where it will receive best exposure.
Observe sun angles in morning, midday, evening and note winter sun lows. Map existing shade from trees, buildings, and fences. Record reflective surfaces and heat sinks that create warmer microzones. Test shaded periods with a light meter or smartphone app over several days.
- Track sun path weekly for seasonal change.
- Mark persistent and transient shade sources.
- Identify frost pockets and warmer spots.
- Choose orientation to maximize target sunlight.
Local Codes, Permits, and HOA Rules to Check
Before construction begins, the builder should verify local building codes and permit requirements that may apply to a greenhouse structure.
Homeowners should also review HOA covenants for restrictions on size, appearance, or placement.
Confirming these rules early prevents fines and costly modifications later.
Local Building Codes
Which regulations apply depends on location and the scale of the structure: local building codes, zoning ordinances, required permits, and any HOA restrictions can all affect a DIY PVC greenhouse project.
Local building codes define size limits, setback requirements, approved materials, structural load standards, and anchoring methods.
Compliance guarantees safety and avoids fines or forced removal.
Consult municipal code offices or planning departments before building.
A simple checklist aids preparation:
- Confirm size and height thresholds requiring permits.
- Verify wind, snow load, and foundation standards.
- Check approved material and fire-safety rules.
- Obtain written confirmation or permit documentation.
HOA And Permit Rules
Local codes and permit requirements often overlap with homeowners association (HOA) rules, so PVC greenhouse plans should be checked against both sets of regulations. The builder should confirm setback, height, and appearance limits, plus whether a permit or variance is required. HOA covenants may restrict visible structures or specific materials. Documentation, approval timelines, and neighbor notifications vary; keeping records and contacting the local building office avoids fines or mandated removal. If denied, appeal options or design adjustments can resolve conflicts. Below is a quick checklist for review.
| Item | Action |
|---|---|
| Setbacks | Measure and verify |
| Permits | Apply early |
| HOA | Submit plans and obtain approval |
Essential Tools for a PVC Greenhouse Build
For a successful PVC greenhouse build, a concise set of reliable tools makes the work faster and the results more accurate. A measured toolkit reduces mistakes and speeds assembly. Essential items focus on cutting, joining, anchoring, and adjusting PVC components and coverings without repeating material details.
- Measuring tape, carpenter’s square, and marker for accurate layout and cuts.
- PVC pipe cutter or fine-tooth saw plus deburring file for clean, square ends.
- Rubber mallet, clamp set, and adjustable wrench for secure fittings and gentle seating.
- Drill with bits, screwdriver set, and safety glasses for fast, safe assembly.
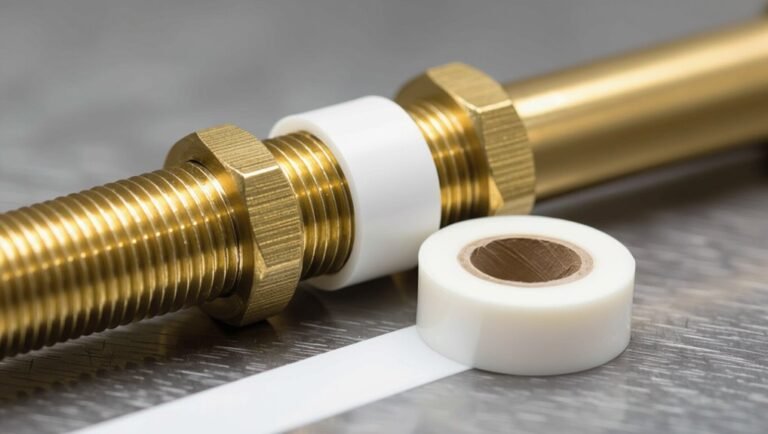
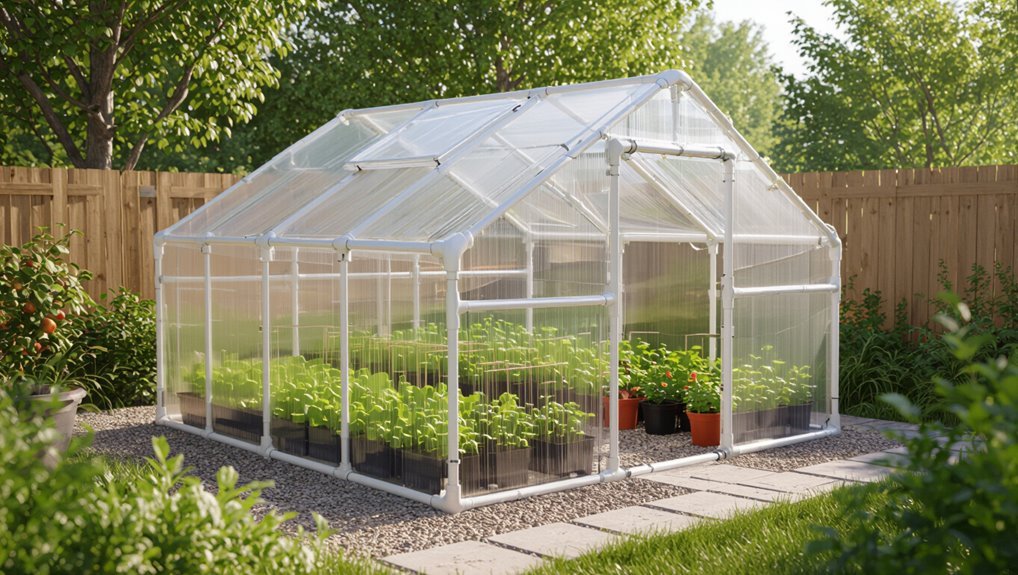
Materials List: PVC, Connectors, and Covers
The materials list for a DIY PVC greenhouse focuses first on choosing appropriate PVC pipe types and diameters for strength and flexibility.
Next, various connector options — including elbows, T-joints, and specialty fittings — are compared for assembly and stability.
Finally, cover materials such as polyethylene film, greenhouse-grade polycarbonate, and shade cloth are presented with their trade-offs in light transmission and durability.
Essential PVC Types
Which PVC varieties and fittings are necessary depends on greenhouse size, shape, and projected lifespan; lightweight schedule-40 pipe is common for easy assembly while heavier-duty CPVC or thicker-walled pipe suits larger, permanent structures. Choices affect strength, UV resistance, and joint stability. Pressure-rated pipe often provides extra rigidity; UV-stabilized options reduce degradation. Cut and test-fit lengths before final assembly. Consider wall thickness (SCH40 vs SCH80), diameter (usually 1″–2″), and compatibility with selected covers. Recommended practices include avoiding brittle compounds and selecting pipe rated for outdoor use.
- Wall thickness and schedule
- Diameter selection
- Material (PVC vs CPVC)
- UV resistance and rating
Connector Varieties
In assembling a PVC greenhouse, selecting compatible connectors, pipe types, and cover materials determines structural integrity and ease of repair. Connector varieties include elbows, tees, crosses, and slip couplings; each supports different load paths and joint flexibility. Reinforced or metal-reinforced PVC fittings increase durability where stress concentrates, while UV-resistant fittings reduce degradation.
Quick-release or threaded connectors facilitate maintenance and seasonal disassembly. Corner brackets and base flanges anchor frames to foundations. When choosing connectors, match schedule and diameter, consider wall thickness, and plan for inserts or sleeves where longer spans or heavier covers demand added stiffness.
Cover Material Options
When selecting cover materials for a PVC greenhouse, balance light transmission, durability, insulation, and cost to match crop needs and local climate. Choices affect microclimate, maintenance, and lifespan. Compare options by performance and budget.
- Polyethylene film — inexpensive, high light transmission, short lifespan; good for single-season use.
- Polycarbonate panels — durable, excellent insulation and impact resistance; higher cost, long-term value.
- Shade cloth — reduces heat and light for sensitive plants; pairs with another covering.
- Reinforced PVC/vinyl — durable, moderate insulation, heavier and pricier; suitable for semi-permanent structures.
Choose PVC Schedule and Pipe Diameter for Strength
Select PVC schedule and pipe diameter based on expected loads and span to guarantee the greenhouse frame resists bending and wind without excessive deflection.
Determine span lengths and anticipated snow or wind loads, then consult span tables or simple beam calculations to choose a schedule (wall thickness) that limits deflection.
For small backyard frames, Schedule 40 often suffices; longer spans or heavier loads may require larger diameters or Schedule 80.
Consider stiffness (moment of inertia) more than nominal pipe size.
Allow margin for aging and UV degradation.
Verify joints and supports align with chosen pipe strength to prevent localized failure.
Selecting Connectors, Anchors, and Fasteners
Having chosen pipe schedule and diameter to meet strength and stiffness requirements, attention turns to connectors, anchors, and fasteners that will reliably transfer loads and preserve alignment.
Select durable PVC or metal fittings sized to pipe OD, favoring slip or threaded joints for predictable fit. Use ground anchors or concrete footings where wind uplift or snow loads demand permanence. Corrosion-resistant screws, stainless clamps, and UV-rated zip ties secure covers and bracing.
Consider removable connections for maintenance.
- Match connector type to structural role
- Anchor depth and method by soil and load
- Fastener material for corrosion resistance
- Allow disassembly for repair
Comparing Covers: Plastic Film vs Polycarbonate
Which covering is best depends on priorities: cost, durability, light transmission, and thermal performance.
Plastic film is inexpensive, easy to install, and provides good light diffusion but requires frequent replacement and offers limited insulation.
Polycarbonate panels cost more upfront, resist impact, last years, and provide superior thermal retention with multiwall options.
Film suits short-season or temporary structures; polycarbonate fits permanent or higher-performance builds.
Consider UV stabilization, condensation behavior, and repairability: film tears easily but can be patched; polycarbonate resists weathering yet may need precise framing.
Decision balances budget, longevity, and desired microclimate control.
Preparing and Leveling the Ground
Before any framing or anchoring begins, the site must be cleared, graded, and compacted to provide a stable, level base for the PVC greenhouse.
Soil should be removed of roots, debris, and large stones.
Drainage and slope assessed to prevent pooling; add gravel or sand where needed.
Compact in layers using a tamper or plate compactor until firm.
Final surface tolerance should be within a few degrees and a few centimeters across the footprint.
- Remove vegetation and debris
- Verify slope and drainage direction
- Add and level gravel/sand as required
- Compact in 2–3 incremental passes
Building a Simple Anchored Base Frame
Attention to anchor selection and precise squaring guarantees the base frame resists wind and stays true to the planned footprint.
The text compares common anchor types (ground spikes, augers, and concrete footings) and their suitability for different soils.
Clear instructions for checking level and achieving 90-degree corners follow to keep the structure stable and plumb.
Choosing Anchor Types
When anchoring a simple PVC greenhouse base frame, the choice of anchor type determines stability, ease of installation, and suitability for the site’s soil and exposure conditions.
Consider soil composition, wind exposure, required permanence, and available tools. Select anchors that match frame size and anticipated loads. Avoid invasive options where roots or buried utilities exist. Cost and reusability influence selection for seasonal versus permanent installs. Installation should allow simple removal if needed and secure attachment to PVC using straps, brackets, or ground screws rated for lateral load.
- Concrete footings – permanent, high stability
- Ground screws – strong, reusable
- Auger stakes – quick, good in loam
- Sandbag/weighting – non-invasive, temporary
Leveling And Squaring
Leveling and squaring the anchored base frame guarantees the greenhouse sits true and the PVC joints align for a tight, weatherproof fit.
First, set corner anchors roughly to plan, then connect temporary straightedge rails. Use a spirit level and a mason’s line to confirm grade across both axes. Adjust anchor heights with shims or by digging until bubbles center and lines run true.
Measure diagonals; equal diagonals indicate a square rectangle. Tighten anchors or backfill while rechecking level and square.
Finalize by securing permanent base rails to anchors so the frame remains fixed and geometry stable.
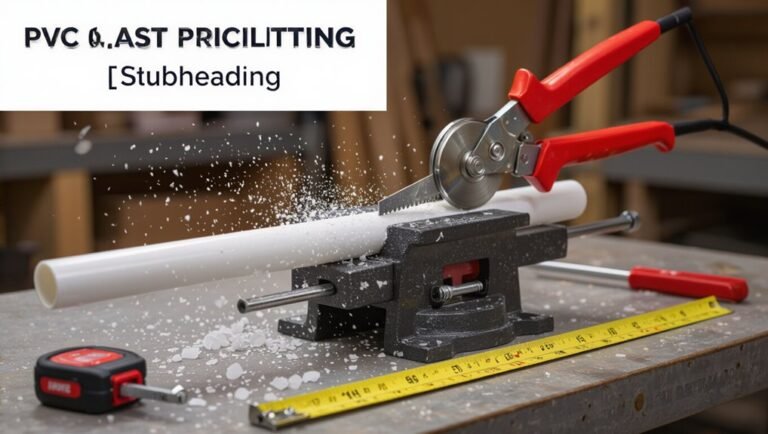
Measuring and Cutting PVC Accurately
In preparing PVC for a greenhouse, precise measuring and clean cuts determine fit, strength, and ease of assembly.
Careful layout, consistent markings, and confirming lengths twice reduce waste. A tape measure, square, and marker create straight references; a miter box or PVC cutter yields burr-free ends. Sanding or deburring guarantees snug joints and correct seating of fittings. Protect measurements from heat distortion by measuring at rest. Label parts for location to speed later assembly without remeasuring.
- Measure twice, cut once.
- Use guides for straight cuts.
- Deburr and test-fit every piece.
- Label and organize cut parts.
Assembling Hoop Ribs and Side Rails
With cut and labeled PVC pieces laid out, the builder assembles hoop ribs and side rails to form the greenhouse skeleton.
Each hoop is formed by joining pre-cut PVC segments with 90° or curved connectors, ensuring consistent spacing using a measured jig or temporary spacer.
Side rails slide into tee fittings attached to base stakes, aligning rails parallel and level.
Fasteners or PVC cement secure connections where permanence is desired; removable fittings allow adjustments.
The crew checks symmetry frequently, adjusting until hoops are evenly spaced and rails run straight.
Final inspection verifies joint tightness and uniform curvature before proceeding.
Attaching End Frames and Door Openings
With the hoop ribs and side rails in place, attention turns to positioning the end frames squarely and securing them to the base.
Careful measurement guarantees door openings align with the frame and allow enough clearance for the chosen door type.
Marking and cutting the openings precisely prevents gaps and preserves structural integrity.
Positioning End Frames
One or two people should lift each end frame into place, aligning the base plates with the foundation marks and ensuring the verticals are plumb before fastening. The team checks squareness across diagonals, confirms top hoop alignment, and temporarily clamps corners.
Fasten base plates with appropriate anchors, then secure frame joints with screws or straps. Prepare door opening locations without cutting, marking reinforced jambs and hinge points for later work.
- Verify foundation marks and plumb verticals.
- Check diagonal measurements for squareness.
- Temporarily clamp and adjust hoop alignment.
- Anchor base plates and secure frame joints.
Cutting Door Openings
After the end frames are anchored and jambs marked, attention shifts to creating the door openings. The builder measures twice, transferring dimensions to the greenhouse skin and PVC trim. Using a fine-toothed saw or rotary cutter, straight, controlled cuts follow marked lines, keeping edges square.
Reinforcing strips or aluminum angle are installed along cut edges to preserve shape and prevent tearing. Hinges attach to the prepared jambs with corrosion-resistant screws; doors are test-fitted, adjusted for smooth swing and even gaps, then sealed with weatherstripping. Final checks confirm alignment, secure fastenings, and unobstructed operation before continuing assembly.
Installing Bracing for Wind and Snow Loads
To make certain the PVC greenhouse withstands seasonal wind and snow loads, install a system of diagonal braces, gussets, and tie-downs that reinforce joints and distribute forces to the foundation.
The builder fits diagonal PVC or metal struts across frame corners, secures gusset plates at high-stress intersections, and adds cross-bracing along spans to limit racking.
Snow load is addressed by reinforcing ridge and hip connections and increasing brace spacing where snow accumulates.
Regular inspection and tightening of fasteners maintains integrity.
Materials should resist corrosion and UV; use stainless hardware and UV-stable connectors to prolong performance.
- Diagonal corner braces
- Gusset plates
- Cross-bracing along spans
- Reinforced ridge connections
Securing the Greenhouse to the Ground
The section outlines practical methods for anchoring a PVC greenhouse and preparing its base to resist uplift and movement.
It compares common anchoring options such as ground stakes, auger anchors, and concrete footings.
It also summarizes base preparation steps including site leveling, compacting, and installing a perimeter frame or gravel pad.
Anchoring Options
Secure anchoring is essential for a PVC greenhouse to resist wind, snow loads, and accidental knocks; a weak base undermines the structure regardless of framing quality.
Anchoring choices depend on site soil, desired permanence, and budget. Options provide lateral and uplift resistance without repeating base preparation details.
- Ground stakes: driven steel or rebar stakes tied to PVC joints; simple and removable.
- Auger anchors: screw-in anchors with high pull-out resistance for loose soils.
- Concrete footings: short poured anchors for permanent, heavy-duty hold.
- Sandbag or ballast: temporary, non-invasive solution for lightweight, movable frames.
Base Preparation
With a firm base established, attention turns to preparing the ground and anchoring points so the PVC greenhouse resists uplift, shifting, and settling; this involves evaluating soil type, drainage, and frost depth, marking the footprint, and deciding on edge details (trenches, perimeter boards, or concrete collars) that interface with chosen anchors.
The area is cleared, leveled, and compacted; high spots removed, low spots filled with crushed stone for drainage. Anchor locations are laid out and test-fit. Perimeter boards receive treated lumber or metal brackets; concrete collars cast where frost or wind demands.
Final checks confirm square, level, and secure footing before frame erection.
Installing Plastic Covering Without Wrinkles
Start by unrolling the plastic over the frame and aligning its centerline with the ridge to guarantee even tension on both sides. The installer works from center to edges, pulling gently to smooth ripples while an assistant holds the opposite side. Use temporary clamps or spring clips at midpoints, then adjust tension progressively toward ends. Avoid over-stretching; aim for firm but elastic drape.
- Smooth centerline first, secure with light clips.
- Work outward in equal increments to prevent skewing.
- Check for trapped air and ease with short pulls.
- Finish by securing at structural members, maintaining even tension.
Sealing Seams and Protecting Edges
A concise overview of sealant options and edge protection will help guarantee the greenhouse covering remains watertight and durable.
Common sealants—silicone, butyl tape, and greenhouse-specific adhesives—are compared for adhesion, flexibility, and UV resistance.
Practical edge treatments like hem bars, PVC trim, and folded hems provide mechanical protection and a secure substrate for sealing.
Sealant Types Overview
In choosing sealants for PVC greenhouse seams and edges, functionality and compatibility guide the selection: silicone, polyurethane, acrylic, and butyl varieties each offer distinct adhesion, flexibility, UV resistance, and paintability profiles.
- Silicone: Excellent UV and moisture resistance; remains flexible but is hard to paint; bonds poorly to some plastics without primer.
- Polyurethane: Strong adhesive strength and abrasion resistance; good for dynamic joints; requires careful surface prep.
- Acrylic: Paintable and easy to apply; less flexible and shorter lifespan under constant UV exposure.
- Butyl: Highly flexible and tacky; ideal for lap joints and quick repairs; limited temperature range.
Edge Protection Methods
For securing seams and shielding vulnerable edges, effective edge protection combines proper sealing, physical covers, and compatible adhesives to prevent drafts, moisture intrusion, and UV degradation. The guide recommends silicone or polyurethane sealants for flexibility, PVC edge trim to guard sheeting, and UV-resistant tape at corners. Overlaps should be sealed, fasteners protected, and edges capped to reduce wear. Periodic inspection and resealing extend life. Installation prioritizes clean surfaces and compatible materials to avoid chemical reactions.
| Method | Benefit |
|---|---|
| Sealant (silicone/polyurethane) | Flexible, watertight |
| Edge trim/capping | Physical abrasion protection |
| UV tape/guard | Sun damage prevention |
Building a Simple PVC Door and Latch
Using simple PVC fittings and a handful of common tools, the door for the greenhouse can be built to be lightweight, weather-resistant, and easy to operate.
A rectangular PVC frame sized to the opening is cut, dry-fitted, and glued; a clear corrugated PVC or polycarbonate panel is fastened with screws and soft washers. Hinges are made from short PVC sleeves or commercial strap hinges; reinforce with wood blocks if needed. A simple sliding or hasp latch keeps the door closed and aligns with a strike on the frame. Seal edges with foam tape to reduce drafts and keep pests out.
- Frame
- Panel
- Hinges
- Latch
Ventilation Options for PVC Greenhouses
Ventilation choices determine temperature, humidity, and airflow control in a PVC greenhouse.
Passive strategies such as roof vents, side louvers, and strategic door placement use natural convection and wind to move air without electricity. When passive methods are insufficient, active options like clip-on fans, exhaust vents with thermostats, or automatic vent openers provide precise, powered control.
Passive Ventilation Strategies
In a PVC greenhouse, passive ventilation relies on carefully placed openings and natural air movement to regulate temperature, humidity, and CO2 without fans or electricity. Design prioritizes airflow paths, roof vents, and shaded intake points.
Placement and sizing respond to prevailing winds and thermal stacking.
Common strategies balance intake and exhaust to avoid drafts and stagnant zones.
- Roof ridge vents sized for hot-air escape and thermal lift.
- Lower sidewall or ground-level inlets for cool-air intake.
- Operable louvered vents or roll-up sides for adjustable flow.
- Strategic shading and plant spacing to reduce overheating and aid circulation.
Active Ventilation Options
Passive strategies handle many temperature and humidity swings, but when greater control or rapid response is required, active ventilation systems provide forced airflow and automated regulation.
Electric fans mounted near ridge or sidewalls exchange air quickly; intake placement should draw cool air from low points, exhaust from high.
Thermostats or hygrostats trigger fans, preserving setpoints.
Solar-powered fan kits offer off-grid operation with modest output.
Automated vents with actuators open when temperatures rise; some combine with timers or sensors.
Proper sizing, wiring safety, and rainproofing matter.
Regular maintenance guarantees longevity.
Integration with passive design yields efficient, reliable climate control.
Passive vs Active Ventilation: Fans and Vents
Airflow management—whether relying on natural stack effects or mechanical assistance—determines a greenhouse’s temperature, humidity, and air quality.
Passive ventilation uses vents, louvers, and thoughtful placement to promote convective flow with no power; it’s low-cost and reliable but slower to respond.
Active ventilation employs fans and thermostats for precise control, faster exchange, and humidity reduction, at the cost of electricity and maintenance.
Choosing combines both: vents for baseline exchange, fans for peak conditions.
Consider redundancy, screening, and adjustable openings to prevent pests and over-ventilation.
- Passive: vents, louvers, placement
- Active: fans, thermostats, speed control
- Hybrid: vents + fans
- Maintenance: screening, backups
Heating Solutions for PVC Greenhouses
Heating strategies for PVC greenhouses range from passive solar design to active heating equipment.
Designers consider thermal mass, insulation, and orientation to capture and store daytime heat before evaluating small electric heaters for supplemental warmth.
When propane is used, careful attention to safe installation and adequate ventilation is required.
Passive Solar Design
How can a simple PVC greenhouse capture and store sunlight to reduce reliance on active heat sources? Passive solar design uses orientation, thermal mass, insulation, and ventilation to stabilize temperatures.
South-facing glazing maximizes winter sun; overhangs prevent summer overheating.
Dense materials (water barrels, stone) absorb daytime heat and release it at night. Insulate north walls and seal gaps to retain warmth. Provide adjustable vents for excess heat and overnight closure. Consider thermal curtains for added insulation. Monitor thermal mass sizing relative to greenhouse volume.
These passive strategies minimize energy use while maintaining plant-friendly microclimates through predictable, low-maintenance methods.
- Orientation
- Thermal mass
- Insulation
- Ventilation
Small Electric Heaters
Consider small electric heaters when passive measures alone cannot keep a PVC greenhouse above critical temperatures; they provide reliable, controllable supplemental heat for short cold spells or for raising night minima.
Compact ceramic or fan-forced models warm small spaces quickly, offer adjustable thermostats, and often include tip-over and overheat protection.
Placement should guarantee even distribution without contacting plastic; elevated on noncombustible stands or mounted to frames is best.
Calculate wattage: roughly 10–20 W per cubic foot depending on insulation and outside lows.
Use a dedicated GFCI-protected circuit and weatherproof cords.
Monitor humidity and ventilation to prevent mold and overheating.
Propane And Ventilation
When electric units cannot meet heating needs for longer cold spells or where power is unavailable, propane offers a high-output, portable alternative for PVC greenhouses.
Propane heaters deliver rapid, controllable warmth but require strict ventilation and CO monitoring to protect plants and people.
Placement should avoid direct contact with PVC to prevent melting; use heat shields and maintain clearance.
Regularly inspect connections and store tanks safely.
- Choose low-oxygen or vented models and install CO detectors.
- Provide intake and exhaust vents sized for heater output.
- Use thermal barriers between heater and PVC framing.
- Follow local codes and fuel handling protocols.
Shade and Sun Control Methods
Why manage sun exposure in a PVC greenhouse? Excess light and heat stress plants, reduce yields, and degrade plastic covers. Effective shade and sun control balance light, temperature, and UV protection.
Options include removable shade cloths with varying densities, reflective whitewash for seasonal cooling, and retractable screens to adjust exposure throughout the day. External shade structures or shade sails can lower peak temperatures without altering interior layout. Ventilation timing and strategic plant placement complement shading to prevent hotspots. Monitoring light levels with a simple sensor guides changes. Properly chosen, installed, and maintained controls extend plastic life and protect crops.
Shelving, Benches, and Layout Ideas
In a PVC greenhouse, efficient shelving, benches, and layout maximize usable space while maintaining airflow, accessibility, and appropriate light for different plant types. Modular shelving along walls frees central aisle space; slatted benches improve drainage and air movement.
Tiered racks place seedlings closer to light, while movable benches permit reconfiguration for seasonal crops. Durable, lightweight materials match PVC framing for easy anchoring.
Consider workstation space for potting and storage near the entrance. Position taller plants to avoid shading smaller ones and keep clear paths for maintenance.
- Wall-mounted shelves for propagation
- Slatted benches for drainage
- Tiered racks for light gradients
- Mobile benches for flexibility
Watering Systems: Hand, Drip, and Misting
How should a PVC greenhouse balance convenience, water efficiency, and plant needs across hand watering, drip irrigation, and misting systems? A practical approach evaluates crop type, container size, and schedule.
Hand watering offers control for seedlings and delicate transplants but is time‑intensive. Drip irrigation conserves water, delivers consistent moisture to root zones, and suits raised beds and rows; include a timer and pressure regulator for reliability.
Misting supports humidity-loving seedlings and cuttings but risks foliar disease if overused; pair with ventilation and timed cycles. Combining methods provides flexibility: drip for main crops, mist for propagation, hand watering for spot adjustments.
Soil, Raised Beds, and Container Planting
For successful growing in a PVC greenhouse, soil choice and bed type determine drainage, root development, and ease of maintenance. Soil should be loose, well-draining, and rich in organic matter; amend with compost and perlite for aeration.
Raised beds reduce soil compaction, improve warmth, and simplify access; build them from rot-resistant lumber or recycled materials.
Containers suit rotation, quarantining, and limited space; pick sizes matching root systems and guarantee drainage holes.
Consider soil depth, watering frequency, and mobility when selecting systems.
- Choose loamy, amended mixes for structure.
- Raised beds: depth and access.
- Containers: size and drainage.
- Mulch and monitor moisture.
Best Plants and Planting Schedules for PVC Greenhouses
Following soil and bed choices, plant selection and timing determine greenhouse productivity and season extension. Cold-hardy greens (lettuce, spinach), herbs, seedlings and quick-maturing vegetables fit PVC greenhouse microclimates. Stagger sowing every 2–3 weeks for continuous harvest; start warm-season transplants indoors 4–6 weeks before last frost and move when nights warm. Use succession planting and intercropping to maximize space. Monitor light and temperature; adjust shading and ventilation for summer. Fast crops free beds for later plantings. Choose varieties labeled for containers or short-season regions to capitalize on controlled conditions.
| Crop type | Timing |
|---|---|
| Greens | Early spring, fall |
| Herbs | Year-round |
| Tomatoes | After frost |
| Radishes | Succession spring/summer |
Pest and Disease Prevention in a Small Greenhouse
Preventing pests and diseases in a small PVC greenhouse relies on proactive sanitation, environmental control, and regular monitoring.
Surfaces, tools, and pots are cleaned; damaged plants are removed promptly to reduce inoculum.
Ventilation and humidity management limit fungal outbreaks while proper spacing improves airflow.
Introduce biological controls and inspect newcomers to prevent introductions.
Monitor daily for early signs and record occurrences to guide responses.
- Sanitation: disinfect benches, tools, and trays regularly.
- Environment: control temperature, humidity, and air circulation.
- Monitoring: inspect plants, sticky traps, and keep records.
- Response: isolate, prune, and use targeted biological or low-toxicity treatments.
Seasonal Maintenance Checklist
Regularly timed seasonal maintenance keeps a PVC greenhouse functional, efficient, and ready for each crop cycle. Inspection routines include checking frame joints, replacing torn film, cleaning surfaces, and testing vents and fans. Soil amendments, pot sanitation, and tool organization occur between plantings to reduce pests. Records of temperatures, humidity, and crop rotations inform adjustments. Small repairs and part replacements are done promptly to avoid escalation. The checklist emphasizes safety: secure loose fittings and clear walkways. Routine tasks prevent costly downtime and protect yields.
| Task | Frequency |
|---|---|
| Frame & cover inspection | Monthly |
| Cleaning & sanitation | Between crops |
| Ventilation check | Weekly |
Winterizing Your PVC Greenhouse
Often overlooked, winterizing a PVC greenhouse is essential to protect the structure and crops from cold damage, moisture intrusion, and wind stress. The process focuses on insulation, ventilation, anchoring, and moisture control to sustain plants and prevent structural strain. Recommended steps include sealing gaps, adding thermal mass, and installing frost-tolerant coverings while preserving airflow. Regularly clear snow and inspect connections to avoid uneven loading. Use humidity monitors and gentle heating only when necessary to prevent freezes. Properly winterized greenhouses extend growing seasons and reduce maintenance demands during cold months.
- Seal gaps and add insulation
- Improve anchoring and windproofing
- Manage ventilation and humidity
- Clear snow and monitor loads
Repairing Cracks, Tears, and Broken PVC
After winter stress and routine inspections, attention shifts to repairing cracks, tears, and broken PVC to preserve structural integrity and weatherproofing.
Small tears in film get patched with UV-resistant tape or clear adhesive patches, applied to clean, dry surfaces and overlapped beyond damage.
Cracked PVC pipe sections are replaced or joined with slip couplings after cutting out the compromised segment; properly sized connectors and primer/solvent cement guarantee a watertight bond.
Minor splits can be reinforced with fiberglass wrap or epoxy putty.
Fasteners and joints receive inspection and tightening.
Post-repair testing for leaks and alignment confirms restored performance before reopening.
Upgrades That Make Your PVC Greenhouse Last Longer
Several targeted upgrades can substantially extend a PVC greenhouse’s lifespan by reducing wear, improving structural resilience, and minimizing maintenance needs.
Reinforcing joints with metal brackets and stainless fasteners prevents wobble and cracking; upgrading to UV-stabilized polycarbonate panels cuts sun damage and plastic degradation.
Anchoring the frame with ground spikes or concrete footings resists wind uplift and shifting.
Adding drip irrigation and guttering channels reduces runoff erosion and concentrated moisture that accelerates PVC wear.
- Metal brackets and stainless fasteners
- UV-stabilized polycarbonate panels
- Ground spikes or concrete footings
- Drip irrigation and guttering systems
Budget-Friendly Variations and DIY Hacks
Having outlined upgrades that extend a PVC greenhouse’s lifespan, the focus shifts to cost-saving alternatives and simple hacks that achieve similar benefits with minimal expense.
Reusing clear plastic shower curtains as coverings reduces cost while retaining light transmission; double layering with an air gap improves insulation. Sandbags or concrete pavers can weigh anchors compared to costly anchors. Painted white interior walls boost diffuse light using inexpensive latex. Salvaged windows or polycarbonate from old structures serve as rigid panels. Solar-powered clip fans and passive vent flaps cut energy bills. Routine seal maintenance using silicone and weatherstripping prevents larger repairs, saving money long-term.
Scaling Up: From Hobby Greenhouse to Small Operation
Moving from a hobby PVC greenhouse to a small-scale production requires rethinking structure, workflow, and resource allocation to handle higher plant density, longer growing cycles, and more consistent environmental control.
Plans should prioritize sturdier anchoring, expanded benching, and zoned irrigation.
Scheduling, record-keeping, and pest management become systematic tasks.
Ventilation and heating upgrades must support uniform conditions.
Consider workflow for seeding, potting, and harvest to reduce labor bottlenecks.
- Reinforce frame and anchoring for increased loads.
- Implement drip irrigation and automated timers.
- Create rotational benches and staging areas.
- Establish monitoring logs and pest control protocols.
PVC vs Wood and Metal Frames: Cost & Durability
When scaling a PVC hobby greenhouse into a small production space, material choice for the frame becomes a practical decision affecting upfront cost, maintenance, and lifespan. PVC offers low cost, light weight, corrosion resistance, and easy assembly, but weak UV and load tolerance require thicker pipe or reinforcement.
Wood provides better strength, aesthetic warmth, and repairability; treated or rot-resistant species increase longevity but raise maintenance and initial expense.
Metal (aluminum or galvanized steel) yields superior durability, load-bearing capacity, and minimal maintenance, though it costs more and may need thermal breaks to reduce condensation. Choice depends on budget, climate, and anticipated operational intensity.
Where to Buy Materials: Cheap and Quality Sources
For sourcing materials, gardeners should balance price, quality, and convenience by comparing local suppliers, big-box retailers, and specialty vendors. Local hardware stores offer personalized advice and quick pickup; big-box chains often have consistent PVC, fittings, and clear sheeting at competitive prices; plumbing supply houses provide higher-grade pipe and connectors; online marketplaces give broader selection and bulk discounts but watch shipping costs and reviews.
Consider reclaimed or surplus centers for low-cost frames and clear panels in good condition. Inspect material specs, UV resistance, and return policies. Prioritize suppliers that match project scale, timeline, and warranty needs.
- Local hardware stores
- Big-box retailers
- Specialty/plumbing suppliers
- Online/surplus sources
Weekend Build Timeline: 2-Day Step-by-Step
Over a single weekend, the build is broken into clear, time-boxed tasks so a two-person team can complete a basic PVC greenhouse in about 12–16 hours of hands-on work. Day one focuses on site prep, frame cutting and assembly; day two covers covering, anchoring and finish details. Time estimates, required tools and safety pauses are noted. Tasks are sequenced to minimize downtime and allow one person to fetch materials while the other works.
| Day | Tasks |
|---|---|
| Day 1 Morning | Site prep, layout |
| Day 1 Afternoon | Cut and assemble frame |
| Day 2 Morning | Fit cover, doors |
| Day 2 Afternoon | Anchor, trim, inspect |
Common Mistakes First-Time Builders Make and How to Avoid Them
Frequently, first-time builders underestimate site preparation, weatherproofing and structural stability, leading to warped frames, loose covers or poor drainage; recognizing these common pitfalls early and following straightforward checks—square the base, use UV-rated film, allow proper overlap and secure anchors—prevents most failures and reduces costly rework.
Common mistakes include inadequate foundation, poor joint fit, insufficient ventilation, and weak anchoring. Each issue has a simple fix: level and compact the site, deburr and dry-fit PVC, add vents or operable windows, and use ground anchors or concrete footings. Inspect seams, tension covers properly, and plan drainage to avoid recurring problems.
- Foundation
- Fitting
- Ventilation
- Anchoring
Conclusion
A PVC greenhouse offers gardeners an affordable, flexible shelter that punches above its weight: like a pocket-sized sail catching a hopeful wind, it expedites seedlings, extends seasons, and tests ideas without draining resources. While not indestructible or suited for every climate, its quick assembly, low cost, and adaptability make it a practical first choice or temporary solution. Thoughtful placement, quality coverings, and routine care will maximize its usefulness and lifespan.