How to Attach Copper Pipe Without Solder €” Easy DIY Methods
You can easily attach copper pipe without solder using methods like push-fit, compression, flare, crimp, or threaded fittings. Each method relies on mechanical seals, such as O-rings or ferrules, ensuring strong connections when done correctly. Here are the key takeaways:
- Push-fit: Fast and reversible connections.
- Compression: Cost-effective and reliable.
- Crimp and Flare: Provide strong, permanent joints.
Make sure to use the correct size fittings, follow manufacturer specifications for torque or crimping, and pressure-test the line for leaks. Continue reading for detailed preparation steps, tool lists, and troubleshooting tips.
Pick the Right Method: Solder‑Free vs. Soldered
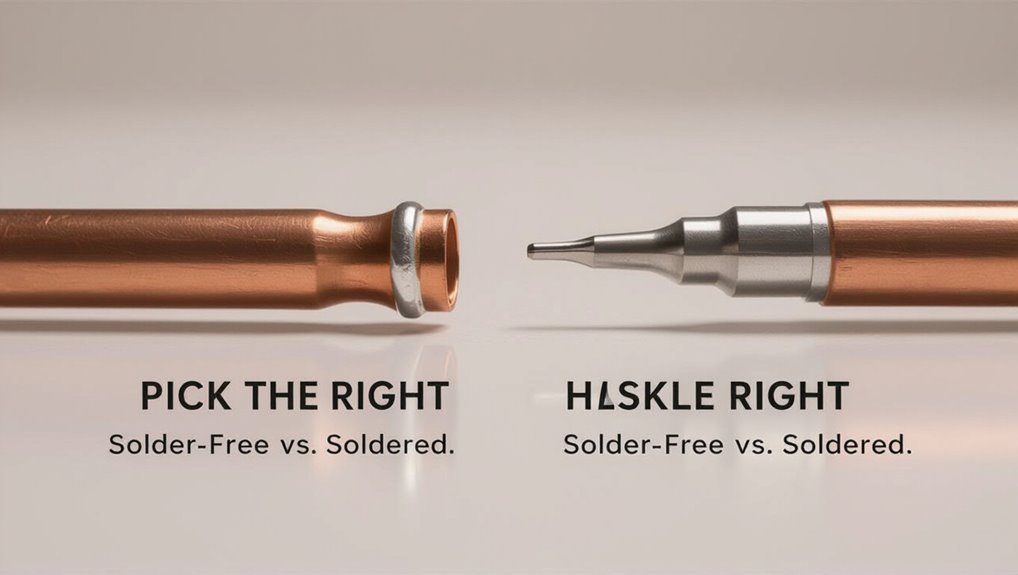
How should a homeowner decide between solder‑free and soldered copper pipe connections? A homeowner evaluates skill, time, budget, tool access, and application.
Soldered joints provide proven durability and high-temperature tolerance but require flame, flux, solder, and practice.
Solder‑free options reduce fire risk, speed installation, and suit confined spaces or DIYers lacking soldering confidence; some rely on seals or mechanical compression.
Consider pipe size, water pressure, code requirements, permanence, and future disassembly.
Where codes or high‑temperature systems demand soldering, that route is preferable. Otherwise, solder‑free methods offer practical, safe alternatives for many residential repairs and installs.
Quick Comparison: Push‑Fit, Compression, Flare, Crimp, Threaded
The section compares common solder-free fittings, starting with push-fit and compression types.
Push-fit connectors offer tool-free, fast installation and forgiving alignment, while compression fittings require tightening a nut and ferrule for a mechanically sealed joint.
The differences in speed, reusability, and leak tolerance will guide the choice for specific jobs.
Push‑Fit Overview
Wondering which solderless method suits a given plumbing task best, a quick comparison highlights the strengths and limits of push‑fit, compression, flare, crimp, and threaded joints.
Push‑fit fittings offer speed and tool‑free connections for copper, PEX, and CPVC, relying on an internal O‑ring and gripping teeth. They suit repairs and tight spaces but cost more per fitting and may be bulkier than alternatives.
Longevity depends on correct pipe preparation and water quality.
Considerations include pressure rating, temperature range, and accessibility for future servicing.
- Installation speed: instant push, no heat.
- Versatility: multi‑material compatibility.
- Serviceability: removable with proper tools.
Compression Vs Push‑Fit
After outlining push‑fit’s quick, tool‑free advantages, it is useful to contrast it with compression fittings, which rely on a nut and ferrule to form a mechanical seal.
Compression requires tightening torque and occasional re‑adjustment; it performs well on rigid copper and in confined spaces where push‑fit bodies may not fit.
Push‑fit gives faster installation, easy disassembly, and forgiving alignment but costs more per fitting and can be bulkier.
Compression is cost‑effective, familiar to plumbers, and suited to semi‑permanent joints.
Choice depends on access, budget, permanence, and preference for speed versus traditional mechanical reliability.
Tools You Need for Solder‑Free Copper Work
A concise set of tools is required to prepare and join copper without solder.
Basic hand tools (tube cutters, deburrers, and wrenches) are paired with push‑fit connectors and their associated sealing components for fast, tool‑minimal assemblies.
For applications needing more mechanical security, fluxless fittings such as compression, crimp, and threaded connectors and the appropriate installation tools are used.
Essential Hand Tools
For solder-free copper work, a concise set of hand tools covers cutting, deburring, joining, and measuring tasks without needing open flame or flux.
Essential items include a compact tubing cutter for clean cuts, a ratcheting cutter for thicker lines, and a quality deburring tool to remove burrs and guarantee snug fittings.
A tubing bending spring or manual bender helps route pipe without kinks.
Slip-joint pliers and adjustable wrenches provide grip and torque for compression fittings and nuts.
A small level and tape measure assure alignment and length.
Safety gloves and eye protection complete the minimal kit.
- Tubing cutter
- Deburring tool
- Wrenches
Push‑Fit Connectors
Following the compact toolset for cutting, deburring, and tightening, push-fit connectors simplify joining copper without heat or solder.
These fittings require clean, square-cut pipe and a firm push to engage internal O‑rings and metal teeth that grip tubing. They suit repairs, tight spaces, and temporary or permanent runs, accommodating straight, elbow, and tee configurations.
No flame, flux, or specialized skills are needed, reducing risk and setup time. Compatibility with copper, PEX, and CPVC varies by model; always confirm size and material ratings.
After installation, inspect for proper depth and test under normal water pressure.
Fluxless Mechanical Fittings
Fluxless mechanical fittings combine threaded, compression, and swaged designs to join copper without solder or flame. They rely on metal-to-metal seals, gaskets, or ferrules and suit repairs, retrofit, and installations where open flame is undesirable. Typical components include union nuts, gland rings, and preassembled couplings. Installation demands careful pipe preparation, proper torque, and occasional sealant specified by the manufacturer.
- Prepare: deburr, clean, and measure for correct insertion depth.
- Assemble: slide components, align, and hand-start threads.
- Secure: tighten to torque spec; verify leak-free under pressure testing.
Prep Copper Pipe Ends for Solder‑Free Joints
Before making solder-free connections, the copper pipe ends must be clean, square, and burr-free to guarantee a tight, leak-resistant seal. Removal of oxidation and debris with a clean cloth or abrasive pad secures proper contact for compression rings, push-fit O-rings, or flared fittings.
Deburring the inside edge prevents O-ring damage and flow restriction; a hand reamer or round file works well. Chamfering the outer edge slightly aids insertion into fittings without displacing seals.
Final inspection for scratches, dents, or distortions avoids leaks. Keep surfaces dry and oil-free; contamination undermines seal performance in mechanical, no-solder joints.
How to Cut Copper Pipe Cleanly and Squarely
Cut the copper pipe with steady, controlled motions to produce a square, burr-free end that seats properly in fittings.
A clean cut prevents leaks and assures secure mechanical connections when solder is not used.
Use a quality tubing cutter or fine-tooth hacksaw; clamp the pipe lightly in a vise to stabilize without deforming.
Remove burrs with a deburring tool or round file, and verify squareness by sight or with a try-square.
Measure twice, mark once, and recheck alignment before cutting.
- Choose proper tool.
- Deburr thoroughly.
- Confirm square and clean end.
How Push‑Fit (Press‑to‑Connect) Fittings Work
Push-fit (press-to-connect) fittings create a watertight seal by compressing an internal O-ring around the pipe while a metal grab ring secures it against pull-out.
Installation requires cutting the pipe squarely, deburring and cleaning the end, checking insertion depth, and pushing the pipe into the fitting until it clicks or marks align.
The method eliminates soldering and is reversible on many brands by using a release tool or sleeve.
How They Seal
A sealing mechanism inside press‑to‑connect fittings combines an elastomer O‑ring and a metal or polymer grip ring to create a watertight join without heat or solder.
When pipe inserts, the grip ring bites lightly into the tubing, preventing withdrawal, while the O‑ring compresses to form a continuous elastomer seal around the pipe.
A collet or locking sleeve retains the assembly and resists axial forces.
Components function together to accommodate slight surface irregularities and pressure variations without adhesives.
Advantages include reusability and immediate serviceability; limitations center on correct pipe preparation and compatibility with pipe material and system pressure.
- Grip ring: mechanical hold
- O‑ring: fluid seal
- Collet: retention mechanism
Installation Steps
Having described how the grip ring, O‑ring, and collet work together to seal and hold tubing, the installation process outlines the precise preparations and actions that guarantee those components perform correctly.
Installers cut pipe squarely, deburr and remove sharp edges, then clean and inspect surfaces for nicks or corrosion. Mark insertion depth on tubing to make certain full engagement. Fully insert pipe into the fitting until the mark meets the shoulder; a tactile click or visual indicator confirms seating. For press‑to‑connect variants, use the correct pressing tool and jaws sized to the fitting. Finally, test the joint under working pressure and check for leaks.
Push‑Fit Fittings : Step‑By‑Step Installation
Begin by preparing the pipe and workspace so each step proceeds smoothly and safely. The installer measures, marks, deburrs, and cleans pipe ends, confirming correct length and alignment. Push‑fit fittings are inspected for debris and O‑rings before use.
- Insert: fully push the pipe into the fitting until it seats against the stop, feeling the tactile click or mark.
- Verify: pull back gently to guarantee engagement and check alignment; correct depth with a marker if needed.
- Test: pressurize the system and observe for leaks, rechecking connections and reseating if any seepage appears.
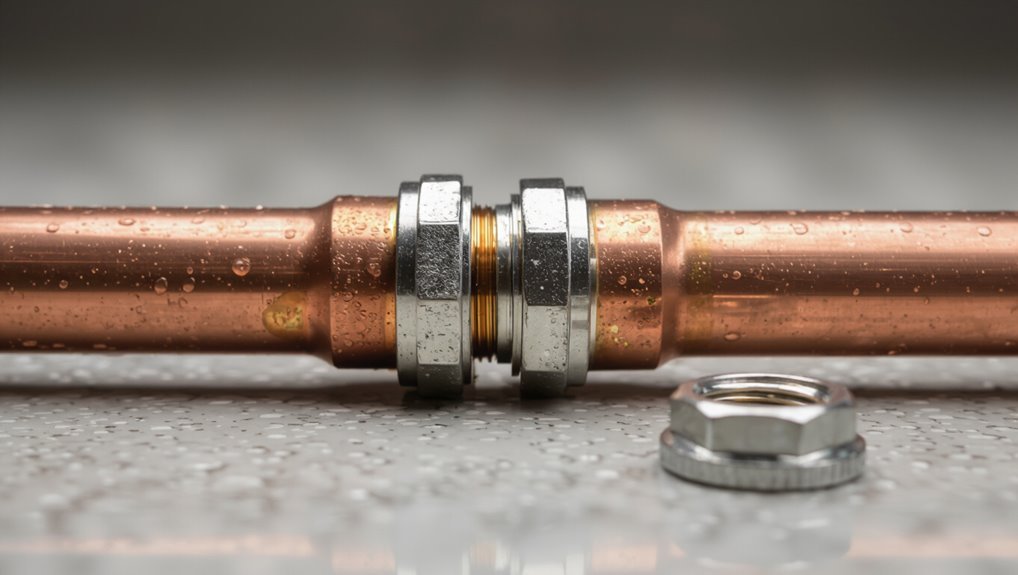
How Compression Fittings Join Copper Pipe
Compression fittings join copper pipe by compressing a brass ferrule against the pipe and fitting body to form a watertight seal.
The installation requires sliding the nut and ferrule onto the pipe, inserting the pipe into the fitting, and tightening the nut to the specified torque or turn count.
Proper tightening technique and alignment are emphasized to prevent leaks and avoid deforming the pipe.
How Compression Fittings Work
A compression fitting joins copper pipe by mechanically squeezing a metal ring (the ferrule) between the pipe and a threaded nut, creating a tight seal without heat.
The ferrule deforms slightly, biting into the pipe and forming a metal-to-metal barrier that resists pressure and prevents leaks.
The nut transmits compressive force; the fitting body aligns flow and contains the seal.
Common materials are brass or stainless steel; ferrule design varies for soft or hard copper.
Proper surface condition and correct component sizing guarantee reliability.
- Ferrule deformation mechanism
- Nut force transmission
- Body alignment and containment
Installation And Tightening
When installing a compression fitting, the installer slides the nut and ferrule onto the cut, deburred pipe, inserts the pipe fully into the fitting body, then tightens the nut to compress the ferrule and form the seal.
Proper installation requires straight pipe ends, correct ferrule orientation, and hand-tightening followed by a measured wrench turn—typically one to one-and-a-quarter turns beyond hand-tight for standard fittings.
Over-tightening risks deforming the ferrule or cracking the pipe; under-tightening causes leaks.
After tightening, the joint should be pressure-tested. Re-tightening may be done once if a minor leak appears, then retest.
Compression Fittings : Step‑By‑Step Installation
Begin by gathering the required parts and tools: the compression nut, ferrule (olive), matching fitting body, pipe cutter, deburring tool or fine file, and two adjustable wrenches.
The pipe end is cut square, deburred, and cleaned.
Slide nut then ferrule onto pipe, insert pipe into fitting shoulder fully, then hand-tighten the nut.
Use one wrench to hold the fitting body and the other to tighten the nut a further 1/4 to 1/2 turn past hand-tight, compressing the ferrule for a leak‑tight seal.
Test under low pressure, check for leaks, and retighten minimally if required.
- Align components
- Tighten carefully
- Inspect leaks
When and How to Use Flare Fittings on Copper
Flare fittings are recommended when a gas-tight, high-pressure joint is needed, typically on refrigeration, gas, or brake line applications.
Types include single-flare and double-flare fittings and varied flare angles (45° and 37°), each matching specific hardware and pressure requirements.
Installation involves cutting and deburring the tube, forming the flare with the correct tool and angle, and tightening the flare nut to the manufacturer’s torque to avoid leaks or deformation.
When To Use
In situations that demand a reliable, leak-resistant joint without heat, a flared fitting provides a durable mechanical seal for copper tubing. It suits situations where vibration, disassembly, or higher pressure require a reusable connection.
Typical use cases include refrigeration lines, gas service, and equipment hookups where soldering is impractical or prohibited.
- When portability or frequent maintenance is expected, choose flares for easy detachment.
- When working with thin-wall or soft copper that cannot tolerate solder heat, flares prevent distortion.
- When codes restrict open flame or site conditions forbid soldering, flares offer code-compliant alternatives.
Flare Fitting Types
Which type of flare fitting to use depends on tubing wall thickness, pressure, and service application. Single-flare (45°) fittings suit soft copper tubing and low- to moderate-pressure lines like refrigeration and fuel; they require a full 45° flare and matching male cone.
Double-flare (double 45° or SAE) is preferred for automotive and high-vibration environments, providing stronger, crack-resistant joints on thin-walled tubing.
For high-pressure or instrumentation lines, 37° AN/JIC flare fittings offer metal-to-metal sealing and tighter tolerances.
Material compatibility, vibration, and service fluid dictate selection; proper flare geometry and matching components guarantee reliable, leak-free connections.
Installation Steps
Begin by confirming the tubing type, wall thickness, and system pressure to determine whether a single, double, or 37° flare is appropriate; then gather the correct flaring tool, fittings, and cutting supplies.
The installer cuts squarely, deburrs both inside and outside, measures insertion depth, and marks the tube for consistent flare length.
Clamp the tube securely, form the flare per tool instructions, and inspect the cone for cracks or unevenness.
Assemble with the matching nut and fitting, tighten to specified torque, and pressure-test for leaks. Address leaks by re-cutting and re-flaring or replacing damaged components.
- Prepare
- Form
- Test
How Crimp Systems Work With Copper Pipe
Using a crimp system, a copper pipe is joined to a fitting by compressing a metal ring or sleeve around the pipe to create a watertight mechanical seal.
The fitting seats over the tube end and the crimp ring sits over the fitting’s ferrule.
A crimping tool applies uniform radial force, deforming the ring into the pipe and fitting contours to form a reliable joint without heat or flux.
Proper pipe insertion depth and ring placement are critical.
Crimp connections are quick, consistent, and suitable for potable water and hydronic systems when rated components and correct techniques are used.
Crimp Rings & Tool : Step‑By‑Step
When preparing a crimp connection, attention to the ring selection and tool setup determines the joint’s reliability. The practitioner confirms pipe and fitting sizes, selects correct-sized copper crimp rings, and inspects rings for deformities.
The crimp tool is checked for calibration, jaw cleanliness, and appropriate die installed. Assembly requires full insertion of the pipe into the fitting shoulder, sliding the ring to the proper position, then applying steady, perpendicular pressure with the tool until a uniform crimp forms.
- Verify ring size and condition.
- Calibrate and clean the crimping tool.
- Confirm pipe seat and execute a single, complete crimp.
Using Threaded Adapters to Join Copper to Threads
When joining copper pipe to threaded fittings, selecting an adapter with the correct pipe size, material compatibility, and thread type is critical for a reliable connection.
The installer must match male and female threads and choose brass or stainless adapters to avoid galvanic corrosion.
Proper thread sealing—using PTFE tape or compatible pipe dope applied in the correct direction and amount—prevents leaks without solder.
Choosing The Right Adapter
Which threaded adapter suits a copper line depends on pipe size, thread type, and pressure rating. Selection hinges on matching copper OD or nominal size to adapter ferrule or compression fittings, choosing NPT, BSP, or garden-thread variants, and confirming working pressure and temperature limits.
Material compatibility (brass, bronze, or stainless) prevents galvanic issues. When changeover to different metals occurs, dielectric or isolating designs are preferred.
Consider thread direction and taper. Install space and accessibility influence choice of straight, elbow, or union adapters.
- Match size and thread standard.
- Verify pressure and temp ratings.
- Choose compatible materials.
Sealing Threads Properly
After selecting an adapter that matches size, thread standard, and materials, attention turns to achieving a reliable seal between copper and threaded fittings.
The installer cleans threads and mating surfaces, inspects for damage, and confirms proper tape or compound compatibility with drinking water and system temperature.
PTFE tape is wrapped clockwise, two to three turns, keeping tape off the first thread to avoid contamination.
For tapered NPT joints, a compatible pipe thread sealant can be applied instead, ensuring even coverage.
The adapter is hand-started, then tightened with the correct wrench until snug plus recommended turns, avoiding overtightening.
Repair Clamps & Brackets for Temporary Leak Fixes
Repair clamps and brackets provide a quick, non-soldered means to stop leaks in copper piping until a permanent repair can be made.
These devices compress a gasket or metal band around the damaged area, offering immediate containment and pressure resistance for small cracks or pinholes.
Proper selection depends on pipe diameter, leak location, and water pressure.
Installation is straightforward: align clamp, tighten fasteners, and test for seepage.
Limitations include temporary lifespan and unsuitability for large ruptures.
Considerations:
- Choose size and material compatible with copper.
- Verify gasket integrity before installation.
- Monitor the repair and plan permanent replacement.
Epoxy and Metal Adhesives for Temporary Copper Repairs
When clamps or brackets cannot fully stop a small leak or when a less bulky temporary fix is preferred, epoxy and metal adhesives offer an alternative method for sealing copper pipe damage.
Epoxy putties and liquid metal adhesives bond to clean, dry copper to fill pinholes, hairline cracks, or seam failures.
Surfaces must be abraded, degreased, and allowed to cure per manufacturer directions; some formulas tolerate wet conditions.
These repairs are temporary, withstand moderate pressure for short periods, and are best used until a permanent repair or replacement is performed.
Select products rated for potable water when applicable.
Specialty Coupling Options for Repair and Hard‑to‑Fit Joins
For complex repairs and tight spaces, specialty couplings provide versatile, reliable connections where standard fittings cannot be used. These couplings suit awkward angles, damaged sections, and temporary fixes without solder.
Selection depends on access, pressure rating, and permanence required.
- Compression repair couplings: clamp over cut ends, sealing with ferrules; ideal where heat or extensive disassembly is undesirable.
- Push-fit angled adapters: allow quick directional changes and minimal clearance installation; removeable and reusable in many brands.
- Split-sleeve and wrap couplers: bridge corroded or crushed pipe by mechanically compressing a gasketed sleeve around the defect for immediate service restoration.
Match Fittings to Pipe Size and Wall Thickness
Proper fitment begins by matching the fitting to the pipe’s outer diameter so joints seat correctly.
Wall thickness also matters because thin‑wall (L) and thick‑wall (K or M) copper require compatible fitting types or inserts to guarantee a leak‑proof connection.
Selecting fittings specified for both the OD and the pipe wall prevents gaps, movement, and premature failure.
Matching Outer Diameter
Accurate matching of the fitting’s outer diameter to the copper pipe guarantees a leak-free mechanical or compression connection and prevents stress at joints. The installer verifies nominal pipe size, measures OD with calipers, and selects fittings specified for that OD rather than relying on nominal descriptions. Mismatched OD causes poor seating, gasket extrusion, or brittle failure under vibration.
- Measure OD precisely and confirm manufacturer tolerances.
- Match fitting bore to measured OD; include allowance for finishes or plating.
- Test-assemble before final tightening to make certain full engagement and correct gasket compression.
Considering Wall Thickness
After confirming outer diameter, attention shifts to the pipe wall thickness because fittings and compression rings are specified not only by OD but by the pipe’s wall gauge or schedule; mismatching these dimensions can prevent full engagement, deform gaskets, or overload mechanical grips.
Installers verify whether tubing is Type K, L, M, or ACR and note nominal versus actual dimensions. Compression nuts, ferrules, and push-fit collars are chosen to match wall thickness so seals compress evenly.
When adapting between thin and thick walls, use purpose-designed adapters or sleeves. Proper selection preserves seal integrity, prevents leaks, and maintains mechanical longevity.
Tools & Tips for Deburring, Sanding, and Cleaning Copper
For clean, leak-free joints, preparing copper pipe edges and surfaces is essential; deburring removes sharp metal, sanding evens surfaces, and cleaning eliminates oils and oxides that interfere with fittings.
Recommended tools include a handheld deburring tool or reamer, fine-grit emery cloth or Scotch-Brite pad, and a mild solvent or acetone for final wipe.
Techniques emphasize steady rotation when deburring, light even strokes when sanding, and lint-free cloths for cleaning.
Safety gear—gloves and eye protection—protects from burrs and solvent.
Follow manufacturer instructions for fittings to guarantee compatibility after surface preparation.
- Use the right tool for each step.
- Inspect edges and seats after prep.
- Remove all residues before assembly.
Common Mistakes When Attaching Copper Without Solder
Proper surface prep reduces many problems, but several common errors still lead to leaks or failures when attaching copper without solder.
Improper sizing and uneven cuts prevent full seating of fittings. Skipping deburring or cleaning leaves debris that obstructs seals. Over‑tightening compression fittings damages ferrules; under‑tightening permits movement and leaks. Using incompatible sealants or pipe materials causes chemical or mechanical failure. Neglecting alignment stresses joints and shortens life. Reusing softening or damaged fittings compromises integrity. Ignoring manufacturer torque or installation instructions voids warranties. Addressing these mistakes improves reliability and reduces the need for premature repairs.
Pressure Testing Solder‑Free Copper Joints Safely
When pressure testing solder‑free copper joints, technicians must follow a clear, methodical sequence to verify integrity without risking damage or injury. They isolate the test section, cap open ends, and select an appropriate test medium and pressure within code limits. Observations focus on audible leaks, visible weeps, and pressure decay over a fixed interval.
- Inflate incrementally to working pressure, hold, inspect fittings and seals.
- Monitor pressure gauge for drop; mark time and magnitude of any loss.
- Release pressure slowly, inspect for loosened components, and document results for corrective action.
Longevity and Maintenance of Solder‑Free Copper Connections
Having confirmed leak‑free performance through controlled pressure testing, attention shifts to practices that maximize the lifespan of solder‑free copper connections.
Routine inspections for corrosion, mechanical stress, and sealant degradation prevent failures; prioritize visual checks at fittings, supports, and junction points.
Maintain proper support spacing and avoid overtightening to reduce metal fatigue.
Use compatible materials and replace worn O‑rings or compression ferrules promptly.
Flush lines after installation to remove debris and periodically after service changes.
Document maintenance dates and observations.
Where chemical exposure is possible, apply appropriate protective coatings and monitor for accelerated deterioration to safeguard long‑term reliability.
When Local Code or Inspectors Require Soldered Joints
If local code or an inspector mandates soldered joints, installers must comply by converting or reworking solder‑free connections to meet those requirements; this typically involves removing push‑fit or compression fittings, thoroughly cleaning and fluxing pipe ends, and using the specified solder alloy and heat source to create capillary, watertight joints. The party performing work should document compliance, verify materials, and schedule reinspections.
Key steps include:
- Remove noncompliant fittings and prepare copper by sanding to bright metal.
- Apply approved flux and use proper solder and torch technique to form a continuous fillet.
- Pressure‑test and record results per code.
Best Solder‑Free Choices: Potable Water vs. Heating Systems
After addressing situations where authorities insist on soldered joints, attention shifts to selecting solder‑free methods appropriate for potable water versus heating systems. The writer evaluates press fittings, compression joints, and mechanical couplings for drinkable supply and hydronic loops, noting approval, temperature limits, and leak resistance. Potable work demands certified fittings and corrosion‑resistant materials; heating systems tolerate higher temperatures and may favor brass or specialized push‑fit types. Selection weighs certification, operating temperature, and permanence. The table summarizes typical choices and considerations.
| Application | Common Option | Key Consideration |
|---|---|---|
| Potable | Press fittings | NSF/ANSI approval |
| Heating | Push‑fit/brass | Temperature rating |
Quick Fixes vs. Permanent Repairs: Choose the Right Approach
When a copper line fails, the decision between a quick fix and a permanent repair hinges on scope, risk, and planned service life.
The writer notes that temporary measures—compression fittings, repair sleeves, or pipe clamps—are suitable for immediate containment, low pressure, or until a scheduled overhaul.
Permanent work favors mechanically joined fittings, press systems, or full section replacement for longevity and code compliance.
Consider budget, access, and skill; temporary fixes reduce downtime but may demand earlier replacement.
Evaluate whether the repair must endure full system pressures and temperatures before choosing a long‑term solution.
- Assess urgency
- Match conditions
- Plan replacement
Troubleshooting Leaks and Poor Seals in Solder‑Free Joints
Diagnose leaks in solder‑free copper joints by systematically isolating the fitting, pressurizing the line, and observing for moisture, drips, or hissing at the connection points.
If a leak appears, depressurize, disassemble, and inspect surfaces for debris, burrs, corrosion, or damaged O‑rings.
Clean mating surfaces, replace seals or compression rings showing wear, and reassemble with correct torque — avoid overtightening.
For push‑fit connections, make certain pipe is fully inserted to the stop and cut squarely; trim and reinsert if necessary.
After repair, perform a pressure test and monitor for delayed seepage; consider replacing incompatible materials causing galvanic corrosion.
Recommended Brands and Products for Solder‑Free Copper Work
For reliable solder‑free copper work, professionals generally favor a handful of proven product categories and brands: push‑fit fittings from SharkBite and John Guest for quick repairs and modifications, Viega ProPress and HoldRite press systems for high‑quality mechanical joints, and reliable compression fittings from Mueller or Nibco where thread‑oriented connections are required. These options balance ease, durability, and code acceptance. Selection depends on pressure rating, pipe size, and local codes.
Typical recommendations include:
- SharkBite push‑fit for repair and retrofit.
- Viega ProPress for permanent, press‑tool installations.
- Mueller compression for threaded or connector connections.
Conclusion
Like a gardener choosing tools for different soil, the DIY plumber selects push‑fit, compression, flare, crimp, or threaded fittings to make copper sing without fire. Clean cuts and burr‑free ends are seeds; the right method is the sun that nurtures potable water or heating roots. Temporary fixes are quick grafts; permanent joins are patient pruning. When leaks whisper, tighten, re‑seat, or replace—the garden prospers when care, fit, and proper tools align.