How Long Do CPVC Pipes Last? Lifespan & Maintenance Tips
Key Takeaway: CPVC pipes have a lifespan of 25 to 50 years in residential settings when installed correctly and maintained within specified limits.
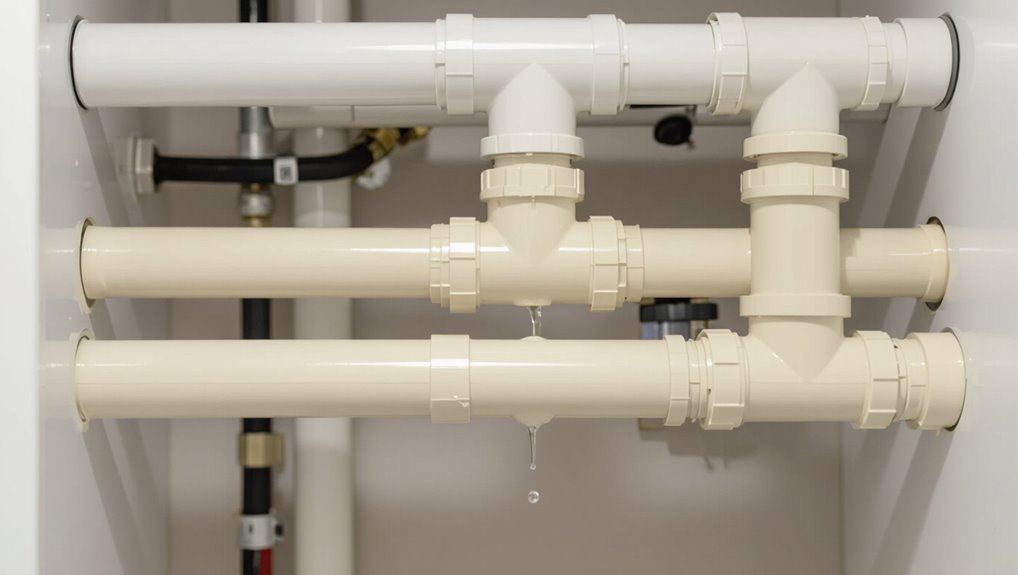
CPVC plumbing can last anywhere from 25 to 50 years, depending on installation quality and adherence to temperature, pressure, and chemical guidelines. However, factors such as poor solvent welding, high sustained temperatures, repeated pressure cycling, UV exposure, or contact with incompatible solvents can shorten this lifespan.
To maximize the longevity of CPVC pipes, conduct routine visual inspections, ensure proper support spacing, use correct joining techniques, and avoid harsh chemicals. In many cases, small localized repairs can restore functionality without the need for complete repiping. For more detailed instructions on inspection, maintenance, and repair decisions, additional guidance is available.
TL;DR: Typical CPVC Lifespan for Homes
Typically, CPVC piping in residential plumbing lasts between 25 and 50 years, depending on water chemistry, installation quality, and temperature exposure.
Homeowners generally expect decades of reliable service when lines are installed correctly and water conditions are neutral.
Routine visual inspections, attention to joint integrity, and avoiding excessive heat or chemical stress extend usable life. Failures often stem from improper solvent welding, mechanical damage, or prolonged exposure to high-temperature water beyond rated limits.
When aging signs appear—brittleness, discoloration, or leaks—targeted repairs or section replacements restore performance without wholesale system replacement in most cases.
How Lifespan Varies : Quick Overview
Lifespan of CPVC piping shifts with three key factors: installation quality, water temperature, and chemical exposure.
Poor joints or improper support accelerate wear and leaks, while higher water temperatures shorten material life.
Exposure to harsh chemicals or disinfectants can cause embrittlement or corrosion, further reducing service life.
Installation Quality Impact
When installed with correct joint preparation, proper solvent cementing, and adequate support spacing, CPVC systems can reach their expected service life; conversely, poor fusion, overtightened fittings, or insufficient hangers accelerate degradation and leaks. Installation quality dictates stress distribution, chemical resistance at joints, and susceptibility to mechanical damage. Skilled installers follow manufacturer procedures, maintain cleanliness, and use correct tools; errors shorten service life and increase maintenance. Inspection and pressure testing catch flaws early. The table below summarizes common defects, causes, consequences, and mitigation.
| Defect | Cause | Mitigation |
|---|---|---|
| Poor solvent weld | Inadequate cleaning | Recut and rejoin |
| Overtightened joint | Excess torque | Use torque specs |
| Unsupported span | Missing hangers | Add supports |
| Abrasion | Improper handling | Protect pipe |
| Misalignment | Poor fit-up | Realign and reassemble |
Water Temperature Effects
Beyond installation practices, operating conditions—especially water temperature—have a direct influence on CPVC pipe performance and aging. Elevated temperatures accelerate polymer chain mobility, reducing mechanical strength and increasing creep; sustained hot water near CPVC’s upper rating shortens expected service life.
Cycling between hot and cold can induce thermal stress, promoting microcrack initiation at fittings and joints. Conversely, moderate temperatures within recommended limits preserve stiffness and longevity.
Design margins, proper insulation, and avoiding continuous operation at maximum allowable temperatures mitigate accelerated degradation. Routine inspection for softening, distortion, or leaks helps detect heat-related deterioration before failure.
Chemical Exposure Risks
Exposure to chemicals markedly alters CPVC service life: aggressive solvents, strong acids or bases, and certain organic compounds can soften the polymer, swell joints, or embrittle fittings, accelerating cracks and leaks.
The degree of damage depends on concentration, exposure duration, temperature, and whether chemicals contact internal or external surfaces.
Routine system contamination, industrial discharges, or improper cleaning agents shorten expected lifespan.
Selection of CPVC formulations, protective barriers, and proper chemical compatibility checks mitigate risk.
Regular inspections detect early signs such as discoloration, warping, or stress fractures, enabling timely replacement or isolation to prevent failures.
- Identify common incompatible chemicals
- Monitor concentration and exposure time
- Use compatible cleaners and barriers
- Inspect for discoloration or warping
Temperature and CPVC: What Shortens Life
How does temperature influence the service life of CPVC piping? Elevated temperatures accelerate thermal aging, reducing tensile strength and increasing brittleness over time.
Repeated heating and cooling cycles cause thermal expansion and contraction, promoting microcracks and joint stress.
Continuous exposure above manufacturer-rated limits softens the polymer, leading to creep, deformation, and faster oxidative degradation.
Conversely, extreme cold makes CPVC less ductile and more susceptible to impact damage.
Temperature gradients along runs create differential stresses at fittings and junctions.
Properly rated temperature selection, insulation, and avoiding sustained overtemperature conditions extend CPVC longevity and maintain reliable performance.
How Pressure and Flow Damage CPVC Pipes
Thermal stresses interact with hydraulic forces to influence CPVC durability: internal pressure and flow dynamics impose mechanical loads that, over time, can initiate cracks, widen joints, and accelerate material fatigue.
Repeated pressure cycles cause microfractures; sudden pressure spikes (water hammer) produce shock loads that propagate flaws.
High sustained pressure increases creep, deforming wall geometry and thinning load-bearing sections.
Turbulent flow at fittings and bends raises local shear, eroding inner surfaces and promoting stress concentrations.
Proper pressure regulation, flow control, and system design reduce mechanical aging and extend service life by minimizing conditions that drive crack initiation and growth.
- Pressure cycling induces fatigue
- Water hammer causes shock damage
- Sustained overpressure promotes creep
- Turbulence concentrates wear and stress
Chemicals That Attack CPVC (What to Avoid)
Often, certain solvents and aggressive chemicals will attack CPVC, causing softening, crazing, or rapid degradation of the pipe material. Avoid concentrated ketones, esters, aromatic hydrocarbons, chlorinated solvents, and strong oxidizers; prolonged contact can compromise mechanical integrity and joint seals.
Alcohols and mild acids generally pose less risk but should be checked against manufacturer compatibility charts. Cleaning agents, adhesive residues, and industrial fumes may cause localized damage.
When chemical exposure is possible, select compatible piping or protective containment, make certain there is ventilation, and use chemical-resistant gaskets and coatings. Routine inspection for surface crazing, discoloration, or soft spots detects early chemical attack.
UV Exposure and Why CPVC Fails Outdoors
Sunlight frequently degrades CPVC when exposed outdoors because ultraviolet (UV) radiation breaks molecular bonds in the polymer, leading to surface embrittlement, discoloration, and loss of mechanical strength.
Over months to years, exposure causes microcracks, reduced impact resistance, and brittle failures under normal pressure.
Weathering accelerates where sunlight is direct and cumulative; temperature cycling exacerbates stress.
Protective measures extend service life but are separate topics.
- UV breaks polymer chains, weakening structure.
- Surface chalking signals advanced degradation.
- Brittleness increases leak and rupture risk.
- Outdoor lifespan is shorter without shielding; inspection is essential.
Installation Mistakes That Cause Early Failure
Improper installation is a common cause of premature CPVC failure, where errors such as inadequate solvent welding, over-tightened fittings, poor support spacing, and incorrect joint alignment introduce stress concentrators and weak bonds that shorten service life.
Additional common faults include using incompatible adhesives, failing to deburr or clean pipe ends, and applying excessive heat during installation.
Mechanical damage from tools, sharp bends without proper fittings, and neglecting thermal expansion allowances create cracking and joint separation.
Poorly chosen fasteners or clamps can cut into the pipe.
Correct technique, specified adhesives, appropriate supports, and adherence to manufacturer instructions prevent early deterioration and leaks.
Pipe Diameter, Wall Thickness and Durability
Pipe diameter directly affects flow rate and velocity, influencing wear and potential clogging in CPVC systems.
Wall thickness governs mechanical strength and resistance to cracking, with heavier schedules offering greater margin under stress.
Together these factors determine durability under operating pressure, so matching diameter and wall thickness to expected pressures is essential for long-term performance.
Diameter Impact On Flow
Diameter and wall thickness together determine hydraulic capacity and structural resilience: a larger internal diameter reduces frictional losses and increases flow rate for a given pressure, while thicker walls raise the pipe’s pressure rating and resistance to deformation or external damage.
The diameter primarily governs velocity, head loss, and pump sizing; undersized pipes increase wear, noise, and energy use. Designers balance diameter with routing constraints and fixture demand to optimize system longevity. Proper sizing minimizes stagnation and excess pressure. Consider velocity targets and future demand when selecting diameters to preserve CPVC performance without unnecessary material or installation costs.
- Larger diameter lowers frictional head loss
- Higher velocity promotes erosion and noise
- Correct sizing reduces stagnation risk
- Oversizing increases cost and space requirements
Wall Thickness And Strength
While diameter governs flow behavior, wall thickness defines the structural capacity that allows CPVC to withstand internal pressure, mechanical loads, and environmental stresses. Thicker walls increase burst resistance, reduce deflection, and prolong service life when combined with proper support and installation. Manufacturers specify nominal wall thickness for pressure classes; selection should match intended application and temperature conditions. Installation practices—joining, clamping, and avoiding excessive bending—preserve designed strength. Corrosion is not a factor, but mechanical damage and UV exposure can degrade performance. Regular inspection for scoring or crushing helps maintain longevity and safety.
| Attribute | Effect |
|---|---|
| Wall thickness | Strength |
| Diameter | Flow |
| Temperature | Material softening |
| Mechanical damage | Weak points |
| Support spacing | Deflection control |
Durability Versus Pressure
Balancing internal pressure demands against material dimensions determines CPVC system durability: larger diameters increase hoop stress for a given pressure, while greater wall thickness reduces stress and raises burst capacity.
The interaction of diameter, wall thickness and pressure rating governs service life; engineers select schedules to match operating conditions and safety margins. Temperature and chemical environment alter allowable stress, so conservative sizing extends longevity. Proper installation avoids stress concentrators that shorten life. Inspection and replacement schedules consider calculated working stress and observed degradation.
- Match pipe schedule to maximum expected pressure and temperature
- Prefer thicker walls where pressure fluctuations occur
- Monitor joints and fittings for leaks or cracks
- Reassess sizing after system modifications
Hard Water, Minerals and Corrosion on CPVC
Exposed to hard water, CPVC systems accumulate mineral deposits that restrict flow and alter heat transfer characteristics. Scale buildup narrows passages, increasing pressure drop and reducing delivery efficiency. Calcium and magnesium precipitates bond to inner walls, promoting uneven heating and localized stress.
Though CPVC resists electrochemical corrosion, fittings and metal interfaces may corrode, introducing particulates that accelerate abrasion and clogging. Routine water softening, periodic flushing, and targeted descaling mitigate deposit formation. Inspection of joints and metallic components helps detect early degradation. Proper maintenance preserves hydraulic performance and thermal behavior, extending functional service life without compromising CPVC’s inherent chemical stability.
How Manufacturers Test and Rate CPVC Life
Understanding how manufacturers assess CPVC longevity begins with controlled laboratory protocols that simulate years of field service. Testing measures hydrostatic pressure resistance, thermal aging, chemical exposure, and joint durability under accelerated conditions. Results inform published life ratings and safety factors used in standards and warranties. Independent labs replicate installation variables to validate manufacturer claims.
- Hydrostatic stress tests predict long-term creep rupture behavior.
- Elevated-temperature aging accelerates polymer degradation mechanisms.
- Chemical immersion evaluates resistance to common water contaminants.
- Mechanical joint cycling assesses fusion and solvent-weld integrity over repeated loads.
These methods yield conservative lifespan estimates for design and regulation.
Early Signs Your CPVC Pipes Are Aging
Discoloration or staining of CPVC surfaces often signals chemical breakdown or prolonged exposure to heat.
Falling water pressure or reduced flow can indicate internal scaling, partial blockages, or microcracking.
Visible cracks or a brittle feel to the pipe material are clear signs that the system is nearing the end of its useful life.
Visible Discoloration Or Staining
How can subtle shifts in color signal more than cosmetic wear? Visible discoloration or staining on CPVC often indicates surface oxidation, UV exposure, chemical contact, or mineral deposits. Observers should treat color changes as diagnostic clues rather than mere blemishes. Early recognition helps prioritize inspection and remediation before structural compromise.
- Pale yellowing along joints may indicate prolonged heat or chemical stress.
- Brown or rust-like streaks often point to corrosive fittings or external metal contact.
- Chalky white residue suggests mineral buildup from hard water.
- Irregular blotches can reveal uneven aging or localized chemical exposure.
Reduced Water Flow
Diminished flow through CPVC pipes often signals internal narrowing from scale, sediment, or internal degradation rather than a simple pressure fluctuation. Reduced water flow appears gradually; routine checks reveal slower fixture output, irregular spray patterns, or longer fill times. Intervention priorities focus on diagnosis, cleaning, and selective replacement to restore capacity and prevent stress on fittings.
| Sign | Likely cause | Action |
|---|---|---|
| Slow faucet | Scale buildup | Descale or flush |
| Weak shower | Sediment | Clean aerators |
| Intermittent surge | Partial blockage | Inspect lines |
| Lower pressure | Internal narrowing | Evaluate for replacement |
Cracks Or Brittleness
Cracks or a brittle feel in CPVC pipes signal material fatigue and the onset of failure. Inspection should focus on hairline fractures, surface crazing, and areas near joints and supports. Environmental stressors and aging reduce flexibility, increasing leak risk and sudden rupture. Prompt action prevents water damage and costly replacements.
- Hairline fractures often appear near fittings or bends, indicating stress concentration.
- Surface chalking or flaking suggests UV or chemical degradation weakening the polymer.
- Brittle sections crack under minor impact or thermal cycling, revealing embrittlement.
- Immediate replacement of affected runs is recommended to restore system integrity.
Inspecting CPVC Joints and Fittings (What to Look For)
When inspecting CPVC joints and fittings, attention should focus on bond integrity, alignment, and signs of stress or chemical attack; these elements determine whether a joint will hold under pressure and temperature cycles.
The inspector looks for complete, even solvent cement fillets without gaps or unmixed residue.
Misaligned pipes, angled fittings, or sprung slip joints indicate poor installation and concentrated stress.
Surface crazing, discoloration, softening, or residue patterns near joints suggest chemical exposure or heat degradation.
Metal-to-plastic contact points require examination for corrosion transfer.
Threads should seat fully with appropriate tape or sealant, and strain on nearby tubing must be absent.
Three Quick Home Tests to Check CPVC Health
Homeowners can perform three simple, low-risk checks to assess CPVC plumbing: a visual joint inspection for solvent-cement fillets and discoloration, a pressure test by running multiple fixtures simultaneously while observing for leaks or seepage, and a heat-susceptibility check using warm water and touch to detect softening or surface tackiness that indicate thermal degradation.
Each check is noninvasive and informs whether professional evaluation is warranted.
Record findings, locations, and any progressive changes. If any test reveals persistent leakage, brittle cracking, or tactile softening, replacement or certified inspection should follow rather than further homeowner troubleshooting.
- Document results with date and photos
- Note odor or chemical residue
- Compare cold vs warm response
- Prioritize visible cracks
Routine Maintenance to Extend CPVC Life
After performing the three quick home checks and recording any findings, routine maintenance helps preserve CPVC integrity and delay costly replacements.
Regular visual inspections identify discoloration, deformation, or joint stress; documenting changes supports trend detection.
Maintain appropriate water pressure and temperature limits to reduce mechanical and thermal strain.
Protect exposed runs from UV light and physical impact using insulation or coverings.
Replace worn fittings and deteriorated seals promptly to prevent localized failures.
Keep surrounding drains and gutters clear to avoid water pooling near buried or exterior piping.
Schedule periodic professional evaluations to confirm system health and catch hidden issues early.
Safe Descaling and Cleaning Methods for CPVC
The section outlines safe descaling and cleaning methods for CPVC, emphasizing selected gentle chemical cleaners that will remove deposits without damaging the polymer.
It also compares appropriate mechanical descaling tools and techniques that minimize abrasion and stress on pipe walls.
Finally, it recommends preventive maintenance steps to reduce scale buildup and limit the need for aggressive cleaning.
Gentle Chemical Cleaners
Frequently, mild chemical cleaners provide an effective, low-risk option for descaling and removing deposits from CPVC without compromising pipe integrity.
The text describes appropriate cleaners (pH-neutral or slightly acidic), recommended dilution, contact time, and thorough rinsing.
It advises testing on a small section, avoiding aggressive acids or solvents, and wearing basic PPE.
Regular, gentle treatments reduce buildup and prolong service life without stressing joints or solvent-welded connections.
Professionals prefer certified products and follow manufacturer guidance to maintain warranty and safety.
- Use pH-neutral or citric-based cleaners
- Dilute per label instructions
- Rinse completely after treatment
- Test in an inconspicuous area first
Mechanical Descaling Tools
Mechanical descaling tools provide a physical method to remove scale, mineral deposits, and biofilm from CPVC pipes when chemical cleaners are insufficient or contraindicated.
Operators typically use soft-bristled brushes, nylon scrapers, and flexible cable brushes sized to pipe diameter to avoid scratching or gouging surfaces.
Rotary brushes on low-torque drills can dislodge buildup but require careful speed control and nonmetallic components.
Hydrojetting at low pressure is effective for interior debris if pressure limits for CPVC are observed.
Inspection with borescopes guides tool selection and verifies cleanliness.
Proper cleaning minimizes abrasion, preserves pipe integrity, and prepares surfaces for any subsequent treatments.
Preventive Maintenance Steps
Regularly scheduled inspections and gentle cleaning preserve CPVC performance and extend service life by preventing scale, biofilm, and chemical buildup before they compromise flow or joint integrity.
Routine maintenance emphasizes nonabrasive methods, compatible cleaners, and controlled chemical exposure. Technicians verify system pressure, temperature, and material compatibility prior to any treatment. Mechanical scraping is avoided on internal surfaces; soft brushes and low-pressure flushing remove loose deposits.
Flush protocols remove residual cleaning agents and prevent concentration hotspots. Documentation of findings and actions supports trending and timely interventions, reducing emergency repairs and extending expected lifespan.
- Use pH-neutral, CPVC-safe cleaners
- Employ soft brushes or sponge tools
- Flush thoroughly with potable water
- Record inspections and treatments
When to Repair a CPVC Leak vs. Replace a Section
When evaluating a CPVC leak, determine whether a targeted repair or section replacement best restores system integrity by evaluating leak size, pipe condition, accessibility, and water damage risk.
Small pinhole leaks, localized cracks near joints, or failures in accessible fittings often warrant targeted repairs if surrounding pipe shows no degradation.
Extensive cracking, multiple leaks, brittle or discolored pipe, chemical exposure, or recurring failures indicate replacement of the affected section.
Consider long-term reliability, cost of repeated repairs, and potential water damage during decision-making.
When in doubt, prioritize replacement to prevent future failures and maintain system longevity.
Safe DIY Repair Techniques for CPVC Leaks
Before any repair begins, the homeowner must shut off the water and drain the line to prevent pressure and residual flow.
The damaged section should be cut out cleanly and removed, with pipe ends wiped and sanded before applying primer.
Cement is then applied to primed surfaces and joints are joined and held until set to complete a secure repair.
Shut Off Water
Shut off the water supply immediately upon detecting a CPVC leak to limit damage and create a safe workspace.
The person assesses whether the leak is at a fixture, valve, or accessible pipe and locates the nearest shutoff (fixture, branch, or main).
They close valves slowly to prevent pressure surge and open a downstream faucet to drain residual water.
If a valve is stuck, caution and professional help are recommended.
- Identify and label shutoff locations for future access
- Turn valves clockwise until fully closed
- Relieve pressure by opening nearby taps
- Call a professional if valves fail or leak persists
Cut And Remove
After the water supply is secured and pressure relieved, the next step is to cut away the damaged CPVC section to prepare for repair.
A clean, straight cut guarantees proper fit; use a fine-toothed hacksaw, tubing cutter, or PVC pipe cutter sized for CPVC.
Mark cut lines at least 1 inch from visible damage or fittings, maintaining enough spare pipe for coupling or replacement.
Support adjacent piping to prevent stress during removal.
Remove burrs and rough edges with a file or deburring tool, avoiding excessive heat.
Collect and dispose of removed fragments safely.
Inspect ends for cracks before proceeding to the next phase.
Clean, Prime, Cement
Prepare the pipe ends and fittings by thoroughly cleaning, priming, and applying CPVC solvent cement in steady, even strokes to guarantee a reliable bond.
A clean surface and correct primer soften the material for fusion; solvent cement then creates a fused joint as it cures.
Fit parts quickly, maintaining alignment until set.
Wipe excess cement, follow manufacturer cure times, and pressure-test before restoring service.
Proper ventilation and gloves protect the repairer.
Disposal of used rags prevents fire risk.
Observe local codes; consult a professional for complex or high-pressure systems.
- Confirm true, square cuts
- Use recommended CPVC primer
- Apply cement liberally but neatly
- Respect cure and test times
Planning a Full House CPVC Repipe: Step-by-Step
Begin by conducting a thorough assessment of the existing plumbing system to document pipe layout, fixture locations, material changes, and areas of damage or code noncompliance.
Next, create a detailed plan: draw new pipe routes, select CPVC sizes and fittings, and identify shutoff and access points.
Obtain permits and schedule inspections.
Prepare materials, tools, and protective measures for occupants.
Isolate water, demolish affected sections, and remove old piping systematically.
Install new CPVC following manufacturer and code practices: supports, slope, joints, and insulation.
Pressure test, inspect, restore finishes, and document work and warranty information for future reference.
Cost Comparison: Repair, Partial Repipe, Full Replacement
How much should a homeowner expect to spend when weighing a localized repair against a partial or full CPVC repipe? Costs vary by extent, labor rates, accessibility, and materials. Localized repairs often cost least—repair clamps or short section replacements.
Partial repipes replace plumbing in affected zones and balance cost and disruption.
Full replacements maximize longevity and eliminate recurring leaks but carry highest upfront expense.
Decisions hinge on age of system, frequency of failures, and resale considerations.
- Local repair: low cost, quick fix, limited lifespan
- Partial repipe: moderate cost, targeted longevity
- Full replacement: high cost, all-encompassing solution
- Hidden factors: access, permits, fixture updates
CPVC vs. PEX vs. Copper: Real-World Lifespan Comparison
After weighing repair versus repipe costs, homeowners often compare pipe materials by expected service life to justify the expense: CPVC, PEX, and copper each offer different real-world longevity influenced by installation quality, water chemistry, and temperature exposure.
CPVC typically lasts 25–50 years when properly installed and protected from UV and extreme heat. PEX often reaches 40–60 years in residential systems due to flexibility and freeze resistance but can be affected by oxidants and UV. Copper can exceed 50 years, sometimes 70+, though acidic or aggressive water and poor fittings reduce life. Routine inspection and correct installation extend all three.
Warranties for CPVC: What They Usually Cover
Manufacturers typically outline basic warranty coverage for CPVC, including defects in material and workmanship and expected service life.
These warranties also specify limitations and exclusions—such as damage from improper installation, chemical exposure, or freeze-related failures—that can void claims.
The claim process usually requires documentation of purchase, installation details, and evidence of the failure to initiate service or replacement.
Warranty Coverage Basics
Most CPVC piping products include some form of warranty that typically covers defects in material and workmanship for a specified period, with terms varying by manufacturer and application.
Coverage often specifies eligible components, required installation standards, and claim procedures.
Proof of purchase and compliance with recommended use are commonly required.
Transferability and prorated versus full replacement options differ, and some warranties tie coverage length to planned application (e.g., potable water versus industrial).
Registering the product can simplify claims.
Consumers should document installation and maintenance to support any future warranty requests.
- Coverage scope: materials, joints, fittings
- Claim process: documentation, timeframe
- Remedies: repair, replacement, prorated
- Registration and proof of purchase
Limitations And Exclusions
In warranty documents, limitations and exclusions define specific situations and conditions under which CPVC coverage does not apply, so owners can understand the boundaries of protection.
Typical exclusions include damage from improper installation, chemical exposure, freezing, physical impact, and misuse beyond intended pressure or temperature ratings.
Warranties often void when non-approved adhesives, fittings, or joining methods are used, or when modifications occur without manufacturer approval.
Routine wear, cosmetic defects, and consequential damages such as water loss or property damage are commonly excluded.
Understanding these clauses helps owners assess residual risks and when supplemental insurance or extended coverage may be advisable.
Claim Process Steps
After outlining exclusions that can void coverage, the claim process clarifies how an owner must proceed when a covered failure occurs. The owner should document damage promptly, retain original purchase and installation records, and notify the manufacturer per specified timelines. Inspections by an authorized representative may be required before repairs. Approved remedies typically include repair, replacement, or prorated credit. Timely, accurate compliance with claim procedures preserves warranty rights and speeds resolution.
- Photograph damage and preserve affected components
- Compile receipts, serial numbers, and installer details
- Submit formal notice within the warranty window
- Cooperate with inspections and provide requested samples
Practical Checklist to Maximize CPVC Longevity
Regularly inspecting CPVC installations and following a concise maintenance checklist helps guarantee decades of reliable service.
The checklist includes monthly visual checks for discoloration, cracks, or joint stress; verify clamps, supports, and hangers are secure and at correct spacing; confirm exposed pipes are shielded from UV and excessive heat; test system pressure quarterly and note any drops; flush lines annually to remove sediment and check valves and faucets for corrosion or leaks; replace worn seals, gaskets, or adhesives promptly; document inspections and repairs; make certain water temperature stays within recommended limits; and consult manufacturers for approved chemicals and repair parts.
Conclusion
CPVC often serves reliably for decades, yet its future can hinge on hidden factors: fluctuating temperatures, pressure spikes, incompatible chemicals, or aging joints. Homeowners think replacement is distant—until a slow leak reveals brittle strands or discolored fittings suggest chemical attack. With sensible maintenance and timely repairs, disaster can be postponed; without them, failure may come suddenly. The question remains: will vigilance hold, or will unseen wear force costly action sooner than expected?