How High Should a Washer Drain Pipe Be? Quick Guide & Tips
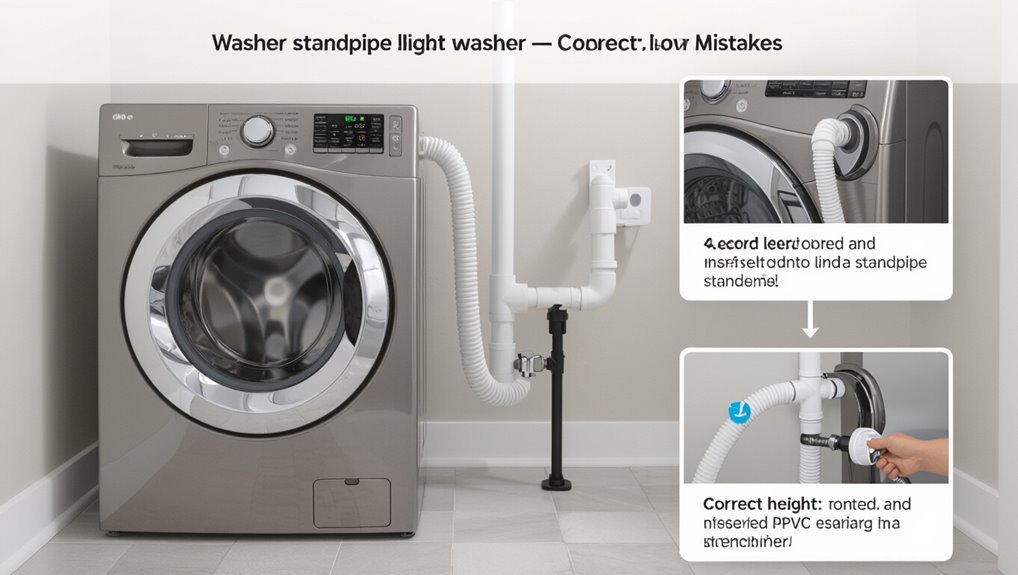
For optimal performance, most residential washer standpipes should be installed at a height of 36 inches above the finished floor. This height helps prevent siphoning and splashing while adhering to common appliance requirements.
Key Takeaways:
- Standard Height: 36 inches for top-load washers; 18–30 inches may be acceptable for front-load machines if the pump capacity allows.
- Diameter: The standpipe should be 2 inches in diameter.
- Installation: Ensure the pipe is properly trapped and vented, and secure the hose to prevent kinks.
Following these guidelines will ensure effective drainage for your washing machine.
Who This Guide Is For
Designed for homeowners, DIYers, and property managers dealing with laundry plumbing, this guide addresses the practical questions and code considerations that determine correct washer drain pipe height.
It targets readers needing straightforward guidance to evaluate existing installations, plan replacements, or verify compliance before inspection.
Content suits those with basic tool skills and willingness to consult local codes; it also helps maintenance staff and landlords prioritizing safe, reliable hookups across units.
The tone is technical but accessible, avoiding contractor-only jargon. It does not replace professional diagnosis for atypical systems, complex remodels, or multifamily plumbing requiring licensed oversight.
The Short Answer: Ideal Washer Drain Pipe Height
The ideal washer drain pipe height balances proper drain height with plumbing code and washer requirements to guarantee reliable drainage.
Typically this means a standpipe minimum height that prevents siphoning and overflow while matching the washer’s discharge hose length.
The standpipe must also connect correctly to the waste system to provide proper venting and trap protection.
Proper Drain Height
For most residential top‑loading and front‑loading washers, the ideal drain pipe height is between 36 and 42 inches above the floor; this range prevents siphoning, guarantees proper pump function, and accommodates common hose lengths without stress or kinking.
Proper drain height balances manufacturer recommendations, appliance pump capacity, and local plumbing practice.
Placement should allow a smooth hose curve and secure connection while keeping the hose clear of standing water.
Installers verify clearance behind the washer and confirm hose reach.
Consider future replacement models and service access when finalizing height to avoid rework.
- Verify hose reach
- Assure secure connection
- Maintain service access
Standpipe Minimum Height
In most residential installations, a standpipe should rise at least 36 inches above the finished floor—commonly accepted as the minimum to prevent backflow and siphoning while matching typical washer hose lengths.
Building codes often prescribe a 36–42 inch range; local variations may require specific measurements. The standpipe diameter should accommodate discharge volume and a trap must be installed at the correct depth to maintain the water seal.
Height should also consider appliance gravity feed and user access for inspection. Proper elevation minimizes overflow risk during pump cycles and guarantees the washer’s internal drain mechanisms function without undue stress or leakage.
Connection To Waste
Moving from standpipe height considerations to the actual connection to waste, installers should place the washer drain outlet so the standpipe discharges into a properly trapped and vented waste line at a height that matches the appliance manufacturer’s recommendation—typically 36–42 inches above the finished floor—while assuring the outlet aligns with the building’s waste piping to avoid sags or sharp bends.
Proper alignment prevents backflow and reduces stress on fittings.
Connections must comply with codes and use appropriate materials.
Regular inspection of joints and traps ensures longevity.
Consideration of future access simplifies maintenance.
- Match manufacturer height and local code
- Maintain straight, short runs
- Use correct traps and vents
Quick Pass/Fail: Is Your Drain Height Acceptable?
A simple check compares the washer’s standpipe to the required drain height specified by the manufacturer.
If the standpipe falls within that range, it passes the quick test; if it’s too low or too high, it fails and needs adjustment.
This pass/fail approach gives an immediate indication of whether further plumbing work is necessary.
Required Drain Height
One clear way to tell if a washer drain height is acceptable is to compare the standpipe top to the appliance manufacturer’s specified range; most residential washers require the standpipe to be between 36 and 96 inches above the finished floor, with the trap located within that span.
Required drain height guarantees proper siphon prevention and efficient gravity flow. Installers should follow local plumbing codes and manufacturer instructions.
Key considerations include:
- Exact manufacturer range for that washer model.
- Trap placement and slope to maintain water seal and avoid backflow.
- Compliance with local code clearances and access for servicing.
Quick Pass/Fail Test
Use a simple measurement and observation to determine quickly whether a washer drain height will pass: check that the standpipe top falls within the washer manufacturer’s specified range (commonly 36–96 inches), verify the trap sits inside that span, and confirm the hose can reach without kinking.
Next, run a short drain cycle and watch for overflow, gurgling, or slow draining.
If water drains smoothly and the hose remains secure, the height is acceptable. If water backs up, sounds suggest siphoning, or the hose strains, adjust the standpipe or reposition the trap until measurements and a live test show normal operation.
How to Measure Your Standpipe (Step‑by‑Step)
Before taking measurements, make sure the washer is disconnected and the area around the standpipe is clear so access is safe and unobstructed.
The inspector measures from the finished floor to the top of the standpipe opening, noting any caps or elbows that affect effective height.
A tape measure held vertically gives the primary reading; record to the nearest inch.
- Measure floor to standpipe top, keep tape straight.
- Note fittings, add or subtract their height if they change the outlet level.
- Verify measurement against appliance specifications and local code requirements before finalizing.
Front‑Load vs Top‑Load: Drain Height Differences
How do front‑load and top‑load washers alter the ideal standpipe height? Front‑load machines typically use lower drain pumps and require a standpipe height that accommodates their pump outlet and prevents siphoning; installers often position the standpipe to match the manufacturer’s pump discharge elevation.
Top‑load machines, especially high‑efficiency models with taller internal traps or gravity‑fed drains, may need a higher connection to avoid overflow and backflow during rapid drain cycles.
Differences also stem from hose length, pump strength and internal trap design. Always consult the washer’s installation instructions rather than relying on assumptions about washer style alone.
Standard Standpipe Height Ranges by Washer Type
Typical standpipe height recommendations vary by washer design, so installers should note the specific range for each type.
Top‑load machines generally require a higher standpipe to prevent siphoning and splashing, while front‑load models often use a lower range tied to their pump outlet.
Stackable units combine front‑load pump heights with clearance needs for stacked placement, which can restrict available standpipe height.
Top-Load Washer Height
For top-load washers, standpipe height is determined by the washer’s fill and drain requirements plus local plumbing code, with most models requiring a standpipe between 36 and 42 inches above the finished floor.
Installers measure appliance specifications and account for hose tail length, trap location, and potential siphoning.
Typical guidance balances overflow protection with ergonomic access. Local codes or manufacturer instructions take precedence; deviations may cause slow drains or venting issues.
When uncertainty exists, consult the washer manual or a licensed plumber to confirm required elevation and trap design before installation.
- Follow manufacturer height range.
- Verify trap and vent placement.
- Consult local code or plumber.
Front-Load Washer Height
Front-load washers generally require a standpipe height that balances efficient drainage with manufacturer specifications and local code, commonly ranging between 18 and 30 inches above the finished floor for many residential models. Guidance varies by model: taller standpipes reduce splashback and prevent siphoning, while too-high outlets can stress hoses. Installers should consult the washer manual and local plumbing code; typical recommendations account for pump capacity, trap location, and hose length. Below is a quick reference.
| Washer Type | Typical Height | Notes |
|---|---|---|
| Compact front-load | 18–22 in | Smaller pumps |
| Standard front-load | 20–30 in | Most common |
| High-efficiency | 18–28 in | Check manual |
| Commercial front-load | 24–30 in | Higher capacity |
Stackable Washer Height
Stackable washers generally require a standpipe height that accommodates both the washer’s pump capacity and the stacked configuration’s hose routing, with common residential ranges falling between 24 and 30 inches above the finished floor.
The stacked arrangement concentrates discharge and necessitates clearances to prevent kinks, allow trap placement, and meet local codes; higher standpipes (up to 36 inches) may be specified for certain high-efficiency models or to avoid backflow.
Installers should consult manufacturer instructions and local plumbing codes to reconcile pump head, hose length, and trap arm distance for reliable drainage.
- 24–30 inches: typical residential recommendation
- 30–36 inches: for some HE or stacked models
- Follow manufacturer and local code requirements
Recommended Standpipe Diameter and Why It Matters
A common recommendation is a 2-inch standpipe for residential washing machines because that diameter balances flow capacity and clog resistance: it accommodates the high discharge rate during pump cycles while reducing risk of siphoning or backups that can occur in narrower pipes. Proper diameter supports rapid removal of large water volumes and lint, minimizes overflow risk, and aligns with most local codes. Selection considers machine output, trap size, and ease of maintenance. Visualizing size and function:
| Pipe Diameter | Flow Capacity | Maintenance |
|---|---|---|
| 1.5″ | Lower | Frequent |
| 2″ | Standard | Moderate |
Minimum Trap Arm and Standpipe Requirements
In most plumbing codes, the minimum trap arm and standpipe requirements for washing machine installations specify both length and slope to prevent siphoning and guarantee proper drainage. The trap arm must be long enough to create a stable water seal but short enough to avoid excessive horizontal run; slope is typically 1/4 inch per foot.
Standpipe height guarantees the trap remains below the inlet and prevents backflow during discharge. Materials, fittings, and trap weir elevations influence performance; installers must follow manufacturer guidance and general plumbing practice to maintain trap seal integrity and reliable draining.
- Minimum trap arm length and slope
- Standpipe height relative to trap
- Proper fittings and installation techniques
Local Plumbing Codes That Affect Drain Height
When considering drain height, local plumbing codes play a decisive role by setting minimum and maximum standpipe dimensions, required trap configuration, and acceptable connection points to sewer or waste lines. Code variations determine standpipe height ranges, trap seal depth, ventilation needs, and whether air gaps or indirect connections are mandatory. Inspectors enforce clearances from floors and appliances and may require specific fittings or clamps. Installers must consult municipal codes or adopted editions of the IPC/UPC to guarantee compliance. Example checklist:
| Item | Typical Range | Note |
|---|---|---|
| Standpipe height | 30–96 in | Varies by code |
| Trap seal | 2–4 in | Minimum depth |
| Venting | Required | Per local rules |
How Washer Pump Strength Affects Allowable Height (Examples)
Washer pump strength determines the maximum vertical distance (pump head) the unit can lift discharge water, and exceeding that limit reduces or stops flow.
Higher pump head ratings often mean lower flow rates at peak height, so tradeoffs between lift and volume must be considered.
Concrete examples—such as a pump that provides 1.5 meters of head at 12 L/min versus one that reaches 2.5 meters at 6 L/min—clarify practical allowable heights for different machines.
Pump Head Limits
Exerting a finite vertical push, the washer’s pump determines how high discharged water can be lifted before flow stalls or becomes intermittent. Pump head is specified in meters or feet; manufacturers list maximum lift under ideal conditions.
Real installations reduce that figure through fittings, vertical pipe length, and occasional partial blockages. Practically, installers compare pump head to required discharge height plus allowance for losses. Shorter, straighter runs preserve head; taller or convoluted routes demand stronger pumps or repositioning.
- Match pump head rating to vertical discharge plus losses.
- Account for elbows, valves, and partial obstructions.
- Verify manufacturer specifications for real-world margins.
Flow Rate Tradeoffs
Having matched pump head to the required vertical rise and accounted for fittings and losses, attention turns to how available head interacts with flow rate: as lift increases, a pump’s output falls, so the practical discharge height depends on acceptable flow rather than on peak lift.
Pump curves show decreasing flow with rising head; selecting a pump requires choosing a point on that curve where the washer’s expected drainage rate remains sufficient to prevent backups or excessive cycle time. Conservative design uses a margin below stall head. Designers balance higher discharge height against longer drain times, avoiding reliance on maximum-rated lift.
Real-World Examples
In practical settings, pump strength limits translate directly into maximum practical discharge heights: a typical mid-range residential washer pump rated for 20–25 feet of static lift will deliver progressively lower flow as that lift is approached, meaning installers commonly cap vertical discharge at about 10–12 feet to preserve acceptable drain times.
Examples demonstrate outcomes for common scenarios: a short 4–6 ft standpipe yields near-rated flow; a 10–12 ft install shows modestly reduced flow and longer cycle drains; extending beyond 15 ft risks slow or incomplete drainage, prompting booster pumps or rerouting.
Practical tradeoffs guide installer decisions.
- Short (4–6 ft): near-rated flow
- Mid (10–12 ft): reduced flow
- High (>15 ft): poor drainage
Where to Place the Standpipe Relative to the Washer
Near the washer, the standpipe should be positioned so the outlet falls within the machine’s drain hose reach while maintaining the required height above the trap (typically 18–30 inches). The standpipe should sit close enough to avoid kinks or stretched hoses, yet allow access for servicing. Clearance from walls and adjacent fixtures prevents abrasion and facilitates inspection. Alignment with the washer drain box simplifies connections. Local codes and manufacturer recommendations determine exact placement; adherence avoids backups and overflow. Consider hose length, appliance footprint, and future replacement when locating the standpipe.
| Factor | Recommendation |
|---|---|
| Distance | Within hose reach |
| Height | 18–30 in |
| Clearance | Allow service access |
| Alignment | Match drain box |
| Code | Follow local rules |
Installing a Standpipe: Step‑by‑Step Height Check
The installer first measures the standpipe to confirm it meets required minimum and maximum heights for the washer model and local code.
Next, the trap arm length is checked to guarantee proper slope and that it falls within allowable distance to the trap weir.
Finally, the venting connection is secured and verified to prevent siphoning and meet ventilation requirements.
Measure Standpipe Height
Before drilling or gluing any fittings, confirm the standpipe height against local plumbing codes and the washer manufacturer’s recommendations, ensuring the top of the standpipe sits at the correct elevation to prevent siphoning or overflow.
The installer measures from the finished floor to the standpipe top, allowing for trap placement and any wall offset.
Verify clearances for hoses and access panels, and note that typical residential heights often fall within the manufacturer’s specified range.
Record measurements before cutting pipes.
Then perform a dry fit to confirm vertical alignment and that the standpipe will accept the washer drain hose without strain.
- Measure finished floor to top
- Verify clearances
- Dry-fit alignment
Check Trap Arm Length
When evaluating trap arm length for a standpipe, installers measure from the trap outlet to the vent connection to make certain the run falls within code limits and maintains proper slope; an overly long trap arm can cause siphoning or slow drainage while one too short may prevent adequate venting.
The technician confirms permissible distance per local code, checks that the pipe maintains a 1/4 inch per foot slope, and avoids excessive fittings that reduce effective length.
Adjustments include relocating the trap, shortening the arm, or rerouting to meet maximum developed length.
Final verification uses a level and tape measure before securing the assembly.
Secure Venting Connection
A secure-venting connection guarantees the standpipe height and vent tie-in create a continuous, unobstructed air pathway to prevent siphonage and backflow.
The installer verifies vent size matches code, aligns the vent collar at proper elevation, and seals joints to maintain pressure balance.
Airflow checks follow trap sealing and height confirmation.
If resistance appears, recheck fittings and clear obstructions before finalizing.
- Confirm vent diameter and distance to standpipe per local code.
- Verify a smooth, pitched connection with no low spots or sags.
- Pressure-test or water-test the assembly to verify unobstructed venting.
Using a Laundry Sink or Floor Drain Instead of a Standpipe
In homes where a dedicated standpipe isn’t installed, using a laundry sink or an existing floor drain can provide an acceptable alternative for washer discharge if local code and plumbing conditions permit.
The drain hose should reach the sink or floor drain without kinking and be positioned to prevent backflow; a high loop may be useful where codes require it.
The sink trap and drain must handle peak washer flow and be vented properly to avoid siphonage or slow drainage.
Inspect connections for leaks, verify the sink drain size is adequate, and consult local regulations or a plumber when in doubt.
How to Secure a Drain Hose to Prevent Siphoning
To prevent siphoning, the drain hose should be routed to the correct height above the trap and secured so it cannot slip downward. A firm hanger or clamp at the recommended position keeps the hose stable during drain cycles.
Additionally, ensuring a visible air gap at the hose inlet prevents backflow and confirms proper installation.
Proper Hose Height
Without proper elevation, a washer’s drain hose can be vulnerable to backflow and siphoning, so installers should secure the hose at the recommended height and anchor it to the standpipe or countertop to maintain an air gap.
Proper hose height prevents wastewater reversal and guarantees reliable gravity drainage.
The hose should rise smoothly without kinks, remain above the washer’s specified minimum (typically 30–39 inches), and terminate inside the standpipe without sealing it.
Fastening methods must avoid crushing the hose or creating permanent bends.
Periodic inspection confirms the hose remains at the correct height and free of obstruction.
- Maintain 30–39 inches
- Avoid kinks
- Inspect regularly
Secure Hanger Attachment
Secure the drain hose to a sturdy hanger or bracket so it remains fixed at the recommended height and cannot slip or kink during operation.
The hanger should be mounted to a solid structural surface, not drywall alone, and positioned where the hose curves gently without sharp bends.
Use high-quality clamps or zip ties anchored to the bracket; avoid compressing the hose.
Confirm the connection resists movement from vibration and load changes during spin cycles.
Periodically inspect for wear, corrosion, or loosening and tighten or replace fasteners as needed.
Proper attachment minimizes siphoning risk and prolongs hose life.
Check For Air Gap
Following proper hanger attachment, the next step is to verify the drain hose has an adequate air gap to prevent siphoning.
An air gap separates the washer drain outlet from the household sewer connection so waste cannot be drawn back into the machine.
Inspect the hose routing, confirm the high loop or standpipe height meets local codes, and make certain a firm connection without kinks.
If a standpipe is used, verify its top exceeds the washer’s water level.
Periodic checks prevent backflow, clogs, and odors, maintaining appliance performance and protecting potable lines from contamination.
- Measure height and clearance.
- Inspect connections.
- Test for leaks.
Common Mistakes That Cause Washer Drainage Failure
Improper installation and routine oversights are often the root causes of washer drainage failure; common mistakes include setting the standpipe too low or too high, using incorrect hose types, kinking or crushing the drain hose, and neglecting to secure the hose properly at the trap. Additional errors involve poorly sized or clogged standpipes, flimsy connections that allow siphoning, and routing hoses through tight bends or behind appliances where damage occurs.
Using nonstandard fittings, omitting venting or air gaps, and failing to replace aged hoses also increase risk. Regular inspection, correct components, and secure routing reduce failures and prolong drain reliability.
How to Test Drainage After Setting the Height
After the drain height is set, a fill cycle should be run to confirm water flows into the drum and begins the expected drain sequence.
The system should be inspected for leaks at hose connections and the standpipe while water is being expelled.
The pump’s operation — noise, speed of draining, and complete water removal — should be observed to verify proper function.
Run A Fill Cycle
With the drain height set, the next step is to run a fill cycle to verify that water enters and exits the tub at the correct rate and that no siphoning or backflow occurs.
The machine is started on a short fill to observe inlet flow, water level, and hose stability. Listen for abnormal sounds and watch for slow drainage or surging. If the washer has multiple inlet valves, confirm balanced fill.
After the cycle completes, inspect the drain hose connection and standpipe alignment for proper seating. Repeat one more cycle under a typical load to make certain consistent performance.
- Observe inlet and initial drainage.
- Note sounds and flow consistency.
- Repeat under typical load.
Check For Leaks
Regularly inspect all visible connections and the area around the washer while running a drain cycle to confirm there are no leaks.
Observe hose ends, clamps, trap connections and the standpipe base for dripping or seepage.
Place absorbent towels or a shallow tray beneath joints to catch small leaks and note any moisture accumulation.
Check after several cycles and with varying water flow to reveal intermittent leaks.
Tighten loose clamps or reseal threaded fittings as needed, then retest.
If leaks persist at molded hose ends or cracked fittings, replace the faulty component rather than relying on repeated temporary fixes.
Observe Pump Operation
Start the washer and run a drain cycle to confirm the pump moves water efficiently and without unusual noise or hesitation. Observation focuses on flow rate, sound, and cycle timing; deviations suggest obstruction, improper height, or pump wear.
Visual monitoring of the discharge and listening for grinding or stuttering helps identify issues early. If water returns or dribbles, reassess standpipe height and hose positioning.
For formal testing, document cycle duration and compare to manufacturer expectations. Recommended checks:
- Listen for consistent, smooth motor and pump sounds.
- Confirm continuous, forceful discharge into standpipe.
- Note any slow drains, backups, or repeated pump attempts.
Troubleshooting Slow Drainage and Backflow
Identify common causes of slow drainage and backflow by inspecting the drain line, standpipe height, and trap for obstructions, kinks, or improper connections.
The technician checks for lint buildup, foreign objects, and collapsed hoses that restrict flow.
Water pooling indicates partial blockage or inadequate standpipe height relative to pump output.
Backflow often stems from a clogged trap or a loose hose connection that allows siphoning; make sure clamps and fittings are secure.
Testing with a brief manual drain cycle isolates pump versus plumbing issues.
Recommend cleaning traps, clearing lines with appropriate tools, and replacing damaged hoses or fittings to restore proper drainage.
When to Add a Vent or Reconfigure Traps
When should a vent be added or a trap reconfigured to resolve persistent washer drainage problems? A vent or trap change becomes necessary when recurring gurgling, slow emptying, or siphoning persists after cleaning and correct drain height. Proper venting stabilizes air pressure; trap arrangement prevents siphon and backflow.
- Install an individual vent or AAV when multiple fixtures share a line causing negative pressure during pump discharge.
- Reconfigure trap geometry if the trap arm is too long, deep, or has multiple bends that encourage siphoning.
- Employ a standpipe-to-trap adapter or raise the trap/standpipe junction to restore correct flow dynamics.
Handling Stacked or Closet‑Style Washer Drain Heights
If recurring venting or trap reconfiguration fixes in a laundry room are impractical because of space or shared plumbing, stacked or closet‑style washer installations present distinct constraints for standpipe and trap placement.
Such installations often require shorter, more accessible standpipes while maintaining minimum height to prevent siphoning and backups.
The trap must be positioned to allow the washer’s drain hose to reach without kinking and to preserve the required trap seal and venting distance.
Tight vertical clearances may necessitate offset traps or engineered stub‑outs.
Compliance with local codes and clear access for service remain essential to avoid performance and inspection issues.
Cost and Time Estimates for Changing Drain Height
In estimating the cost and time to change a washer drain height, contractors assess factors such as access to the existing plumbing, distance to the vent and soil stack, required materials (pipe type, fittings, trap adapters), and whether wall or floor openings must be cut and repaired.
Typical jobs range from simple adjustments taking one to three hours to complex reroutes lasting a day or more.
Cost commonly spans a modest repair fee to several hundred dollars for labor and disposal, with permits adding to expense in some jurisdictions.
- Simple adjustment: 1–3 hours, low cost.
- Moderate reroute: half–day, mid cost.
- Complex relocation: full day+, higher cost.
Tools and Materials Needed for a Height Adjustment
For a washer drain height adjustment, a concise set of tools and materials is essential: basic hand tools (adjustable wrench, pipe wrench, screwdrivers), a PVC or ABS cutter and deburring tool, appropriate pipe and fittings (correct diameter waste pipe, trap adapter, elbows, couplings), primer and solvent cement or ABS cement as required, plumber’s tape and sealant, a standpipe of proper length, and a P-trap assembly rated for laundry use.
Additional useful items include a level, measuring tape, marker, hose clamp or standpipe retainer, rubber gasket or boot for washer hose, bucket for residual water, work gloves, safety glasses, and rags for cleanup.
When to Call a Plumber vs DIY for Drain Height Work
When evaluating whether to tackle a washer drain height adjustment as a homeowner or call a plumber, consider the scope of work, local code requirements, and the person’s comfort with plumbing tasks.
Minor adjustments, replacing a standpipe or extending a trap arm within accessible space, suit competent DIYers with basic tools.
Complex relocations, hidden leaks, or modifications affecting vents and code compliance warrant a licensed plumber to guarantee proper pitch, secure joints, and permit adherence.
Safety, water damage risk, and time constraints also influence the decision. Err on professional help when uncertainty could lead to repeated repairs or inspection failures.
- Scope complexity
- Code/permit needs
- Risk tolerance
Documenting Compliance for Inspections
Compliance requires clear, verifiable records showing the washer drain height meets code and inspector expectations. Photographs with a visible measuring tape, dated notes, and labeled diagrams establish objective proof.
Include the applicable code citation, permit number, installer name, and contact details. Record measurements from finished floor to pipe center and outlet termination, noting any deviations and corrective actions taken.
Preserve receipts for components and signed inspection reports or approval stickers. Store documentation both physically and digitally, with backups accessible for future inspections or resale. Consistent, organized records reduce disputes and streamline official verification.
Practical Tips to Prevent Future Drain Height Problems
Having clear documentation sets the stage for preventing future drain height issues by revealing patterns and common failure points that can be addressed proactively.
The approach emphasizes routine verification, standardized installation, and feedback loops so recurring errors are eliminated before they recur.
- Institute regular measurements and photo logs after installation to catch drift or settling early.
- Adopt a single installation reference (template, clamp position, and height marker) to reduce variability between technicians.
- Create an easy reporting channel for occupants and maintenance to flag performance changes, then review trends quarterly and adjust procedures accordingly.
Quick Checklist: Final Drain Height Inspection Before Use
Before turning the washer on, a concise final inspection confirms the drain height meets specifications and prevents immediate performance issues.
The inspector verifies the standpipe top sits within the manufacturer’s recommended range, the hose loop reaches recommended elevation without kinking, and the hose end is secured above the trap.
Connections are checked for firmness and correct slip-fit engagement.
The standpipe is level and clear of obstructions; clamps and supports are present.
Water seal and trap integrity are visually confirmed.
Any deviation is corrected before operation.
Documentation of measurements and adjustments is recorded for future reference.
Top User Questions About Washer Drain Pipe Height (Q&A)
After the final inspection confirms measurements and fittings, common questions from users often arise about acceptable standpipe height, hose loop placement, and trap requirements.
The section addresses concise answers, citing typical code ranges, recommended loop heights to prevent backflow, and trap dimensions to guarantee proper venting.
Practical clarifications cover exceptions for stacked units and basement setups.
Short guidance on validating local codes and when to consult a plumber is provided, emphasizing safety and function.
Users receive straightforward resolution paths and references to measurements, preventing common installation errors and guaranteeing compliant, reliable washer drainage.
- Standpipe height ranges
- Hose loop placement
- Trap and vent requirements
Conclusion
The guide closes with clear, practical guidance: install the washer drain pipe at the recommended height to prevent overflow, siphoning, and code violations. Homeowners and installers should measure, document, and recheck before use, addressing differences between front‑ and top‑load machines. With commonsense maintenance and a short checklist, costly repairs are avoidable. Like a pocket watch in a smartphone age, small attention to this detail keeps household plumbing running smoothly and worry‑free.