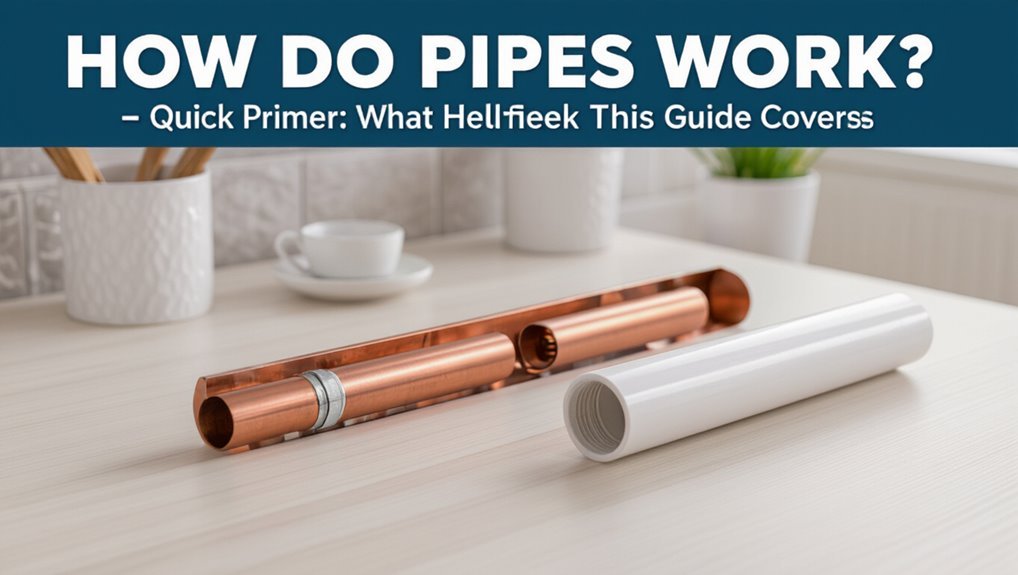
How Do Pipes Work? Simple Guide to Plumbing Basics for Homeowners
Pipes in a home are essential for delivering fresh water and removing wastewater. They consist of supply pipes, which bring cold and hot water, and drain pipes, which carry wastewater away. Here’s a quick breakdown of how they work:
Key Takeaways:
- Supply Pipes: Typically made of copper, PEX, or galvanized materials, these pipes deliver pressurized fresh water.
- Drain Pipes: Made from PVC or cast iron, these pipes use gravity and slope to carry wastewater, while vents help prevent sewer gas from entering the home.
- Flow Control: The diameter of pipes, water pressure, and fittings all affect the flow of water and potential loss.
- Maintenance: Regular inspection, winterization, and knowing when to hire a professional are crucial for maintaining a healthy plumbing system.
By understanding these basics, homeowners can better manage their plumbing and address issues as they arise.
Quick Primer: What This Guide Covers
This guide outlines the essential plumbing knowledge every homeowner should have, including basic system components, common problems and their causes, routine maintenance tasks, and when to call a professional.
It summarizes core topics: identifying fixtures and fittings, recognizing leaks, clogs, and pressure issues, and understanding basic valve operation.
It highlights preventive actions—inspections, drain cleaning habits, and seasonal precautions—plus safety measures for simple repairs.
It specifies which diagnostic steps homeowners can take and which signs warrant licensed help.
The primer frames subsequent sections without detailing pipe function, focusing instead on scope, goals, and practical homeowner responsibilities.
What a Plumbing Pipe Actually Does in Your Home
A plumbing pipe channels water and wastewater through a home’s system, delivering clean supply to fixtures and carrying used water away to sewer or septic lines.
It provides a controlled pathway, maintaining pressure for faucets and appliances while preventing leaks and contamination.
Pipes support flow rate, reduce friction losses, and withstand thermal and chemical stresses.
They connect valves, fittings, and fixtures to enable isolation, maintenance, and repairs.
Proper sizing and routing minimize noise and guarantee efficient drainage.
Corrosion resistance and appropriate material selection extend service life.
Regular inspection detects blockages, joint failures, or wear before they escalate into costly damage.
Supply vs. Drain Systems: The Two Plumbing Networks
The home’s plumbing is actually two networks: a cold-and-hot supply system that delivers water through pipes and valves, and a drainage-and-venting system that removes waste through traps and drain pipes.
Supply piping and valves control flow and temperature to fixtures, while drains, traps and vents maintain proper flow and prevent sewer gases from entering living spaces.
Understanding how these components differ helps homeowners recognize problems and communicate effectively with a plumber.
Cold And Hot Supply
Many homes rely on two distinct plumbing networks: one for cold and hot supply that delivers fresh water under pressure, and another for drains that removes wastewater by gravity.
The cold-and-hot supply network consists of separate lines: cold mains and a hot loop from a water heater. Valves, pressure regulators, and backflow preventers protect and control flow.
Materials vary—copper, PEX, CPVC—chosen for temperature tolerance and code. Hot lines are insulated to reduce heat loss.
Fixtures receive mixed supply via faucets and showers with thermostatic or pressure-balancing valves. Routine checks focus on leaks, water temperature, and consistent pressure.
Drainage And Venting
Plumbing separates into two distinct networks: the supply system, which delivers pressurized fresh water, and the drain-and-vent system, which removes wastewater and equalizes pressure to prevent trap siphoning.
The drain-and-vent network relies on gravity to carry waste through progressively larger pipes to the sewer or septic tank. Vents connect fixtures to the atmosphere, allowing air into the system so drains flow smoothly and odors stay out of living spaces.
Proper grading, pipe sizing, and continuous venting prevent backups and slow drains. Maintenance focuses on keeping drains clear and vents unobstructed to guarantee reliable, sanitary operation.
Pipes, Valves, Traps
Although serving a common goal of moving water, supply and drain networks use different pipes, valves, and traps designed for opposing pressures and functions.
Supply piping, typically copper, PEX, or CPVC, carries pressurized potable water and uses shutoff, pressure-reducing, and check valves to control flow and prevent backflow.
Drain systems use larger PVC or cast iron pipes sized for gravity flow, relying on venting and P-traps to seal sewer gases and maintain water seals.
Traps and valves differ: traps prevent odors; valves isolate fixtures for repair.
Correct material choice, proper slope, and appropriate valve placement guarantee safe, efficient operation and serviceability.
How Water Pressure Moves Through Pipes
Water pressure is the force that drives water through a home’s pipes, determined by the height of the supply source and the resistance within the piping network.
Pressure pushes water from higher-pressure zones to lower-pressure fixtures. It overcomes friction in pipe walls, fittings, and valves; losses accumulate along long runs and through bends. Pressure at a tap equals supply pressure minus these losses.
Pumped systems add mechanical pressure to maintain flow. Pressure regulators and check valves control and stabilize pressure to protect appliances and prevent backflow.
Measuring pressure at outlets helps diagnose leaks, blockages, or failing components without altering pipe dimensions.
Why Pipe Diameter Matters for Flow and Pressure
Pipe diameter directly influences both flow rate and pressure loss: larger pipes allow more water to pass with lower friction, while smaller pipes restrict flow and increase velocity, which raises frictional losses.
Choosing diameter matches demand and distance; long runs amplify frictional pressure drop, so larger sizes preserve usable pressure. Undersized piping causes reduced fixture performance, noise, and higher pump energy.
Oversizing raises material and installation costs and can slow turnover, promoting sedimentation.
Calculations use flow rate, allowable pressure drop, and pipe roughness to select size. Proper sizing balances performance, cost, and system efficiency for reliable water delivery.
How Pipe Material Affects Performance and Lifespan
Material choice considerably shapes a plumbing system’s durability, performance, and maintenance needs. Different materials resist corrosion, scale, and temperature differently, influencing flow efficiency and repair frequency.
Compatibility with water chemistry, joint types, and installation methods affects leak risk and service life. Some materials require sacrificial anodes or protective coatings; others tolerate flexing or freezing better. Cost, weight, and ease of replacement inform long-term value. Proper selection reduces callbacks and extends useful life while poor matching accelerates failures and contamination risks.
- Corrosion resistance influences longevity and water quality
- Thermal tolerance affects burst risk and insulation needs
- Flexibility eases installation and movement
- Joint reliability determines leak likelihood
- Chemical compatibility prevents degradation
Common Home Plumbing Pipe Materials: Copper, PVC, PEX, Galvanized Steel
The section compares common residential pipe types and highlights their practical qualities.
Copper is noted for durability and resistance to corrosion, making it a long-lasting option for potable water.
PEX is described as flexible and simple to install, often reducing labor and fitting complexity.
Copper: Durable, Corrosion-Resistant
Copper remains a long-standing choice for residential plumbing due to its strength, longevity, and natural resistance to corrosion. The material withstands high temperatures, resists biological growth, and often outlasts other options.
Installation requires soldered or compression joints; fittings are widely available. Cost is higher than plastic alternatives, but durability can justify investment over decades. Copper’s recyclability and predictable failure modes appeal to homeowners and professionals evaluating long-term value.
- Rigid tubing suited for water supply and hot lines
- Compatible with common fittings and valves
- Performs well under heat and pressure
- Minimal taste or odor imparted to water
- Recyclable and widely trusted
PEX: Flexible, Easy Installation
A flexible plastic option, PEX has become popular for residential plumbing because it combines ease of installation with resistance to freezing and corrosion. Installers value its bendability, fewer fittings, and compatibility with copper and PVC systems. It suits retrofits and new construction, reducing labor and leak points. Temperature limits and UV sensitivity require careful handling and proper fittings. Manufacturers offer oxygen-barrier and non-barrier types for heating or potable use. Cost is moderate and repair straightforward. Longevity is good when installed per code, though some jurisdictions restrict its use for exterior or high-temperature applications.
| Attribute | Note |
|---|---|
| Material | Cross-linked polyethylene |
| Strength | Flexible, durable |
| Limitations | UV, max temp |
Where Each Pipe Type Is Typically Used in a House
Although many pipe materials appear similar at a glance, each type is chosen for specific functions and locations in a house—PVC and CPVC for drain, waste, and vent lines and some cold-water runs; PEX for flexible distribution to fixtures; galvanized steel mainly in older supply systems; and cast iron still found in older main sewer lines and where noise dampening is needed.
Typical placements include:
- PVC/CPVC: basement sewer branches, vent stacks, exterior waste lines.
- PEX: behind walls, underfloors, connecting showers, sinks, toilets.
- Copper: visible supply runs, soldered connections, repairs.
- Galvanized: legacy lines in crawlspaces or walls.
- Cast iron: main sewer runs, plumbing stacks in multi-story homes.
How Hot-Water and Cold-Water Piping Differ
Because temperature and pressure demands differ, hot-water and cold-water piping use different materials, sizes, and installation practices to guarantee safety and longevity. Hot lines require heat-resistant materials (copper, CPVC, PEX rated for hot use), insulation to reduce heat loss, and slightly larger diameter or higher pressure ratings in long runs. Cold lines can use standard PEX or copper without extra thermal considerations but need freeze protection in unheated spaces. Valves, expansion fittings, and proximity to heat sources also differ, influencing layout and maintenance.
| Aspect | Difference |
|---|---|
| Material | Heat-rated vs standard |
| Insulation | Required vs optional |
| Pressure | Higher rating often for hot |
| Fittings | Expansion fittings for hot |
What Drain, Waste, and Vent (DWV) Systems Do
Hot- and cold-water supply lines manage pressure and temperature, but household plumbing also relies on a separate network to remove used water and gases: the drain, waste, and vent (DWV) system.
It channels wastewater from fixtures to the sewer or septic tank, prevents backflow, isolates solids in traps, and allows air movement to stabilize flow. The DWV system handles gravity-driven drainage, collects and routes waste safely, and provides access points for cleaning and inspection.
Proper slope, sizing, and connections guarantee reliable function and reduce clogs, odors, and sanitary hazards.
- Waste collection from sinks, tubs, and toilets
- Gravity drainage toward the sewer or tank
- Trap placement to capture solids
- Cleanouts for maintenance and inspection
- Pipe sizing and slope to prevent backups
How Vents Prevent Sewer Gas and Maintain Drainage
When a plumbing fixture drains, the vent system admits air into the drain lines and provides a path for sewer gases to escape above the roof, preventing pressure imbalances that can siphon water from traps or force odors into living spaces. Vents stabilize pressure, support smooth flow, and allow sewer gas to vent harmlessly. Properly sized and located vents reduce slow drains and gurgling. Blocked or missing vents cause trap loss and odor risks. Regular inspection and keeping roof stacks clear preserves function. Below is a concise reference.
| Function | Effect |
|---|---|
| Air admittance | Prevents siphoning |
| Gas escape | Keeps odors out |
| Pressure balance | Guarantees flow |
| Vent sizing | Affects performance |
| Maintenance | Prevents blockages |
How Traps Stop Odors and Which Ones You’ll See
Traps prevent sewer gas from entering the home by holding a small, sealed water barrier in the bend of the pipe.
Common trap types include the P-trap under sinks, the S-trap (now less common and often prohibited), and bottle traps used on some fixtures.
Each design maintains the water seal differently while allowing water and waste to pass through.
How Traps Hold Water
A small curve of pipe beneath fixtures holds water to block sewer gases from entering a home: this water seal is the essential function of a trap.
Traps retain a measured water column that prevents backflow of odors while allowing wastewater to pass. Surface tension and gravity keep the seal intact; frequent use refreshes the water, while evaporation or leaks break it.
Proper slope and correct installation guarantee the trap fills and drains without siphoning. Maintenance focuses on preventing clogs and leaks to preserve the seal and prevent sewer gas entry.
- Water sits in the trap’s bend
- Gravity maintains the seal
- Surface tension aids retention
- Evaporation can break the seal
- Leaks or siphoning remove the water
Types Of Common Traps
Plumbing fixtures use several trap designs—P-traps, S-traps, bottle traps, and drum traps are among the most common—to maintain a water seal that blocks sewer gases while allowing wastewater to flow.
P-traps, found under sinks and tubs, combine reliability and ease of cleaning.
S-traps, now discouraged or banned in many codes, can siphon dry and lose their seal.
Bottle traps save space beneath basins but collect debris and require frequent cleaning.
Drum traps, older and bulky, are prone to clogging and harder to service.
Each design balances space, maintenance, and code compliance in residential installations.
How Fittings (Elbows, Tees, Couplings) Change Flow Direction
Fittings like elbows, tees, and couplings redirect water by changing the pipe geometry and adding localized resistance; elbows alter direction in increments (45° or 90°), tees split or combine flows, and couplings join segments while maintaining alignment.
The resulting flow patterns include velocity changes, pressure losses, and minor turbulence where momentum shifts occur. Proper selection and orientation minimize head loss and noise, while material and size continuity preserve capacity.
Installers consider bend radius and tee angle to reduce wear and clogging. Maintenance inspects joints for leaks and deposits that exacerbate flow disruption.
- Elbow: concentrates turn, raises local pressure drop
- Tee: divides flow, can create unequal branch velocities
- Coupling: smooths connection between pipes of same diameter
- Long-radius fittings: reduce turbulence compared with sharp bends
- Alignment and support: prevent stresses that distort flow
How Valves Control Flow: Shutoff, Ball, Gate, and Check Valves
Several common valve types—shutoff, ball, gate, and check—regulate household water by controlling passage, pressure drop, and flow direction through different internal mechanisms.
Shutoff valves isolate sections for maintenance; quarter-turn designs offer quick closure, while multi-turn models allow finer control.
Ball valves use a rotating spherical bore for reliable sealing and minimal pressure loss.
Gate valves lift a wedge to permit full flow, suited for open or closed positions but slower to operate.
Check valves prevent backflow automatically, protecting fixtures and systems.
Proper valve selection balances accessibility, required flow characteristics, and system compatibility.
How Water Heaters Connect to Your Piping System
When installed, a water heater ties into the home’s cold and hot supply lines, the temperature-and-pressure relief arrangements, and a dedicated drain or expansion device so that it can heat water safely and deliver it at the correct pressure and temperature.
The unit connects via inlet and outlet fittings, often with shutoff valves and flexible connectors for service. A relief valve vents to an air gap or discharge pipe. Drain pans and condensate lines protect finishes.
Electrical or fuel connections and venting complete the system, allowing controlled delivery of hot water to fixtures while providing access points for maintenance.
- Cold water inlet with shutoff valve
- Hot water outlet with isolation valve
- Temperature-and-pressure relief discharge pipe
- Drain pan and condensate/overflow line
- Serviceable connections and venting
How Pressure Regulators Protect Your Pipes and Fixtures
A pressure regulator reduces incoming municipal or well pressure to a safe, consistent level before water enters a home’s plumbing, preventing stress on pipes, joints, valves, and fixtures.
It maintains set outlet pressure despite supply fluctuations, minimizing leaks, pipe fatigue, and premature fixture wear. Regulators protect appliances like dishwashers and washing machines by preventing overpressure events that cause seal or hose failure.
Properly sized and adjusted regulators extend system life and improve performance.
Periodic inspection and replacement when malfunctioning or after extreme pressure events guarantee continued protection, preserving water efficiency and reducing repair costs across the plumbing network.
How Thermal Expansion Affects Home Plumbing
Because water and plumbing materials expand as temperature rises, thermal expansion creates pressure fluctuations inside a closed domestic water system that can stress pipes, joints, fixtures, and appliance components.
The phenomenon raises pressure when heated water is confined, causing leaks, drips, or weakened seals over time. Repeated cycles accelerate wear on soldered joints, flexible connectors, and appliance valves. Home systems without expansion relief (like expansion tanks or relief valves) are more vulnerable.
Routine inspection and appropriate components reduce failure risk and prolong service life.
- Hot-water heater pressure spikes after heating cycles
- Slow leaks at fittings after temperature swings
- Pinging or knocking in pipes
- Rapid wear of appliance inlet valves
- Increased risk of relief-valve discharge
How Pipe Insulation Reduces Heat Loss and Freezing Risk
Although often out of sight, pipe insulation considerably reduces conductive and convective heat loss from hot-water lines and helps maintain fluid temperature along cold-water runs, lowering energy use and shortening recovery time for water heaters.
Insulation materials—foam, fiberglass, rubber—create an air barrier that slows heat transfer and stabilizes temperatures. For exterior or unheated spaces, insulation increases the time-to-freeze by reducing thermal loss to ambient air, especially when combined with proper sealing of gaps and heat tracing if needed.
Correctly sized, installed insulation minimizes condensation on cold pipes and improves overall system efficiency with a modest upfront cost.
How to Identify Pipe Age and Signs of Corrosion
After ensuring pipes are properly insulated to reduce heat loss and freezing risk, homeowners should assess the actual age and condition of their plumbing to anticipate failures and plan maintenance.
Examination combines visual cues, material type, and documentation. Older homes often have galvanized steel, cast iron, or lead; newer builds use copper, PVC, or PEX.
Corrosion signs include green or rust-colored deposits, flaking metal, pitting, and brittle joints. Measuring wall thickness where accessible and checking service records helps estimate lifespan.
When uncertain, a plumber’s inspection and simple tests confirm material and deterioration level.
- Green or blue-green discoloration on copper
- Rust flakes or orange residue
- Pitted or thinning metal surfaces
- Brittle or crumbling joints and fittings
- Known installation date from records
How Leaks Form and Common Leak Locations
When pressure, corrosion, mechanical stress, or poor installation compromises a pipe or fixture, leaks begin as small breaches that often grow over time.
Water follows weaknesses: pinholes in aging supply lines, corroded joints, deteriorated solder or compression fittings, and cracked fittings at bends. Fixtures leak where seals fail—faucet cartridges, shower valves, toilet bases—and flexible hoses develop kinks or fray.
Drain leaks occur at trap connections, threaded couplings, and damaged PVC joints. Hidden leaks appear under slabs, behind walls, and beneath cabinets, often indicated by staining, musty odors, reduced pressure, or unexplained water bills.
Early detection limits damage and repair scope.
How to Shut Off Water to a Fixture or the Whole House
Shutting off water promptly limits damage and makes most repairs manageable; homeowners should know both the fixture shut-off valves and the main shut-off for the house.
Locate small shut-off valves under sinks and behind toilets; turn clockwise to close. Know the main shut-off near the water meter or where the service enters; turn clockwise or use a wrench if needed.
After closing, open a faucet to relieve pressure and confirm flow stopped. Label valves and keep a wrench accessible. If the main valve is stuck or leaks, contact a plumber immediately.
- Locate fixture valves under or behind fixtures
- Turn valves clockwise to close
- Find main shut-off by the meter or entry point
- Open a faucet to drain residual water
- Label valves and store a wrench nearby
Isolate and Test for a Hidden Leak
One simple way to confirm a hidden leak is to isolate sections of the plumbing and test each independently. The homeowner closes fixture shutoffs and the main valve to divide the system into manageable zones.
Each zone is pressurized with the supply restored briefly or using a pressure gauge; drops indicate a leak in that zone. Visual checks, listening devices, or moisture meters help pinpoint the area within the implicated zone.
Recordings of baseline pressure before and after isolation improve accuracy. When testing finishes, valves are returned to their normal positions and findings are documented for repair decisions or professional referral.
Temporarily Stop a Leaking Pipe (DIY)
After isolating the affected zone and confirming a leak, a homeowner can take temporary steps to stop or slow the flow until a permanent repair is made.
Immediate actions prioritize safety and minimizing water damage: shut main or branch valves, mop or catch drips, and warn occupants. Temporary seals and support can hold until a professional arrives.
- Wrap pipe with plumber’s tape or pipe repair tape snugly over the leak.
- Apply epoxy putty to a dry, cleaned section and allow it to cure.
- Clamp a rubber patch (rubber + hose clamp) over the hole.
- Use a compression repair coupling for small pinholes.
- Reduce system pressure by partially closing valves.
Repair vs. Replace: Deciding When to Repipe
When should a homeowner opt to repair individual sections of plumbing and when is full repiping warranted? Decisions hinge on pipe age, material, frequency and location of failures, water quality, and cost-effectiveness.
Isolated leaks, localized corrosion, or single-fitting failures often justify targeted repairs. Widespread pinhole leaks, persistent low pressure from scale buildup, systemic corrosion (galvanized or polybutylene), or multiple failures across the system suggest full repiping.
Consider long-term maintenance costs, potential property damage, and resale value. A professional inspection with diagnostic testing clarifies severity; homeowners should weigh immediate expense against longevity, reliability, and safety when choosing repiping.
What to Expect When a Professional Replaces Pipe Sections
A professional typically begins with an arrival and assessment to locate the damaged section and plan access.
Expect a temporary water shutoff while the old pipe is removed and the new section fitted.
After replacement, the technician will restore water and perform pressure and leak testing to confirm the repair.
Arrival And Assessment
Several clear steps mark the arrival and initial assessment when a professional comes to replace pipe sections: the technician evaluates visible damage, confirms the work area and access points, and discusses the scope and timeline with the homeowner.
They inspect surrounding structures, note corrosion or leaks, measure pipe sizes, and identify potential obstacles.
The technician documents findings, explains required materials and safety measures, and outlines next actions.
Homeowner questions are invited; responsibilities and cleanup expectations are clarified.
A clear record of agreed work is made before any cutting or removal begins.
- Visual inspection of exposed pipes and fittings
- Measurement and material verification
- Noting structural or access constraints
- Explaining required parts and safety steps
- Recording agreed scope and timeline
Temporary Water Shutoff
Before work begins, the technician will shut off water to the affected section to prevent leaks and allow safe cutting and replacement.
Valves serving the area are located and closed; if needed, the main shutoff is used. Homeowners are informed of service disruption and expected duration.
Downstream fixtures may be drained to clear standing water and reduce mess. Temporary plugs or caps isolate pipe ends after sections are removed.
Pressure is monitored to confirm isolation. If other systems rely on that line (heating, irrigation), those impacts are noted.
Restoration of supply awaits completion and verification by the crew.
Replacement And Testing
Technicians remove the damaged section, fit replacement pipe and connectors, and secure joints using the appropriate method—soldering, compression fittings, push-fit couplings, or solvent welding—based on pipe material and code requirements.
They isolate the system, verify alignment and support, then restore water and inspect for leaks. Pressure testing confirms integrity; drains are checked for flow. Records note materials, locations, and any permits. Homeowners receive guidance on system care and warranty details.
- Work area protection and removal of old pipe
- Precise cutting, deburring, and fitting
- Appropriate joint method and curing time
- Pressure and leak testing procedures
- Final cleanup and documentation
How Pipe Joining Methods Differ: Soldering, Gluing, Crimping
When joining pipes, homeowners encounter three common methods—soldering, gluing, and crimping—each suited to specific materials, skill levels, and pressure requirements.
Soldering bonds copper by melting filler metal into a heated joint; it demands heat sources, flux, and basic skill but yields durable, high-pressure connections.
Gluing uses solvent cement for PVC and CPVC, chemically fusing plastic pieces; it’s quick, inexpensive, and requires clean cuts and correct cure time.
Crimping secures PEX with rings and a specialized tool, offering fast, reliable joints without heat.
Selection depends on pipe material, expected pressure, accessibility, and homeowner comfort with tools and safety.
How Water Quality Affects Pipe Corrosion and Scaling
After choosing an appropriate joining method, attention turns to how water quality influences the long-term integrity of those joints and the pipes they connect.
Water chemistry—pH, dissolved oxygen, chloride and sulfate levels, and aggressiveness—affects corrosion rates in metals and degradation of some plastics.
Suspended solids and organic matter can accelerate wear and harbor microbes that form corrosive biofilms. Proper testing and targeted treatments (filtration, pH adjustment, corrosion inhibitors) help protect systems.
Routine monitoring guides maintenance and material choices to extend service life and prevent leaks.
- Low pH increases metal dissolution
- High chlorides promote pitting
- Oxygen accelerates rusting
- Organics fuel biofilms
- Soft water can be mildly corrosive
How Mineral Buildup (Scale) Reduces Flow and When to Act
Mineral deposits, commonly called scale, accumulate inside pipes and fixtures where hard water leaves behind calcium, magnesium, and other salts, narrowing passageways and increasing flow resistance.
Over time reduced diameter raises pressure loss, lowers fixture flow rates, and stresses pumps and heaters, decreasing efficiency and lifespan.
Signs include slower taps, reduced shower pressure, frequent heater cycling, and visible crusting on aerators and valves.
Minor buildup can be managed with descaling agents, mechanical cleaning, or water softening; significant narrowing or recurrent deposits indicate the need for professional inspection or replacement to restore capacity and prevent failure.
Regular monitoring prevents costly repairs.
How Tree Roots and Ground Movement Damage Underground Pipes
Tree roots can penetrate joints and cracks in underground pipes, gradually blocking flow and causing leaks.
Shifts in soil from settling, seasonal freeze-thaw cycles, or nearby construction can bend, crack, or misalign lines.
Together, root intrusion and ground movement often combine to create slow-developing failures that require inspection and targeted repair.
Tree Root Intrusion
When roots seek moisture and nutrients, they can infiltrate tiny cracks or loose joints in underground pipes, exploiting soil movement and pressure changes to widen openings and eventually cause blockages, leaks, or collapses.
Roots follow leaks, growing inside pipes and forming dense mats that obstruct flow. Small penetrations enlarge as roots thicken, stressing pipe material and joints.
Tree species with aggressive root systems pose higher risk, especially near older clay or poorly joined lines.
Early signs include slow drains, gurgling, sewage odors, and localized sinkage. Professional inspection and targeted root removal prevent escalation and structural failure.
- Slow draining fixtures and backups
- Gurgling or bubbling noises
- Visible wet spots or sinkholes
- Roots visible during camera inspection
- Frequent, localized sewer repairs
Soil Movement Effects
Roots are only one of several forces that shift soil and strain buried pipes; seasonal drying, freeze–thaw cycles, heavy rainfall, and nearby construction can all change ground conditions and create differential movement along a pipeline.
Soil heave and settlement bend joints, fracture brittle materials, and displace bedding, compromising seals and alignment. Repeated cyclical stress causes fatigue, slow leaks, and joint separation.
Saturated soils transmit loads differently than dry soils, increasing lateral pressure. Pipes in unstable or poorly compacted backfill are especially vulnerable.
Regular inspection, improved bedding, flexible joints, and rerouting away from large roots or excavation zones reduce long‑term damage risk.
Use Your Water Meter to Find Leaks
A household water meter provides a simple, objective way to detect hidden leaks: by recording flow when all fixtures are off, it reveals unexpected consumption. A homeowner checks the dial or digital readout, confirms no water is used, then watches for movement over 15–30 minutes. Any change implies a leak somewhere in the system.
- Inspect the meter face for a small leak indicator or low-flow dial movement.
- Turn off indoor and outdoor valves to isolate the source.
- Note the meter reading, wait, then compare for differences.
- Use the procedure before calling a plumber to save time.
- Record results for repair history.
Simple Seasonal Checks to Maintain Your Home’s Piping
As seasons change, homeowners should winterize any exposed piping by insulating pipes and shutting off outdoor water sources.
A brief inspection for drips, corrosion, or damp spots helps catch leaks early.
Regular seasonal checks reduce freeze damage and costly repairs.
Winterize Exposed Pipes
When temperatures drop, homeowners should protect exposed pipes to prevent freezing, bursts, and subsequent water damage.
Exterior and uninsulated interior plumbing need straightforward winterizing steps: insulating pipes, sealing drafts, and allowing faucets to drip during extreme cold.
Shutoff valves for outdoor spigots should be closed and hoses removed. Heat tape may be applied where recommended, and attic or crawlspace vents checked for cold air intrusion.
Regularly monitor vulnerable areas during prolonged freezes to act quickly if ice forms.
- Install foam pipe sleeves or wrap with insulating tape
- Close and drain outdoor faucets
- Seal gaps around pipes with caulk
- Use approved electric heat tape sparingly
- Leave cabinet doors open near plumbing
Inspect For Leaks
After winterizing exposed pipes, homeowners should perform a focused inspection for leaks to catch small problems before they become costly.
Visually examine visible supply lines, joints, fittings, and drainpipes for corrosion, wetness, or mineral deposits. Check under sinks, around water heaters, and near appliances for puddles or damp insulation.
Run faucets and observe pressure changes or new drips; inspect ceilings and walls for stains indicating hidden leaks.
Monitor the water meter with all fixtures off to detect unnoticed flow. Small leaks warrant prompt tightening, sealant replacement, or professional repair to prevent structural damage and mold growth.
Prevent and Safely Thaw Frozen Pipes
Although freezing temperatures can arrive suddenly, homeowners can reduce the risk of burst pipes by insulating vulnerable plumbing, maintaining steady indoor heat, and draining outdoor lines before winter.
When a pipe freezes, prompt, safe thawing prevents rupture: open faucets to relieve pressure, apply gentle heat with a hair dryer or electric heating pad, and work from the faucet toward the frozen section.
Avoid open flames and high heat. If thawing fails or a leak appears, shut off water and call a plumber. Regular winter prep and quick, cautious response minimize damage and expensive repairs.
- Insulate exposed pipes in crawlspaces and attics
- Let faucets drip during extreme cold
- Seal gaps where cold air enters
- Drain and winterize outdoor hoses and lines
- Know main shutoff valve location
How to Improve Water Pressure Without Repiping
Because low water pressure often stems from manageable issues like clogged aerators, partially closed valves, or mineral buildup, homeowners can boost flow without the expense of repiping by diagnosing and addressing these common causes.
Start by checking main shutoff and fixture valves, then remove and clean aerators and showerheads to clear debris and mineral scale.
Flush water heater to remove sediment. Inspect supply hoses and flexible connectors for kinks or blockages.
Consider installing a whole-house or point-of-use pressure booster if municipal supply is weak.
If corrosion or multiple failing fittings are found, consult a plumber before attempting repairs.
How to Size Replacement Pipes for Fixtures and Appliances
Choosing the correct pipe size for replacing lines to fixtures and appliances requires matching flow needs, pressure constraints, and code requirements to guarantee adequate performance and avoid noise or wear.
Assessment begins by identifying fixture unit demand and fixture type, then measuring run length and considering simultaneous use. Pressure drop calculations and material-specific flow charts guide diameter selection.
Account for future upgrades and velocity limits to prevent hammer and erosion. Verify compatibility with existing fittings and water heater or valve capacities.
When in doubt, consult manufacturer’s specs or a licensed plumber for confirmation.
- Determine fixture unit values
- Measure run length and layout
- Check pressure drop and velocity
- Match material flow charts
- Confirm appliance inlet requirements
Building Codes and Permits That Affect Pipe Work
Proper pipe sizing must be checked against applicable building codes and permitting requirements before work begins, since regulations govern materials, routing, support, and maximum allowable pressures and temperatures.
Codes specify minimum pipe sizes, venting, backflow prevention, and approved materials for potable and waste systems. Local jurisdictions often require permits and inspections for rough‑in, pressure testing, and final connection to mains.
Failure to comply can cause failed inspections, costly rework, or voided insurance. Homeowners should consult code references and local building departments to confirm requirements, submission procedures, and inspection schedules prior to altering or installing plumbing systems.
How to Find and Hire a Qualified Plumber for Pipe Jobs
Homeowners should first verify a plumber’s current license and adequate liability and workers’ compensation insurance to guarantee compliance and financial protection.
They should obtain multiple written estimates that itemize labor, materials, permits, and timelines to compare scope and cost.
Checking licensure and written bids together helps identify reputable contractors and avoid unexpected expenses.
Verify Licenses and Insurance
A qualified plumber for pipe work should hold the proper licensure and carry current insurance, and confirming both before hiring reduces legal and financial risk.
Verification includes checking license number against the state registry, confirming insurance covers liability and workers’ compensation, and ensuring license classification matches the scope of pipe work.
Clients may request copies and contact insurers or licensing boards directly. Proper documentation protects against shoddy work, uninsured injuries, and permit denials.
Maintain written records and log verification dates.
- Request license number and issuing authority
- Ask for certificate of insurance and policy limits
- Confirm workers’ compensation coverage
- Verify specialty endorsements
- Record verification details and dates
Get Multiple Written Estimates
After verifying licenses and insurance, the next step is to obtain multiple written estimates so the homeowner can compare costs, materials, timelines, and warranty terms.
The homeowner should request itemized bids from at least three qualified plumbers, specifying scope, pipe types, fittings, permits, cleanup, and contingency allowances.
Compare labor rates, material brands, estimated start and completion dates, and warranty coverage in writing.
Beware unusually low bids and require clarifications in writing.
Use estimates to evaluate professionalism, responsiveness, and communication.
Keep all documents for reference and to enforce agreed terms.
Choosing based on value and documented commitments reduces risk and disputes.
Typical Costs for Common Pipe Repairs and Repipes
Typical repairs and full repipes vary widely in cost based on pipe material, accessibility, house size, and regional labor rates. Estimates commonly span minor repairs ($100–$500), partial section replacements ($500–$2,500), and whole-house repipes ($3,000–$15,000+).
Variables include pipe type (copper, PEX, PVC), wall or slab work, fixture count, and permit fees. Homeowners should budget contingencies for hidden damage and select licensed plumbers for accurate bids.
- Minor leak repair: $100–$500
- Fixture or valve replacement: $150–$800
- Partial repipe (one/ two rooms): $500–$2,500
- Whole-house repipe: $3,000–$15,000+
- Slab or concealed work: premium costs
Plan a Repipe: Timeline and Disruptions
When planning a repipe, homeowners should expect a coordinated sequence of steps—inspection, material selection, permit acquisition, scheduling, and the work itself—with the overall timeline ranging from a single day for a small partial repipe to several weeks for a whole-house or slab-involved project.
Preparatory work may include clearing access, shutting off water, and arranging temporary fixtures.
Active work causes noise, dust, and limited water use; expect contractors, inspections, and possible drywall or flooring repairs.
Communication about daily windows and completion milestones reduces surprises.
Contingencies—hidden corrosion, code issues, or supply delays—can extend the schedule and add costs.
Where to Document Your Home’s Piping for Future Owners
Because future buyers and service professionals rely on clear records, homeowners should create a concise, organized file that maps pipe locations, materials, installation dates, permit numbers, and any repairs or upgrades.
This record belongs in both physical and digital forms: a labeled binder kept with home documents and a cloud folder accessible to agents or contractors.
Include annotated diagrams, photos of key junctions and hidden access points, warranty and inspection copies, and contact information for installers.
Update after any work and note approximate ages. Clear, portable documentation speeds inspections, valuations, and informed maintenance decisions.
- Annotated floorplan with pipe routes
- Photos of access points and junctions
- Copies of permits, warranties, and invoices
- Installer and inspector contact details
- Digital backup with version dates
How to Spot Plumbing Scams and Get Fair Quotes
Homeowners should watch for common pricing red flags such as vague estimates, large upfront deposits, or bids far below or above typical local rates.
They are advised to verify a plumber’s license, insurance, and references before accepting any work.
Requesting written, itemized estimates from multiple contractors helps guarantee fair pricing and clear expectations.
Common Pricing Red Flags
How can a homeowner tell when a plumbing estimate is fair and not a setup for overcharging? A detached review highlights common pricing red flags that signal caution: unusually low bids, vague itemization, high upfront cash demands, pressure tactics to accept “today only” deals, and unexplained add-ons after work begins.
These signs help readers recognize potential scams without discussing licensing verification. Homeowners are advised to request written breakdowns, compare multiple quotes, and note inconsistencies. Awareness of these red flags reduces risk of surprise costs and empowers homeowners to seek clear, accountable pricing before authorizing repairs.
- Unusually low bid compared to competitors
- Vague or missing line-item breakdowns
- Large upfront cash-only requests
- High-pressure “accept now” sales tactics
- New add-ons presented after work starts
Verifying Licenses And Estimates
Why verify a plumber’s credentials before signing an estimate? A homeowner protects budget and safety by confirming licenses, insurance, and local registrations. Verifying prevents unlicensed work, substandard materials, and liability exposure. Compare written estimates, ask for itemized costs, and request references. Watch for high-pressure tactics or demands for full upfront payment.
| Check | Why it matters |
|---|---|
| License number | Confirms training and legal standing |
| Insurance proof | Covers damages and injuries |
| Itemized estimate | Reveals labor, parts, and markups |
Choose contractors with clear paperwork, reasonable timelines, and verifiable reviews.
Where to Learn More: Trusted Resources and Next Steps
A concise list of vetted resources helps a reader deepen plumbing knowledge and plan sensible next steps.
The section points to reliable sources, explains practical next steps, and sets expectations for skill limits and safety. It encourages consulting professionals for complex jobs and keeping records of repairs and estimates.
Readers are guided to balance DIY learning with regulatory compliance and warranty concerns, and to prioritize safety and proper tools.
- Local building department for codes and permit info
- State licensing board to verify plumbers
- Manufacturer manuals and installation guides
- Community college or trade school courses
- Reputable online tutorials and association sites
Conclusion
A homeowner closes a basement door and listens: pipes breathe, whispering the decisions made years ago—materials chosen, installers trusted, pressures balanced. In the quiet, the map of supply and drain, drawn in copper and PVC, hints at future choices: a repipe, a careful repair, the file passed to a new owner. Knowing what runs beneath the floors keeps worry from turning into crisis—until the next small, unmistakable drip.