How to Unfreeze Pipes Fast: DIY Steps to Prevent Burst Pipes
Key Takeaway: How to Unfreeze Pipes Fast
If your pipes freeze, it’s crucial to act swiftly to prevent bursting. Here’s a step-by-step guide:
- Shut Off the Main Water Supply: This prevents any additional water from entering the system.
- Open Nearby Faucets: This relieves pressure in the pipes, allowing for easier thawing.
- Expose the Frozen Section: Identify where the pipe is frozen and make it accessible.
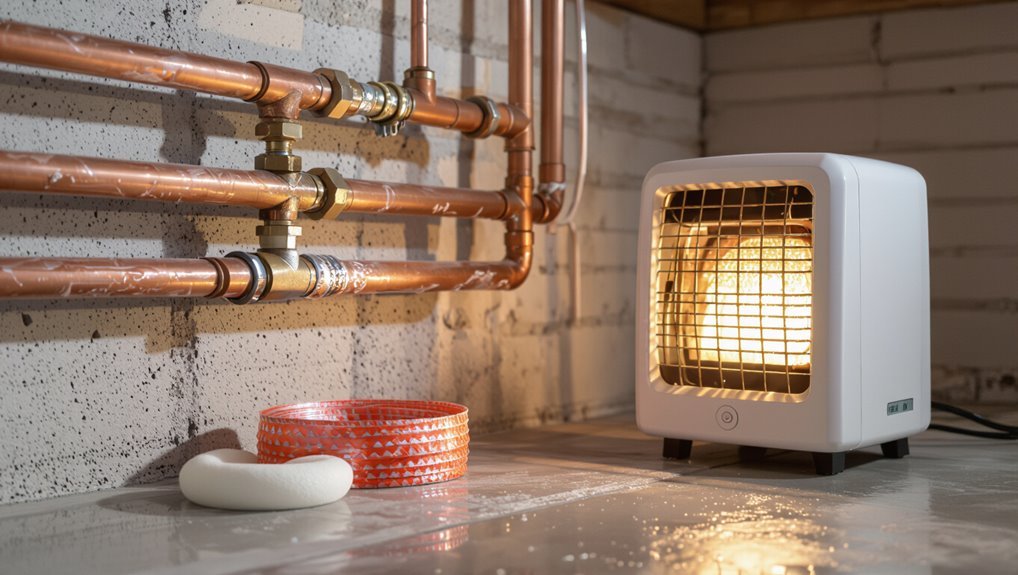
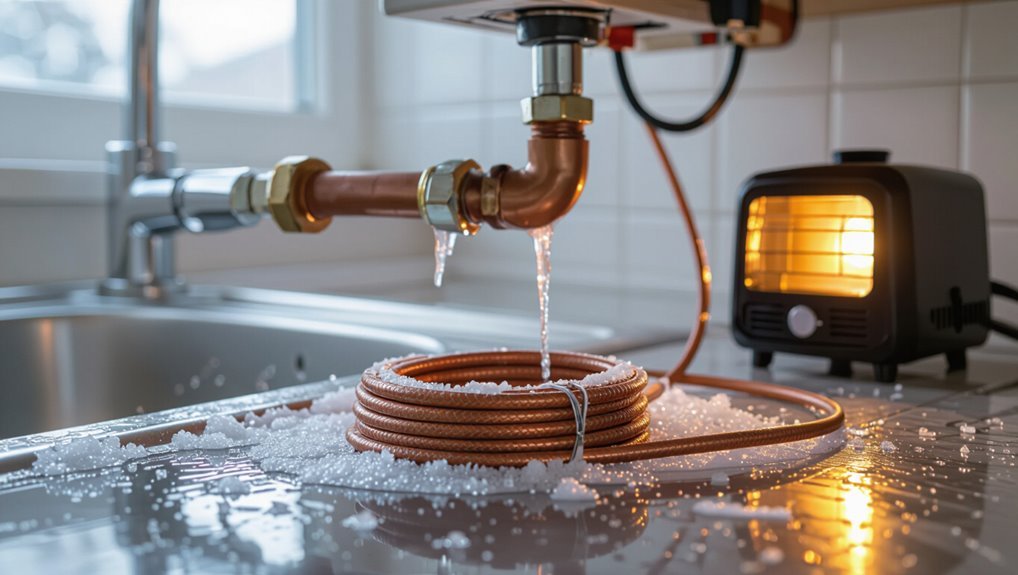
- Apply Controlled Heat: Use a hair dryer, hot towels, or an electric heater to gradually warm the pipe, starting from the faucet and moving toward the frozen area. Avoid open flames as they can cause damage.
- Monitor for Leaks: Keep an eye on fittings and connections; if you see leaks, stop immediately.
- Ensure Safety: Keep children and pets away from the area and prepare towels for any leaks that may occur.
Follow these steps promptly to safely thaw your pipes and prevent further damage.
Quick Emergency Steps to Thaw a Frozen Pipe Now
At the first sign of a frozen pipe—no water flow or frost on exposed plumbing—act quickly to prevent a burst: shut off the main water supply to the affected area, open nearby faucets to relieve pressure and allow thawed water to escape, then apply controlled heat starting at the faucet end and working toward the suspected freeze using a hair dryer, electric heater, or warm towels; avoid open flames and do not use high-voltage devices.
The person assesses accessibility, clears insulation or obstructions, monitors fittings for leaks as thawing progresses, and keeps children and pets away.
If thawing fails or damage appears, contact a plumber.
Fast Ways to Tell a Pipe Is Frozen
A sudden lack of water when taps are opened is often the first sign that a pipe has frozen.
Visible frost or ice on exposed sections of pipe confirms freezing and pinpoints the problem area.
These clear indicators help prioritize thawing efforts and prevent further damage.
No Water Flow
When water stops flowing despite open taps, frozen pipes are often the cause; a sudden reduction to a trickle or complete stoppage—especially at exposed fixtures, upper floors, or outdoor spigots—signals possible freezing. The occupant should check multiple faucets to locate the affected run, listen for irregular sounds, and note temperature drops near walls. Acting quickly reduces burst risk. Temporary measures like shutting main valves and gently warming accessible pipe sections are prudent while arranging professional help.
| Indicator | Action |
|---|---|
| Trickle only | Test adjacent fixtures |
| No flow upstairs | Inspect access panels |
| Outdoor spigot dead | Check exterior insulation |
| Irregular noise | Avoid high pressure |
Frost On Pipes
Frost forming on a pipe’s exterior is one of the clearest, fastest clues that water inside has frozen; observers should scan exposed lines in basements, crawl spaces, attics, and exterior walls.
Immediate signs are visual and tactile rather than waiting for loss of flow.
- White or crystalline coating along the pipe surface
- Cold, brittle feel compared to adjacent plumbing
- Localized condensation that freezes quickly
- Visible bulging or slight deformation at a joint
- Frost accompanied by a hissing or cracking sound
Prompt identification reduces rupture risk; once frost appears, take swift thawing and isolation measures.
Safety Checklist Before You Try to Thaw a Pipe
Before attempting to thaw a pipe, verify basic safety measures are confirmed: shut off the main water supply or the valve feeding the affected line, cut power to nearby electrical fixtures if water exposure is possible, and ventilate the area to prevent buildup of heat or steam.
Inspect for signs of existing leaks or bulging pipe sections, wear gloves and eye protection, and ascertain a clear escape path if water release occurs. Keep a functioning fire extinguisher nearby when using heat sources.
Have towels, buckets, and a tarp ready to contain water. If unsure about wiring or severe damage, contact a professional.
Step-by-Step: Safely Thaw a Frozen Pipe
Begin by confirming the safety checklist—the main water supply is off, electrical hazards are isolated, and leak containment materials are in place—then locate the frozen section and expose as much of the pipe as possible by removing insulation or opening access panels.
The procedure proceeds methodically to avoid pressure buildup or damage. Apply heat gradually, move toward warmer areas, and monitor for leaks. If thawing fails or damage appears, stop and call a professional.
- Start heating at the exposed section
- Progress toward warmer pipe ends
- Use steady, even heat only
- Check joints and fittings frequently
- Restore water slowly and inspect
Best Tools and Household Items to Thaw Pipes
The article outlines practical heat sources and torches that can safely thaw frozen pipes, noting their power and appropriate use cases.
It also reviews common household tools and materials—such as towels, space heaters, hair dryers, and heat tape—that assist in controlled warming and leak prevention.
Emphasis is placed on choosing methods that match the pipe location and material to minimize damage and risk.
Heat Sources And Torches
When addressing frozen pipes, choosing appropriate heat sources and tools is critical to thawing quickly and safely. Professionals recommend starting with low-heat, controlled methods—space heaters, heat lamps, electric hair dryers, and hot water applied via towels—before considering higher-temperature devices.
Higher-heat options can speed thawing but increase risk; propane or MAP gas torches should be used only by trained technicians with proper permits and ventilation. Emphasis remains on monitoring, keeping valves open, and checking for leaks as ice melts.
- Electric heat gun (low setting)
- Infrared heat lamp
- Portable space heater
- Hot water-soaked cloths
- Professional torch with safety gear
Household Tools And Materials
A concise kit of common household tools and materials can speed safe thawing of frozen pipes while minimizing damage.
Essentials include a hair dryer, space heater, or heat lamp for controlled warmth; electric heating tape for direct application; towels and plastic sheeting to catch condensation and protect surfaces; a bucket and wrench to open drains and relieve pressure; pipe insulation or foam sleeves for post-thaw prevention; rubber gloves and safety goggles; a flashlight and mirror to inspect hard-to-reach runs; extension cords rated for the heater; a thermometer to monitor ambient temperature; and a phone to call a plumber if problems persist.
Prevent Leaks and Pressure Problems While Thawing
Several precautions help prevent leaks and pressure spikes while thawing pipes: isolate the affected section, relieve system pressure, and monitor for signs of cracking.
The operator should work methodically to reduce risk and detect failures early. Follow recommended steps and check valves, joints, and nearby fittings frequently.
- Open nearby faucets to drain and vent pressure.
- Shut off supply to the frozen branch if possible.
- Apply heat gradually from the faucet toward the freeze.
- Inspect visible joints for hairline leaks during warming.
- Keep a bucket and towels ready to capture any drips.
Respond quickly to any leak evidence to minimize damage.
When to Stop, Shut Off Water, and Call a Pro
If warming fails to restore flow within a short, reasonable time or if any signs of cracking, persistent leaks, or swelling fittings appear, stop attempts immediately, shut off the main supply, and call a licensed plumber.
A professional evaluates hidden damage, locates remaining ice, and prevents pressure-related bursts. Homeowners should document visible damage, note when and where freezing started, and avoid reactivating water until repairs are complete.
If odors, discolored water, or continued dripping occur after restoration, keep the supply off.
For commercial or complex systems, or if the main valve is inaccessible or leaks when closed, contact emergency plumbing services without delay.
Conclusion
In short, following these clear, safety-minded steps lets a homeowner thaw pipes quickly without causing more harm. If someone worries that DIY thawing is risky, remember small, cautious actions—warm towels, hair dryers, gradual heat—minimize danger while monitoring for leaks and pressure. Should conditions worsen or ice extend beyond reach, turning off the main and calling a professional prevents disaster. Calm, measured effort often restores flow and avoids costly bursts.