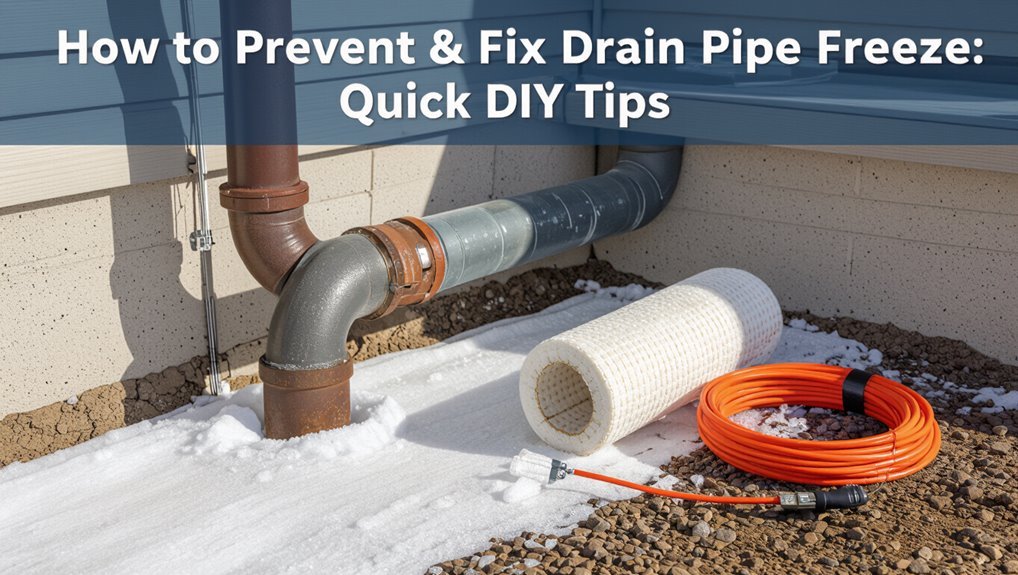
How to Prevent & Fix a Drain Pipe Freeze: Quick DIY Tips
Key Takeaway: How to Prevent & Fix a Frozen Drain Pipe
To prevent and fix a frozen drain pipe, watch for signs like frost, low flow, gurgling, or odors. If you suspect a freeze, immediately shut off the water supply. Use a hair dryer or heat tape to gently warm the pipe, starting from the warm end and moving towards the cold. Avoid using open flames or boiling water. For accessible traps, slowly pour warm (not hot) water to help thaw. Temporarily patch any leaks with epoxy putty, then insulate your pipes and seal drafts to prevent future freezing. Always follow safety precautions and local codes, and seek out long-term solutions.
Quick Fix: Thaw a Frozen Drain Pipe Safely
A reliable quick fix for a frozen drain pipe focuses on restoring flow without causing damage: identify the frozen section, apply gentle, direct heat, and monitor for leaks or thaw-related stresses.
One method uses a hair dryer or heat gun on low, moving steadily to avoid overheating fittings. Insulating nearby areas before heating reduces refreeze risk.
If accessible, gently pour warm (not boiling) water into the drain while heating externally. Keep a towel beneath joints to catch drips.
Stop heating if plastic softens or fittings loosen. When flow returns, inspect for cracks and reinforce insulation to prevent recurrence.
How to Tell a Drain Pipe Is Frozen
Signs of a frozen drain pipe include visible frost on the exterior of the pipe, reduced or no water flow, and unusual noises or odors coming from the drain.
Homeowners should inspect exposed piping for ice buildup and test flow at fixtures to confirm blockage.
Any creaking, gurgling, or foul smells alongside poor flow warrants immediate attention.
Visible External Pipe Frost
Crystalline frost forming on the exterior of a drain pipe is a clear visual cue that water inside has begun to freeze; this appears as white, granular ice or a thin sheath of opaque frost along joints and low sections.
Such frost often collects where insulation is thin, where pipes pass through unheated spaces, or near exposed fittings. It may localize in bends or around trap assemblies.
Frost indicates prolonged subfreezing exposure and raises risk of internal ice buildup. Inspect visually during cold spells, noting length and thickness of frost.
Photographing affected areas helps track progression and informs targeted thawing or insulation repair.
Reduced Or No Flow
Flow that slows or stops is the most direct indicator of a frozen drain pipe. Water pooling in sinks, tubs, or floor drains despite open fixtures signals an internal blockage from ice.
Toilets may weakly refill or fail to flush fully; showers produce thin trickles. Intermittent flow that improves as temperatures rise suggests partial thawing farther down the line.
Testing multiple fixtures helps locate the freeze—consistent reduction at fixtures on the same supply branch points to a shared frozen section.
Prompt identification prevents pipe stress and backups; once detected, safe thawing methods should be applied to restore normal flow.
Strange Noises Or Odors
A frozen drain pipe often announces itself through unexpected noises and unusual odors: creaks, gurgles, or popping as expanding ice stresses pipe walls, and sour, musty smells when trapped wastewater and organic matter begin to decompose behind an obstruction. Observation of sound and scent helps diagnose location and severity. Immediate action reduces rupture risk: shut off water, open faucets, and gently apply safe heat. Persistent or sharp noises and strong odors warrant professional inspection to prevent contamination and structural damage.
| Sensation | Feeling |
|---|---|
| Creaking | Unease |
| Gurgling | Annoyance |
| Popping | Alarm |
| Musty odor | Disgust |
| Sour odor | Concern |
Why Drain Pipes Freeze: Cold, Location, and Water Behavior
When temperatures drop below freezing, standing water in drain pipes can solidify and expand, creating blockages and stress on joints. The risk increases where pipes are exposed to cold air or run through unheated spaces, and where water movement is slow or intermittent, allowing ice to form more easily.
Temperature, pipe placement, and flow patterns combine: thin-walled or poorly insulated pipes lose heat quickly; locations with drafts or exterior walls cool faster; intermittent drains let layers of ice build. These factors make freezing more likely and damage more severe, prompting timely inspection and mitigation.
- Frustration at sudden blockages
- Anxiety over hidden damage
- Urgency to act quickly
Which Drains Freeze First (And Why)
Exterior hose bibs and any exposed outdoor spigots are among the first plumbing fixtures to freeze because they sit outside the insulated envelope and contain standing water in narrow passages.
Basement and crawlspace drains freeze next when cold air infiltrates uninsulated or poorly sealed spaces, cooling pipes that run near exterior walls or through unheated voids.
Identifying these vulnerable locations helps prioritize insulation, shutoff, and winterization measures.
Exterior Hose Bibs
Evaluating hose bibs early is important because they are among the first outdoor plumbing fixtures to freeze: their exposed location, thin walls, and direct connection to interior supply lines make them vulnerable to heat loss and ice formation before larger drain sections do.
Attention to hose bibs prevents burst pipes and costly repairs. Simple steps — disconnect hoses, shutoff indoor valves, insulate spigots, and use frost-free models — reduce risk.
Signs of trouble include reduced flow or bulging pipes.
Emotional impact resonates: loss, relief, and confidence when preventive actions succeed.
- Loss: surprise damage and water waste
- Relief: quick fixes avert emergency calls
- Confidence: preparedness reduces anxiety
Basement And Crawlspace Drains
After addressing exposed hose bibs, attention turns to basement and crawlspace drains, which often freeze next because they sit low in the home and connect to long runs of pipe that lose heat to cold foundations and poorly insulated soil.
These drains frequently have limited indoor heat and may run through unheated cavities, increasing frost risk. Condensate, low flow and standing water in traps freeze faster than flowing water.
Preventive steps include insulating drain runs, improving perimeter insulation, adding heat tape where allowed, and maintaining slight slope to avoid standing water.
Prompt thawing with safe heat sources reduces pipe damage and blockages.
Safety Checklist Before You Touch Pipes
Before any tools touch the pipe, a clear safety checklist should be followed to reduce injury and property damage: verify that water is shut off at the main, confirm power to nearby electrical outlets is disconnected, wear appropriate PPE (gloves and eye protection), guarantee good lighting and stable footing, and keep a phone or means of summoning help within reach.
The homeowner should inspect for hazards: slippery surfaces, fragile insulation, or loose fittings. If uncertainties exist, professional help is advised. Emotional readiness matters; remain calm and deliberate.
Consider these reminders:
- Pause and breathe: fear can cause mistakes.
- Respect the risks: water plus electricity is dangerous.
- Call help if unsure: better safe than regretful.
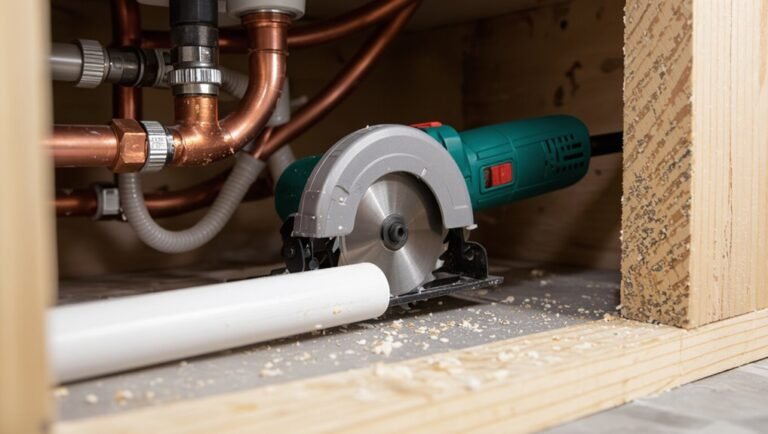
Tools You’ll Need to Thaw a Frozen Drain Pipe Safely
Several essential tools and a few safety items are required to thaw a frozen drain pipe safely: a hair dryer or heat gun (low setting), an electric space heater, insulating gloves, safety goggles, and a non-contact infrared thermometer to monitor pipe temperature.
Flexible heating tape or heat cables rated for plumbing speeds thawing along length. Pipe insulation materials and towels help retain heat and catch condensation. A bucket and towels collect meltwater.
Extension cords rated for the load and a GFCI-protected outlet reduce electrical risk. A flashlight and adjustable wrench assist inspection and minor valve adjustments without disassembling plumbing.
When to Call a Plumber Instead of DIY
When should a homeowner stop DIY efforts and call a professional? A plumber should be contacted when risks, complexity, or damage exceed basic DIY ability. Signs include persistent leaks, inability to restore flow, or visible pipe deformation. Waiting can worsen damage and increase costs.
- Fear of hidden damage or mold that grows unseen
- Frustration from repeated failures and worsening cold-water loss
- Anxiety about making costly mistakes or voiding warranties
A licensed plumber offers diagnostics, safe thawing, and permanent repairs, reducing long-term risk and restoring reliable plumbing faster than continued do-it-yourself attempts.
Locate the Exact Frozen Section
The inspector should visually scan exposed pipe runs for frost, ice accumulation, or bulging that indicate a frozen section.
Small, cold-feeling areas can be isolated by warming short lengths with a hair dryer or hot cloth to confirm the affected spot.
Marking the exact location helps determine whether a temporary thaw or professional repair is required.
Check For Frost Or Bulging
How can one pinpoint the exact frozen section of a drain pipe? Visual inspection focuses on frost, ice accumulation, or bulging spots along accessible pipe runs.
Cold patches often appear as white frost crusts; bulges indicate internal ice pressure and demand prompt attention. Note locations, orientation, and nearby cold sources before any intervention. Signs may be subtle indoors where pipes pass through unheated spaces.
- Seeing frost can trigger worry and urgency.
- Discovering a bulge can create alarm and a need to act.
- Tracing cold streaks can bring relief when found early.
Test Sections With Heat
Why start applying controlled heat along suspect pipe runs? A focused heat source—hair dryer, heat gun on low, or heat tape—reveals the frozen segment by progressing until the trapped water moves.
Begin at the warmest accessible point and work toward colder areas, warming joints and bends first. Pause periodically to check flow inside fixtures or for softening frost on exposed pipe. Avoid open flame.
If warming one section restores flow, mark that location for insulation and monitor nearby lengths. If heat fails to advance after several minutes, the blockage may be extensive; consider shutting water and calling a professional.
Thaw a Frozen Drain With Warm Water
Pour warm (not boiling) water slowly into the affected drain or down the exposed section of pipe to raise the temperature and melt the ice blockage.
Proceed gradually to avoid cracking pipes; monitor for leaks and verify runoff drains safely away. If flow resumes, flush with more warm water to clear residual ice.
- Relief: hearing the slow drip return restores calm.
- Caution: a crack or sudden gush demands immediate shutdown.
- Confidence: a steady thaw proves the method effective.
If symptoms persist after several attempts, consult a plumber to prevent further damage.
Use a Hair Dryer to Thaw Outdoor Drains Safely
When outdoor drains freeze, a hair dryer can be a controlled, low-heat option to thaw exposed pipes and visible drain openings without introducing boiling water or open flames.
The device should be used on a low or medium setting, held several inches from the pipe, and moved continuously to avoid overheating any single spot. Direct heat toward the frozen section and any nearby fittings until water flow resumes.
Keep the cord dry and use a GFCI outlet. Avoid forcing instruments into the drain.
If thawing is slow or ice extends into underground lines, contact a plumber to prevent damage.
Apply Heat Tape or Cable to Thaw and Prevent Freezing
The article considers heat tape and heating cable options with attention to material compatibility, thermostat control, and manufacturer specifications.
It then outlines safe installation steps, including surface preparation, correct placement, secure fastening, and following electrical codes.
Finally, it notes expected energy use, recommends periodic monitoring for damage or excessive draw, and suggests smart plugs or meters to track consumption.
Choosing The Right Tape
Selecting the appropriate heat tape or cable requires matching the product’s temperature rating, wattage, and installation type to the pipe material and exposure conditions.
The right choice balances sufficient heat to prevent ice without overheating plastic pipes; self-regulating tapes adapt output by temperature, while constant-wattage offers steady warmth for metal lines.
Weatherproofing and UL listing for wet locations matter for outdoor or buried runs. Compatibility with insulation type and pipe diameter guarantees efficiency.
Consider power source accessibility and control options like thermostats or built-in sensors to limit energy use and risk.
- Relief that pipes stay safe
- Confidence in reliable performance
- Calm about winter readiness
Safe Installation Steps
Before applying heat tape or cable, a clear plan should be established that identifies pipe material, power availability, and the exact run to be heated so installation proceeds safely and effectively. Surfaces must be dry and insulated where permitted; follow manufacturer spacing and overlap restrictions. Secure tape with approved fasteners, avoid staples, and keep thermostats or self-regulating sections visible. Test continuity before energizing and verify grounding. Route cords away from sharp edges and high-traffic zones. Record installation details and label circuits. Inspect annually and after extreme weather; replace damaged sections immediately to maintain safety and effectiveness.
| Step | Action | Note |
|---|---|---|
| 1 | Clean pipe | Dry surface |
| 2 | Apply tape | Follow pattern |
| 3 | Secure | Use straps |
| 4 | Test & label | Verify power |
Energy Use And Monitoring
Monitor energy use closely when applying heat tape or cable, because power demand and run length determine both thawing speed and operating cost. The installer calculates wattage per foot, estimates runtime to reach safe temperature, and uses thermostatic controls or timers to avoid waste.
Periodic checks with a clamp meter and infrared thermometer confirm actual draw and pipe surface temperature. Attention to circuit capacity prevents overloads; GFCI protection guarantees safety. Record usage during initial thaw to set future limits.
- Relief when thawing finishes quickly
- Anxiety eased by controlled power draw
- Satisfaction from lower bills and safe pipes
Use a Space Heater Safely Near Drain Pipes
A single properly placed space heater can help keep vulnerable drain pipes above freezing, but it must be used with strict attention to safety and manufacturer instructions. Position the heater on a stable surface, keep combustibles away, and avoid enclosing the unit. Monitor temperature and never leave it running unattended for long periods.
| Guideline | Action |
|---|---|
| Distance | Keep heater ≥3 ft from pipes and materials |
| Surface | Place on level, nonflammable base |
| Supervision | Check hourly when in use |
| Power | Use dedicated circuit; avoid extension cords |
Follow local codes and unplug when not needed.
Steam and Hot Towels: Controlled Thaw Methods
Apply controlled steam or hot towels to thaw frozen drain pipes gradually, focusing heat on the pipe section and joints rather than open fittings or nearby flammable materials.
The method is deliberate: wrap a towel soaked in hot (not boiling) water, replace frequently, or direct steam from a safe distance to soften ice.
Monitor for leaks and progress; stop if fittings stress or water flows suddenly. Maintain ventilation and wear heat-resistant gloves.
If thawing reaches a weak spot, shut water off.
- Relief as stubborn ice yields
- Anxiety easing with careful control
- Confidence from steady, observable results
Unsafe Thawing Methods to Avoid (And Why)
The section outlines common thawing approaches that create hazards and should be avoided.
Open flames can ignite nearby combustibles and damage pipes, while pouring boiling water on frozen sections risks cracking fittings from rapid temperature change.
Chemical heat packs may overheat localized areas or release harmful fumes if misused.
Using Open Flames
Using an open flame to thaw a frozen drain pipe poses severe fire and injury risks and should be avoided.
Flames can ignite insulation, nearby materials, or trapped vapors; metal expands unevenly, causing cracks or bursts; and scorched pipes can release toxic fumes.
Professionals warn against torches, grills, or candles near plumbing. Safer alternatives exist and should be chosen.
- Panic at a sudden spark near home wiring
- Anger at costly repairs from a burst joint
- Fear of smoke or toxic fumes in enclosed spaces
Hot Water On Pipes
Many people pour hot water directly onto frozen drain pipes hoping for a quick fix, but this method can crack cold metal or brittle plastic as rapid temperature change produces stress.
Sudden heating also risks joints and soldered fittings separating, causing immediate leaks. For insulated or buried sections, surface warming may not reach the ice plug, giving a false sense of resolution while internal pressure builds.
Scalding water can harm occupants and damage finishes when it runs uncontrolled.
Safer alternatives involve gradual, controlled warming from a distance, warming the surrounding space, or using electric thawing tools designed for plumbing to avoid structural damage.
Chemical Heat Packs
Avoids quick fixes, chemical heat packs are marketed as convenient for thawing frozen drains but pose significant risks.
They generate localized heat and sometimes steam, which can crack PVC, warp seals, or ignite nearby combustibles. Residue from packs can corrode metal fittings and contaminate water.
Use safer methods like gentle electric pipe heaters, warm towels, or professional service.
- Panic from unexpected smoke or smell
- Regret over costly pipe or fixture damage
- Fear of hazardous chemical exposure
The detached assessment recommends avoiding chemical heat packs and choosing controlled, low-temperature alternatives to protect plumbing and health.
Check for Burst Pipes After Thawing
Once the ice inside a pipe has melted, inspect the system immediately for signs of rupture or leakage. The homeowner should look for wet spots, drips, bulging pipe sections, and reduced water pressure. Water stains or pooling beneath fixtures indicate failure. Shut off the main valve when a burst is suspected and document damage with photos for repair planning or insurance. Avoid using fixtures until assessed. If unsure, contact a licensed plumber to evaluate structural fittings and drain lines. Quick detection limits water damage and mold growth; timely professional assessment guarantees safe, permanent repairs.
| Sign | Location | Action |
|---|---|---|
| Drip | Under sink | Shut valve |
| Bulge | Exposed pipe | Photo |
| Stain | Ceiling | Dry area |
| Low flow | Faucet | Call plumber |
Temporary Fixes for a Cracked Drain Pipe
When a drain pipe shows a crack, temporary patch materials such as rubber tape, epoxy putty, or hose clamps can be applied quickly to limit water loss.
These short-term fixes are chosen for speed and ease of installation rather than permanence. Homeowners should use them only to stop leaks until a professional repair or replacement can be performed.
Temporary Patch Materials
Temporary patch materials offer a quick, short-term solution to slow or stop leaks in a cracked drain pipe until a permanent repair can be made. Common options include epoxy putty, silicone rubber tape, and pipe repair clamps.
Each has limits: they resist water and cold briefly, but degrade under pressure or movement. Selection depends on crack size, pipe material, and access.
Apply only after draining and drying the area; follow product instructions. These measures reduce immediate damage and buy time for a professional fix.
Emotional reassurance comes from knowing there is a temporary, tangible way to control risk:
- Relief: a visible seal restores calm
- Urgency: prompts immediate action
- Hope: allows planning for proper repair
Fast Leak Stopping
Having applied a short-term patch, attention turns to quick methods that stop active leaks immediately while a longer-term solution is arranged.
Temporary leak-stopping priorities include reducing flow, sealing the breach, and monitoring for failure. Shutoff valves or hose clamps limit water, while pipe repair tape, rubber and clamp wraps, or epoxy putty cover cracks; apply clean, dry surfaces for best adhesion.
For larger breaks, use a rubber patch secured with hose clamps or a repair coupling if available.
After initial stopping, test at low pressure, inspect for seepage, and schedule a permanent repair or professional replacement promptly.
Drying and Ventilating After a Thaw
A thorough drying and proper ventilation are essential steps once a frozen drain pipe has thawed to prevent lingering moisture from causing corrosion, mold, or odors.
Surface water should be wiped and collected, joints inspected for damp pockets, and damp materials removed promptly. Fans or dehumidifiers accelerate drying in confined spaces; open cabinet doors and vents to improve airflow.
Monitor for residual leaks and odors for 24–48 hours.
- Relief: seeing dry, intact fittings restores confidence.
- Urgency: musty smells demand immediate attention to avoid health risks.
- Satisfaction: a dry, ventilated space signals a successful thaw and repair.
Insulate Drains to Prevent Future Freezes
Proper insulation of drain lines is the first step in preventing future freezes, so selecting materials rated for the pipe type and local climate is essential.
All pipe penetrations through walls and floors should be sealed to stop cold drafts from reaching the piping.
Maintaining a steady flow of warm air in crawlspaces and utility areas complements insulation and reduces freeze risk.
Choose Proper Insulation
Insulation selection determines how effectively a drain pipe resists freezing and how long that protection lasts. The writer recommends matching insulation type to pipe material, exposure level, and budget.
Foam sleeves suit indoor runs; mineral wool or foil-faced options work for colder or exposed areas. R-value and moisture resistance should guide choices. Proper fit and continuous coverage prevent cold spots.
Install with appropriate tape or clamps, avoiding compression that reduces effectiveness. Consider adding a heat cable where extremes occur.
- Relief: confident protection reduces winter anxiety.
- Pride: neat installation feels responsible.
- Security: lasting insulation protects home health.
Seal Pipe Penetrations
When pipe runs pass through walls, floors, or foundations, small gaps around the penetration create direct pathways for cold air and moisture to reach the pipe and undermine any surrounding insulation.
Sealant and backer rod should fill voids after confirming the pipe is centered and supported. Use low-expanding foam or silicone caulk for narrow gaps and fire-rated foam where required by code.
For larger openings, install properly sized escutcheons or insulated pipe collars. Guarantee seals are continuous, weatherproof, and compatible with surrounding materials.
Periodically inspect penetrations for deterioration and reseal as part of routine freeze-prevention maintenance.
Maintain Warm Air Flow
Regularly ensuring warm air can reach drain pipes is essential to preventing freeze-related blockages. A homeowner should open cabinet doors, route warm air toward vulnerable pipes, and use safe heat sources to keep temperatures above freezing.
Insulation wraps supplement airflow but do not replace it; combining methods yields reliable protection. Periodic checks during cold snaps catch developing issues early.
- Relief: seeing steady water flow removes anxiety and winter dread.
- Confidence: simple steps empower and reduce emergency calls.
- Comfort: a warm, functioning plumbing system preserves home safety and peace of mind.
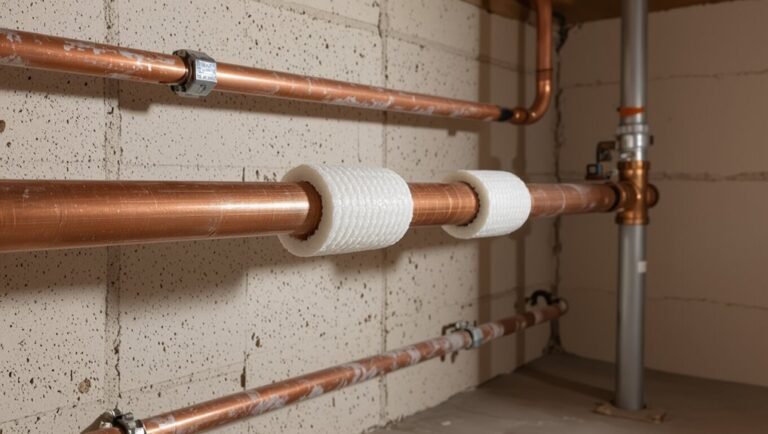
Best Insulation Types for Drain Lines
Choosing the right material for insulating drain lines can considerably reduce the risk of freezing and make repairs easier.
Common choices include foam pipe insulation, fiberglass wrap, and rubberized insulation. Foam sleeves offer easy installation and good thermal resistance for exposed runs.
Fiberglass wrap handles higher temperatures and irregular shapes but requires vapor barrier tape to prevent moisture.
Rubberized closed‑cell insulation resists condensation and compresses to fit tight spaces.
For outdoor or buried lines, weatherproofing with protective jackets or tape is advisable.
Selection depends on location, pipe material, temperature extremes, and accessibility for inspections and future repairs.
Add Foam Sleeve Insulation to Drains (Step‑By‑Step)
After selecting the appropriate insulation type, the next step is to install foam sleeve insulation on accessible drain runs to prevent freezing.
The installer measures pipe length, slices sleeves along their seam, fits them snugly around drains, and secures seams with waterproof tape.
Joints and bends receive overlapping sections to maintain continuous coverage; exposed ends are capped or taped.
Periodic inspection verifies sleeves remain intact and dry. Proper installation reduces freeze risk and simplifies future maintenance.
- Relief at seeing protected pipes
- Confidence in reduced emergency repairs
- Satisfaction from a simple, effective fix
Seal Gaps Where Cold Air Reaches Pipes
When cold air can reach drain pipes through gaps in walls, floors, or utility chases, sealing those openings is essential to prevent freezing and heat loss.
Identify penetrations around pipe runs, vents, and access panels. Use closed-cell foam sealant for irregular cavities and fire-rated caulk where required by code.
Install foam gaskets or expanding spray for larger voids, trimming excess after curing. Insulate the surrounding cavity after sealing to reduce temperature differentials.
Check for air movement with a smoke stick or infrared thermometer. Reinspect and reseal annually or after renovations to maintain continuous protection against cold intrusion.
Reroute a Vulnerable Drain Line: Options and Costs
When a drain line is repeatedly exposed to freezing conditions, rerouting it to a warmer or better-insulated path can prevent future blockages.
Options range from minor reruns within a crawlspace to full exterior relocation, with choices influenced by material, access, and local codes.
Estimated costs vary widely—typically a few hundred dollars for simple adjustments up to several thousand for extensive rerouting or trenching.
Options For Rerouting
If a drain line repeatedly freezes because of its location or routing, rerouting the pipe can be the most reliable long-term solution; the decision depends on the extent of exposure, accessibility, and budget.
Options include relocating lines inside conditioned space, raising them above cold zones, or running them through insulated chases. Each approach balances disruption, permanence, and protection level.
Contractors assess structural access, slope, venting, and connections. Homeowners weigh DIY versus pros, permits, and winter work challenges.
- Relief when a permanent fix replaces constant worry
- Confidence from a professional, lasting solution
- Frustration during temporary disruption
Estimated Rerouting Costs
Rerouting a vulnerable drain line carries a range of price points that reflect scope, materials, labor access, and local code requirements.
Minor reroutes within an accessible crawlspace or attic using PVC or ABS typically cost $300–$800 for parts and a few hours of labor.
Moderate jobs involving drywall or limited trenching rise to $800–$2,000.
Complex reroutes requiring joist work, cast-iron replacement, permits, or exterior excavation commonly run $2,000–$6,000 or more.
Additional expenses: permits, inspections, insulation, and restoration (drywall, paint, flooring).
Homeowner quotes should itemize materials, labor hours, permit fees, and contingency allowances.
Using Heat Tape on Drain Pipes: Pros and Cons
Although heat tape can be an effective way to prevent frozen drain pipes by supplying targeted warmth, its suitability depends on installation quality, pipe material, and local freezing severity.
Properly installed self-regulating tape reduces freeze risk; improper use risks overheating, fire, or voided warranties. Metal pipes conduct heat well, PVC requires careful spacing and thermostatic control.
Costs are moderate but include ongoing power use and periodic inspection. Consider professional installation for complex runs.
- Relief when winter threatens, knowing lines are protected.
- Anxiety if tape ages or wiring frays unnoticed.
- Confidence when inspections confirm safe operation.
Keep Indoor Temps That Protect Drain Lines
After considering heat tape as a targeted defense, maintaining appropriate indoor temperatures provides a broader, passive safeguard for drain lines. Consistent heating reduces thermal stress on pipes in exterior walls and unheated spaces. Recommended practices include setting thermostats to prevent dips below freezing, sealing drafts, and allowing warm air circulation near vulnerable plumbing runs. Monitoring with inexpensive thermometers and smart sensors helps detect cold spots before freeze risk increases. Insulation complements steadier indoor temps but does not replace them; combined measures offer reliable protection.
| Action | Benefit |
|---|---|
| Maintain thermostat | Prevents ambient drops |
| Seal drafts | Reduces cold infiltration |
| Circulate warm air | Reaches hidden pipes |
| Use sensors | Early cold detection |
| Insulate walls | Lowers heat loss |
Why Running Water Prevents Freeze‑Ups
Running water keeps pipes from freezing by preventing the formation of stationary ice plugs: moving water requires lower cooling time to reach freezing and any developing ice is swept downstream before it can block the pipe.
A slow, steady flow reduces localized heat loss, distributes ambient warmth, and prevents supercooling. Minimal dripping can be enough when temperatures are near freezing; longer, steady flow is needed in extreme cold.
Homeowners should balance water waste with protection needs.
Emotional benefits encourage action:
- Relief: avoiding sudden blockages and costly repairs.
- Confidence: simple prevention steps that work.
- Reassurance: lower risk of burst pipes and disruption.
Smart Timers and Faucets to Prevent Freezing
Automated timers can be set to run small, regular flows that keep drain pipes above freezing without wasting water.
Faucets with built‑in frost protection provide passive defense in vulnerable locations.
Integrating timers and frost‑protected fixtures with local weather sensors allows systems to ramp up flow only when temperatures approach freezing.
Set Timers For Flow
Install timers or programmable faucet controllers to maintain intermittent flow during cold spells, which reduces the chance of standing water freezing in exposed pipes.
The device cycles a slow drip or brief flow periods, preserving heat transfer and preventing ice blockages without wasting excessive water. Selection favors weatherproof units with battery backup and simple programming.
Installation typically involves attaching a controller to the outdoor spigot or integrating with an indoor valve in vulnerable locations. Users should test settings before severe cold and pair timers with insulation measures for best results.
- Relief knowing pipes stay protected
- Confidence from automated reliability
- Calm during cold nights
Install Frost‑Protected Faucets
Choose frost‑protected faucets and compatible smart timers to reduce freeze risk at vulnerable outdoor and unheated indoor fixtures.
Frost‑protected faucets have a long stem that locates the shutoff inside a warmer space, minimizing exposed water in the line. When paired with smart timers, brief, intermittent flow cycles keep water moving during cold snaps without wasting much water.
Install per manufacturer instructions, ensuring proper shutoff valve alignment and slope toward the outlet. Test cycles manually after installation and inspect seals annually.
For retrofit situations, verify pipe access and pressure compatibility; consider professional help if internal shutoffs are inaccessible.
Sync With Weather Sensors
How can smart timers and weather sensors be synchronized to prevent frozen lines without wasting water? A system links local temperature forecasts and on‑site sensors to run faucets or heating only when freeze risk is detected.
Timers override constant flow, activating brief pulses or low trickles during critical hours. Integrations reduce waste and energy while preserving pipes.
- Relief: automated protection removes late‑night worry.
- Confidence: accurate sensors react faster than guesswork.
- Economy: targeted runs save water and heating costs.
Proper setup requires sensor placement, temperature thresholds, and occasional manual checks to confirm reliable operation.
Protect Outdoor Drains, Gutters, and Traps
Because outdoor drains, gutters, and traps are the first line of defense against winter buildup, they must be kept clear and insulated to prevent ice formation that can block flow and cause backups.
Inspect and clear leaves, debris, and sediment before freeze. Fit gutter guards and drain screens to reduce re-clogging. Ascertain downspouts direct water away from foundations and are pitched for gravity flow.
Install heat tape or self-regulating cable on exposed metal runs and around trap inlets where permitted. Secure loose connections and replace cracked sections.
Test runoff during a cold spell to confirm unobstructed flow and functioning protections.
Winterize Basement and Crawlspace Drains
Outdoor drain upkeep naturally leads to attention on interior low points where trapped water can freeze: basement and crawlspace drains.
These spaces are vulnerable; standing water, poor insulation, and intermittent heating create freeze risk. Inspect drains, clear debris, and confirm slope for proper drainage.
Install covers, use removable heat tape rated for wet locations, and seal cracks where cold air intrudes. Consider a small thermostatic heater in very cold, occupied basements; leave crawlspace vents closed or insulated when appropriate.
Emotional reminders:
- Protect the home’s foundation and family comfort.
- Prevent costly pipe bursts and soggy, ruined belongings.
- Preserve peace of mind through simple winter prep.
Protect Drains in Seasonal or Vacation Homes
When a property will be unoccupied for weeks or months, drains in seasonal or vacation homes require deliberate preparation to prevent freeze damage and odors. Routine checks and targeted winterization steps reduce the risk of costly repairs.
Owners should shut off and drain water lines to fixtures, open low drains slightly to allow complete drainage, and pour non-toxic antifreeze into traps to maintain a seal against sewer gas. Insulate exposed piping and seal gaps where cold air enters.
Arrange periodic on-site inspections or hire a local caretaker to run systems briefly during warm spells and confirm no leaks or new blockages.
Protect Drains During a Power Outage
If power fails, gravity-fed drains and fixtures can behave differently and require immediate attention to avoid backups, frozen traps, or sewer gas entering the home.
The homeowner should shut off unnecessary water sources, open faucets minimally to keep flow, and check exposed pipes for rapid temperature drops.
A battery-powered heater or warm air directed at vulnerable pipe runs reduces freeze risk.
Seal vents and gaps to retain heat where plumbing passes.
Monitor traps and basins; pour warm (not boiling) water if freezing is suspected.
Emergency plans minimize damage and stress.
- Panic at night
- Helpless watching pipes
- Relief when mitigation works
Detect Slow Leaks After a Freeze Event
After a freeze, small fractures and loosened fittings can allow water to escape slowly and go unnoticed for days. Homeowners should begin by conducting a focused inspection of visible pipes, fixtures, and ceilings for damp spots, staining, or mineral deposits that indicate persistent seepage.
Next, monitor water meter readings with all fixtures off—any movement suggests a leak. Check under sinks, around traps, and near joints for fresh drips or corrosion. Use a flashlight to reveal hairline cracks and a tissue to detect moisture.
Document findings, isolate affected zones by shutting valves, and contact a plumber if leakage persists or structural damage appears.
Repairing Common Drain Materials: PVC, ABS, Cast Iron
Begin by identifying the pipe material—PVC, ABS, or cast iron—as each requires different tools, adhesives, and temperature precautions; correct identification guides selection of solvent cement, primers, mechanical couplings, or corrosion treatments.
PVC joints use solvent cement after dry-fitting and priming; work in moderate temperatures and guarantee clean cuts.
ABS also uses solvent cement but requires ABS-specific products; avoid PVC primers on ABS.
Cast iron needs corrosion assessment, cast-iron fittings, and either rubber-sleeve couplings or professional welding for serious damage.
Use appropriate safety gear; test joints under low pressure before returning to service.
- Relief when a repair holds
- Frustration avoided with the right parts
- Confidence restored with proper technique
When Patching Is OK and When to Replace
When evaluating a frozen or damaged drain pipe, the decision to patch or replace hinges on the extent of damage, pipe material, age, and the likelihood of future failures.
Small cracks, pinhole leaks, or isolated corrosion on newer PVC or ABS often justify a patch or localized splice if joints remain sound.
Extensive corrosion, multiple leaks, crushed sections, or brittle old cast iron typically require replacement to guarantee long-term reliability.
Consider accessibility, cost of recurring repairs, code requirements, and potential water damage.
When in doubt, prioritize replacement for hidden damage, multiple failure points, or systems near the end of service life.
How to Glue or Solder a Small Drain Repair
The section outlines the basic tools and materials required for a small drain repair, from flux and solder or PVC solvent to brushes and a torch or heating tool.
It explains how to prepare the repair area by cleaning, drying, and cutting back damaged pipe to sound material.
Finally, it summarizes the glue or solder technique, covering proper alignment, application order, and curing or cooling times.
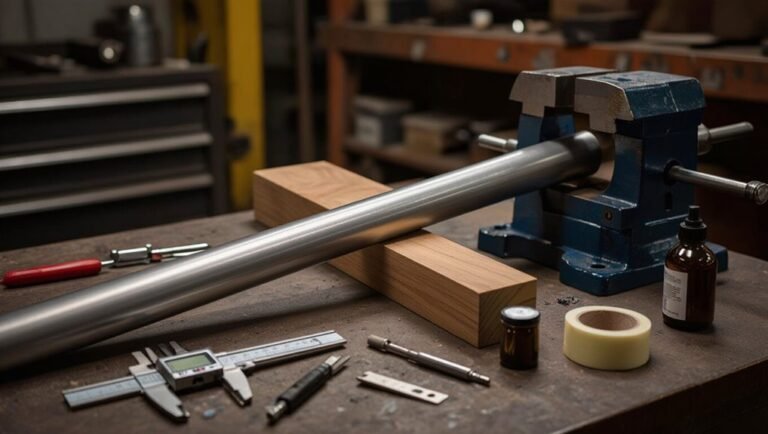
Tools And Materials Needed
A compact set of tools and quality materials makes small drain repairs—whether glued PVC joints or soldered copper fittings—efficient and reliable.
The technician gathers essentials: pipe cutter, deburring tool, appropriate adhesive or flux and solder, sandpaper, primer, cloths, and safety gear.
Parts match pipe type and size; adhesives rated for plumbing, and solder/flux compliant with codes.
Preparation items (heat source, clamps) are present but not described in procedure.
Proper materials reduce leaks and repeat work; the kit gives confidence and speed.
Emotional reassurance comes from readiness, control, and the satisfaction of a job done right.
- Readiness
- Control
- Satisfaction
Preparing The Repair Area
Before starting the glue or solder repair, the work area must be cleared, dried, and well-lit so the technician can access the pipe, joints, and tools without obstruction.
Protective coverings shield flooring and nearby fixtures from drips, flux, or adhesive. Ventilation reduces fumes when soldering or using solvent cement.
Arrange tools within reach on a stable surface and organize fittings in sequence to avoid confusion. Shut off water and depressurize the section; place a bucket and absorbent cloths for residual moisture.
Ascertain adequate lighting and a fire-safe zone for any heat source. Confirm a clear exit path before beginning.
Glue Or Solder Technique
With the workspace prepared and hazards controlled, attention turns to repairing the joint using either solvent cement for plastic or solder for copper.
For PVC, apply primer, then solvent cement, push fittings firmly, and hold until set.
For copper, clean surfaces, flux, heat evenly, feed solder, and cool without disturbing the joint.
Check for leaks after restoring water.
- Relief when a steady bead seals the leak.
- Confidence from neat, tested workmanship.
- Calm knowing the pipe won’t freeze again if insulated.
Tools, cleanliness, and patience determine success; avoid overheating or under-priming to prevent failure.
DIY Repair vs Professional Replacement: Cost Estimates
Decision-making about a frozen drain pipe repair hinges on comparing upfront costs, long-term value, and risk tolerance: DIY fixes often cost only the price of tools and materials (typically $20–$200), while professional replacement can range from $300 for localized repairs to $1,500+ for extensive pipe replacement or access work. DIY suits minor clogs, temporary thawing, or simple patching but carries risk of missed damage. Professionals provide diagnostics, warranties, and code-compliant replacement. Homeowners should weigh labor value, permit needs, and potential water damage when choosing.
| Option | Typical Outcome |
|---|---|
| DIY | Lower cost, higher risk |
| Pro | Higher cost, lower risk |
Document Freeze Damage for Insurance Claims
When freeze-related damage occurs, documenting it promptly and thoroughly is essential for a successful insurance claim. The homeowner should photograph all visible damage, note dates and times, and preserve receipts for emergency repairs.
A concise written inventory of affected rooms and items, with estimated values, supports the claim. Contacting the insurer immediately and following their documentation checklist prevents delays. Retain damaged pieces where safe; they serve as evidence.
Emotional impact can be communicated without exaggeration—stick to facts. Consider brief witness statements if others witnessed burst events.
- Shock at sudden loss
- Anxiety over repair costs
- Relief when documentation helps
Common Mistakes Homeowners Make Thawing Pipes
After documenting freeze damage and contacting the insurer, homeowners often face the immediate task of thawing frozen pipes, but several common mistakes can turn a fixable problem into a costly one.
Rushing to apply open flames risks fire and pipe damage. Heating only accessible sections ignores hidden ice farther along the line. Using excessive water pressure to force flow can burst weakened pipes.
Neglecting to shut off valves before working increases flooding risk. Failing to monitor joints and fittings misses early leaks. Ignoring manufacturer guidance for pipe materials and DIY limits delays proper repairs and voids warranties.
Test Your Fixes Before Full Use
After repairs, the homeowner should run a slow flow check to confirm water moves steadily without drips or sputtering.
If flow remains weak, the temperature should be increased gradually to avoid thermal shock to the pipe.
Only once steady flow and stable warming are observed should full water use resume.
Slow Flow Check
A brief slow-flow check confirms that the thawed section is clear and the repair is holding before returning the plumbing to normal use.
One faucet is opened slightly; flow is observed for steady, drip-free output and any unusual sounds. The drain is watched for smooth descent without gurgling, and fittings are inspected for leaks.
If concerns appear, shut water off and address the issue.
- Relief when water moves freely
- Anxiety easing as sounds normalize
- Confidence restored when seals remain dry
Document observations and repeat the slow-flow check after any additional adjustments.
Gradual Temperature Increase
When the slow-flow check shows stability, the homeowner should raise water temperature and flow gradually to confirm the repaired section tolerates normal thermal and pressure changes. This controlled increase helps reveal hidden weaknesses—such as small leaks, loose fittings, or remaining ice—before returning the entire system to full use.
The gradual approach proceeds in increments: slightly warmer water and higher flow for 10–15 minutes, inspection for drips or noise, then repeat until normal conditions are reached. Persistent anomalies prompt immediate shutdown and re-evaluation.
Documenting each step and observed responses guarantees safe restoration and informs any needed follow-up repairs or professional assessment.
Energy‑Saving Ways to Keep Drains Warm
If pipes are kept just warm enough, the risk of freezing drops dramatically and energy use can stay low; simple measures—insulation, targeted heat sources, and efficient water flow—combine to maintain safe temperatures without wasting power.
A pragmatic approach uses foam sleeves, heat tape with thermostat control, and routine slight water movement to prevent cold spots. Seal gaps where drafts reach pipes and route warm air toward vulnerable runs. Monitor temps with inexpensive sensors. Emphasize small, targeted interventions over whole‑house heating increases.
Emotional reassurance comes from visible steps and measurable results:
- Comfort: warmth where needed, worry eased
- Control: small actions, big impact
- Confidence: measurable protection
Train Household Members on Freeze Protocols
Because clear roles and practiced steps reduce panic and damage, household members should be taught a concise freeze protocol that covers detection, immediate actions, and who to notify.
The protocol lists signs of a frozen drain—no flow, frost, odd noises—and immediate steps: shut off relevant valves, open nearby faucets to relieve pressure, and avoid using force on fixtures.
It assigns responsibilities for contacting an adult, a plumber, and utility services if needed. Practice drills guarantee familiarity.
Include where to find shutoff locations, recommended temporary fixes (warm compresses, hair dryer), and a short checklist posted near the main water control.
Local Codes for Drain Repairs and Permits
Although local regulations vary, homeowners should understand that drain repairs often fall under municipal plumbing codes and may require permits and inspections. Compliance protects occupants and preserves property value.
Before starting work, verify permit requirements, licensed contractor rules, and required inspection stages. Failure can mean fines or forced rework.
- Unexpected permit refusals can be frustrating and costly.
- Inspections may feel intrusive but guarantee safety and code compliance.
- Clear documentation brings relief and resale confidence.
When in doubt, consult the local building department or a licensed plumber to confirm scope, timelines, and documentation needed for lawful, lasting repairs.
Ice Still in the Pipe? Quick Troubleshooting
Still seeing ice in the line after initial thawing efforts? Inspect accessible pipe runs for remaining frost, checking low spots and joints where water pools and refreezes.
Confirm heat sources reached the frozen section; use a hairdryer or heat tape cautiously, working from warm to cold ends.
Apply gentle pressure by running nearby fixtures to encourage flow; listen for shifting sounds. If thawing produces leaks, shut water immediately and contain drips.
Persistent blockage, inaccessible routing, or repeated refreezing indicates a deeper obstruction or insulation gap; document location and conditions before calling a licensed plumber for safe repair.
Long‑Term Strategies to Eliminate Drain‑Freeze Risk
After confirming that a frozen section has been fully thawed or documenting persistent trouble spots, planning longer‑term measures reduces future risk and repair costs.
Consider insulating vulnerable runs, regrading or rerouting exterior drains, and installing heat‑trace or thermostatic tape on critical stretches.
Evaluate pipe material and replace corroded or undersized segments.
Schedule seasonal inspections and prioritize attic, crawlspace, and exterior wall penetrations.
Engage a licensed plumber for complex reroutes or electrical heat solutions.
Small investments prevent emergencies and mounting bills.
- Imagine calm winters without frantic repairs.
- Remember the relief when pipes flow freely.
- Picture fewer calls to repair services.
Conclusion
Frozen drain pipes can be thawed and defended with prompt, informed action; like a slow sunrise, steady, patient warming restores flow without sudden shock. Homeowners who recognize signs, follow safety checks, and train household members reduce emergency calls. Observing local codes, using approved techniques, and adopting long‑term insulation and slope corrections provide lasting protection. When ice persists, structured troubleshooting and professional help close gaps between temporary fixes and permanent solutions.