Prevent Copper Pipes From Freezing: Easy Tips to Avoid Burst Pipes
To prevent copper pipes from freezing, follow these key tips:
- Maintain Indoor Heat: Keep your home heated consistently during cold weather.
- Seal Drafts: Identify and seal any drafts that may let cold air in.
- Insulate Exposed Pipes: Use foam or elastomeric sleeves to insulate any exposed sections of piping.
- Drip Faucets: Allow a slow drip from faucets connected to vulnerable lines to keep water flowing.
- Disconnect Outdoor Hoses: Remove and store outdoor hoses to prevent freezing in the pipes.
- Apply Heat Tape: Use heat tape on any exposed pipes to provide additional warmth.
- Open Cabinets: Open cabinet doors to allow warm air to circulate around plumbing, especially in colder areas.
- Shut Off Exterior Lines: Before a cold snap, shut off and drain any exterior water lines.
- Monitor for Signs of Freezing: Keep an eye out for frost, reduced water flow, or cold spots in pipes.
If you notice any of these signs, take action immediately, and consider consulting a plumber for further assistance.
Quick Answer: How to Stop Copper Pipes From Freezing
Act quickly to reduce the risk of copper pipes freezing by maintaining consistent indoor heat, insulating exposed pipe runs, and allowing a slow drip from faucets during extreme cold.
The homeowner should seal gaps where cold air enters, open cabinet doors to warm enclosed plumbing, and apply foam or fiberglass insulation to vulnerable sections.
For long runs in unheated spaces, install heat tape or a thermostat-controlled heater cable following manufacturer instructions.
Monitor weather alerts and winterize outdoor hoses and irrigation lines.
When unsure, consult a licensed plumber to assess insulation needs and recommend targeted solutions to prevent freezing and potential bursts.
Why Copper Pipes Freeze and Why It Matters
Copper pipes lose heat to cold surroundings through conduction and convection, which can lower water temperature to freezing.
When water inside a pipe freezes it expands and can rupture the copper, creating costly damage.
Proper insulation and preventive measures reduce heat loss and the risk of burst pipes.
Heat Transfer Basics
Understanding explains why metal pipes are vulnerable to freezing: heat flows from warmer water and surrounding materials to colder air until equilibrium is reached.
Copper’s high thermal conductivity accelerates heat loss, especially where insulation is thin or absent. Conduction through pipe walls, convection from exposed surfaces, and radiation to cold surroundings combine to drop liquid temperature toward freezing.
Pipe diameter, water flow rate, and ambient temperature gradients determine how quickly that happens. Moisture and wind exacerbate cooling.
- Thin copper wall losing heat like a metal rod.
- Cold air swirling around an uninsulated crawlspace pipe.
- Slow-moving water cooling inside a narrow tube.
- Frost forming along an exposed joint.
Water Expansion Risk
Having lost heat to the surroundings, the water inside a pipe can freeze and expand by roughly 9%, exerting high pressures on the pipe wall and joints. Copper resists corrosion and has limited flexibility; expansion can split seams or pop fittings. Damage often appears suddenly when thawing releases pressured fragments and leaks. Consequences include costly repairs, water loss, and structural damage. Awareness of expansion mechanics guides risk reduction without repeating insulation advice. Emotional stakes—home, safety, expense—motivate action.
| Fear | Loss | Urgency |
|---|---|---|
| Burst sound | Flooded floor | Winter nights |
| Repair bills | Ruined possessions | Immediate action |
Insulation Importance
Pipes exposed to cold lose heat to their surroundings and, without adequate insulation, will reach freezing temperatures much faster than the ambient air. When the water inside freezes and expands, the resulting pressure can crack seams or dislodge fittings.
Insulation slows conductive and convective heat loss, preserving liquid flow and reducing freeze duration. Properly sized foam, fiberglass, or rubber wraps create thermal barriers and limit radiation to cold surfaces. Sealing gaps and insulating nearby walls increases effectiveness.
Regular inspection prevents compression or moisture damage that degrades R-value.
- Frost-lined exterior pipe
- Bubble of expanding ice
- Cracked solder joint
- Wrapped pipe corridor
When Do Copper Pipes Freeze? Temperature Thresholds
Freezing of copper water lines occurs when ambient temperatures fall low enough and water movement is insufficient to prevent ice formation; the most commonly cited threshold is 32°F (0°C), but practical risk increases well above that point when exposures are prolonged or when wind, poor insulation, or cold drafts accelerate heat loss.
Pipes in unheated spaces can begin to freeze between 20–32°F (-7–0°C) within hours, while sustained subfreezing conditions speed ice formation. Smaller-diameter lines and sections near exterior walls freeze faster.
Duration of cold, thermal bridging, and stagnant water are primary determinants, so threshold assessment must consider both temperature and exposure time.
Signs Your Copper Pipes Are at Risk
Visible frost or ice forming on exposed copper runs is an immediate indicator that freezing conditions are affecting the system.
Likewise, reduced or intermittent water flow—especially cold water that sputters or slows—signals partial blockages from ice inside the pipe.
Observing either condition warrants prompt inspection and corrective action to prevent a full freeze or rupture.
Visible Frost Or Ice
A thin crust of frost or small patches of ice forming on a copper line indicates that water inside is at or below freezing and that the pipe’s heat balance has been compromised.
Observers can spot white, powdery streaks where metal cools against cold air, or clear, glassy ice clinging to joints and bends. Frosted sections often feel cold to the touch and may show tiny crystalline ridges along seams.
Prompt attention prevents expansion stress. Visual cues precede audible or flow changes, making inspection valuable in unheated spaces, crawlspaces, and exterior walls during prolonged cold snaps.
- White powdery streaks along straight runs
- Glazed ice at elbows and fittings
- Crystalline ridges near seams
- Frost concentrated in uninsulated cavities
Reduced Or Intermittent Flow
Detecting reduced or intermittent flow often signals that ice is forming inside copper pipes and restricting water movement.
Homeowners may notice weak streams, sputtering faucets, or sinks that take longer to fill. Flow variations can occur room-to-room or only at fixtures served by exterior walls.
Such symptoms warrant immediate inspection because progressing ice plugs increase pressure and risk of rupture.
Temporary fixes include gently warming exposed sections, opening nearby cabinets, and running a trickle to keep water moving.
If issues persist, contact a licensed plumber to locate the blockage, assess insulation, and recommend repairs or preventive measures to avoid bursts.
Most Vulnerable Pipe Locations in Your Home
Where are copper pipes most likely to freeze inside a home? Cold-prone spots tend to be where pipes are exposed, poorly heated, or adjacent to exterior walls.
The following images evoke typical vulnerable locations:
- Basement rim joists with pipes running along uninsulated sill plates.
- Crawlspace runs beneath floors, dangling near cold soil and vents.
- Attic supply lines close to roof eaves and unheated soffits.
- Exterior wall cavities behind cabinets or vanity units with limited airflow.
These areas combine low ambient temperatures, drafts, and limited heat transfer from living spaces, increasing freeze risk and potential for pressure-related failure.
How Insulating Copper Pipes Prevents Freezing
Insulating copper pipes reduces heat loss by adding a thermal barrier between the metal and cold ambient air.
It also helps prevent condensation build-up on pipe surfaces, which can lead to moisture-related damage.
Together, these effects maintain a more consistent pipe temperature and lower the risk of freezing.
Reduce Heat Loss
Thermal loss through a copper pipe occurs when warmer water transfers heat to the colder surrounding air, lowering the pipe’s temperature toward freezing point; adding insulation slows that exchange by creating a barrier of low-conductivity material that reduces convective and radiative heat transfer.
Insulation maintains water temperature longer, shortens the time spent near freezing, and reduces the need for active heating. Properly fitted foam sleeves or wrap minimize gaps and thermal bridges.
Selection of thickness and material matches exposure and ambient temperatures. Visualizing common installations helps owners prioritize vulnerable runs.
- Frosted outdoor meter pipe wrapped in foam
- Uninsulated crawlspace loop with added sleeve
- Attic branch covered with thicker wrap
- Basement main line protected along foundation
Prevent Condensation Build-Up
Alongside slowing heat loss, proper pipe insulation also limits condensation that can accelerate cooling and promote freezing.
Insulation creates a thermal barrier between cold ambient air and the warm pipe surface, reducing surface dew point contact and moisture accumulation. By preventing water from forming on copper, insulation stops evaporative cooling that would otherwise lower pipe temperature and increase freeze risk.
Closed-cell foam or rubber sleeves fit snugly, eliminating gaps where humid air can condense. Fewer wet surfaces also reduce corrosion and mold issues.
Periodic inspection guarantees insulation remains intact and effective, maintaining dry pipe surfaces through damp conditions.
Maintain Consistent Temperature
When kept wrapped in appropriate insulation, copper pipes experience smaller temperature swings and remain closer to the building’s ambient warmth, reducing the chance that internal water will reach freezing.
Insulation slows heat loss, stabilizes internal temperatures during night chills, and limits cold-air infiltration at joints. It enables passive retention of heat from surrounding spaces and brief warm-water flows, preventing formation of ice that expands and fractures tubing.
Consistent thermal conditions also reduce stress on fittings and valves, extending system longevity.
- Frost-free attic with insulated runs.
- Basement loop retaining house heat.
- Sleeved exterior wall penetration.
- Insulated crawlspace headers.
Best Insulation Types for Copper Pipes
Several common insulation materials suit copper pipes, each offering distinct R-values, moisture resistance, and installation methods that affect performance in cold conditions. Closed-cell foam provides high R-value and resists moisture; elastomeric foam balances flexibility and durability for indoor runs. Fiberglass with a vapor barrier works where high temperatures occur, but requires careful sealing. Pipe wrap tape is convenient for irregular shapes and small sections but offers lower long-term R-value.
| Material | Strength |
|---|---|
| Closed-cell foam | High R-value, moisture resistant |
| Elastomeric foam | Flexible, durable |
| Fiberglass with barrier | High temp tolerance |
| Pipe wrap tape | Easy fit, temporary solution |
Measure and Buy the Right Pipe Insulation
The homeowner should measure the pipe diameter to choose insulation with the correct inner bore.
Next, they should total the linear feet of exposed piping to determine how much material to buy.
Accurate measurements prevent gaps, waste, and the need for repeat purchases.
Measure Pipe Diameter
Accurate pipe diameter measurement is the foundation for selecting insulation that fits securely and performs as designed. A caliper or flexible tape measures the outside diameter; when only nominal sizes are known, measure actual OD at multiple points to detect corrosion or fittings.
Record measurements to match foam or fiberglass sleeves labeled by OD range. Guarantee allowance for adhesive seams or slit-foam closures. For bundled or wall-embedded pipes, measure accessible exposed sections and note variations.
- Caliper closing on smooth copper surface
- Flexible tape wrapping around pipe circumference
- Marked measurement compared to insulation chart
- Noting dents or buildup affecting fit
Calculate Required Length
When planning insulation purchases, determine total linear footage by measuring each run from valve to fixture and adding lengths for bends, fittings, and exposed connections.
Next, account for overlapping sections and manufacturer-specified coverage per tube or roll; subtract overlap only where pieces will butt tightly. Include short stub outs, risers, and any external runs exposed to wind.
Convert measurements to the units used on packaging, rounding up to the nearest available length to avoid shortages.
Finally, add a contingency allowance of 5–10% for cutting errors and unexpected adjustments, then purchase insulation with suitable R‑value for the local climate.
Step-by-Step: Insulate Exposed Copper Pipes
Several straightforward steps guide proper insulation of exposed copper pipes to prevent freezing and reduce heat loss.
The process begins with assessment, cleaning, and measuring runs. Suitable foam or rubber sleeves are selected to match diameter and ambient conditions. Joints and bends receive additional protection, and seams are sealed for continuity.
- Measure pipe length and diameter, noting valves and fittings.
- Clean surfaces, remove moisture and debris for adhesive contact.
- Fit split-foam or slip-on insulation, ensuring snug contact with pipe.
- Seal seams and secure with tape or clamps; leave access at service points.
Use Heat Tape and Cables Safely on Copper Pipes
Many homeowners rely on approved electric heat tape or self-regulating heating cables to prevent copper pipes from freezing, but safe installation and correct selection are essential to avoid damage or fire risk.
Install devices per manufacturer instructions, use cables rated for copper, and avoid overlapping or running under insulation unless specified. Secure with electrical tape or approved clips, keep connections and thermostats accessible, and protect cords from sharp edges.
Test operation before cold snaps and inspect annually for wear or discoloration. If unsure about electrical connections or local codes, consult a licensed electrician to confirm safe installation and proper circuit protection.
When to Use Heating Cables vs. Foam Insulation
Which approach best suits a given run of copper pipe depends on location, exposure, and heat source availability: heating cables are appropriate for exposed pipes in unheated spaces or where active temperature control is needed, while foam insulation is usually sufficient for pipes protected within conditioned walls or insulated chases.
- Exposed garage line with wind-driven cold: heating cable along the pipe.
- Basement loop under a slab but accessible: self-regulating cable with thermostat.
- Interior wall plumbing serving bathrooms: closed-cell foam sleeves.
- Crawlspace runs with moderate protection: thick foam plus vapor barrier.
Select based on risk, access, and continuous heat need.
Seal Drafts and Cold Air Around Pipe Penetrations
After choosing the appropriate heat or insulation strategy, attention shifts to the points where pipes pass through walls, floors, and foundations, since even well-insulated lines can be compromised by cold air infiltration.
Seal gaps around penetrations with appropriate materials: low-expansion spray foam for larger voids, caulk for narrow cracks, and foam pipe collars where pipes meet framing.
Ascertain seals are continuous and compatible with pipe materials and local codes.
Check for overlooked openings around electrical conduit, vents, and service lines.
Periodic inspection and resealing after settling or renovation maintains thermal integrity and reduces the risk of localized freezing.
Protect Outdoor Faucets and Hose Bibs From Freezing
Outdoor faucets and hose bibs are common weak points for heat loss and water freeze because they sit at exterior walls and connect directly to indoor plumbing. They require simple, targeted protection to prevent ice formation and pipe rupture.
Insulating covers, frost-proof sillcocks, and indoor shutoff valves reduce exposure. Winterizing steps remove standing water and limit cold intrusion.
- A foam insulated cover clipped over the spigot blocks wind and traps warmth.
- A frost-proof sillcock extends the valve seat inside the heated wall.
- An indoor shutoff lets one drain the exterior line.
- Disconnect hoses to avoid trapped water expanding.
Why Leaving Faucets Dripping Can Prevent Freezes
Leaving a faucet dripping can reduce pressure build-up in the pipes by allowing water to move toward any forming ice, which lowers the chance of seals failing or joints bursting.
A continuous, slow flow also maintains movement through vulnerable sections, making it harder for water to reach freezing temperature.
This simple measure is a low-effort way to protect copper pipes during prolonged cold spells.
Reduce Pressure Build-Up
Allowing a small, steady flow from interior taps relieves pressure that otherwise builds in pipes as ice forms, preventing ruptures by giving water a path to expand.
A trickle reduces trapped pockets and lowers stress at weak joints, offering a simple safeguard during rapid freezes. This practice is most effective when applied to faucets served by exposed or poorly insulated lines.
Homeowners should target cold-prone fixtures and balance water use to conserve supply.
Visualizing the effect helps remember the habit:
- A thin stream easing pressure like a safety valve.
- Ice forming without trapped pressure.
- Water escaping at a faucet, not a burst seam.
- A calm, slow release preventing sudden failure.
Maintain Flow Movement
Maintain a slight, continuous flow through vulnerable pipes to keep water moving and reduce the chance of ice crystals forming into blockages. A slow drip relieves stagnation, equalizes pressure, and prevents pockets of supercooled water that freeze first. This is particularly effective for exposed runs and uninsulated areas. Owners should open cold taps slightly, prefer interior faucets near exterior walls, and monitor flow during extended cold snaps. Minimal water waste contrasts with the cost of a burst pipe. Consider combining dripping with insulation and thermostat setbacks for balanced conservation and protection.
| Action | Benefit |
|---|---|
| Drip taps | Prevents freezing |
| Monitor | Detects issues |
| Insulate | Enhances effect |
Set Your Thermostat to Reduce Freeze Risk
When temperatures drop, keeping the thermostat at a steady, moderate setting is the simplest effective step to reduce the risk of copper pipes freezing. A stable indoor temperature prevents interior walls and plumbing from reaching freezing point.
Recommended settings balance energy use and protection; avoid large nightly setbacks that let pipes cool. Smart thermostats can maintain minimums and offer alerts. Consistent heat supports gradual thawing if temperatures briefly dip.
- Hallway radiator humming softly beneath a 62–68°F public target.
- Basement warmth holding near pipe runs.
- Thermostat schedule without deep night setbacks.
- Remote alert signaling sudden temperature drops.
Open Cabinets and Vent Home Heat to Interior Pipes
Homeowners are advised to open cabinet doors beneath sinks and along exterior walls to allow warm air to reach copper pipes.
They should clear stored items and insulation that block airflow under and around pipes.
Directing vents or portable heat sources so warm air flows toward vulnerable pipe runs further reduces freeze risk.
Open Cabinet Doors
Opening cabinet doors under sinks and along exterior walls allows warm air from the house to circulate around vulnerable copper pipes, reducing the risk of freezing during cold spells.
This simple habit improves airflow, equalizes temperature, and prevents cold pockets that initiate ice formation. It is most effective when combined with steady indoor heating and when exterior vents are minimized.
- Warm air drifting into a sink cabinet, wrapping a cold pipe.
- A steady room thermostat preventing sudden temperature drops.
- Sunlit kitchen warming interior walls, reaching recessed plumbing.
- Air movement from nearby registers sweeping across pipe runs.
Remove Obstructions Underpipes
Leaving cabinet doors open is only part of the response; removing stored items and insulating clutter that block warm air from reaching pipes completes the measure. Homeowners should clear boxes, towels, and chemicals from beneath sinks and along baseboard runs so heat circulates freely. Small gaps behind appliances and plumbing access panels deserve attention; unobstructed flow reduces localized cooling that precedes freezing. Where removal is impractical, use thin pipe insulation or foam barriers to separate stored goods from pipe surfaces. Periodic inspections confirm obstructions haven’t returned and maintain consistent warmth around vulnerable copper lines.
| Item Removed | Benefit |
|---|---|
| Boxes | Improved airflow |
| Linens | Reduced cold pockets |
| Cleaning supplies | Easier inspection |
| Appliances gap | Heat circulation |
| Insulation barrier | Protects pipes |
Vent Heat Toward Pipes
Aim vents and warm air toward exposed copper runs by opening nearby cabinet doors and, when practical, adjusting floor or wall registers to direct heated airflow into enclosed spaces where pipes are located.
This simple redistribution of home heat raises local temperature, reducing freeze risk along vulnerable lengths of copper. Care should be taken to avoid blocking airflow with stored items; lightweight insulation can complement airflow without trapping moisture.
Monitor temperatures during cold spells and adjust vents as needed to maintain steady warmth instead of intermittent blasts that can still permit freezing.
- Warm air entering under a sink
- Open cabinet revealing pipe runs
- Floor register angled toward a crawlspace door
- Gentle convection circulating around a supply line
Seasonal Prep Checklist for Copper Pipes
A seasonal prep checklist for copper pipes provides a concise sequence of tasks to reduce freeze risk and water damage during cold months. It lists inspections, insulation, valve checks, water flow routines, and professional service scheduling. Completing the list lowers stress and prevents costly repairs.
| Task | Emotional Impact |
|---|---|
| Inspect for corrosion and leaks | Relief |
| Add insulation to exposed lines | Confidence |
| Test and exercise shutoff valves | Control |
| Maintain slow indoor water flow | Security |
| Schedule annual professional review | Assurance |
Follow the checklist before the first frost to protect plumbing and preserve peace of mind.
Emergency Steps When a Copper Pipe Is Starting to Freeze
When a copper pipe shows signs of freezing, the first action is to stop or restrict water flow to reduce pressure and minimize rupture risk.
Next, applying safe, steady heat—such as a hair dryer, space heater at a distance, or warm towels—can thaw the pipe gradually without causing shock.
These measures should be performed promptly and cautiously while arranging for professional help if the freeze is extensive or pipes are damaged.
Stop Water Flow
Shut off the main water supply immediately to halt pressure that can burst freezing copper pipes; this prevents further damage while emergency measures proceed.
The homeowner checks the meter valve, closes exterior hose bibs, and drains visible faucets to relieve trapped water. Isolation valves for affected branches are used when present.
- A hand turns the main shutoff firmly clockwise until resistance is felt.
- Exterior spigots are opened and left ajar to drain.
- Interior shutoff for the freezing branch is engaged to limit impact.
- Faucets are opened at the highest and lowest points to empty lines.
Apply Safe Heat
Several simple, controlled steps can thaw a copper pipe safely without introducing excessive heat or pressure.
The responder should open nearby faucets to relieve pressure and allow melted water to flow.
Apply steady, indirect heat: use an electric space heater, heat lamp, or hair dryer aimed along the pipe, never open flame.
Wrap the pipe with warm towels or heating tape rated for plumbing.
Monitor temperature and joints for leaks; stop if cracking or hissing occurs.
Work from the warmest section toward the frozen area.
If thawing fails within a short time or damage appears, contact a licensed plumber immediately.
How to Thaw a Frozen Copper Pipe Safely
A frozen copper pipe should be thawed carefully to prevent bursts and water damage; the person addressing it must first locate the frozen section, shut off the water supply to that pipe or the main, and open nearby faucets to relieve pressure and allow melted water to flow.
Next, heat should be applied gradually along the pipe toward the faucet end, watching for leaks and warming adjacent fittings. Continuous monitoring guarantees safe thawing without sudden pressure spikes.
If thawing fails or damage appears, professional help should be summoned immediately.
- warm breath-like flow along metal
- steady progression toward outlet
- cautious inspection for leaking
- prompt call for help
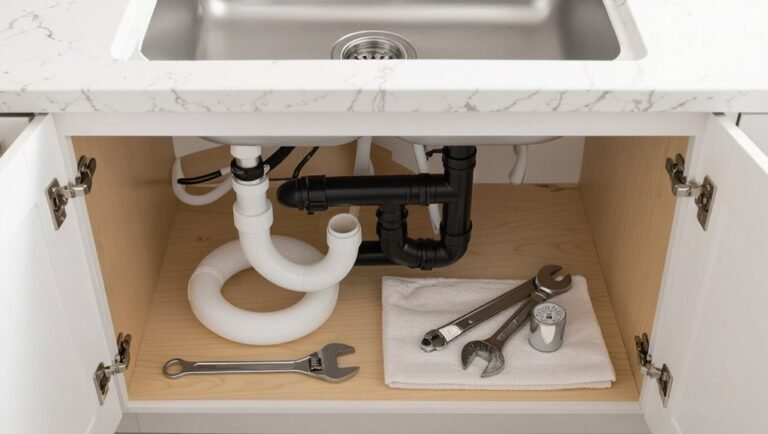
Tools and Supplies to Keep for Frozen Copper Pipes
Preparedness hinges on keeping a small kit of specific tools and supplies on hand for frozen copper pipes. The kit should include a hair dryer or heat gun (used cautiously), an infrared thermometer to monitor pipe temperature, pipe insulation sleeves or foam, pipe wrap tape, and a utility knife.
A small adjustable wrench and channel-lock pliers aid valve access. Heat-resistant gloves and safety glasses protect hands and eyes. A bucket and towels manage released water. A portable space heater and extension cord help warm cold areas.
A flashlight and spare batteries assist inspections in dim spaces.
Detect Hidden Frozen Copper Pipes With Simple Tests
Silent clues often reveal the location of hidden frozen copper pipes: unusually cold wall sections, frost on exposed fittings, a sudden loss of water flow at specific fixtures, or bulging drywall where ice has expanded.
A homeowner can perform simple tests to confirm suspicions without invasive work. Gently tap accessible pipe runs; a hollow, high-pitched sound suggests ice. Open suspect faucets—no flow pinpoints frozen segments between valve and supply.
Use a non-contact infrared thermometer to map temperature drops along walls and ceilings. Shine a flashlight into cavities to spot condensation or frost patterns.
- Tap pipes for sound
- Open faucets
- Infrared scan
- Flashlight inspection
Short-Term Fixes vs. Permanent Upgrades to Stop Freezing
When immediate thawing or insulation will suffice, temporary measures can prevent burst pipes long enough for a permanent solution to be planned and paid for.
Short-term fixes include targeted heat (hair dryer, heat tape), localized insulation (foam sleeves, wraps), and controlled dripping to relieve pressure. These reduce immediate risk but require monitoring and safe power use.
Permanent upgrades focus on improved insulation of walls and basements, rerouting or relocating vulnerable runs, and installing thermostatically controlled heat tracing.
Decision factors include frequency of freezes, access, budget, and long-term value. Short-term actions buy time; upgrades provide lasting protection and lower maintenance.
When to Replace Aging Copper Pipes to Reduce Risk
How long should copper pipes be kept in service before replacement becomes the safer option?
Inspection intervals, visible corrosion, pinhole leaks, and water discoloration guide decisions. Aging copper shows thinning, greenish deposits, or repeated repairs; replacing reduces freeze-and-burst risk.
Consider replacement when service life exceeds 50 years, when failures increase, or when repairs outpace value. Professional assessment of wall thickness and joint integrity informs timing.
Prioritize sections exposed to cold or with poor insulation.
- A mottled green elbow with mineral crusts.
- A hairline pinhole leaking onto insulation.
- Thin-walled pipe under a crawlspace.
- Multiple patched joints along one run.
How Rerouting or Relocating Pipes Prevents Future Freezes
Rerouting or relocating water lines away from unheated spaces and exterior walls reduces exposure to cold pockets and greatly lowers the chance of freezing and burst pipes. Strategic repositioning moves pipes into conditioned cavities, shortens exposed runs, and allows easier access for maintenance. Professional assessment identifies vulnerable segments and feasible new paths that avoid drafts and exterior sheathing. Properly planned rerouting also permits integration with existing heating zones and minimizes future freeze risk without relying solely on insulation.
| Benefit | Action | Outcome |
|---|---|---|
| Exposure reduction | Move to interior wall | Lower freeze risk |
| Accessibility | Consolidate runs | Easier repairs |
| Integration | Connect to heated zone | Consistent temperatures |
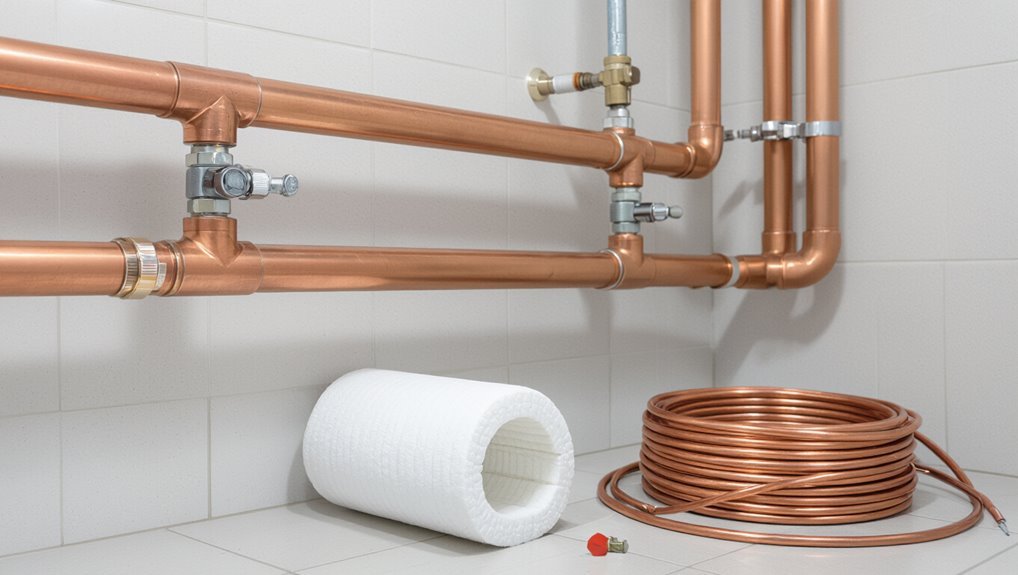
Cost-Effective Insulation Upgrades for Tight Budgets
Shifting vulnerable copper lines toward interior spaces often isn’t feasible on a tight budget, so homeowners can achieve strong freeze protection through targeted, low-cost insulation upgrades.
Simple foam pipe sleeves, adhesive-backed foam tape, and fiberglass wrap reduce conductive heat loss. Sealing drafts around crawlspaces and basements prevents cold air reaching pipes. Reflective pipe insulation paired with weather stripping boosts effectiveness without major expense.
- Foam pipe sleeves slipped over exposed runs.
- Self-sealing foam tape wrapped at joints and bends.
- Fiberglass wrap where higher temperatures are needed.
- Caulking and weather stripping around exterior wall penetrations.
When to Call a Plumber for Frozen or Burst Copper Pipes
When should a homeowner call a plumber after suspecting frozen or burst copper pipes? A professional should be contacted immediately if visible leaks, falling water pressure, discolored water, or expanding bulges in drywall or ceilings occur. If thawing efforts fail within reasonable time or the main shutoff is unclear, call for help. Emergencies require rapid response to limit water damage and mold.
| Sign | Action |
|---|---|
| Visible leak | Call now |
| Loss of pressure | Schedule urgent service |
| Structural dampness | Call now |
| Thawing unsuccessful | Call plumber |
How to Repair a Burst Copper Pipe: Basic Options
Assess available options quickly after a copper pipe bursts to limit water damage and restore service.
First, shut the main valve, drain lines, and photograph the break.
Temporary fixes include a rubber patch and hose clamps for small pinholes, or epoxy putty molded over a crack to stop leakage short-term.
For permanent repair, cut out the damaged section and solder a new copper coupling or use push-fit fittings for solderless replacement.
Large ruptures may require replacing a length of pipe and checking nearby fittings for stress.
- Rubber patch + hose clamps
- Epoxy putty seal
- Cut-and-solder coupling
- Push-fit replacement
Insurance Tips for Burst Copper-Pipe Damage and Recovery
Because prompt action and clear documentation affect claim outcomes, homeowners should immediately secure the property, stop further damage, and begin recording evidence after a copper pipe bursts.
Photographs, videos, timestamps, and a written log of actions support claims. Notify the insurer promptly and review policy details—coverage for sudden bursts, water damage, and resulting mold varies.
Retain receipts for emergency repairs, temporary housing, and mitigation services. Obtain contractor estimates only if insurer does not require approved vendors.
Keep damaged materials for inspection. Document communications with adjusters. If disputed, escalate to a supervisor or consider professional public adjuster or legal advice.
Conclusion
Like a lighthouse guiding ships from hidden shoals, prudent homeowners prepare their copper pipes before winter’s fog arrives. Recognizing vulnerable spots, applying simple insulation, and knowing when to summon professional hands can spare a household the sudden rupture and flood that mimic a storm’s cruelty. With attentive measures and timely action, small investments avert large losses, leaving domestic life steady and dry rather than adrift in costly recovery.