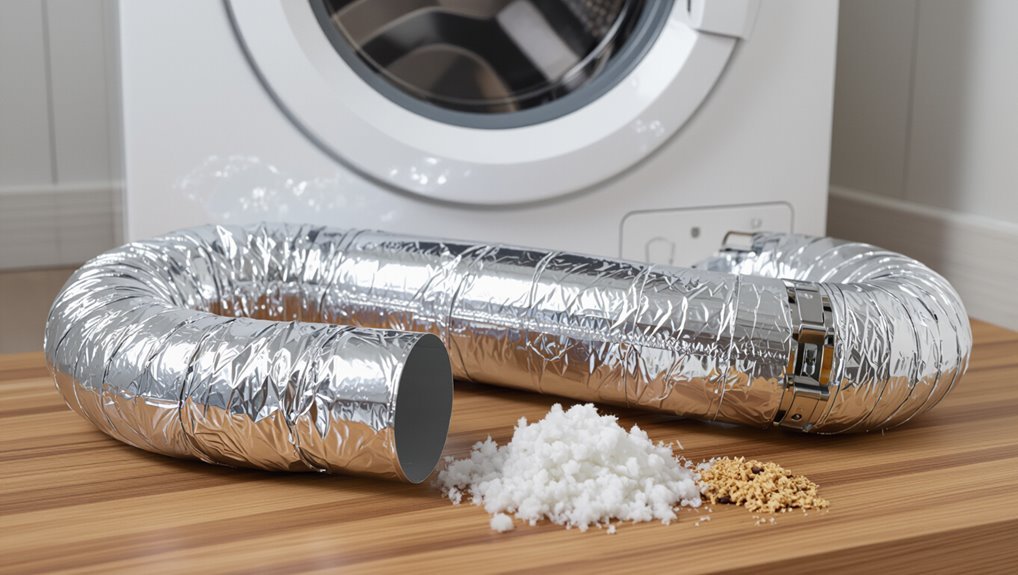
Can You Use Plastic Pipe for Dryer Vent? Safety Tips & Alternatives
Key Takeaway: Plastic pipe is not recommended for dryer vent installations due to safety risks including lint buildup, melting, and increased fire potential.
Plastic dryer vent pipes are generally unsafe and should not be used for permanent installations. Building codes typically require the use of rigid or semi-rigid metal ducts to ensure safety and compliance with insurance regulations. It’s important to inspect any existing plastic vents for signs of warping, discoloration, or frequent lint accumulation, and replace them promptly if necessary. For optimal airflow, consider using smooth-walled aluminum or galvanized steel ducts with short, straight runs and sealed joints.
Short Answer: Is Plastic Dryer Vent Pipe Allowed?
Is plastic dryer vent pipe allowed? The short answer: usually not recommended.
Building codes and manufacturers commonly require rigid or semi-rigid metal ducts because plastic can melt, trap lint, and increase fire risk.
Plastic foil or flexible vinyl may be found in some homes but often fails inspections and voids warranties.
Exceptions exist for short, non-venting dryer configurations or temporary installations, but these are rare and risky.
Professionals advise replacing plastic with smooth, code-compliant metal venting to improve airflow, reduce lint buildup, and meet safety standards.
Compliance and manufacturer guidance determine acceptable materials.
Quick Upgrade Checklist: When to Replace Plastic Vents
Given the risks and code limitations of plastic dryer vents outlined above, homeowners and inspectors should follow a brief, practical checklist to know when replacement is required.
Inspectors note visible damage, frequent lint buildup, or signs of melting as triggers. Replacement is also advised when performance drops or dryer runs longer than normal.
- Flexible plastic or foil crimped sections that are punctured or crushed
- Any discoloration, warping, or softened areas from heat exposure
- Recurrent lint accumulation after routine cleaning
- Dryer cycle time increases despite clean lint screen
- Shift to a remodel or appliance upgrade that changes vent routing
Replace promptly when any item appears.
What Building Codes Typically Require for Dryer Vents
When establishing dryer vent installations, building codes prioritize fire safety, proper exhaust flow, and accessible maintenance; they commonly require rigid or semi-rigid metal ducting, minimal use of flexible plastic or foil, a maximum total duct length, smooth interior surfaces, and approved terminations to the exterior. Codes also specify secure connections, limited use of screws that trap lint, and required clearances from combustibles. Inspections often verify pitch, access for cleaning, and exterior hood type. Compliance reduces fire and moisture risk and improves dryer efficiency.
| Requirement | Typical Detail |
|---|---|
| Material | Rigid or semi-rigid metal |
| Length | Maximum total run specified |
| Interior | Smooth, non-porous surface |
| Termination | Exterior vent with backdraft damper |
| Access | Cleanout or access door required |
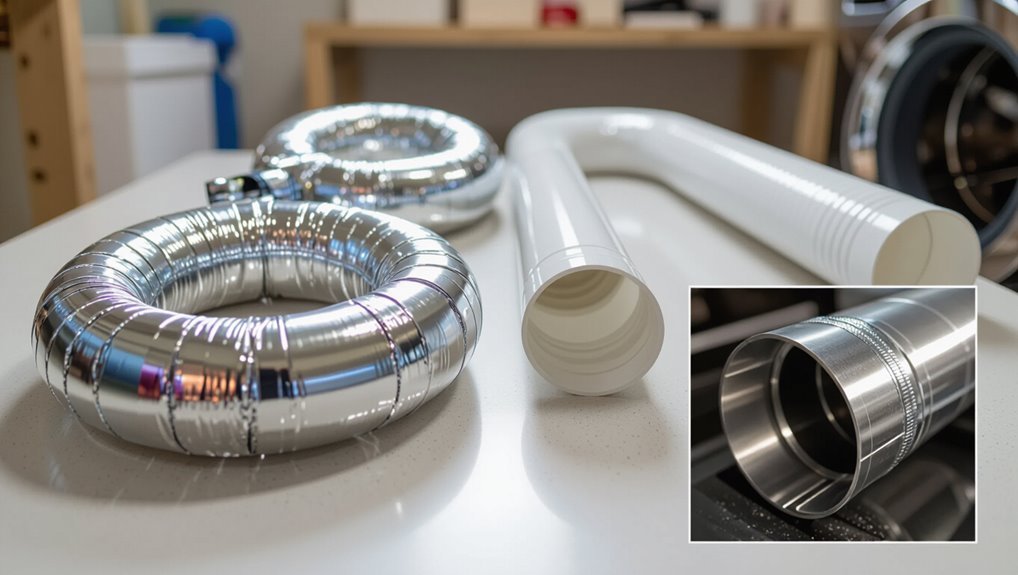
Which Plastic Dryer Hoses Homeowners Mean (Types)
Homeowners referring to “plastic dryer hoses” usually mean one of three types: thin foil-like flexible ducting, ribbed PVC or polyethylene flexible hoses, or molded plastic connectors that connect the dryer to a metal vent.
Each type differs in durability, airflow resistance, and suitability for permanent installation. Common distinctions include collapsibility, risk of lint buildup, and how securely they attach.
- Thin foil-like flexible ducting: lightweight, easily crushed
- Ribbed PVC/polyethylene hoses: stiffer, more prone to lint accumulation
- Molded plastic connectors: short, for appliance-to-vent joins
- Decorative plastic covers: aesthetic, non-structural
- Insulated plastic variants: rare, limited use
How Hot Do Dryer Vents Get?
After outlining the common types of plastic dryer hoses and their physical properties, attention turns to the temperatures those vents typically reach during operation.
Typical residential dryer exhaust temperatures range from about 120°F to 160°F (49–71°C) at the dryer outlet during a cycle. Temperatures drop along the duct length, often reaching near-ambient at the exterior vent depending on run length, bends, and ventilation.
High-heat cycles, clogged ducts, or gas dryer malfunctions can push localized temperatures higher. Materials used for venting must tolerate expected peak temperatures plus a safety margin to maintain long-term integrity and performance.
Why Lint + Plastic = Fire Risk
Because lint is highly flammable and many plastic vent materials soften at typical dryer temperatures, their combination creates a persistent ignition hazard: accumulating lint provides fuel while warm, flexible plastic offers both a heat-transfer pathway and a structure that can melt, deform, or trap embers, increasing the chance that a small spark or overheating event will grow into a sustained fire.
The risk elevates where vents are long, obstructed, or poorly installed. Key contributing factors include:
- Lint buildup reduces airflow and raises internal temperatures.
- Melting plastic can capture hot lint and embers.
- Static charge attracts fibers to walls.
- Flexible seams leak heat.
- Hard-to-clean runs hide hazards.
Which Plastics Fail First: PVC, Polyethylene, Polypropylene
The analysis compares how common plastics used in venting respond under heat and lint accumulation.
PVC is noted for melting and releasing toxic off‑gassing at elevated temperatures, posing both structural and indoor air quality hazards.
Polyethylene is prone to softening and deformation under sustained heat, increasing blockage and failure risk.
PVC Melting And Off-Gassing
Evaluating which plastic fails first under dryer-vent conditions requires examining melting points and decomposition behavior: PVC begins to soften and release corrosive hydrogen chloride at lower temperatures than polyethylene or polypropylene, making it the most problematic in both structural failure and toxic off-gassing.
PVC’s lower thermal stability leads to brittle collapse and hazardous fumes before other common plastics degrade. Observations emphasize risks from sustained heat, lint accumulation, and poor ventilation.
Considerations include regulatory guidance and material selection to avoid PVC in venting.
- rapid softening under moderate heat
- hydrogen chloride and chlorinated byproducts
- brittle failure after exposure
- increased fire and corrosion risk
- regulatory and health concerns
Polyethylene Softening Risk
When exposed to the sustained heat and hot, lint-laden air of a dryer vent, polyethylene (PE) begins to soften at temperatures well below those that compromise polypropylene but above PVC’s early degradation threshold. This makes its failure mode dominated by thermal softening and deformation rather than immediate chemical decomposition.
Polyethylene’s glass shift and low softening point allow sagging, collapse, and joint separation under continuous load and vibration. Lint accumulation accelerates localized heating; dryer cycling compounds creep and permanent deformation.
Though not as flammable as PVC’s off-gassing risk, PE’s mechanical failure increases blockage and fire hazard. Rigid, heat-rated metal alternatives are recommended.
Flexible Plastic Hose vs Rigid Plastic (Key Differences)
Flexible plastic hose offers easier bending and quicker installation in tight spaces, while rigid plastic requires more fittings and planning but yields smoother airflow.
Fire risk varies: flexible materials and corrugated surfaces can trap lint and may be more susceptible to ignition, whereas rigid types generally resist heat better.
Durability and longevity favor rigid plastic for sustained performance, with flexible hose tending to degrade or collapse sooner under regular use.
Flexibility And Installation
Many homeowners must choose between flexible plastic hose and rigid plastic pipe based on how each handles bends and installation constraints. The flexible hose bends easily around obstacles and requires fewer fittings, while rigid pipe provides straighter runs and firmer connections.
Consider access, length, and required support when selecting material.
- Flexible hose adapts to tight spaces and reduces cutting.
- Rigid pipe needs elbows for direction changes.
- Flexible often installs faster but may sag without supports.
- Rigid installations need precise measurements and more joints.
- Both require proper clamps and sealed connections for effective venting.
Fire Risk Differences
Although both flexible and rigid plastic dryer vents are designed to move lint-laden, hot air safely outdoors, they differ markedly in how they tolerate heat, trap lint, and respond to ignition sources.
Flexible plastic hose often has corrugations that collect lint, restricting airflow and creating hot spots that can accelerate melting or ignition.
Rigid plastic presents smoother interiors that shed lint more readily but can still soften under sustained high temperatures and crack, exposing flammable materials.
Both types lack the fire resistance of metal; however, flexible hose’s geometry and joints increase ignition risk, while rigid sections fail more abruptly when exposed to sustained heat.
Durability And Longevity
Beyond fire behavior, the expected service life and mechanical resilience of dryer vent materials differ markedly.
Flexible plastic hose degrades faster under heat cycles, stretching and cracking, while rigid plastic offers stiffer walls but can become brittle over years. Maintenance, installation stress, and exposure to UV or chemicals alter longevity. Choice impacts replacement frequency and safety.
- Flexible hose: convenient, vulnerable to punctures and sagging
- Rigid plastic: more durable, resists crushing
- Heat cycling: accelerates plastic fatigue
- Maintenance: periodic inspection extends life
- Replacement intervals: flexible < rigid, plan accordingly
Moisture and Condensation Problems With Plastic Vents
When warm, humid exhaust from a dryer passes into a cooler plastic vent, steam can condense on the interior surfaces, producing water buildup and promoting lint clumping.
Condensed water collects at low points or seams, increasing corrosion risk for nearby metal fittings and creating microbial growth conditions. Accumulated moisture reduces airflow, lengthening drying cycles and raising energy use.
Intermittent pooling also accelerates adhesive failure in foil or tape joints. Regular inspection, slope toward the exterior, and proper insulation of duct runs mitigate condensation.
For persistently damp systems, switching to rigid metal ducting with smooth interiors and adequate venting capacity is recommended.
Static Buildup in Plastic Ducts and Why It Matters
Static electricity can accumulate rapidly inside plastic dryer ducts because nonconductive materials and turbulent airflow promote charge separation between moving lint particles and the duct walls.
This buildup increases the risk of sparks, attracts lint to walls reducing airflow, and can degrade flexible plastic over time.
Practical points include:
- Lint carries charge and clings to plastic surfaces, narrowing the passage.
- Sparks are more likely when lint concentration is high and airflow fluctuates.
- Static-induced clogs reduce dryer efficiency and raise fire risk.
- Metal ducts dissipate charge; plastic traps it.
- Regular cleaning and using conductive alternatives mitigate hazards.
Code Sources: Where to Check Local Dryer‑Vent Rules
Local building codes establish the baseline requirements for dryer‑vent materials, clearances, and termination.
Manufacturer installation instructions specify approved pipe types and any conditions that affect warranty and safety.
Checking both sources guarantees compliance with legal requirements and the appliance maker’s safety guidance.
Local Building Codes
Because dryer-vent requirements vary by jurisdiction, homeowners and installers should consult the specific codes that apply in their area before selecting materials or beginning work.
Local building codes determine approved materials, clearances, exhaust termination, and inspection requirements. Authority having jurisdiction (AHJ) interpretations can differ even between neighboring towns.
The following sources are commonly referenced when verifying rules:
- Municipal building department websites and permitting offices
- State building code agency publications and amendments
- Local fire marshal or fire department regulations
- County or regional inspection guides and handbooks
- Official code documents: IRC, IMC, NFPA standards
Confirm code editions and any local amendments before proceeding.
Manufacturer Installation Instructions
Consult manufacturer installation instructions as a primary code source when planning or modifying dryer-vent systems.
Manufacturers provide model-specific guidance on acceptable materials, maximum duct length, connector fittings, clearance, and termination types. These instructions often supersede general advice and may be required for warranty validity.
Installers should retain and follow printed or online manuals and note any revisions. Where instructions conflict with local codes, the more restrictive requirement typically governs, but verification with local authorities is advised.
Documenting adherence to manufacturer directions aids inspections and insurance claims. Always use the specified components and avoid improvisation that could create fire or moisture risks.
Insurance Risks of Using Plastic Dryer Vents
How does the choice of a plastic dryer vent affect homeowners’ insurance coverage and premiums?
Insurers view non‑code materials as increased fire risk, which can lead to denied claims or higher premiums if a loss links to improper venting. Policy language and local codes matter.
- Claims may be denied if plastic vents violate policy or local code
- Insurers can require replacement with approved metal vents during inspection
- Premiums might rise after a reported incident tied to venting
- Homeowners could face reduced settlement amounts for code‑noncompliant systems
- Documentation of compliant installation helps prevent coverage disputes
When Plastic Vents Might Be Allowed (Exceptions)
In limited situations, plastic dryer vents may be tolerated for occasional indoor dryer use where exhaust is routed into a controlled space rather than outdoors.
Local building codes or inspectors sometimes grant exceptions for temporary setups, laundry room conversions, or within multifamily units subject to specific venting provisions.
Readers should verify municipal regulations and insurer policies before considering any nonmetal venting option.
Occasional Indoor Dryer Use
Although plastic dryer vents are generally discouraged for continuous use, certain limited indoor situations may permit them under strict conditions.
Occasional indoor dryer use can be acceptable when the run is short, lint control is excellent, and the appliance is electric. The user should guarantee proper ventilation to the outdoors, avoid flexible plastic foil, and monitor for heat buildup.
- Short, rigid plastic sections only
- Electric dryer, not gas
- Frequent lint removal and filter checks
- Venting terminates outdoors promptly
- Regular inspection for melting or discoloration
These measures reduce fire and moisture risks during infrequent use.
Local Code Exceptions
When local building codes permit alternatives to the general prohibition on plastic dryer vents, they typically do so under narrowly defined conditions that prioritize fire safety, moisture control, and appliance compatibility.
Exceptions often apply to electric dryers in short, internal runs where metallic venting is impractical; they may require specific listed plastic materials, limited lengths, smooth interior surfaces, and secure, noncombustible connections at the dryer and wall.
Approval usually demands manufacturer endorsement, compliance with testing standards, and routine inspection provisions.
Jurisdictions may restrict use to temporary setups or accessory structures, and local authority interpretation governs final acceptability.
How to Inspect a Plastic Dryer Vent for Safety
A visual and tactile inspection of a plastic dryer vent quickly reveals common safety issues that require attention. The inspector checks connections, vent routing, and accessibility, then follows a concise checklist to determine if immediate action is needed.
- Verify secure clamps and fittings at the dryer and wall.
- Feel along the run for soft spots, crimps, or separated seams.
- Confirm the vent is short, straight, and not trapped in insulation.
- Ascertain the exterior hood opens freely and is free of blockages.
- Test airflow with the dryer running to detect restrictions or weak exhaust.
Warning Signs Your Plastic Vent Is Degrading
How can one tell if a plastic dryer vent is failing?
Visible cracks, splits, or brittle sections indicate material breakdown.
Yellowing or discoloration from heat exposure suggests aging.
Softened or melted spots near joints reveal overheating.
Persistent lint accumulation despite regular cleaning can mean internal roughness or collapsed areas reducing airflow.
Noticeable odors of burning or scorched fabric when the dryer runs signal heat-related damage.
Loose, warped, or separated seams and connectors allow leaks and reduce efficiency.
Increased drying times and higher exhaust temperatures measured at the vent exit are performance clues pointing to progressive degradation.
When to Swap Plastic for Metal: Decision Criteria
Noticing signs of material failure or overheating should prompt evaluation of whether continued use of plastic venting remains safe and effective.
The decision to replace plastic with metal depends on measurable risks, performance loss, and local codes. Inspect for cracks, softening, discoloration, and repeated lint clogs.
Consider dryer age, frequency of use, and vent run length. If any of the following apply, replacement is advised:
- Persistent overheating or melted sections
- Frequent blockages despite cleaning
- Long or convoluted vent runs reducing airflow
- Visible structural damage or brittleness
- Local code or insurance requirements mandate metal venting
Prompt action reduces fire and efficiency risks.
Best Permanent Alternatives to Plastic Dryer Vent Pipe
For long-term replacement of plastic dryer vent pipe, rigid metal ducts and semi-rigid aluminum are the primary options.
Rigid metal offers the best airflow and fire resistance, while semi-rigid aluminum provides greater flexibility for tight runs.
The following section compares their performance, installation considerations, and code compliance.
Rigid Metal Ducts
Rigid metal ducts—typically galvanized steel or aluminum—are the most durable and code-compliant permanent replacement for plastic dryer vent pipe. They resist crushing, reduce lint buildup when properly installed, and withstand high temperatures and static.
Rigid ducts improve airflow and dryer efficiency, lowering fire risk versus plastic alternatives. Installation requires proper pitch, smooth fittings, and sealed joints to prevent leaks and lint accumulation.
Advantages and considerations include:
- Long service life and greater fire resistance
- Improved airflow and reduced drying times
- Fewer joints if runs are straight
- Requires careful measurement and cutting
- Heavier and less flexible than alternatives
Semi-Rigid Aluminum
Semi-rigid aluminum duct offers a middle ground between rigid metal and flexible foil, combining moderate flexibility with durable, smooth-sided construction that improves airflow and resists crushing.
It is suitable where slight bends are required and rigid runs are impractical. Installation uses clamped or screwed joints and foil tape rated for ductwork; joints should be secured and sloped toward the outlet to prevent lint build-up.
Compared with plastic, it withstands higher temperatures and reduces fire risk. Periodic inspection and cleaning remain necessary.
Semi-rigid aluminum is a cost-effective, code-acceptable permanent alternative when used correctly and joined to compatible fittings.
Pros and Cons: Rigid Galvanized Duct
Galvanized ducting offers a durable, smooth-walled option for dryer vents that resists crushing and supports efficient airflow; however, its weight, cost, and susceptibility to corrosion in high-humidity environments are important trade-offs to contemplate.
The material provides long-term rigidity, good fire resistance, and uncomplicated cleaning access, making it a professional-grade choice for straight runs and exposed sections.
Installation may require more hardware and skill, and connections must be sealed to prevent leaks. Maintenance is straightforward but heavier panels complicate retrofits.
- Durable and crush-resistant
- Smooth interior for better airflow
- Higher initial cost and weight
- Can corrode in humid areas
- Requires secure, sealed joints
Pros and Cons: Semi‑Rigid Aluminum Duct
Semi‑rigid aluminum duct is noted for reasonable durability and longer service life than many flexible plastic options, though it can dent or crush more easily than rigid metal.
Its corrugated profile may restrict airflow compared with smooth ducts, potentially reducing dryer efficiency.
Installation is generally straightforward and maintenance involves periodic inspection for kinks, lint buildup, and secure connections.
Durability And Longevity
Although not as robust as rigid ductwork, the aluminum construction of semi-rigid dryer ducts offers moderate durability and a reasonable service life when installed and maintained properly.
Lifespan typically exceeds plastic alternatives but falls short of heavy gauge rigid metal. Vulnerabilities include punctures, kinks, and corrosion in moist environments; proper fastening and gentle bends mitigate damage.
Inspection and periodic replacement of compromised sections preserve safety. Consider professional installation for long runs or exterior exposure.
- Resists heat better than plastic
- Susceptible to physical damage
- Can corrode if wet
- Easier to install than rigid
- Replace sections as wear appears
Airflow Efficiency Concerns
Durability considerations naturally lead to airflow performance, since physical damage, kinks, and corrosion directly affect resistance and lint buildup.
Semi‑rigid aluminum ducts offer smoother interiors than flexible foil, reducing turbulence and pressure drop; their coils still create minor eddies that slightly impede flow compared with rigid ducts.
Crushed or bent sections increase static pressure, so any deformation undermines the semi‑rigid advantage.
Thermal expansion and contraction can loosen joints, introducing gaps that alter flow patterns.
Installation And Maintenance
Installers should find semi‑rigid aluminum ducts straightforward to fit in typical residential setups, as the material is flexible enough to navigate short bends yet firm enough to hold shape without constant support.
Routine maintenance and simple installation steps usually balance pros and cons: lightweight sections are easy to cut and clamp, but require careful sealing and support to avoid sagging.
- Cut ends squarely to guarantee tight clamp connections.
- Use foil tape and approved clamps, not screws that trap lint.
- Support runs every 4–6 feet to prevent sagging.
- Inspect annually for crushed or separated joints.
- Replace if corrosion or persistent lint accumulation occurs.
Pros and Cons: Double‑Wall Stainless Steel Duct
Double‑wall stainless steel ducting offers a rigid, smooth interior and an insulated outer layer that reduces lint buildup and helps maintain airflow, while its corrosion resistance and fire‑rating make it safer than many flexible alternatives; however, it is heavier, more expensive, and requires more precise fittings and clearances during installation, which can increase labor and restrict use in tight spaces.
| Feature | Note |
|---|---|
| Durability | Long lifespan, resists corrosion |
| Safety | Fire‑rated, minimal lint traps |
| Performance | Smooth bore, maintains airflow |
| Cost | Higher material and install cost |
| Installation | Requires exact fittings, less flexible |
Flexible Foil vs Flexible Metal Hose: Which to Use
The choice between flexible foil and flexible metal hose often hinges on how easily the duct can be routed and installed in tight spaces.
Flexible foil provides maximum pliability for awkward runs, while metal hose offers greater rigidity that can simplify secure connections.
Fire resistance and long‑term safety also differ, with metal hose generally outperforming foil at resisting heat and reducing lint‑ignition risks.
Flexibility And Installation Ease
Flexibility often determines whether a dryer vent material is practical for a given run: flexible foil offers exceptional bendability for tight, irregular paths but can kink or crush under tension, while flexible metal hose provides firmer shape retention and resists compression, making it easier to maintain smooth airflow through longer or partially constrained runs.
Installers consider length, bends, and access when choosing. Flexible foil suits short, complex routes; metal hose suits longer, straighter runs.
Practical installation tips include:
- Measure run length and count bends before purchase
- Prefer fewer joints and tighter clamps
- Support the hose to prevent sagging
- Avoid sharp compressions
- Test for smooth airflow after install
Fire Resistance And Safety
Because dryer vents operate near heat and collect lint, material choice directly affects fire risk: flexible foil is thin and can tear or collapse, increasing lint buildup and presenting a higher ignition hazard, whereas flexible metal hose—especially stainless or smooth-walled aluminum—offers greater heat tolerance, structural integrity, and lower likelihood of trapping lint, making it the safer option in most installations.
The metallic option resists punctures and maintains airflow, reducing hotspots.
Foil hose may be acceptable only for very short, inaccessible runs where code permits, but manufacturers and inspectors favor rigid or smooth metal ducting to minimize fire and maintenance risks.
How to Install Rigid Metal Dryer Vent (Step‑By‑Step)
Begin by measuring the distance from the dryer outlet to the outside vent and planning a straight, short route that minimizes bends and connections.
Use rigid metal duct, appropriate elbows, and wall or roof cap. Cut, deburr, and fit pieces securely with sheet‑metal screws and foil tape; avoid clamps that crush duct.
Seal joints, support runs, and maintain access for cleaning. Test airflow after reconnecting the dryer.
- Gather tools: tin snips, drill, screws, tape
- Cut and deburr metal pipe ends
- Fit and screw sections together
- Seal joints with UL‑rated foil tape
- Support and test airflow
Choosing Correct Duct Diameter and Max Run Length
After planning the route and fitting rigid metal sections, the next consideration is selecting the proper duct diameter and ensuring the total run does not exceed manufacturer and code limits.
A 4‑inch smooth metal duct is standard for most residential dryers; larger commercial units may require 5‑ or 6‑inch ducts. Larger diameter reduces static pressure and lint buildup but must match dryer outlet and vent hood.
Total equivalent length—counting fittings’ length penalties—should stay within the dryer manufacturer’s maximum, commonly 25–35 feet for nonflex metal.
Shorter runs and fewer fittings preserve performance and reduce fire risk; always follow local code.
Avoiding Sharp Bends and Long Runs for Airflow
When dryer ducts include sharp bends or long, convoluted runs, airflow is considerably reduced and lint accumulates at those constrictions, increasing drying times and fire risk.
Proper routing minimizes resistance and maintenance. Routing should favor straight, short paths and gentle curves. Consider these practical guidelines:
- Keep runs as short as the layout allows to preserve airflow.
- Limit bends; use gentle sweeps rather than 90-degree turns.
- Use smooth-walled, rigid ducting where permitted to reduce turbulence.
- Support ducts to prevent sagging, which traps lint.
- Plan termination location to avoid unnecessary length and to enable easy cleaning.
These measures improve efficiency and safety.
Proper Ways to Join Metal Duct Sections
Join metal dryer duct sections using methods that create a secure, low-resistance airflow path while preventing lint escape and minimizing vibration. Fit sections snugly with male ends inserted into female ends, aligning seams to maintain internal smoothness.
Use approved crimped couplings or smooth connector pieces for changes in diameter. Support joints with duct straps or hangers spaced to prevent sagging and stress on connections.
Verify overlaps face downstream to reduce lint accumulation at seams. Inspect joints for gaps and correct misalignment that causes turbulence.
Maintain accessibility for periodic cleaning and replace corroded or crushed sections promptly to preserve airflow and safety.
Fasteners and Tape: What’s Allowed and What to Avoid
Proper mechanical connections and secure supports set the stage for selecting fasteners and tape that will hold dryer vent ducts together without restricting airflow or creating fire hazards.
Metal foil tape rated for HVAC use is acceptable; avoid cloth duct tape and non‑rated adhesives. Use corrosion‑resistant screws or rivets sparingly to join metal ducts, placing heads outside airflow.
Staples and excessive fasteners that deform the duct are discouraged. Seal joints to prevent lint escape while preserving smooth interior surfaces.
- Acceptable: UL‑approved foil HVAC tape
- Avoid: cloth duct tape
- Use: self‑tapping sheet‑metal screws
- Avoid: staples through the duct interior
- Consider: rivets for long runs
Vent Termination Options and Selecting a Hood
The choice of dryer vent hood affects airflow, lint shedding, and resistance to pests, so common styles like louvered, flap, and magnetic hoods are compared for their pros and cons.
Proper placement and flashing determine weatherproofing effectiveness and help prevent backdrafts and moisture intrusion.
Selection should balance hood performance with local climate considerations and code requirements.
Hood Styles Compared
Choosing the right dryer vent hood affects airflow efficiency, lint control, and exterior appearance; several common styles—such as flap/door, hooded, louvered, and hood with backdraft damper—each balance weather resistance, pest exclusion, and ease of maintenance differently.
- Flap/door: simple, low profile, can stick with lint or wind.
- Hooded: wider discharge, good rain protection, easier to clean.
- Louvered: screens airflow, limits pests, may trap lint in slats.
- Hood with backdraft damper: prevents cold air infiltration, adds resistance.
- Specialty insect screens: improve exclusion but require frequent inspection.
Choose based on maintenance access and airflow needs.
Weatherproofing And Placement
After considering hood styles and how they influence airflow and maintenance, attention turns to where the vent exits and how it is sealed against weather and pests.
Placement favors exterior walls away from prevailing winds, elevated above ground to avoid splashback and snow buildup, and clear of nearby openings to prevent re-entrainment.
Termination options include backdraft dampers, louvered hoods, and gravity flaps; each should be corrosion-resistant and sized to the duct.
Flashing and high-quality exterior sealant prevent leaks where the duct meets siding.
Screens must balance pest exclusion with minimal lint accumulation and periodic inspection access.
Wall Venting vs Roof Venting: Pros and Cons
When deciding between wall and roof dryer venting, homeowners should weigh airflow efficiency, installation complexity, weather exposure, and maintenance needs.
Wall vents often provide shorter duct runs and easier access for cleaning, while roof vents can be neater and avoid sidewall obstructions. Roofing penetration may leak if poorly flashed; sidewall installs can be impacted by wind and snow.
Code and local climate influence choice. Consider trade-offs:
- Shorter run improves airflow and reduces lint buildup.
- Roof vents require secure flashing and possible roof access.
- Wall vents are simpler to install and service.
- Roof vents may need insect or bird guards.
- Exterior aesthetics differ.
Converting a Plastic Vent to Code‑Compliant Metal
If a homeowner finds an existing dryer vent made from flexible plastic or foil, code and safety concerns often necessitate replacing it with rigid metal ducting.
The process begins with evaluating the current route, measuring lengths, and planning for smooth shifts and minimal bends to reduce lint buildup.
Sections of approved smooth-walled galvanized or stainless steel pipe should replace nonmetallic materials, joined with foil tape or mechanical clamps as codes require.
Sealing, securing, and maintaining proper slope toward the exterior prevent moisture and lint accumulation.
Verification of exhaust termination, exterior damper condition, and compliance with local code completes the conversion.
Tools and Materials Checklist for an Upgrade
The checklist for upgrading a plastic dryer vent lists required tools and materials, emphasizing the distinction between flexible and rigid ducts and their appropriate uses.
It also specifies compatible sealants, clamps, and fasteners to guarantee airtight, code‑compliant connections.
Attention to correct components and hardware prevents leaks and reduces fire risk.
Required Tools And Materials
A clear checklist helps guarantee a smooth dryer vent upgrade by identifying every tool and material before work begins. The following essentials support a safe, code-compliant installation and efficient operation.
- Screwdriver set and drill with metal bits for fasteners and connections
- Tin snips and utility knife for cutting ducts and tape
- Galvanized or aluminized rigid duct sections and connection collars
- High-temperature foil tape, foil or metal clamps, and approved vent hood
- Vent brush, vacuum, and safety gear (gloves, eye protection, dust mask)
Quantities and sizes depend on duct length, dryer outlet, and wall or roof penetration specifics.
Flexible Vs Rigid Ducts
Why choose rigid instead of flexible ducting for a dryer vent upgrade?
Rigid metal ducting offers smoother interior surfaces, reduced lint buildup, and improved airflow, lowering fire risk and improving dryer efficiency.
Flexible foil or plastic ducts kink, trap lint, and constrict airflow, increasing run time and energy use.
Rigid ducts require fewer connections and maintain shape over long runs; they are easier to clean with brushes or vacuums.
Flexible ducts remain useful for short final connections behind machines where access is limited.
Selection should favor rigid metal for main runs, reserving flexible only when unavoidable for tight spaces.
Sealants, Clamps, Fasteners
Several essential sealants, clamps, and fasteners are required to complete a dryer vent upgrade properly: high-temperature silicone sealant for joints, foil tape (UL 181‑rated) for seam reinforcement, stainless-steel worm-drive clamps for secure connections, sheet‑metal screws for rigid duct sections, and masonry anchors or exterior-grade screws for wall/roof terminations.
A compact checklist guarantees safe, code‑compliant installation. Choose materials rated for heat and corrosion resistance, avoid plastic fasteners at hot junctions, and match fastener length to substrate thickness.
Proper seals and mechanical connections reduce lint buildup and leakage, improving dryer efficiency and safety.
- High-temperature silicone sealant
- UL 181 foil tape
- Stainless-steel worm-drive clamps
- Sheet-metal screws
- Masonry anchors / exterior screws
When to Call a Professional Installer
Homeowners should consider hiring a professional installer when the dryer vent project involves complex routing, structural modifications, unfamiliar building codes, or signs of significant damage such as corrosion, mold, or animal nesting that could compromise safety or performance.
A professional assesses proper clearances, selects code-compliant materials, and plans safe wall or roof penetrations to prevent leaks and fire hazards. They diagnose airflow restrictions, repair or replace damaged ducts, and guarantee termination and backdraft dampers function correctly.
For multi-story runs, concealed spaces, or persistent lint accumulation despite maintenance, a licensed installer reduces risk and guarantees long-term ventilation efficiency.
Cost Comparison: Plastic, Aluminum, Galvanized, Stainless
A brief cost comparison highlights that plastic dryer vent pipe is typically the least expensive upfront, while aluminum, galvanized steel, and stainless offer progressively higher material prices.
Longevity, corrosion resistance, and maintenance needs alter the long-term value, often making pricier metals more economical over time.
The trade-offs between initial outlay and lifetime performance merit clear consideration when selecting vent material.
Material Cost Differences
When comparing dryer vent materials, cost differences largely reflect raw material prices, fabrication complexity, and expected service life.
A concise comparison highlights upfront purchase costs and typical installation components without addressing long-term value.
- Plastic: lowest initial cost; inexpensive fittings; vulnerable to heat limitations.
- Aluminum foil/duct: very cheap; flexible; may require replacement more often.
- Galvanized steel: moderate cost; rigid sections and clamps add expense.
- Stainless steel: highest upfront cost; corrosion-resistant fittings increase price.
- Additional costs: vent hood, connector pieces, seals, and professional labor vary by material choice.
Long-Term Value
Although initial purchase price influences choice, long-term value for dryer vent materials is determined by durability, maintenance frequency, safety risk, and lifecycle costs including replacement and energy impacts.
Plastic pipe is cheapest upfront but degrades, risks melting or fire, and requires more frequent replacement and inspection, raising lifecycle cost.
Flexible aluminum balances low cost and adequate durability but can trap lint in corrugations, increasing cleaning needs.
Galvanized steel is affordable and robust but may corrode; periodic replacement and potential airflow loss affect efficiency.
Stainless steel costs more initially yet offers longest service, lowest maintenance, best safety profile, and lowest total cost over time.
Maintenance Tips to Extend Any Dryer Vent’s Life
Regularly scheduled inspections and simple upkeep greatly prolong the lifespan of any dryer vent system.
Routine visual checks, securing loose connections, and replacing worn sections prevent airflow restrictions and moisture buildup. Attention to material compatibility and outdoor termination reduces corrosion and pests.
Professional assessment after significant changes in laundry usage or ductwork guarantees safe operation and code compliance.
- Inspect exterior hood and flap for obstructions
- Tighten clamps and replace damaged tape or connectors
- Confirm proper support to avoid sagging runs
- Replace crushed or deteriorated duct sections promptly
- Monitor surrounding insulation and clearances for heat safety
How Often to Clean Dryer Vents and Simple Methods
Most manufacturers and safety experts recommend cleaning dryer vents at least once a year, with more frequent attention — every 3–6 months — for heavy use, long duct runs, or households with pets and lint-prone fabrics.
Inspection should precede cleaning: check exterior exhaust, feel airflow, and look for visible buildup.
Simple methods include disconnecting the dryer and using a vent brush or flexible snake to remove lint from the duct, vacuuming the interior and lint trap housing, and wiping connections and the dryer exhaust outlet.
Professionals can perform thorough duct cleaning and inspect for damage; schedule service if airflow remains weak after basic cleaning.
Lint Filters and Secondary Catchers to Reduce Risk
Many households add a secondary lint catcher or upgraded filter to reduce lint buildup in dryer ducts and lower fire risk.
These devices capture stray fibers before they enter rigid or plastic pipe, extending time between professional cleanings and lowering ignition potential.
Selection and placement matter: magnetic or clamp-mounted catchers on the exterior vent are common; inline screens fit inside duct runs.
Regular inspection and cleaning of any added device is essential to avoid blockage.
Consider these practical options:
- Exterior lint trap with removable cup
- Inline metal mesh screen
- Magnetic quick-clean filter
- Washable reusable filter cartridge
- Hood-mounted secondary trap
How Poor Venting Affects Energy Use and Drying Time
Poorly vented dryers force warm, moist air to linger in the drum and ductwork, which increases cycle length and raises energy consumption as the machine repeats heating and tumbling to reach dryness.
Restricted airflow reduces heat transfer from the element to clothes, so sensors detect higher humidity and extend cycles. Longer runtimes and frequent reheats raise electricity or gas use and accelerate wear on components.
Moisture buildup can lead to mildew smells, prompting extra cycles. Efficient venting shortens drying time, lowers utility bills, and reduces mechanical stress.
Proper duct size, straight runs, and clean vents optimize performance and energy efficiency.
Temporary Fixes for Unsafe Plastic Vents (Don’t Rely on These)
When a dryer system uses unsafe plastic venting, homeowners sometimes resort to quick repairs to keep the appliance running while arranging a proper replacement.
These measures are temporary stopgaps that reduce immediate lint buildup or drafts but do not address fire risk, melting, or code violations.
The following short-term fixes are common yet unreliable:
- Wrapping torn plastic with foil tape to seal leaks
- Using hose clamps on flexible plastic connectors
- Stuffing lint-catching fabric or mesh into vent openings
- Routing the plastic through longer runs to avoid sharp bends
- Propping vents with makeshift supports rather than replacing them
All are short-term only.
Recommended Approved Vent Pipes and Kits
Approved dryer venting materials prioritize heat resistance, smooth airflow, and code compliance.
Stainless steel rigid ducting and UL-listed semi-rigid aluminum ducts are favored for durability and minimal lint buildup. Galvanized steel ducts also meet many codes if properly sealed and supported.
Manufacturer-approved connector kits, including short flexible metal connectors and clamped adapters, guarantee secure joins at the appliance.
Chimney-type vent kits with backdraft dampers and exterior wall hoods improve exhaust performance and safety.
All recommended products carry UL or equivalent listings; installers should follow local codes, manufacturer instructions, and use proper clamps, foil tape, and support straps for reliable operation.
Common Homeowner Mistakes When Replacing Vents
Although seemingly simple, replacing a dryer vent often leads to mistakes that compromise safety and performance.
Common homeowner errors include choosing nonapproved materials, creating excessive duct length, and poor fastening that allows leaks or disconnection.
Improper connections and crushing flexible ducts reduce airflow, while neglecting lint buildup risks fire.
- Using vinyl or thin plastic instead of metal-approved ducts
- Bending or kinking ducts in tight spaces
- Relying on foil tape rather than approved clamps and foil tape where required
- Installing multiple sharp elbows that impede flow
- Failing to seal exterior termination properly, allowing pests and moisture
Final Safety Checklist for a Code‑Compliant Dryer Vent
After correcting the common installation errors noted earlier, a concise safety checklist guarantees the dryer vent meets code and operates safely.
Verify material: rigid or semi‑rigid metal venting only; no plastic or foil foil‑type flexible.
Confirm smooth, short, straight runs with a single 90° bend maximum.
Check connections: secure with metal clamps, no screws that trap lint.
Ascertain proper slope toward exterior and a backdraft damper installed.
Measure exhaust length against manufacturer limits and local code.
Confirm exterior termination is unobstructed and screened.
Test dryer performance and inspect for leaks; document compliance and schedule annual lint inspections.
Conclusion
Plastic dryer venting is rarely acceptable long‑term: flexible foil or plastic hoses can be a fire and lint‑buildup hazard, and most codes require smooth, rigid metal ducts. Homeowners should replace nonmetal hoses with approved galvanized or stainless steel ducting, guarantee proper length, slope, and clean access, and avoid common installation errors. Even a tiny plastic hose can become a catastrophic tinderbox; follow code, inspect regularly, and choose certified metal kits for safety and performance.