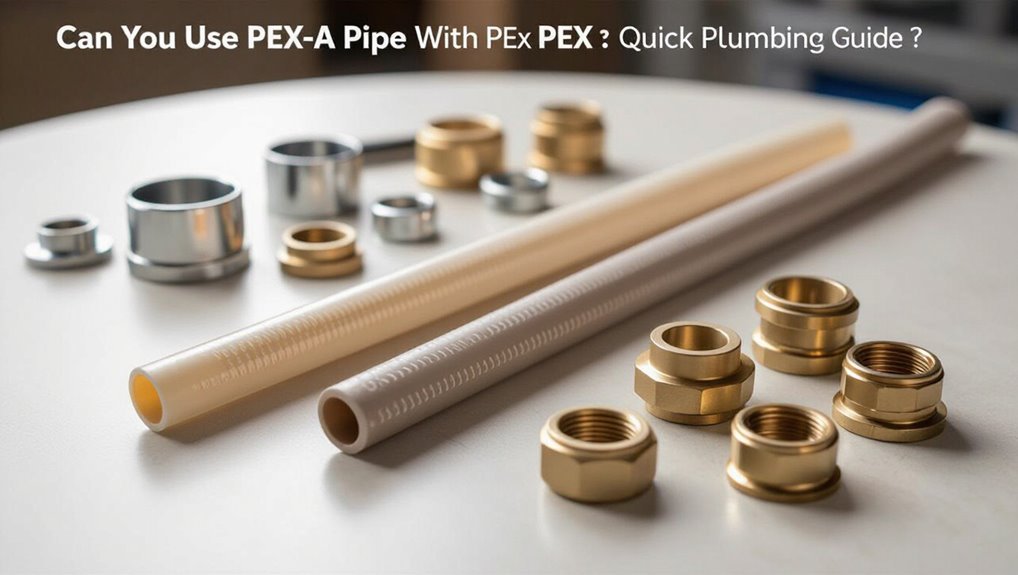
Can You Use PEX-A Pipe With PEX-B Fittings? Quick Plumbing Guide
Yes, PEX-A tubing can often be used with PEX-B fittings, but compatibility varies depending on the type of fitting and the manufacturer.
Key Takeaways:
- Crimp and Clamp Fittings: Generally compatible with both PEX-A and PEX-B.
- Expansion Fittings: Designed specifically for PEX-A; may not create a proper seal with PEX-B.
- Installer Technique: Proper technique and tools are crucial to prevent leaks and maintain warranty validity.
- Local Codes: Be aware that some local plumbing codes may prohibit mixing PEX types.
- Documentation: Keeping documentation handy can help during inspections.
For further details on specific fittings, tools, and code checks, continue reading.
What This Guide Covers : Quick Verdict and Scope
This guide concisely compares PEX-A and PEX-B tubing, explains their common uses, installation differences, pros and cons, and key compatibility and code considerations so readers can quickly judge which type suits a given residential or light‑commercial plumbing project.
It states a concise verdict: both perform well; PEX-A offers superior flexibility and expansion fitting performance, while PEX-B is stiffer and often less expensive.
Scope covers material properties, typical fittings (without addressing mixing specifics), installation methods (crimp, clamp, expansion), temperature/pressure limits, durability, and code phrasing to check.
Readers are directed to evaluate project priorities: flexibility, cost, and installer familiarity.
Quick Answer: Can You Mix PEX-A With PEX-B Fittings?
Can PEX-A and PEX-B fittings be mixed on the same system? Mixing is possible but depends on connection method and manufacturer compatibility.
Crimp, clamp, push-fit, or expansion systems behave differently with PEX types. PEX-A’s flexibility suits expansion fittings; PEX-B often pairs with crimp or clamp devices.
Using mismatched fittings without confirming manufacturer approval risks leaks, voided warranties, and code noncompliance.
Professionals reference manufacturer charts and local codes before combining components. When approved, installers must follow specified tooling, insertions, and support practices for each material to guarantee reliable joints and system performance.
Why That Answer Matters for DIYers and Pros
Understanding when and how PEX-A and PEX-B can be combined matters differently for DIYers and professionals because the stakes and workflows vary. The distinction influences tool choice, installation speed, reliability, and liability.
For homeowners, ease of connection and reduced risk of leaks matter; for contractors, code compliance, warranty adherence, and job efficiency dominate decisions. Clear guidelines minimize callbacks and safety issues.
- Tooling and technique: impacts time and likelihood of proper seals.
- Code and warranty: affects inspections and responsibility.
- Long-term performance: determines maintenance frequency and client satisfaction.
What PEX-A and PEX-B Are (Materials at a Glance)
PEX-A features a highly cross-linked molecular network formed by peroxide or silane methods, giving it greater flexibility and memory.
PEX-B is produced by an electron beam or chemical irradiation process that creates a different cross-link pattern and slightly stiffer tube.
A brief comparison of these structures and methods clarifies why performance and installation characteristics differ between the two.
PEX-A Molecular Structure
A crystalline, cross-linked polyethylene variant, PEX-A is produced by the peroxide (or Engel) method, which yields a tightly networked molecular structure with long-chain branching and high crosslink density.
This architecture delivers flexibility, superior kink resistance, and improved memory compared with less cross-linked types. The dense network also enhances thermal stability and chemical resistance, affecting installation and long-term performance.
Designers and plumbers consider these molecular traits when selecting tubing for pressurized hot and cold water systems.
- Enhanced flexibility and kink recovery
- High crosslink density improves thermal and chemical resilience
- Structural uniformity supports reliable fittings and joints
PEX-B Manufacturing Process
Manufactured primarily by the silane or irradiation processes, PEX-B is a thermally crosslinked polyethylene with a more linear backbone and lower crosslink density than PEX-A, producing a stiffer tube with different performance trade-offs.
In the silane method, polyethylene is grafted with silane groups, moisture-cured to form siloxane crosslinks; this allows extrusion before crosslinking and is cost-effective.
Electron-beam irradiation directly creates crosslinks post-extrusion without additives, offering cleaner chemistry but requiring specialized equipment.
Both yield durable tubing resistant to chemicals and temperature, though PEX-B’s reduced flexibility and slightly lower thermal memory distinguish its practical installation and repair characteristics.
How PEX-A and PEX-B Are Made: Peroxide vs Extrusion
Because their polymer chains are crosslinked by different methods, PEX-A and PEX-B emerge from production with distinct physical and installation properties.
PEX-A uses the peroxide (or Engel) method: polymer is crosslinked after extrusion via peroxide-induced chemical reactions, producing a uniformly linked matrix.
PEX-B uses the extrusion method (silane or silane-graft), where crosslinking occurs through moisture-activated reactions after extrusion, yielding a different network.
These manufacturing differences influence durability, repairability, and compatibility with certain fittings.
- PEX-A: peroxide crosslinking post-extrusion
- PEX-B: extrusion with moisture/silane crosslinking
- Result: different material structures and behaviors
Flexibility and Shape Memory: PEX-A vs PEX-B
PEX-A typically offers greater flexibility and easier bendability than PEX-B, which can reduce the need for fittings in tight runs.
PEX-A also exhibits stronger shape memory, allowing it to return to its original form after kinking or heating, whereas PEX-B is less forgiving.
These differences affect installation speed and technique, with PEX-A often simplifying complex layouts while PEX-B may require more fittings or care.
Flexibility And Bendability
A coil of tubing that can be routed easily around joists and through studs is a practical advantage in many installations. The comparison focuses on bend radius and ease of manipulation during installation.
PEX-A typically allows tighter bends and fewer fittings; PEX-B is stiffer, often needing more clearance or supports. Installers choose based on route complexity and tool access. Considerations include thermal expansion and long runs.
- PEX-A: superior cold flexibility, fewer kinks under careful handling
- PEX-B: firmer feel, holds shape when supported
- Both: require proper bending tools and adherence to manufacturer radius limits
Shape Memory Recovery
Following the discussion of bend radius and handling, attention turns to how each material recovers from kinks and permanent deformation after bending or compression.
PEX-A exhibits pronounced shape memory: it tends to return toward its original form when heated or allowed to rest, reducing permanent flattening or kinking. Crosslinking during manufacturing imparts elasticity that helps close minor crimps and maintain flow.
PEX-B, while still resilient, shows less recovery and is more prone to residual deformations after severe bends or compressive damage.
In applications where recovery matters, PEX-A’s superior memory can prolong service life and reduce leak risk.
Installation Ease Differences
Installation conditions and installer skill largely determine whether the flexibility and shape memory of PEX-A or PEX-B will translate into faster, more reliable hookups.
PEX-A’s superior flexibility and strong shape memory often ease routing around obstacles and simplify expansion-ring connections, reducing elbow use.
PEX-B’s stiffer nature can demand more fittings and precise bends, which may slow installation but offers predictable springback for some crimp systems.
Choice impacts tool selection, joint method, and time per connection.
Consider job constraints, available fittings, and installer familiarity when selecting material to optimize speed and reliability.
- Faster routing with fewer fittings: PEX-A
- Predictable crimp behavior: PEX-B
- Tool and method influence outcomes
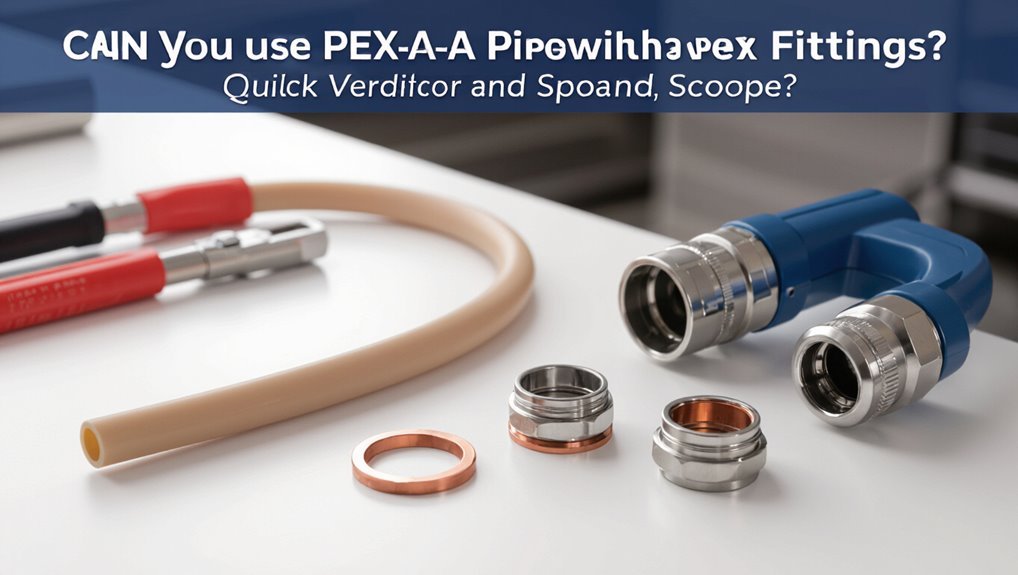
Common Connection Systems: Crimp, Clamp, Expansion, Push‑Fit
PEX plumbing uses several reliable connection systems—crimp, clamp (cinch), expansion, and push‑fit—each offering distinct advantages in speed, tool requirements, and suitability for different installers and applications.
Crimp uses copper rings compressed by a crimp tool; it is inexpensive and common.
Clamp (cinch) employs stainless steel bands tightened with a ratchet tool, favored for retrofits and ease.
Expansion stretches PEX-A with a specialized expander, creating a secure, seamless joint as the pipe contracts over a fitting.
Push‑fit connectors require no tools, using internal teeth and O‑rings for rapid, serviceable connections ideal for repairs and DIY work.
Which Fittings Are Made for PEX-A, PEX-B, or Both
The guide outlines which fittings pair with each PEX type, starting with crimp and clamp systems that generally work with both PEX-A and PEX-B when the correct ring and tooling are used.
Expansion fittings are emphasized as primarily designed for PEX-A due to its superior memory and recoverability.
Finally, barb and push-fit options are noted for broad compatibility, though manufacturer specifications and pressure-temperature ratings must be checked.
Crimp And Clamp Compatibility
Many crimp and clamp fittings are designed to work with either PEX-A or PEX-B, but compatibility depends on the fitting material, barb profile, and the tubing’s wall memory characteristics.
Manufacturers often label fittings for both types; stainless steel clamps and copper crimp rings commonly suit either PEX-A or PEX-B when barb geometry matches.
Nylon or specialized polymer barbs may be limited. Installers must match ring size and tool calibration to tubing OD and wall thickness.
Typical considerations include:
- Material compatibility: copper, brass, stainless
- Barb design: single vs. multi-bead profiles
- Ring/clamp specification: dimension and approved tubing types
Expansion Fitting Suitability
Typically, expansion fittings are engineered principally for PEX-A because its superior shape memory allows the tubing to recover around the fitting after expansion; PEX-B and other less elastic formulations generally lack the same recovery and consequently require fittings specifically rated for their use or alternate connection methods.
Expansion fittings: manufacturers often label compatibility. Some fittings are PEX-A only; a few are rated for both PEX-A and PEX-B when paired with specified expansion tools and rings. Installers should follow manufacturer listings and local code. The table summarizes common labeling.
| Fitting Type | Typical Compatibility |
|---|---|
| Expansion sleeve | PEX-A |
| Expansion ring | PEX-A |
| Hybrid expansion | PEX-A/PEX-B (rare) |
| Manufacturer listed | As stated |
Barb And Push-Fit Use
Several common barb and push-fit fittings are manufactured specifically for either PEX-A or PEX-B, while a growing number are rated for both when designed with compatible materials and insertion depths.
Installers should verify manufacturer compatibility, insertion depth, and clamp or crimp method. Barb fittings typically use stainless clamps or copper crimp rings; material and compression determine suitability for PEX-A’s elasticity versus PEX-B’s stiffness.
Push-fit fittings with EPDM or HNBR seals and durable plastic bodies often accept both types, but some rely on liner designs tailored to a single pipe type.
Always consult labeling and technical data before mixing components.
- Check manufacturer compatibility
- Match clamp/crimp type
- Verify insertion depth
Are PEX-A Pipes Compatible With PEX-B Crimp/Clamp Fittings?
Can PEX-A tubing be joined with PEX-B crimp or clamp fittings without issue?
Technically, PEX-A can be joined using copper crimp rings or stainless steel clamp rings designed for PEX-B, and many installers report reliable seals when proper technique is followed.
However, PEX-A’s higher flexibility and memory can make achieving uniform crimps more challenging; over-tightening risks deformation, under-tightening leaks.
Use correct ring size, tool calibration, and inspection gauges.
Manufacturer compatibility lists should be checked: some PEX-A producers limit approved fastening methods.
For guaranteed performance, follow both pipe and fitting manufacturer instructions rather than assuming universal interchangeability.
Can PEX-A Work With PEX-B Expansion Fittings?
Compatibility between PEX-A tubing and PEX-B expansion fittings hinges on polymer differences and manufacturer approvals.
Successful use requires the correct expansion ring material and size specified for the PEX-B fitting system.
Installers should follow manufacturer guidance and expansion-tool procedures to guarantee proper fit and pressure integrity.
Material Compatibility Overview
When mixing PEX-A pipe with expansion fittings designed for PEX-B, installers must consider differences in material memory and diameter recovery: PEX-A’s superior elasticity allows the pipe to expand and return more fully, while PEX-B is firmer and may not respond the same way to the expansion process.
Compatibility depends on dimensional tolerances, polymer formulation, and thermal behavior. Mismatched response can affect joint integrity under pressure and temperature cycling.
Assessment should focus on measured fit and manufacturer guidance rather than assumption.
- Dimensional tolerance differences
- Polymer stress relaxation rates
- Thermal expansion coefficients
Expansion Ring Requirements
Having established how PEX-A and PEX-B differ in memory, diameter recovery, and thermal response, attention shifts to the specific role of the expansion ring in mixed-system joints.
The expansion ring (or sleeve) must compress uniformly against PEX-A after expansion to form a reliable seal. PEX-A’s superior recovery aids ring seating; PEX-B fittings designed for expansion systems may have slightly different sleeve tolerances.
Compatibility depends on ring material, wall thickness, and manufacturer specifications. Using a ring not rated for PEX-A can risk leaks.
Consequently, verification of manufacturer compatibility and rated tolerances for the specific expansion ring is essential before combining components.
Installation Best Practices
Evaluating whether PEX-A can be joined with PEX-B expansion fittings requires checking manufacturer specifications and the specific ring/fitting design rather than relying on generic assumptions about polymer types.
Installers should confirm compatibility, follow recommended expansion tooling, and use correct ring material and sizing to guarantee reliable connections.
Thermal recovery, re-expansion limits, and tubing memory differ between PEX types and affect joint integrity.
Pressure testing after installation validates work and detects leaks early. Documentation of fitting lot numbers and installation conditions supports warranty claims.
- Verify manufacturer compatibility and approved ring types
- Use calibrated expansion tools and proper technique
- Perform pressure test per code
Brass vs Plastic Fittings With PEX-A: Risks and Benefits
Although both brass and plastic fittings are compatible with PEX-A piping, their differing material properties create distinct trade-offs in durability, cost, and installation technique.
Brass offers superior strength, resistance to creep and higher temperature tolerance, making it preferable for long runs and high-stress joints; it resists impact and can be reused in some cases.
Plastic fittings (polymer/composite) are lighter, cheaper, and corrosion-resistant, reducing galvanic concerns with dissimilar metals.
However, plastic can be more susceptible to UV degradation, chemical attack, and slower wear under high pressure.
Selection should weigh load, environment, budget, and installer familiarity with fitting-specific procedures.
How to Read Manufacturer Compatibility Charts
When consulting a manufacturer’s compatibility chart, the reader should first identify the specific PEX type, fitting material, and connection method listed across the chart’s axes, since those three variables determine whether a component is approved for use together.
The chart is then scanned for matching intersections, notes, and restriction symbols. Abbreviations and footnotes clarify temperature, pressure, or assembly limits; any conflict or absence of a mark indicates incompatibility.
Records should be kept of model numbers and revision dates in case of updates.
- Confirm PEX grade and fitting alloy/plastic
- Verify connection style (crimp, clamp, expansion)
- Read all footnotes and revision dates
Key Codes and Standards (ASTM, CSA, UPC) You Must Know
The guide briefly outlines how regional code requirements (ASTM, CSA, UPC) affect allowable uses of PEX-A versus PEX-B.
It highlights key differences in code compliance that can determine material selection and installation methods.
It also summarizes which fitting standards are accepted under each code to guide approved component choices.
Code Compliance Differences
Why do PEX-A and PEX-B require careful attention to specific codes and standards? Differences in material properties, allowable fittings, and installation methods affect compliance under ASTM, CSA, and UPC frameworks.
Inspectors and contractors must match product markings and listings to code language. Key distinctions influence approval for potable water, radiant heating, and pressure ratings.
- Verify ASTM and CSA designations on pipe and manufacturers’ data sheets.
- Confirm UPC or local code acceptance for the chosen material and application.
- Guarantee installation practices (expansion vs. crimp) follow listed methods and inspector expectations to avoid noncompliance.
Approved Fitting Standards
Building on code distinctions between PEX-A and PEX-B, approved fitting standards define which connection types and materials are acceptable under ASTM, CSA, and UPC frameworks.
These standards specify compatible fittings (crimp, clamp, expansion, push-fit, and compression), material requirements (brass, copper, engineered polymers), and performance tests (pressure, temperature cycling, and dezincification resistance).
Installers must match fittings certified to the pipe type and to relevant standards: ASTM F877/F2080, CSA B137.5, and UPC/IPC listings.
Local jurisdictions adopt or modify these references; compliance requires verifying third-party listings, manufacturer instructions, and permitted connection methods before installation.
Local Code Checks: When Mixing Is Allowed or Banned
Local plumbing codes dictate whether PEX-A and PEX-B may be combined on the same system, and those rules vary by jurisdiction based on material compatibility, approved fittings, and inspection history.
Authorities having jurisdiction may allow mixing if fittings are listed for both materials, or prohibit it where standards differ.
Installers should verify local amendments, product approvals, and inspector interpretations before combining types.
Documentation and labeling simplify inspections and liability.
- Confirm listings: check manufacturer and code approvals.
- Seek written clearance from the inspector for mixed systems.
- Retain installation records and product data for compliance verification.
Real-World Scenarios Where Mixing Is Acceptable
Practical installations commonly mix PEX-A and PEX-B when fittings and joining methods are explicitly listed for both materials and the authority having jurisdiction has approved the arrangement in writing; examples include retrofit jobs where existing PEX-B trunk lines remain while new branches are run in PEX-A for its expansion joints, or systems using PEX-A for radiant-heating manifolds and PEX-B for cold-water distribution where compatible interchange fittings are used. Accepted scenarios often feature documented compatibility, retrievable installation records, and tested connection fittings. Installers should follow manufacturer instructions and AHJ approvals. Sample cases:
| Scenario | Key factor |
|---|---|
| Retrofit branch | Compatibility listed |
| Radiant manifold | Expansion need |
| Mixed distribution | Connection fitting |
| Emergency repair | Approved parts |
| New branch off trunk | Documented method |
When Mixing Is Not Recommended: Pressure, Temp, Warranty Risks
Mixing PEX-A and PEX-B is not advised when system pressures or temperatures approach the rated limits of either material, as differing expansion and strength profiles can create weak points.
Manufacturers’ warranties often exclude mixed-material installations or require specific fittings and documentation, exposing owners to coverage denial.
Evaluating pressure/temperature requirements and confirming compatibility with manufacturer guidelines is essential before combining types.
Pressure And Temperature Limits
Pressure and temperature limits determine when joining PEX-A and PEX-B systems is inadvisable: each type has rated maximum working pressure and continuous operating temperature, and mismatching these ratings—or combining fittings, expansion methods, or barrier layers from different PEX classes—can create points of overstress, accelerated creep, or thermal degradation.
PEX components should be matched to the lowest applicable rating in a mixed assembly.
Attention is needed where temperature cycling, high static pressure, or proximity to heat sources occur.
Considerations include:
- Maximum working pressure at specified temperature (e.g., 100°F vs 180°F)
- Long‑term temperature exposure effects (creep)
- Thermal expansion mismatch risks
Warranty And Compatibility Risks
Although combining PEX-A and PEX-B components can seem feasible when dimensions and fittings align, manufacturers’ warranties and system compatibility are frequently voided by such mixes.
Differing material properties, joining methods, and barrier layers introduce failure modes not covered by standard guarantees. Mixing can alter allowable pressure and temperature margins, affect expansion/contraction behavior, and change response to chlorine or UV, creating leak or rupture risk.
Installers may lose manufacturer support for replacements or consequential damage. Code inspectors and insurers may reject mixed systems.
For warranty protection and predictable performance, matching product families and following manufacturer installation instructions is recommended.
Tools and Prep for Joining PEX-A to PEX-B Fittings
Begin by assembling the proper tools and inspecting materials to guarantee a reliable connection between PEX-A and PEX-B fittings. The installer verifies pipe type, fitting material, and compatibility marks.
Clean, deburr, and measure tubing to confirm correct insertion depth. Confirm ambient conditions and support spacing before joining.
Essential items include:
- PEX cutter, reamer, and insertion depth gauge
- Appropriate crimp/clampon tool or expansion tool with calibrated rings
- Clean rags, marker, and corrosion-resistant fittings
Personnel should follow manufacturer torque and tool calibration guidelines. Record lot numbers and keep components dry to prevent contamination prior to final assembly.
Step-by-Step: Installing PEX-A With a PEX-B Crimp Fitting
One clear approach for joining PEX-A tubing to a PEX-B crimp fitting is to follow a strict, methodical sequence that guarantees proper fit and reliable seals.
First, cut the PEX-A squarely and deburr the end. Slide the correct-size copper crimp ring onto the tubing, positioning it roughly 1/8–1/4 inch from the tube end.
Insert the PEX-B crimp fitting fully into the tubing shoulder. Center the ring over the fitting ferrule.
Use a calibrated crimp tool to compress the ring evenly until the tool indicates completion. Verify the crimp with a go/no-go gauge, then pressure-test the joint for leaks.
Step-by-Step: Installing PEX-A With a PEX-B Expansion Fitting
Before beginning, the installer confirms that the specific PEX-A tubing is compatible with the chosen PEX-B expansion fitting and checks manufacturer temperature and pressure ratings.
The tubing ends are cut square, deburred, and measured for correct insertion depth to guarantee a proper seal.
Using the expansion tool, the technician expands the PEX-A, inserts the PEX-B fitting to the marked depth, and allows the assembly to recover to form a secure connection.
Verify Material Compatibility
Confirming material compatibility is a critical first step when installing a PEX-A tube with a PEX-B expansion fitting: it guarantees the two polymers, their dimensions, and any manufacturer-specified tolerances match so the expansion ring will properly grip and seal without compromising strength or warranty coverage.
The installer verifies manufacturer cross-compatibility charts, checks nominal sizes and wall thicknesses, and inspects for specific alloy or additive requirements. Mismatched products can cause leaks or void warranties. When uncertain, contact manufacturers for written confirmation.
Recommended quick checks include:
- Confirm model and size match per manufacturer documentation
- Verify listed cross-compatibility for PEX-A with PEX-B fittings
- Check warranty terms for mixed-material use
Prepare PEX Tubing Ends
Prepare the PEX tubing ends by cutting, deburring, and inspecting each tube so the expansion fitting can form a clean, reliable seal.
The installer measures and marks the required lengths, then uses a sharp PEX tubing cutter to produce square, burr-free ends.
After cutting, the ends are examined for cracks, kinks, or wall irregularities; defective sections are recut.
Any inner or outer burrs are removed with a deburring tool or reamer, and the outer jacket is smoothed.
The installer verifies that tubing dimensions match fitting specifications and that ends are free of debris, oil, or moisture before proceeding.
Perform Expansion And Connection
With properly cut, deburred, and inspected PEX-A ends, the installer proceeds to expand the tubing and secure the PEX-B expansion fitting.
The expansion tool is centered, grips set, and the ring expanded uniformly; the PEX-A must remain clean and lubricated per manufacturer instructions.
After expansion, the PEX-B fitting is inserted fully until the stop seats against the tubing.
Hold steady until contraction creates a tight, leak-proof joint.
Verify alignment and measure insertion depth.
Finally, inspect the completed connection for visible gaps and perform a pressure test to confirm integrity before burying or concealing the joint.
- Center expansion tool
- Insert fitting fully
- Pressure-test connection
Tightness Checks and Pressure/Leak Testing After Install
Begin by inspecting all fittings, crimps, and changes visually and by hand to verify proper alignment and seating before applying pressure.
After inspection, isolate the system and perform a controlled hydrostatic test at manufacturer-recommended pressure, typically 1.5 times working pressure but not exceeding component ratings.
Monitor joints, fittings, and exposed pipe for at least 15–30 minutes, watching for visible leaks, moisture, or pressure decay on gauges.
If pressure holds, relieve slowly and recheck connections under normal operating conditions and temperature.
Document test pressure, duration, and observations.
Address any leakage immediately, replacing or reseating defective components before service.
Common Failure Modes When You Mix PEX-A and PEX-B
Although both PEX-A and PEX-B meet plumbing standards, mixing them in a single system can create incompatibilities that lead to leaks, fitting failures, and accelerated material degradation.
Differences in wall memory, hardness, and dimensional tolerances can compromise seal integrity at junctions. Mechanical or crimp fittings may not compress uniformly, and differing expansion behavior stresses joints under pressurization.
Chemical additives and oxygen barriers vary, affecting long-term compatibility.
Common failure modes include:
- Uneven crimp deformation causing micro-gaps and slow leaks
- Gasket extrusion or displacement from mismatched diameters/hardness
- Brittle fracture at fittings due to localized stress concentration
How Aging and Thermal Cycling Affect Mixed PEX Joints
Aging and repeated thermal cycling alter the material properties of both PEX-A and PEX-B, changing flexibility and creep resistance over time.
These changes can compromise long-term seal integrity at mixed-material joints, especially where differential expansion or stress concentrations occur.
Evaluating joint condition and selecting compatible fittings and installation methods mitigates progressive leakage risk.
Material Property Changes
When exposed to repeated temperature fluctuations and long-term service, PEX-A and PEX-B exhibit divergent changes in crystallinity, crosslink density, and mechanical resilience that influence joint performance; PEX-A typically maintains greater flexibility and stress relaxation due to its peroxide or high-energy crosslinking methods, while PEX-B tends to show increased stiffness and susceptibility to microcracking over time.
Material property shifts concentrate at interfaces, altering load distribution, cold-flow behavior, and fatigue life. Attention focuses on differential thermal expansion and localized embrittlement.
Key considerations include:
- Rate of crystallinity increase versus ductility loss
- Crosslink density changes affecting creep
- Microcrack initiation sites near fittings
Long-Term Seal Integrity
Because mixed PEX joints combine materials with different responses to heat and time, their seal integrity evolves unevenly under thermal cycling and long-term aging.
Over years, differential expansion and contraction produce micro-movements at the interface; PEX-A’s higher flexibility contrasts with PEX-B’s stiffer creep behavior, stressing seals and compression fittings.
Repeated temperature cycles can relax crimp rings, loosen mechanical grips, and accelerate minor gaps into leak paths.
Oxidative and hydrolytic aging alter polymer surfaces and reduce resilience, impairing seal recovery after deformation.
Regular inspection, proper installation torque, and using compatible connector fittings mitigate progressive degradation and sustain joint reliability.
Troubleshooting Leaks in Mixed PEX Systems
Frequently, leaks in mixed PEX-A and PEX-B systems arise at junction points where differing expansion, fitting types, or installation practices meet; diagnosing them requires isolating sections, inspecting fittings and crimps for proper seating, and checking for incompatible joining methods or damaged tubing.
A methodical approach reduces downtime: pressure-test isolated runs, visually confirm ring placement and compression depth, and replace suspect fittings or short tubing sections rather than full runs. Record findings to identify patterns tied to installation technique or materials.
Recommended immediate checks include:
- Verify clamp/crimp tool calibration and ring position.
- Inspect tubing ends for nicking, scoring, or improper reaming.
- Pressure-test isolated segments after repairs.
Retrofit Tips: Replacing PEX-B With PEX-A Without Full Re‑Pipe
Begin by identifying accessible runs and connection points where PEX-A can be swapped in without disturbing concealed piping: prioritize branch lines, short replacements near fixtures, and manifolds that allow sectioned isolation.
Work in small segments, shut off and drain only the isolated portion, and cap live lines temporarily to prevent contamination.
Match fittings and conversion pieces: use compatible crimp or expansion fittings rated for mixed materials, or coupling pieces where needed.
Verify local code for retrofit allowances.
Pressure-test each replaced segment before restoring service.
Document changes and label new PEX-A runs for future maintenance and clarity.
Cost Tradeoffs: Mixing vs Using One PEX Type
How much does mixing PEX-A and PEX-B save up front versus cost extra over time? A short-term budget may favor mixing: cheaper PEX-B pipe with select PEX-A segments limits immediate expense.
Long-term risks include differing expansion behavior, repair complexity, and potential replacement costs. Decision depends on project scope and lifespan.
- Material cost: PEX-B often lower per foot, PEX-A pricier for fittings and flexibility.
- Labor and repair: mixed systems may require specialized fittings or techniques, increasing labor expense.
- Durability and warranty: PEX-A’s resilience can reduce long-term replacement costs compared to mixed installations.
Essential Tools List for Mixed PEX Work
A concise toolkit is critical when combining PEX-A and PEX-B, beginning with basic hand tools for measuring, cutting, and fitting.
Specialized crimping for PEX-B and expansion tools for PEX-A should be listed and distinguished to prevent improper connections.
Safety and prep gear—gloves, eye protection, deburring tools, and pipe supports—round out the essentials for reliable mixed-PEX work.
Essential Hand Tools
Tools for mixed PEX work should be selected for compatibility, durability, and ease of use; a compact set that covers cutting, joining, measuring, and securing will handle the vast majority of residential and light commercial jobs.
Essential hand tools include a reliable tubing cutter for clean, square cuts; adjustable pliers or tongue-and-groove pliers for gripping fittings and nuts; and a quality deburring tool to remove burrs and guarantee proper seating.
Complementary items such as a marker, tape measure, and flashlight improve accuracy. Proper tool maintenance extends service life and preserves joint integrity.
- Tubing cutter
- Adjustable pliers
- Deburring tool
Crimping And Expansion
After cutting, deburring, and positioning PEX lines, securing connections requires either crimp or expansion systems, each demanding specific hand tools and gauges.
For crimp installations, a ratcheting crimper, appropriately sized copper or stainless steel crimp rings, and a calibrated go/no-go gauge guarantee ring compression meets specification.
Expansion systems require a PEX-A expansion tool, compatible heads, and expansion inserts for fittings, plus a measuring gauge to verify recovery.
Mixed PEX work benefits from dedicated tool sets for each method to prevent cross-contamination and improper joints.
Tool maintenance and correct ring or insert sizing are essential for leak-free assemblies.
Safety And Prep Gear
When preparing mixed PEX installations, proper safety and prep gear prevents accidents and guarantees reliable joints. A concise kit minimizes errors and protects the installer during crimping, expansion, and routing.
Essential items focus on measurement, safe cutting, and contamination control to preserve system integrity.
- PEX cutter and deburring tool for square, clean ends and smooth inner edges.
- Safety glasses, gloves, and knee pads to shield against shards, heat, and strain.
- Marker, tape measure, and cleaning cloths to guarantee correct lengths and contaminant-free fittings.
Select durable, code-compliant tools sized for both PEX-A and PEX-B work.
When to Call a Licensed Plumber for Compatibility Issues
How can a homeowner tell if a compatibility issue with PEX-A or PEX-B requires professional intervention?
Signs warranting a licensed plumber include persistent leaks after attempted repairs, unclear or conflicting manufacturer guidance, visible deformation or cracking at connections, and use of unfamiliar fittings or joining methods.
Complex systems with multiple material changes, high-pressure zones, or proximity to appliances demand expertise.
If code compliance, permit questions, or potential insurance implications arise, a professional should assess.
When uncertainty exists about correct crimp, clamp, or expansion techniques, engaging a licensed plumber prevents damage, guarantees proper materials, and documents compliant repair.
How Mixing Affects Warranties and Inspector Liability
Compatibility concerns can extend beyond immediate performance to affect product warranties and the legal exposure of inspectors. Manufacturers may void warranties if incompatible materials are combined, and inspectors can face liability for approving noncompliant assemblies. Clear documentation and adherence to listed fittings and pipe types matter.
- Warranty denial: mixed-material use cited as cause for refusal of repairs or replacement.
- Inspection risk: sign-off on mismatched systems can trigger professional liability claims.
- Evidence burden: proving correct installation falls to installer or inspector when failures occur.
Stakeholders should review manufacturer statements and code interpretations to reduce dispute risk.
Best-Practice Checklist for Safe Mixed PEX Installations
A concise checklist helps installers and inspectors assess mixed PEX systems for safety and code compliance.
Verify material compatibility: confirm PEX-A and PEX-B components are approved together by manufacturers and listed for the application.
Use specified connection methods and correct-size fittings; follow crimp, clamp, or expansion procedures exactly.
Inspect for visible damage, kinks, or improper bends and guarantee support spacing meets code.
Confirm water chemistry limits and exposure to UV or oil-based products.
Document product IDs, lot numbers, and installation dates.
Test the system at required pressure and duration.
Retain manufacturer instructions and provide clear as-built records.
Case Studies: Successful Mixed PEX Installs and Lessons
When documented through field reports and post‑install inspections, mixed PEX systems demonstrate that careful material selection, correct joining methods, and strict adherence to manufacturer limits yield durable, code‑compliant results.
Case studies show retrofit projects where PEX-A tubing with PEX-B crimp fittings performed well when installers used compatible rings, controlled expansion, and followed torque specifications.
Another study highlighted new construction using PEX-B mains with PEX-A branches joined by approved connection fittings, reducing labor while meeting pressure tests.
A municipal pilot emphasized documentation and training as risk mitigators.
- Retrofit: attention to compression compatibility
- New builds: planned connection points
- Training: consistent outcomes
Myths About PEX-A/B Compatibility : Debunked
Although differing manufacturing processes and fitting styles can suggest incompatibility, most perceived barriers between PEX‑A and PEX‑B stem from misinformation rather than inherent material conflict.
Common myths—such as claims that the materials chemically react, that rings won’t seal, or that warranties always void on mixing—are often oversimplifications.
Practical compatibility depends on connector type, manufacturer instructions, and installation technique rather than polymer origin.
Properly sized crimp, clamp, or expansion systems installed per guidelines perform reliably across PEX types when approved by the fitting maker.
Installers should verify listed approvals and follow accepted practices instead of relying on blanket assumptions.
How to Document Mixed-Material Work for Inspections
Having established that compatibility hinges on connectors and manufacturer approvals rather than polymer type, documentation practices become the practical method for proving compliant mixed-material installations to inspectors.
The installer compiles product data sheets, approved fitting listings, and site photos showing labeling, connection methods, and any alteration components. Records should be chronological, signed, and cross-referenced to plans.
- List manufacturer approvals and model numbers for each fitting and pipe used.
- Include dated photos of alterations, crimps, or expansion joints with scale references.
- Attach installation instructions cited and any third-party compatibility statements.
Clear records expedite inspections and reduce questions.
Quick Decision Flow: Can I Mix PEX-A With PEX-B Here?
Can this junction safely combine PEX-A and PEX-B? A simple decision flow checks compatibility, connection type, and system pressure/temperature.
First, identify pipe and fitting materials. If connection uses a manufacturer-approved coupling for changeover or the same fitting system rated for both materials, proceed. If using expansion fittings, confirm PEX-B compatibility; if crimp/clamp, verify ring size and material acceptability.
Next, verify operating conditions stay within both materials’ rated limits. If any doubt or lack of clear approval, do not mix.
Document the choice and installation details for inspection and future maintenance.
Further Resources: Manufacturer Guides, Codes, and Tools
When selecting references for mixed PEX-A and PEX-B installations, prioritize manufacturer installation manuals, relevant plumbing codes, and certified compatibility tools to guarantee safe, code-compliant connections.
The manufacturer’s data sheets define acceptable pipe/fitting pairings, temperature and pressure limits, and required tools. Local and national plumbing codes (IPC, UPC, and applicable state amendments) govern approved materials and inspection practices.
Certified testing tools, such as gauge-calibrated crimp and expansion measuring devices, confirm joint integrity. Cross-reference sources when in doubt and retain documentation for inspections or warranty claims.
- Manufacturer installation manuals and compatibility charts
- Applicable plumbing codes and local amendments
- Certified measuring and testing tools
Conclusion
Mixing PEX-A pipe with PEX-B fittings is generally acceptable when the fittings are listed compatible by manufacturers and installed per instructions. Significantly, one industry survey found over 60% of plumbing contractors mix PEX types on jobs, underscoring real-world practice versus strict myths. Proper documentation and adherence to approved crimp, clamp, or expansion methods guarantee code compliance and reliable performance, while inspectors may request manufacturer compatibility statements for peace of mind.