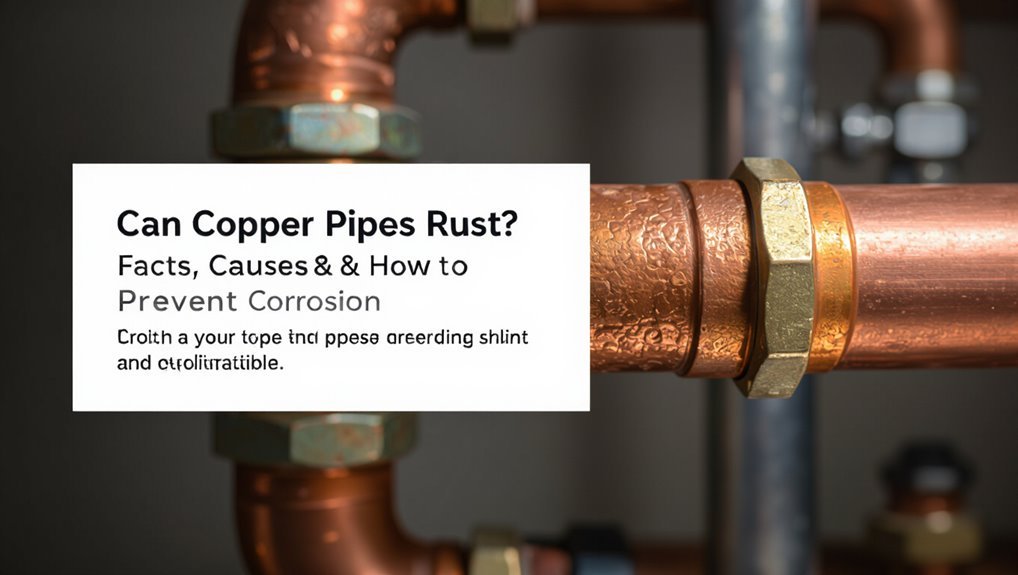
Can Copper Pipes Rust? Facts, Causes & How to Prevent Corrosion
Copper pipes do not rust since rust is specifically iron oxide, and copper lacks iron. However, they can corrode, resulting in a greenish patina, white or blue deposits, or even pinhole leaks. This corrosion can be caused by aggressive water chemistry, stray electrical currents, mechanical damage, or prolonged moisture exposure. While some corrosion products can offer protection, active corrosion can weaken the pipes and lead to leaks. To prevent corrosion, conduct regular inspections, monitor water chemistry, and implement protective measures.
Can Copper Pipes Rust?

No, copper pipes do not rust in the traditional sense because rust refers specifically to the oxidation of iron.
Instead, copper can oxidize and develop a protective green patina. However, under certain conditions like acidic water or high dissolved oxygen, copper can corrode, potentially leading to issues like pinhole leaks.
It’s important to watch for early signs of corrosion, such as discoloration or leaks, to prevent larger problems.
Short Answer: Do Copper Pipes Rust?
Copper pipes do not rust like iron pipes because copper lacks iron.
However, they can corrode, leading to oxidation that results in a greenish patina. This corrosion typically occurs under specific conditions such as aggressive water chemistry, stray electrical currents, or mechanical damage, rather than from normal use.
Rust vs. Corrosion
When it comes to copper plumbing, the reddish-green films you see are not rust but rather copper corrosion products, including cuprous oxide and copper carbonate. It’s crucial to differentiate between rust and corrosion: rust specifically refers to iron oxide found on iron or steel, while corrosion encompasses the chemical changes any metal undergoes, including copper tarnish and verdigris. While copper does corrode, altering its appearance and potentially affecting functionality, it does not produce rust.
Understanding this distinction is essential for addressing the issue effectively—whether that involves cleaning, using corrosion inhibitors, or considering replacement. Here’s a quick comparison of the terms to clarify their meanings:
| Term | Meaning |
|---|---|
| Rust | Iron oxide on iron or steel |
| Corrosion | Chemical degradation of any metal |
| Copper films | Copper-specific corrosion products |
This knowledge helps you appropriately respond to copper corrosion without mislabeling it as rust.
Oxidation And Patina
Copper plumbing can develop a greenish patina due to oxidation, which is a natural reaction with oxygen, moisture, and pollutants.
This patina consists of compounds like copper(I) oxide, copper(II) oxide, and basic copper carbonates. While it may appear unattractive, the patina can actually protect the underlying metal by slowing further corrosion.
The patina’s appearance can vary based on environmental conditions and water chemistry.
For homeowners, it’s important to differentiate between harmless patination and active corrosion.
Regular inspections can help determine whether the patina is a sign of surface change or if cleaning and protective measures are needed to maintain the integrity of your plumbing.
When Corrosion Occurs
Copper corrosion occurs when it is exposed to oxygen and moisture over time. Unlike iron, copper does not rust but can develop a green patina known as verdigris and copper oxides.
Active corrosion, which can lead to leaks and reduced flow, manifests as pitting, dezincification in alloys, or erosion caused by aggressive water.
Key factors that trigger copper corrosion include:
- Acidic or alkaline water: This type of water can attack copper surfaces and accelerate metal loss.
- High dissolved oxygen or chlorides: These elements promote localized corrosion and pitting.
- Galvanic coupling: Contact with dissimilar metals can cause accelerated deterioration.
- Abrasive or turbulent flow: Such conditions can erode protective layers on the copper.
To prevent corrosion, regular inspection and water testing are crucial for detecting early signs.
Implementing targeted mitigation strategies can significantly extend the service life of copper piping.
How This Guide Is Organized
This guide is structured to provide valuable, user-focused information on copper corrosion. It begins with an overview of corrosion mechanisms, followed by identification of common signs, diagnostic checks, prevention strategies, repair options, and essential maintenance tips.
Each section is concise and directly addresses specific topics, allowing for quick reference without extraneous details. Technical explanations are paired with actionable advice and safety notes.
Diagnostic procedures outline necessary tools and measurements for assessing pipe condition and water chemistry. Prevention strategies prioritize effective interventions, including routine measures and situational approaches for various installations.
Repair guidance differentiates between temporary and permanent fixes and indicates when to seek professional assistance. A maintenance checklist at the end summarizes essential tasks and inspection intervals to enhance pipe longevity.
Visual Signs Copper Pipes Are Corroding
If you’re concerned about the condition of your copper pipes, here are key signs of corrosion to watch for:
- Green or Bluish-Green Patina: If you notice an uneven green or bluish-green discoloration around joints or fittings, it may indicate prolonged oxidation due to water chemistry interactions.
- White or Powdery Residue: The presence of a white or powdery substance near soldered joints suggests active corrosion or mineral buildup, which is a sign of deterioration.
- Pitting or Small Leaks: Look for small pinhole leaks with dark edges, as these indicate aggressive localized corrosion that can weaken the pipe.
- Flaking or Thinning Copper: If the copper appears to be flaking or thinning, especially with discolored streaks nearby, this indicates metal loss and potential contamination risks.
If you observe any of these signs, it’s crucial to have your pipes evaluated to prevent further damage.
Inspecting Copper Pipes Safely
Inspecting copper pipes safely is essential to prevent injury and damage. Here’s a straightforward guide to ensure a thorough and safe inspection:
- Turn Off Water Supply: Begin by shutting off the water supply to avoid leaks during inspection.
- Relieve Pressure: Open a faucet to relieve any residual pressure in the pipes.
- Ensure Proper Lighting and Ventilation: Make sure the inspection area is well-lit and ventilated.
- Wear Protective Gear: Use gloves and safety goggles to protect yourself during the inspection.
- Use Non-Conductive Tools: If you’re near electrical fixtures, use non-conductive tools to minimize risk.
- Examine Accessible Sections First: Start with easily reachable areas and look for signs of damage such as discoloration, verdigris buildup, pinholes, or soft spots.
Avoid invasive probing.
- Work in Confined Spaces Safely: If inspecting tight spaces, bring a partner and portable lighting for safety.
- Document Findings: Take photos and measurements of any suspect areas for future reference.
- Seek Professional Help if Needed: If you’re unsure about the internal condition of the pipes, recommend a professional evaluation instead of attempting repairs yourself.
Following these steps will help ensure a safe and effective inspection of copper pipes.
Simple DIY Tests for Active Corrosion
To identify active corrosion on copper pipes, you can perform three simple DIY tests:
- Visual Inspection: Check for greenish or brownish discoloration and pitting, especially at joints and exposed areas.
- Electrochemical Spot Test: Use this test to detect the presence of active corrosion products.
- Flow and Pressure Monitoring: Monitor the system’s performance; any deterioration may indicate corrosion issues.
These tests can help you quickly assess the condition of your copper pipes.
Visual Inspection For Discoloration
A visual inspection can quickly detect early signs of copper corrosion. Look for greenish-blue patina, dulling, or dark spots, especially along joints and bends where moisture accumulates.
Pay attention to areas with powdery residue or white salts, as these indicate prolonged moisture exposure. Focus on soldered joints, fittings, and sections near leaks or condensate sources.
To enhance your inspection:
- Inspect joints, bends, and valves closely.
- Use bright light and a magnifier to spot subtle changes.
- Photograph and date any suspicious areas.
- Note any nearby dampness or residues.
If discoloration appears limited and dry, it may be cosmetic. However, if you see active moisture or spreading coloration, further testing or a professional evaluation is recommended.
Document your findings to aid in maintenance decisions and prioritize repairs.
Electrochemical Spot Test
To determine if corrosion is active or just cosmetic, use a simple electrochemical spot test. Here’s how:
- Gather Materials: You’ll need a conductive solution (like saltwater or potassium nitrate), a clean cotton swab, and a multimeter or copper sulfate test kit.
- Conduct the Test:
- Moisten the cotton swab with the conductive solution.
- Rub the stained area to collect surface ions.
- Touch the swab to the multimeter probe. If you get a measurable voltage or a changing reading, this indicates ongoing corrosion.
- Alternative Method: Apply copper sulfate solution to the area. If a blue-green deposit forms, it suggests active copper ion release, indicating corrosion.
- Record Results: Test multiple locations to see if the staining is isolated or part of a broader issue.
- Safety Precautions: Always wear gloves and eye protection, and clean any residues afterward to avoid misleading results.
This straightforward test helps you quickly assess the condition of the metal and take appropriate action.
Flow And Pressure Monitoring
When you notice unexpected changes in water flow or pressure, it may signal serious issues like corrosion inside your pipes. Monitoring flow rates and pressure can help you identify leaks, blockages, or potential failures before they escalate.
Here’s how to effectively check your system:
- Record Baseline Readings: Start by noting the pressure and flow rates from your fixtures.
- Timed Flow Measurement: Use a known-volume container to measure how long it takes to fill. This can indicate flow rate changes.
- Test Multiple Fixtures: Check various fixtures to pinpoint specific issues.
- Recheck After Inactivity: If the system has been unused, retest to see if any changes occur.
Look for visual signs like greenish deposits or pinhole leaks that may accompany pressure drops.
If you detect anomalies, document your findings and consult a plumber for a professional inspection. Early detection can save costs and prevent further damage.
When to Call a Professional Plumber
If you’re a homeowner dealing with rusty copper pipes, here’s how to determine if you should call a professional plumber:
- Widespread Corrosion: If you notice extensive corrosion on your pipes, it’s time to schedule an inspection and evaluation.
- Discolored Water: If your water consistently appears brown or metallic, seek professional water testing and treatment.
- Leaks or Weak Joints: Active leaks or compromised joints require immediate repair or replacement.
Addressing these issues promptly with a licensed plumber protects your plumbing system and ensures safe drinking water.
Short-Term Fixes for Localized Copper Corrosion
If you’re dealing with small, localized copper corrosion, here are the immediate steps you can take:
- Clean the Area: Start by cleaning the affected spot to remove any dirt or debris.
- Dry Thoroughly: Ensure the area is completely dry to prevent further corrosion.
- Apply Corrosion Inhibitor: Use a suitable corrosion inhibitor to slow down deterioration.
- Temporary Patch: If there are leaks, consider applying a temporary patch or wrap until you can make a permanent repair.
These steps will help you manage corrosion effectively until a more permanent solution can be implemented.
Clean And Dry Area
Moisture and contaminants can lead to copper corrosion, so it’s important to address affected areas quickly.
Here’s how to effectively clean and dry these spots:
- Inspect: Check for signs of corrosion, discoloration, or deposits.
- Remove Debris: Gently eliminate loose corrosion products using a soft brush—avoid steel wool and harsh abrasives.
- Clean: Wipe the area with a cloth dampened in mild detergent or isopropyl alcohol, then rinse with clean water.
- Dry: Ensure the area is thoroughly dried with compressed air or a clean, lint-free cloth.
These steps will help stabilize the surface and prevent further damage until permanent repairs can be made.
Apply Corrosion Inhibitor
To effectively address localized copper corrosion, consider applying a corrosion inhibitor specifically designed for copper. These products create a protective film or neutralize harmful agents on the metal surface, helping to slow down deterioration until a permanent repair can be made.
When choosing an inhibitor, ensure it is compatible with potable-water systems. Follow the manufacturer’s instructions for dilution, dwell time, and ventilation.
Application methods include brushing, spraying, or swabbing, making sure to cover the affected area thoroughly without creating excess pooling.
After application, allow the surface to dry and monitor for any signs of recurring oxidation or breakdown of the protective film.
Temporary Patch Or Wrap
If you need to temporarily stop leaks in a corroded pipe, using a patch or wrap can be effective until you can make permanent repairs. Here’s a quick guide to help you:
- Clean the Surface: Remove any corrosion and ensure the area is dry for optimal adhesion.
- Select the Right Material: Use epoxy putty for small pinholes, or self-fusing silicone/plumber’s tape for cracks.
- Apply Properly: Follow the manufacturer’s instructions on cure times and layer thickness.
- Inspect Regularly: Check for leaks or signs of corrosion and plan for permanent repairs as soon as possible.
These temporary solutions can help you manage leaks effectively until you can address the issue more permanently.
Long-Term Repair Options: Patching, Lining, and Repiping
When dealing with corroded copper pipes, consider three long-term repair options: targeted patching, internal lining, and full repiping.
- Targeted Patching: This method involves using epoxy or mechanical clamps to quickly fix localized leaks.
It’s the least invasive option but may not address underlying corrosion issues. This approach is best for limited corrosion and serves as a temporary fix.
- Internal Lining: This technique involves inserting a cured-in-place epoxy or polymer to seal and smooth the inside of the pipes.
It extends the service life of your plumbing without the need for demolition. The success of internal lining largely depends on the existing condition of the pipes and the expertise of the installer.
- Full Repiping: This option replaces the affected sections of your plumbing with new copper or alternative materials.
While it is the most expensive and disruptive option, it completely eliminates corrosion-prone areas, providing a definitive and long-lasting solution.
Expected Lifespan of Copper Pipes Under Normal Conditions
Copper pipes can last between 50 to 70 years in typical residential settings, where water has a neutral pH and moderate mineral content.
With ideal conditions, like balanced water chemistry and quality installation, they can even last over 100 years.
However, factors such as physical damage, aggressive water, and improper fittings can shorten their lifespan.
Regular maintenance, including inspections and minor repairs, can significantly extend the life of your copper plumbing.
How Copper Corrodes (Plain Chemistry)
Copper corrosion occurs through oxidation, leading to the formation of cuprous (Cu2O) and cupric (CuO) oxides, as well as basic copper carbonates or sulfates under certain conditions. This process is driven by the interaction of copper with oxygen, water, and dissolved ions.
When different metals, oxygen gradients, or acidic water are present, electrochemical cells form, creating anodic and cathodic sites that accelerate metal loss. While protective patinas can slow down further corrosion, they can be compromised by chlorides or low pH levels.
Key factors influencing the corrosion rate include redox couples, conductivity, and surface films. To manage corrosion, it’s essential to limit exposure to aggressive species and maintain stable protective layers.
| Reaction Type | Typical Product |
|---|---|
| Oxidation | Cu2O, CuO |
| Ionic Attack | CuCO3, CuSO4 |
What “Rust” Technically Means Versus Copper Corrosion
Rust specifically refers to the iron oxide that forms on iron and steel, while corrosion is a broader term that applies to the deterioration of various metals.
For instance, copper corrodes by forming copper oxides and other compounds, which look and behave differently than iron rust.
Both rust and corrosion result from electrochemical reactions, but the specific reactions and products vary depending on the metal and its environment.
Understanding this distinction can help you better address issues related to metal deterioration.
Rust Definition Versus Corrosion
When it comes to understanding rust versus corrosion, it’s essential to know the key differences:
- Terminology: Rust specifically refers to iron oxides, while corrosion is a broader term that encompasses the electrochemical degradation of various metals.
- Mechanism: Rust forms when iron oxidizes, whereas copper undergoes corrosion through oxidation, sulfidation, or carbonate formation.
- Appearance: Rust appears as reddish-brown and powdery flakes, while copper corrosion can range from brown to green and typically forms adherent films.
- Implications: The differences in rust and corrosion require distinct prevention and treatment strategies for each metal.
Understanding these distinctions can help with diagnosis, maintenance, and material selection.
Copper Oxide Formation
Copper oxide formation occurs when copper reacts with oxygen and environmental factors, leading to the creation of cuprous oxide (Cu2O) and cupric oxide (CuO).
Unlike iron rust, these copper oxides are protective and adhere well to surfaces, forming a greenish patina in moist or polluted environments. This patina, made up of basic copper carbonates, helps slow down further corrosion.
The rate of copper oxide formation is influenced by temperature, humidity, oxygen levels, and the presence of sulfides or chlorides, which can accelerate deterioration.
Importantly, while copper oxides change the appearance of the metal, they do not immediately compromise its structural integrity.
Electrochemical Corrosion Processes
When discussing corrosion, it’s important to understand the differences between rust and the corrosion of copper. Rust specifically refers to iron oxide, which forms when iron oxidizes at an anode, with electrons moving to a cathodic site, typically in the presence of a conductive electrolyte.
In contrast, copper does not rust; instead, it undergoes corrosion through different electrochemical processes.
Here’s a quick overview of copper corrosion:
- Anodic Reaction: Copper oxidizes to form Cu2+ ions, leading to metal loss.
- Cathodic Reaction: Depending on the environment, oxygen reacts with water and electrons to form either water in acidic conditions or hydroxide ions in neutral/alkaline conditions.
- Electrolyte Impact: The composition of the electrolyte affects the types of corrosion products formed, such as oxides, sulfides, or carbonates.
- Galvanic Cells: The presence of dissimilar metals and deposits can create galvanic cells, which may accelerate the corrosion process.
Understanding these processes is crucial for preventing and managing copper corrosion effectively.
Common Corrosion Products on Copper Pipes: Patina and Verdigris
On copper pipes, two common corrosion products can form: patina and verdigris.
Patina is a thin, protective layer made of copper oxides and basic copper carbonates, typically appearing bluish-green or brownish. It adheres closely to the metal, slowing further oxidation.
In contrast, verdigris is a loose, powdery deposit that can be bright green-blue and is made of copper acetates or chlorides. It is more chemically active and may flake off, exposing fresh copper.
The formation of these layers depends on environmental factors like moisture, pollutants, and pH levels.
You can identify patina by its stable, adherent texture, while verdigris will be loose and flaky.
Understanding the differences between these corrosion products can help you determine the necessary maintenance for your copper pipes.
How to Tell Corrosion From Surface Staining or Mineral Deposits
To distinguish true corrosion from surface staining or mineral buildup on copper pipes, consider these key factors:
- Appearance: Look for green-blue, powdery layers indicative of corrosion; mineral deposits are usually hard and may appear chalky or white.
- Texture: Gently scrape the surface. Corrosion may crumble or smear, while mineral scale will resist scratching and chip off in larger pieces.
- Location: Check for corrosion at joints and wet spots where water collects; staining typically follows the path of run-off.
- Cleaning Test: Use vinegar or a mild acid. If the residue persists after cleaning, it suggests deeper corrosion rather than surface stains.
These steps will help you accurately assess the condition of your copper pipes.
Water Chemistry: pH, Dissolved Oxygen, and Hardness
To prevent copper corrosion in plumbing, understanding water chemistry is crucial. Key factors include:
- pH Levels: Low pH (acidic) water increases metal loss, while high pH promotes protective scale formation. Aim for a near-neutral pH to minimize corrosion.
- Dissolved Oxygen: Oxygen-rich water accelerates corrosion through enhanced electrochemical reactions. Reducing dissolved oxygen can help decrease corrosion rates.
- Water Hardness: Moderate hardness (calcium and magnesium ions) can create protective carbonate layers, slowing corrosion. Soft water, lacking these minerals, can be more corrosive.
To summarize, the most corrosive conditions for copper are acidic, oxygen-rich, and soft water.
Conversely, oxygen-depleted, moderately hard, near-neutral water is less aggressive.
Adjusting these factors can significantly reduce copper deterioration in your plumbing system.
Role of pH in Copper Pipe Corrosion
pH is crucial for controlling copper pipe corrosion, as it directly impacts the metal-water interface.
Here’s how different pH levels affect copper:
- Low pH (<6.5): Increases copper ion solubility (Cu2+) and leads to uniform corrosion.
- Neutral pH (6.5–8.5): Supports the formation of protective carbonate films, minimizing corrosion.
- High pH (>8.5): Can create brittle or porous scales, risking pipe integrity.
To prevent accelerated corrosion, it’s essential to monitor and maintain a balanced pH.
Keeping the pH in the neutral range promotes durable protective films and reduces copper ion release.
Dissolved Oxygen’s Role in Copper Corrosion
Dissolved oxygen is a key factor in copper corrosion, as higher levels can speed up the formation of oxides and localized damage.
To assess corrosion risk, it’s essential to identify sources of aeration, such as surface water interaction, turbulence at fittings, or oxygen entering during system maintenance.
Oxygen Concentration Effects
Oxygen in water significantly influences copper corrosion. When dissolved oxygen (DO) levels are high, it accelerates corrosion by enhancing electron transfer from the copper surface, leading to faster formation of cuprous and cupric oxides.
Higher DO levels result in increased corrosion rates due to more oxidants available for electrochemical reactions. Conversely, low DO levels slow down the corrosion process, favoring uniform attack.
Key points to consider:
- High DO: Increased cathodic reaction rate leads to faster corrosion.
- Low DO: Reduced oxygen diffusion means slower overall corrosion.
- Intermittent DO Changes: Can cause localized corrosion due to fluctuations.
- Managing DO Levels: Essential for controlling corrosion risk.
Understanding these factors helps in addressing corrosion issues effectively.
Aeration Source Identification
To identify aeration sources linked to dissolved oxygen’s role in copper corrosion, follow these steps:
- Inspection and Measurement: Use dissolved oxygen (DO) probes to measure oxygen levels and flow mapping to identify areas with increased aeration. Temperature logs can also provide insights into potential corrosion sites.
- Visual Indicators: Look for signs of corrosion such as green-blue staining or pitting near inlets and pipe rises, which often indicate where oxygen is accessing the metal.
- Common Sources: Identify typical aeration sources like leaks, air entrainment from pumps, dead-legs in the system, and mixing in storage tanks.
- Monitoring: Isolate sections of the system and monitor changes in DO levels to establish a direct link between aeration and corrosion.
- Sampling: Collect samples upstream and downstream to measure oxygen consumption rates, differentiating between biological oxygen demand and physical aeration.
- Remediation Strategies: Once sources are identified, implement solutions such as eliminating air entrainment, optimizing flow, adding deaeration processes, or applying protective linings to mitigate corrosion.
Impact of Water Hardness and Minerals on Copper
Copper’s durability is significantly impacted by the hardness and mineral content of water. Here’s how:
- Scale Formation: Hard water leads to calcium and magnesium deposits that can create blockages and sites for under-deposit corrosion, which can compromise copper pipes and fixtures.
- Alkalinity: A balanced level of alkalinity in water can help stabilize protective oxide layers on copper, enhancing its longevity and resistance to corrosion.
- Particulates: Silica and iron particles can physically damage copper surfaces, leading to crevices that initiate localized corrosion.
- Trace Ions: The presence of trace metals like zinc and lead can alter the electrochemical behavior of copper, affecting its corrosion rates and overall integrity.
Understanding these factors can help in maintaining copper systems and preventing corrosion-related issues.
Chlorides, Sulfates, and Other Aggressive Ions That Attack Copper
Chlorides, sulfates, and other aggressive ions pose significant risks to copper piping and components. Chloride ions can penetrate and damage the protective cuprous oxide layer, leading to localized pitting and reduced service life.
Sulfates can acidify environments or form soluble complexes that accelerate corrosion. Other aggressive ions, such as nitrates and bromides, can increase corrosion rates by altering electrochemical conditions.
The severity of corrosion is influenced by factors like ion concentration, pH, temperature, and dissolved oxygen, with sudden spikes often causing more damage than consistently low levels.
To mitigate these risks, focus on source control, chemical conditioning, and selecting appropriate materials.
Galvanic Corrosion: When Copper Meets Other Metals
When copper is connected to a more anodic metal in the presence of an electrolyte, galvanic corrosion can occur, leading to accelerated corrosion of the less noble metal. This typically happens in wet environments where metals like steel, aluminum, and cast iron come into contact with copper.
Key factors influencing the rate of galvanic corrosion include:
- Area Ratio: The relative surface areas of the metals can affect the corrosion rate; a larger anodic area increases corrosion.
- Electrolyte Conductivity: Higher conductivity can enhance the corrosion process by facilitating the electrochemical reactions.
- Temperature: Elevated temperatures generally increase corrosion rates due to enhanced reaction kinetics.
- Joint Geometry: The design of the joints and fittings can create areas where moisture accumulates, increasing the risk of corrosion.
Visual signs of galvanic corrosion include localized pitting or accelerated wear on the anodic metal, often noted near joints or fittings.
Regular inspections of these areas are crucial in managing the risk of corrosion. If dissimilar metals must be used together, consider mitigation methods to prolong the service life of the anodic material.
Preventing Galvanic Corrosion With Dielectric Fittings
To prevent galvanic corrosion in plumbing systems with dissimilar metals, using dielectric fittings is essential. These fittings act as an insulating barrier at joints and connections, effectively interrupting the electrical path that causes corrosion.
Dielectric unions, nipples, and couplings utilize nonconductive materials to separate copper from metals like steel, brass, or galvanized iron, thereby preventing the formation of an electrochemical cell.
When selecting dielectric fittings, ensure they match the pressure ratings and thread types of your existing pipes. Proper installation is crucial; follow manufacturer instructions to keep the dielectric component intact.
Regular inspections are also important to check for seal integrity and signs of galvanic corrosion, such as pitting or discoloration.
While dielectric fittings are not a complete solution for all corrosion issues, they are a practical and cost-effective method to extend the life of copper pipes in mixed-metal connections.
How Stray Electrical Currents Cause Copper Corrosion
Stray electrical currents can cause significant copper corrosion, primarily due to their unexpected entry into copper piping from nearby electrical systems, poorly bonded equipment, or buried metallic structures.
This leads to electrolytic corrosion, where the current alters anodic and cathodic reactions on the pipe surface, resulting in accelerated metal loss at anodic sites.
To effectively diagnose and prevent this type of corrosion, it’s crucial to understand the common sources of stray currents and the electrochemical processes involved.
Stray Current Sources
Stray electrical currents can pose a significant risk to copper plumbing by accelerating corrosion. Here are common sources of these unintended currents and how to mitigate them:
- Faulty Wiring: Insulation breaches in building wiring can lead to contact between electrical conductors and plumbing. Regular inspections can help identify and fix these issues.
- DC-Powered Devices: Equipment like solar inverters and EV chargers can emit stray currents if not properly isolated. Ensuring correct installation and isolation can prevent this.
- Grounding Issues: Poor or multiple grounding connections can create unintended return paths through metal pipes. Proper grounding practices can minimize this risk.
- Cathodic Protection Systems: Misapplied systems that inject current into nearby metal infrastructure can lead to corrosion. Regular maintenance and correct referencing are crucial.
Addressing these issues can significantly reduce the risk of corrosion in copper plumbing.
Electrolytic Corrosion Mechanisms
Electrolytic corrosion in copper plumbing occurs when unintended electrical currents pass through the pipes, leading to accelerated metal loss. This process transforms copper atoms into soluble ions due to electrochemical reactions at the metal surface. Stray DC or unbalanced AC currents utilize the pipes as conductors, causing anodic areas to release Cu2+ ions while cathodic areas reduce oxygen or hydrogen, resulting in concentrated damage at anodic sites.
Several factors affect the rate of these reactions, including water chemistry — such as conductivity, dissolved oxygen levels, pH, and chloride content. Localized pitting or thinning can be exacerbated by deposits or galvanic contacts that create differences in cell potential.
Signs of electrolytic corrosion include unexpected pinhole leaks, high copper levels in water tests, and stray voltage measurements.
To mitigate this issue, it’s crucial to identify the current paths, install dielectric breaks, ensure proper bonding and grounding, and address any sources of stray voltage to halt ongoing corrosion.
Soil Chemistry and Corrosion of Buried Copper Lines
Buried copper lines are at risk of corrosion due to their interaction with the surrounding soil. Here are the key factors that influence corrosion risk:
- Soil pH: Acidic soils can accelerate corrosion, while alkaline soils tend to slow it down.
- Moisture & Resistivity: Wet, low-resistivity soils increase electrical conductivity, leading to higher corrosion rates.
- Aggressive Ions: Chlorides and sulfides are particularly harmful as they can cause pitting and crevice corrosion.
- Microbiology & Organics: The presence of sulfate-reducing bacteria and organic matter can alter redox conditions, potentially increasing corrosion risk.
Understanding these factors can help in assessing the corrosion risk for buried copper lines and in taking appropriate preventive measures.
Effect of High Temperatures and Flow Rates on Corrosion
High temperatures and increased flow rates significantly impact the corrosion of copper pipes. Elevated temperatures speed up metal oxidation and reduce oxygen solubility, leading to increased corrosion rates.
Higher flow rates can damage protective oxide layers, exposing fresh metal and allowing aggressive ions like chlorides to attack more quickly. This combination can cause issues such as pitting and erosion-corrosion in copper alloys.
To mitigate these risks, consider the following strategies:
- Control temperatures and limit flow velocities.
- Ensure proper pipe sizing to reduce stress on materials.
- Use corrosion-resistant alloys or linings.
- Apply compatible corrosion inhibitors.
- Regularly monitor for signs of early degradation.
Microbial Corrosion: How Bacteria Affect Copper
Microbial corrosion of copper occurs when bacteria form biofilms on the interior of pipes, leading to accelerated deterioration.
One key player in this process is sulfate-reducing bacteria, which produce hydrogen sulfide as a metabolic byproduct. This compound enhances corrosion at metal surfaces.
The rate of corrosion and potential protection strategies depend on the interplay between the biofilm structure, metabolic products, and the chemistry of copper.
Understanding these factors is crucial for managing and preventing microbial-induced corrosion in copper piping.
Bacterial Biofilm Formation
Bacterial biofilms on copper surfaces can lead to accelerated corrosion, impacting the longevity of metal structures.
When bacteria adhere to copper and produce extracellular polymers, they create biofilms that modify local conditions, fostering environments with varying oxygen levels, pH, and ion concentrations. This can lead to localized corrosion sites and undermine protective coatings.
To mitigate these issues, consider these strategies:
- Surface Conditioning: Enhance initial bacterial adhesion with organic films and rough surfaces.
- Microenvironment Control: Manage oxygen levels and acidity to prevent differential corrosion.
- Protection Maintenance: Ensure barrier layers allow for uniform protective patina formation.
- Effective Control Measures: Utilize mechanical cleaning, disinfectants, and optimize fluid flow to disrupt biofilm formation.
Sulfate-Reducing Bacteria
Sulfate-reducing bacteria (SRB) are known to accelerate copper corrosion by creating anaerobic conditions and producing harmful metabolites like hydrogen sulfide. They thrive in biofilms or sediment where oxygen is scarce, leading to pitting corrosion and compromised pipe integrity.
To detect SRB, microbiological sampling and sulfide measurements are crucial. Control methods include reducing nutrient sources, enhancing flow, and utilizing targeted biocides or physical cleaning. Long-term prevention strategies involve careful material selection, system design to prevent stagnation, and regular monitoring.
Here’s a quick overview of SRB features, impacts, and control measures:
| Feature | Impact | Control |
|---|---|---|
| Anaerobic growth | Pitting corrosion | Biocides |
| H2S production | Sulfide films | Flushing |
| Biofilm association | Localized attack | Monitoring |
Microbially Induced Corrosion
Microbially Induced Corrosion (MIC) on copper surfaces occurs when bacterial communities form biofilms that alter electrochemical conditions.
These biofilms create localized environments with shifts in pH, oxygen levels, and the production of corrosive byproducts like sulfides and organic acids, leading to accelerated metal dissolution.
To effectively manage MIC, it’s essential to focus on:
- Biofilm Formation: Microbial mats can concentrate harmful metabolites at the metal interface, increasing corrosion risk.
- Metabolic Byproducts: Compounds such as sulfides and acids disrupt protective passive films on copper.
- Diagnostics: Regular surface inspections, molecular assays, and corrosion rate measurements help in early detection of MIC.
- Mitigation Strategies: Implementing biocide dosing, filtration methods, nutrient control, and judicious material selection can significantly reduce the risk of corrosion.
Manufacturing Defects and Alloy Quality That Increase Corrosion Risk
When copper pipes are made with improper metallurgy or inadequate quality control, they can develop microstructural flaws that increase the risk of corrosion. Issues like impurity segregation, excessive oxygen absorption, and uneven grain structure can create weak points for corrosion to begin.
Additionally, incorrect alloying—such as insufficient tin in dezincification-resistant variants or uncontrolled lead and sulfur content—can negatively affect both electrochemical behavior and mechanical properties, leading to pitting and stress corrosion cracking.
Surface defects, cold work from manufacturing, and residual stresses can further weaken the protective film on the pipes. Inadequate annealing and cleaning processes can leave harmful residues that exacerbate localized corrosion.
To minimize these risks and enhance the longevity of copper pipes, it’s crucial to use certified alloys, conduct thorough inspections, apply proper heat treatment, and maintain traceable material documentation.
Installation Mistakes That Speed Up Copper Corrosion
Common installation mistakes can significantly increase the risk of copper pipe corrosion. To avoid this, ensure the following:
- Protective Coatings: Always use proper protective coatings to shield copper from moisture and chemicals. Missing or incorrect coatings expose the metal and accelerate corrosion.
- Electrical Grounding: Check for stray electrical currents, as these can lead to electrochemical corrosion. Proper grounding can prevent this issue along pipe runs.
- Joints and Connections: Ensure that joints are correctly executed. Poorly made connections can create crevices that trap corrosive agents, weakening the pipes’ resistance to corrosion.
Improper Protective Coating
A thin or uneven protective coating on copper piping can be more detrimental than not applying any coating at all. Gaps, pinholes, and improperly cured layers allow moisture and contaminants to reach the metal, which accelerates corrosion.
To avoid this, ensure proper surface preparation by cleaning off oil, flux, and oxidation that can prevent adhesion and promote underfilm corrosion.
Choose the right coating. Avoid acidic or non-breathable materials that can react with copper or retain moisture.
Apply the coating evenly, ensuring there are no missed spots that could create weak points. Additionally, allow sufficient drying time to prevent solvents and moisture from being trapped, which can lead to blistering, peeling, and hidden leaks.
Proper application and curing are essential to protect your copper piping effectively.
Stray Electrical Currents
Stray electrical currents can significantly accelerate the corrosion of copper pipes, leading to costly repairs and system failures. Understanding the causes and solutions is crucial for homeowners and plumbing professionals alike. Here’s a quick guide to address common issues:
Causes of Stray Electrical Currents:
- Improper Bonding: Insufficient or incorrect bonding can introduce stray currents.
- Faulty Grounding: A compromised grounding system may fail to prevent electrical interference.
- Nearby Electrical Work: Electrical installations nearby can create unintended current paths.
Indicators of Corrosion:
- Visible Pitting: Small holes or pits in the pipe surface.
- Greenish or Powdery Deposits: Corrosion products that appear on the pipes.
- Unusual Noises: Sounds from the plumbing system indicating potential issues.
- Rapid Leak Development: Sudden leaks may signal accelerated corrosion.
Solutions:
- Install Bonding Jumpers: Ensure proper bonding to eliminate stray currents.
- Repair Grounding System: Fix any grounding issues to stabilize the system.
- Re-route or Isolate Nearby Electrical Work: Prevent interference from nearby electrical installations.
- Investigate Measured Stray Voltage: Identify and address the source of stray voltage.
- Replace or Repair Affected Pipe: Take action on visibly damaged pipes.
Regular Maintenance:
Conduct inspections and coordinate plumbing and electrical installations to prevent stray currents.
Early detection and intervention can significantly extend the life of your plumbing system.
Incorrect Joint Installation
Incorrectly assembled joints can lead to severe issues like corrosion and leaks. Here are the main causes and preventive measures to consider:
- Poor Solder Joints: Gaps or cold joints can create weak points. Ensure proper soldering techniques to avoid this issue.
- Flux Application: Excess or insufficient flux can become trapped in crevices, leading to corrosion. Use the correct amount of flux for each joint.
- Fitting Compatibility: Mismatched or non-compatible fittings can exacerbate corrosion. Always use compatible materials to maintain integrity.
- Alignment and Tightening: Misalignment or overtightening can stress joints, cracking protective oxide layers. Align fittings correctly and tighten to the manufacturer’s specifications.
Preventive Treatments: Coatings, Tapes, and Insulation for Copper Pipes
To protect your copper pipes from corrosion, mechanical damage, and heat loss, consider using protective coatings, tapes, and insulation.
- Coatings: Options like epoxy, polyurethane, and metallic sprays create a barrier against corrosive elements. Choose a coating based on the specific environment and temperature conditions.
- Tapes: Self-amalgamating and polymer tapes effectively seal solder joints and prevent galvanic corrosion by isolating dissimilar metals. Proper application is crucial for their effectiveness.
- Insulation: Materials such as closed-cell foam and rubber insulation help reduce condensation and heat loss, which lowers the risk of corrosion due to moisture.
For all treatments, ensure that surfaces are clean and dry, and follow the manufacturer’s curing times.
Regular inspections and timely repairs are key to maintaining the integrity of your pipes without affecting water quality or flow.
Water Treatment Options to Reduce Copper Corrosion
To effectively reduce copper corrosion in your plumbing and heat-exchange systems, controlling water chemistry is essential.
Here are key treatment options tailored to your needs:
- pH Adjustment: Raise the pH using sodium carbonate or lime to create a protective copper oxide film, which minimizes corrosion.
- Corrosion Inhibitors: Use phosphates and silicates to form thin barriers inside pipes, slowing down ion exchange and corrosion rates.
- Oxygen Control: Implement deaeration, vacuum degassing, or oxygen scavengers to reduce dissolved oxygen levels, which can accelerate corrosion.
- Ion Removal/Softening: Consider ion exchange or reverse osmosis to eliminate aggressive ions like chloride and sulfate, reducing the risk of localized corrosion.
These strategies can significantly enhance the longevity of your plumbing systems by minimizing copper corrosion.
Sacrificial Anodes and Cathodic Protection Basics
Sacrificial anodes protect copper pipes by corroding first, diverting corrosive currents away from the metal.
There are two methods of cathodic protection: passive systems using sacrificial anodes and active systems using impressed current.
The choice between these methods depends on factors like the chemistry of the soil or water, the size of the system, and the capacity for maintenance.
Understanding these elements helps ensure effective protection for your copper piping.
Sacrificial Anode Function
A sacrificial anode, typically made of zinc, magnesium, or aluminum, is used to protect copper piping from corrosion through a method called cathodic protection.
This anode corrodes first because it has a more negative electrochemical potential than copper, effectively redirecting corrosion away from the pipe.
For optimal performance, it’s crucial to choose the right anode material, size, and to ensure good environmental conductivity.
Regular inspections and timely replacement are necessary once the anode is consumed. Proper installation is vital for maintaining electrical continuity and ensuring the anode is adequately exposed to the electrolyte (like soil or water) for effective current flow.
Key points to remember:
- The anode corrodes preferentially, protecting the copper.
- It provides a current flow that shields the pipe.
- Material selection is critical for effectiveness.
- Periodic replacement is essential to maintain protection.
Cathodic Protection Types
When managing corrosion risk, cathodic protection provides two main options: galvanic (sacrificial) anodes and impressed-current systems.
Galvanic anodes use active metals like zinc, magnesium, or aluminum, which are attached to the copper pipe network. These anodes corrode first, supplying electrons to protect the copper from oxidizing. This system is easy to install and self-sufficient, requiring no power, but its effectiveness can vary based on soil or water resistivity and how quickly the anodes wear down.
Impressed-current systems, on the other hand, utilize a DC power source and inert anodes to create a protective current. These systems allow for adjustable protection, making them suitable for larger or more resistive environments. However, they require monitoring, a power supply, and regular maintenance to ensure effective operation and avoid overprotection.
Best Practices for Burying and Protecting Copper Lines
To effectively protect copper lines and enhance their longevity, follow these best practices for burial and protection:
- Choose Non-Reactive Bedding: Use materials like sand or pea gravel for bedding to ensure consistent compaction, which helps prevent point loads that can lead to damage.
- Install Polyethylene Sleeving: Where soil chemistry is a concern or stray currents may be present, use polyethylene sleeving or conduit to shield the copper lines.
- Electrically Isolate Copper: To prevent electrochemical corrosion, isolate copper from steel structures using dielectric fittings and ensure proper grounding.
- Mark Routes Clearly: Use durable warning tape to mark the routes of the copper lines and maintain accessible inspection pits at regular intervals to facilitate easy monitoring.
Material Alternatives to Copper Pipes
If you’re looking for alternatives to copper pipes, several materials can meet your needs while offering various benefits. Here’s a quick overview of the most common substitutes and their strengths:
- PEX (Cross-Linked Polyethylene): This material is highly flexible and easy to install, making it ideal for residential plumbing, especially in areas prone to freezing.
- CPVC (Chlorinated Polyvinyl Chloride): Best for hot-water applications, CPVC is resistant to chemicals and can handle high temperatures.
- Galvanized Steel: Known for its structural strength, galvanized steel is often used in older plumbing systems. However, it can be susceptible to internal corrosion over time.
- Stainless Steel: This option offers excellent corrosion resistance, making it suitable for aggressive environments where longevity is a concern.
When choosing the right material, consider factors like water chemistry, mechanical demands, and local building codes.
Additionally, ensure that proper joining methods and compatible fittings are used to prevent issues such as galvanic corrosion and premature failure.
Cost Comparison: Repairing Corroded Copper vs. Replacing With Alternatives
The cost to repair corroded copper plumbing versus replacing it with alternatives varies based on pipe length, accessibility, and material. Here’s a quick breakdown:
- Copper Spot Repair: Typically the cheapest option, this involves patching or soldering isolated corrosion, especially when access is easy.
- Copper Section Replacement: Moderate costs apply when replacing a section of pipe, particularly if it’s easily accessible.
- PEX Replacement: Generally lower material costs and faster installation, but be mindful of additional fittings expenses.
- CPVC/Steel Alternatives: Costs can vary; consider durability and compatibility with your plumbing system.
Maintenance Schedule to Keep Copper Pipes Corrosion-Free
To keep your copper plumbing corrosion-free, follow this practical maintenance schedule:
- Monthly: Conduct a visual inspection for leaks and any green or blue staining, which can indicate corrosion.
- Quarterly: Test the water for hardness and pH levels to ensure they remain within acceptable ranges, as imbalances can contribute to corrosion.
- Annually: Hire a professional to inspect the integrity of joints, fittings, and insulation to identify any potential issues.
Address minor problems like loose straps or degraded insulation immediately.
Keep a record of inspection dates, test results, and any actions taken to monitor trends and respond to corrosion indicators early.
Adjustments, such as replacing sacrificial anodes, should be based on water chemistry findings rather than a fixed schedule.
Quick Checklist: Prevent Copper Pipe Corrosion in Your Home
Quick Checklist: Prevent Copper Pipe Corrosion in Your Home
To help you effectively prevent copper pipe corrosion, follow this straightforward checklist:
- Inspect Pipes Regularly: Check visible pipe surfaces every three months for any discoloration, pitting, wet spots, or loose/missing insulation.
- Test Water Quality: Conduct an annual water test for pH, hardness, chloride, and sulfate levels. If the pH is below 7.0 or if chloride/sulfate levels are elevated, consult a plumber immediately.
- Ensure Proper Fittings: Confirm that dielectric fittings are used to isolate copper from dissimilar metals. Tighten or replace any corroded connectors and clear out any trapped debris.
- Maintain Supports and Clearances: Ensure proper support and spacing for pipes to prevent vibration and abrasion.
If advised by a professional, consider installing sacrificial anodes or adjusting your water chemistry.
Conclusion
Copper pipes do not rust like iron, but they can corrode, leading to issues such as verdigris, pinhole leaks, and plumbing failures. To prevent these problems, it’s important to protect your copper pipes by maintaining proper water pH, regularly flushing the system, using sacrificial anodes, and following professional plumbing practices. Homeowners should conduct routine inspections and address any issues promptly to ensure the longevity and reliability of their water systems.