How to Reset Water Softener After Power Outage: Step-by-Step Guide to Restore Settings and Salt Levels
To reset your water softener after a power outage, follow these steps:
First, check the unit for any leaks, loose wires, and the condition of the salt. Next, power-cycle the control head and allow the electronics to stabilize. Enter program mode to re-enter the current time, hardness level, resin capacity, and reserve percentage. Clear any error codes and initiate a manual regeneration to ensure proper brine draw and backwash. If you notice salt bridges, break them up and add the correct type of salt if necessary. Finally, test the outlet and transformer; if issues persist, consult a professional. For detailed guidance, continue reading.
What to Do Immediately After a Power Outage Affects Your Water Softener
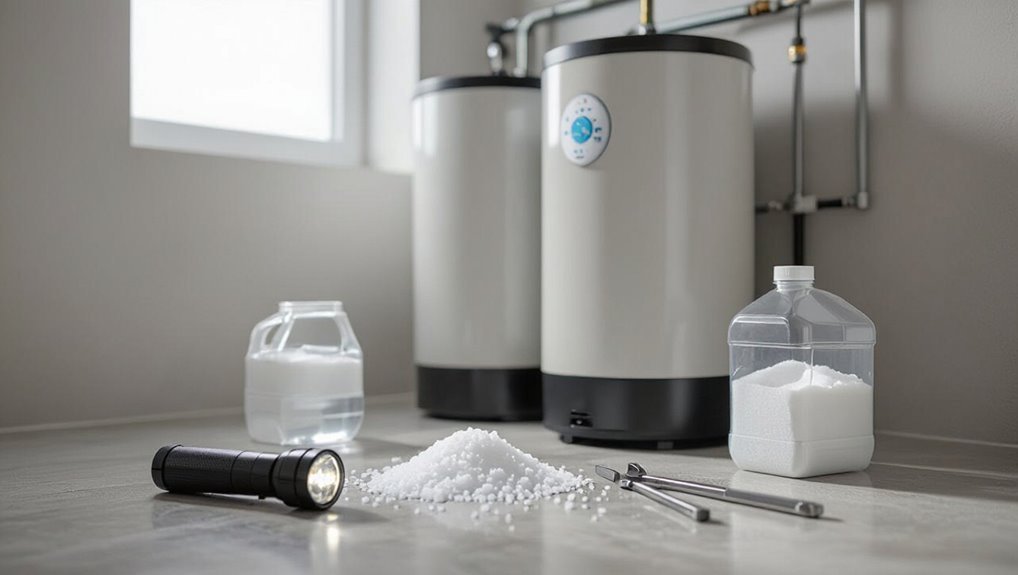
After a power outage, a quick visual inspection and confirmation that electrical connections and nearby appliances are safe should precede any handling of the softener.
The homeowner should wait a few minutes after power is restored to allow the control electronics to stabilize before attempting a restart.
Finally, the control head should be checked for retained settings versus a full reset by reviewing the display and cycle history or consulting the unit’s manual.
Quick safety checks before touching the unit
Several quick checks should be performed before anyone touches the softener following a power outage: verify the unit is powered off at the breaker or unplugged, confirm no visible water leaks around valves, hoses, or the control head, and inspect the surrounding area for standing water or electrical hazards.
Technicians should also note control panel error lights and document salt level when preparing to learn how to reset water softener after power outage.
How long to wait before restarting the softener
How long one should wait before restarting the softener depends on the source and duration of the outage and whether any water entered the control or electrical components.
Generally, wait until power is stable and any visible moisture has fully dried—typically 30 minutes to several hours.
If flooding or contamination occurred, wait longer and consult a technician before reapplying power to avoid damage or hazards.
How to determine if the control head lost settings or just power
Who or what changed the settings—the outage or a deeper fault—can be determined quickly by checking the control head display and behavior.
If the clock and settings are blank or flashing, power was interrupted; if programmed schedules, time, and last-regeneration data remain correct, only power loss occurred.
Persistent error codes, unresponsive buttons, or corrupted menus indicate a fault needing diagnostic reset or professional service.
Direct Reset Steps for Most Digital Water Softeners
The user should first locate the softener’s control head and confirm it has power before proceeding.
They can follow a generalized reset sequence used by most digital brands—power cycle, enter the reset or program mode, and confirm or re-enter basic settings.
After resetting, the user must restore the time-of-day and regeneration schedule and verify the valve is in the correct position and the motor operates during a manual regen.
Locate the control head and power source
Locate the control head and confirm the power source before initiating a reset: the control head sits atop the resin tank and houses the display and buttons, while the unit’s transformer or plug supplies its electricity.
Inspect connections for loose wires or corrosion, verify the transformer is plugged in and undamaged, and note battery compartments.
Document model and serial numbers before proceeding to reset steps.
Basic reset procedure for common brands (generalized steps)
Most digital water softeners follow a similar reset sequence that can be completed in a few clear steps: guarantee power is connected, access the control panel, and prepare to re-enter basic settings (time, hardness, regeneration schedule).
Press and hold the manufacturer’s reset or confirm button, clear any error codes displayed, re-enter water hardness value, confirm settings, and initiate a manual regeneration to verify normal operation.
Restoring time-of-day and regeneration schedule
After completing the basic reset and confirming system readiness, attention turns to restoring the time-of-day and regeneration schedule so the unit will regenerate at the correct intervals.
The technician sets current time, selects daytime or 24-hour format, programs preferred regeneration hour (typically overnight), and re-enters days-between-regenerations or meter settings.
Save changes and exit programming; the display should show updated schedule confirmation.
Verifying valve position and motor function
Begin by confirming the valve is in the service position and the control motor responds to commands.
Inspect for visible obstructions, listen for smooth motor operation during a manual regen cycle, and verify the indicator aligns with service markings.
If the motor stalls or the valve misaligns, power-cycle the unit, recheck wiring and connectors, and consult the manufacturer’s troubleshooting guide before attempting repairs.
Reprogramming Settings After a Power Interruption
After a power interruption, the control must be reprogrammed to restore correct operation.
The technician sets the current time and day, enters capacity, water hardness, and reserve values, and selects manual or demand-initiated regeneration.
Finally, the new settings are confirmed and saved before returning the unit to service.
Setting the current time and day
Clarity in timekeeping is essential when reprogramming a water softener after a power interruption; the controller requires the correct current day and time to schedule regenerations properly.
Technicians verify AM/PM or 24-hour mode, advance digits using keypad arrows, and confirm entries with the set button.
Accurate time prevents missed or mistimed regenerations and guarantees efficient resin performance without altering capacity or hardness parameters.
Entering capacity, hardness, and reserve settings
Technicians enter the resin capacity, water hardness, and reserve percentage into the controller to restore proper regeneration scheduling and ion-exchange performance.
They consult system documentation or test results to input grains per gallon, tank grain capacity, and a reserve (typically 10–30%).
Accurate values prevent over- or under-regeneration.
After programming, they verify values, save settings, and monitor the first regeneration cycle for correct operation.
Configuring manual vs. demand-initiated regeneration
Configuring whether the softener regenerates on a fixed schedule or in response to actual water usage is essential after a power interruption, since loss of power can reset the controller to its default mode.
The technician selects manual/timeclock regeneration for predictable workloads or enables demand-initiated regeneration (DI) to conserve salt and water by using meter-based triggers.
Verify mode selection matches household consumption patterns.
Confirming and saving new settings
Verify each parameter on the controller display and test the unit briefly to confirm the chosen regeneration mode, time of day, and meter calibration have been applied correctly after a power interruption.
After confirming accuracy, save settings using the controller’s save or accept command.
Record key values (hardness, cycle time, salt level) and observe one short regeneration to guarantee proper operation before concluding the reset.
Checking and Restoring Salt and Resin Conditions
Next, the article addresses salt and resin health, beginning with a visual check for low salt and salt bridging and clearing any crust that prevents proper refill.
It then explains how to inspect the resin tank and verify recent backwash activity to confirm beads are functioning and not fouled.
Finally, guidance is provided on adding the correct type of salt safely and when to run a manual regeneration after refilling.
Inspecting salt level and bridging removal
At regular intervals the salt level and condition inside the brine tank should be inspected to guarantee efficient softener operation; a low or bridged salt bed prevents proper regeneration and can lead to hard water, foul odors, or tank damage.
Remove crusted bridges by tapping sides or using a broom handle, scoop out debris, and refill with recommended salt type to maintain correct depth and free-flowing brine.
How to check resin condition and backwash status
After addressing salt level and removing any bridging, attention should turn to the resin tank and the backwash cycle to confirm the softener is removing hardness effectively.
Inspect resin for discoloration, channeling, or compaction by peering into the tank.
Manually initiate a regeneration/backwash cycle and observe flow and clarity of discharge.
If resin appears fouled or backwash is weak, schedule resin cleaning or service.
Adding salt safely and recommended salt types
Begin by confirming the brine tank is dry of standing water and free of crusted salt before adding new salt; this prevents bridging and contamination of the resin.
Use high-purity, pellet or nugget sodium chloride or potassium chloride if preferred for low-sodium needs.
Add salt slowly to avoid dust and bridging, keep the level below the fill line, and store extra salt dry and covered.
When to run a manual regeneration after refilling salt
When should a manual regeneration be initiated once the brine tank is refilled?
It is recommended immediately after adding salt if the tank was emptied or salt bridging occurred. Manual regeneration guarantees fresh brine reaches resin, restores capacity, and prevents hardness breakthrough.
If only topping off minor salt, waiting for the next scheduled cycle is acceptable; otherwise trigger regeneration without delay to verify softening performance.
Troubleshooting Common Post-Outage Problems
After a power outage, the guide provides a clear troubleshooting checklist for a unit that will not power on.
It also explains common display error codes with their likely causes and fixes, addresses poor soft water quality after a reset and corrective steps, and outlines step-by-step remedies for unusual noises or a stuck valve.
Readers are directed to follow the checklist in order and consult professional help if basic fixes do not restore normal operation.
Unit won’t power on diagnostic checklist
Why won’t the water softener power on?
Inspect the outlet, test with another device, and check the circuit breaker or GFCI.
Verify the power cord and connections for damage or looseness.
Examine internal fuses or resettable breakers per manufacturer instructions.
Confirm transformer or control board signs of burn or swelling.
If unresolved, contact qualified service to avoid voiding warranty or causing further damage.
Display shows error codes common codes and fixes
If the unit powers but its display shows error codes, interpreting those codes is the next step in diagnosing post-outage problems. The technician should reference the manual, note code frequency, and reset power briefly. Common fixes include checking salt bridge, valve alignment, and water pressure; log codes if recurring and contact support for persistent faults.
| Code | Likely fix |
|---|---|
| E1 | Power reset |
| E2 | Valve check |
| E3 | Pressure |
| E4 | Salt level |
Soft water quality issues after reset and how to resolve them
How can a reset leave treated water tasting hard or behaving inconsistently? A reset may interrupt regeneration cycles, clear resin beads, or introduce untreated bypass flow.
Technicians should verify timer and hardness settings, confirm completed regeneration, inspect for bypass valve position, and flush lines.
If issues persist, check salt level and water source hardness; perform a manual regeneration to restore consistent soft water performance.
Strange noises or valve stuck step-by-step fixes
Following checks for taste and regeneration, attention should shift to mechanical symptoms such as unusual noises or a stuck control valve that commonly appear after a reset or outage.
Inspect for debris, loose fittings, or air in lines. Power-cycle the controller, manually initiate a regeneration, and lubricate or clean the valve per manufacturer guidance.
Replace faulty seals or the control head if persistent.
Brand-Specific Notes and Where to Find Exact Instructions
Different brands use either digital touchpad controllers with menus and firmware or mechanical timers with manual knobs and simpler reset steps.
Users should consult the model-specific manual or the manufacturer’s website and contact customer support for exact procedures and parts diagrams.
If a reset fails or the controller needs updating, firmware updates or dealer service may be required.
Typical differences between digital and mechanical controllers
While both digital and mechanical controllers manage the same basic functions—timed regeneration, manual override, and diagnostic alerts—their operation, user interaction, and troubleshooting steps differ considerably by design and brand.
Digital units offer programmable menus, precise diagnostics, and often battery-backed clocks; mechanical models rely on cams, dials, and simpler indicators.
Reset steps, error codes, and required tools vary; consult model-specific guidance for exact procedures.
How to locate model-specific manuals and customer support
Where can one find exact reset steps and model specs for a specific water softener?
Manufacturer websites host downloadable manuals and FAQs; enter model number from the unit or valve.
Authorized dealer pages, installer guides, and OEM support portals also provide diagrams and programming charts.
For direct help, contact manufacturer customer service or certified local dealers with model and serial numbers ready for precise instructions.
When firmware updates or dealer service may be required
Because modern water softeners increasingly incorporate electronic controls and occasionally built‑in Wi‑Fi, firmware updates and professional service become necessary when functions behave irregularly, error codes persist after basic resets, or when a model‑specific bulletin indicates a software revision.
Consult the manufacturer’s support site or dealer for firmware files, release notes, and stepwise update instructions; authorize dealer service for hardware faults, warranty concerns, or complex diagnostics.
Preventive Measures to Avoid Future Reset Issues
To minimize the need for future resets, the guide recommends practical safeguards such as backup power or surge protection and keeping a record of preferred programming.
It also advises a regular maintenance schedule to limit outage-related issues.
Keeping recommended spare parts and basic tools on hand further reduces downtime and simplifies any required resets.
Backup power options and surge protection
Although power interruptions are often brief, they can disrupt a water softener’s programming and salt regeneration schedule.
So evaluating backup power options and surge protection is crucial. Consider a small UPS to preserve electronic timers, a battery backup for multi-day outages, and whole-home surge protectors to guard control boards.
Install per manufacturer guidance and test periodically to guarantee continuity and protection.
Recording and backing up preferred settings
After ensuring reliable backup power and surge protection, users should document their water softener’s preferred settings to prevent future reset issues.
Record model, cycle times, hardness level, regeneration frequency, and salt dose.
Store a physical copy near the unit and a digital copy in cloud storage.
Periodically verify accuracy after adjustments and before seasonal changes to enable quick restoration after outages.
Regular maintenance schedule to reduce outage impact
When routine inspections and scheduled servicing are maintained, a water softener is far less likely to suffer settings loss or functional interruptions after a power outage.
Establish a quarterly checklist: verify timers, inspect control valves and wiring, check salt levels and brine tank integrity, and run a manual regeneration.
Log findings and address minor repairs promptly to prevent cascading failures and simplify post-outage recovery.
Recommended spare parts and tools to keep on hand
Building on a steady maintenance routine, keeping a small inventory of spare parts and basic tools minimizes downtime and simplifies resets after outages.
Essential items guarantee prompt repairs and accurate resets, reducing service calls and preserving system performance.
- Replacement control valve gasket
- Backup power adapter or battery pack
- Probe or float assembly
- Basic tool kit (screwdrivers, pliers, wrench)
Signs You Should Call a Professional
If the softener stops working entirely, leaks heavily, or shows electrical faults, a professional should be contacted immediately rather than attempting further resets.
Homeowners should expect diagnostic and labor charges and ask for an estimate up front to understand likely costs and timeframes.
Before the visit, compiling the unit model, any displayed error codes, recent symptoms, and a brief service history will help the technician diagnose and resolve the issue efficiently.
Emergency failures vs. routine resets
Distinguishing between routine resets and emergency failures is essential for maintaining a water softener’s reliability and preventing costly damage.
Routine resets follow power loss or minor programming errors and are resolved by rebooting, reprogramming cycles, or checking salt levels.
Emergency failures involve leaks, motor seizure, control valve malfunctions, or persistent brine issues. Those require immediate professional diagnosis and repair to prevent water damage and system collapse.
Costs and expectations for professional service
Routine resets and emergency failures differ not only in cause but in the urgency and cost associated with repair.
Homeowners should know when professional help is warranted. Professional service typically involves diagnostic fees ($75–$150), hourly labor ($50–$120), and parts or replacement components.
Expect transparent estimates, warranty explanations, and clear timelines; minor adjustments cost less than motor or valve replacements.
How to prepare information for a service visit (model, error codes, recent issues)
When contacting a technician, homeowners should gather clear, specific information to speed diagnosis and reduce visit time.
Record the water softener model and serial number, note any displayed error codes, and photograph control panel screens.
Document recent symptoms, times of occurrence, recent power outages, maintenance performed, and salt level.
Provide access details and any prior service records to facilitate efficient repair.
Quick Reference: Step-by-Step Checklist to Restore Your Water Softener
A concise checklist guides a user through the essential steps to restore a water softener to normal operation: confirm power and bypass status, inspect brine level and salt condition, initiate a manual regeneration cycle, verify valve and timer settings, and check for leaks or unusual noises.
- Confirm power, breaker, and bypass valve positions.
- Inspect salt level; break up clumps.
- Start manual regeneration; observe cycle completion.
- Verify timer, settings, and listen for leaks.
Conclusion
When power outages unsettle a home’s softener, restoring it is like guiding a ship back to harbor after a storm. By following reset steps, reprogramming cycles, and checking salt and resin, routine flows resume and household waters clear. Minor glitches can be fixed with simple troubleshooting; persistent issues signal the need for a professional’s steady hand. With preventive measures in place, future outages become brief ripples rather than tempests, leaving systems and routines quietly restored.