How to Reroute Sprinkler Lines: A Step-by-Step Guide for DIY Lawn Irrigation
Rerouting sprinkler lines involves a few key steps to ensure a successful DIY lawn irrigation project. First, locate and expose the existing pipes. Next, plan a new route that avoids obstacles and maintains the proper slope for drainage. You’ll then need to cut and reconnect the pipes or fittings, followed by testing for leaks and ensuring proper coverage. Be sure to shut off and drain the zones, verify utility locates, and wear appropriate personal protective equipment (PPE). Use the correct primer, cement, or compression fittings for dry-fitting PVC or poly pipes. After pressure testing, adjust the sprinkler heads and troubleshoot any low flow issues. For more detailed steps, tools, costs, and troubleshooting tips, continue reading.
Overview of Rerouting Sprinkler Lines for DIY Lawn Irrigation
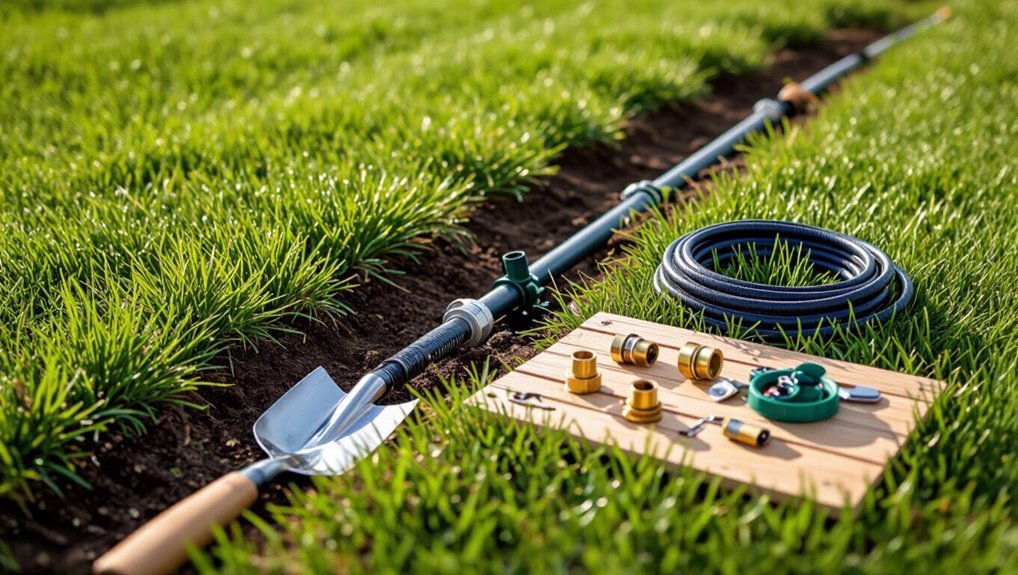
Rerouting a sprinkler line involves locating and exposing existing pipes, planning a new path, cutting and connecting pipe or fittings, and testing for proper flow and leaks.
Homeowners commonly reroute lines due to landscape changes, new structures or hardscape, obstacles that interfere with emitters, or to correct poor coverage and overspray.
A simple checklist—basic plumbing skills, appropriate tools, clear utility markings, and manageable pipe runs—helps determine when the task is suitable for DIY versus when a licensed irrigation professional should be hired.
What rerouting a sprinkler line involves
Relocating a sprinkler line requires uncovering the existing pipe, planning a new route that avoids obstacles and preserves proper slope, and cutting and joining sections of pipe and fittings to connect the new path to the system.
The process includes locating valves, testing water flow, assembling compatible fittings, securing pipe with proper bedding, pressure-checking joints, and restoring turf.
This explains how to reroute sprinkler lines.
Common reasons to reroute sprinkler lines (landscape changes, avoid obstacles, improve coverage)
When yard layouts change, sprinklers often need repositioning to match new beds, paths, or structures; similarly, lines are rerouted to work around obstacles like tree roots, patios, or utility trenches, or to correct coverage gaps caused by plant growth or shifting soil.
Other common reasons include reducing overspray onto sidewalks or buildings, optimizing water distribution for new plantings, and preventing damage from landscaping projects.
When to hire a pro vs. DIY feasibility checklist
How should a homeowner decide between tackling sprinkler-line changes themselves or hiring a professional?
Evaluate system complexity, pipe material, underground utilities, permit requirements, and personal skill with plumbing and trenching.
Choose a pro for pressurized leaks, mainline relocation, complex zoning, or unclear utility maps.
DIY suits minor reroutes, simple PVC cuts, and clear shallow lines.
Estimate time, tools, and contingency budget before starting.
Tools, Materials, and Safety Precautions
The next section lists the essential tools and materials needed to reroute sprinkler lines, from pipe and fittings to basic hand tools.
It also notes optional items that improve efficiency and system longevity, such as pipe thread sealant, trenching tools, and durable controller components.
Finally, it covers safety precautions including locating underground utilities, wearing proper PPE, and following local codes.
Essential tools and materials
A concise kit of tools, materials, and basic safety gear is required before rerouting sprinkler lines to guarantee the job is efficient and hazard-free.
Necessary items include basic hand tools, pipe fittings, and protective equipment to prevent injury or system damage.
- Trench shovel and hand saw
- PVC pipe and couplings
- Pipe cutter and primer/solvent
- Teflon tape, clamps
- Safety glasses, gloves
Optional tools for efficiency and longevity
Consider adding optional tools that save time and extend system life: a mechanical trencher speeds excavation, a pressure gauge verifies system performance, and an inline filter or check valve reduces debris and backflow.
These items improve installation quality and reduce maintenance needs.
- Mechanical trencher
- Pressure gauge
- Inline filter
- Check valve
- Pipe lubricant
Safety precautions and utility locating requirements
With optional tools in place to improve efficiency, attention now shifts to safety practices and locating underground utilities before excavation begins.
Workers must call local utility-marking services (811) to identify gas, electric, water, and telecom lines.
Wear PPE—gloves, eye protection, sturdy boots.
Use hand digging near marked utilities, maintain a safe distance, and follow local codes to prevent damage and injury.
Assessing Your Existing Irrigation System
The technician begins by identifying each sprinkler zone, head, and control valve to understand how the system is organized.
Next, the pipe layout and typical water flow patterns are mapped to reveal routing options and constraints.
Finally, common issues such as low pressure, leaks, and uneven coverage are diagnosed to determine whether repairs or rerouting are required.
Identifying sprinkler zones, heads, and valves
A map of the irrigation system provides the foundation for identifying sprinkler zones, heads, and valves: each zone is typically controlled by a single valve and contains heads arranged to cover a specific landscape area.
Inspect controller labels, follow wiring to valve boxes, count and note head types (rotor, spray, drip), record coverage patterns and operational issues, and mark inaccessible or damaged components for repair.
Mapping pipe layout and water flow
Mapping the pipe layout and water flow begins with tracing visible lines from valve boxes to heads and sketching their routes. Then confirming hidden runs using probing tools or low-pressure dye tests. A clear map aids reroute planning and materials estimation.
- Locate valves and control wires
- Mark pipe diameters and depths
- Note sprinkler head types and spacing
- Record flow direction and main feed
- Flag potential obstacles
Diagnosing common issues before rerouting (low pressure, leaks, uneven coverage)
Begin by inspecting system performance to identify symptoms such as low pressure at heads, visible or subsurface leaks, and uneven coverage patterns; these indicators determine whether rerouting is necessary or if targeted repairs suffice.
Measure pressure at the controller, run each zone, check flow rates, listen for leaks, and observe spray patterns.
Document findings, prioritize fixes, and decide if reroute will improve efficiency.
Planning the Reroute
The planner maps new pipe runs to guarantee uniform coverage while minimizing length and fittings.
They calculate pipe diameters and pressure requirements, select appropriate head types and spacing, and note any changes needed for flow balance.
Finally, they verify permits, local codes, and HOA rules to confirm the reroute complies with regulations.
Designing new pipe runs for optimal coverage
Several factors determine ideal pipe runs for a sprinkler reroute: existing head locations, water pressure and flow, landscape contours, and connection points to the main supply.
The designer maps head spacing to guarantee full overlap, routes mains to minimize trench length and crossings, avoids sharp bends, places valves accessibly, and segments zones logically.
Durable materials and future expansion are considered.
Calculating pipe size and pressure requirements
Accurate calculation of pipe diameter and pressure needs is essential to guarantee each zone delivers required flow without excessive friction loss or pressure drop.
The planner assesses available static and residual pressure, total dynamic head, and flow per zone.
Using flow tables and Hazen-Williams or Darcy-Weisbach formulas, select pipe sizes minimizing velocity and head loss while matching controller and valve capacities.
Choosing new head types and spacing
With pipe sizing and pressure calculations established, attention shifts to selecting sprinkler head types and determining spacing to achieve uniform coverage and water efficiency.
The planner evaluates spray, rotor, and drip options based on zone flow and plant needs.
Spacing follows manufacturer overlap guidelines, matching radius to pressure.
Adjustments account for wind, landscape features, and minimizing runoff for efficient, even irrigation.
Permits, local codes, and HOA considerations
Before trenching or altering existing lines, the planner confirms applicable permits, municipal codes, and homeowners association rules to guarantee the reroute complies with legal and community requirements.
They review setback, water use, and backflow device regulations, verifies utility locates, and obtains required permits.
Documentation and approved plans are kept on site; failure to comply can cause fines, delays, or mandated restoration.
Step-by-Step Rerouting Process
The rerouting process begins by shutting off the water and isolating the affected irrigation zone to prevent flow during work.
Next, the crew excavates the proposed route, removes old pipe sections, and installs new mainline and lateral pipes using the chosen material (PVC, PE, or poly).
Finally, sprinkler heads and risers are positioned and connected before testing the zone for leaks and proper coverage.
Shutting off water and isolating the irrigation zone
Start by locating the irrigation system’s main shutoff and any manual valves that control the affected zone, then turn them off to stop water flow and relieve pressure in the lines.
Verify isolation by activating the zone controller briefly to confirm no water reaches heads.
Drain or open drain caps to remove residual water, and tag valves to prevent accidental reopening during work.
Excavating along the new route safely
Begin excavating along the planned route by marking the line with spray paint and probing for utilities with a hand digger or vacuum tool.
Then remove sod and soil in successive, controlled layers to expose the trench without damaging existing pipes or cables.
Maintain consistent trench depth and slope, brace trench edges when deep, keep spoil away from edges, and inspect frequently for unseen utilities or root systems.
Cutting and removing old pipe sections
Cut sections of the old sprinkler line using the appropriate cutting tool for the pipe material—PVC cutters or a reciprocating saw for PVC and CPVC, a tubing cutter for polyethylene, and a hacksaw for harder plastics—while wearing safety glasses and gloves.
Remove cut segments, label and separate fittings for reuse, clear surrounding soil, inspect remaining ends for damage, and cap or plug live lines temporarily.
Installing new mainline and lateral pipes (PVC/PE/Poly)
Once the old sections are cleared and capped, the installer lays out the new mainline and lateral routes, selecting appropriate pipe material (PVC for buried pressure mains, polyethylene for flexible laterals, or CPVC where specified) and measuring each run to minimize fittings and maintain proper slope and access for valves.
- Cut pipes to length
- Dry-fit layouts before gluing
- Use primer and solvent cement for PVC
- Install compression or barbed fittings for poly
- Pressure-test mains before backfill
Installing and positioning sprinkler heads and risers
After the mains and laterals are laid and pressure-tested, the crew moves on to laying out and installing risers and sprinkler heads along the new routes.
They set riser heights for grade and mower clearance, space heads to guarantee proper overlap, use fittings and adapters to secure connections, level and bury risers to ground flush, and adjust nozzle types and trajectories for uniform coverage.
Connecting to existing valves and manifolds
Several clear steps guide connecting new laterals to existing valves and manifolds to confirm reliable flow and control.
The installer isolates the zone, depressurizes piping, and removes a section for tie-in. Compatible fittings and solvent or threaded adapters guarantee secure joints.
Proper slope, clamps, and leak testing follow. Labels and wiring checks restore zone sequencing before system pressurization and commissioning.
Backfilling, compacting soil, and restoring turf
Begin by backfilling excavated trenches with select soil in thin lifts to protect new pipe and promote proper compaction. Each lift is compacted lightly with hand tamper or plate compactor until firm.
Restore topsoil, regrade to original slope, and replace sod or seed. Water and roll newly laid turf gently to guarantee contact and prevent settling; monitor and top up soil as needed.
Testing and Adjusting the New Layout
Once the reroute is complete, the system should be pressure tested and inspected for leaks before regular operation.
Sprinkler heads must be adjusted for correct spray pattern, arc, and radius while zones are balanced to guarantee even coverage.
Finally, procedures for winterization and routine seasonal maintenance should be established to protect the new layout.
Pressure testing and checking for leaks
After reassembling the rerouted lines, the system is pressurized and inspected for leaks to verify integrity and performance.
Valves are opened slowly, zones activated sequentially, and pressure gauges monitored for drops.
Visible joints and fittings are examined; soap solution or dye highlights escaping air or water.
Any leak is isolated, fittings tightened or replaced, and pressure retested until stable readings confirm a sound system.
Adjusting head spray patterns and arc/radius
With the system pressurized and leak-free, attention turns to fine-tuning each sprinkler head so coverage matches the new layout.
Each head’s arc and radius are adjusted per manufacturer instructions: set arcs to avoid sidewalks and structures, shorten radii to prevent overlap, and test patterns at runtime.
Replace or swap nozzles for different spray distances and confirm uniform edge-to-edge coverage.
Balancing zones for even distribution
Fine-tuning individual heads sets the stage for balancing entire zones so water is distributed evenly across the lawn.
The installer valves each zone, runs a timed test, and records coverage. Flow and pressure are measured; adjustments to nozzle sizes, run times, or zone groupings are made to match requirements.
Repeat tests confirm uniform application rates and eliminate dry spots or overspray.
Winterization and seasonal maintenance after reroute
Once the reroute is confirmed functional, the system should be tested under typical operating conditions and then prepared for seasonal shutdowns and maintenance.
Inspect joints, valves, and new fittings for leaks; adjust pressure and zone timing to prevent pooling.
Blow out lines or drain per local guidelines, label changes for spring startup, and schedule a brief post-winter inspection to verify integrity before reactivation.
Troubleshooting Common Problems After Rerouting
After rerouting, the installer should inspect for low flow or pressure problems and apply fixes such as cleaning filters, checking valves, or resizing piping.
Persistent leaks or soggy spots warrant tracing lines, tightening or replacing fittings, and confirming proper burial depth and bedding.
Coverage gaps and shadowing from obstacles require head adjustment, repositioning of emitters, or adding zones to restore uniform irrigation.
Low flow or pressure issues and fixes
Low water pressure or reduced flow is a common outcome after rerouting sprinkler lines and can stem from kinks, undersized piping, partially closed valves, or debris in the system; diagnosing the specific cause quickly helps restore even coverage without unnecessary work.
- Inspect for kinks or sharp bends
- Check valve positions and manifold operation
- Measure line diameter versus design specs
- Flush lines and filters for debris
- Test zone pressure with a gauge
Persistent leaks or soggy spots
Several common causes can produce persistent leaks or soggy spots following sprinkler line rerouting, including loose fittings, damaged pipe sections, improperly seated couplings, or disturbed joints introduced during excavation.
Inspect visible fittings and joints, run the system to locate wet areas, dig carefully to expose lines, replace or reseat faulty parts, pressure-test repaired sections, then backfill and compact soil to prevent future settling and pooling.
Coverage gaps and shadowing caused by obstacles
When obstacles such as trees, new landscaping, or installed structures interrupt spray patterns, coverage gaps and shadowing can leave sections of a lawn dry or unevenly watered. Identifying the specific obstruction and its effect on nozzle reach is the first step toward an effective remedy.
Adjust head placement, swap to rotary or adjustable nozzles, trim or reposition foliage, and add supplemental emitters to restore uniform coverage without overwatering adjacent areas.
Cost Estimates and Timeframe
Typical DIY cost components—pipe, fittings, valves, connectors, and basic tools—are outlined to give a realistic budget range.
Time estimates are provided for small (a few hours), medium (half to full day), and large (multiple days) reroutes.
This section helps readers weigh material costs against labor time when planning a project.
Typical DIY cost breakdown
A basic DIY reroute of a residential sprinkler line generally costs between $50 and $300 in materials and requires one to six hours of labor, depending on yard size, soil conditions, and whether fittings or new pipe sections are needed. Typical expenses: materials, tools, and incidental parts. Cost examples:
| Item | Low | High |
|---|---|---|
| PVC pipe | $10 | $60 |
| Fittings | $5 | $40 |
| Valves | $15 | $100 |
| Tools/misc | $10 | $50 |
Estimated time for small, medium, and large reroutes
Because soil type, yard layout, and the extent of existing piping affect work pace, estimated times for rerouting sprinkler lines are given as ranges rather than fixed values.
Small reroutes (one zone, minor adjustments): 1–3 hours.
Medium reroutes (two to three zones, moderate trenching): half to full day.
Large reroutes (whole-system redesign): one to three days, depending on complexity and crew size.
Tips to Improve Long-Term Performance
To extend the life of a rerouted sprinkler system, designers should follow pipe-layout best practices that minimize future reroutes and make access easier for repairs.
Establishing a preventive maintenance schedule — regular inspections, zone testing, and seasonal winterization — helps catch issues before they require major work.
Consider upgrades such as smart controllers, rain sensors, and pressure regulators to improve efficiency and reduce wear on components.
Best practices for pipe layout to minimize future reroutes
When planning pipe runs, thoughtful layout decisions reduce the need for future reroutes and simplify maintenance.
Paths should follow property contours and avoid obstacles. Use straight runs with gentle bends, centralized manifolds, and accessible junctions.
Size pipes for future zones and mark buried lines clearly.
- Follow property contours
- Avoid hard-to-access areas
- Use manifolds
- Size for expansion
- Mark buried lines
Preventive maintenance schedule
Although occasional repairs address immediate issues, a structured preventive maintenance schedule keeps sprinkler systems reliable and extends component life.
Inspect valves, heads, and pipes monthly during the season; flush lines and test zones at least twice yearly; winterize before freeze risk and activate spring startup checks.
Record dates, findings, and actions to track wear, prioritize replacements, and prevent leaks or uneven coverage.
Upgrades to consider (smart controllers, rain sensors, pressure regulators)
Consider upgrading key components—smart controllers, rain sensors, and pressure regulators—to boost efficiency, reduce water waste, and extend system life.
Smart controllers enable weather-based scheduling and remote adjustments. Rain sensors prevent unnecessary cycles during precipitation. Pressure regulators protect valves and emitters from damage and uneven coverage.
Together these upgrades lower utility costs, reduce maintenance frequency, and improve irrigation consistency for long-term lawn health.
Example Scenarios and Step-by-Step Case Walkthroughs
The article presents three practical case walkthroughs to illustrate common rerouting needs.
First, it covers rerouting lines around a newly installed patio with step-by-step instructions.
Next, it explains extending a zone for added lawn and consolidating two zones into one, each with concise procedural steps.
Rerouting to avoid a new patio: detailed steps
When a new patio encroaches on existing sprinkler runs, rerouting requires mapping the current layout, identifying valves and lateral lines in the affected zone, and planning alternative paths that maintain coverage without crossing the patio footprint.
Locate buried lines, shut off affected zones, dig minimal trenches, cut and cap or remove displaced pipe, install new lateral lines around the patio, reconnect, test for leaks, and adjust head placement.
Extending a zone for new lawn area: detailed steps
Extend an existing irrigation zone by mapping the current layout, calculating additional run time and flow requirements, and planning new lateral runs and sprinkler head placements to guarantee uniform coverage of the added turf.
Mark trenches, shut off water, depressurize, cut and glue PVC or use compression fittings, install appropriate emitters or pop-up heads, slope and backfill, test pressure and overlap, and adjust timer settings.
Consolidating two zones into one: detailed steps
Consolidating two irrigation zones into one often follows after expanding coverage elsewhere and requires careful planning to preserve spray patterns and flow rates.
Assess combined valve capacity, pipe diameter, and head types.
Map existing runs, cap or remove redundant valves, re-route mainlines with appropriate fittings, balance head spacing, and adjust pressure regulators.
Test run, check uniformity, and seal joints to prevent leaks.
Conclusion
Rerouting sprinkler lines restores efficient coverage and conserves water when planned and executed carefully. A homeowner in Denver reassigned a failing front-bed zone, replacing a cracked lateral and shifting two heads to eliminate overspray; the result reduced dry spots and cut weekly runtime by 20%. With proper mapping, pressure checks, and quality fittings, modest DIY reroutes deliver lasting benefit—improved lawn health, lower bills, and fewer future repairs when done methodically.