How to Clean a Moen Faucet Screen: Step-by-Step Guide to Remove Mineral Buildup and Improve Water Flow
To clean a Moen faucet screen and improve water flow, start by shutting off the water supply. Remove the aerator or snap-in screen using hand tools or taped pliers. Rinse and brush the screen under warm water, then soak it in white vinegar for 30–120 minutes if mineral buildup remains. After soaking, rinse again, inspect the O-rings, reassemble the components, and test for leaks. If you encounter stubborn scale or damage, consider replacing the insert or using a commercial descaler. Follow the detailed steps below for effective cleaning.
What Causes Clogged or Reduced Water Flow in Moen Faucet Screens
Mineral deposits, especially calcium and magnesium, commonly accumulate on aerator screens and in the faucet spout, narrowing flow passages and trapping debris.
Indicators that a Moen aerator or screen needs cleaning include reduced water pressure, uneven or sputtering stream, and visible white or chalky buildup.
Higher water hardness accelerates this buildup, making clogs more frequent and cleaning necessary on a shorter schedule.
Common mineral deposits and where they form
When hard water passes through a Moen faucet, dissolved calcium and magnesium salts tend to precipitate and accumulate on screens, aerators, and inner cartridge surfaces, forming white, chalky deposits known as limescale.
Other deposits include iron stains (reddish-brown) from well water and silica films that cake on mesh.
Guidance on how to clean a Moen faucet screen targets these specific locations for effective removal.
Signs your Moen aerator or screen needs cleaning
How can a homeowner tell that a Moen aerator or screen requires cleaning? Reduced water pressure, uneven spray patterns, or sputtering flow indicate obstruction.
Visible debris or white/green crust around the spout, slower sink drainage when the faucet runs, and unexpected spitters or streams signal buildup.
Routine inspection reveals trapped particles, mineral fragments, or dislodged components needing removal and cleaning.
How water hardness affects buildup
Hard water’s dissolved minerals create hard, adherent deposits on Moen faucet screens, narrowing flow passages and trapping sediment that disrupts spray patterns and reduces pressure.
Higher calcium and magnesium concentrations accelerate scaling, especially where flow slows.
Over time, biofilms and particulate matter embed in mineral layers, worsening clogging.
Regular descaling prevents progressive restriction, restores uniform flow, and prolongs screen lifespan.
Tools and Materials Needed for Cleaning a Moen Faucet Screen
To prepare for cleaning a Moen faucet screen, the writer lists essential tools and common household supplies alongside spare parts to guarantee a smooth repair.
Recommended items include a small screwdriver, needle-nose pliers, white vinegar, and a soft brush.
Suggested spare parts to have on hand are replacement screens and O-rings.
- Small screwdriver
- Needle-nose pliers
- White vinegar and soft brush
- Replacement screens and O-rings
Recommended tools and household supplies
Gather basic tools and a few common household supplies before removing the Moen faucet screen to guarantee the task proceeds smoothly.
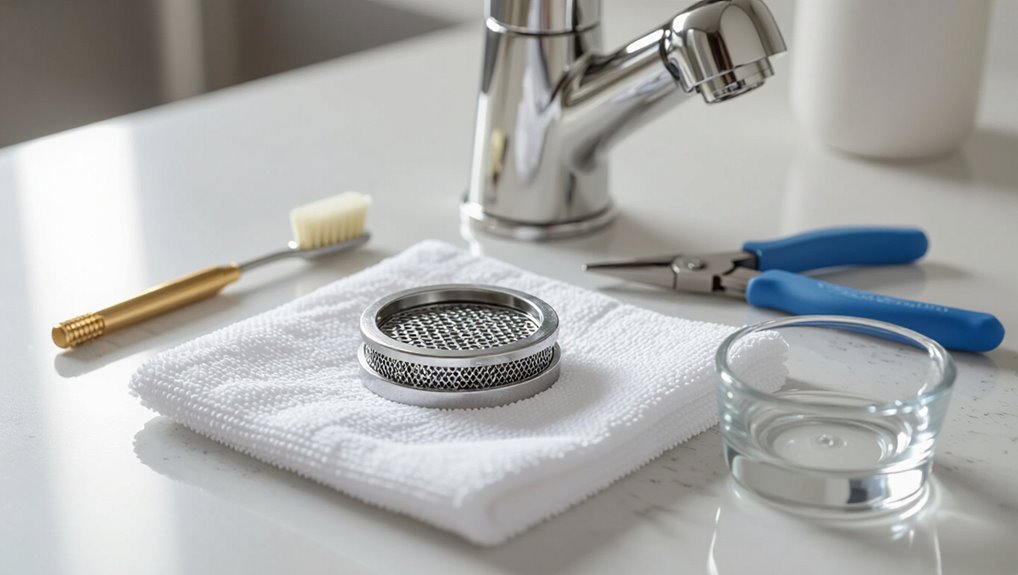
Recommended items include adjustable pliers with tape-covered jaws, a small flathead or hex key, a soft brush (old toothbrush), white vinegar or CLR, a bowl for soaking, a lint-free cloth, and rubber gloves to protect hands.
Keep a towel nearby.
Parts to have on hand (replacement screens, O-rings)
After collecting the tools and supplies, it helps to have common replacement parts on hand in case the existing screen or seals are damaged during removal.
Recommended spares include OEM or compatible faucet aerator screens, assorted O-rings (various sizes), and small nylon or rubber washers.
Keeping these parts prevents delays, guarantees proper sealing, and restores peak flow if corrosion or tearing is found.
Identifying Your Moen Faucet Type and Screen Design
Common Moen faucet models and aerator types should be identified first, since design differences determine cleaning steps.
The screen may be a removable aerator insert or an integrated component, and visual inspection or a gentle twist can usually reveal which.
If uncertainty remains, consulting Moen documentation or the faucet’s model number will confirm the correct parts and procedures.
Common Moen faucet models and aerator types
Moen faucets are offered in several popular families—such as Arbor, Align, Eva, and Chateau—each often paired with distinct aerator styles (threaded, snap-in, or pressure-compensating inserts) and screen designs.
Single-handle kitchen models commonly use threaded aerators; pull-down sprayers have inline screens or removable cartridges.
Bathroom faucets often feature small snap-in inserts.
Identifying model family narrows expected aerator type for cleaning or replacement.
How to tell if your screen is removable or integrated
The faucet’s model family and outlet type determine whether the screen is a removable aerator, a snap-in insert, or an integrated part of the spout assembly.
Inspect the spout tip: visible threads usually indicate a screw-in aerator; a smooth lip with a small slot often hides a snap-in screen; a seamless spout with no accessible opening suggests the screen is integrated and requires disassembly to access.
When to consult Moen documentation or model number
When should a user consult Moen documentation or check the faucet’s model number?
Consult documentation when uncertainty exists about screen removability, unique aerator designs, or warranty terms.
Model numbers help locate exact parts diagrams, replacement screens, and service instructions.
Reference Moen resources before disassembly, when proprietary tools may be required, or to confirm compatible replacement components and avoid voiding warranties.
Step-by-Step Guide to Remove the Moen Faucet Screen
Before beginning, the area should be cleared and the water supply turned off to prevent spills and pressure while working.
The author then describes how to unthread or pry off the aerator housing using the correct tools and gentle force to avoid marring finishes.
Finally, guidance is given on removing the screen carefully, protecting threads and surfaces to guarantee the faucet can be reassembled without damage.
Preparing the work area and turning off water
Clear the area around the sink and gather basic tools—adjustable wrench, cloth, small bowl, and flashlight—so the task proceeds without interruptions.
Then locate and shut off the water supply valves under the sink or the main shutoff. Open the faucet to relieve residual pressure and collect drips in the bowl.
Verify good lighting and stable footing before proceeding to any disassembly.
Removing aerator housing safely
Begin by positioning a towel over the sink to catch small parts and prevent scratches.
Then inspect the aerator housing to determine whether it unscrews by hand or requires the adjustable wrench with a cloth to protect the finish.
Support the faucet with one hand, apply steady counterclockwise force, loosen slowly, and set the housing and any retaining rings on the towel in order for reassembly.
Extracting the screen without damaging threads or finish
Carefully extract the screen using tools and motions that protect the faucet finish and threads; wearing nitrile gloves gives better grip without adding oils, while a soft-jawed pliers or rubber tape around standard pliers prevents marring.
Apply steady, even torque counterclockwise, avoid jerking. Support housing to prevent twisting.
If resistance occurs, soak briefly in vinegar, then retry.
Inspect threads and gasket before reassembly.
Step-by-Step Cleaning Methods for Mineral Buildup
The following section outlines practical cleaning methods for mineral buildup on a Moen faucet screen, ranging from simple rinsing to professional options.
It covers a quick rinse-and-brush technique for light deposits, a vinegar soak with step-by-step timing for moderate buildup, and guidance on when to use commercial descalers or ultrasonic cleaning for stubborn deposits.
Each method includes expected results and precautions to protect the screen and surrounding finish.
Quick rinse and brush method for light buildup
For light mineral buildup, a quick rinse and gentle brushing typically restores flow without disassembly.
The screen is removed if accessible, rinsed under warm running water, and scrubbed with a soft-bristle brush to dislodge deposits.
Inspect for remaining debris, repeat rinsing, and reassemble.
Test water flow and check for leaks.
Repeat periodically to prevent recurrence and maintain peak performance.
Vinegar soak method for moderate buildup (steps, timing)
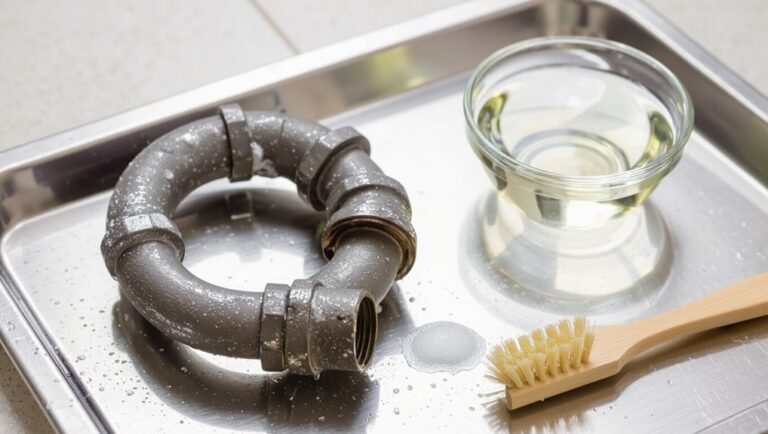
Soak the Moen faucet screen in white vinegar to dissolve moderate mineral deposits: remove the screen, place it in a small container, and submerge it in undiluted vinegar for 30 minutes to 2 hours depending on buildup severity, checking every 30 minutes and agitating gently to help loosen scale.
After soaking, rinse thoroughly, scrub remaining residue with a soft brush, reassemble, and test flow.
Commercial descalers and when to use them
Many homeowners turn to commercial descalers when vinegar fails to remove heavy mineral buildup because these products contain stronger acids or chelating agents formulated to dissolve stubborn scale more quickly.
Choose a descaler labeled safe for brass, chrome, or stainless finishes; follow manufacturer dilution and contact-time instructions; wear gloves and eye protection; rinse thoroughly after treatment; test on a small area first to prevent surface damage.
Ultrasonic cleaning option for stubborn deposits
Consider ultrasonic cleaning when mineral deposits resist vinegar and commercial descalers. The process uses high-frequency sound waves in a liquid bath to dislodge and lift scale from small, intricate parts like Moen faucet screens without abrasive scrubbing.
Units vary; follow manufacturer instructions, use a mild detergent or approved descaler, secure screens in the basket, run short cycles, rinse thoroughly, and air-dry before reassembly.
Inspecting and Reassembling the Faucet After Cleaning
After cleaning, the screen, housing, and O-rings should be inspected for cracks, corrosion, or deformities that could impair sealing.
Any worn or damaged parts must be replaced and O-rings lightly lubricated with plumber’s grease to guarantee a proper seal.
Finally, the aerator is reinstalled and the faucet tested for steady, splash-free flow and leaks.
Checking screen, housing, and O-rings for damage
Carefully examine the aerator screen, housing, and O-rings for nicks, corrosion, mineral buildup that cannot be removed, or flattened and cracked seals.
Note any deformities or embedded debris that could impede sealing or flow.
Assess threads and mating surfaces for damage.
Photograph or mark parts needing attention.
Keep components organized for reassembly and replace only those confirmed as compromised.
Replacing worn parts and proper lubrication
Begin by selecting replacement parts that match the model and diameter of the original components, since using incorrect O-rings, seats, or aerator inserts can cause leaks or poor performance.
Inspect cartridges, springs, and seals for wear. Replace damaged items with OEM or compatible parts.
Apply a thin film of plumber’s silicone grease to O-rings and moving surfaces to guarantee smooth operation and prevent drying.
Reinstalling the aerator and testing water flow
With worn parts replaced and O-rings lightly lubricated, attention turns to reinstalling the aerator and verifying flow to guarantee the faucet functions correctly.
Thread the aerator assembly gently, hand-tighten, then test hot and cold water separately.
Observe spray pattern, pressure, and any leaks.
If irregularities persist, remove and re-clean or check seat and washer alignment before final tightening.
Preventive Maintenance and Tips to Reduce Future Buildup
To minimize mineral buildup and prolong screen life, the guide recommends simple preventive steps tailored to local water conditions.
Suggested actions include a short numeric checklist for quick reference:
- Clean screens every 1–3 months for hard water, 6–12 months for soft water.
- Consider whole-house softeners or point-of-use filters to reduce deposits.
- Flush fixtures weekly and wipe aerators after heavy use.
- Keep a maintenance log to track cleaning and filter changes.
These measures help maintain steady flow and reduce the need for deep cleanings.
Recommended cleaning frequency by water type
Although mineral accumulation varies, cleaning frequency should be matched to the household water type:
soft-water homes typically require inspection and light cleaning every 3–6 months.
Moderately hard-water homes benefit from cleaning every 1–3 months.
Hard- or very hard-water areas should clean aerators and screens monthly or after any noticeable flow reduction.
Adjust frequency for visible deposits, taste changes, or reduced pressure; document schedule for consistency.
Water softener and filtration options
Several practical water treatment options can substantially reduce mineral buildup on Moen faucet screens and aerators.
Whole-house water softeners using ion exchange remove hardness minerals before they reach fixtures. Point-of-use carbon or reverse-osmosis filters further reduce sediment, chlorine, and dissolved solids at kitchen sinks.
Periodic system maintenance and correct sizing guarantee consistent protection and prolong aerator life without altering daily cleaning routines.
Quick daily or weekly habits to maintain flow
Maintain consistent brief habits to keep Moen faucet screens flowing smoothly: a quick weekly rinse of the aerator, wiping the spout tip after heavy use, and running water at full flow for a few seconds can prevent mineral and sediment buildup before it becomes problematic.
Additionally, inspect screens monthly, remove visible debris promptly, and avoid abrasive cleaners; these simple routines extend screen life and preserve steady water flow.
Troubleshooting Persistent Flow or Leak Issues
If cleaning the aerator and screen does not restore normal flow, the next steps include checking supply shutoff valves, supply lines, and household water pressure.
Persistent low flow or leaks may indicate worn internal cartridges, seals, or valve seats that require diagnosis or parts replacement.
Professional assistance should be sought when internal repairs are beyond basic homeowner skills or when warranty and manufacturer support from Moen are needed.
When cleaning doesn’t restore flow: next checks
Proceed to deeper diagnostics when removing and cleaning the aerator and screen fail to restore normal flow or stop a leak.
Inspect supply shutoff valves for full opening, confirm water supply lines are kink-free and debris-free, and check the faucet’s inlet screens and hose connections for blockages.
Verify water pressure at other fixtures to isolate household supply issues before pursuing internal faucet repairs.
Diagnosing internal faucet or valve problems
Begin systematic internal diagnostics when external checks have been exhausted and the faucet still delivers weak flow or leaks.
Inspect cartridge, O-rings, and seals for wear, mineral deposits, or corrosion.
Verify diverter function and check inlet screens and supply lines for obstruction.
Test valve operation by isolating hot and cold supplies.
Document findings and replace worn internal components with OEM parts as needed.
When to call a plumber or contact Moen support
After completing internal diagnostics—inspecting cartridges, O-rings, seals, diverters, inlet screens, and supply lines—and replacing obvious worn parts, determine whether remaining issues exceed homeowner repair scope.
Contact a licensed plumber or Moen support when leaks persist, water pressure remains abnormal, internal damage is suspected, or warranty-covered components are involved.
Provide model information, photos, and steps already taken to expedite diagnosis and resolution.
Replacement Parts and Cost Considerations
When replacement is needed, common Moen screen and aerator part numbers and the typical cost differences between DIY and professional service should be presented clearly. The table below summarizes representative part numbers and a simple cost range comparison. This helps readers decide whether to replace parts themselves or hire a plumber.
| Part / Service | Example / Range |
|---|---|
| Screen (aerator insert) | Moen 1225, 1222 — $5–$15 |
| Service cost | DIY parts $5–$20; professional $75–$200 |
Common replacement screen and aerator part numbers
Many Moen faucets share a small set of compatible screen and aerator part numbers—most commonly the 1225 (replacement aerator insert) and 1222/1225 for standard male/female configurations—so identifying the faucet model or measuring thread size and flow rate simplifies sourcing replacements.
OEM kits often include screens, O-rings, and housings, while aftermarket aerators can offer flow-control variants (0.5–2.2 GPM) at lower cost but may require matching threads and finishes.
Additional common numbers include 1288, 1398, and 1688 for various styles; adapters and trim kits resolve mismatches.
Cost ranges for DIY vs professional service
A few straightforward faucet screen or aerator fixes can cost under $10 in parts and an hour or less of labor for a DIYer.
More involved replacements or sectional rebuilds typically run $15–$50 for OEM inserts, O‑rings, and housings.
Hiring a plumber raises prices substantially due to service fees, with typical single‑visit labor and parts totaling $75–$250 depending on region, complexity, and whether cartridge replacement or valve work is required.
DIY saves labor costs but requires tools and confidence; professionals add diagnosis, warranty, and higher hourly rates.
Safety Precautions and Warranty Considerations
The article notes that certain cleaners can damage delicate materials and finishes, so nonabrasive, manufacturer-recommended solutions should be used.
It also explains that improper cleaning methods or harsh chemicals may void Moen’s warranty.
When uncertain about safe products or if damage occurs, the manufacturer should be contacted for guidance and possible warranty service.
Materials and finishes to avoid with cleaners
Several common household cleaners can damage delicate faucet materials and void manufacturer warranties if used improperly.
Avoid abrasive powders, steel wool, and scouring pads on plated or PVD finishes.
Steer clear of bleach, ammonia, and harsh acids on brushed, chrome, or matte surfaces.
Use mild soap, water, or manufacturer-approved cleaners to protect coatings and maintain finish integrity.
How cleaning affects warranty and when to contact Moen
Following guidance on which cleaners and tools to avoid, homeowners should also consider how their cleaning choices affect Moen’s warranty coverage; using improper chemicals or abrasive methods can void protections.
Consult Moen’s warranty terms before attempting aggressive cleaning.
For persistent issues or suspected defects, contact Moen support or an authorized service provider.
Document maintenance steps and retain purchase records to support any claim.
Conclusion
Like a small clearing where a stream regains its voice, a clean Moen faucet screen restores steady flow and quiet confidence. Attention to the tiny mesh—regular rinsing, gentle descaling, correct reassembly—keeps water moving freely and extends the life of the fixture. When care becomes habit, the faucet’s brief, disciplined renewal stands as a small ritual against mineral encroachment, preserving function and preventing larger repairs that would disturb the household’s calm.