How to Install a Water Pressure Booster: Step-by-Step Guide for Homeowners
Installing a water pressure booster enhances your home’s water pressure and minimizes pump short-cycling. To get started, ensure you know your water supply type (municipal or well), measure both static and dynamic pressure, and check if any permits are necessary. Gather essential tools, fittings, and safety gear. The installation process includes mounting the pump and pressure tank, connecting piping with the appropriate valves and check valves, wiring a GFCI-protected circuit and pressure switch, and finally, testing and adjusting the system. Follow the detailed steps below for a successful installation.
What a Water Pressure Booster Is and When You Need One
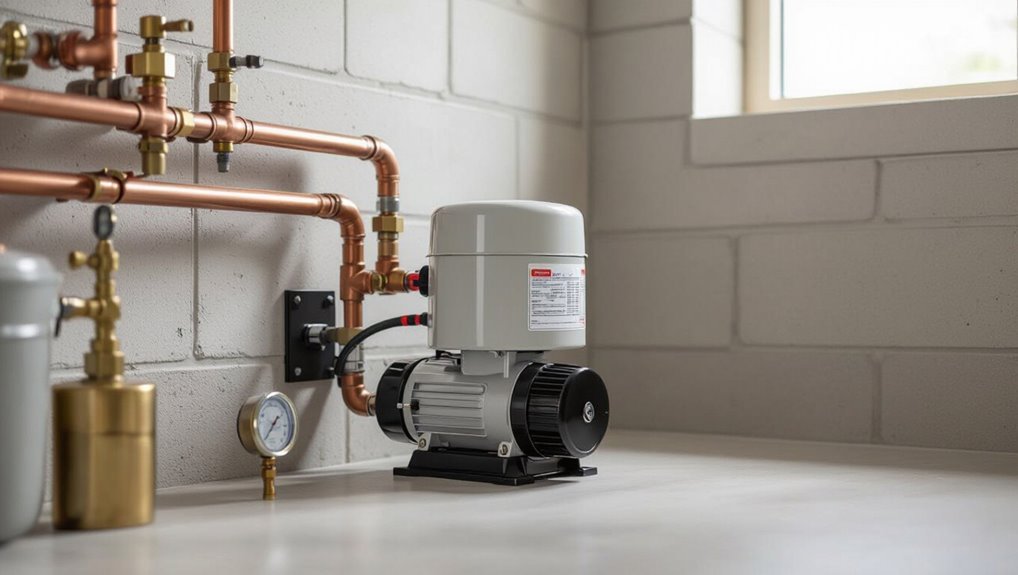
A water pressure booster combines a pump and a pressure tank to raise and stabilize household water pressure by supplying flow on demand and reducing short-cycling.
Homeowners commonly notice low pressure through weak showers, slow-filling appliances, or poor flow on upper floors.
When municipal supply or well output is insufficient, a booster is often the appropriate fix, whereas pipe upgrades, pressure regulators, or demand-side solutions may be better in cases of blockages or system-wide restrictions.
How a booster pump and pressure tank work together
Combining a booster pump with a pressure tank creates a balanced system that raises and stabilizes household water pressure.
The pump boosts flow when demand rises; the tank stores pressurized water to reduce pump cycling, noise, and wear.
This synergy simplifies control, improves longevity, and conserves energy.
Homeowners following guidance on how to install a water pressure booster should size and set pressures correctly.
Common signs of low water pressure in homes
How can homeowners tell when water pressure is inadequate? Slow-filling tubs and long waits for hot water indicate weak flow.
Low shower spray, sputtering faucets, and poor performance from appliances like dishwashers or washing machines are common.
Visible signs include uneven flow between fixtures and noisy pipes.
Frequent need to run pumps or multiple taps reducing overall pressure also signals inadequate supply.
Situations where a booster is the right solution vs alternatives
When household signs point to inadequate water pressure—slow fills, weak showers, noisy pipes—homeowners should consider whether installing a water pressure booster will actually solve the problem.
A booster suits low municipal supply or long-run losses. It is inappropriate for pipe clogs, municipal restrictions, or variable-pressure systems; those need cleaning, regulator adjustments, or municipal coordination.
Evaluate source, restrictions, and cost before choosing.
Pre-Installation Checklist: Tools, Parts, and Permits
Before beginning the installation, the homeowner should assemble required tools and safety gear and verify a complete parts list including pump type, pressure tank, switches, and fittings.
They should confirm local codes and permits and note situations that warrant hiring a licensed professional.
Finally, appropriate pump capacity and pressure settings must be chosen to match household demand and system specifications.
Required tools and safety equipment
While confirming local permits and system specifications, the installer should assemble the essential tools and safety equipment needed for a water pressure booster installation. Necessary items prevent injury and guarantee proper installation.
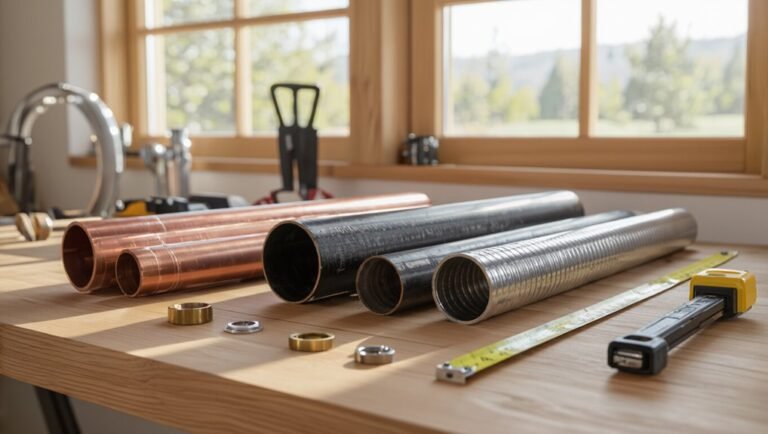
- Adjustable wrenches, pipe wrenches, and pliers.
- Pipe cutter, tape measure, and deburring tool.
- Voltage tester, multimeter, and insulated screwdriver set.
- Safety glasses, gloves, hearing protection, and a respirator.
Parts and components checklist (pump types, pressure tank, switches, fittings)
A concise parts checklist guarantees the installer has every component required for a reliable water pressure booster system.
Essential items include pump selection (single‑stage, multistage, or booster), appropriately sized pressure tank, pressure switch with cut‑in/cut‑out settings, and fittings plus isolation valves and check valves.
Verify gauges, wiring materials, mounting hardware, and flexible connectors before starting.
- Pump type
- Pressure tank
- Pressure switch
- Fittings
Local code, permits, and when to hire a pro
Why check local regulations? Local codes dictate permit requirements, setback, backflow prevention, and inspection rules.
Confirm municipal plumbing and electrical standards before purchasing parts. Some installations require licensed contractors; complex plumbing, mains connections, or code-triggering changes merit a professional.
Obtain permits when mandated to avoid fines and guarantee insurance coverage. Keep documentation of approvals and inspections for compliance and resale.
How to choose the right pump capacity and pressure settings
After confirming permits and any code-driven requirements, attention turns to selecting a pump and setting the pressure to match the property’s demands.
Calculate peak flow by totaling fixture units; choose a pump with slightly higher capacity than peak demand.
Set cut-in/cut-out pressures to protect plumbing and appliances—typically 30/50 psi or 40/60 psi depending on local supply and manufacturer guidance.
Assessing Your Existing Plumbing and Water Source
Before installing a booster, the installer measures static and dynamic pressure and checks flow rates to establish baseline performance.
They determine whether the supply is municipal or a private well, then inspect piping layout, valves, and any obvious restrictions that could limit improvement.
Compatibility with existing water heaters, pressure-reducing valves, and backflow devices is verified to guarantee safe, code-compliant integration.
Measuring current pressure and flow rate (static and dynamic)
Measuring both static and dynamic water pressure, along with flow rate, establishes the baseline needed to determine whether a booster is necessary and what capacity it must deliver.
Use a pressure gauge at an outdoor spigot for static pressure (no fixtures running). For dynamic pressure, record pressure with typical fixtures operating.
Measure flow rate by timing a known-volume container. Log readings at different times for accuracy.
Identifying water source type: municipal vs well systems
How is the household water supplied: from a municipal connection or a private well?
The installer determines source type because municipal systems deliver pressurized, metered water with backflow devices, while wells rely on pumps, pressure tanks, and often variable supply.
Identifying ownership, supply reliability, and any treatment equipment informs booster selection, control strategy, and necessary electrical or permit considerations.
Inspecting piping layout, valves, and potential restrictions
When evaluating the plumbing for a booster pump installation, the inspector maps the main supply route, branch lines, valves, and visible fittings to identify flow paths and potential bottlenecks.
He checks valve condition and position, measures pipe diameters, notes reducers, bends, and tees, and looks for corrosion, sediment buildup, or partially closed valves.
Findings guide placement and sizing decisions.
Compatibility with water heaters, pressure-reducing valves, and backflow devices
Before adding a booster, the inspector verifies that the existing water heater, pressure-reducing valve (PRV), and any backflow prevention devices will function safely and effectively at the higher system pressure.
The check includes heater relief valve ratings, PRV adjustment range or replacement, and backflow device certification.
Any undersized fittings, thermal expansion concerns, or code conflicts prompt upgrades to guarantee safe, compliant operation.
Step-by-Step Installation Guide
The installation begins with preparing the site and shutting off the water supply to guarantee a safe, dry workspace.
The pump and pressure tank should be mounted securely before connecting suction and discharge lines using proper slope, fittings, and supported runs.
Finally, check valves, isolation valves, union fittings and the pressure switch are installed and wired according to code to complete the system.
Preparing the installation site and shutting off water supply
Clear the work area and assemble necessary tools so the pump, fittings, and pressure tank can be positioned without obstruction.
Verify solid, level floor space and nearby electrical access.
Locate main shutoff and any local branch valves; drain system downstream by opening faucets and a hose bib.
Close and tag the shutoff.
Relieve pressure, collect residual water, and confirm zero flow before beginning installation.
Mounting the pump and pressure tank securely
Begin by positioning the pump and pressure tank on a level, vibration-dampening base close to the prepared water line and electrical outlet.
Anchor mounting feet with corrosion-resistant bolts and isolators. Align unit orientation per manufacturer specs. Confirm adequate clearance for service access and pressure switch adjustment.
Verify rigid, stable seating; confirm tank is upright and secured to prevent movement during operation.
Connecting suction and discharge lines (best practices)
Connect suction and discharge lines using appropriately sized, rigid piping and short, flexible connectors to minimize vibration transfer while preserving alignment.
Verify straight runs with minimal elbows to reduce friction losses. Maintain proper slope on suction piping, eliminate air pockets, and support pipes to prevent strain.
Use corrosion-resistant materials, seal threads with suitable tape or compound, and pressure-test lines before finalizing connections.
Installing check valves, isolation valves, and union fittings
With suction and discharge lines secured and aligned, the next step is installing check valves, isolation valves, and union fittings to control flow and allow future maintenance.
Install a spring check on the discharge to prevent backflow, place gate or ball isolation valves on both sides for service, and fit unions adjacent to the pump for quick removal.
Pressure-rated, properly oriented components guarantee reliability.
Wiring the pressure switch and electrical connections safely
Power to the booster must be handled methodically to guarantee safety and proper operation: first confirm the main power is shut off at the breaker and verify absence of voltage with a tester.
Then mount the pressure switch and route conductors following local codes and the manufacturer’s wiring diagram.
Tighten connections, use proper gauge wire, install a dedicated circuit and appropriate overcurrent protection, ground the unit, and secure junctions.
Setting pressure switch cut-in and cut-out points
How should the pressure switch be adjusted for reliable operation?
The installer sets cut-in and cut-out points according to system needs, typically 30–50 psi cut-in and 50–70 psi cut-out for residential.
Adjust nuts on the switch cautiously, testing cycles after each change.
Make certain the differential avoids short cycling, matches tank precharge, and complies with local codes and pump specifications.
Initial fill, bleeding air, and priming the pump
Begin by isolating the booster system from the supply and opening any tank and system drains so water can be introduced slowly. This controlled fill reduces turbulence and helps push trapped air toward bleed points.
Close inlet isolation gradually as tanks fill. Open manual bleed valves at high points until steady water flows.
Prime the pump per manufacturer instructions, ensuring suction lines are full and seals leak-free before restoring normal service.
First startup checklist and performance verification
With isolation valves closed and the pump primed, conduct a structured first-start checklist to confirm system integrity and operational settings before placing the booster into service.
Open isolation valves slowly, monitor for leaks, verify correct rotation and motor current, confirm pressure switch cut-in/cut-out setpoints, check tank precharge, observe pump cycling and stable outlet pressure, and log readings for future reference.
Testing, Adjustment, and Commissioning
The commissioning phase verifies system performance under real conditions by measuring flow rate and pressure while the booster supplies a typical household or irrigation demand.
Technicians should fine-tune the tank precharge and pressure switch settings to achieve efficient pump cycling and prevent short-cycling.
Any startup abnormalities—noisy operation, pressure loss, leaks, or erratic cycling—must be diagnosed and corrected before the system is handed over.
How to test flow rate and pressure under load
To verify booster performance under realistic conditions, measure flow rate and pressure while the system supplies typical household or building fixtures simultaneously.
Use a calibrated flow meter at an outlet and a pressure gauge at pump discharge.
Open multiple fixtures to create expected demand, record steady-state and transient readings, note pump cycling and pressure drops, and compare results to design specifications for acceptance.
Adjusting tank precharge and pressure switch for optimal cycles
Once system flow and pressure have been validated under load, attention shifts to fine-tuning the pressure tank precharge and the pressure switch setpoints to minimize short cycling and guarantee stable delivery.
The tank precharge should equal cut-in pressure minus 2 psi, measured with the tank isolated.
Adjust the switch differential so cycles occur every few minutes, balancing storage and pump run time.
Detecting and correcting common startup issues
Begin system startup with a structured checklist to reveal and resolve common faults quickly: verify pump prime and motor rotation, confirm pressure switch contacts actuate at setpoints, inspect for leaks and air entrainment in supply lines, and monitor pump current for signs of overload or electrical imbalance.
If issues appear, isolate and correct supply obstructions, tighten fittings, purge trapped air, adjust switch deadband, and retest until stable pressure and cycling are achieved.
Maintenance, Troubleshooting, and Longevity
A clear maintenance plan extends the booster’s service life and should list routine tasks, inspection intervals, and seasonal winterization steps.
Common symptoms such as unusual noise, short-cycling, and leaks are addressed with stepwise troubleshooting that distinguishes simple repairs from component replacement.
Guidance also covers criteria for replacing parts versus the entire unit to help owners budget and plan for end-of-life replacement.
Routine maintenance schedule and tasks
Establishing a clear maintenance schedule helps keep a water pressure booster operating reliably and prevents small issues from becoming system failures.
Routine tasks and timing:
- Monthly: inspect for visible leaks and check pressure gauge readings.
- Quarterly: test safety valves and electrical connections.
- Biannually: clean filters and strainers.
- Annually: service pump bearings, diaphragm, and professional performance check.
Common problems and stepwise troubleshooting (noise, short-cycling, leaks)
Troubleshooting common water pressure booster issues requires a methodical, step-by-step approach that isolates causes and applies targeted fixes.
This section outlines concise diagnostics and remedies for typical symptoms—unusual noise, short-cycling, and leaks—prioritizing safety checks and simple tests before component replacement.
- Inspect mounting, valves, and air charge for vibration/noise.
- Check pressure switch, tank bladder, and inlet restrictions for short-cycling.
- Trace fittings, joints, and seals for leaks.
- Test flow and upstream supply; document readings before repairs.
When to replace parts vs full system replacement
After isolating noise, short-cycling, and leaks and confirming supply and pressure readings, determining whether to replace individual components or the entire booster system depends on the severity, frequency, and cost of failures relative to remaining service life.
Replace parts for isolated faults, recurring inexpensive fixes, or when warranty covers components.
Opt for full replacement with chronic failures, obsolete models, efficiency losses, or when repair costs approach replacement.
Winterization and freeze protection tips
When temperatures approach freezing, protecting a water pressure booster system from cold damage becomes a priority to preserve functionality and avoid costly repairs.
Effective winterization combines insulation, controlled heat, and strategic draining to prevent pipe bursts, pump casing cracks, and pressure tank damage.
Insulate exposed pipes and pump, install thermostatically controlled heat tape or a small cabinet heater, drain outdoor lines, and test relief valves before cold spells.
Cost Estimates, Energy Use, and Return on Investment
Typical costs for parts, installation, and permits are summarized to give readers a clear budget range for common residential booster setups.
Energy consumption estimates and practical efficiency measures, such as pressure switches, variable-speed pumps, and proper sizing, are presented to help minimize operating costs.
Long-term benefits and ROI scenarios identify when reduced water waste, improved appliance performance, and increased property value can justify the initial expense.
Typical costs for parts, installation, and permits
Budgeting for a water pressure booster involves three principal cost components: parts, professional installation, and any required permits or inspections. Typical parts cost ranges from basic pumps ($150–$600) to premium units ($700+); installation varies by complexity ($200–$1,200); permits often cost $50–$300. Homeowners should obtain quotes and factor contingency.
| Item | Typical Range | Notes |
|---|---|---|
| Pump | $150–$700+ | Quality varies |
| Installation | $200–$1,200 | Labor, complexity |
| Permits | $50–$300 | Local requirements |
| Contingency | 10–20% | Unexpected costs |
Estimating energy consumption and ways to improve efficiency
Estimate annual energy use for a water pressure booster by calculating pump running hours, motor power (kW), and duty cycle: multiply motor kilowatts by hours operated per year and by the pump’s load factor to get kWh.
Then convert to cost using local electricity rates.
Improve efficiency by sizing correctly, selecting high-efficiency motors, using variable speed drives, reducing leaks, and optimizing controls and pressure settings to minimize runtime.
Long-term benefits and scenarios where ROI justifies installation
Evaluating long-term benefits requires comparing upfront costs, ongoing energy consumption, and maintenance against measurable gains such as improved water delivery, reduced waste, and extended equipment life.
Quantify savings from fewer pump cycles, lower utility bills, and decreased appliance wear. ROI often justifies installation in large households, irrigation systems, or properties with chronic low pressure; calculate payback using local energy rates, maintenance schedules, and expected equipment lifespan.
Safety, Warranty, and Compliance Considerations
The installation must meet electrical safety and grounding standards to protect equipment and users.
Backflow prevention and other measures are required to safeguard potable water from contamination.
Manufacturer warranties and service agreements should be reviewed to confirm coverage and required maintenance.
Electrical safety and grounding requirements
Because booster pump systems combine water and electrical power, strict adherence to electrical safety and grounding requirements is essential to prevent shock, fire, and equipment damage.
Installations must use GFCI-protected circuits, appropriately sized breakers and wiring per local code, and a dedicated grounded circuit.
Bond metal piping to the pump ground.
Qualified electricians should perform wiring, inspections, and obtain required permits to guarantee compliance.
Backflow prevention and potable water protection
Having addressed electrical grounding and safety, attention now shifts to preventing backflow and protecting the potable water supply when installing a booster pump.
Install an approved backflow preventer or reduced-pressure zone assembly per local code. Use potable-rated materials, maintain accessible shutoff valves, and incorporate air gaps where required.
Test and certify assemblies after installation to guarantee compliance and protect drinking water quality.
Understanding manufacturer warranties and service agreements
Many manufacturers offer warranties and optional service agreements that define coverage, duration, and owner responsibilities for booster pump systems.
Homeowners should review terms for parts, labor, exclusions, required maintenance, and voiding actions.
Registration, proof of purchase, and authorized installation often affect eligibility.
Service plans can extend protection but compare costs, response times, and technician qualifications before committing to guarantee long-term reliability and compliance.
Alternatives and Upgrades to Consider
The section compares pressure-boosting options such as variable frequency drives (VFDs) versus single-speed pumps, highlighting efficiency and control differences.
It contrasts whole-house booster systems with point-of-use solutions to clarify scope, cost, and installation impacts.
It also outlines smart controls, sensors, and remote monitoring features that can optimize performance and simplify maintenance.
Pressure-boosting with variable frequency drives (VFDs) vs single-speed pumps
A comparison of variable frequency drives (VFDs) and single‑speed pumps focuses on control, efficiency, and system longevity:
VFDs modulate motor speed to match demand, reducing energy use and pressure swings, while single‑speed pumps operate at a fixed output and rely on on/off cycling or pressure tanks to maintain pressure.
VFDs cost more upfront but lower operating noise, wear, and utility bills; installation complexity is higher.
Whole-house booster systems vs point-of-use solutions
Having compared VFD-driven and single‑speed booster pumps, attention turns to whether pressure needs are best met by whole‑house systems or targeted point‑of‑use units.
Whole‑house boosters provide consistent pressure across all fixtures, simplifying plumbing but increasing cost and space needs.
Point‑of‑use units address localized issues economically and efficiently, ideal for distant bathrooms or weak outdoor taps, but require multiple installations and isolated maintenance.
Smart controls, sensors, and remote monitoring options
Why add smart controls and sensors to a booster system? They optimize pressure, protect equipment, and provide diagnostics and alerts remotely.
Consider upgrades and options:
- Remote monitoring via Wi‑Fi or cellular for real‑time status.
- Pressure and flow sensors with automated setpoint adjustments.
- Leak detection and shutoff integration.
- Scheduled operation and usage analytics to reduce wear.
Conclusion
A homeowner leaves the project with steadier streams and quieter worries, having turned thin trickles into dependable flow. The booster, once a puzzle, becomes a steady heartbeat for daily life — shower, garden, and appliance revived. Though maintenance and costs remain companions, the payoff in comfort and confidence is tangible. Like a lighthouse cutting fog, the installation guides household routines back to calm certainty, promising lasting usefulness when tended wisely.