How to Seal Around PEX Pipe: Step-by-Step Methods for a Leak-Free, Code-Compliant Finish
To effectively seal around PEX pipe and ensure a leak-free, code-compliant finish, follow these essential steps:
- Prevent Issues: Sealing prevents leaks, pest infiltration, heat loss, and maintains fire safety compliance.
- Materials: Use sleeves for pipe penetrations, closed-cell backer rod for gaps, low-expansion foam for larger openings, and silicone or firestop caulk for final sealing.
- Preparation: Start by cleaning the surfaces around the PEX pipe.
- Installation: Install sleeves or backer rods as needed, then apply foam or sealant in layers.
- Finishing Touches: Trim excess material and tool the surface smooth.
- Inspection: Periodically inspect the sealed areas and document your work to ensure compliance with local codes.
Follow these methods to achieve a reliable seal around PEX piping.
Why Proper Sealing Around PEX Pipe Matters for Safety, Code Compliance, and Durability
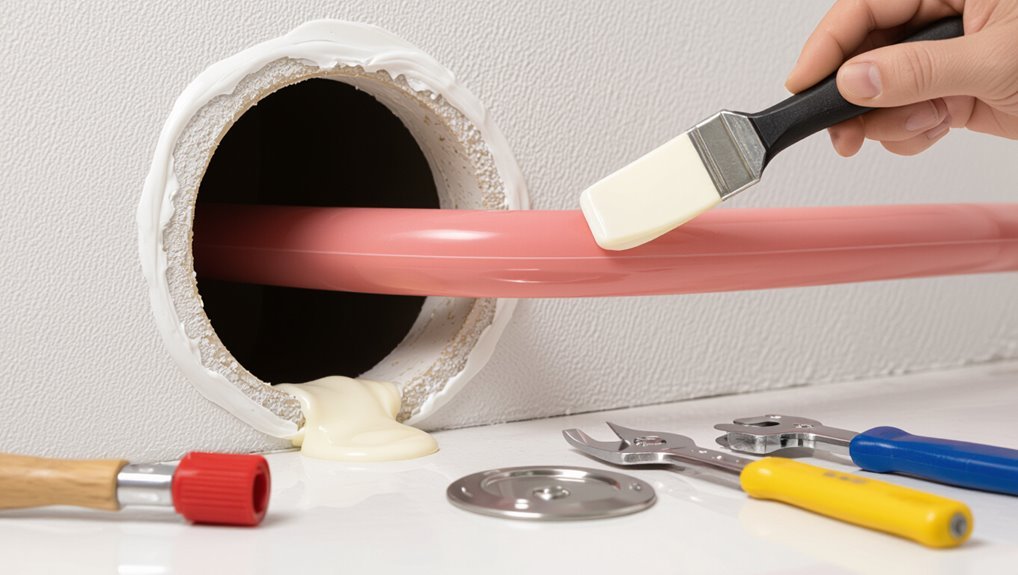
Improper sealing around PEX pipe can lead to water leaks, pest entry, heat loss, and increased risk of fire spread through wall and floor penetrations.
Building and plumbing codes often require approved penetration firestopping, specified insulation levels, and may trigger local permits or inspections for work that alters fire or plumbing assemblies.
Addressing sealing correctly protects occupants, guarantees code compliance, and extends the service life of the piping system.
Common risks of improper sealing (leaks, pests, heat loss, fire spread)
Seal failures around PEX pipe can lead to a cascade of problems—water leaks, pest entry, energy loss, and even accelerated fire spread—so attention to proper sealing is essential.
Improper sealing risks structural damage, mold, higher heating bills, and vermin access. Learning how to seal around PEX pipe prevents these outcomes, preserves system longevity, and protects occupants by maintaining thermal integrity and limiting pathways for moisture and flames.
Relevant plumbing and fire codes to consider (penetration firestopping, insulation, local permit triggers)
Because PEX penetrations intersect multiple safety disciplines, compliance with plumbing, building, and fire codes is essential to prevent hazards and avoid costly rework.
Install listed firestop systems at rated penetrations, maintain required insulation and protection from heat sources, and follow local plumbing rough‑in and inspection requirements.
Confirm permit triggers for modifications, document materials and assemblies, and retain records for inspections and future maintenance.
Quick, Direct Answer Best Overall Method to Seal Around PEX Pipe
For most residential installations, a combination of a snug pipe sleeve, low-expansion foam or backer rod, and a quality silicone or acrylic caulk provides the best overall seal, with firestop putty or intumescent caulk used where firestopping is required.
Simple repairs and typical wall or floor penetrations are suitable for a competent DIYer, while complex assemblies, fire-rated penetrations, or work affecting structural elements should be handled by a professional.
The following section explains material choices, application tips, and clear indicators for when to call a pro.
Recommended materials for most applications (pipe sleeves, foam, caulk, firestop)
Use a combination of pipe sleeves, low-expansion foam, silicone or acrylic caulk, and listed firestop materials to address most PEX penetrations:
sleeves protect the pipe and maintain proper clearance, foam fills gaps while allowing movement, caulk provides a weather- and moisture-resistant finish at small gaps, and firestop products restore required fire-resistance where the assembly penetrates a rated wall or floor.
Use corrosion-resistant sleeves, low-pressure spray foam, paintable silicone or acrylic caulk, and manufacturer-listed firestop sealants or collars sized for the penetration.
When to call a pro vs. DIY
When should a homeowner tackle sealing PEX penetrations and when should a professional be called in?
Homeowners can DIY routine seals: small gaps, non-firewall penetrations, single pipes, and use foam, sleeves, or caulk per instructions.
Call a pro for fire-rated penetrations, complex multi-pipe assemblies, unknown materials, evidence of leaks, building-code compliance inspections, or when unsure of pressure, routing, or required permits.
Types of Penetrations and How They Affect Sealing Choice
Penetration location and assembly type determine which sealing methods and materials are appropriate.
Interior and exterior wall penetrations, ceiling and floor openings, concrete slab or foundation pass-throughs, and HVAC or insulated assemblies each present different risks for moisture, air leakage, and movement.
Choosing a sealant or collar depends on substrate, expected movement, fire and vapor requirements, and whether thermal or mechanical protection is needed.
Wall (interior, exterior) penetrations
Because wall penetrations vary in profile and function, the type—through-stud, chase, rim-joist, exterior cladding, or concrete slab—directly determines the sealing strategy.
Interior through-stud holes prioritize firestopping and vapor control; chases require continuous gaskets or foam; rim-joist gaps need rigid blocking and sealant; exterior cladding demands weatherproof flashing and backer; concrete slab penetrations use nonshrinking grout or hydraulic cement.
Ceiling and floor penetrations
Ceiling and floor penetrations fall into a few clear categories—bored holes through joists, service chases between floors, drop-ceiling gaps, and recessed fixture pockets—and each presents distinct challenges for sealing around PEX.
Choices depend on access, movement, firestopping and sound isolation: use flexible grommets or foam for small bored holes, intumescent seals for fire-rated assemblies, acoustic caulk for noise control, and sleeve systems for chases.
Concrete slab and foundation penetrations
Concrete slab and foundation penetrations vary from single service sleeves cast into the slab to tightly packed trench drains and drilled cores. Each configuration determines the sealing approach.
Rigid sleeves, annular gaps, and multiple bundled PEX require different materials: flexible watertight grommets for movement, cementitious grout for structural fills, and elastomeric sealants for small gaps.
Selection considers load, groundwater, and code.
HVAC and insulated assemblies
When HVAC ducts, insulated piping, or wrapped conduit penetrate walls and floors, the assembly’s size, insulation thickness, and required movement dictate sealing choices; larger rectangular ducts often need compressible fire- and smoke-rated collars or intumescent wraps.
In contrast, insulated refrigerant lines or condensate drains typically require flexible grommets or pre-formed boots to preserve vapor barriers and allow thermal expansion.
Selection must meet fire, smoke, acoustic, and condensation control requirements.
Tools and Materials Needed for Sealing PEX Pipe
A concise inventory of tools and materials helps guarantee clean, code-compliant seals around PEX.
Essential PEX-specific supplies include connector sleeves and escutcheons, while sealants and fillers such as acrylic latex caulk, silicone, and firestop sealant address gaps.
Also recommended are pipe insulation and sleeves or closed-cell spray foam, firestopping products like intumescent sealants and fire collars, and hand tools such as a utility knife, caulking gun, backer rod, and gloves.
PEX-specific supplies (PEX connector sleeves, escutcheons)
Several specialized PEX-specific supplies are essential for a secure, code-compliant seal: connector sleeves (crimp or clamp rings), escutcheons (wall plates), and matching fittings that guarantee proper mechanical and aesthetic finishes.
Connector sleeves secure reliable tube-to-fitting joints; escutcheons cover wall penetrations and permit movement while meeting finish standards.
Use manufacturer-matched fittings and sleeves sized to pipe type (PEX-A/B/C) and diameter.
Sealants and fillers (acrylic latex caulk, silicone, firestop sealant)
After fitting sleeves and escutcheons to secure mechanical connections and cover wall penetrations, attention turns to the sealants and fillers that close gaps, prevent drafts, and meet building and fire codes.
Use acrylic latex caulk for paintable, interior gaps; silicone for waterproof flexibility around fixtures; and listed firestop sealant where required by code.
Select compatibility with PEX and substrate, applying per manufacturer instructions.
Insulation and sleeves (pipe insulation, closed-cell spray foam)
Insulate PEX runs and fill gaps around sleeves to reduce heat loss, prevent condensation, and limit air infiltration where pipes pass through walls or floors.
Use closed-cell foam spray for perimeter sealing and rigid foam or split polyethylene insulation for runs.
Guarantee snug-fit foam sleeves at penetrations, avoid overexpansion against fittings, and trim excess.
Label insulated runs for future access and maintenance.
Firestopping and code-grade materials (intumescent sealants, fire collars)
When PEX pipes penetrate fire-rated assemblies, installers must use firestopping products specifically tested and listed for plastic piping to maintain the wall or floor’s hourly rating.
Intumescent sealants, fire collars and approved firestop foam expand to seal annular gaps during a fire.
Select materials with appropriate listing numbers and follow manufacturer instructions and local code to preserve fire resistance and inspection compliance.
Tools (utility knife, caulking gun, backer rod, gloves)
A compact set of basic tools makes sealing PEX pipe clean, safe, and code-compliant: a sharp utility knife for trimming sheathing and backer rod, a caulking gun compatible with intumescent sealants or firestop cartridges, an appropriately sized closed-cell backer rod to control joint depth, and nitrile or leather gloves to protect hands from sealants and sharp edges.
Also include a brush for cleaning, tape measure, and disposable rags.
Step-by-Step Methods to Seal Around PEX Pipe (Multiple Situations)
The following step-by-step methods address common sealing scenarios around PEX pipe and indicate appropriate materials and techniques.
- Small drywall gaps (≤ 1/4″)
- Moderate wall/ceiling gaps (1/4″–1″)
- Large/irregular openings (>1″) and special cases such as slab penetrations and required firestopping.
Each method notes prep, application, and inspection to guarantee watertight, code-compliant seals.
Sealing small gaps in interior drywall (gap ≤ 1/4)
For small interior drywall gaps up to 1/4 inch, the recommended materials are lightweight spackling or acrylic caulk, a putty knife, sanding block, and a clean cloth.
Preparation includes wiping the area, removing loose debris, and masking surrounding surfaces if needed.
The typical sequence is apply filler or caulk, smooth and feather edges with the putty knife, let dry, then sand and touch up paint.
Materials and prep
Materials and tools should be assembled before any sealing work begins to guarantee a quick, clean repair.
Required items: painter’s caulk or acrylic latex caulk, a caulk gun (if tube), antimicrobial silicone optional, utility knife, putty knife, fine-grit sandpaper, clean cloth, rubbing alcohol for degreasing, and painter’s tape.
Protective gloves and eye protection complete the prep.
Step sequence
With tools and supplies ready, attention turns to sealing small gaps in interior drywall where PEX passes through—those up to 1/4 inch wide.
Clean the hole edges and pipe. Backfill minimal voids with foam backer rod if needed.
Apply paintable latex caulk around the pipe, smoothing with a wetted finger or tool. Allow cure time, then repaint or finish surface.
Sealing moderate gaps in walls and ceilings (1/4″ to 1″)
For moderate gaps of 1/4″ to 1″ in walls and ceilings, the discussion covers recommended materials—such as backer rod, acrylic-latex or silicone caulk, and fire-rated sealant where required—and basic surface preparation.
The sequence outlines inserting backer rod if needed, applying sealant in a consistent bead, and tooling the joint for a flush finish.
Safety precautions and cleanup are noted before and after work.
Materials and prep
A concise set of tools and supplies helps guarantee a clean, durable seal around PEX where gaps range from 1/4″ to 1″.
Required materials include low-expansion fire-rated sealant or acrylic latex caulk, backer rod sized to gap, foam gaskets for piping, utility knife, caulk gun, cleaning wipes, and gloves.
Prep: clear debris, dry surfaces, and size backer rod to recess sealant.
Step sequence
Begin by verifying the gap size and choosing the appropriate backer rod and sealant so the repair matches the joint depth and fire-rating requirements; insert backer rod to proper depth, clean surrounding surfaces, and center the PEX.
Apply sealant in a continuous bead, tool to a concave profile, remove excess, and allow full cure.
Inspect for voids and reapply if needed to guarantee an airtight, code-compliant seal.
Sealing large openings or irregular gaps (>1)
For openings larger than one inch or for irregular gaps, selecting the proper filler—typically backer rod for deep voids and low-pressure expanding foam for irregular shapes—is essential to guarantee a stable base and prevent overfill.
The recommended sequence is to insert backer rod to the appropriate depth, apply foam in passes if needed, allow full cure, then trim and finish with a sealant or caulk.
Proper staging minimizes material waste and promotes a durable, airtight seal around PEX.
When to use backer rod or expanding foam
When should backer rod be chosen over expanding foam, and what trade-offs determine the decision?
Backer rod suits wide, deep gaps needing uniform fill, compressible support for sealant, and easy future access.
Expanding foam excels at irregular cavities, fast thermal and air sealing, and structural fill but can obstruct removals and over-expand.
Choose by gap geometry, accessibility, required permanence, and substrate sensitivity.
Step sequence
After choosing between backer rod and expanding foam based on gap shape and future access, proceed with a clear, ordered method for large or irregular openings (gaps wider than about 1 inch).
Clean and dry the area, insert backer rod or temporarily pack voids, apply expanding foam or sealant in layers, allow full cure, trim excess, and finish with paintable caulk or escutcheon for a neat, code-compliant seal.
Sealing PEX through concrete slab or foundation
When PEX passes through a concrete slab or foundation, choosing between a coring sleeve and a direct seal affects long-term movement and moisture control.
The recommended sequence is to install a sleeve (if used), center the pipe, apply backer or foam where required, and finish with a compatible elastomeric or polyurethane sealant rated for concrete-to-plastic bonds.
Specific product choices include PVC/metal sleeves for expansion, low-modulus silicone or polyurethane sealants for flexibility, and expanding foam or non-shrink grout for void filling.
Coring sleeve vs. direct seal
Choosing between a coring sleeve and a direct seal is a matter of balancing long-term protection, ease of installation, and site-specific constraints.
A coring sleeve provides movement allowance, mechanical protection, and easier replacement; it suits buried or high-stress penetrations.
Direct sealing is quicker and lower cost for small, immobile pipes but offers less abrasion resistance and harder future access.
Step sequence and recommended products
Begin by sequencing tasks logically: prepare the penetration, install any required sleeve or backing, position the PEX, apply the chosen sealant or mechanical seal, and finish with a protective cover or patch.
For concrete slabs use cementitious grout or hydraulic cement for voids, polyurethane or silicone for flexible seals, and metal compression sleeves where movement or code requires.
Verify compatibility and cure times before backfilling.
Firestop method for PEX pipe penetrations (required in rated assemblies)
The section outlines selection of an approved firestop system rated for PEX pipe penetrations and applicable wall or floor assemblies.
It then presents a clear step sequence for installation, including substrate preparation, annular space measurement, firestop material application, and curing or topping procedures.
Inspection tips summarize common compliance checkpoints and documentation required for rated-assembly verification.
Choosing an approved firestop system
When a PEX pipe passes through a fire-rated wall or floor, an approved firestop system must be selected to restore the assembly’s tested fire-resistance rating.
This selection depends on pipe size, penetration type, annular space, presence of insulation or sleeve, and the specific wall or floor construction.
Choose systems listed by manufacturers for PEX, referencing tested designs, installation instructions, compatible sealants/putties, and applicable code listings.
Step sequence and inspection tips
Prepare a clear, documented sequence outlining every action from inspection to final verification so installers and inspectors can follow the same steps and confirm compliance. Include pre-work checks (material certification, annular space), installation order (backer, sealant, collars), cure times, and labeling. Specify measurement tolerances, acceptable gaps, and required photos. Define inspection points, sign-off criteria, and remediation steps for failures.
Sealing PEX in exterior walls for weatherproofing and pest prevention
Sealing PEX where it passes through exterior walls requires weather-resistant materials and properly installed flashing to block moisture and deter pests.
The recommended sequence is to install a backer or collar, apply a flexible exterior-grade sealant, and then fit flashing or a trim plate tied into the wall’s weather barrier.
Attention to sequencing and compatible materials guarantees a durable, weathertight seal.
Weather-resistant materials and flashing
Choose materials and flashing that block moisture, air, and pest entry while allowing for PEX movement and thermal expansion.
Preferred materials include compression grommets, flexible silicone or polyurethane sealants, self-adhesive butyl or EPDM flashing, and closed-cell foam backer.
Flashing should be layered over WRB, integrated with housewrap, and sealed to pipe sleeves.
Use corrosion-resistant fasteners and UV-resistant products for longevity.
Step sequence
When routing PEX through exterior walls, work from the outside inward, starting with a clear sequence that addresses weatherproofing, pest exclusion, and allowance for thermal movement; each step should be performed in order so that flashing, backer, sealant, and trim form continuous, layered defenses without trapping moisture.
Begin with flashing and a drainage plane, install a compressible backer or gasket, apply compatible sealant, insert PEX with movement allowance, then finish with trim and insect-proof screens.
How to Achieve a Neat, Finished Look Around PEX Pipes
A neat finish around PEX pipes often begins with hardware such as escutcheons, rosettes, or trim plates that cover gaps and provide a clean connection to the wall or floor.
After installing trim, any sealant should be smoothed flush and allowed to cure before painting.
Proper surface preparation and matching paint help the repair blend with surrounding finishes for a professional appearance.
Using escutcheons, rosettes, and trim plates
Install escutcheons, rosettes, or trim plates to conceal rough openings where PEX pipes pass through walls or floors, creating a clean, finished passage while protecting the pipe and surrounding surfaces.
Select sizes matching pipe diameter, material, and style. Secure plates flush to the surface, trim excess PEX jacket if needed, and guarantee accessibility for movement and future maintenance without compressing or kinking the tubing.
Painting and surface prep after sealing
After escutcheons or trim plates are secured, attention shifts to preparing surrounding surfaces for paint and final sealing to guarantee a seamless appearance.
Surfaces must be cleaned, sanded lightly, and primed where bare drywall or patched compound exists.
Mask adjacent finishes, use paintable silicone or acrylic caulk at gaps, then apply matching paint.
Inspect for uniform coverage and wipe away residue for a professional finish.
Common Mistakes and How to Avoid Them
Common failures when sealing around PEX pipes often stem from using the wrong materials, relying on quick fixes, or ignoring regulations.
Common pitfalls include:
- Using incompatible sealants (chemical or temperature issues)
- Over-reliance on expanding foam near fittings or valves
- Failing to maintain code-required clearances and fire ratings
A brief review of these items helps prevent leaks, component damage, and code violations.
Using incompatible sealants (chemical or temperature issues)
Selecting the wrong sealant for PEX can lead to chemical degradation, joint failure, or loss of flexibility when exposed to temperature extremes.
Installers should choose PEX-compatible products rated for potable water and the system’s temperature range. Avoid solvent-based adhesives and sealants with plasticizers that attack PEX.
Verify manufacturer approvals, read technical data sheets, and test in small areas when uncertain to guarantee long-term integrity.
Over-reliance on expanding foam near fittings or valves
Relying heavily on expanding foam around PEX fittings or valves can create more problems than it solves, because the rigid or semi-rigid cured foam may stress joints, obstruct access for future repairs, and in some formulations release chemicals harmful to plumbing components.
Use minimal foam only where permitted, leave fittings accessible, choose compatible low-expansion products, and prefer removable or mechanical sealing methods to simplify maintenance and prevent damage.
Failing to maintain code-required clearances and fire ratings
When installers overlook required clearances or fail to preserve fire-rated assemblies, the result can be code violations, compromised fire containment, and increased liability.
Ignoring prescribed distances around PEX, sealing methods that bridge firestops, or removing intumescent materials undermines safety and inspections.
To avoid this, follow local codes, use listed firestop products, restore ratings after penetrations, and document compliance for permits and inspectors.
Troubleshooting: Identifying and Fixing Seal Failures
Signs of a failing seal include persistent moisture, noticeable drafts, and staining around the PEX penetration.
The article outlines how to diagnose each symptom and offers step-by-step repair options tailored to the failure mode—recaulking, replacing damaged grommets or foam, or rebuilding the seal area.
Guidance prioritizes best practices and safety to restore a watertight, insulated barrier.
Signs of a failing seal (moisture, drafts, staining)
A failing seal around PEX piping typically reveals itself through three clear indicators: persistent moisture, noticeable drafts, and discoloration of nearby surfaces.
Moisture may appear as beads, damp insulation, or mold. Drafts indicate gaps allowing air and humidity exchange. Staining or peeling paint signals long-term leakage.
Early recognition of these signs prompts assessment before structural damage or mold escalation occurs.
Step-by-step repair options for each failure mode
If moisture, drafts, or staining are detected around PEX piping, a systematic troubleshooting approach narrows the cause and matches repair methods to the failure mode.
Inspect fittings, joints, and crimps; tighten or replace damaged connectors. Reseal gaps with appropriate foam or caulk for air infiltration. Replace compromised insulation or backing.
For persistent leaks, isolate section, depressurize, cut out faulty PEX, and install new tubing with code-compliant fittings.
Inspection, Maintenance, and Long-Term Care
Routine inspections of sealed PEX penetrations are recommended at least annually, with additional checks after seasonal temperature swings or any building work.
Preventive maintenance should include tightening or replacing compromised fittings, reapplying compatible sealants where shrinkage or wear appears, and checking for signs of moisture or corrosion.
Clear records of inspection dates, actions taken, and materials used will support code compliance and preserve warranty coverage.
How often to inspect sealed penetrations
Regular inspections of sealed PEX penetrations should occur on a predictable schedule to detect deterioration, moisture intrusion, or compromised seals before they cause damage.
Inspections every 6–12 months suit most installations; high-risk areas (basements, exterior walls, mechanical rooms) merit quarterly checks.
Document findings, note sealant aging, and plan timely repairs or resealing when cracks, gaps, or persistent dampness are observed.
Seasonal checks and preventive maintenance
Seasonal checks align maintenance with climate-driven stressors on sealed PEX penetrations, ensuring changes in temperature, humidity, and freeze-thaw cycles are addressed before they cause leaks or seal failure.
Inspect seals, sleeves, and surrounding insulation each season; look for cracking, compression, or moisture.
Re-torque fittings if applicable, replace degraded sealant, clear debris, and verify vapor barriers remain intact to prevent deterioration.
Recordkeeping for code inspections and warranties
A concise, well-organized record of inspections, maintenance, and repairs helps demonstrate compliance with building codes and preserves warranty coverage for PEX installations.
Documentation should include dates, inspector or technician names, scope of work, materials used, and photos.
Retain receipts, permit approvals, and manufacturer warranty statements.
Store records digitally and as hard copies, and provide copies to homeowners or property managers for future inspections and claims.
Comparison of Common Seal Materials and When to Use Each
The section compares common seal materials by key performance factors—water resistance, fire rating, flexibility, and cost—to guide appropriate selection for PEX penetrations. Below is a quick visual reference of typical options and primary strengths. The following table highlights broad differences to frame the discussion.
| Material | Typical Strength |
|---|---|
| Silicone | High flexibility, good water resistance |
| Firestop sealant | High fire rating, variable flexibility |
Performance factors to compare (water resistance, fire rating, flexibility, cost)
Durability matters most when choosing a seal for PEX penetrations, so comparing water resistance, fire rating, flexibility, and cost clarifies trade-offs and appropriate applications.
Water resistance prevents mold and leaks; fire-rated materials meet code at firewall assemblies; flexible seals accommodate movement without cracking; low-cost options suit noncritical gaps while premium products offer longevity and certification.
Match material properties to location and code.
Estimated Costs and Time for Typical Sealing Jobs
A brief cost breakdown compares materials and methods, from inexpensive caulk and foam to higher-priced compression fittings and professional-grade sealants.
Time estimates contrast a straightforward DIY seal (typically 30–90 minutes per joint) with professional labor, which may take less time on-site but adds hourly rates and travel.
These figures help readers weigh upfront expenses against labor costs and expected project duration.
Cost breakdown by method and materials
When comparing sealing methods for PEX pipe, cost and time vary considerably based on material choice, hole size, and accessibility.
Basic options: caulk or silicone ($5–$15 per tube) for small gaps; firestop caulk or intumescent sealant ($15–$40) for fire-rated needs; foam backer plus sealant ($10–$30).
Metal escutcheons or flange kits cost $10–$50.
Specialized sleeves or collars run $25–$100.
Typical DIY time vs. professional labor estimates
For most homeowners, sealing around a PEX pipe is a short job: simple caulking or installing an escutcheon typically takes 15–45 minutes per penetration, while using foam backer plus sealant or an intumescent firestop adds another 30–60 minutes for curing setup and neat finishing.
DIY labor usually totals 30–90 minutes per opening; professionals charge 1–2 hours plus travel, typically billed at $75–$150/hour.
Local Code Resources and How to Verify Compliance
Readers should consult local building department websites or contact code officials to locate applicable PEX sealing requirements and approved product lists.
They should verify whether specific sealants or methods are listed on municipal or state approved product directories.
The authority having jurisdiction will also indicate when permits and inspections are required for plumbing alterations.
How to find local code requirements and approved product lists
Where can one verify which sealants, sleeves, and firestopping methods are permitted for PEX installations in a specific jurisdiction?
Contact the local building department or code enforcement office, consult that jurisdiction’s adopted codes (IRC/IBC) and amendments, and review municipal approved product lists or fire marshal publications.
Check manufacturer listings, ICC-ES reports, and state plumbing board resources to confirm listed, tested, and accepted products.
When permits and inspections are required
After confirming which sealants, sleeves, and firestopping methods are accepted locally, the next step is determining whether the work requires a permit and inspection.
Typically, penetrations through fire- or pressure-rated assemblies, structural alterations, or commercial projects trigger permitting.
Contact the local building department, provide scope and product data, and request inspection criteria and scheduling.
Retain approvals and inspection reports for compliance records.
Practical Tips and Best Practices for a Durable, Code-Compliant Seal
The author outlines practical tips to guarantee a durable, code-compliant seal around PEX that address temperature, installation logistics, and safety.
Key considerations include:
- Material selection for cold climates or high-temperature runs.
- Working around existing plumbing and electrical services.
- Safety precautions such as ventilation, PPE, and firestop certification.
These points frame the specific best practices and step-by-step choices that follow.
Material selection tips for cold climates or high-temperature runs
Material selection for PEX penetrations in extreme temperatures hinges on matching sealant and sleeve properties to the operating environment: cold climates require flexible, low-temperature–rated elastomers that remain pliant below freezing, while high-temperature runs need heat-resistant materials that resist flow, hardening, or breakdown.
Choose rated silicone or polyurethane sealants, closed-cell foam grommets, and metal or high-temp polymer sleeves; verify manufacturer temperature ranges and code approvals.
Working around existing plumbing and electrical services
Work carefully when sealing PEX near existing plumbing and electrical services to prevent damage, maintain access, and guarantee compliance with codes.
Inspect clearances, avoid compressing adjacent lines, and preserve required separation.
Use nonconductive, approved sealants and escutcheons; label penetrations for future work.
Coordinate with trades, follow local routing and support rules, and test assemblies before finishing surfaces.
Safety precautions (ventilation, PPE, firestop certification)
Because sealing around PEX often involves chemical sealants, foam, or heat, proper ventilation and personal protective equipment are essential to prevent inhalation, skin contact, and eye injury.
Workers should wear gloves, safety glasses, and respirators as warranted, and guarantee airflow or extraction.
Firestop materials must be certified to code; document products and installation to satisfy inspections and maintain building safety records.
Conclusion
Like a ship’s hull patched before a long voyage, a properly sealed PEX penetration keeps systems watertight, fire-safe, and code-aligned, preserving function and trust. Attention to penetration type, the right materials, and local rules turns a simple finish into durable protection; cutting corners invites slow leaks and failed inspections. With careful technique and the appropriate sealant, installers leave behind not just a neat opening but a quiet assurance of lasting performance.