How to Clean Out HVAC Ducts: A Step-by-Step Guide for Cleaner Air
Cleaning HVAC ducts is essential for improving air quality and ensuring system efficiency. To start, turn off the power, remove the registers, and use brushes along with a HEPA vacuum to clear out dust, mold, and debris. Next, clean the accessible blower, coils, and drain pan while wearing appropriate PPE. Inspect for any signs of mold or damage. For extensive contamination or complex systems, consider hiring a certified professional. Regularly changing filters and conducting periodic inspections will help maintain optimal airflow and efficiency. For detailed steps and safety precautions, refer to our full guide.
Why Cleaning HVAC Ducts Matters for Indoor Air Quality and System Efficiency
Dirty ducts can worsen indoor air quality and trigger allergies or discomfort by circulating dust, mold, and pollutants throughout a home.
Clogged or poorly maintained ductwork also forces the HVAC system to work harder, raising energy use, accelerating wear, and increasing long‑term repair or replacement costs.
Visible dust, unexplained spikes in energy bills, persistent odors, or uneven heating and cooling are common signs that duct cleaning may be needed.
Health and comfort impacts of dirty ducts
Accumulated dust, mold, and allergens in HVAC ducts reduce indoor air quality and can trigger respiratory symptoms, allergic reactions, and odor problems for occupants.
Studies link contaminated ducts to worsened asthma, chronic coughing, and sleep disruption.
Regular maintenance and knowing how to clean out hvac ducts help restore comfort, reduce allergen loads, and improve perceived air freshness, benefiting vulnerable residents and overall wellbeing.
Energy use, HVAC longevity, and cost implications
Reduced airflow from clogged ducts forces HVAC systems to work harder, increasing energy consumption and accelerating wear on components.
Higher utility bills and more frequent repairs or premature replacements result.
Regular duct cleaning improves airflow, reduces strain, and can extend equipment life while lowering operating costs.
Investment in cleaning and routine maintenance yields measurable energy savings and delays expensive system overhauls.
Signs your ductwork needs cleaning
When airflow patterns change or occupants notice persistent dust and odors despite routine cleaning, these are clear indicators that ductwork may require attention.
Additional signs include visible mold around vents, uneven room temperatures, unexplained allergies or respiratory irritation, increased dust accumulation shortly after cleaning, and unusual noises from ductwork.
Prompt inspection and targeted cleaning restore air quality and system performance.
Safety, Tools, and Preparation Before You Start
Before beginning duct cleaning, standard safety precautions—including power shutoff, proper ventilation, and PPE—should be reviewed and a professional contacted if mold, rodents, extensive build-up, or complex systems are present.
Gather a concise tools-and-materials checklist (vacuum with HEPA filter, brushes, screwdrivers, replacement filters, drop cloths, and sealant) to guarantee efficient work.
Finally, prepare the home and HVAC system by protecting floors and furniture, turning off the system, and removing or covering registers and nearby items.
Safety precautions and when to call a professional
Although DIY duct cleaning can save money, safety must govern every step: proper personal protective equipment, power isolation of HVAC components, and adequate ventilation are essential to prevent injury, inhalation of contaminants, and cross-contamination of living spaces.
Call a professional if mold, pest infestation, significant asbestos, complex ductwork, persistent odors, HVAC performance issues, or inaccessible sections are present; professionals guarantee safe, code-compliant remediation.
Tools and materials checklist
A clear checklist of safety gear, tools, and consumables streamlines duct-cleaning preparation and reduces the chance of missed items that could compromise safety or effectiveness.
Essential items include personal protective equipment, agitation and vacuum tools, inspection devices, and replacement parts. Gather only what’s needed to avoid clutter and guarantee efficient work.
- N95 or P100 respirator and gloves
- High-powered vacuum with HEPA filter
- Rotary brush or agitation tools
- Inspection camera or flashlight
- Replacement filters and sealant
Preparing the home and HVAC system for cleaning
With tools, safety gear, and replacement parts assembled, attention turns to readying the home and HVAC system for cleaning to guarantee worker safety and protect household items.
Disconnect power at the breaker, cover vents and nearby furnishings with drop cloths, clear access paths, notify occupants, and isolate pets.
Verify ladder stability, adequate lighting, and a functioning vacuum or containment system before beginning.
Step-by-Step Guide to Cleaning HVAC Ducts (DIY)
The guide begins with powering down the HVAC and gaining safe access to the system.
It then recommends documenting the duct layout and problem areas before removing and cleaning vent registers and grilles.
Next steps cover agitating settled dust, followed by proper vacuuming techniques for cleaning duct interiors.
Step 1 Turn off power and access the system
Begin by cutting power to the HVAC system at both the thermostat and the main breaker to prevent the fan or blower from starting during cleaning.
Verify power loss with an inline switch or noncontact tester.
Remove access panels and registers carefully, noting screw locations.
Wear gloves and eye protection.
Keep replacement fasteners organized.
Confirm safe, unobstructed access to ducts before proceeding to inspection.
Step 2 Inspect and document duct layout and problem areas
One should visually trace the ductwork from the furnace or air handler through each branch, noting register locations, access points, and any visible signs of dust buildup, mold, moisture, gaps, or disconnected sections.
Photographs, labeled sketches, and concise notes should record dimensions, suspicious odors, and airflow restrictions.
Prioritize sealing breaches and marking areas needing deeper inspection or professional assessment.
Step 3 Remove and clean vent registers and grilles
Loosen and remove each vent register and grille to access accumulated dust and debris, keeping screws and fasteners organized for reinstallation.
Wash metal or plastic parts in warm, soapy water; scrub with a soft brush, rinse, and dry thoroughly.
Vacuum stubborn buildup with a brush attachment.
Replace damaged screens or seals.
Label registers to guarantee correct placement when reinstalling.
Step 4 Agitate and dislodge dust and debris within ducts
Agitate the interior surfaces to free settled dust and debris so they can be removed more effectively.
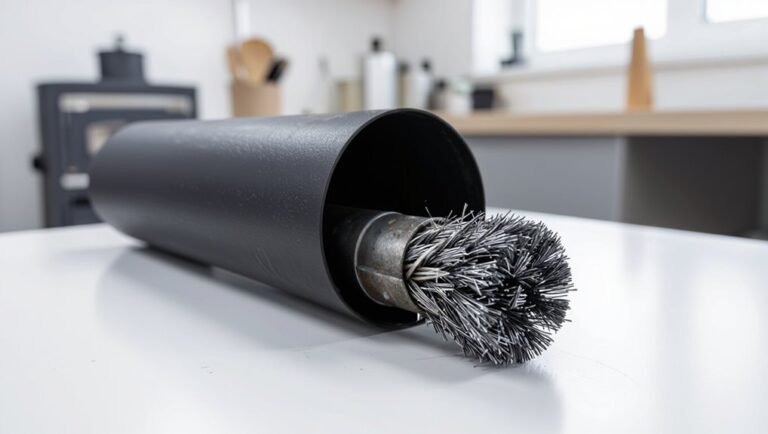
Use stiff brushes, rotary brush attachments, or extendable poles with soft bristles to reach bends and deeper runs.
Work systematically from supply to return, dislodging compacted accumulations and cobwebs.
Avoid harsh scraping that damages liners; loosen material just enough for subsequent extraction.
Step 5 Vacuuming techniques for duct interiors
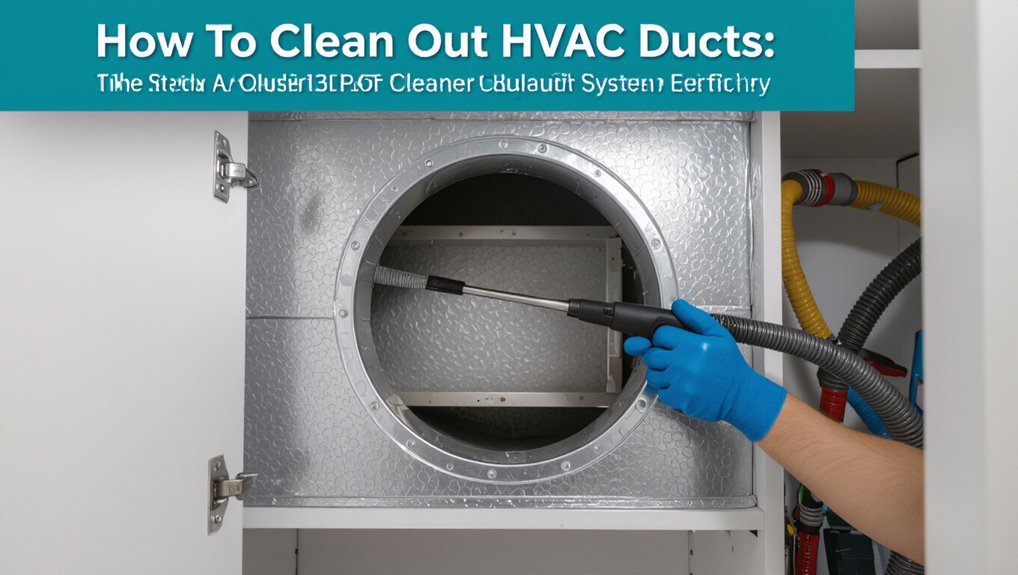
Begin vacuuming with a high-powered, HEPA-rated vacuum or a dedicated duct vacuum to capture loosened dust without recirculating fine particles into the home.
Insert flexible hose into each run, using brush attachments to reach seams and bends. Work from supply toward return, pausing to reposition and clear clogs.
Inspect collected debris, empty filter canister outdoors, and reseal access points securely.
Step 6 Wiping and sanitizing accessible duct surfaces
After vacuuming, accessible interior surfaces should be wiped and treated to remove residual dust and inhibit microbial growth.
A microfiber cloth dampened with a mild detergent solution removes film; follow with a disinfectant approved for HVAC surfaces or a diluted bleach solution where safe.
Work in sections, avoid excess moisture, wear gloves and mask, and allow surfaces to dry completely before reassembling access panels.
Step 7 Cleaning or replacing filters and other components
Move on to the system’s filters and accessible components, since they directly affect airflow and indoor air quality.
Inspect filters, replacing disposable types and washing reusable ones per manufacturer instructions.
Clean or vacuum blower fan, drain pan, and accessible coils; remove debris and mold with appropriate cleaners.
Check seals and fasteners, and document component condition for possible professional service if damage or persistent contamination is found.
Step 8 Reassembly, testing, and final inspection
Reconnect panels, access doors, and duct sections in the reverse order of disassembly, ensuring gaskets and fasteners seat evenly and filters are installed correctly.
Tighten connections, restore insulation, and secure access covers.
Power the system, run each mode, and verify airflow, temperatures, and fan operation.
Inspect for leaks, vibration, or unusual noise.
Document work, note filter replacement dates, and advise occupants on follow-up maintenance.
When to Hire a Professional Duct Cleaner
A professional duct cleaner should be considered when systems are complex, mold is present, rodents have infested ductwork, or contamination is extensive beyond DIY capability.
Homeowners are advised to verify contractor certifications and insurance and to prepare specific questions about methods and guarantees.
Clear expectations about typical costs and the scope of services help compare bids and avoid unexpected charges.
Complex systems, mold, rodent infestation, or extensive contamination
When ducts show signs of serious issues—visible mold growth, evidence of rodent infestation, persistent musty odors, or contamination that extends beyond simple dust—homeowners should consider hiring a professional duct cleaner; these conditions require specialized equipment, containment protocols, and expertise to diagnose and remediate safely.
Professionals assess system complexity, isolate affected zones, remove biological hazards, and guarantee thorough cleaning to prevent recurrence and protect indoor air quality.
Certifications, insurance, and what to ask a contractor
After recognizing conditions that exceed DIY repair—mold colonies, rodent activity, or widespread contamination—homeowners should verify a contractor’s qualifications before hiring.
Credentials, insurance, and clear procedures protect occupants and systems.
Ask for proof of:
- NADCA certification or equivalent
- liability and workers’ comp insurance
- written scope and methods
- references and recent photos
- post-service inspection and warranty
Expected costs and service scope
Cost estimates for professional duct cleaning typically range from modest to substantial depending on home size, system complexity, and specific services requested; basic cleanings often run $300–$500 for a small home, while extensive jobs—including coil cleaning, sanitizing, and dryer vent work—can exceed $1,000. Professionals quote by scope: inspection, cleaning, repairs, and add-ons; warranties vary.
| Service | Typical inclusion |
|---|---|
| Inspection | Duct assessment |
| Basic cleaning | Surface vacuuming |
| Deep cleaning | Ventilation and coil |
| Add-ons | Sanitizing, repairs |
Specialized Cleaning Methods and Add-Ons
Specialized duct cleaning employs a range of tools and treatments tailored to the system and contamination level.
Technicians may use high-efficiency vacuum and negative-pressure systems alongside rotary brushes or air whips to dislodge and extract debris.
Add-ons such as UV lights, antimicrobial coatings, and ozone generators have specific benefits and limitations that warrant careful evaluation.
High-efficiency vacuum and negative pressure systems
High-efficiency vacuum and negative pressure systems employ powerful, HEPA-filtered vacuums coupled with sealed containment to extract dust, debris, and biological contaminants from ductwork while preventing cross-contamination of indoor spaces.
Technicians establish negative pressure at access points, connect collection hoses, and operate continuously during agitation. These systems capture fine particulates and microorganisms offsite, reduce airborne re-entrainment, and improve overall cleaning effectiveness and indoor air quality.
Rotary brush and air whip tools
Rotary brush and air whip tools mechanically dislodge settled dust, lint, and biological matter from duct interiors by combining rotating bristles or flexible whip lines with bursts of compressed air.
Operators advance tools through vents, breaking loose deposits while downstream vacuuming captures debris. Proper tool selection, adjustable speeds, and careful navigation prevent damage to insulation and registers.
Routine inspection confirms cleanliness and system integrity.
UV lights, antimicrobial treatments, and ozone pros and cons
After mechanical agitation and vacuuming remove settled particulates, technicians may consider supplemental options aimed at biological control and odor reduction, including ultraviolet (UV) lamps, antimicrobial coatings, and ozone treatments.
UV lamps can reduce microbial growth when properly installed; antimicrobial coatings inhibit recolonization but require compatibility checks.
Ozone can mask odors but poses health risks and is generally discouraged for occupied spaces; follow regulations and manufacturer guidance.
Preventing Recontamination and Maintaining Clean Ducts
Effective prevention of duct recontamination starts with choosing the right filters, installing them correctly, and following a strict replacement schedule.
Routine HVAC maintenance—including coil and blower cleaning, sealing duct joints, and clearing condensation drains—helps minimize debris accumulation.
Home improvements such as air sealing, controlled humidification, and reducing entry points for dust further limit contaminants entering the system.
Filter selection, installation, and replacement schedule
Choosing the right air filter, installing it correctly, and replacing it on a regular schedule are essential steps to prevent duct recontamination and sustain clean airflow.
The homeowner should match filter MERV rating to needs, guarantee proper orientation and seal, track replacement intervals, use quality disposable or washable filters, and record dates to maintain routine.
- Select appropriate MERV
- Verify airflow direction
- Guarantee a tight seal
- Replace per schedule
- Log replacements
Regular HVAC maintenance tasks to reduce debris buildup
Maintain a regular HVAC maintenance routine to minimize debris accumulation and prevent duct recontamination by addressing key system components and habits that introduce particulates.
Schedule professional inspections, clean blower fans and drain pans, vacuum accessible duct inlets, and replace filters per manufacturer guidance.
Keep vents and registers dusted, guarantee condensate lines are clear, and promptly repair leaks or damaged insulation to reduce intrusions.
Home improvements to limit dust and contaminants (air sealing, humidification)
When air sealing and humidity control are addressed together, they considerably reduce the entry and persistence of dust, pollen, and mold spores in a home’s ductwork.
Sealing gaps, insulating junctions, and installing proper weatherstripping limit infiltration.
Maintaining 40–50% relative humidity deters mold and stabilizes particulate behavior.
Combined with filtration and routine cleaning, these improvements prevent recontamination and extend duct cleaning intervals.
Common Mistakes and Pitfalls to Avoid
Care must be taken to avoid overaggressive cleaning methods that can dent or tear ducts and void system warranties.
Relying solely on spray chemicals or ozone can mask problems without removing debris and may introduce health risks.
Equally important is inspecting and servicing connected components—coils, blower, and return plenum—since leaving them untreated commonly leads to rapid recontamination.
Overaggressive cleaning that damages ducts
Excessively vigorous duct cleaning—using overly stiff brushes, high-pressure air, or powerful vacuum setups without proper containment—can gouge linings, dislodge insulation, and loosen seam joints, creating leaks and reducing system efficiency.
Technicians should match tools to duct materials, employ controlled suction, and inspect for damage frequently.
Overworking components shortens service life and increases repair costs; conservative, methodical cleaning preserves integrity and performance.
Relying solely on spray chemicals or ozone
Relying solely on spray chemicals or ozone to sanitize ducts can give a false sense of remediation because these agents address surface residues and odors but do not remove settled dust, biological growth embedded in insulation, or particulate buildup that impedes airflow.
Such treatments can mask problems temporarily, risk chemical residues, and divert attention from needed mechanical cleaning and inspection to restore airflow and indoor air quality.
Ignoring connected components (coil, blower, return plenum)
Overlooking the coil, blower, or return plenum during duct cleaning compromises the effectiveness of the whole service.
Technicians who skip these components leave trapped dust, mold, and biofilm that recontaminate ducts and reduce airflow.
Thorough cleaning and inspection prevent odor, energy loss, and premature equipment failure.
Recommend accessing, cleaning, and sealing all connected parts as part of any professional duct service.
How to Verify Effectiveness After Cleaning
A concise post-cleaning assessment begins with a visual inspection checklist to confirm ducts, registers, and accessible components are free of debris and properly sealed.
Quantitative verification follows by measuring airflow and overall system performance against baseline or manufacturer specifications.
Finally, monitoring indoor air quality for reductions in dust, particulates, and odors provides confirmation of meaningful improvement.
Visual inspection checklist
One clear checklist helps technicians verify duct cleaning effectiveness by directing attention to visible debris removal, airflow restoration, and component condition.
Inspect main trunks and branch lines for dust, mold, or pest signs; verify registers and grilles are free of residue; check fan housing, coils, and heat exchanger accessibility for cleanliness; confirm seal integrity at seams and connections; document findings with photos and notes.
Measuring airflow and system performance
Measure airflow and system performance with objective tests that compare pre- and post-cleaning conditions, ensuring the duct cleaning produced measurable improvements.
Technicians should record static pressure, supply and return CFM at key registers, fan speed, and temperature differentials. Document filter pressure drop and motor amperage.
Compare results to baseline specifications; note any remaining restrictions or leaks and recommend corrective actions if performance gains are insufficient.
Monitoring indoor air quality improvements
How can indoor air quality (IAQ) improvements be verified after duct cleaning?
A sequence of objective checks confirms effectiveness: compare pre- and post-cleaning particulate counts using a handheld particle counter, monitor CO2 and VOC trends, inspect for lingering dust or odors, and verify reduced allergen levels with surface swabs or filter tests.
Document results, repeat measurements after a few weeks, and correlate with occupant symptom reports.
Quick Reference: Typical Frequency and Cost Estimates
A concise guide outlines recommended cleaning intervals based on occupancy, pets, allergies, and visible contamination to help readers decide when service is appropriate.
It then summarizes ballpark cost ranges and notes factors that influence price, such as system size, accessibility, and extent of contamination.
Together these points offer a quick reference for planning and budgeting HVAC duct maintenance.
Recommended cleaning intervals by situation
For common household and commercial scenarios, recommended duct cleaning intervals vary by occupancy, pet presence, indoor air quality needs, and environmental exposure; the following quick-reference guidance summarizes typical frequencies and rough cost ranges to help prioritize inspections and budgeting.
- Single-family, no pets: inspect every 3–5 years.
- Homes with pets/allergies: inspect every 2–3 years.
- Smokers/renovation: inspect annually.
- Commercial high-occupancy: inspect every 1–2 years.
- Post-mold/flood: inspect immediately, then follow-up within 6–12 months.
Ballpark cost ranges and factors that influence price
Following inspection frequency recommendations, an overview of typical costs and the variables that drive pricing helps homeowners and facility managers budget effectively. Typical residential duct cleaning ranges $300–$700; larger homes or commercial systems run $800–$2,000. Factors: system size, contamination level, access difficulty, and add-on services (sanitize, mold remediation).
| Item | Typical Cost | Driver |
|---|---|---|
| Small home | $300–$500 | Size |
| Large home/commercial | $800–$2,000 | Complexity |
| Add-ons | $50–$600 | Scope |
Conclusion
Like replacing a clogged tea strainer, cleaning HVAC ducts restores smooth flow and clearer flavor to a home’s air. One homeowner noted that after removing years of dust, their allergy attacks dropped by half—anecdotally echoing EPA findings that proper ventilation and maintenance measurably improve indoor air quality. Whether DIY or hiring pros, regular attention to ducts keeps systems efficient, reduces pollutants, and helps households breathe easier with fewer surprises.