How to Clean Mold Under Sink Safely: Step-by-Step Guide for Lasting Results
How to Clean Mold Under Sink Safely: Step-by-Step Guide for Lasting Results
To safely clean mold under your sink, start by wearing protective gear like an N95 mask, gloves, and goggles. Ensure proper ventilation and contain the area to prevent spread. Remove any loose mold, scrub the affected area with a suitable cleaner, rinse thoroughly, and replace any irreparably damaged porous materials. After addressing the source of moisture, dry the area completely and enhance ventilation to prevent mold’s return. Finally, seal and dispose of any contaminated items responsibly. Follow this detailed step-by-step guide for effective mold removal and prevention strategies.
What Causes Mold Under a Sink and Why It’s Dangerous
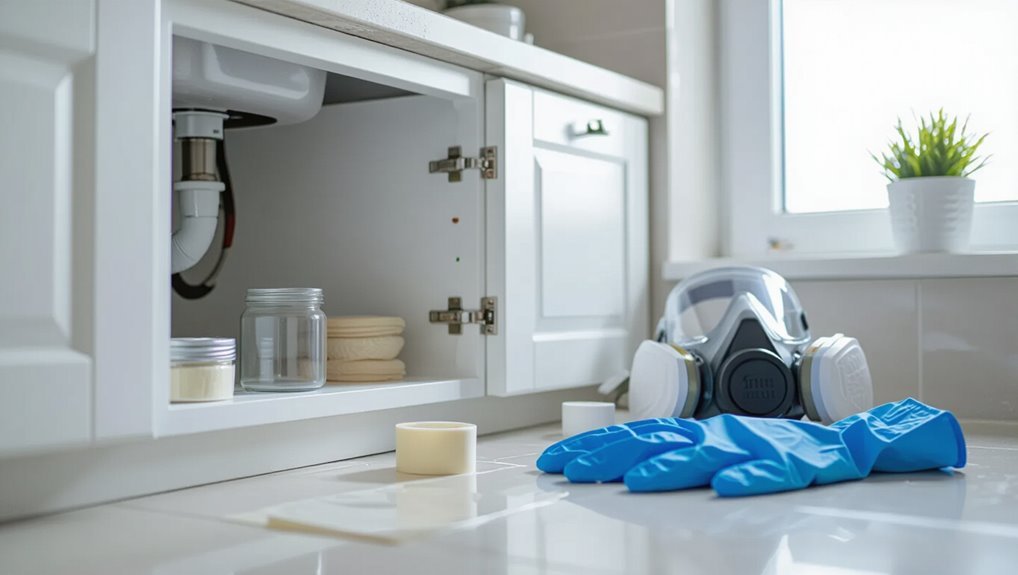
Leaks, condensation, and persistent humidity beneath sinks create the moist conditions that allow mold to grow.
Hidden mold can release spores and allergens that affect respiratory health and can rot cabinet materials and substructures over time.
Visual spotting, musty odors, and household members experiencing unexplained allergy-like symptoms are common signs mold is present.
Common sources of moisture and leaks under sinks
Several common plumbing and household issues create the damp conditions that allow mold to develop beneath sinks.
Leaky supply lines, corroded drain traps, loose faucet seals, and poor caulking permit persistent moisture.
Condensation from cold pipes and slow drains adds humidity.
Roof or cabinet spills and appliance leaks (dishwasher, garbage disposal) also contribute.
Addressing these prevents recurrence when learning how to clean mold under sink.
Health risks and structural damage from hidden mold
Hidden mold beneath a sink poses both health and structural hazards because confined, damp spaces promote dense fungal growth and prolonged material deterioration.
Exposure can trigger respiratory irritation, allergic reactions, and exacerbate asthma, especially in sensitive individuals.
Hidden fungal colonies also degrade cabinetry, flooring, insulation, and substructure, weakening joints and finishes and increasing repair costs while spreading spores that seed further infestations if moisture problems persist.
Signs you have mold under the sink (visual, smell, and symptoms)
Many homeowners first notice mold under a sink through a combination of visual cues, musty odors, and recurring health symptoms.
Dark spots, fuzzy growth, or discoloration on cabinet wood, pipes, and caulk indicate colonies. A persistent damp, earthy smell signals hidden moisture.
Occupants may experience nasal congestion, coughing, headaches, or skin irritation.
Immediate inspection and remediation prevent spread and health risks.
Assessing the Mold Problem Safely Before You Start
Before beginning cleanup, the person should decide whether the situation warrants a professional or a DIY approach based on size, location, and health risks.
A visual inspection with photos and notes helps document the affected area, noting discoloration, musty odors, and any water sources.
Basic indicators—spread pattern, texture, and material affected—can guide the likely mold type and extent without immediate lab tests, while recognizing that uncertain or widespread cases need expert assessment.
When to call a professional vs. DIY
How extensive is the mold issue and what risks does it pose?
Evaluate visible spread, water source, material affected, and occupant health vulnerabilities.
Recommend professional remediation for widespread growth, porous structural involvement, recurrent outbreaks, or mold linked to chronic health symptoms.
DIY suits small, contained patches on nonporous surfaces when proper PPE and ventilation are used; otherwise call a specialist.
How to inspect and document the affected area
After deciding whether remediation can be handled DIY or requires a pro, the next step is a careful inspection and documentation of the affected area to define scope and plan work.
Observe visible mold, water stains, and damaged materials without disturbing growth. Photograph locations, note measurements, odor presence, and likely moisture sources.
Record dates and initial containment measures for reference during cleanup.
Determining mold type and extent without lab tests
What does the mold likely indicate about its source and severity? The observer notes color, texture, and pattern: black, green, powdery, or fuzzy suggest different organisms and moisture history.
Smell intensity, spread, and proximity to plumbing or leaks gauge extent.
Porous vs. nonporous surfaces reveal penetration depth.
If uncertainty or widespread growth exists, recommend professional testing and remediation.
Safety Precautions and Protective Gear
Before beginning work, the writer lists essential personal protective equipment: an N95 or better respirator, chemical-resistant gloves, sealed goggles, and disposable or washable coveralls.
They recommend simple ventilation and containment measures—open windows, run a fan to the outside if possible, and seal the work area with plastic sheeting to limit spore spread.
A concise tools-and-materials checklist (cleaners, scrub brushes, spray bottles, sponges, trash bags, and a HEPA vacuum) is advised to guarantee the job proceeds safely and efficiently.
Personal protective equipment checklist (respirator, gloves, goggles, clothing)
Wear appropriate personal protective equipment when tackling mold under a sink to limit inhalation, skin contact, and eye exposure.
A checklist includes an N95 or P100 respirator rated for particulates, chemical-resistant nitrile gloves, splash-proof safety goggles, and disposable coveralls or washable long-sleeved clothing with closed shoes.
Consider tape-sealed cuffs and a hair cover. Inspect gear for damage before use.
Ventilation and containment strategies to prevent spread
After selecting and inspecting protective gear, attention turns to controlling air movement to keep mold spores from spreading beyond the sink cabinet.
The person opens nearby windows, uses a window or box fan to exhaust air outward, and seals cabinet gaps with plastic sheeting and tape.
Negative pressure and localized containment minimize airborne spread while work proceeds, reducing cross-contamination to adjacent rooms.
Materials and tools to have ready
Several essential items should be gathered and checked for integrity before any cleaning begins: an N95 or higher respirator, nitrile gloves, eye protection (goggles or a full-face shield), and disposable coveralls or washable long-sleeve clothing; in addition, have a HEPA-filtered vacuum, stiff-bristle brush, plastic sheeting and tape for containment, spray bottles, a bucket, detergent, EPA-registered fungicide or a bleach solution (if appropriate), and waste bags for contaminated materials.
Protective footwear, spare gloves, and a flashlight complete the kit.
Step-by-Step Mold Removal Process Under a Sink
The following section outlines a practical sequence for mold removal under a sink, beginning with preparing the workspace, turning off utilities, and removing stored items to isolate the affected cabinetry.
It compares common household cleaners with commercial products and then describes initial steps: removing loose mold and debris followed by applying a chosen cleaner.
Clear scrubbing techniques and safe practices for each step are specified to minimize spread and recontamination.
Preparing the workspace and turning off utilities
Before any cleaning begins, the area under the sink should be cleared and made accessible, with cabinets emptied of all items and surfaces inspected for mold extent and nearby hazards.
Next, shut off water supply valves and, if electrical outlets or appliances are present, switch power at the breaker.
Confirm adequate ventilation by opening windows or using an exhaust fan and wear appropriate PPE before proceeding.
Removing items and isolating cabinetry
Begin by removing all loose items from the cabinet and placing them in a clean, ventilated area so nothing is recontaminated.
Then isolate the cabinet by sealing edges with plastic sheeting and tape, and cover vents.
Wear gloves and a mask.
Inspect for hidden damp spots and document damage before cleaning.
- Remove items
- Seal cabinet
- Protect yourself
- Inspect and document
Cleaning solutions: comparison of household vs. commercial cleaners
Several common options exist for tackling sink-cabinet mold, broadly divided into household remedies and commercial cleaners, each with distinct effectiveness, safety profiles, and surface compatibility. Household solutions (vinegar, baking soda) are inexpensive and gentler; commercial products offer stronger kill rates but require PPE and ventilation. Choose based on surface, severity, and occupant sensitivity.
| Type | Notes |
|---|---|
| Vinegar | Mild, porous surfaces |
| Baking soda | Deodorizes, mild scrub |
| Bleach-based | Strong, non-porous only |
| Commercial fungicide | High efficacy, PPE recommended |
| Hydrogen peroxide | Safer oxidizer, effective on stains |
Step 1 Removing loose mold and debris
Clear away loose mold and debris using tools that minimize spread and disturbance.
Wearing gloves and an N95 respirator, the technician gently brushes and vacuums with a HEPA-equipped unit.
Cracked caulk, flaking paint, and softened wood are removed and bagged immediately.
Contaminated materials that cannot be cleaned are sealed for disposal.
Work proceeds from clean to dirty zones.
Step 2 Applying cleaner and scrubbing techniques
Next, the technician applies an appropriate cleaner and scrubs the affected surfaces methodically to remove remaining mold and stains.
Recommended cleaners include EPA-approved mold removers or diluted detergent; avoid ammonia with bleach.
Agitate with a stiff nylon brush, targeting grout, seams, and porous spots. Work in small sections, reapplying cleaner as needed until visible discoloration and residue are lifted.
Step 3 Rinsing, drying, and using HEPA vacuuming if needed
Rinse treated surfaces thoroughly with clean water to remove residual cleaning solution and dislodged mold particles, using a sponge or spray bottle to avoid spreading contaminants.
Blot surfaces dry with clean towels, then allow full air drying with fans and dehumidifier.
If visible debris or dust remains, HEPA-vacuum the area using a brush attachment and dispose of filters or contents per manufacturer instructions.
Step 4 Treating porous materials and when to replace them
When porous materials under the sink—such as particleboard, drywall, insulation, and fabric—have been exposed to mold, they often cannot be fully decontaminated and require either careful surface treatment or removal.
Assess each item by extent of growth, structural integrity, and odor to determine whether to salvage or replace. Small, lightly affected pieces may be sealed after cleaning; heavily contaminated or weakened items should be discarded and replaced.
Step 5 Final inspection and reassembly
Inspect the cleared area thoroughly for any remaining mold, moisture, or damage before reassembling fixtures and contents.
Make certain surfaces are fully dry and treated, verify repairs (sealant, pipes) are secure, and replace discarded porous items.
Reinstall clean storage, test plumbing for leaks, and run ventilation.
Document findings and schedule follow-up checks to confirm mold does not recur and remediation was effective.
Dealing with Plumbing and Structural Issues Revealed by Mold
Mold under a sink often exposes underlying plumbing failures such as a leaking p-trap, loose supply lines, or degraded seals that require prompt diagnosis and repair.
Cabinet bases and shelving saturated by moisture may need targeted repairs or full replacement to prevent recurrence.
Adjacent walls and flooring should be assessed and remediated for mold contamination before finishing work proceeds.
Identifying and fixing common leak sources (p-trap, supply lines, seals)
A careful examination of the cabinet’s plumbing often reveals the source of hidden moisture—common culprits include a leaking p-trap, loose or cracked supply lines, and deteriorated seals around fixtures and drains.
Inspect joints for corrosion, tighten connections, replace worn washers or supply hoses, and reseal drains with plumber’s putty or new gaskets.
Test for drips and monitor for recurrence to guarantee repairs hold.
When cabinet materials need repair or replacement
When moisture damage extends beyond surface staining, cabinet materials often require repair or replacement to prevent ongoing structural decay and health risks.
Inspect particleboard, plywood, and cabinet backs for swelling, delamination, rot, or persistent mold. Remove and replace compromised panels, seal exposed edges with waterproofing, and reinforce framing as needed.
Confirm plumbing leaks are resolved before reinstalling to avoid recurrence.
Mold remediation for surrounding walls and flooring
Address surrounding walls and flooring promptly upon discovering mold to prevent hidden water damage and structural deterioration from worsening.
Inspect for soft spots, staining, and odor; remove baseboards to check cavities.
Stop leaks, dry and dehumidify thoroughly.
Cut out and replace compromised drywall, flooring and insulation.
Treat remaining surfaces with appropriate biocide, document repairs, and consult a contractor for structural concerns or pervasive contamination.
Preventing Mold Recurrence Under the Sink
To prevent mold from returning under the sink, long-term moisture control such as improving ventilation and using a dehumidifier is essential.
A concise maintenance checklist and routine inspections help catch leaks and condensation early.
Selecting appropriate caulks, sealants, and water-resistant materials completes a practical prevention strategy.
Long-term moisture control strategies (ventilation, dehumidifiers)
Multiple practical steps can reduce persistent moisture under a sink, with ventilation and dehumidification forming the core of long-term control.
Install passive vents or an inline exhaust fan to improve airflow; guarantee cabinet vents are unobstructed.
Use a compact dehumidifier or moisture-absorbing packs rated for small spaces.
Monitor humidity and address plumbing drips promptly to prevent reappearance.
Maintenance checklist and routine inspections
Having established persistent moisture controls like ventilation and dehumidifiers, a focused maintenance checklist and regular inspections keep mold from returning under the sink.
- Inspect for leaks and drips monthly, checking pipes, traps, and seals.
- Wipe dry cabinet interiors weekly and remove stored damp items.
- Monitor humidity levels and run ventilation when above recommended range.
- Replace damaged shelving or liners and document findings for follow-up.
Best caulks, sealants, and water-resistant materials to use
A few well-chosen sealants and water-resistant materials form the first line of defense against mold returning under a sink.
Use 100% silicone caulk for waterproof joints, polyurethane sealants for durability, and bathroom-grade mildew-resistant products.
Install PVC or PEX plumbing, cement backer board for cabinetry repairs, and waterproof paint or epoxy coatings on exposed surfaces.
Verify proper adhesion and full cure before closing spaces.
Safe Disposal and Cleanup After Mold Removal
After removing mold, contaminated materials should be sealed in heavy-duty plastic bags and labeled before disposal according to local regulations.
Tools and PPE require thorough cleaning and disinfection or safe discard to prevent recontamination.
A final assessment of indoor air quality, with professional testing if odor or symptoms persist, helps confirm the space is safe.
How to bag and discard contaminated materials
Seal contaminated items immediately to prevent spore spread and protect occupants and cleanup workers.
Place debris, damaged materials, and absorbent items into heavy-duty plastic bags, compressing to remove air, then seal with tape.
Label bags as mold-contaminated.
Transport directly to approved disposal sites; avoid storing indoors.
Replace small fasteners and noncleanable components.
Follow local regulations for hazardous waste disposal.
Cleaning and decontaminating tools and PPE
Once contaminated materials are bagged and removed, attention shifts to cleaning and decontaminating the tools and personal protective equipment used during the job.
Rigid items get scrubbed with detergent and hot water, then disinfected with appropriate solutions.
Disposable PPE is double-bagged and discarded.
Non-porous tools are rinsed, dried, and stored separately.
Document cleaning steps and replace any compromised equipment.
Post-cleanup air quality checks and when to test
When should air quality be assessed following mold removal to confirm a safe reentry?
Post-cleanup air testing should occur after surfaces dry and ventilation runs several hours to a day.
Use particle counts or spore traps for comparison with baseline or outdoor levels.
If occupants report symptoms or visible residues persist, engage a certified indoor air professional for thorough sampling and clearance documentation.
Cost, Timeframe, and When to Hire a Professional
Typical DIY mold cleanup under a sink often takes a few hours to a day and can cost under a couple hundred dollars for cleaners and basic protective gear.
Indicators such as widespread growth, recurring moisture, visible damage, or health symptoms signal the need for professional remediation.
When hiring a contractor, verify proper credentials, request references and a written scope of work, and ask about containment, mold testing, and post-remediation clearance.
Typical DIY time and cost estimates
A straightforward under-sink mold cleanup usually takes between one and four hours and can be completed for $20–$200 in materials.
More extensive damage or plumbing issues can push costs and time considerably higher.
Typical DIY tasks—cleaning, drying, sealing minor leaks, and repainting—add parts and supplies.
Budget time for ventilation, drying cycles, and disposal; expect extra hours if accessing tight spaces.
Red flags that require professional remediation
Several clear signs indicate that mold under a sink exceeds DIY scope and warrants professional remediation.
Indicators include extensive or recurrent growth (>10 sq ft), persistent musty odors, visible water damage or structural compromise, plumbing leaks that cannot be stopped, suspected HVAC or wall cavity contamination, occupants with respiratory symptoms, or failed previous DIY attempts.
Costs and timelines rise with severity; professionals assess and contain effectively.
Choosing a mold remediation contractor (credentials and questions to ask)
When should a homeowner call in a professional rather than attempt DIY cleanup? For extensive, recurring, or hidden mold, a certified remediator is advised.
Verify IICRC or state licensing, liability insurance, and references. Ask about inspection scope, containment methods, clearance testing, estimated costs, timeline, and warranty.
Obtain a written contract detailing responsibilities, disposal, and post-remediation verification before hiring.
Quick Reference: Tools, Materials, and Checklist for Cleaning Mold Under a Sink
A concise inventory helps guarantee mold under a sink is removed safely and efficiently.
The list below presents the essential tools, protective gear, cleaning solutions, and common replacements needed for a typical remediation. Users should verify supplies and condition before starting work to minimize risk and repeat visits.
- N95 respirator, gloves, safety goggles, and disposable coveralls
- Scrub brushes, utility knife, shop vacuum with HEPA filter, and plastic sheeting
- Bleach or ammonia-free fungicidal cleaner, white vinegar, and detergent-based cleaners
- Replacement caulk, plumber’s putty, replaced insulation or wood panels as needed
Essential tools and protective gear
Proper protective gear and the right tools are essential before anyone begins cleaning mold under a sink to reduce health risks and confirm effective removal.
Recommended items include N95 respirator, chemical-resistant gloves, eye protection, and disposable coveralls.
Essential tools: scrub brushes, plastic scraper, microfiber cloths, a bucket, spray bottle, flashlight, and heavy-duty trash bags.
Guarantee ventilation and have a first-aid kit nearby.
Recommended cleaning solutions and replacements
With protective gear and tools in place, attention turns to effective cleaning solutions and which parts should be replaced to prevent recurrence.
Use diluted bleach (1:10) or commercial mildew cleaner for nonporous surfaces; vinegar or hydrogen peroxide for safer alternatives.
Discard and replace damaged caulk, foam insulation, soft plywood, and severely corroded pipes or fittings.
Seal and dry thoroughly before reinstalling components.
Conclusion
Beneath the sink, where damp shadows conspire, the reader discovers that vigilance and care can turn decay into renewal. With gloves, goggles, and steady method, mold’s dark spread yields to bright air and dry surfaces, revealing hidden leaks to mend. This small, resolute effort restores cleanliness and calm, transforming a neglected hollow into a guarded, healthy space—proof that attention and simple habits can keep future spores from staging another quiet return.