How to Remove a Glued Toilet Flange: Step-by-Step Fix for Stubborn Flanges
To remove a glued toilet flange, start by assessing the materials involved. Cut away any sealant and use a compatible solvent or controlled heat to soften the adhesive. Carefully pry or mechanically cut the flange free, ensuring the drain pipe and subfloor are protected. Once removed, clean the area, inspect the subfloor for damage, and repair if necessary. Finally, install a matching replacement flange with the appropriate seal and bolts. For a comprehensive guide, including detailed steps, tool lists, safety tips, and prevention strategies, continue reading.
How to Remove a Glued Toilet Flange Safely and Effectively
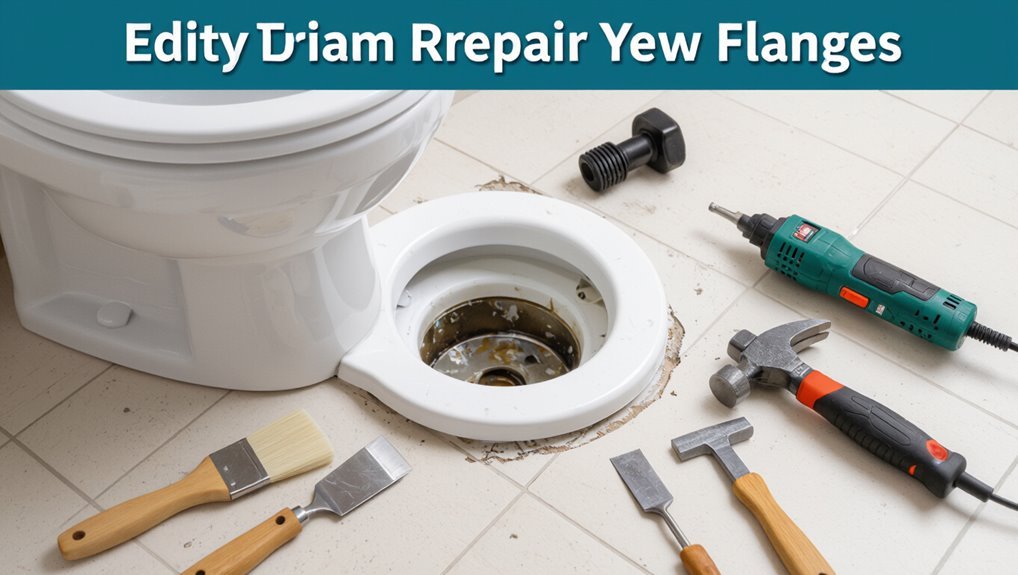
The section outlines the steps for removing a glued toilet flange, emphasizing safety and proper tools.
It summarizes how to soften or cut the adhesive, detach the flange, and prepare the flange area for repair or replacement.
Expected results include a clean flange seat, minimal damage to the drain pipe, and readiness for a new flange or seal.
Quick overview of the process and expected results
Begin by evaluating the flange and surrounding materials to determine adhesion type and condition.
The process outlines cutting away sealant, applying heat or solvent, prying the flange free, and cleaning the subfloor.
Expected results: intact subfloor or minimal repair, removed glued flange ready for new installation, and restored flange alignment.
How to remove glued toilet flange requires patience, proper tools, and safety precautions.
When and Why a Flange Needs Removal
Visible cracks, severe corrosion, misalignment, or a flange that no longer secures the toilet indicate replacement is necessary.
A flange bonded with incompatible adhesive or irreparably damaged can prevent a proper seal and stable mounting.
Leaving a compromised or glued flange in place risks leaks, sewer gas intrusion, and premature floor or toilet damage.
Signs the flange must be replaced
A cracked or corroded flange, persistent leaks at the toilet base, wobbling toilets, and recurring seal failures are clear indications that the flange likely requires replacement.
Additional signs include visible flange separation from the floor, stripped or broken bolt holes, warped or uneven flange faces, and mold or water damage around the closet flange area.
These defects compromise proper sealing and secure mounting.
Risks of leaving a damaged or glued flange in place
Those signs indicating flange failure also signal mounting risks if the flange is left damaged or merely glued back in place.
Water leaks, wax ring failure, and pipe misalignment can cause chronic seepage, subfloor rot, mold growth, and structural decay.
Continued movement risks toilet instability, seal loss, and sewage odors.
Long-term neglect increases repair complexity, costs, and potential health hazards.
Tools, Materials, and Safety Precautions
This section lists the essential tools and replacement parts needed to remove a toilet flange, including wrenches, flange kits, sealants, and replacement bolts.
It also outlines recommended safety gear and precautions, such as gloves, eye protection, ventilation, and proper handling of old wax rings and corroded fasteners.
Finally, it explains common signs that the job should be handed to a professional, like extensive pipe damage, complex flange replacements, or uncertain sewer connections.
Essential tools and replacement parts
Assembling the right tools and parts before removing a toilet flange prevents delays and reduces risk of damage.
Essential items include cutting and prying tools, replacement flange or flange repair ring, and new wax ring or gasket.
Preparation also requires bolts, screws, and appropriate sealant or silicone.
Verify material compatibility for pipe type and flange diameter.
- Cutting/prying tools
- Replacement flange/repair ring
- Wax ring, bolts, sealant
Recommended safety gear and precautions
With the tools and parts gathered, attention turns to safety gear and precautions to protect both the installer and the work area.
Recommended items include safety glasses, nitrile gloves, a dust mask or respirator, knee pads, and closed-toe shoes.
Ventilate the space, shut off water, and isolate electrical sources.
Keep a flashlight, first-aid kit, and chemical spill neutralizer nearby.
When to call a professional
When should a professional be called for a toilet flange replacement?
A professional is advised when rusted or corroded bolts, damaged drainpipe, hidden structural rot, or complex glue removals exist.
Call also if soldered cast-iron, compromised subflooring, persistent leaks, or unclear plumbing codes are involved.
Professionals guarantee correct flange alignment, seal integrity, and safe handling of hazardous materials.
Assessing the Flange and Surrounding Conditions
The inspector first identifies the flange type, material, and any adhesive or sealant used to secure it.
Next, the subfloor condition and the state of the wax ring are checked for rot, gaps, or compression that could affect a replacement.
Photographs and precise measurements are then taken to document the setup and guide selection of a suitable new flange.
Inspecting flange type, material, and glue used
Before any cutting or prying begins, a careful assessment of the flange type, material, and any adhesive present establishes what tools and techniques will be safest and most effective.
The inspector identifies flange style (cast, ABS, PVC, or brass), notes fastener locations and damage, determines adhesive type by appearance or residue (solvent, construction adhesive, epoxy), and decides whether heat, solvents, or mechanical removal suits the situation.
Checking subfloor condition and wax ring status
A brief inspection of the subfloor and wax ring reveals whether the flange removal will be straightforward or require deeper repairs.
The technician checks for rot, soft spots, water stains, and delamination around the flange.
The wax ring’s condition—compressed, torn, or contaminated—indicates seal failure.
Damaged subflooring or a degraded wax ring necessitates repair or replacement before reinstalling a new flange.
Photographing and measuring for replacement
Photographing and measuring the existing flange and surrounding floor documents conditions and guides selection of the correct replacement parts.
The technician captures top, side, and underside views, noting bolt locations, pipe diameter, flange height, and any offsets.
Measurements include distance to wall, subfloor thickness, and gap dimensions.
Clear photos and labeled measurements streamline parts ordering and guarantee proper fit during installation.
Step-by-Step Removal Procedure
The procedure begins with preparing the workspace, shutting off the water, and safely removing the toilet to expose the flange without damaging the drain.
Once the fixture is out, the old wax and debris should be cleaned away to inspect how the flange is attached.
The guide then covers options for detaching a glued flange and specific approaches for flanges bonded to PVC versus metal pipes.
Preparing the workspace and shutting off water
Clear the work area and gather necessary tools before any plumbing is touched; this prevents trips, protects flooring, and keeps parts organized.
Next, locate and close the toilet shutoff valve, then flush to drain remaining water.
Place towels and a bucket to catch residual drips. Disconnect water supply hose at the valve if needed.
Verify no leaks and have gloves, goggles, and a flashlight ready.
Removing the toilet without damaging the drain
Begin by removing the tank lid and setting it aside in a safe place to prevent chips or cracks.
Disconnect water line and drain remaining water.
Unbolt closet bolts and remove caps.
Rock bowl gently to break seal; lift straight up to avoid scraping the trap.
Have an assistant support weight.
Set toilet on protective padding, keeping flange centered and undisturbed for flange work.
Cleaning old wax and debris from the flange area
With the toilet removed and set aside, attention moves to the flange area for wax and debris removal.
Protective gloves and goggles are used. Old wax is scraped with a putty knife, taking care not to gouge the flange. A stiff brush and mild solvent clear residue. Surrounding surfaces are wiped dry.
Inspect the flange and drain for remaining buildup before proceeding.
Methods to detach a glued flange
The section outlines practical methods for detaching a glued toilet flange, starting with solvent-based softening and safe chemical handling.
It then covers mechanical removal using an oscillating tool or saw and the controlled use of heat with required cautions.
Finally, it describes cutting out and extracting flange sections when adhesive and metal must be removed.
Solvent-based softening and safe chemical use
When the flange is bonded with adhesive, apply a solvent-based adhesive softener to weaken the bond before attempting mechanical removal.
The operator should select a solvent compatible with the adhesive and flange material, follow manufacturer instructions, ventilate the area, wear gloves and eye protection, and avoid ignition sources.
Allow sufficient dwell time, reapply if needed, and dispose of contaminated rags per local regulations.
Mechanical removal with oscillating tool or saw
Begin by securing the work area and confirming that the solvent softener has had adequate dwell time; this prepares for controlled mechanical cutting of the bonded flange using an oscillating tool or a fine-toothed saw.
Use firm, steady strokes to slice adhesive layers without contacting the drain or surrounding tiles. Remove flange remnants gradually, clear debris, and inspect the substrate for bonding residue before proceeding with cleanup and repair.
Heat application and cautions
Apply controlled heat to soften the adhesive holding the flange, using a heat gun set to a moderate temperature and keeping the nozzle moving to prevent overheating any single spot.
Maintain distance to avoid warping PVC or igniting sealants. Protect surrounding finishes with heat-resistant cloth and ventilate for fumes.
Monitor temperature, pause for cooling, and wear heat-resistant gloves and eye protection while working.
Cutting out and removing flange sections
Cut into the flange in small, controlled passes to separate glued sections without damaging the surrounding pipe or floor.
Use a rotary tool with a metal or carbide blade, scoring along seams and bolt slots.
Pry loosened segments with a flat chisel, tapping gently.
Remove epoxy residues with a scraper and solvent.
Inspect the flange seat and surrounding substrate for damage before fitting a replacement.
Dealing with flange bonded to PVC vs metal pipes
When removing a toilet flange, the procedure differs substantially depending on whether it is bonded to PVC or attached to a metal drain; each material requires distinct tools and techniques to avoid damaging the waste pipe or surrounding flooring. Technicians assess adhesive bonds, cut selectively, protect pipe edges, and choose solvent or mechanical removal suited to PVC or metal.
| Material | Tool | Technique |
|---|---|---|
| PVC | Heat gun | Soften glue |
| Metal | Angle grinder | Cut flange |
| Both | Scraper | Clean edges |
Inspecting and repairing subfloor after flange removal
With the flange removed and pipe edges cleaned, the technician inspects the surrounding subfloor for rot, compression, or gaps that could compromise a new flange installation.
Damaged areas are marked, cut back to solid joists, and moisture sources addressed. Replacement plywood or patching with exterior-grade material is fastened and sealed.
Subfloor level is verified before installing a new flange and wax ring.
Replacement Options and Installation After Removal
After removal, the next focus is selecting a replacement flange suited to the drain material and floor condition—PVC or cast-iron systems require different attachment methods, while damaged subfloors may need a repair flange or an extender.
The discussion should cover when to use repair rings, extenders, or flange bolts and provide concise steps for installing a new flange on each substrate.
Finally, instructions for reinstalling the toilet and performing a leak test complete the replacement sequence.
Choosing the correct replacement flange type
Select a flange that matches the toilet’s drainage configuration, floor type, and pipe material to guarantee a reliable seal and proper elevation.
Consider material options—PVC, ABS, cast-iron-compatible adapters, or brass—for corrosion resistance and compatibility.
Choose a repair or adjustable flange when wall or floor height varies.
Verify bolt spacing, wax ring or gasket compatibility, and secure mounting method before purchase.
Installing a new flange on PVC, cast-iron, or damaged subfloor
Begin by evaluating the pipe material and subfloor condition to determine the appropriate replacement approach:
For PVC, solvent-weld or slip-on flanges match pipe size and require proper primer and cement.
Cast-iron needs a hub adapter or no-hub flange secured with stainless band clamps.
For damaged subfloor, install plywood patches or blocking, then fasten a flange to solid substrate using corrosion-resistant screws and appropriate sealant.
When to use flange repair rings, extenders, or flange bolts
When deciding between repair rings, extenders, or new flange bolts, assess the flange’s condition, the toilet’s height relative to the finished floor, and the integrity of the surrounding substrate. Choose repair rings for minor cracks, extenders when flange sits below finished floor, and replace bolts if corrosion or stripped threads exist.
| Repair rings | Extenders | Bolts |
|---|---|---|
| Minor cracks | Low flange | Corrosion |
| Quick fix | Raises flange | Secure toilet |
| Thin substrate | Tile/wood floor | Threaded inserts |
Reinstalling the toilet and testing for leaks
After choosing the appropriate repair ring, extender, or new bolts and confirming the flange sits properly relative to the finished floor, reinstalling the toilet proceeds with careful alignment and proper sealing.
Place a new wax ring or wax-free seal, lower the bowl evenly onto bolts, tighten nuts evenly, reconnect supply, and restore water.
Flush multiple times, inspect base and connections for leaks, and retighten if needed.
Troubleshooting Common Problems
Common obstacles include a flange that remains bonded after attempted removal, a damaged drain pipe or severely corroded metal flange, and problems with an uneven subfloor or mismatched flange height.
The article outlines simple tests to distinguish adhesive or rust seizure from structural pipe damage.
It then summarizes repair options and when to call a professional.
Flange still bonded after attempted removal
If the flange remains stuck despite prying and cutting, persistent bonding usually means old adhesive, hardened wax, rusted fasteners, or a combination of all three is holding it in place.
The technician should reapply penetrating solvent, heat the joint carefully, remove remaining bolts with penetrating oil and impact, and score adhesive residues.
Repeat prying and vacuum debris; persistent spots may require longer solvent dwell time.
Damaged drain pipe or corroded metal flange
When stubborn bonding exposes more than adhesive—such as warped cast iron, a cracked PVC drain, or a heavily corroded metal flange—the technician must shift focus from removal tactics to evaluating pipe integrity and replacement options. Inspection, leak testing, and material assessment guide repair vs. replacement decisions; corroded metals often require flange sleeving or pipe section replacement.
| Condition | Typical action |
|---|---|
| Corroded metal | Sleeve or replace |
| Cracked PVC | Cut and splice |
| Warped cast iron | Replace section |
| Hidden leaks | Pressure test |
| Poor fit | Rebuild flange |
Uneven subfloor or flange height issues
Uneven subfloors or improperly seated flanges can prevent a watertight seal and lead to rocking toilets, wax ring failure, or flange cracking.
Inspect for gaps, rot, or high spots; measure flange height relative to finished floor.
Solutions include shimming the subfloor, installing a flange spacer or extension, replacing damaged decking, or resetting the flange at proper height.
Verify level and stability before reinstalling the toilet.
Time, Cost, and Effort Estimates
Typical DIY removal of a toilet flange takes one to three hours depending on corroded bolts and pipe access, while a licensed plumber can complete the job in about one hour.
Materials for a DIY repair—new flange, bolts, wax ring and basic tools—generally cost $20–$75, whereas a professional service typically charges $100–$300 or more including labor.
Time, parts, and skill level will determine whether a homeowner should attempt the work or hire a pro.
Typical time required for DIY vs professional job
Although complexity varies with flange condition and access, most DIYers should plan on 1.5–4 hours for a straightforward flange removal and replacement, while a professional plumber typically completes the same job in 1–2 hours. Time estimates depend on corrosion, awkward bolts, and subfloor repairs. Typical durations:
| Task | Typical Time |
|---|---|
| Inspection | 15–30 min |
| Removal | 30–90 min |
| Replacement | 30–60 min |
| Cleanup | 10–20 min |
Estimated costs for materials and professional service
Estimate costs by separating materials, labor, and potential repairs.
Materials—flange, wax ring, bolts, sealant, and tools—typically total $25–$80.
DIY labor is free but time-consuming; professionals charge $150–$400 for removal and reinstall.
Expect extra $50–$200 if subfloor or drain pipe repairs are needed.
Provide a contingency of 10–20% for unforeseen issues.
Preventing Future Flange Bonding Problems
Preventing future flange bonding problems begins with following best practices for correct alignment, proper surface preparation, and using compatible sealants during installation.
The author recommends adhesives and sealants formulated for PVC or cast-iron plumbing and warns against general-purpose construction adhesives, fiberglass fillers, and solvent cements not rated for flange materials.
Regular inspections and choosing products specified by the flange or pipe manufacturer reduce the risk of premature bond failure.
Best practices when installing or sealing a flange
Guarantee a secure, serviceable toilet flange by following installation and sealing practices that minimize future bonding problems. Confirm proper flange height, solid substrate, correct fasteners, and a quality wax or rubber gasket. Use compatible sealants sparingly and allow full cure. Check alignment and torque bolts to spec; leave accessible joints for future service.
| Task | Tip |
|---|---|
| Substrate prep | Clean, dry, level |
| Sealing | Thin, compatible bead |
| Fastening | Even torque |
Recommended products and adhesives to avoid
Several common adhesives and sealants are best avoided around toilet flanges because they can interfere with proper sealing, complicate future repairs, or damage piping and flooring materials.
Avoid permanent construction adhesives, epoxy glues, silicone sealants labeled for high-bond structural use, and solvent-based PVC cements near flange connections.
Use removable gaskets, plumber’s putty alternatives, and flange-compatible bolts and clips instead.
Useful Resources and Further Reading
Further reading and curated links can help readers confirm techniques and follow manufacturer recommendations when removing a toilet flange.
Authoritative step-by-step videos and factory guides provide visual clarification and model-specific details.
The following resources are recommended for safe, accurate work:
- Video walkthroughs demonstrating flange removal and replacement.
- Manufacturer installation and maintenance guides for flange models.
- Plumbing code references and troubleshooting checklists.
Links to step-by-step videos and manufacturer’s guides
When tackling a toilet flange replacement, consulting step-by-step videos and manufacturer guides helps guarantee correct procedures and appropriate parts selection.
Reliable tutorials demonstrate tool technique, flange removal, and wax ring replacement. Manufacturer guides specify flange models, torque, and compatible seals.
Prioritize official sources and verified professionals for safety and warranty compliance.
- Manufacturer installation PDFs
- Professional plumber video walkthroughs
- Community how-to clips with verified credentials
Conclusion
Removing a glued toilet flange can feel like battling a tiny, stubborn mountain, but with patience, the right tools, and careful technique it is wholly manageable. The homeowner should weigh safety, time, and cost before beginning, then proceed methodically—assessing conditions, using appropriate heat, solvent, and cutting tools, and addressing complications calmly. Proper replacement and preventive measures will greatly reduce the chance of repeat problems and guarantee a secure, lasting toilet installation.