How to Stop Leakage in Water Tank: Quick Fixes and Permanent Repair Guide
To stop a leak in your water tank, first, turn off the inlet or main supply and disconnect any electrical components. Use protective gear and take photos of the damage for reference. For significant leaks, drain the tank and apply heavy-duty patches or bolted steel plates, and consider calling a professional. For minor leaks, waterproof tape, rubber patches, epoxy, or plumber’s putty can be effective; just remember to monitor the area regularly. Always match materials and sealants to the tank type and ensure surfaces are clean before making permanent repairs. Continue reading for detailed repair methods, estimated costs, and tips for prevention.
How to Quickly Stop a Leaking Water Tank
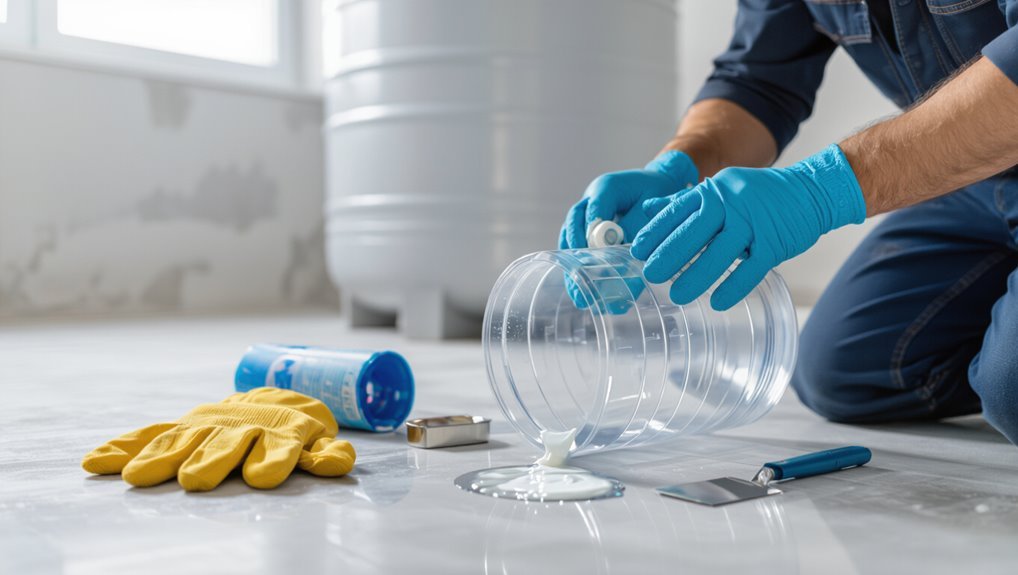
Before attempting repairs, the person should assess hazards and take immediate safety steps, including cutting water and isolating electrical sources if there is risk of contact.
For small leaks, quick temporary fixes such as waterproof tape, sealant, or a patch can reduce flow until a permanent repair is made.
For large or burst leaks, emergency measures—such as shutting off the main supply, draining the tank, and using temporary plugs or clamps—should be implemented while arranging professional assistance.
Immediate safety steps before attempting repairs
Although a leaking water tank may spur immediate action, safety must be the priority: isolate the water source by shutting off the inlet valve or main supply, cut power to any nearby electrical devices and pumps, and evacuate the area if flooding threatens floors or electrical systems.
Then assess hazards visually, wear protective gear, keep bystanders clear, document the leak for professionals, and contact a qualified plumber to address how to stop leakage in water tank.
Fast temporary fixes for small leaks
With the supply shut off and immediate hazards managed, attention can shift to short-term measures that stop small leaks and limit water damage until a professional repair is made.
Apply waterproof tape or a rubber patch clamped over the hole, use epoxy or plumber’s putty for hairline cracks, and temporarily seal threaded fittings with Teflon tape.
Drain and monitor the area frequently.
Emergency fixes for large or burst leaks
Act quickly to limit flooding and structural damage when a large crack or burst appears in a water tank: shut off the main supply and the tank’s inlet valve, isolate nearby electricals, and evacuate low-lying areas.
Apply heavy-duty emergency patches—rubber sheet clamped, pipe repair wrap, or bolted steel plate. Use portable pumps to divert water to containment.
Call professional repair or replacement immediately.
When to shut off water supply and electricity
After isolating the immediate breach and applying temporary patches, decisions about shutting off the water supply and electricity must be made quickly to prevent further flooding and reduce electrocution risk.
The water main should be closed if leaks persist or repairs require draining.
Electricity to adjacent circuits or appliances must be cut when water contacts wiring, or if standing water reaches outlets.
Notify professionals before restoring services.
Identifying the Source and Type of Leak
A systematic inspection begins with common leak points—seams, fittings, valves and inlet/outlet connections—while noting whether damage aligns with the tank material (plastic, metal, cement, fibreglass).
Observing patterns such as external wet spots versus unexplained drops in water level helps distinguish external from internal leaks.
Simple tools and tests, like dye, pressure checks and listening for drips, narrow the search for hidden faults.
Inspecting common leak locations (seams, fittings, valves, inlet/outlet)
Many water-tank leaks originate at predictable points—seams, fittings, valves, and the inlet/outlet—so inspection should focus on these areas first.
Examine seams for cracks or separated joints, check fittings and hose connections for loose or corroded threads, operate valves to reveal drips, and inspect inlet/outlet seals and gaskets.
Note wet spots, mineral deposits, and pressure-related weeping for targeted repair.
Differentiating material-related leaks (plastic, metal, cement, fibreglass)
Material type dictates typical failure modes and repair approaches, so identifying whether a tank is plastic, metal, cement, or fibreglass narrows down likely leak causes.
Plastic often cracks or UV-degrades; metal corrodes or welds fail; cement develops hairline cracks, joints or spalling; fibreglass delaminates or suffers impact damage.
Matching diagnosis to material guides appropriate sealants, patches, or structural repairs.
Signs that indicate internal vs external leaks
Often water tank leaks present subtle clues that distinguish whether water is escaping from inside the vessel or entering from outside; recognizing these signs directs inspection and repair.
Internal leaks show wet patches on interior walls, dropping water level without external dampness, or staining beneath fittings.
External leaks produce exterior dampness, soil erosion, puddles around the base, or water ingress trails along seams and joints.
Tools and simple tests to locate hidden leaks
Recognizing whether a leak is internal or external narrows the likely causes, but locating the exact source usually requires simple tools and a few quick tests.
Use a flashlight, dye tablet or food coloring, plastic wrap and tape, a pressure gauge, and a moisture meter. Inspect seams, fittings, drains, and overflow.
Perform dye and pressure tests, isolate sections, and monitor moisture readings.
Materials and Tools Needed for Repairs
Before any repair begins, a concise list of essential tools and safety gear should be prepared to guarantee a safe and effective job.
The discussion then moves to selecting appropriate sealants, tapes, and patch materials based on tank material and leak type.
Guidance follows on when to use epoxy, silicone, rubber patches, or plumber’s putty for specific situations.
List of essential tools and safety gear
A compact set of tools and appropriate safety gear streamlines water tank leak repairs and reduces risk. A concise kit enables quick assessment, safe access, and effective temporary or permanent work.
Items should be durable, corrosion-resistant, and sized for the tank. Personal protection is essential to prevent injury and contamination.
- Adjustable wrench and pliers
- Wire brush and scraper
- Portable inspection light
- Gloves, goggles, respirator
Sealants, tapes, and patch materials: how to choose
Several types of sealants, tapes, and patch materials suit different tank materials and leak scenarios, so selection should be based on compatibility, pressure rating, cure time, and expected longevity.
Consider substrate (metal, plastic, concrete), water contact safety, temperature and UV exposure, and whether a temporary or permanent fix is meant.
Choose certified products and follow manufacturer specifications for surface preparation and application.
When to use epoxy, silicone, rubber patches, or plumber’s putty
When a leak is identified, choosing between epoxy, silicone, rubber patches, or plumber’s putty depends on the tank material, leak type, and whether the repair must withstand pressure, movement, or prolonged water exposure.
Epoxy suits structural, load-bearing repairs on metal or rigid plastic.
Silicone seals flexible joints and underwater fittings.
Rubber patches handle tears or punctures on flexible liners.
Plumber’s putty is for non-pressurized, removable seals.
Step-by-Step Permanent Repair Methods
The following section outlines concise, permanent repair procedures tailored to common tank materials and failure types.
It covers crack repair for plastic tanks, welding, brazing or cold-weld options for metal tanks, and approaches for sealing porous concrete or masonry.
Instructions also address replacing or resealing faulty fittings and valves and repairing welded or seam failures.
Repairing cracks in plastic tanks
Begin by evaluating the crack’s size, location, and whether the tank material is polyethylene, polypropylene, or another plastic, since repair methods and required materials vary with plastic type and stress factors.
Clean and dry the area, sand edges, apply compatible plastic welding or adhesive, reinforce with a matching plastic patch or fiberglass-backed tape, cure per manufacturer instructions, then test under normal pressure for leaks.
Fixing leaks in metal tanks (welding, brazing, cold weld)
Repairing metal tanks follows different principles than plastic repairs because metals respond to heat and mechanical stress differently. Methods like welding, brazing, and cold weld compounds are selected based on metal type, wall thickness, operating pressure, and service fluids.
Inspect, clean, and remove corrosion. Choose welding for thick steel, brazing for thin or mixed metals, and cold-weld for low-pressure temporary seals.
Test and stress-relieve.
Sealing porous concrete or masonry tanks
Evaluating the extent of porosity and damage is the essential first step before sealing concrete or masonry tanks: identify active leaks, hairline cracks, spalling, efflorescence, and areas of undermining.
Then map dry and wet zones and note exposure to hydrostatic pressure or chemicals.
Clean surfaces, remove loose material, dry; inject epoxy or cementitious repair mortar into cracks; apply crystalline waterproofing or elastomeric coatings in layers; cure and retest.
Replacing or resealing faulty fittings and valves
After sealing porous areas and confirming structural integrity, attention shifts to fittings and valves, common sources of persistent leakage that bypass intact concrete repairs.
Inspect all fittings, shut off water, drain tank, and remove faulty parts.
Clean seating surfaces, replace degraded gaskets or O-rings, and install new threaded or flanged fittings with proper sealant or PTFE tape.
Test under pressure and monitor for leaks.
Repairing welded or seam failures
Addressing welded or seam failures requires a methodical approach that restores structural continuity and prevents future corrosion or fatigue.
Inspect and prepare the area by cleaning, grinding out defects, and evaluating metal thickness.
Select appropriate welding methods and qualified welders, perform weld passes with proper heat control, post-weld inspect and treat for corrosion protection, and pressure-test to verify integrity before returning the tank to service.
When to replace the tank entirely
When tank damage is extensive, repeated, or compromises core structural elements, replacement rather than repair becomes the safest and most economical long-term solution.
Decision factors include corrosion through walls, multiple irreparable cracks, foundation failure, frequent leaks despite repairs, and health risks from contamination.
Evaluate cost of new tank, downtime, regulatory compliance, and lifetime warranty; replace when repairs exceed 50% of replacement cost.
Preventive Maintenance to Avoid Future Leaks
Preventive maintenance focuses on routine actions that keep small issues from becoming leaks.
A concise inspection checklist and schedule, water quality controls to limit corrosion, proper installation and support to avoid stress points, and seasonal measures for freeze and UV protection form the core measures.
Implementing these practices consistently reduces the likelihood of future tank failures.
Regular inspection checklist and schedule
Because small problems often show subtle signs before becoming major failures, a clear inspection checklist and a consistent schedule are essential to preventing water tank leaks.
Routine checks document condition, spot seams, fittings, and supports, and guarantee timely repairs. Recommended frequency: monthly visual, quarterly detailed, annual professional assessment.
- Inspect seams and joints
- Check inlet/outlet fittings
- Assess supports and foundations
- Test overflow and valves
Water quality management to reduce corrosion and deterioration
Effective water quality management greatly slows corrosion and material degradation in tanks by controlling factors that drive chemical and biological attack.
Routine testing for pH, dissolved oxygen, chloride, and hardness identifies corrosive conditions.
Implementing treatment—adjusting pH, adding corrosion inhibitors, chlorination or UV for biofouling, and filtration—extends tank life.
Regular monitoring and documented corrective actions prevent accelerated deterioration and future leaks.
Proper installation and support to prevent stress leaks
Make certain tanks are installed and supported so loads are evenly distributed and connections remain free of undue stress, because many leaks originate from misguided mounting, misaligned piping, or inadequate foundation stiffness.
Verify level foundations, vibration isolation, proper anchoring, and expansion joints where piping meets fittings.
Use compatible materials, correct torque on fasteners, and periodic inspections to detect settlement or movement before seals or welds fail.
Seasonal maintenance tips (freeze protection, UV exposure)
After verifying proper installation and support to prevent stress-related leaks, attention shifts to seasonal maintenance that protects tanks from freeze damage and ultraviolet degradation.
Inspect insulation and add removable heat tape or insulated jackets before cold spells. Clear snow, maintain proper drainage, and use breathable UV-resistant covers or reflective paint.
Schedule biannual checks to repair compromised seals, coatings, or fittings promptly to prevent future leaks.
Cost Estimates and When to Call a Professional
Typical DIY repairs like sealant application or replacing small fittings often cost a few dollars to a couple hundred.
In contrast, professional repairs or tank replacement can range from several hundred to several thousand depending on severity.
A professional should be called if leaks persist after basic fixes, if structural damage or corrosion is visible, or if the source cannot be identified.
When seeking quotes, provide the plumber or tank specialist with tank material and age, a clear description of the leak’s location and history, and photos or measurements to guarantee accurate estimates.
Typical costs for DIY fixes vs professional repair
When homeowners consider fixing a leaking water tank, cost varies widely depending on the problem’s cause, the repair method chosen, and whether the work is done DIY or by a professional. DIY patch kits: $10–$50; sealants: $20–$100; minor parts: $5–$50. Professionals often charge $150–$800 or more depending on labor, materials, and tank access.
| Option | Typical DIY | Professional |
|---|---|---|
| Patch | $10–$50 | $150–$400 |
| Sealant | $20–$100 | $200–$600 |
| Parts | $5–$50 | $150–$800 |
Signs a professional or specialist is required
Cost comparisons help homeowners decide whether to attempt a repair themselves or hire help, but certain signs clearly indicate a professional is required.
Persistent or widening leaks, structural tank cracks, compromised foundations, corroded fittings, hidden or intermittent leaks, water contamination, failed previous repairs, or complex plumbing integrations necessitate specialist assessment.
Safety risks, confined access, or insurance requirements also warrant calling a qualified technician.
How to brief a plumber or tank specialist for repair quotes
A clear, concise brief speeds up the quoting process and helps guarantee comparable estimates from plumbers or tank specialists.
Include tank type, material, age, visible damage, leak location, water input/output details, recent repairs, and photos or video.
State accessibility, urgency, desired warranty, and budget constraints.
Request itemized quotes listing labor, parts, sealants, replacement components, and estimated timeline.
Common Mistakes and How to Avoid Them
Common mistakes in repairing a leaking water tank include using inappropriate materials or relying on temporary fixes that soon fail.
Often the underlying causes—such as excessive pressure, foundation movement, or corrosive water chemistry—are overlooked, leading to repeated leaks.
Safety errors during DIY repairs, like working without proper isolation or protective gear, further increase risk and should be avoided.
Wrong materials or temporary fixes that fail
Many DIY repairs rely on inappropriate materials or quick fixes that only postpone failure.
Using household sealants, duct tape, or mismatched patch kits often leads to recurring leaks, contamination, and structural damage.
Short-term plugs can hide larger problems and complicate future repairs.
Proper material selection, manufacturer-approved products, and professional assessment prevent wasted effort and escalating costs.
Overlooking root causes (pressure, foundation, water chemistry)
When leaks recur despite patched joints or replaced fittings, underlying factors such as system pressure imbalances, settling foundations, or corrosive water chemistry are often ignored.
Diagnosing these root causes is essential because surface repairs will fail if the driving condition remains. Technicians should measure pressure, inspect structural supports, and test water for pH and dissolved solids.
Then, they should address the specific cause before repairing visible damage.
Safety mistakes to avoid during repairs
Several critical safety mistakes frequently occur during water tank repairs and can turn a routine fix into a hazardous situation.
Workers neglect lockout/tagout, skip personal protective equipment, ignore confined-space protocols, and use improper ladders or tools.
Electrical and chemical hazards are underestimated.
To avoid incidents, follow permits, ventilation, PPE, fall protection, correct tools, and verified isolation procedures before starting any repair.
Long-Term Solutions and Upgrades
Long-term solutions focus on preventing future failures rather than patching current leaks.
Upgrading to corrosion-resistant materials, adding overflow and automated leak-detection systems, and implementing design changes that ease maintenance can greatly extend tank life.
A planned upgrade strategy balances upfront cost with reduced repair frequency and improved safety.
Upgrading to corrosion-resistant materials
Because corrosion is the primary cause of many tank failures, upgrading components to corrosion-resistant materials offers a durable path to prevent future leaks.
Recommend stainless steel fittings, fiberglass-reinforced plastic panels, and polymer-lined steel for vulnerable areas. Use compatible fasteners and protective coatings at joints.
Periodic inspection verifies integrity. Initial cost rises are offset by longer service life, reduced maintenance, and lower leak risk.
Installing overflow and leak-detection systems
Install overflow and leak-detection systems to catch excess water and identify breaches before they escalate into major losses.
Automated float valves, alarmed overflow outlets, and electronic sensors monitor levels and moisture, triggering shutoffs or alerts.
Placement near seams, fittings, and underfloor areas guarantees early detection.
Regular testing, battery backups, and integration with remote notifications minimize downtime and prevent unnoticed leakage damage.
Design improvements for longevity and easier maintenance
Evaluate tank design choices with an emphasis on materials, access, and modularity to extend service life and simplify upkeep.
Specify corrosion-resistant alloys or coated concrete, smooth interiors, and UV-stable liners.
Incorporate accessible inspection ports, removable panels, and standardized fittings for quick part replacement.
Design gravity-fed drains, sloped floors, and external monitoring mountings.
Prioritize redundancy and clear maintenance pathways to reduce leak risk and downtime.
Repair Case Examples and Practical Scenarios
The section presents concise repair case examples and practical scenarios for common tank leaks.
It covers a stepwise repair for a small crack in a rooftop plastic tank, a professional approach for a corroded metal seam on an underground tank, and a quick homeowner fix for a leaking joint on a garden reservoir.
Each example emphasizes tools, materials, and safety considerations appropriate to the situation.
Small crack in rooftop plastic tank stepwise repair
Begin by identifying the crack’s size, location, and whether it is hairline, surface, or penetrating through the tank wall; these factors determine the appropriate materials and sequence of repairs.
Drain and dry the area, sand and clean surrounding plastic, apply compatible adhesive or epoxy for penetrating cracks, reinforce with plastic welding or patch, cure fully, test under partial fill, then restore full service.
Corroded metal seam on underground tank professional approach
Evaluating a corroded metal seam on an underground tank requires a methodical, safety-first professional response that balances containment, investigation, and repair planning.
Specialists isolate the site, control groundwater, and empty the tank per regulations.
Non‑destructive testing locates seam failure; corroded sections are cut out, replaced with welded patches or flange repairs, and cathodic protection or coatings are installed.
Post‑repair pressure testing and monitoring confirm integrity.
Leaking joint on garden reservoir quick homeowner fix
Addressing a leaking joint on a garden reservoir, a homeowner can often stop the drip quickly with simple, low‑risk measures before scheduling a permanent repair.
Shut off inflow, drain to expose joint, clean and dry surfaces.
Apply plumber’s tape or silicone sealant for temporary sealing, clamp with a rubber patch if needed.
Monitor for continued seepage and arrange professional replacement of the joint.
Conclusion
As the adage says, “A stitch in time saves nine.” Timely, informed action can convert a small drip into a long-lasting fix. By accurately identifying the leak, choosing appropriate materials, and following step-by-step repair or replacement methods, homeowners minimize damage and cost. Routine inspection and preventive maintenance prevent recurrence, while knowing when to call a professional guarantees safety. Combining quick temporary measures with permanent solutions preserves the tank’s function and extends its lifespan.