How to Run Water to a Shed: A Step-by-Step Guide for DIY and Pro Installations
To run water to a shed, you’ll need to plan your supply method—options include buried trenching, insulated above-ground piping, or alternatives like rainwater collection. Choose from pipe materials such as PEX, copper, or CPVC, ensuring you include frost protection, shutoff valves, and backflow prevention. Remember to contact utility locates, size your lines for fixtures, and adhere to local codes. While a DIY approach is suitable for simple installations, more complex setups may require professional assistance. For detailed steps, material lists, and cost estimates, continue reading.
How to Run Water to a Shed Quick Overview and Best Approach
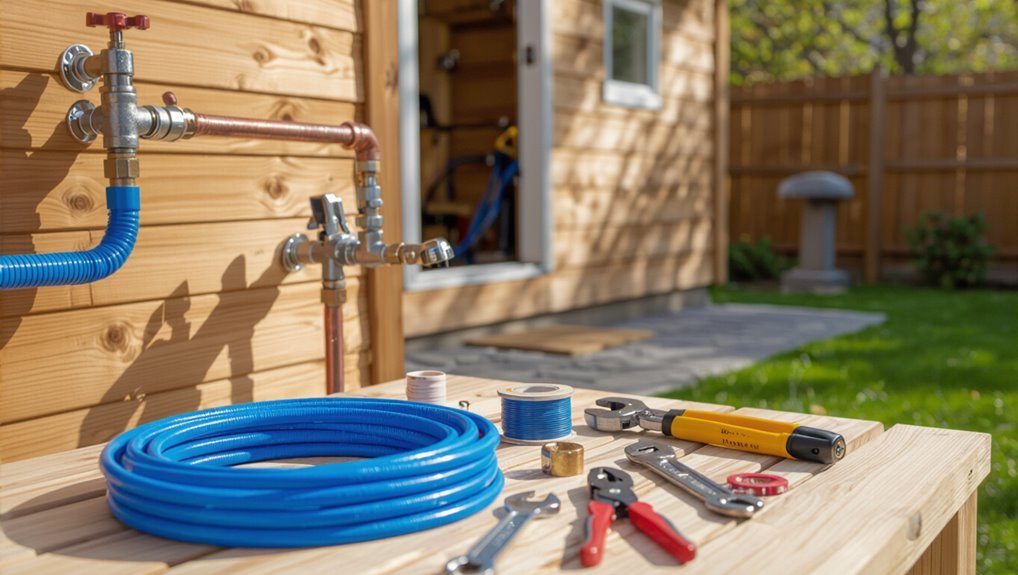
The safest, code-compliant ways to run water to a shed typically involve extending a buried water line with frost protection, using proper backflow prevention, and following local plumbing codes.
Homeowners should weigh DIY feasibility—simple, short runs with basic trenching can be done by experienced DIYers—against situations that warrant a professional, such as complex hookups, electrical-proximity issues, or strict permit requirements.
Choosing the best approach depends on site conditions, local regulations, and the installer’s skill level.
Short answer: the safest, code-compliant options for most sheds
Several reliable methods exist for bringing water to a shed while meeting safety standards and most local codes: the safest, code-compliant options typically include trenching with buried PEX or copper from the main, using frost-depth burial or insulation, installing a pressure-regulated, GFCI-protected outdoor circuit for pump or heater, and adding approved shutoffs and backflow prevention.
These choices prioritize durability, freeze protection, and compliance when learning how to run water to a shed.
When to hire a professional vs. DIY considerations
After outlining the safest, code-compliant methods for supplying water to a shed, the next decision is whether to hire a licensed plumber or proceed as a competent DIYer.
Hire a pro for complex hookups, gas- or electrical-integrated systems, trenching in rocky terrain, unfamiliar code, or required permits.
DIY suits simple frost-proof spigots, basic hose bib runs, and confident owners who verify local regulations and tool skills.
Planning and Preparation
Before any trenching or connections begin, the homeowner should determine the shed’s water demand—what fixtures and appliances will be used and how seasonal needs affect flow.
They must also verify local codes, obtain required permits, and schedule utility locates to avoid buried services.
Finally, the project’s water source and a realistic budget for materials, labor, permits, and contingencies should be selected and documented.
Assessing water needs for the shed (fixtures, appliances, seasonal usage)
How much water a shed will require depends on the planned fixtures, appliances, and seasonal use; a clear inventory of taps, sinks, toilets, water heaters, washing machines, irrigation lines, and any garden or workshop equipment establishes baseline demand.
Estimate peak simultaneous flow (GPM), daily volume (gallons), and hot water needs.
Factor frost protection, occasional fill tasks, and future additions to size supply and storage appropriately.
Local codes, permits, and utility locate requirements
With water demand and fixture inventory established, attention must shift to the legal and safety framework governing any supply work.
Verify local plumbing codes, setback and frost‑proof requirements, and required materials. Obtain permits from the municipality before excavating.
Call utility‑locate services to mark buried lines. Keep permit paperwork, inspection schedules, and utility clearances on file to guarantee compliant installation and avoid fines.
Choosing a water source: house tap, municipal line, well, or rainwater catchment
When deciding on a water source for a shed, the choice hinges on availability, planned use, budget, and long‑term maintenance obligations.
Options include tapping the house supply for reliability, connecting to a municipal line where permitted, drilling a well for independence, or installing rainwater catchment for nonpotable uses.
Assess flow needs, water quality, seasonal reliability, and required infrastructure before selecting.
Budgeting: materials, labor, permits, and contingency
After selecting a water source, a clear budget framework guides decisions about materials, labor, permits, and reserves for the project.
Itemize pipe, fittings, valves, fixtures, and trenching or mounting supplies. Obtain labor quotes for DIY time or contractor rates. Research permit fees and inspection costs.
Allocate a contingency (10–20%) for unexpected issues, and compare total estimates before committing.
Comparing Supply Methods and Materials
When choosing how to supply a shed, the author compares trenching from the house with above-ground runs, outlines material choices and their best uses, and notes cold-weather protection and pump options. The following quick-reference table summarizes key trade-offs for each approach. Practical considerations—frost depth, durability, ease of installation, and required pressure—will guide the final choice.
| Topic | Quick notes |
|---|---|
| Trenching vs. above-ground | Buried lines protect from freezing but cost more to install; above-ground is cheaper and easier to access. |
| PEX vs. copper vs. PVC/CPVC | PEX is flexible and freeze-tolerant, copper is durable and long-lasting, PVC/CPVC is economical and easy to join. |
| Cold-weather measures | Insulate, use heat tape or trace, and bury below frost line when possible. |
| Pump/pressure systems | Consider submersible or booster pumps and pressure tanks for remote or high-elevation sheds. |
Trenching from house vs. above-ground options
A direct comparison of trenching from the house versus above-ground supply methods focuses on durability, cost, appearance, and local code requirements.
Trenching offers protected lines, greater freeze resistance, and cleaner aesthetics but higher labor and excavation permits.
Above-ground runs reduce digging, allow easier access and lower upfront cost, yet require concealment, insulation for freezing, and may face stricter visibility or setback rules.
PEX vs. copper vs. PVC/CPVC pros, cons, and best use cases
Although each piping material can deliver safe, reliable water to a shed, PEX, copper, and PVC/CPVC differ markedly in cost, ease of installation, freeze resistance, longevity, and code acceptance.
PEX: flexible, cheap, DIY‑friendly, moderate UV sensitivity.
Copper: durable, bacteriostatic, expensive, soldering required.
PVC/CPVC: rigid, economical for cold or hot supply (CPVC), solvent‑weld joints, lower freeze tolerance, common in many jurisdictions.
Cold-weather considerations: insulation, freeze protection, and heat trace
Material choice influences cold‑weather strategy because flexibility, thermal conductivity, and joint types affect how a line responds to freezing and what protection is practical.
Insulate buried and exposed runs with closed‑cell foam; add rigid foam for foundation penetrations.
For vulnerable aboveground piping, use self‑regulating heat trace with thermostat control and proper tape/seal.
Drainback or frost‑proof fixtures remain essential backup protection.
Pump and pressure system options for remote sheds
Many remote sheds depend on one of several pump-and-pressure approaches—pressure tanks with submersible or jet pumps, constant-pressure variable-speed systems, or simple hand/foot pumps—each suited to different source types, run lengths, and use patterns.
Selection considers flow demand, power availability, maintenance, and freeze risk.
Tank systems offer surge and simplicity; variable-speed yields steady pressure and efficiency; manual pumps require no power but limited flow.
Tools, Materials, and Safety Equipment
A clear inventory of essential tools — including trenching equipment, pipe cutters, crimpers, and pressure-testing gear — sets the foundation for a safe, efficient installation.
Required fittings, valves, and fixtures should be specified by type, size, and material to match local code and the chosen supply method.
Proper safety gear and utility-marking procedures must be followed before excavation to prevent injury and service interruptions.
Essential tools list
Tools and supplies fall into three categories: basic hand tools, plumbing-specific equipment, and safety gear.
The essential list emphasizes efficiency and safety for running water to a shed.
- Adjustable wrench, pipe cutter, tape measure.
- PEX tubing or copper tools, crimping tool, pressure gauge.
- Safety glasses, gloves, GFCI tester.
Required fittings, valves, and fixtures
Several essential fittings, valves, and fixtures are required to create a safe, code-compliant water supply to a shed: shutoff valves, backflow prevention, pressure regulators, appropriate connectors and adapters, and weather-resistant hose bibs or interior fixtures.
Recommended components include:
- Ball shutoff, frost-free hose bib, and vacuum breaker.
- Pressure regulator and union fittings.
- Copper/PEX adapters, mounting brackets, and isolation valves.
Safety gear and utility marking procedures
Before digging or handling plumbing components, professionals should don appropriate personal protective equipment and verify that underground utilities are marked; this includes safety glasses, work gloves, steel-toed boots, hearing protection when using power tools, and high-visibility clothing.
- Contact utility locators to mark lines.
- Use insulated tools and GFCI for electrical risks.
- Keep a first-aid kit and emergency contacts on site.
Step-by-Step Guide: Running a Pressurized Water Line to a Shed (DIY Trench Method)
The process begins with marking the route and calling 811 to locate underground utilities, then securing any required permits and planning inspection points.
Next comes excavating a trench to the proper depth and slope—observing local winterize depths—followed by laying bedding, frost protection, and conduit where necessary.
Finally, the chosen pipe (PEX, copper, or CPVC) and fittings are installed with a shutoff valve accessible near the shed.
Step 1 Mark route and call 811 for locating underground utilities
Survey the planned route and mark its centerline with stakes or spray paint, keeping the line as straight and direct as practical to minimize trench length and fittings.
Then contact 811 (or local utility notification service) to request professional locating.
Wait the required time, respect marked utility zones, adjust route to avoid conflicts, and document locate tickets before digging begins.
Step 2 Obtain permits and plan inspection points
Once permits are secured and inspection points are planned, the project can proceed without legal or compliance surprises.
The installer files permit applications, notes required setbacks, depths and material approvals, and schedules inspections at rough-in and final stages.
Documentation of approved plans and inspector contact information is kept on site.
Compliance with local codes prevents delays and costly rework during the water line installation.
Step 3 Excavate trench to required depth and slope (winterize depth specifics)
Before digging, confirm local frost depth and utility locations so the trench meets frost-protection and clearance requirements; excavate to at least the frost depth plus pipe insulation allowance, maintaining a consistent fall (typically 1/8″–1/4″ per foot) toward the shed or main line.
Verify trench bottom is smooth, free of rocks, and wide enough for bedding and pipe placement while following permit specifications.
Step 4 Lay bedding, frost protection, and conduit if needed
Place a smooth, level bedding layer, install any required frost protection, and position conduit or pipe sleeve as the next step to protect the water line and guarantee proper alignment.
Use compacted sand or pea gravel for bedding, add foam insulation or continuous trench wrap where frost is a concern, and center the conduit to allow pipe movement.
Verify slope and clearances before backfilling.
Step 5 Install pipe (PEX/copper/CPVC) and fittings; include shutoff valve
Begin by laying out the chosen pipe type (PEX, copper, or CPVC) along the prepared bedding, keeping runs straight and supported to prevent kinks or sagging.
Cut to length, deburr or chamfer, and dry-fit fittings.
Assemble per manufacturer instructions—crimp, solder, or solvent weld as required.
Install a shutoff valve near the source, secure pipe to prevent movement, and protect exposed fittings with insulation or sleeves.
Step 6 Pressure test the line and inspect for leaks
With the pipe runs assembled, fitted, and secured, the next step is to pressurize the system and check every joint and fitting for leaks.
A pressure gauge and pump (or house supply) raise system pressure to test level per code.
Hold pressure for the required duration, inspect visually and with soapy solution, tighten or replace faulty connections, then document test results before proceeding.
Step 7 Backfill, compact, and restore surface
After confirming the line holds pressure and all fittings are dry, backfilling can proceed:
Begin by layering clean fill around pipe, avoiding large rocks and sharp debris.
Compact in 6–8 inch lifts to prevent settling, using hand tamper or plate compactor as appropriate.
Restore topsoil, grade for drainage, and replace sod or gravel to match surrounding surface, minimizing future erosion and disturbance.
Step 8 Connect inside shed: fixtures, pressure regulator, and final shutoff
Install the interior connections by mounting the pressure regulator, final shutoff valve, and fixture supply lines in sequence to control flow and protect shed plumbing.
Secure regulator to wall, set to recommended psi, then attach shutoff accessible near entry.
Run short supply runs to sink, hose bib, or washer with proper fittings, support pipes, install dielectric unions where needed, and label valves for clarity.
Step 9 Final inspection and commissioning
Begin by performing a systematic final inspection and commissioning sequence to confirm the trench, fittings, and interior connections are secure, leak-free, and compliant with local codes.
Check pressure, operate valves, test each fixture, and inspect visible joints.
Verify backflow prevention and insulation.
Document settings, take photos, and notify authorities if required.
Address any leaks or deficiencies before finalizing the installation.
Alternative Installation Methods
The section surveys alternative approaches for bringing water to a shed, contrasting above-ground runs with insulated, heat-traced piping against more conventional buried lines.
It also considers timed frost‑free hydrants or sillcocks, and the separate logistics of using a well or pump‑fed cistern—covering both plumbing and power requirements.
Finally, rainwater harvesting and plumbed gray‑water systems are presented as low‑infrastructure options with different permit and maintenance implications.
Above-ground run with insulated and heat-traced piping
Several practical situations call for routing water above ground to a shed using insulated, heat-traced piping: where trenching is impractical, bedrock prevents burial, or temporary service is desired.
Above-ground runs use UV-resistant conduit, closed-cell foam insulation, and self-regulating heat tape; secure pipes on brackets, slope for drainage, protect connections, and install GFCI-protected power for trace heating.
Regular inspection prevents freeze damage.
Using a timed frost-free hydrant or sillcock
When above-ground heat-traced piping is impractical or undesired, a timed frost-free hydrant or sillcock offers a compact alternative for protecting outdoor supply lines from freezing.
Timed units retract or close automatically, draining the line after use. They require proper downhill grading, a freeze-resistant mounting location, and connection to a pressurized supply.
Electrical timing controls simplify seasonal operation without continuous heat.
Running water from a well or pump-fed cistern plumbing and power needs
Consider whether a well or pump-fed cistern will supply the shed’s daily demand and how that choice affects plumbing layout, electrical needs, and freeze protection.
A pressure tank and controller, correctly sized pump, and dedicated circuit with GFCI are required.
Pipe routing, backflow prevention, and pump placement minimize priming and heat loss.
Include automatic shutoff, accessible service points, and ventilation for frost mitigation.
Rainwater harvesting and plumbed-to-shed gray-water options
Beyond mains, well, or cistern supply options, harvest-based and gray‑water systems offer viable alternatives for meeting a shed’s nonpotable needs while reducing mains demand.
Rainwater collection requires guttering, first‑flush diverters, screened storage, and a pump or gravity feed.
Gray‑water reuse needs filtration, odor control, and municipal approval; both demand labeling, backflow prevention, and periodic maintenance to guarantee safe, reliable supply for irrigation, cleaning, and toilet flushing.
Electrical and Heating Integration
Consideration of electrical and heating integration is essential when running water to a shed, particularly for powering sump pumps, heat tape, or mini‑split heaters.
Basic wiring practices and proper GFCI protection should be planned to guarantee safety and code compliance.
Coordination with a licensed electrician is recommended for circuit sizing, conduit runs, and any required permits.
Adding electric for sump pumps, heat tape, or mini-split heaters
Adding electrical capacity to a shed for sump pumps, heat tape, or a mini-split heater requires planning for load, circuit protection, and weatherproofing.
Determine expected amperage, designate dedicated circuits, and allow headroom for motor startups.
Specify outdoor-rated conduit, GFCI-compatible devices, and weatherproof outlets/enclosures.
Coordinate breaker sizing with the main panel and plan for future expansion while documenting installations for inspections and maintenance.
Wiring basics, GFCI protection, and professional coordination
Plan the shed’s electrical layout around safe, code-compliant practices that prioritize correct wire sizing, circuit protection, and coordinated equipment selection.
Specify dedicated circuits for pumps, heaters, and HVAC; use GFCI protection for all outdoor, wet-area, and sump circuits.
Label panels, include disconnects, and follow local code.
Coordinate with a licensed electrician for load calculations, permits, and final inspections to guarantee safety and warranty compliance.
Common Problems, How to Avoid Them, and Troubleshooting
Common problems when running water to a shed include freeze damage, low pressure, buried-line leaks, and corrosion or incompatible materials.
Each issue has straightforward prevention measures—insulation and heat tracing for freezes, pressure checks and pipe sizing for low flow, tracer wires and pressure tests for buried leaks, and selecting compatible materials and coatings to prevent corrosion.
The following troubleshooting steps and maintenance tips address how to identify, avoid, and repair these failures efficiently.
Freeze damage prevention and repair strategies
Several straightforward measures can greatly reduce the risk of freeze damage to shed water lines and fixtures.
Insulate exposed pipes, bury supply lines below frost depth, use heat tape with thermostat, and install frost-free sillcocks.
Drain and winterize interior fixtures before cold snaps.
For repairs, replace burst sections, check joints for corrosion, pressure-test the system, and restore proper insulation and slope to prevent future failures.
Low pressure causes and fixes
Diagnose low water pressure by systematically checking supply and delivery components: insufficient municipal or well pressure, clogged pipes or fixtures, partially closed valves, undersized supply lines, or pressure-reducing and check valves that are malfunctioning can all reduce flow to a shed.
Test source pressure, inspect and clean aerators and valves, fully open supply valves, evaluate line size, and replace faulty regulators or weak pumps to restore adequate flow.
Leak detection and repair in buried lines
Locate and repair leaks in buried supply lines promptly to prevent water loss, soil erosion, and frost damage.
Inspect visible wet spots, sinkage, or lush vegetation; listen for running water with a stethoscope or electronic leak detector.
Isolate sections, excavate minimally, and replace damaged pipe or fittings with approved couplings.
Pressure-test repaired runs, backfill with clean bedding, and monitor for recurrence.
Corrosion and material compatibility issues
After repairing buried leaks, attention should turn to corrosion and material compatibility, which can silently undermine a shed’s water system over time.
Common problems include galvanic corrosion between dissimilar metals and chemical attack on plastics.
Avoidance: match metals, use dielectric unions, select compatible pipe materials and coatings.
Troubleshooting: inspect joints, test water chemistry, replace corroded sections, and monitor sacrificial anodes.
Cost Estimates and Timeframe
The section compares typical DIY cost breakdowns—materials, fittings, and trenching—to the higher but often more reliable expense of professional installation.
It also outlines the time required for planning, obtaining permits, and completing installation, noting common schedule variations.
Readers are guided to weigh upfront costs against labor, compliance, and timeline considerations.
Typical DIY cost breakdown vs. professional installation
Several common variables determine whether a DIY water run to a shed will save money compared with hiring a professional: distance from the house, pipe material and size, need for trenching or boring, permit and inspection fees, and local labor rates.
DIY costs typically include materials ($100–$800), fittings, valves, and rental equipment; professional installs add labor ($500–$2,500+), warranty and code compliance, often making pros costlier but faster and more reliable.
Time required for planning, permitting, and installation
Planning, permitting, and installation for running water to a shed typically span from a few days to several weeks depending on project complexity and local bureaucracy.
Initial planning and design take a day or two; permit approval can require one to four weeks.
Installation ranges from a single weekend for simple gravity or hose-fed systems to several days for trenching, piping, and inspections when hiring professionals.
Maintenance Checklist and Seasonal Care
A concise maintenance checklist helps preserve the shed’s water system and prevent costly damage.
It should cover routine inspections, basic winterization steps like draining lines and insulating exposed pipes, and scheduled checks for leaks or corrosion.
Guidance on long-term upkeep and clear criteria for when to call a professional completes the plan.
Routine inspections and winterization steps
Regular visual checks and a concise winterization routine keep the shed’s water system reliable and prevent costly freeze damage.
- Inspect visible pipes, valves, and fittings for leaks, corrosion, or insulation gaps; tighten or replace as needed.
- Drain exterior lines, shut off supply, and blow out remaining water with air or open drain valves.
- Apply or replace pipe insulation, heat tape where required, and store hoses indoors.
Long-term upkeep and when to call a pro
Maintain a concise, season-specific checklist to preserve the shed’s plumbing and spot issues before they escalate.
Inspect valves, connectors, and hoses quarterly; clear debris from vents and drains; test pressure and check for leaks after storms.
Winterize by draining lines and insulating exposed pipes.
Engage a licensed plumber for persistent leaks, low pressure, frozen pipe damage, or when alterations require permits or pressure-system expertise.
Example Scenarios and Recommended Approaches
Typical needs vary by use: a small garden shed often requires a simple hose connection, while a workshop shed may need pressurized lines for a sink and washing machine.
For remote, off-grid sheds the preferred solutions include a shallow well with a pump or a rainwater collection and filtration system.
Each scenario calls for different piping, pressure, and permitting considerations that will guide the chosen approach.
Small garden shed with hose connection
When a homeowner needs a simple water source for a small garden shed—primarily for watering plants, filling a wheelbarrow, or cleaning tools—the most practical solution is a dedicated hose connection fed from the main supply or a nearby outdoor spigot.
Run a short buried sleeve or frost‑proof line, install a shutoff and vacuum breaker, and use quick‑connect hose fittings for convenience and seasonal drainage.
Workshop shed with sink and washer hookup
For workshops that require a sink and washer hookup rather than just a hose connection, the plumbing approach becomes more involved: supplies must meet indoor‑style flow and pressure needs, drain lines and a trap are required for wastewater, and electrical considerations for the washer may affect placement.
Plan supply sizing, install a P-trap and vented drain to code, include shutoffs, and locate a GFCI outlet and dedicated circuit.
Remote off-grid shed on well or rainwater system
Why choose a well or rainwater system for a remote off‑grid shed depends on site water availability, planned uses, and maintenance willingness.
A well offers reliable supply for frequent use but needs pump, power (solar or generator), filtration, and permitting.
Rainwater systems suit intermittent needs, requiring collection area, storage, filtration, and winterizing.
Choose based on demand, budget, water quality, and regulatory constraints.
Useful Resources and References
Although often overlooked, a curated set of resources streamlines planning and execution of running water to a shed by providing code guidance, material specifications, and practical how‑tos.
Essential references include:
- Local building codes and permit offices for compliance and inspections.
- Manufacturer installation manuals and pipe/fixture specifications.
- Reputable how‑to guides, plumbing forums, and professional association publications for techniques and troubleshooting.
Conclusion
To summarize, running water to a shed demands careful planning, appropriate materials, and adherence to code—whether choosing trenching for a pressurized line or settling for aboveground solutions. Investigating the theory that frost-free hydrants alone prevent freeze damage reveals it is incomplete: proper depth, insulation, slope, and valve placement also matter. By combining proven practices with local code guidance, both DIYers and professionals can achieve a reliable, safe water supply tailored to the shed’s use and climate.