How to Thaw a Frozen Sewer Line Safely: Step-by-Step DIY Methods and When to Call a Pro
If your sewer line has frozen, the first step is to stop all water usage and ventilate the affected areas. Avoid flushing toilets to prevent further issues. For small, accessible sections outdoors, you can safely thaw the line using warm (not boiling) water, heat tape, or electric immersion heaters. For longer runs or delicate plastic pipes, use caution with heat sources or consider mechanical thawing methods like an auger. Monitor for restored flow, leaks, or sewage odors. If the flow does not return quickly or if you notice any damage, it’s best to call a plumber. Continue reading for detailed step-by-step methods, necessary tools, estimated costs, and important safety checks.
What to do immediately if you suspect a frozen sewer line
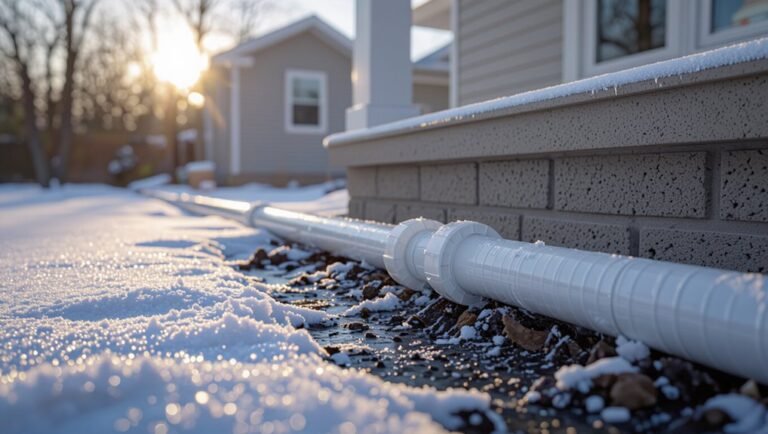
Signs such as gurgling drains, sewage odors, or slow backups indicate a possible frozen sewer line.
The immediate priority is to stop using water, ventilate affected areas, and prevent backups from reaching living spaces.
If sewage begins to back up, pipes bulge, or DIY measures fail quickly, professionals or emergency services should be contacted.
Signs that your sewer line is frozen
How can a homeowner tell if a sewer line has frozen? Look for slow drains, gurgling toilets, sewage odors, or backing up fixtures.
Outdoor cleanouts may be icy or emit cold air.
Unusual lawn wet spots near the sewer route suggest blockage.
Document symptoms before attempting how to thaw frozen sewer line methods and contact a plumber if multiple signs appear.
Immediate safety steps to protect your home and family
After recognizing symptoms of a frozen sewer line, the homeowner should act quickly to reduce health risks and property damage.
Stop using water fixtures, turn off outdoor hose bibs, and avoid flushing toilets if backups occur.
Ventilate affected areas, keep children and pets away from drains, and place buckets under leaks.
Document conditions for later repair and contact a licensed plumber for assessment.
When to stop DIY efforts and call emergency services
If a homeowner suspects a frozen sewer line and DIY warming steps do not restore normal flow within a short time, they should stop further home attempts and call emergency services or a licensed plumber immediately.
Turn off water at the main, avoid using fixtures, clear drains to reduce backups, and evacuate areas with sewage odors.
Provide access, document symptoms, and follow professional instructions.
Quick overview: Can you safely thaw a frozen sewer line yourself?
A frozen sewer line can sometimes be thawed safely by a homeowner, but doing so carries risks (pipe damage, leaks, sewage exposure) that must be weighed against cost and speed benefits.
Whether a DIY approach is viable depends on pipe location, material, ambient temperature, and how easily the affected section can be accessed.
If conditions are unfavorable or the pipe is buried deep or made of fragile material, professional intervention is usually the safer outcome.
Short answer: risks, benefits, and likely outcomes
How risky is thawing a frozen sewer line without a professional?
Risks include pipe damage, leaks, sewage backup, and electrical or fire hazards from improper heating.
Benefits: quicker resolution and lower immediate cost if done correctly.
Likely outcomes range from successful thaw with no damage to worsened breaks requiring urgent repairs; cautious assessment and readiness to stop and call a pro are advised.
Factors that determine DIY viability (pipe location, material, temperature, access)
Because thawing a frozen sewer line carries variable hazards and chances of success, the decision to attempt a DIY thaw hinges on a few key factors: where the pipe runs (indoors, under a slab, or outdoors), what material it’s made from (PVC, cast iron, clay), the extent of freezing and ambient temperature, and how accessible the affected section is for safe, controlled heating.
PVC tolerates gentle heat; cast iron is forgiving; buried or slab pipes and widespread ice require pros.
Tools and materials needed for safe thawing
The section lists essential hand tools and personal protective equipment required for a safe thawing operation.
It also covers approved heat sources for warming frozen sewer lines, specific items to avoid (open flames, high‑voltage heat guns, and chemical thawing agents), and typical cost ranges.
Finally, it notes where materials and rental equipment can be sourced.
Hand tools and protective equipment
Essential tools and protective gear are essential for thawing a frozen sewer line safely: a plumber’s snake or auger, a wet/dry vacuum, insulated pipe thawing rods or a warm-air blower, GFCI-protected extension cords, and chemical-safe de-icing products if mechanical or heat methods are unsuitable.
Required hand tools include adjustable wrenches, channel-lock pliers, pipe cutters, and flashlights.
Protective equipment: gloves, eye protection, waterproof boots, and respirators as needed.
Heat sources approved for thawing sewer lines
Select heat sources that deliver controlled, even warmth and are rated safe for use on buried or indoor sewer piping.
Approved options include:
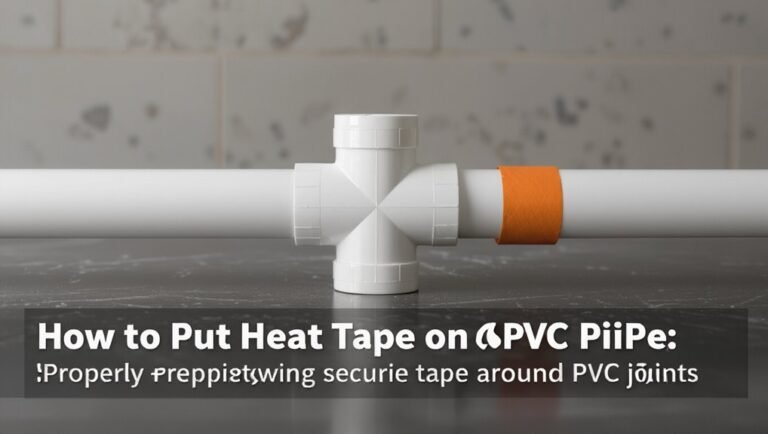
- Electric heat tape with thermostat control
- Low-wattage immersion-style cable heaters for accessible lines
- Steam thawing equipment operated per manufacturer guidelines
- Professional-grade electric thawing machines designed for sewer pipes
Each choice should allow temperature monitoring and ground-fault protection.
Items to avoid (open flame, high-voltage heat guns, chemicals)
Avoid open flames, high-voltage heat guns, and chemical de-icers when thawing sewer lines, because these methods can ignite sewer gas, damage pipe materials, or release harmful vapors.
Additionally, avoid torches, improvised heating elements, oven or grill heat, and corrosive salts.
Use controlled, low-temperature electric thawing tools and warm water techniques instead, and consult a professional for stubborn or inaccessible freezes.
Estimated cost and sourcing options
Several common tools and materials are required for safe sewer-line thawing, and total costs typically range from modest DIY expenses to higher professional fees depending on scope.
Sources include hardware stores, rental centers, and plumbers.
Typical items and price ranges:
- Heat tape / small heater: $20–$150
- Plumbing snake / auger: $30–$200
- Insulation / pipe wrap: $5–$50
- Professional service: $150–$600
Step-by-step DIY methods to thaw a frozen sewer line
The article outlines four practical DIY approaches for thawing a frozen sewer line: applying warm water and insulation to accessible outdoor sections, wrapping exposed pipe segments with electric heating tape or cable, using steam or hot water via a basement sewer cleanout, and employing a drain snake or auger for mechanical thawing.
Each method is presented with step-by-step guidance tailored to the access and pipe condition. Safety precautions and when to stop and call a professional are highlighted alongside procedural steps.
Method 1 Thawing accessible outdoor sewer sections with warm water and insulation
This section outlines a compact, step-by-step DIY approach for thawing accessible outdoor sewer sections using warm water and insulation, beginning with a clear preparation and safety checklist.
It then describes the procedural sequence—equipment setup, controlled application of warm water, and insulation placement—so a homeowner can follow each action reliably.
Finally, it explains how to monitor progress and verify a complete thaw to avoid refreezing or damage.
Preparation and safety checklist
Before attempting to thaw an accessible outdoor sewer section with warm water and insulation, a clear preparation and safety checklist should be followed to minimize risks and guarantee effectiveness.
Inspect area for hazards, shut off nearby water sources, wear insulated gloves and eye protection, locate utility lines, clear debris, have a bucket and towels ready, use a thermometer, and arrange a phone for emergencies.
Step-by-step procedure
Begin by confirming that all safety checks from the preparation list are complete and that the frozen section is accessible; only then proceed with the thawing steps.
Wear gloves and eye protection.
Pour warm (not boiling) water onto exposed pipe joints, moving slowly along the frozen section.
Wrap thawed areas with insulating blankets to retain heat.
Repeat until flow resumes, avoiding concentrated heat on fittings.
How to monitor progress and confirm thaw
After thawed sections are wrapped and warm water has been applied along the frozen run, progress is checked by observing water flow and temperature changes at accessible downstream points.
Inspectors note restored drain flow, steady warm-water output, and absence of gurgling or backups.
Use an infrared thermometer or touch (with protection) to confirm rising pipe temperature.
Stop when continuous flow and normal odors return.
Method 2 Using electric heating tapes or cable on exposed pipe segments
The section outlines how to choose appropriate self-regulating or constant-wattage heating tape rated for sewer pipe materials and outdoor use.
It then summarizes step-by-step installation, recommended temperature control methods, and realistic thaw time estimates.
Safety precautions, including GFCI protection, proper grounding, and avoiding wrapped joints or damaged insulation, are emphasized.
Selection of appropriate heating tape
Selecting the correct heating tape requires matching tape type, wattage, and controller to the pipe material and environmental conditions to guarantee efficient, safe thawing.
Choose self-regulating tape for mixed temperatures, constant-wattage for uniform heat on metal, and appropriate insulation rating for outdoor exposure.
Verify voltage compatibility, maximum run length, and manufacturer certifications; prioritize tapes with built-in thermostat compatibility and clear installation guidelines.
Installation steps and temperature control
When using electric heating tape or cable on exposed sewer pipes, the installer should begin by shutting off power to nearby circuits and confirming the pipe material, diameter, and any existing insulation so the chosen tape layout and attachment method match manufacturer guidelines.
Measure and clean the pipe, apply tape per pattern (spiral or straight) with recommended spacing, secure with approved tape/clips, insulate over the heater, and connect per wiring instructions.
Safety precautions and time estimates
After completing installation and wiring of electric heating tape, attention shifts to safety precautions and realistic time estimates for thawing exposed sewer segments.
Inspect connections, ground faults, and insulation; avoid overlapping tape and combustible materials. Monitor temperature with a thermostat or infrared thermometer.
Typical thawing takes one to six hours per frozen section depending on length, pipe material, and ambient temperature; extend cautiously if progress is slow.
Method 3 Thawing through-house drain access (basement/sewer cleanout) using steam or hot water
This method is suitable when the freeze is in a reachable run of the house drain and access to the basement or cleanout is available.
The discussion will cover safe ways to introduce steam or controlled hot water into the line, including routing through the cleanout and using hoses or steamers that avoid pressure surges.
Guidance will also address backflow prevention and simple sanitation steps to protect the home and occupants.
When this method is appropriate
In situations where the blockage is located inside the home’s drain system and a basement or cleanout access provides direct entry to the frozen section, thawing through the house drain with steam or hot water is appropriate.
It is best suited for short runs of frozen pipe, accessible cleanouts, and when the frozen zone is believed to be between the trap and the main sewer line rather than in the municipal lateral.
Appropriate when homeowners can access the cleanout, the freeze is localized, visible signs indicate interior freezing (no street backups), and no structural or sewer-slope issues exist.
How to route heat/hot water safely into the line
With access confirmed at the basement cleanout and the frozen section localized inside the home drain, the next step is directing heat or hot water into the line without causing damage.
Use a controlled flow of hot (not boiling) water via a flexible hose into the cleanout while monitoring joints.
Alternate with warm air or steam cautiously, avoiding pressure buildup and insulating exposed pipe to retain heat.
Preventing backflow and sanitation measures
Begin by isolating the sewer line and preparing containment to prevent contaminated water from backing up into the home; shut off fixtures that connect to the affected branch.
Place a rubber plug or inflatable test ball at an accessible upstream cleanout if available, and position sanitary buckets or a dedicated drain pan beneath any joints or fittings that may weep.
Wear PPE, vent odors, use GFCl-protected heaters, disinfect tools, and dispose of waste per local regulations.
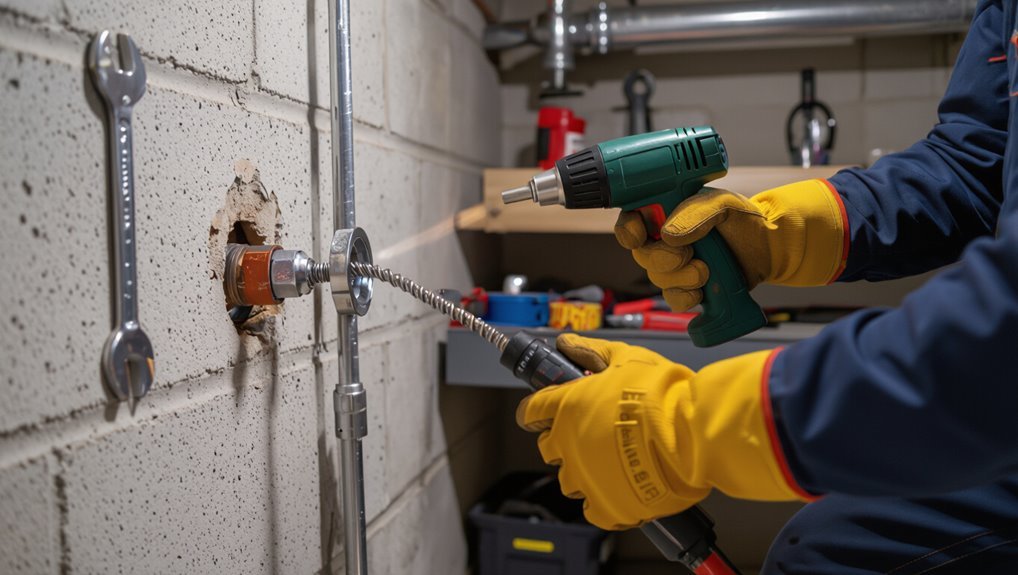
Method 4 Mechanical thawing with a drain snake or auger
Mechanical thawing with a drain snake or auger is recommended when the freeze is localized and accessible, or when heat methods are impractical or risky for surrounding materials.
The technique requires feeding the cable gently, using slow rotation and short forward pushes to break ice without nicking or stressing the pipe wall.
Successful clearance is indicated by restored flow, reduced resistance on the cable, and visible discharge of melted water.
When to use an auger vs. heat
Decide between an auger and heat based on the freeze location, pipe material, and surrounding conditions.
Use an auger when the ice plug is localized near the trap or accessible bend and pipes are metal or thick PVC rated for mechanical clearing.
Choose heat for long runs, buried sections, or fragile plastics.
Prioritize methods that minimize stress and avoid worsening blockages.
Proper technique to avoid pipe damage
After weighing whether a snake or heat is more appropriate, the homeowner must follow careful technique when using a drain snake or auger to avoid cracking, kinking, or dislodging joints.
Insert cable gently, advancing slowly while rotating minimally. Use a properly sized head and avoid forcing past resistance.
Retract gradually, keep bends supported, and inspect connections for movement or damage before finishing.
Signs you’ve cleared the blockage
Confirm success by checking clear, consistent flow, reduced gurgling, and steady drainage from fixtures served by the thawed segment.
Additional signs include unobstructed toilet flushes, faster sink drainage, and restored sewer odor control.
Absence of backups, normal water level in traps, and no unusual sounds during use indicate the blockage is cleared.
If issues persist, professional inspection is advised.
How to confirm the sewer line is fully thawed and functional
After thawing, the homeowner should run targeted tests—check water flow from faucets, flush toilets, and observe sinks and floor drains for proper drainage.
They should visually inspect accessible pipe sections and joints for cracks, leaks, or bulging that indicate freeze damage.
If any abnormal flow or visible damage appears, a professional camera inspection should be scheduled to confirm interior pipe condition.
Tests to run (water flow, toilet/drain checks)
Begin by running a series of simple, sequential tests to verify that the thawed section is clear and operating normally: flush each toilet individually, observe bowl refill and drainage speed, run sinks and showers together, check for gurgling or slow drains, and run a large-volume water test (bathtub or hose) to confirm continuous flow.
Note any backups and retest after adjustments.
How to inspect for pipe damage after thawing
Inspect the thawed section for damage by systematically examining visible fittings, listening for leaks, and verifying unobstructed flow with targeted tests.
Check joints, cleanouts, and nearby soil for wetness or displacement.
Run multiple fixtures sequentially to confirm consistent drainage and absence of gurgling or backups.
Note any persistent slow flow, odors, or sounds indicating cracks or partial collapse and document findings for repair.
When to perform a camera inspection
Once visible checks and flow tests suggest the thawed section is intact, a camera inspection should be scheduled to confirm internal condition and full functionality.
A professional camera run identifies residual ice, collapse, cracks, root intrusion, and misalignment.
Schedule inspection after initial flow restoration and again if blockages recur.
Retain video for warranty, repair planning, and to verify that thawing fully restored normal sewer performance.
Common problems and how to handle them
During thawing, technicians may encounter pipe cracks, splits, or leaks that require immediate isolation and repair to prevent further damage.
Persistent blockages that do not clear after thawing often indicate collapsed sections or buildup needing mechanical clearing or professional assessment.
If thawing triggers sewage backup or contamination, responders should stop water use, cordon the area, and follow proper cleanup and disinfection protocols or call a specialist.
Pipe cracks, splits, and leaks discovered during thawing
Cracks, splits, and leaks that appear while thawing a frozen sewer line require immediate assessment to prevent water damage and sewage backup.
The area should be isolated, water shut off, and temporary containment deployed.
Small hairline cracks may be patched temporarily with rubber and hose clamps; larger ruptures or corrosion necessitate professional repair or pipe replacement.
Document damage for repair planning and insurance.
Persistent blockages after thawing
After addressing visible damage from thawing, attention must turn to blockages that can persist or form as ice melts and dislodged debris moves through the pipe.
Inspect with a drain camera, clear loose debris with a plumber’s snake or high-pressure water jet, and flush lines thoroughly.
If stubborn obstructions remain, schedule professional clearing to prevent recurrence or pipe damage.
Sewage backup and contamination response steps
Respond immediately to any sewage backup to limit health risks and property damage: isolate the affected area, shut off water sources feeding the compromised fixtures, and keep people and pets away until assessments are complete.
Wear protective gear, ventilate, document damage, and call a plumber and certified cleanup crew.
Disinfect surfaces, dispose of contaminated materials, and notify insurers.
Do not use HVAC to circulate air.
When to call a professional plumber
Certain signs—burst pipes, sewage backups, or repeated thaw failures—indicate an immediate need for a professional.
A licensed plumber can perform safe thawing with specialized equipment, assess damage, and prevent code violations in ways a homeowner cannot.
Guidance on selecting a qualified pro and key questions to ask will help guarantee effective, timely repairs.
Clear indicators you need a pro immediately
When should a homeowner stop DIY efforts and call a professional plumber?
Immediate professional help is required for sewage backups, persistent foul odors, visible pipe cracks or bursts, failure of multiple fixtures, or suspected gas leaks.
Also call a pro if thawing attempts fail after reasonable measures, electrical hazards exist, or structural damage appears.
Prioritize safety and avoid further water or contamination risks.
What professionals will do that you can’t
If a homeowner reaches the limits of safe DIY or observes signs that point to structural, electrical, or contamination hazards, a licensed plumber brings tools, training, and legal protections that cannot be matched with consumer methods.
Professionals diagnose with cameras, perform controlled pipe thawing, repair or replace damaged sections, secure electrical risks, sanitize contamination, and document work for permits and insurance, minimizing further damage and liability.
Choosing the right professional and questions to ask
How should a homeowner select a plumber for a frozen sewer line? A homeowner should verify licenses, insurance, and specialized freeze-thaw experience.
Ask about methods, warranty, and emergency response time. Request references and written estimates.
- License and insurance
- Freeze-thaw experience
- Warranty and written estimate
- Emergency availability and response time
Preventive measures to avoid future frozen sewer lines
Preventing future freezes begins with targeted pipe protection such as insulation and electric heat-tracing, combined with yard and landscaping adjustments to reduce cold exposure around buried lines.
A seasonal maintenance checklist—clearing vents, checking insulation integrity, and monitoring low spots—helps catch vulnerabilities before winter.
For persistent problems, consider long-term upgrades like replacing susceptible pipe materials, rerouting shallower runs, or improving slope to promote flow.
Insulation and heat-tracing options for pipes
Several practical methods—pipe insulation, foam sleeves, and electric heat-tracing—reduce the risk of sewer lines freezing by maintaining pipe temperature and minimizing heat loss.
Closed-cell foam, fiberglass wrap, and polyethylene jackets provide durable thermal barriers.
Self-regulating heat tape delivers controlled warmth along vulnerable runs.
Proper sealing at joints and enclosing exposed sections in insulated conduit maximizes effectiveness while conserving energy and reducing freeze events.
Yard and landscaping tips to reduce exposure
A handful of targeted yard and landscaping adjustments can greatly lower the likelihood of sewer lines freezing by reducing surface exposure and improving thermal protection.
Strategies include avoiding deep excavation near lines, directing drainage away from pipe corridors, planting shallow-rooted groundcover for insulation, maintaining soil compaction to reduce air pockets, and relocating decorative rock or mulch that exposes pipes.
Coordinate changes with utility maps.
Seasonal maintenance checklist
Seasonal maintenance checklists list key tasks and timing to minimize the risk of sewer line freezing before cold weather arrives.
Regularly inspect exposed pipes and insulation. Flush and run water periodically during cold snaps. Keep drains clear of debris and roots. Schedule professional camera inspections annually.
- Inspect and insulate exposed pipes
- Run water during freezes
- Clear debris and roots
- Annual professional inspection
Long-term upgrades to consider (pipe material, rerouting, slope improvements)
After completing routine seasonal checks and immediate fixes, homeowners should evaluate long-term upgrades that reduce the likelihood of future sewer line freezes.
Options include replacing older metal or clay pipes with insulated PVC or HDPE, rerouting shallow sections deeper below frost line, and correcting pipe slope to prevent standing water.
Professional assessment determines feasibility, code compliance, and cost-effective prioritization.
Estimated costs and timeframes for DIY vs professional thawing
A concise comparison of costs and timeframes helps homeowners choose between DIY thawing and hiring a professional.
DIY expenses typically include rental or purchase of heating tools, pipe insulation, and safety gear, while professional services quote labor, equipment, and possible service guarantees.
Time estimates vary accordingly: DIY jobs may take several hours with risk of delays, whereas licensed technicians often complete thawing faster and may offer warranties on work.
Cost breakdown for DIY materials and tools
Many homeowners considering a DIY thaw will find that basic materials and tool rentals typically cost considerably less up front than hiring a professional, though total expense varies with pipe location, severity of the freeze, and local labor rates. Typical costs: heat tape $20–50, space heater $40–100, plumbing snake $15–40, safety gear $10–30, rental tools $30–80.
| Item | Emotional weight |
|---|---|
| Heat tape | Relief |
| Space heater | Urgency |
| Plumbing snake | Determination |
| Safety gear | Caution |
| Rentals | Hope |
Typical professional service costs and warranty considerations
Several factors determine what homeowners can expect to pay for professional sewer-line thawing, typically ranging from $150 to $600 depending on accessibility, method required (heat tracing vs. electric cable vs. hydro-jet-assisted thawing), and whether emergency or after-hours service is needed.
Professionals often charge higher for complex diagnostics; warranties commonly cover workmanship for 30–90 days, while pipe repairs may carry longer manufacturer or contractor guarantees.
Safety checklist summary before, during, and after thawing
A concise safety checklist covers key actions to take before, during, and after thawing a frozen sewer line.
It should note required personal protective measures, steps to prevent electrical and fire hazards, and procedures for sanitation and cleanup.
Following a clear, ordered list reduces risk and speeds recovery.
Personal protective measures
Before thawing a frozen sewer line, the operator should complete a concise safety checklist that covers personal protective equipment, hazard recognition, and emergency procedures.
The operator must wear chemical-resistant gloves, eye protection, a respirator if fumes are present, waterproof boots, and protective clothing.
Maintain clear escape routes, have a first-aid kit and spill containment ready, and decontaminate gear and hands after work.
Electrical and fire safety reminders
Confirm electrical sources are isolated and ignition risks controlled before proceeding to thaw a frozen sewer line.
Verify power to affected fixtures and nearby outlets is off and locked where possible.
Use only approved, grounded equipment and avoid open flames or combustible materials.
Monitor heat source temperatures, keep a suitable fire extinguisher nearby, and reassess electrical isolation after work completion.
Sanitation and cleanup steps
Implement a concise sanitation and cleanup checklist to minimize health risks and restore the worksite after thawing a frozen sewer line.
Wear PPE, contain spills with absorbent materials, and disinfect surfaces with appropriate cleaners. Dispose of contaminated materials per local regulations.
Ventilate the area, launder clothing separately, and document damage.
Schedule professional inspection if sewage exposure, persistent odors, or suspected contamination remain.
Real-world scenarios and recommended actions
The article presents three common situations to guide practical responses: a frozen outdoor sewer in mild cold, a basement cleanout obstruction, and recurring freezes despite precautions.
For each scenario, prompt assessment of access, risks, and appropriate thawing methods is recommended.
When risks or repeated failures appear, escalation to professional plumbing services and system hardening measures should be considered.
Scenario A: Frozen outdoor sewer in mild cold
When an outdoor sewer line freezes during mild cold, homeowners will usually notice slow drains, gurgling toilets, or localized surface frost near the pipe run; addressing it quickly and safely can prevent backups and pipe damage.
Recommended actions: locate the frozen section, remove surface snow, apply gentle external heat (warm water, heat tape, or a space heater at safe distance), monitor thaw progress, and call a plumber if unsure.
Scenario B: Frozen sewer in basement cleanout
Moving indoors, a frozen sewer at the basement cleanout presents different risks: standing wastewater can back up quickly, freezing often indicates colder temperatures or poor insulation, and access is confined.
Recommend isolating the area, wearing PPE, and opening nearby fixtures to relieve pressure.
Use gentle heat (space heater, heat gun cautiously) and thermal wraps.
If thawing risks pipe damage or odors persist, call a plumber.
Scenario C: Repeated freezing despite precautions
Although precautions like insulation, heat tape, and regular maintenance reduce risk, some sewer lines continue to freeze repeatedly due to underlying issues such as inadequate slope, persistent drafts, outdated materials, or chronic low flow.
In such cases, a professional inspection is advised to assess rerouting, replacing deteriorated pipe, improving insulation and ventilation, or installing a permanent heating solution to prevent recurrence and protect structural integrity.
Further resources and recommended reading
The article directs readers to manufacturer guidelines for heating tapes and thawing tools to guarantee correct use and safety ratings.
It also points to relevant plumbing codes and local utility advisories for regulatory requirements and outage or line‑repair alerts.
These resources provide authoritative, actionable information for safe thawing practices.
Manufacturer guidelines for heating tapes and thawing tools
When consulting manufacturer guidelines for heating tapes and thawing tools, users should prioritize the specific safety instructions, temperature ratings, and compatible pipe materials provided by each maker, since these details determine safe application, required clearances, and maximum operating durations.
- Verify model-rated pipe types and temperature limits.
- Follow listed installation clearances and fastening methods.
- Observe maximum continuous run times and duty cycles.
- Adhere to warranty and inspection recommendations.
Links to plumbing codes and local utility advisories
After following manufacturer guidance for heating tapes and thawing tools, users should consult applicable plumbing codes and local utility advisories to guarantee legal compliance and account for area-specific hazards or permit requirements.
Relevant resources include:
- Municipal plumbing codes
- State building departments
- Utility advisories
- Professional associations
Conclusion
When a sewer line freezes, prompt, cautious action can prevent costly damage; a homeowner used warm water, heat tape, and careful monitoring to successfully thaw a backyard lateral overnight, avoiding excavation. If DIY steps fail, if odors, backups, or cracks appear, or if the obstruction is inaccessible, call a licensed plumber. Preventive insulation and periodic checks reduce risk, while professionals provide diagnostic tools and safe, guaranteed thawing when needed.