How to Clean Roof Drain Pipes: Step-by-Step Guide for Homeowners
To effectively clean roof drain pipes, homeowners should regularly inspect and clear visible debris. Use a ladder, gloves, and a plumber’s snake or low-pressure washer to dislodge clogs, ensuring water flows freely. Remove and clean strainers, check seals and scuppers for damage, and replace any corroded components as necessary. Schedule seasonal cleanings and consider installing guards to prevent future blockages. If you experience persistent leaks, pooling, or have drains that are hard to access, it’s advisable to consult a professional. For detailed steps, tools, and troubleshooting tips, continue reading.
Why Regular Cleaning of Roof Drain Pipes Matters
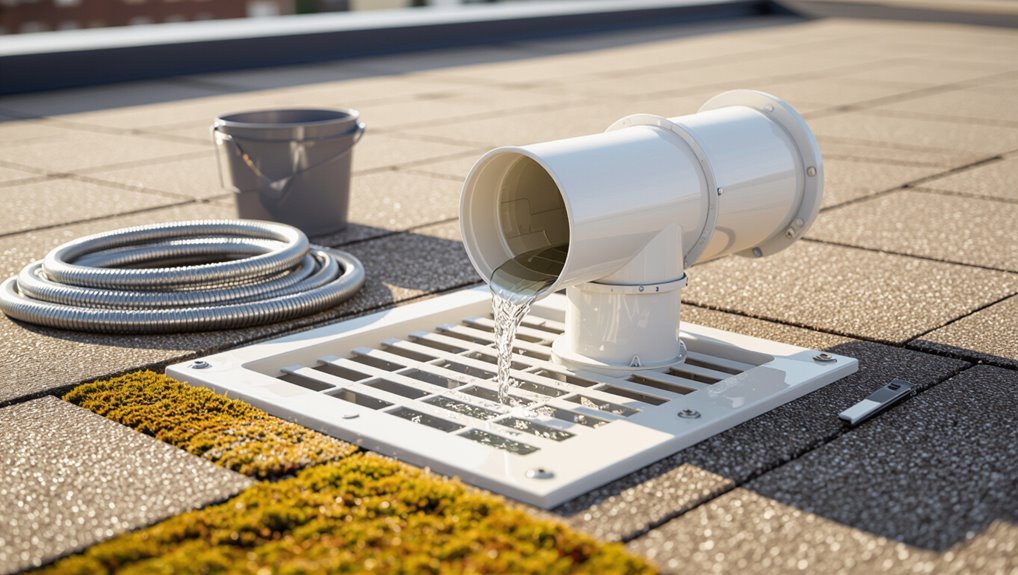
Neglected roof drain pipes commonly lead to clogs, standing water, and accelerated roof and gutter deterioration.
Visible signs that cleaning is needed include slow drainage, overflow during storms, or water stains on ceilings and fascia.
Regular cleaning prevents structural damage and mold growth by ensuring proper water flow away from the roof and building envelope.
Common consequences of neglected roof drains
Several common problems can arise when roof drains go unmaintained, ranging from slow drainage and localized water pooling to structural damage and increased risk of leaks.
Clogged drains accelerate deterioration of roofing materials, promote mold, attract pests, and overload gutters.
Long-term neglect raises repair costs and safety hazards.
Homeowners seeking how to clean roof drain pipes can prevent these predictable, costly outcomes.
Signs your roof drain pipes need cleaning
After outlining the predictable problems that follow from unattended roof drains—slow drainage, pooling, material decay, and higher repair costs—attention turns to the observable signs that indicate cleaning is needed.
Visible debris in gutters, water backing up during rain, stains or mold near downspouts, unusual odors, sagging gutters, and repeated blockages after mild storms all signal clogged roof drain pipes requiring prompt cleaning.
How cleaning protects your roof and home structure
Regular cleaning of roof drain pipes greatly reduces the risk of water-related damage by ensuring rainwater is channeled away from roofing materials, fascia, and foundations.
Routine maintenance prevents clogs that cause pooling, rot, mold, and structural deterioration.
Clear drains extend roof lifespan, protect siding and basement from leaks, and reduce costly repairs.
Consistent inspection and cleaning preserve overall building integrity and value.
Tools, Materials, and Safety Gear Needed
The section lists the essential tools—such as gutter scoops, plumbing snakes, and extension wands—needed to access and clear roof drain pipes.
It also specifies recommended cleaning materials and safe detergents for removing organic buildup and debris.
Finally, it outlines required personal protective equipment and ladder-safety practices to prevent falls and exposure to contaminants.
Essential tools list
Before beginning work on roof drain pipes, gather a compact set of tools, materials, and safety gear to guarantee the job proceeds efficiently and safely.
Essential items include sturdy ladder, plumber’s snake or auger, hand tools (screwdrivers, pliers, adjustable wrench), and personal protective equipment.
Follow local safety practices and inspect equipment before use.
- Ladder
- Plumber’s snake
- Hand tools
- PPE
Recommended cleaning materials and cleaners
Several specific cleaning materials and disinfectants are recommended to effectively clear and maintain roof drain pipes without damaging plumbing or roofing components.
Recommended items focus on biodegradable cleaners, gentle descalers, enzyme treatments, and non-corrosive degreasers.
Use soft-bristle brushes and flexible drain snakes to dislodge debris. Avoid harsh acids or bleach that can corrode fittings.
- Biodegradable enzyme cleaner
- Mild descaler
- Soft-bristle brush
- Flexible drain snake
Personal protective equipment and ladder safety
Wear appropriate personal protective equipment and follow ladder safety protocols to reduce the risk of falls, cuts, and exposure to contaminants when cleaning roof drain pipes.
Gloves, eye protection, a dust mask or respirator, and non-slip footwear are recommended.
Use a sturdy extension ladder with stabilizers, maintain three points of contact, position on level ground, and avoid working alone or in adverse weather.
Preparing for the Job
Before beginning work, the roof and entire drain system should be inspected for damage, blockages, and safe access points.
A concise checklist to secure the work area—including fall protection, ladder placement, and a check of weather forecasts—helps prevent accidents and wasted effort.
If damage is extensive, access is unsafe, or the system requires complex repairs, a qualified professional should be engaged rather than attempting DIY.
Inspecting the roof and drain system before work
A thorough inspection of the roof and drain system establishes safety and identifies problem areas prior to any cleaning work.
The inspector examines shingles, flashing, gutters, downspouts, and pipe entry points for damage, blockages, corrosion, or loose fittings.
Note sagging lines, ponding water, biological growth, and previous repairs.
Document findings, photograph defects, and determine required tools, replacement parts, and professional referrals.
Checklist to secure the work area and weather considerations
1. The homeowner secures ladders, barricades the work zone, and posts warning signs.
Tools and spare parts are staged on stable surfaces away from edges.
Weather is checked: avoid work during rain, high winds, or lightning; postpone if forecasts predict storms or freezing temperatures.
Have non-slip footwear, gloves, and a spotter available.
Confirm clear access for emergency services.
When to call a professional instead of DIY
With ladders secured and weather deemed safe, the homeowner should assess whether the drain problem falls within DIY skill and safety limits or requires a professional.
Call a professional if gutters or downspouts are extensively corroded, drainage involves complex roofing penetrations, persistent backups recur after cleaning, mold or structural damage is present, or working height, electrical hazards, or confined conditions exceed personal capability.
Step-by-Step Guide to Cleaning Exterior Roof Drain Pipes
The procedure begins with safely accessing gutters and downspouts using appropriate ladders and fall protection.
Surface debris is removed from gutters before clogs in downspouts are cleared with handheld tools.
Finally, drain pipes are flushed with water and, if needed, a plumber’s snake or pressure washer is used for stubborn blockages.
Step 1 Accessing gutters and downspouts safely
Begin by evaluating access points and potential hazards before any climbing or ladder placement.
Inspect rooflines, eaves, and downspout locations from ground level.
Choose a stable ladder, verify proper footing, and use ladder safety accessories.
Wear gloves, non-slip footwear, and eye protection.
Identify overhead wires, brittle shingles, and weak gutter hangers.
Plan an exit route and a partner to stabilize the ladder.
Step 2 Removing surface debris from gutters
Start by removing large, loose material—leaves, twigs, and accumulated mulch—using a gloved hand or small scoop while standing securely on the ladder.
Work along the gutter length, placing debris in a bucket or tarp.
Brush remaining grit toward the downspout outlet.
Rinse gently with a hose to flush fine sediment, watching for missed pockets and ensuring water flows freely toward the outlet.
Step 3 Clearing clogs from downspouts with tools
With gutters cleared of surface debris and water confirmed to flow toward the outlet, attention shifts to the downspouts where stubborn clogs most often form.
A ladder-secured worker inserts a plumber’s snake or flexible rod from the gutter into the downspout, rotating to break blockages.
Dislodged debris is pulled up or tapped down into a catchment; repeated probing guarantees the passage opens.
Step 4 Flushing the drain pipes with water
Flush the downspout and connected roof drain lines with a steady stream of water to confirm flow and clear remaining debris.
Begin at the gutter, directing water into each downspout while observing outlet flow. Continue until water runs freely and no sediment emerges.
Check joints and low spots for pooling.
Repeat after removing visible blockages, then inspect for leaks or damage before finishing.
Step 5 Using a plumber’s snake or pressure washer for stubborn blockages
When a steady flow of water fails to clear an obstruction, a plumber’s snake or a pressure washer can dislodge compacted debris and roots that resist basic flushing.
Insert the snake carefully, rotate to break clogs, and retract slowly.
For pressure washers, use a low-angle nozzle and controlled pressure to avoid pipe damage.
Proceed until debris clears and water moves freely.
Step 6 Reassembling and testing flow
Begin by replacing any removed sections—strainers, elbows, or access caps—ensuring gaskets and seals are properly seated and fasteners are snug but not overtightened.
Then run water through drains from roof level, observing flow and checking for leaks at joints.
Confirm downspouts clear and water exits freely.
If flow slows or leaks appear, reopen access, clear obstruction, reseat seals, and retest.
Cleaning Internal Roof Drain Pipes and Scuppers (Flat Roofs)
For flat roofs, the first task is to identify internal drains, scuppers, and leaders so each component can be accessed safely.
Technicians begin by opening drain covers and strainers, then remove sediments and debris by hand or with a shop vacuum.
After flushing internal piping and verifying trap seals, they inspect and repair or replace any damaged drain components.
Identifying internal drains, scuppers, and leaders
A clear understanding of the roof’s drainage components is essential before any cleaning work begins.
Identify internal drains (centrally located, recessed with grates), scuppers (side openings in parapets directing water off the roof), and leaders/downspouts (vertical pipes conveying water to ground).
Note locations, sizes, and access points, and document any visible damage or obstructions for targeted cleaning and repair planning.
Step 1 Opening drain covers and strainers
Lift the drain cover and strainers carefully to expose the inlet and surrounding flange. Inspect for corrosion, cracks, gasket condition, and proper seating.
Note orientation and any fasteners before loosening. Collect fallen debris with a small brush and pan to prevent further entry.
Photograph or mark parts for correct reassembly. Keep covers nearby on a clean surface to avoid contamination.
Step 2 Removing sediments and debris by hand or vacuum
With covers and strainers set aside, attention moves to clearing accumulated sediment and debris from the drain throat and immediate inlet area.
Workers remove leaves, gravel and organic matter by hand using gloves and scoops, then deploy a wet/dry vacuum to extract finer grit and water.
Collected waste is contained for proper disposal, ensuring the inlet remains unobstructed and accessible.
Step 3 Flushing internal piping and checking trap seals
Start a pressurized flush of the internal drain lines and scuppers to dislodge remaining sediment and confirm free flow toward the roof outlet.
Inspect trap seals for proper water retention and signs of leaks or siphonage.
Observe flow at roof outlet and downstream access points.
Repeat flushing until clear, then document any persistent slow spots for targeted repair or further investigation.
Step 4 Repairing or replacing damaged drain components
When damaged components are identified during inspection or flushing, address them promptly to restore reliable drainage and prevent roof water intrusion.
Evaluate cracks, corrosion, warped strainers, and seal failures. Minor issues may require sealant, gasket replacement, or tightening.
Severely corroded drains, broken clamping rings, or blocked scuppers warrant component replacement.
Follow manufacturer specifications and guarantee watertight connections before retesting drainage.
Environmentally Friendly Cleaning Options
The author recommends choosing biodegradable cleaners and non-toxic degreasers to break down residues without harming surrounding vegetation or aquatic life.
They note simple application techniques—controlled scrubbing, low-pressure rinsing, and use of absorbent pads—to limit runoff.
Guidance also covers containment and disposal practices to prevent contaminants from entering storm drains or nearby waterways.
Biodegradable cleaners and safe degreasers
Although heavy-duty chemical solvents may remove stubborn grime quickly, biodegradable cleaners and safe degreasers offer an effective, lower-risk alternative for roof drain pipes by breaking down organic buildup without harming landscapes, stormwater, or downstream habitats.
They contain enzymes or plant-based surfactants, are compatible with common pipe materials, and reduce odor while minimizing residual toxicity.
- Enzyme-based cleaners
- Citrus or soy degreasers
- pH-neutral detergents
- EPA Safer Choice products
Methods to prevent runoff contamination
Following use of biodegradable cleaners and safe degreasers, measures that limit contaminated runoff further protect surrounding soils and waterways.
Install leaf guards and debris screens, direct downspouts to vegetated swales or rain gardens, and use temporary sediment barriers during maintenance.
Collect and dispose of wash water responsibly, avoiding storm drains.
Regular inspections guarantee systems function, minimizing pollutant transport and preserving local water quality.
Troubleshooting Common Problems
Common persistent clogs are first diagnosed by isolating the blockage location and then addressed with progressively advanced solutions from manual augers to hydro-jetting.
Corroded or physically damaged pipes require assessment to determine whether targeted repairs will restore function or full replacement is more cost-effective.
Seasonal freezing and ice-damming call for preventive measures and specific remedies to thaw and protect drains without causing further damage.
Persistent clogs diagnostics and advanced solutions
Diagnosing persistent clogs begins with a systematic inspection of the roof drain system to identify blockage location, cause, and recurring patterns.
Technicians should check roof strainers, downspout entry points, interior drain lines, and any junctions for debris, sediment buildup, biological growth, or structural damage.
Use camera inspection, targeted hydro-jetting, enzymatic cleaners, and mechanical augers; implement sediment traps and routine maintenance schedules to prevent recurrence.
Corroded or damaged pipes repair vs. replacement
After confirming that blockages are not the sole issue, attention must turn to the condition of the pipes themselves: corrosion, cracks, or collapse change repair prospects and long-term performance. Assessment guides choice: patching suits minor localized damage; liner or section replacement fits extensive perforation; full replacement is best for widespread corrosion or compromised structural integrity.
| Option | When to choose |
|---|---|
| Repair | Localized damage |
| Replace | Extensive corrosion or collapse |
Frozen or ice-dammed drains seasonal remedies
Treat frozen or ice-dammed roof drains promptly, as accumulated ice can block flow, back up water onto the roof, and stress drain components.
Remove snow surrounding drains with a roof rake, apply calcium chloride pellets carefully to melt ice without damaging materials, and clear meltwater channels.
Improve insulation, ventilation, and gutter heating cables seasonally to prevent recurrence and inspect drains after thawing.
Maintenance Schedule and Preventive Measures
Recommended cleaning frequency should reflect roof type and local climate, with more frequent checks for shingled or tree-lined roofs in wet or windy regions.
Seasonal maintenance tasks include clearing debris, inspecting flashings and seals, and testing flow at downspouts and drains.
Installing guards, strainers, or leaf filters can greatly reduce clogs and simplify routine inspections.
Recommended cleaning frequency by roof type and climate
Roof type and local climate together determine how often roof drain pipes should be cleaned: metal, tile, and slate roofs typically shed debris more readily and may need semiannual inspections in temperate zones, while asphalt shingle roofs collect granules and organic matter and often require cleaning every 3–6 months in rainy or leafy areas.
In arid climates with little vegetation, annual checks are usually sufficient for most materials, whereas coastal or storm-prone regions demand more frequent maintenance after major weather events.
- Semiannual for shedding roofs in temperate areas
- Every 3–6 months for asphalt in wet/leafy zones
- Annual in dry, low-vegetation climates
- After storms or heavy coastal winds
Seasonal maintenance tasks and inspection points
Knowing how often drains should be serviced sets the timeline for specific seasonal tasks and inspection points that prevent clogs and water damage.
Spring clearing of debris, summer checks after storms, autumn leaf removal, and winter freeze inspections are recommended.
Inspect seams, flashings, downspout outlets, and roof drains for corrosion, pooling, loose fasteners, and misalignment; document findings and schedule repairs promptly.
Installing guards, strainers, and leaf filters to reduce clogs
Install guards, strainers, and leaf filters to intercept debris before it enters drain pipes and reduce the frequency of manual clearing.
Homeowners should choose durable, corrosion-resistant models sized to fittings, maintain periodic clearing of captured material, and secure attachments to prevent displacement.
Proper selection and installation reduce clogs, extend system life, and minimize emergency interventions, while inspections confirm continued effectiveness and fit.
Cost Estimates and When to Hire a Professional
Typical do-it-yourself cleaning often requires only basic tools and minimal expense, while hiring a professional can range from a modest service fee to higher costs for complex repairs.
Homeowners are advised to compare expected DIY outlays against professional quotes when access, safety, or specialized equipment are factors.
Immediate professional inspection is recommended if there is persistent backup, damaged piping, roof leaks, or signs of structural water intrusion.
Typical DIY costs vs. professional service pricing
Many homeowners can clear minor roof drain clogs for roughly $20–$100 in basic tools and supplies, while hiring a professional typically ranges from $150 to $500 depending on accessibility, system complexity, and regional labor rates. Decisions balance cost, skill, and safety. Simple tasks favor DIY; complex or risky access warrants paid expertise.
| Service type | Typical cost |
|---|---|
| DIY supplies | $20–$100 |
| Pro service | $150–$500 |
Red flags that require professional inspection or repair
Several warning signs indicate that roof drain problems exceed routine DIY fixes and warrant a professional inspection.
Persistent leaks, water pooling on the roof, recurring clogs despite cleaning, visible corrosion or collapsed piping, sagging gutters, stains inside ceilings or walls, and mold growth suggest systemic issues.
Structural damage, complex flashing failures, or inaccessible rooftop drains also require licensed contractor assessment and repair.
Quick Safety Reminders and Final Checklist
Before leaving the roof, a concise ladder and fall-prevention checklist should be reviewed to confirm secure footing, proper angle, and use of safety gear.
The drainage system requires a final operational test to verify clear flow and the absence of leaks.
All actions, observations, and any parts replaced should be documented for future reference and maintenance scheduling.
Ladder and fall-prevention checklist
A concise ladder and fall-prevention checklist consolidates essential safety steps to minimize risk during roof drain cleaning, including ladder selection, proper setup, secure footing, correct climbing technique, use of personal protective equipment, and having an assistant or spotter present.
Procedures are brief, checklist-oriented, and focused on preventing falls.
- Inspect ladder condition and weight rating.
- Set angle and secure base.
- Wear non-slip footwear and harness if needed.
- Maintain three points of contact and use a spotter.
Final system test and documentation of work performed
Conclude with a brief but thorough system test and clear documentation of all work performed to confirm drain functionality and record safety checks.
The inspector verifies flow, seals, and fastenings, notes any abnormalities, timestamps actions, and stores photos.
Final safety checklist is completed and retained for reference.
- Run water flow test
- Inspect seals and joints
- Record findings and photos
- File checklist and recommendations
Conclusion
Regular roof drain pipe cleaning preserves a home’s health and prevents costly water damage. Like a heartbeat kept steady, routine attention keeps systems flowing and problems from spreading. Homeowners who follow safety steps, use appropriate tools, and act promptly when issues arise will extend roof life and protect foundations. When persistent blockages, corrosion, or structural concerns appear, professional help is wise. Consistent maintenance turns reactive repairs into planned care and peace of mind.