How to Keep Downspouts From Freezing: 9 Proven Methods to Prevent Ice Clogs
To prevent downspouts from freezing and causing ice clogs, implement these proven methods: use heat cables, install heated gutter guards, apply insulation wraps, extend downspouts, and maintain regular cleaning. Additionally, improve attic insulation and roof ventilation, use de-icers carefully, and occasionally flush with warm water. Proper installation and routine inspections can further reduce risks of failure and corrosion. Homeowners can choose a mix of these strategies based on their budget and needs. For detailed installation steps, costs, and when to hire a professional, further guidance is available.
Why Downspouts Freeze and Why It’s a Problem
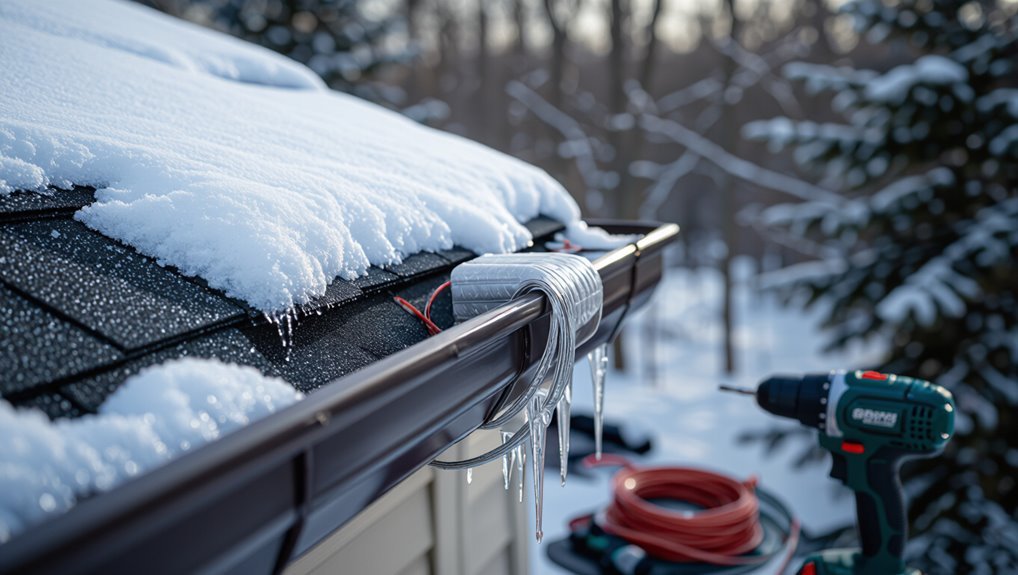
Ice accumulates in gutters and downspouts when melting snow refreezes or when blocked channels trap water that freezes as temperatures drop.
Frozen downspouts can force water under shingles, damage fascia and siding, and direct meltwater toward foundations, increasing risk of leaks and structural harm.
Visible signs include overflowing gutters, icicle formation, slow drainage, and water stains on roofs or walls.
How ice forms in gutters and downspouts
When melting roof snow or rainwater travels into gutters and downspouts during freeze-thaw cycles, it can refreeze where temperatures drop, creating ice dams and blockages.
Water pools behind debris, seams or constrictions freeze first, narrowing flow and promoting further ice buildup.
Understanding this cycle guides preventive choices, informing how to keep downspouts from freezing through insulation, heating, clearing obstructions, and ensuring continuous drainage.
Consequences of frozen downspouts for roofs, walls, and foundations
Frozen downspouts can trigger a cascade of damage across a building’s envelope: clogged or iced-over channels force meltwater to back up into gutters and under roof edges, seep into wall cavities, and pool against foundations.
Resulting effects include roof rot and shingle deterioration, accelerated siding and interior moisture intrusion, compromised insulation and mold growth, plus foundation erosion, basement flooding, and structural settlement risks requiring costly repairs.
Common signs your downspouts are freezing
Many homeowners notice specific, repeatable indicators that downspouts are beginning to freeze: swollen gutters, dripping or refreezing water along the outlet, reduced flow during thaw cycles, and audible cracking or popping as ice expands.
Additional signs include icicles forming at joints, water backing up onto the roof, discoloration or staining below outlets, and unexpected interior leaks or damp basements indicating compromised drainage.
Quick, Effective Solutions to Prevent Ice Clogs
Practical steps can prevent ice from forming in downspouts and restore reliable drainage during cold weather. A handful of targeted fixes—heating elements, insulation, and improved flow—address the most common causes of clogs quickly and with minimal disruption.
The following options summarize efficient, actionable approaches to keep water moving.
- Install heat tape or heat cable; use heated gutter guards or heated downspout inserts.
- Apply downspout insulation and correct slope to improve drainage flow.
- Add downspout extensions and splash blocks to move water away from the foundation.
Heat tape or heat cable installation
Install heat tape or self-regulating heat cable along the length of the downspout and across the gutter to keep metal and joints above freezing, preventing ice dams and clogs.
Install per manufacturer instructions, secure with approved clips, and guarantee power source and thermostat compatibility.
Choose self-regulating cable for variable output, weatherproof connections, and regular inspections to detect damage, assuring reliable winter performance.
Heated gutter guards and heated downspout inserts
Several effective products combine electric heating with debris protection to keep gutters and downspouts clear: heated gutter guards sit across the gutter to melt snow and ice before it compacts, while heated downspout inserts fit inside vertical runs to prevent internal ice formation.
These systems plug into outdoor power, require proper sizing and secure mounting, and reduce manual clearing and ice-dam risks.
Downspout insulation techniques
A few targeted insulation techniques can considerably reduce the risk of downspouts freezing by limiting heat loss and preventing meltwater from refreezing inside the run.
Wrap exposed sections with closed-cell foam tubes, use weatherproof insulation tape at joints, and install removable insulated sleeves for winter.
Confirm seals around wall penetrations are tight and protect exterior downspouts with rigid foam boards trimmed to fit for added thermal protection.
Slope correction and improving drainage flow
Correcting slope and improving drainage flow prevents water from pooling in downspouts and reduces the chance of ice formation by ensuring rapid, gravity-driven runoff.
Assessment identifies low spots, back pitch, or clogged channels. Regrading soil, adjusting hangers, and realigning gutters restore proper pitch.
Ensuring unobstructed flow and consistent fall toward outlets minimizes standing water, lowers freeze risk, and complements other anti-icing measures.
Adding downspout extensions and splash blocks
Extending the downspout outlet and placing a splash block direct runoff farther from the foundation, quickly reducing the volume of standing water that can freeze at the pipe terminus.
Rigid or flexible extensions channel water beyond walkways and soil saturation zones. Properly angled splash blocks disperse flow, preventing pooling.
Secure connections and winter-ready materials minimize dislodgement and freeze-thaw damage, lowering ice-clog risk.
Regular gutter cleaning and debris removal
Schedule routine gutter cleaning to remove leaves, twigs, and sediment that promote ice formation by trapping moisture and obstructing flow.
Inspect gutters and downspouts seasonally, clearing blockages with a scoop and hose. Use gloves and a stable ladder or hire a professional for safety.
Regular debris removal preserves proper drainage, reduces standing water, and minimizes conditions that lead to frozen clogs.
Roof and attic insulation to reduce ice dam formation
Improve attic and roof insulation to keep heat inside the home and prevent the uneven melting and refreezing that creates ice dams at roof edges.
Proper insulation and air sealing reduce attic heat loss, lowering roof surface temperature.
Adding insulation, sealing gaps, and ensuring ventilation work together to maintain uniform roof temperatures, preventing meltwater from refreezing at eaves and reducing ice formation that can clog downspouts.
Installing larger or alternative downspout configurations
After addressing attic and roof insulation to reduce heat loss and uneven roof melting, homeowners can further prevent ice-clogged downspouts by installing larger or alternative downspout configurations.
Increasing diameter improves flow and reduces freeze risk. Smooth, insulated, or down-angled runs minimize standing water.
Adding multiple outlets or rerouting to heated drains or splash blocks promotes drainage away from eaves and foundations.
Using warm water flushing and de-icing products safely
Flush downspouts with warm water and apply de-icing products judiciously to clear existing ice and slow reformation without damaging gutters, landscaping, or nearby concrete.
Use lukewarm water, not boiling, and pour steadily to avoid thermal shock. Prefer calcium chloride or magnesium chloride over rock salt; follow manufacturer rates.
Rinse residues, protect nearby vegetation, and inspect seals afterward to prevent corrosion and displaced debris.
Step-by-Step Guide to Install Heat Cable in Downspouts
A concise, practical walkthrough presents the tools and materials required, safety precautions, and preparation steps for gutters and downspouts.
It then outlines how to route and secure heat cable along the system and how to make the electrical connection.
Finally, testing and verification procedures guarantee the installation functions before winter weather arrives.
Tools and materials needed
Before beginning installation, gather all necessary tools and materials so the job proceeds safely and efficiently.
Required items include self-regulating heat cable rated for downspouts, appropriate power cords and GFCI protection, mounting clips or stainless-steel zip ties, weatherproof silicone sealant, measuring tape, wire cutters, screwdriver or drill with bits, and ladder stabilization accessories.
Optional: thermal adhesive and spare fuses.
Safety precautions before starting
While wearing appropriate personal protective equipment and ensuring the work area is secure, the installer should confirm power to the worksite is off and that all ladders are stable on firm ground.
The installer must inspect for brittle or corroded materials, note overhead hazards, use a spotter for ladder work, plan emergency access, and keep nonconductive tools nearby.
Follow local electrical codes and manufacturer warnings.
Preparing gutters and downspouts
Begin by clearing gutters and downspouts of debris, ice, and loose sealant so the heat cable can sit flush and make reliable contact; this includes removing leaves, nests, loose screws, and any old caulking.
Then, flush the system with water to locate clogs. Inspect joints, seams, and hangers for corrosion or gaps, replace damaged sections, and dry surfaces to guarantee proper adhesion and fitment.
Routing and securing the heat cable
With gutters cleared, sealed, and dry, attention shifts to routing the heat cable through the downspout where correct placement determines thawing effectiveness and longevity.
The cable is fed from the gutter into the downspout, looped gently to cover potential ice points, and anchored with UV-rated clips every 12–18 inches.
Avoid sharp bends, secure overlaps, and keep the cable off metal edges to prevent abrasion.
Electrical connection and testing
At this stage, the heat cable is ready for its electrical connection and functional testing, a process that verifies safe power delivery and proper thawing behavior.
The installer attaches the cable to a GFCI-protected outdoor outlet or hardwires per local code, secures weatherproof connections, restores power, then observes cable warming along the downspout.
A continuity or voltage check confirms correct installation.
Maintenance and troubleshooting
After confirming correct operation and power delivery, attention turns to routine maintenance and troubleshooting to preserve system performance and extend lifespan.
Inspect heat cable and clips seasonally for wear, corrosion, and secure attachment.
Clear debris and ice from downspouts.
Test power and thermostat before cold spells.
Replace damaged cable or connectors promptly.
Document issues and repairs for future reference.
How to Choose the Right Prevention Method for Your Home
Selection of a prevention method should start with an assessment of local climate, roof pitch and material, and the existing gutter and downspout configuration.
Homeowners should weigh upfront costs against long-term benefits such as reduced maintenance and avoided ice damage.
Decisions about professional installation versus DIY depend on system complexity, safety risks, and the homeowner’s skill level.
Assessing climate, roof type, and gutter system
Because freezing risk and effective solutions vary widely by location, the first step is to evaluate the home’s climate, roof design, and existing gutter system together.
Assess snowfall frequency, freeze–thaw cycles, roof pitch and materials, eave length, gutter size, slope, downspout placement, and obstruction points.
Match vulnerability and maintenance capacity to compatible prevention options and installation constraints.
Cost vs. long-term benefits comparison
Cost–benefit analysis helps homeowners weigh upfront expenses against ongoing savings and reduced risk when choosing a freeze-prevention strategy. Short-term costs, maintenance, durability, and energy use determine value; choices align with budget and roof conditions. Consider lifespan and frequency of freeze events to select the most cost-effective option.
| Option | Upfront cost | Long-term benefit |
|---|---|---|
| Heat tape | Low–medium | Prevents ice, moderate energy |
| Heated coil | Medium | Low maintenance, durable |
| Gutter guard | Low–high | Reduces clogs, variable longevity |
When to hire a professional vs. DIY
One clear guideline is to hire a professional for complex roof configurations, extensive ice dams, or any work that requires climbing steep, slippery surfaces or altering electrical systems.
Homeowners with limited tools, uncertain diagnoses, or warranty concerns should also seek pros.
DIY suits simple gutter cleaning, insulation upgrades, or installing non-electrical heat tapes when comfortable working safely.
Prioritize safety, cost, and long-term effectiveness.
Seasonal Maintenance Checklist to Avoid Freezing
A concise seasonal checklist guides homeowners through pre-winter inspection tasks to clear debris, secure fittings, and install any heat or slope adjustments.
It then outlines routine winter monitoring and interventions to detect ice buildup and activate or adjust prevention measures.
Finally, it covers post-winter repairs and assessments to restore damaged components and plan improvements for the next season.
Pre-winter inspection tasks
Before the first hard freeze, a focused exterior inspection identifies the issues that most commonly lead to downspout freeze-ups: clogged gutters, detached or misaligned downspouts, damaged splash blocks, and compromised seals at roofline connections.
Inspect fasteners, brackets, and downspout joints for corrosion or looseness. Clear debris, test water flow with a hose, replace damaged components, and seal gaps to guarantee unobstructed drainage before freezing conditions.
Routine winter monitoring and interventions
Several simple checks performed throughout winter keep downspouts clear and operational, reducing freeze risk and ice dam formation.
Weekly visual inspections identify icicles, blockages, or separation. Promptly clear light obstructions with a plastic shovel or brush; avoid metal tools.
Confirm heated cables remain functional and connections dry. After heavy snowfall, remove roof snow near gutters and verify downspout discharge points are unobstructed.
Post-winter repairs and assessments
Post-winter inspections focus on identifying damage from ice, snow, and freeze-thaw cycles so repairs can restore proper drainage and prevent recurring problems.
Technicians assess gutters, downspouts, seals, and fasteners for corrosion, bending, clogs, and separation.
Necessary actions include clearing debris, replacing damaged sections, resealing joints, adjusting pitch, and verifying outlet flow.
Documentation guides spring maintenance and prioritizes urgent repairs.
Common Mistakes That Make Freezing Worse
Homeowners and contractors often make choices that unintentionally increase the risk of downspout freezing, such as selecting the wrong heat cable or installing it incorrectly.
Poor roof and attic ventilation, improper use of corrosive chemical de-icers, and allowing snow or ice to block downspout outlets further compound the problem.
Identifying and correcting these common errors can prevent repeated ice buildup and related damage.
Incorrect heat cable selection or improper installation
Choose the right heat cable and install it correctly, or the system can fail and even worsen ice buildup.
Using undersized, non-self-regulating cable or improper spacing reduces effectiveness and creates cold spots where ice forms.
Incorrect attachment, sharp bends, or powering without following manufacturer guidelines risks damage, voids warranties, and creates safety hazards.
Proper selection, layout, and secure fastening guarantee reliable thawing.
Neglecting roof and attic ventilation
Neglecting proper roof and attic ventilation traps warm, moist air beneath the roof deck, which melts snow unevenly and promotes ice dam formation at eaves and downspouts.
This increases meltwater refreezing, clogs gutters and downspouts, and stresses roofing materials.
Ensuring balanced intake and exhaust ventilation, sealing attic air leaks, and adding insulation reduces heat transfer, preventing uneven melting and subsequent ice buildup.
Using corrosive chemical de-icers improperly
Applying chemical de-icers without understanding their properties can accelerate corrosion of metal gutters, downspouts, and fasteners, worsening leaks and structural damage.
Using high-chloride salts or concentrated solutions near joints and seams speeds rusting and weakens seals. Residue can clog gutters and harm surrounding vegetation.
Proper selection, dilution, and targeted application reduce damage; consult product labels and manufacturers before treatment.
Blocking downspout outlets with snow or ice
Often unintentionally, packed snow or ice at the base of a downspout blocks runoff, forcing meltwater back into the gutter system where it refreezes and worsens ice dams.
Homeowners should clear outlets promptly, create small runoff channels, and avoid piling shoveled snow against downspouts.
Regular inspection after storms prevents buildup, reduces backup, and limits structural and water-damage risks associated with frozen clogs.
Cost Estimates and Longevity of Different Solutions
Cost and lifespan vary widely between passive fixes and active heating options, so homeowners should weigh upfront costs, installation complexity, and expected service life before choosing a solution. Energy use and ongoing operating costs are particularly important when considering heated systems versus low-maintenance alternatives. The table below summarizes typical ranges to frame that comparison.
| Solution type | Typical upfront cost | Expected lifespan |
|---|---|---|
| Simple extensions/gutters | $50–$200 | 10–20 years |
| Heat-traced downspouts | $150–$800 | 10–15 years |
| Heated cables/straps | $100–$400 (plus wiring) | 8–12 years |
| Insulated downspouts | $75–$300 | 15–25 years |
Upfront costs, installation complexity, and expected lifespan
When choosing methods to keep downspouts from freezing, homeowners should weigh upfront expenses, installation difficulty, and expected lifespan together, since a low initial price can be offset by short durability or high labor requirements.
Simple fixes like gutter guards cost little and last 5–10 years. Heated cables and professional rerouting have higher installation complexity and costs but can exceed 15–25 years with proper maintenance.
Energy use and operating costs for heated systems
After weighing upfront expenses and installation complexity, homeowners must also consider the ongoing energy consumption and operating costs of heated systems.
Electric heat tapes draw continuous power in cold spells, raising utility bills; hydronic or low-voltage options typically use less energy but cost more to install.
Budget projections should include seasonal runtime, thermostat controls, maintenance, and expected lifespan to assess total ownership costs.
When to Call a Professional and What to Expect
Visible ice dams, persistent backups despite DIY attempts, or damaged gutters and downspouts indicate the need for a professional inspection.
Homeowners should ask contractors about experience with freeze-related drainage issues, specific repair or prevention methods proposed, and the length and coverage of any warranties.
Expect scheduling and assessment within days to a couple of weeks, with remediation or preventive work typically completed in a few hours to a few days depending on scope.
Signs you need professional inspection or repair
How can a homeowner tell if a downspout issue demands professional attention?
Persistent ice buildup despite DIY measures, visible cracks or detachment, water pooling near foundation, interior leaks after thaw, or damaged gutters indicate need for inspection.
Professionals assess structural damage, hidden blockages, improper pitch, and insulation needs, provide repairs or replacements, and recommend long-term prevention tailored to the property’s drainage.
Questions to ask contractors and warranties to request
When a homeowner decides a professional inspection or repair is warranted, the next step is knowing what to ask and what guarantees to request.
Ask about licensing, insurance, references, specific solutions for ice-prone downspouts, materials, and maintenance needs.
Request written estimates, scope of work, timelines, and explicit warranty terms covering labor and materials.
Clarify post-service follow-up and invoice/payment conditions.
Typical timeline for remediation and prevention work
Why call a professional now rather than later?
A technician assesses ice damage, clears blockages, and installs heating or insulation within one to three days for urgent cases; routine prevention often schedules within one to two weeks.
Expect inspection, written estimate, prioritized repairs, and follow-up verification.
Winter emergency responses may require same-day service and temporary measures until permanent fixes are applied.
Real-World Examples and Small-Scale Case Scenarios
The section presents concise examples showing how single-family homes typically use simple heat tape or rerouted gutters to prevent downspout ice.
It contrasts those with multi-story and commercial strategies that prioritize accessibility, higher-capacity heating, and code compliance.
It also compares budget-friendly fixes against thorough retrofits to help readers weigh cost, longevity, and disruption.
Single-family home solution examples
Homeowners can address frozen downspouts with targeted, low-cost strategies tailored to typical single-family properties.
Examples include installing gutter guards and heated cables on short downspouts, rerouting runoff away from foundations with extenders, insulating nearby attic and soffit areas to reduce icicle formation, and scheduling seasonal gutter cleaning.
Regular visual inspections after storms confirm effectiveness and reveal minor repairs before ice forms.
Multi-story and commercial building considerations
Because taller facades, larger roof areas, and concentrated drainage loads change failure modes, multi-story and commercial buildings require strategies beyond typical single-family fixes.
Examples include heated leader lines, redundant downspout networks, roof scuppers with insulated drains, and sectional heat-tracing zones controllable per floor.
Maintenance plans emphasize access, inspection schedules, and coordination with building engineers to manage capacity, load, and liability in winter.
Budget-friendly fixes vs. comprehensive retrofits
When budgets are tight, simple interventions—insulation of exposed leaders, flexible heat-tape on short runs, improved gutter slope, and regular clearing of debris—can prevent most freeze-related blockages.
By contrast, thorough retrofits such as full heat-tracing systems, rerouting leaders into heated chases, or installing insulated roof scuppers require higher upfront cost but offer long-term reliability for larger or problem-prone roofs.
Case studies show modest fixes suffice for small homes, while recurring ice on complex roofs justified extensive retrofits.
Additional Resources and Product Recommendations
The article provides practical references and product suggestions to help prevent downspouts from freezing.
Readers are pointed toward reliable manufacturers, official code and safety resources, and suppliers for necessary tools and materials.
Suggested starting points include:
- Trusted brands for heat cables, gutter guards, and insulation.
- Links to building codes and safety guidelines.
- Tools and materials suppliers for DIY projects.
Trusted brands for heat cables, gutter guards, and insulation
Several reliable manufacturers and product lines consistently receive high marks for heat cables, gutter guards, and insulation, making them a sensible starting point for shoppers seeking proven performance and warranty support.
Brands like Heat Tracing Co., WarmlyYours, LeafGuard, Raptor, GutterGlove, Owens Corning, and Johns Manville are frequently recommended for durability, ease of installation, and solid warranties across heat, debris protection, and thermal solutions.
Links to building codes and safety guidelines
A useful set of links to applicable building codes and safety guidelines helps homeowners and contractors verify local requirements for heat cable installation, gutter modifications, and insulation around downspouts.
Provide links to national code bodies, state and municipal permitting offices, electrical safety agencies, manufacturers’ installation manuals, and relevant OSHA guidance.
Cite energy-efficiency and stormwater management standards where they affect downspout work.
Tools and materials suppliers for DIY projects
When preparing a DIY downspout project, homeowners benefit from knowing which suppliers reliably stock heat cables, insulated sleeves, gutter guards, fasteners, and basic hand and power tools.
Reputable national retailers, specialty plumbing/electrical distributors, and manufacturer-direct outlets typically offer product lines, compatibility charts, and installation guides that simplify selection and reduce retrofit errors.
Local hardware stores and online marketplaces provide price comparisons, user reviews, and delivery or pickup options.
Conclusion
As winter tightens its icy grip, the downspout becomes a frozen river, halted mid-flow. With a few thoughtful measures—heat cable like a warm vein, proper slope and clear channels—the water remembers its path and slips away. Choosing methods suited to one’s roof, budget and climate transforms brittle blockages into steady streams. Small investments and seasonal care keep gutters singing through storms, turning winter’s hush into a gentle, unfrozen cadence of runoff.