How to Remove a Bidet From a Toilet: Step-By-Step Guide for Safe DIY Removal
To safely remove a bidet from your toilet, start by shutting off the water supply and relieving any pressure. Protect the floor with towels or a drop cloth. Determine whether your bidet is a handheld sprayer, non-electric seat, or electric seat, and gather essential tools: an adjustable wrench, screwdrivers, pliers, a bucket, and towels.
Next, disconnect the hose and T-adapter, unplug the power for electric models, unbolt the seat, and lift it away. After removal, check for any leaks or damage to the porcelain, clean the area, and prepare for replacements or caps. Detailed steps and troubleshooting tips are available for further assistance.
Quick overview: Can you safely remove a bidet from a toilet?
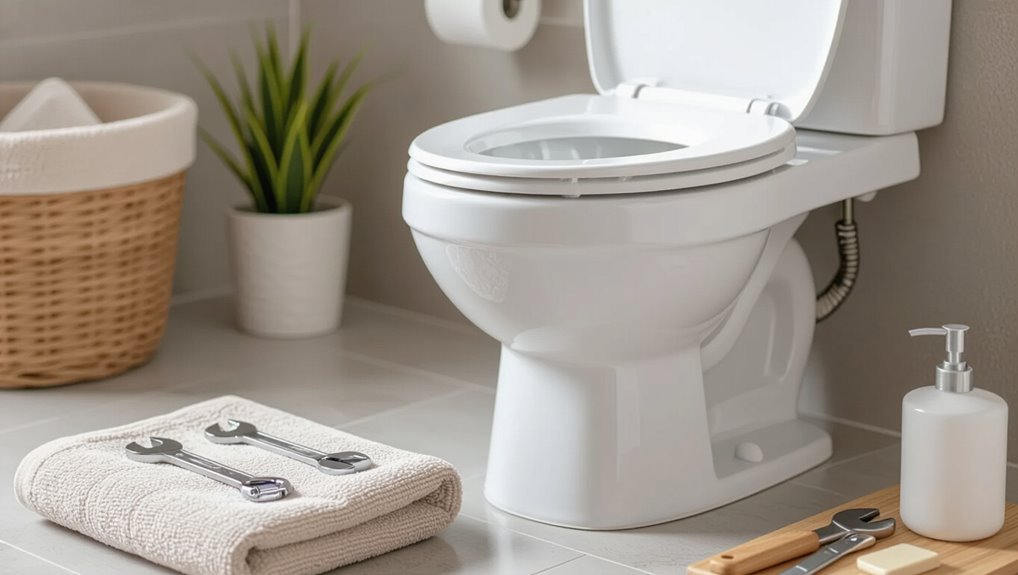
Removing a bidet from a toilet is generally safe for a homeowner with basic plumbing tools and by turning off the water supply first.
Caution is advised if the installation uses complex fittings, concealed valves, or if the user is uncomfortable with potential leaks, in which case hiring a professional is recommended.
When in doubt about water damage or nonstandard plumbing, a trained plumber should be consulted.
Brief direct answer and safety summary
Disconnecting a bidet from a toilet can be done safely by someone with basic DIY skills and common tools, provided they follow simple precautions.
The process of how to remove a bidet from toilet involves shutting water, draining lines, disconnecting hoses, and unfastening the seat mounting.
Wear gloves, protect flooring, and keep towels nearby.
Take care to avoid overtightening fittings during reassembly.
When to consider professional help
Although many homeowners with basic DIY experience can safely remove a bidet from a toilet, professional help should be considered when plumbing complexity, electrical connections, or limited access increase the risk of damage or injury.
A licensed plumber or electrician is advisable if leaks, corroded fittings, integrated heated seats, or unfamiliar valve layouts exist.
Hire pros for permits, warranty concerns, or if confidence and proper tools are lacking.
Tools, materials, and preparations needed
A concise checklist of required tools and likely replacement parts helps guarantee the removal proceeds smoothly.
The person should confirm availability of safety gear and locate the toilet’s water shutoff before beginning.
Protective coverings for the floor and nearby fixtures prevent damage and catch any residual water.
List of tools and replacement parts
Gather the necessary tools and replacement parts before beginning work to minimize interruptions.
Essential items streamline removal and any immediate fixes.
Recommended list:
- Adjustable wrench and pliers
- Screwdrivers (Phillips and flathead)
- Replacement T-valve, compression fittings, and hose
- Small bucket, rags, and plumber’s tape
Safety gear and water-shutoff preparation
Put on basic protective gear and confirm the work area is ready before touching plumbing fittings.
Wear safety glasses, nitrile gloves, and closed-toe shoes.
Have a flashlight, adjustable wrench, bucket, and absorbent towels at hand.
Locate and label the toilet shutoff valve; turn it clockwise to close.
Verify water is off by flushing and checking for residual flow before proceeding.
How to protect the bathroom floor and fixtures
Several protective layers and the right tools will prevent damage and simplify cleanup when removing a bidet.
Gather drop cloths or old towels, cardboard, painter’s tape, and plastic sheeting to cover floor and nearby fixtures.
Use a basin for residual water, putty knives to lift seals, and a bucket for loose hardware.
Keep a shop vacuum and cleaning supplies on hand for final touch-up.
Identify the type of bidet and attachment system
Before beginning removal, the installer should identify whether the unit is a handheld sprayer, a seat-style attachment, an electronic bidet, or a non-electric model.
They should then locate all connection points—water supply line, T-adapter or shutoff adapter, and any mounting hardware or bolts—and note how they attach to the toilet and supply.
Reviewing photos or diagrams of the specific model will help confirm parts and the correct sequence for disassembly.
Common bidet types handheld, seat-style, electronic, non-electric
Identifying the bidet type is the first practical step, since removal methods differ between handheld sprayers, non-electric seat attachments, and full electronic bidet seats.
Handhelds mount via a hose and holder; non-electric seats replace standard seats with simple bolts; electronic seats add power cords, control panels, and often extra mounting brackets.
Correctly classifying guarantees appropriate tools and precautions.
How to recognize connection points: water supply, T-adapter, mounting hardware
Locate the connection points visually and by touch to determine how the bidet interfaces with the toilet and plumbing.
Identify the water supply line to the shutoff valve, a T-adapter splitting flow to the bidet, and mounting hardware securing a seat-style or handheld bracket.
Note material (plastic, brass), thread types, hose connections, and whether bolts or quick-release clips are used for removal planning.
Photos and diagrams to check before starting
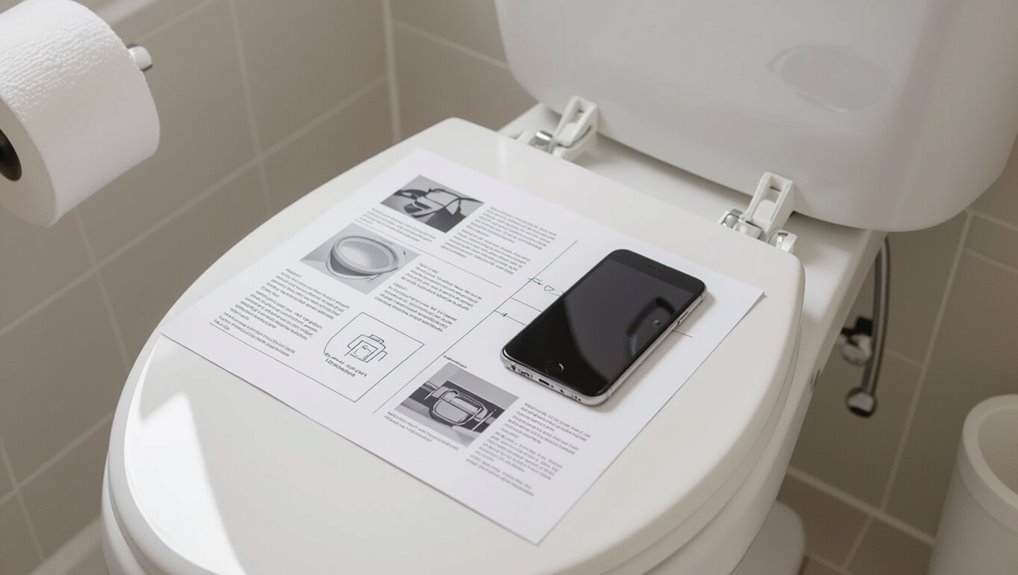
When preparing to remove a bidet, consult clear photos and diagrams that show the specific model and attachment system. This will help the remover confirm whether it is a seat-mounted, handheld, or integrated bidet and whether it uses bolts, quick-release clips, or a T-adapter connection.
Compare images to locate mounting points, water lines, and valves. Note fastener types and any concealed hardware before beginning.
Step-by-step removal process for handheld bidet sprayers
First, the water supply is turned off and any pressure is relieved to prevent leaks.
Next, the sprayer hose is disconnected from the T-adapter and wall valve, and the mounting bracket and fittings are removed.
Finally, the supply line is inspected and either capped or restored to its original configuration.
Turn off water supply and relieve pressure
Shut off the toilet’s water supply at the angle stop and then flush to clear the tank so residual pressure and water in the line are released.
Confirm the valve is fully closed by attempting a light turn; don’t force.
Hold a towel under fittings to catch drips.
Wait a minute, then press the bidet lever briefly to verify all pressure has bled off before proceeding.
Disconnect sprayer hose from T-adapter and wall valve
With the water supply closed and pressure bled off, attention moves to the hose connections for the handheld sprayer.
Using an adjustable wrench, hold the T-adapter steady and loosen the hose nut at the adapter.
Disconnect the other end from the wall valve, catching residual water with a towel or bucket.
Inspect washers, then set hose aside for disposal or reuse.
Remove mounting bracket and secure fittings
Begin by unhooking the handheld unit from its mounting bracket and setting both pieces aside; this exposes the screws or adhesive used to secure the bracket to the toilet or nearby wall.
Remove screws with an appropriate screwdriver or drill; if adhesive, apply a gentle heat source and pry with a plastic scraper.
Collect all fasteners, clean residue, and prepare the area for final supply-line restoration.
Inspect and cap or restore the supply line
After the mounting bracket and handheld unit are removed, attention turns to the water supply line that fed the sprayer.
The technician inspects fittings, hose condition, and valve integrity.
If the line is unused, it is capped with an appropriate threaded plug or shutoff adapter and tightened.
If restoring the original fixture, the original flex hose and valve are reconnected, checked for leaks, and tested.
Step-by-step removal process for non-electric bidet seats
Before beginning, power to any integrated features should be disconnected and the toilet water supply shut off.
The water hose and T-adapter are then detached, followed by unbolting the seat mounting hardware to lift the non-electric bidet seat free.
Finally, the original toilet seat is reinstalled or mounting holes are closed as needed.
Powerless preparation and water shutoff
Turn off the toilet’s water supply and relieve pressure in the line to prevent leaks during removal.
Confirm the bidet seat is powered off if applicable, then unplug any electrical connections (for electric models only) and move cords clear.
Place towels or a shallow pan beneath the connection to catch residual water.
Gather basic tools and protective gloves before proceeding to disconnect hoses.
Disconnect water hose and T-adapter
Loosen the hose connections with an adjustable wrench or pliers, working from the shutoff valve up to the T-adapter where the bidet feed joins the toilet supply.
Drain remaining water into a bucket, then unscrew the bidet hose from the T-adapter.
Cap or plug the toilet supply and T-adapter ports to prevent leaks.
Inspect hose fittings and replace washers if corroded.
Unbolt seat mounting hardware and remove seat
Locate the seat’s mounting bolts at the rear of the bowl and set a small container nearby for hardware.
Using a screwdriver and wrench, hold each nut beneath the bolt while turning the screw above.
Remove both bolts and lift the bidet seat straight up to disengage from hinge posts.
Place bolts, nuts, and washers in the container for safekeeping.
Reinstall original seat or close mounting holes
Decide whether the original toilet seat will be reinstalled or the mounting holes will be closed to prevent leaks and improve appearance.
If reinstalling, align hinge plate, insert bolts, tighten securely, and test stability.
If closing holes, clean edges, apply appropriate rubber grommets or silicone sealant, or install decorative caps.
Confirm flush operation and inspect for leaks before final use.
Step-by-step removal process for electric/bidet seats with power and heated features
Before beginning removal of an electric bidet seat, power must be switched off and the unit unplugged to prevent shock.
The water supply and any quick‑connect fittings should be disconnected next, followed by removal of the mounting plate to lift the seat free.
If the unit has integrated conduits or in‑wall wiring, those connections must be identified and isolated or handled by a qualified electrician before complete detachment.
Turn off electrical power and unplug safely
Shut off the power to the bidet seat at the circuit breaker and confirm the outlet is de-energized by testing it with a non-contact voltage tester or plug-in tester.
Unplug the bidet’s power cord, inspecting plug and cord for damage.
If hardwired, contact a qualified electrician to disconnect.
Secure cords away from the work area to prevent tripping or accidental re-energizing.
Disconnect water supply and any quick-connect fittings
Locate the bidet’s water supply line and the shutoff valve, then place a small bucket or towel beneath the connection to catch any residual water.
Close the shutoff, then loosen the supply nut with an adjustable wrench.
Disconnect any quick‑connect fittings by depressing release collars or following manufacturer instructions.
Inspect and cap exposed lines to prevent leaks; retain washers and fittings for reinstallation or disposal.
Remove mounting plate and lift off seat
Start by ensuring the bidet seat’s power is disconnected at the outlet and any water supply is fully closed; this prevents electrical hazards and accidental sprays while working.
Unscrew or release the mounting bolts/clamps holding the plate, remove retaining clips, then slide the seat forward off the rail.
Lift straight up to disengage hooks.
Inspect for wiring harness clips; disconnect any removable plug before fully removing the seat.
Dealing with integrated electrical conduits and in-wall wiring
Before touching any wiring, confirm power is off at the circuit breaker and the breaker is clearly labeled to prevent accidental re-energizing; this guarantees safety when accessing integrated conduits or in-wall connections.
Disconnect power cord at the outlet, remove cover plates, and trace conduit to junction box.
Photograph wiring, label conductors, loosen terminal screws, detach wires, and cap or rewire per code.
Restore covers.
Common complications and how to resolve them
Removal can reveal stuck or corroded fittings that require penetrating lubricant, careful heat, or gentle mechanical persuasion to free without cracking porcelain.
After the bidet and water are disconnected, leaks should be checked at the shutoff, T-adapter, and hose connections before inspecting the flange, bolt holes, and bowl rim for damage.
If fittings are stripped, the T-adapter or shutoff valve is compromised, or the flange is cracked, replacement parts or professional repair are recommended.
Stuck or corroded fittings and safe removal techniques
When fittings seize from mineral buildup, corrosion, or overtightening, careful assessment and the right tools are essential to avoid damage to the toilet, bidet hardware, or supply lines.
Apply penetrating oil, allow soak time, then use two wrenches for counter‑force. Tap gently with a mallet to break corrosion.
If threads strip or fittings remain immobile, cut and replace corroded connectors, taking care not to crack porcelain.
Leaks after removal where to check first
After easing seized fittings and detaching the bidet, the most likely sources of post‑removal leaks are the supply shutoff valve, the flexible hose or connector, the fill‑line to the tank, and the seal at the toilet’s inlet or tank mounting.
Inspect the shutoff for drips, tighten or replace the hose or connector, confirm the fill‑line connection, and reseal or replace the inlet gasket.
Damaged toilet flange, bolt holes, or cosmetic damage
Inspect the toilet flange, bolt holes, and surrounding porcelain for chips, cracks, or crushed metal immediately after the bidet is removed.
Small chips can be smoothed and sealed with epoxy; cracked bolt holes may require metal inserts or reinforced washers.
Bent or corroded flange components should be replaced.
For cosmetic porcelain damage, use repair kits and match glaze for a discreet finish.
When a replacement T-adapter or valve is required
Several common signs indicate the need for a replacement T-adapter or shutoff valve: persistent leaks at the valve body or fittings, visible corrosion or cracking, stripped threads that prevent a secure connection, or reduced water flow after bidet removal.
Replace faulty parts with compatible, pressure-rated units; shut off water, drain lines, and use plumber’s tape.
Test connections under normal pressure for leaks.
How to restore the toilet to pre-bidet condition
After the bidet is removed, attention turns to restoring the toilet to its original condition. This includes reconnecting or replacing the water line and shutoff valve, filling the system and checking carefully for leaks, and repairing or covering any mounting holes followed by necessary cosmetic finishing.
Each step should be completed methodically to guarantee watertight connections and a tidy appearance.
Reconnecting or replacing the original water line and shutoff valve
Begin by turning off the main shutoff and draining the tank to prevent leaks while reconnecting or replacing the supply line and shutoff valve; this step guarantees a dry workspace and clear access to fittings.
Inspect existing valve and supply hose for corrosion.
Remove bidet T-adapter, reinstall original hose or fit new braided line.
Tighten connections with wrench, orienting valve for easy access.
Filling and testing for leaks
Turn the water back on slowly at the shutoff valve and allow the tank to refill while observing all reconnections and the base of the toilet for any signs of leaking.
Flush several times, watching supply connections, tank bolts, and the floor.
Check for slow drips or moisture after fifteen minutes.
Tighten fittings if needed, then re-inspect to confirm a dry, secure restoration.
Repairing or covering mounting holes and cosmetic finishing
Inspect the mounting area for visible holes, damaged porcelain, or residual hardware before selecting a repair method.
Small holes can be filled with porcelain repair epoxy or two-part filler, sanded smooth, then color-matched with porcelain touch-up paint.
For larger damage, consult a professional for patching or replacement.
Reinstall seat, clean surfaces, and allow full cure time before regular use.
Preventive measures and tips to avoid problems during removal
Careful preparation reduces the risk of leaks and hardware damage when removing a bidet.
Recommended actions include using the correct technique and tools to loosen fittings, applying thread tape and new seals where needed, and capping exposed lines.
Removed components should be labeled, stored dry and clean if kept, or disposed of according to local regulations for plumbing fixtures.
Best practices for loosening fittings without damage
Loosen fittings slowly and deliberately, applying steady, controlled force to avoid stripping threads or cracking plastic components.
Use properly sized wrenches and padded jaws to distribute pressure.
Back off and reapply lubricant if resistance persists.
Hold adjoining parts to prevent twisting fixtures.
Inspect threads and seals as loosened, stopping at signs of damage to reassess technique or seek specialist help to prevent further harm.
Using thread tape, caps, and seals correctly
Prepare thread tape, caps, and replacement seals before disconnecting any plumbing to prevent leaks and contamination during bidet removal.
Use clean PTFE tape on male threads, wrapping clockwise three to five turns.
Fit temporary caps on open valves and hose ends immediately.
Inspect and replace worn rubber seals or O-rings.
Verify snug, hand-tight connections; avoid over-tightening to prevent thread damage.
Storing or disposing of bidet components safely
Several simple precautions reduce damage and contamination when storing or disposing of bidet parts:
- Rinse and dry removable parts; label any damaged pieces.
- Place small hardware in sealed bags; tape labels to avoid loss.
- Wrap fragile components in clean cloth or bubble wrap; store upright.
- Follow local regulations for disposing hoses, cartridges, and electronic modules; use designated recycling or hazardous-waste facilities.
Cost, time estimates, and when to call a plumber
Estimated DIY time and difficulty vary by bidet type, with simple seat models often removed in 15–30 minutes and integrated or electric units taking an hour or more.
Typical replacement part costs—hoses, valves, or mounting hardware—generally range from a few dollars to about $50, while electronic modules can be pricier.
A professional should be called if there is persistent leaking, damaged plumbing, unclear wiring, or if the homeowner lacks confidence in completing the job safely.
Estimated DIY time and difficulty by bidet type
Removing a bidet varies widely in time, cost, and complexity depending on the type: simple attachable seats typically take 15–30 minutes and require only basic tools, mechanical add-on spray kits take 30–60 minutes and may need minor plumbing adjustments, while integrated or electric bidet seats can take 1–2 hours and often involve electrical work and more extensive disconnection.
| Type | Time | Difficulty |
|---|---|---|
| Attachable seat | 15–30 min | Low |
| Spray kit | 30–60 min | Moderate |
| Electric/integrated | 1–2 hrs | High |
Typical replacement part costs
With the time and difficulty for different bidet types established, attention turns to the parts most commonly needed when removing or replacing a unit and what they typically cost.
Replacement valves, T-adapters, hoses and flange bolts usually range $5–$40 each; complete replacement seats run $40–$200.
Typical DIY swap adds 30–90 minutes.
Call a plumber for leaks, corroded fittings, or unfamiliar supply lines.
Signs you should hire a professional
Recognize the situations where a professional is warranted: persistent leaks, corroded or seized fittings, damaged supply lines, unusual toilet connections, or visible water damage that suggests hidden deterioration.
Estimated plumber costs range $100–$300 for simple removal, $300–$800 for repairs or rerouting.
Call a plumber when removal exceeds one hour, requires pipe alterations, involves potential contamination, or risks structural or seal damage.
Useful troubleshooting checklist after removal
After removal, a brief checklist guarantees the toilet and plumbing are functioning properly.
Inspect for leaks immediately and over the next 24–48 hours, then run water pressure and flushing tests to confirm normal operation.
If hidden damage such as cracked seals or corroded fittings is found, stop use and either repair the parts or call a professional depending on severity.
Leak check steps and timeline
Several simple checks performed immediately and over the next 24–48 hours will reveal most leaks after removing a bidet.
Inspect all fittings, shutoff valve, and hose connections for drips. Place paper towels beneath joints; check hourly for the first four hours, then every few hours, finally at 24 and 48 hours.
Note any moisture, tighten or reseal affected connections promptly.
Water pressure and functionality tests
Once leak checks confirm dry fittings, attention turns to verifying water pressure and basic functionality of the toilet and remaining plumbing.
Flush several times, observe tank refill speed, and listen for irregular sounds.
Test sink and other fixtures for pressure changes.
Inspect for slow drains or sputtering.
Note any persistent weakness or intermittent flow for targeted troubleshooting or professional assessment.
What to do if you discover hidden damage
Inspecting for hidden damage should be immediate and systematic; document any corrosion, warped seals, hairline cracks, or water-stained surfaces found during bidet removal.
Assess leak sources, test flange and bowl integrity, and smell for mold. Photograph findings, isolate affected plumbing, and replace compromised gaskets or corroded fittings.
If structural or plumbing damage appears extensive, recommend professional evaluation before reinstalling or discarding components.
Resources and references for parts and professional help
A list of common replacement parts—shutoff valves, T-adapters, and tank caps—can be sourced from hardware stores, plumbing supply houses, and major online retailers.
For installations or uncertain repairs, licensed plumbers can be located through trade directories, local business listings, or platforms that verify credentials and publish customer reviews.
Comparing warranty information, part specifications, and contractor ratings helps guarantee appropriate selections and reliable service.
Where to buy replacement valves, T-adapters, and caps
When parts are needed—whether a replacement valve, a T-adapter, or a tank cap—homeowners can find suitable options from several reliable sources: local hardware stores, big-box home improvement retailers, plumbing supply houses, and reputable online vendors.
Recommended purchase points include:
- Local hardware stores for quick, hands-on selection
- Big-box retailers for variety and returns
- Plumbing supply houses for specialty parts
- Trusted online vendors for reviews and delivery
How to find licensed plumbers and read reviews
If a needed part cannot be sourced or installation feels uncertain, hiring a licensed plumber is the next practical step.
Search local directories, state licensing boards, and trade associations for verified credentials.
Compare review platforms—Google, Yelp, Angi—checking recent comments, license numbers, and complaint histories.
Request written estimates, proof of insurance, and references before scheduling work to guarantee accountability and fair pricing.
Conclusion
Tools put down, the fixture becomes a pale moon—detached, quietly reflecting choices made. The removed bidet leaves behind a clean bowl and a thin trail of memories: valves closed, hoses stowed, threads wrapped. In this small unmaking, the bathroom regains simple geometry and the homeowner gains knowledge like a key. Should stubborn fittings or leaking shadows remain, a professional locksmith of pipes will translate what hands could not.