
How to Restore an Enameled Cast Iron Sink: Step-by-Step Fixes for Chips, Stains & Rust
Restoring an enameled cast iron sink is achievable for chips, surface stains, and minor rust, provided the sink’s structure is intact. The restoration process involves cleaning, sanding, filling chips with enamel or epoxy, and optional reglazing for significant damage. Ensure proper curing and inspect for adhesion before use. Below, you’ll find a detailed step-by-step guide covering preparation, stain removal, re-enameling tips, and maintenance advice.
What to Know Before Restoring an Enameled Cast Iron Sink
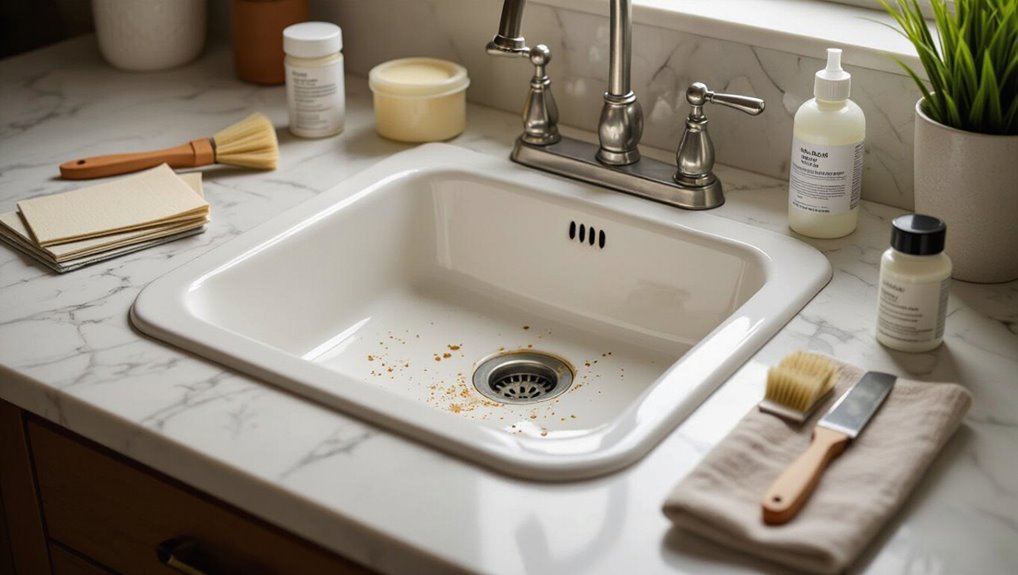
Before beginning work, the homeowner should determine whether restoration is feasible or if full replacement is more cost-effective based on the sink’s age and extent of damage.
They must also plan for safety by gathering appropriate PPE and following precautions, and prepare a concise tools-and-materials checklist.
A careful assessment of chips, stains, rust, and hairline cracks will guide the chosen repair methods and expected outcomes.
Is restoration possible vs. replacement
Can a worn or chipped enameled cast iron sink be restored, or is replacement the only practical option?
Restoration is feasible for chips, surface stains, and minor rust if structure is sound. Success depends on enamel depth, underlying corrosion, and cost versus replacement.
Homeowners researching how to restore an enameled cast iron sink should assess damage, budget, and desired longevity before deciding.
Safety precautions and required PPE
Several essential safety precautions and personal protective equipment (PPE) are required when restoring an enameled cast iron sink to prevent chemical exposure, inhalation of dust, and physical injury.
Work in well-ventilated areas, avoid open flames, and keep children/pets away.
Wear chemical-resistant gloves, eye protection, a respirator rated for particulates/organic vapors, and durable clothing.
Dispose of waste per local regulations.
Tools and materials checklist
A concise checklist of tools and materials helps guarantee the restoration proceeds efficiently and safely.
The list focuses on items for cleaning, rust removal, chip repair, and finishing. Appropriate abrasives, rust converters, enamel repair kits, brushes, masking tape, nitrile gloves, respirator, and clean rags are included.
- Abrasives and sanding pads
- Rust remover/converter
- Enamel repair kit and brushes
- PPE: gloves, respirator, goggles
How to assess damage: chips, stains, rust, hairline cracks
How should one judge whether an enameled cast iron sink is worth restoring?
Inspect chips for depth and size; small, shallow chips are repairable, widespread delamination is not.
Note stains: surface discoloration usually cleans; embedded stains may require refinishing.
Check rust: surface rust can be removed, pitting reduces value.
Hairline cracks risk moisture beneath enamel—structural cracks often mean replacement.
Quick Overview: Step-by-Step Restoration Plan
The restoration plan nutshells into clear stages: prepare the surface, repair chips, remove stains, treat rust, and refinish the enamel.
Each stage includes typical time and cost ranges and notes on expected durability.
This overview sets the sequence for the detailed instructions that follow.
Fast summary of stages: prep, repair chips, remove stains, treat rust, refinish
Begin by preparing the workspace, then move through targeted repairs and surface treatments: Clear and protect surrounding areas, gather tools and safety gear.
Sand and clean chip edges, fill and shape enamel repair compound.
Use nonabrasive cleaners to lift stains, apply mild acid for mineral buildup.
Treat rust with rust converter or sanding, then prime and recoat the surface with enamel touch-up or spray finish.
Time, cost, and durability expectations
When planning the restoration, homeowners should expect a clear timeline, predictable costs, and variable longevity depending on materials and technique.
Typical DIY projects take 1–3 days; professional work requires 1–2 days plus curing.
Materials and tools cost $30–$300; professional service ranges $200–$800.
Proper prep and quality touch-up or enamel coatings extend results for years; poor repairs may fail within months.
Preparing the Sink and Work Area
Before any repair begins, the water supply must be shut off and fittings disconnected while surrounding countertops and cabinets are shielded with drop cloths and tape.
The sink surface should be thoroughly degreased and dried to guarantee adhesion of repair materials.
Finally, adjoining areas must be masked and ventilation arranged to protect finishes and secure safe air circulation.
How to disconnect water and protect surrounding surfaces
Shut off the water supply at the nearest valves and confirm both hot and cold lines are fully closed to prevent leaks while working.
Disconnect supply lines with adjustable wrench, catching residual water in a pan. Cap or plug open fittings to prevent drips.
Protect countertops and cabinets with plastic sheeting and towels, and place drop cloths on floors to guard against chips, stains, and debris.
Cleaning for effective repairs: degreasing and drying
With the water capped and surrounding surfaces protected, attention turns to cleaning the sink to confirm repairs bond properly.
Remove loose debris, then degrease with a mild detergent or a 50/50 isopropyl alcohol–water solution.
Rinse thoroughly, dry with lint-free cloths, and allow air-drying until completely matte.
Ascertain no residue, moisture, or oils remain before proceeding to surface prep.
Masking and ventilation setup
Several layers of protection should be put in place around the sink and work area to control dust, fumes, and accidental damage.
Surfaces and cabinetry are covered with plastic sheeting and painter’s tape; fixtures and drains are masked.
Windows and doors open for cross-ventilation; a window fan or exhaust fan is positioned to draw fumes outside.
A respirator and eye protection are kept available.
Repairing Chips and Exposed Cast Iron
Next, the guide addresses how to assess and repair chips or areas of exposed cast iron, distinguishing cosmetic nicks from structural damage that requires professional attention.
It outlines step-by-step repairs using epoxy or porcelain repair kits, followed by sanding, feathering, and shaping to blend the patch with the surrounding enamel.
Finally, proper curing times and inspection criteria are provided to guarantee a durable, visually consistent finish.
Identifying chip types and when to use filler vs. professional help
When evaluating chips in an enameled cast iron sink, the size, depth, and location determine whether a DIY filler will suffice or if a professional restoration is required.
Surface nicks under 1/8 inch, away from drains, often accept touch-up fillers.
Deep gouges, rusted exposed cast iron, structural cracks, or chips near edges and drain fittings typically need professional assessment and refinishing to guarantee durability and corrosion protection.
Step-by-step chip repair using epoxy or porcelain repair kits
After evaluating whether a chip is small and superficial or requires professional attention, the homeowner can proceed with a controlled repair using epoxy or a porcelain repair kit for surface chips and minor exposed cast iron.
Follow concise steps to clean, mix, apply, and cure the repair to restore protection and appearance.
- Clean and de-grease area.
- Mask surrounding enamel.
- Mix and apply filler precisely.
- Let cure fully before use.
Sanding, feathering, and shaping repaired areas
Begin by evaluating the cured repair to determine how much sanding and shaping is needed to blend the filler smoothly into the surrounding enamel.
Use progressively finer grit sandpaper, starting around 120–220 grit, then 400–600 grit for feathering.
Keep edges rounded to match original contours.
Remove dust, inspect under good light, and verify connections are seamless before final cleaning and touch-up paint.
Curing times and inspection
With the repaired surface smoothed and feathered to match the surrounding enamel, attention shifts to curing times and final inspection to guarantee a durable bond and uniform finish.
Allow recommended cure duration—typically 24–72 hours depending on product and humidity—before light use.
Inspect for adhesion, color match, and texture continuity.
Address any deficiencies with spot sanding, additional coating, or repeat curing as needed.
Removing Stubborn Stains and Mineral Deposits
Next, the guide addresses techniques for removing stubborn stains and mineral deposits using both safe commercial cleaners and simple DIY solutions.
It outlines step-by-step methods for treating coffee stains, rust marks, and hard-water scale while specifying nonabrasive tools and motions to protect the enamel.
Practical warnings highlight cleaners and scrubbing materials to avoid to prevent scratching or dulling the finish.
Safe chemical cleaners and DIY natural solutions
Several effective options exist for tackling stubborn stains and mineral buildup on enameled cast iron without risking the finish: mild commercial cleaners formulated for enamel, oxygen-based bleaches, and a range of DIY alcaline or acidic solutions used judiciously.
Recommended DIY approaches include baking soda paste, diluted white vinegar for brief contact, and lemon juice.
Always test in an inconspicuous spot, rinse thoroughly, and avoid abrasive scrubbing.
Step-by-step stain removal for coffee, rust marks, hard water scaling
Addressing coffee stains, rust marks, and hard-water scaling on enameled cast iron requires targeted methods tailored to each deposit: gentle alkaline pastes and brief acid soaks remove organic stains like coffee,
chelating agents or oxalic acid treatments tackle rust without etching the glaze,
and diluted acidic or descaling solutions dissolve mineral buildup when allowed short contact and followed by thorough rinsing.
Apply, dwell briefly, agitate gently, rinse.
Tools and techniques to avoid scratching the enamel
Select nonabrasive tools and controlled techniques to protect the enamel while removing stubborn stains and mineral deposits.
Use soft cloths, microfiber pads, nylon scrubbers, and plastic scrapers.
Apply gentle acidic cleaners (vinegar or diluted citric acid) and baking soda paste; let sit before wiping.
Rinse thoroughly and dry.
Test any product on an inconspicuous area first to avoid etching or discoloration.
Treating and Neutralizing Rust
Rust must first be assessed to distinguish superficial surface rust, which affects only the enamel, from deeper corrosion that compromises the cast iron.
Removal can be mechanical (abrasion, wire brushing) or chemical (rust removers), chosen based on severity and surrounding enamel.
After cleanup, applying a rust converter and suitable primer prepares the area for a durable refinish.
Differentiating surface rust from deep corrosion
When evaluating an enameled cast iron sink, distinguishing superficial rust from deep corrosion is essential because the choice of treatment hinges on the damage’s depth and extent.
Superficial rust appears as flaky or powdery orange discoloration limited to the enamel surface, often removable without structural repair.
Deep corrosion shows pitting, loss of enamel, and metal weakness, requiring reinforcement or professional restoration.
Rust removal methods: mechanical vs. chemical
After identifying whether discoloration is surface-level or indicative of pitting, the next step is choosing an appropriate removal method: mechanical abrasion or chemical treatment.
Mechanical methods—fine steel wool, sanding, or rotary brushes—physically remove rust but risk enamel damage if overdone.
Chemical options—acidic cleaners or rust removers—dissolve oxidation; they require careful application, rinsing, and neutralization to protect remaining enamel.
Applying rust converters and primers before refinishing
Begin by inspecting and neutralizing any remaining oxidation so that treatments bond to sound metal; rust converters chemically transform iron oxides into a stable, inert layer (usually iron tannate or phosphate) that prevents further corrosion and provides a keyed surface for primers.
Apply converter per manufacturer directions, rinse and dry thoroughly, then use a compatible metal primer.
Allow full cure before sanding and refinishing to guarantee adhesion and durability.
Re-enameling and Touch-Up Finishes
Decisions between touch-up paint and full re-enameling hinge on damage extent: small chips and surface scratches suit repair kits, while widespread crazing or large areas of loss usually require reglazing.
Color-matched porcelain repair kits and high-heat enamel paints are selected to match gloss and withstand heat and cleaners, with attention to primers, multiple coats, and durable finish layers.
When expertise or scope warrants, professional reglazing is an option; readers should weigh longevity, warranty, and typical cost against DIY effort.
When to use touch-up paint vs. full re-enameling
When chips are small, isolated, and confined to the surface glaze, touch-up paint can provide a fast, inexpensive cosmetic fix; deeper cracks, widespread wear, or rust penetration require full re-enameling to restore structural integrity and long-term protection.
Touch-up suits quick spot repairs and minimal cost. Re-enameling is justified for adhesive failure, multiple damaged areas, or when longevity and corrosion resistance are priorities.
Choosing color-matched porcelain repair kits and high-heat paints
After determining whether a spot repair or full re-enameling is appropriate, attention turns to selecting color-matched porcelain repair kits or high-heat paints that will restore appearance and durability.
Choices depend on chip size, gloss match, and heat/moisture resistance. Evaluate manufacturer color charts, sample swatches, and compatibility with porcelain or enamel.
Prefer kits with filler, pigment, and clear topcoat rated for sinks and frequent cleaning.
Step-by-step application: primers, coats, and finish layers
Begin the re-enameling or touch-up process by establishing a clean, dry work area and following a strict sequence: surface prep, primer, base coats, and protective topcoat.
The technician sands, degreases, and applies primer thinly; after curing, two light base coats are brushed or sprayed, each dried between passes.
Finish with a durable topcoat; cure per product instructions.
- Prep
- Prime
- Base coats
- Topcoat
Professional reglazing overview and cost considerations
Evaluating professional reglazing involves evaluating scope, materials, and labor to determine whether re-enameling or a touch-up finish best suits the sink’s condition. Professionals assess adhesion, extent of chips, and underlying rust, then quote costs. Touch-ups run lower; full re-enameling costs more but yields durable results. Warranties and prep quality affect value.
| Service | Typical cost |
|---|---|
| Touch-up | $50–$150 |
| Re-enamel | $300–$800 |
Restoring Drain and Hardware
Attention turns to the sink’s drain and hardware, where worn strainers, pop-ups, and overflow components often compromise function and appearance.
Each part should be inspected, cleaned, or replaced as needed to restore proper drainage and prevent corrosion.
Once hardware is serviced, seals and plumbing connections must be reinstalled and tightened to guarantee a watertight fit.
Cleaning or replacing the strainer, pop-up, and overflow parts
Inspect the drain assembly and related hardware for mineral buildup, corrosion, and worn seals before reassembly.
Remove strainers and pop-up components; soak in vinegar or a descaler, scrub with a nylon brush, and replace O-rings or gaskets.
For irreparable corrosion or stripped threads, install new matching parts.
Clean overflow channels with a pipe cleaner and mild detergent, ensuring unobstructed flow.
Re-sealing and reinstalling plumbing to prevent leaks
Begin by preparing the drain area and all replacement parts, ensuring mating surfaces are clean, dry, and free of old sealant or debris to achieve a watertight fit.
Apply plumber’s putty or silicone sealant as specified, seat the strainer and tighten evenly.
Reconnect tailpiece, trap, and supply lines, check alignment, tighten slip nuts, then test for leaks and retighten as needed.
Final Curing, Polishing, and Maintenance
After repairs, the restored enamel requires specified curing times and gentle polishing to guarantee a durable, glossy finish.
Routine cleaning with nonabrasive cleaners and soft cloths preserves the surface and prevents wear.
Harsh scouring pads, acidic cleaners, and dropping heavy objects should be avoided to protect the repair.
Proper curing times and post-repair polishing techniques
Allow adequate time for repaired areas to fully cure before any polishing or regular use; proper curing guarantees the repair bonds and the enamel achieves its desired hardness.
Typical curing spans 24–72 hours depending on product instructions and room temperature.
Once cured, lightly polish with a nonabrasive pad and fine polishing compound to blend sheen.
Finish with a soft buffing cloth to restore luster.
Routine cleaning practices to protect restored enamel
Maintain gentle, consistent cleaning habits to preserve the integrity of restored enameled cast iron: use mild, nonabrasive cleaners, soft sponges or microfiber cloths, and lukewarm water to remove everyday soil without scratching the surface.
Rinse thoroughly, dry after use to prevent mineral deposits, and address spills promptly.
Schedule periodic gentle polishing to maintain sheen and inspect repaired areas for early signs of wear.
Products and habits to avoid
Avoid products and habits that compromise the enamel’s final curing and long-term durability: abrasive powders, steel wool, high-acid cleaners (like undiluted vinegar or harsh descalers), oven cleaners, and bleach-based formulations can scratch, dull, or chemically damage the newly restored surface.
Also avoid sudden thermal shocks, heavy impacts, and prolonged standing water; use soft cloths, mild pH-neutral cleaners, and drying to preserve finish.
Common Mistakes and When to Call a Professional
Many DIY attempts inadvertently aggravate chips or trap moisture beneath new coatings, accelerating deterioration.
Visible rust through the enamel, persistent flaking, or recurrent stains despite proper curing indicate the restoration has failed or corrosion is too advanced for home repair.
In such cases, a professional reglazing service can assess structural integrity, remove compromised enamel, and apply factory-grade coatings with warranty-backed curing and finish.
DIY errors that worsen damage
Attempting quick fixes can turn a manageable chip or stain into a much larger problem. Improper sanding, using harsh abrasives or acidic cleaners, and applying the wrong repair materials can strip enamel, deepen cracks, or create uneven finishes that trap moisture.
DIYers also risk mismatched fillers, inadequate curing, and glued-on patches that fail. When structural rust, spreading cracks, or persistent leaks appear, consult a professional.
Signs restoration has failed or corrosion is too advanced
When a repair effort makes damage worse, it can be hard to tell whether the problem is fixable at home or beyond salvage.
Clear signs restoration failed include spreading rust beneath enamel, persistent blistering, flaking lacquer, deep pits, structural weakening, or recurring stains after proper treatment.
If adhesives, fillers, or coatings peel repeatedly, corrosion is advanced and professional assessment is advised.
What to expect from a professional reglazing service
Expect a professional reglazing service to provide a systematic assessment, surface preparation, and high-temperature enamel application backed by warranties and safety protocols.
Technicians will identify irreparable corrosion, recommend replacement when necessary, and correct common DIY errors like poor adhesion or uneven coats.
Expect proper masking, ventilation, curing, and documentation of guarantees.
Costs, timelines, and follow-up care are communicated upfront for informed decisions.
Cost Breakdown and Time Estimates
The article now examines the financial and temporal aspects of restoring an enameled cast iron sink.
It compares typical DIY materials costs—cleaners, sandpaper, epoxy or touch-up kits—against estimates for hiring a professional refinisher.
It also outlines expected time for each stage, from prep and repair to curing and final polishing.
Typical DIY materials cost vs. professional service
A clear comparison of typical DIY materials versus hiring a professional helps homeowners decide whether to tackle an enameled cast iron sink restoration themselves or pay for a service. DIY often costs $25–$150 for fillers, sandpaper, epoxy and touch-up paint; professionals typically charge $200–$800 depending on damage and finish. Consider skill, warranty and final appearance.
| DIY | Professional |
|---|---|
| Low cost | Higher cost |
| No warranty | Warranty included |
| Variable finish | Consistent finish |
Time required for each repair stage
In estimating time for each repair stage, homeowners should plan sequential blocks—inspection, surface prep, repair application, curing, and finishing—with most straightforward jobs taking 2–6 hours of active work spread over 1–3 days to allow for drying and curing.
Inspection and prep: 30–90 minutes.
Chip repair and touch-up: 1–3 hours plus 8–48 hours curing.
Final sanding and seal: 30–60 minutes.
Examples and Before/After Scenarios
Typical chip-to-finish timelines are illustrated through concise examples that show how minor repairs can be completed in an afternoon while more extensive restorations may span several days.
Case-based scenarios highlight common damage patterns—hairline chips, large enamel losses, and surface staining—and match each to the recommended restoration steps and expected timeframes.
Before-and-after photos and brief notes on materials used clarify outcomes and help set realistic expectations.
Typical chip-to-finish timelines
Restoration timelines for enameled cast iron sink chips vary with chip size, substrate exposure, and chosen repair method; a small surface chip can often be sanded, filled, and cured within 24–48 hours, while larger chips that reveal bare iron or require multi-layer enamel rebuilding may take several days to a week to complete and fully cure.
Typical examples:
- pinhole (same-day)
- quarter-inch (2–3 days)
- golf-ball-size (5–7 days)
Case-based solutions for common damage patterns
Following the timeline distinctions for chip size and repair method, practical case studies illustrate how specific approaches map to real-world damage.
- Small hairline chip: clean, sand, enamel touch-up; aesthetic restored.
- Medium edge chip: fill, shape, cure, polish; durable seal achieved.
- Large pit with rust: remove rust, apply bonding primer, rebuild enamel; structural integrity regained.
- Surface stains: deep clean, mild abrasion, recoat; uniform finish returned.
Conclusion
Restoring an enameled cast iron sink can extend its life and appearance considerably. Studies show homeowners who perform targeted repairs save up to 70% versus full replacement, illustrating restoration’s cost-effectiveness. After proper prep, chip repair, stain removal, and careful curing, the sink can look nearly new and resist future damage. When repairs exceed one-third of the basin or structural rust is present, consult a professional to guarantee safety and durability.
