How to Disconnect Whirlpool Tub Motor Safely: Step-by-Step Guide
To safely disconnect a Whirlpool tub motor, follow these steps: First, ensure safety by isolating and locking out the circuit. Use a multimeter to confirm zero voltage, then drain the tub. Document and label all motor leads, taking photos of connections for reference. Loosen the terminals and cap any exposed conductors. Support the motor before removing the mounting bolts, then detach any brackets and connectors. Protect the wiring with proper insulation. Finally, inspect the components to determine whether to repair or replace. For detailed procedures, troubleshooting tips, and safety checks, continue reading.
Overview of Disconnecting a Whirlpool Tub Motor Safely
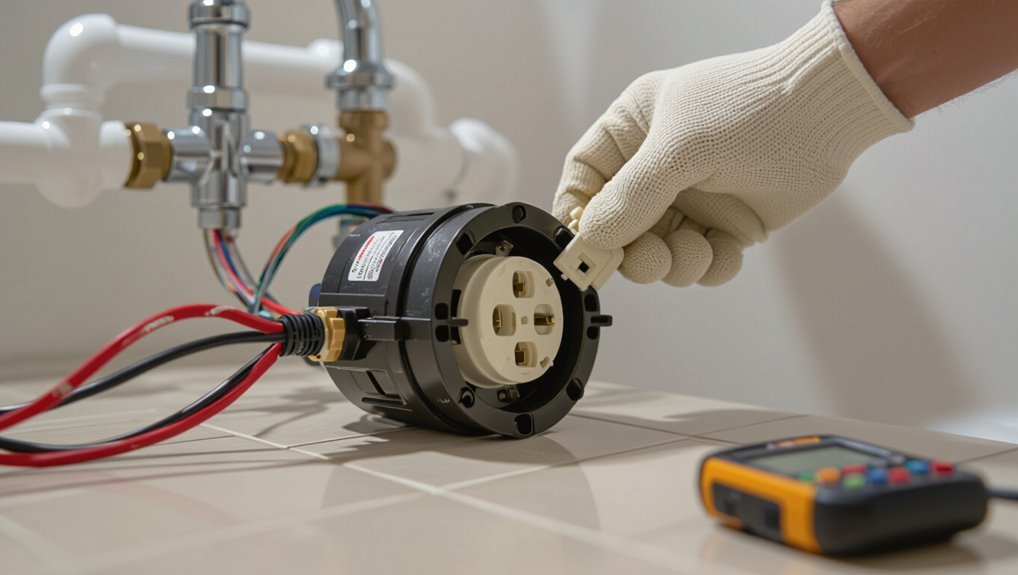
This guide outlines the steps, tools, and qualifications needed to disconnect a whirlpool tub motor, and is designed for competent DIYers or licensed technicians comfortable with electrical work.
It provides a concise safety checklist—power isolation, lockout-tagout, and protective equipment—to minimize shock and injury risks.
The procedure typically takes 30–90 minutes depending on access and model complexity.
What this guide covers and who should attempt the task
A clear, step‑by‑step manual explains what the guide covers—safety precautions, required tools, how to isolate power, how to access and disconnect the motor, and how to test and reassemble components—so readers know the scope before starting.
It details how to disconnect whirlpool tub motor, necessary parts, and diagnostic checks.
Recommended for competent DIYers or licensed technicians; novices should seek professional help.
Quick safety summary and estimated time
Having confirmed the scope, tools, and skill-level recommendations in the preceding section, the quick safety summary below highlights the few nonnegotiable precautions and a realistic time estimate to complete the motor disconnection:
Confirm power is isolated at the breaker and verified with a tester, wear PPE, drain tub, label wiring, and secure parts.
Estimated time: 45–90 minutes for a typical homeowner with basic tools.
Essential Safety Precautions Before You Begin
Before any work on a whirlpool tub motor begins, appropriate personal protective equipment—gloves, eye protection, and nonconductive footwear—should be worn.
Power must be shut off at the breaker and circuits tested to confirm de-energization, and the tub drained with fittings secured to prevent leaks.
If wiring, grounding, or plumbing issues are uncertain or complex, a licensed electrician or plumber should be engaged.
Personal protective equipment needed
Personal protective equipment (PPE) protects technicians from electrical shock, sharp edges, and chemical exposure when disconnecting a whirlpool tub motor.
Required items include insulated gloves, safety glasses, and a face shield for splash protection.
Cut-resistant gloves are recommended for handling metal components.
Non-slip footwear prevents falls on wet surfaces.
Durable work clothing and hearing protection complete the basic PPE set.
Electrical safety: shutting off power and testing circuits
With PPE in place, attention shifts to electrical safety: cutting power and verifying circuits to eliminate shock risks.
The procedure requires locating and switching off the correct breaker, locking/tagging the breaker if available, and confirming de-energized status with a non-contact tester and multimeter at the motor leads.
Only proceed after verification; assume live until tested and documented.
Water safety: draining the tub and preventing leaks
Drain the tub fully and isolate all water supplies to prevent accidental flooding or damage during motor work.
After draining, inspect drain lines, overflow, and visible fittings for leaks.
Place absorbent towels or a shallow pan beneath the access panel to catch residual water.
Tighten or cap nearby valves, and keep a bucket and plumber’s tape on hand to address minor leaks promptly.
When to call a licensed electrician or plumber
When should a homeowner stop and call a licensed electrician or plumber?
If electrical wiring is unclear, junctions are corroded, the motor shows burning smells, or breakers trip repeatedly, an electrician is required.
If pipes leak, fittings are seized, trap or circulation plumbing is damaged, or water intrusion risks exist, a licensed plumber should handle it.
Safety and code compliance mandate professional intervention.
Tools and Materials Required
A concise list of necessary hand tools, electrical testers, and common replacement parts sets the foundation for a safe motor disconnection.
Recommended multimeter settings for voltage and continuity checks are specified to guarantee accurate testing.
Personal protective equipment and other safety accessories are also outlined to minimize risk during the procedure.
Hand tools, testers, and replacement parts list
Several essential hand tools, electrical testers, and a small selection of replacement parts are required to disconnect a whirlpool tub motor safely.
A concise kit speeds work and reduces risk: basic hand tools, a continuity tester, and common spare parts cover typical issues encountered when accessing the motor.
- Flathead and Phillips screwdrivers
- Adjustable wrench
- Insulated pliers
- Continuity tester
- Motor capacitor and wire connectors
Recommended multimeter settings and safety accessories
Moving from basic hand tools and spare parts, attention shifts to the multimeter settings and safety accessories that protect both the technician and the equipment.
Use a digital multimeter set to AC volts for mains checks, continuity or resistance for motor windings, and low-range DC for control circuits.
Recommended safety gear: insulated gloves, safety glasses, nonconductive footwear, and lockout/tagout supplies.
Identify Your Whirlpool Tub Motor and Wiring Configuration
The technician locates the motor by removing the tub’s access panels and visually tracing the pump assembly and mounting brackets.
Identification includes noting motor model numbers, common connector styles (spade, plug, or pigtail), and whether the motor is permanent-split capacitor, shaded-pole, or another type.
Wiring diagrams on the motor label or in the tub’s manual are consulted and wires are clearly labeled before any disconnection.
Locating the motor and access panels
Inspecting the exterior of the tub cabinet reveals the most common location for the whirlpool motor and its wiring: an access panel on the side or front of the bath.
Panels may be secured with screws or clips; remove fasteners, lift panel, and peer into the cavity.
Note motor mounting, conduit, and visible junction boxes. Photograph layout before proceeding to disconnect.
Common motor types and connector styles
After photographing the layout and exposing the motor cavity, identification of the motor type and connectors determines the disconnect procedure and required tools.
Common motors include synchronous, induction, and capacitor-start units. Connector styles vary: blade spade, multi-pin plastic plugs, ring terminals, and sealed pigtails.
Note mounting brackets, thermal switches, and integrated control modules to select correct removal methods and replacement parts.
How to read wiring diagrams and label wires
Begin by locating the motor’s wiring diagram—typically on the tub cabinet, motor housing, or in the appliance manual—and compare it to the actual connector layout to confirm circuit functions before disconnecting anything.
Trace power, ground, and control wires; note color codes and terminal numbers. Use numbered labels or masking tape with a permanent marker.
Photograph connections for reference and secure loose wires.
Step-by-Step Motor Disconnection Procedure
The procedure begins with preparing the workspace and securing the tub to prevent movement.
Next, the technician turns off the appropriate breakers and verifies zero voltage with a multimeter before following a defined sequence to disconnect power leads.
Once electrical isolation is confirmed, motor mounting hardware and support brackets are removed and plumbing connections and seals are detached for safe extraction.
Preparing the workspace and securing the tub
Before any tools are touched, the workspace should be cleared, well-lit, and level so the tub can be accessed safely and components laid out in order.
Protective floor coverings and drip trays prevent damage and contain fluids. Stabilizing supports or blocks prevent tub movement.
Nearby tools and labeled containers for fasteners improve workflow. Guarantee adequate ventilation and unobstructed exits for safe, efficient work.
Turning off breakers and verifying zero voltage with a multimeter
Shut off the circuit breaker supplying the whirlpool tub and lock it out, then verify zero voltage at the motor supply conductors using a properly rated multimeter to confirm the circuit is de-energized.
Inspect the panel label to guarantee correct breaker, test between each conductor and ground, and use known-live test to confirm meter functionality before and after checks.
Disconnecting power leads safely (step sequence)
With voltage confirmed at zero and the breaker secured, the technician proceeds to disconnect the motor’s power leads following a defined sequence to maintain safety and equipment integrity.
First, they photograph and label each lead. Next, they loosen terminal screws, remove leads one at a time, and insulate exposed conductors with capped connectors.
Finally, they recheck for stray voltage before continuing.
Removing motor mounting hardware and support brackets
Begin by supporting the motor to prevent sudden drops or shifts once fasteners are loosened: position a jack, block, or support strap beneath the housing and take up any weight so the motor is fully supported before any bolts are removed.
Loosen and remove mounting bolts methodically, retaining hardware in labeled containers.
Detach support brackets, noting orientation and spacer locations for accurate reinstallation later.
Detaching plumbing connections and seals
Before disconnecting lines, guarantee all water and power to the tub are isolated and the motor is supported to prevent movement; then drain residual water from the pump and surrounding plumbing via the service port or by carefully loosening a lower hose clamp into a catch pan.
Inspect hose fittings, note orientation, then loosen clamps and detach hoses.
Remove seals or O-rings, clean mating surfaces, and document component locations for correct reassembly.
Removing the motor from the cabinet without damage
Support the motor assembly and verify all electrical and plumbing isolation before any removal steps proceed.
The technician carefully unbolts mounting brackets, noting hardware placement, and eases the motor free while maintaining support to prevent strain. Wiring harnesses and grounding are kept clear.
Once clearances are confirmed, the motor is lifted straight out, avoiding contact with cabinet edges or adjacent components to prevent damage.
Handling Wiring and Control Modules
Attention should turn to the wiring and control modules, beginning with unplugging or disconnecting the control box connections according to the manufacturer’s instructions.
Disconnected wires must be individually capped, clearly labeled, and secured to prevent short circuits or misidentification during reassembly.
Finally, exposed wiring and terminals should be protected from moisture and stored or routed to preserve functionality for future use.
Unplugging or removing control box connections
When preparing to unplug or remove the tub’s control box connections, the technician should first verify power is completely disconnected at the breaker and confirm with a non-contact voltage tester; only then should they access the cabinet to locate the control module and wiring harnesses.
They should depress locking tabs, gently separate connectors, and note connector orientations. Avoid forcing pins; inspect for damage before removal.
Safe capping and labeling of disconnected wires
Seal and tag each disconnected conductor immediately to prevent shorts and confirm accurate reconnection.
Use color-coded heat-shrink tubing or insulated wire nuts for secure insulation.
Attach durable labels indicating circuit function and terminal ID, referencing the wiring diagram.
Record connections with a photo or written map.
Confirm labels resist oil and heat; fasten them close to the termination but not under strain or covering insulation.
Protecting wiring from moisture and future use
Several simple measures protect disconnected wiring and control modules from moisture and guarantee they remain serviceable later.
Use heat-shrink tubing over splices, sealed silicone-filled connectors, or waterproof wire nuts.
Wrap exposed harnesses with self-fusing silicone tape and secure control boxes with gasketed covers.
Label terminals clearly and store spare modules in moisture-proof bags with desiccant.
Inspect seals periodically before reuse.
Inspecting and Troubleshooting the Motor and Surrounding Components
The motor and its nearby components should be inspected for common signs of failure such as unusual noise, overheating, burning smells, or intermittent operation that indicate electrical faults.
Technicians will check capacitors, relays, and thermal protectors for proper function and visible damage or leakage.
Guidance should clarify when components can be tested or repaired versus when full motor replacement is the safer, more reliable option.
Signs of motor failure and electrical faults
Many common symptoms indicate a whirlpool tub motor is failing or suffering an electrical fault, and recognizing them early prevents further damage.
Observed signs include unusual vibration, grinding or squealing noises, intermittent operation, reduced or no pump output, burning odors, visible scorch marks, tripped breakers, or blown fuses.
These indicate urgent inspection and isolation before attempting disconnection or repairs.
Checking capacitors, relays, and thermal protectors
One clear step before disconnecting a whirlpool tub motor is to inspect its capacitors, relays, and thermal protectors for signs of failure; these components commonly cause starting issues, intermittent operation, and overheating even when the motor windings appear intact.
Visually check for bulging, leakage, burned contacts, or discoloration.
Use a multimeter to test capacitance, continuity through relays, and thermal protector reset behavior.
When replacement is necessary vs. repair
Evaluate whether to repair or replace the whirlpool tub motor by comparing the extent of internal damage, age, cost of parts and labor, and the availability of compatible components.
If windings, bearings, or rotor are severely damaged, or the motor is obsolete, replacement is usually prudent.
Minor failures—sealed bearings, capacitor or relay faults—can justify repair when parts are affordable and expected lifespan remains acceptable.
Temporary and Permanent Isolation Options
The article outlines methods for temporarily disabling the whirlpool motor to allow safe testing or short-term repairs.
It then contrasts those measures with recommendations for permanent motor removal and storage to prevent damage or moisture ingress.
Finally, it summarizes rewiring options and safety considerations when converting the tub or leaving the motor out permanently.
Temporary disablement for safe testing or repair
Begin by clearly distinguishing temporary disablement from permanent isolation: temporary measures cut power or motion only long enough for testing or repairs, while permanent isolation removes all energy sources and secures the system indefinitely.
For temporary disablement, unplug the unit, switch off the dedicated breaker, lockout/tagout the control panel, secure moving parts, verify zero voltage with a tester, and proceed with diagnostics.
Permanent removal and storage recommendations
After temporary disablement has allowed safe testing or short-term repairs, attention shifts to permanent removal and proper storage to prevent hazards and preserve parts.
The motor should be fully disconnected, labeled, and its wiring caps secured. Drain fluids, dry components, and wrap in moisture-resistant material.
Store in a cool, dry, ventilated area on a stable pallet, away from electrical sources and heavy traffic.
Rewiring options if converting tub or removing motor permanently
Several practical rewiring paths exist when a whirlpool tub is being converted or its motor removed permanently, each balancing safety, code compliance, and future flexibility.
Options include capping and isolating the motor feed at the junction box, removing the dedicated circuit and terminating at the breaker, installing a blanked, GFCI-protected receptacle for future use, or hardwiring lighting/auxiliary components per local code.
Reassembly and Restoring Service (If Reinstalling)
When reinstalling the motor, technicians should follow manufacturer torque and specification guidelines to secure mounts and fasteners.
Electrical and plumbing connections must be restored exactly as originally configured, with wire terminals, seals, and hose clamps checked for proper engagement.
Before replacing access panels, a defined testing sequence should confirm correct motor operation, leak-free plumbing, and safe electrical performance.
Reinstalling motor and torque/spec recommendations
Reinstalling the tub motor requires aligning the housing, securing fasteners to specified torque values, and reconnecting electrical and plumbing interfaces in the reverse order of removal.
Use manufacturer torque specs for mount bolts and impeller nut; typical ranges appear in service manual.
Verify gasket seating and shaft engagement before final tightening.
Rotate shaft by hand to confirm free movement.
Document serial/model for reference.
Reconnecting electrical and plumbing connections correctly
Begin by ensuring all power sources are isolated and water supplies are shut off before reconnecting electrical and plumbing interfaces.
Match wiring to original labels or schematic, tighten terminals to specified torque, secure grounds, and reinstall wire connectors with proper insulation.
Reattach hoses and fittings using appropriate seals or thread tape, tighten per manufacturer guidance, and verify no cross-connections or loose clamps remain.
Testing sequence before closing access panels
With electrical and plumbing connections verified and secured, a structured testing sequence should be followed before closing access panels to confirm safe and proper operation.
First, restore power briefly to check motor rotation and listen for unusual noises.
Verify pump priming, leak-free plumbing, and GFCI/trip function.
Run a full cycle at low speed, then normal speed, document results, and only then replace panels.
Common Mistakes and How to Avoid Them
Common errors include electrical mistakes that lead to shocks or component damage, mechanical missteps that harm seals or mounts, and poor organization such as mislabeling wires or losing small parts.
Each type of error has simple preventative steps—proper lockout/tagout and testing, using the right tools and gentle handling for seals, and clear labeling with a parts tray.
Addressing these avoids safety risks and simplifies any future reassembly.
Electrical errors that cause shocks or damage
Although disconnecting a Whirlpool tub motor is a routine task for many homeowners and technicians, electrical mistakes can create serious shock or fire hazards if overlooked.
Common errors include failing to switch off and lock the circuit breaker, misidentifying live wires, neglecting to test for voltage, and using improper tools or wet hands.
Use insulated tools, verify deenergized circuits, and follow wiring diagrams.
Mechanical mistakes that damage seals or mounts
Handle the motor assembly carefully to prevent damage to seals, bearings, and mounting hardware.
Avoid prying between components, excessive force when removing bolts, or dropping the unit. Support weight evenly, use correct socket sizes, and follow torque specs when reassembling.
Inspect seals and mounts for deformation; replace rather than reuse compromised parts to guarantee watertight, vibration-free operation.
Mislabeling wires and losing small parts
Protecting seals and mounts goes hand in hand with keeping track of wiring and small hardware. Once components are freed, mislabeling wires or losing screws, washers, and clips can turn a straightforward reassembly into a leak-prone, unsafe mess.
Use labeled tags or numbered tape, photo-document connections, store fasteners in compartmentalized containers, and work methodically. Double-check wire colors and terminal positions before finalizing reassembly.
Maintenance Tips After Motor Work
After motor work, routine preventive checks are recommended to identify wear and guarantee connections remain secure.
Regular cleaning, proper lubrication, and a scheduled seal replacement plan help preserve performance and prevent leaks.
Following a concise maintenance checklist reduces the likelihood of premature motor failure.
Preventive checks to extend motor life
Inspect components and document findings immediately after motor work is complete to guarantee longevity and reliable operation.
Technicians should verify electrical connections, secure mounting hardware, and confirm proper grounding.
Check wiring insulation, strain reliefs, and thermal protection devices for correct function.
Monitor vibration, unusual noise, and temperature during initial run.
Record measurements and schedule follow-up inspections to catch developing issues early.
Cleaning, lubrication, and seal replacement schedule
Following verification of connections, mounts, and initial run measurements, routine cleaning, lubrication, and timely seal replacement become the primary actions that uphold motor reliability.
Establish a schedule: inspect seals and clean debris quarterly, lubricate bearings annually or per manufacturer intervals, and replace seals every 2–3 years or upon wear.
Document each service, note torque and lubricant type, and adjust frequency based on usage and environment.
Safety Checklist and Final Verification
A concise safety checklist guides technicians through the pre-power checklist to confirm all wiring, grounding, and panel access are correct before restoring electricity.
After reassembly, a post-installation testing checklist verifies motor operation, leak-free seals, and that all controls respond as expected.
Following both checklists guarantees a safe, fully functional whirlpool tub system.
Pre-power checklist
Before reapplying power, the technician must complete a concise safety checklist and a final verification sweep to confirm all electrical and mechanical safeguards are in place.
The technician verifies isolation, secures wiring, confirms grounding, restores fasteners, and removes tools and debris before powering the circuit.
- Confirm circuit breaker/off-tag status
- Verify motor wiring insulation intact
- Guarantee grounding connection secure
- Tighten mounting and terminal hardware
- Remove tools, clear work area
Post-installation testing checklist
One final, methodical inspection guarantees the whirlpool tub motor and associated systems operate safely and reliably after installation.
A concise post-installation testing checklist verifies electrical, mechanical, and user controls before regular use.
- Confirm ground and circuit integrity with meter.
- Run motor through full cycles, listen for abnormal noise.
- Check for vibration and secure mounts.
- Inspect seals and water connections for leaks.
- Verify GFCI/trip operation and label panel.
Resources and Further Reading
For detailed schematics, parts lists, and service manuals, official Whirlpool resources and authorized parts distributors are the primary references.
Contact information for Whirlpool support and certified technicians should be consulted for complex issues or warranty-related questions.
Readers are encouraged to verify model numbers before ordering parts or requesting service.
Where to find schematics, parts, and service manuals
Numerous reliable sources provide schematics, OEM parts lists, and service manuals for Whirlpool tub motors, including the manufacturer’s support site, authorized parts dealers, and certified repair forums; consulting these resources helps guarantee accurate diagrams, correct part numbers, and up-to-date safety procedures.
- Manufacturer support website for manuals and exploded diagrams
- Authorized parts dealers with OEM listings
- Certified repair forums and technical communities
- Online repair databases and PDF repositories
- Local appliance parts stores with printed catalogs
Contact information for Whirlpool support and certified technicians
After consulting manuals and parts lists, users should know where to reach Whirlpool support and locate certified technicians for repairs that exceed basic maintenance.
Whirlpool customer service can be contacted via the official website, phone support, or authorized dealer portals.
Certified technician directories, local authorized service centers, and warranty documentation list approved repair professionals.
Keep records of service calls and technician credentials for safety and warranty compliance.
Conclusion
Like a careful gardener pruning a storm-bent branch, the technician steps back, tools stowed and circuits tamed, leaving the whirlpool tub quiet and safe. Every clipped wire and checked connection is a small island of order in a sea of potential hazards. With procedures followed and eyes trained on the checklist, the repaired motor rests ready for future tides—trustworthy, contained, and awaiting the next gentle turn of the wrench.