
How to Ignite a Gas Water Heater Safely: Step-by-Step Guide for Beginners
To safely ignite a gas water heater, follow these steps: First, ensure there is no gas smell; if there is, ventilate the area and evacuate immediately. Turn off the gas supply and wait five minutes. Identify your heater type, locate the pilot light, control knob, and shutoff. Gather safety gear, a lighter or match, and necessary tools. For heaters with standing pilots, set the valve to “PILOT,” press the knob, light the pilot, and hold for 20–30 seconds. For electronic ignitions, follow the manufacturer’s reset instructions. If you’re uncertain at any point, it’s best to contact a qualified technician for assistance.
How to Safely Ignite a Gas Water Heater: Quick Overview
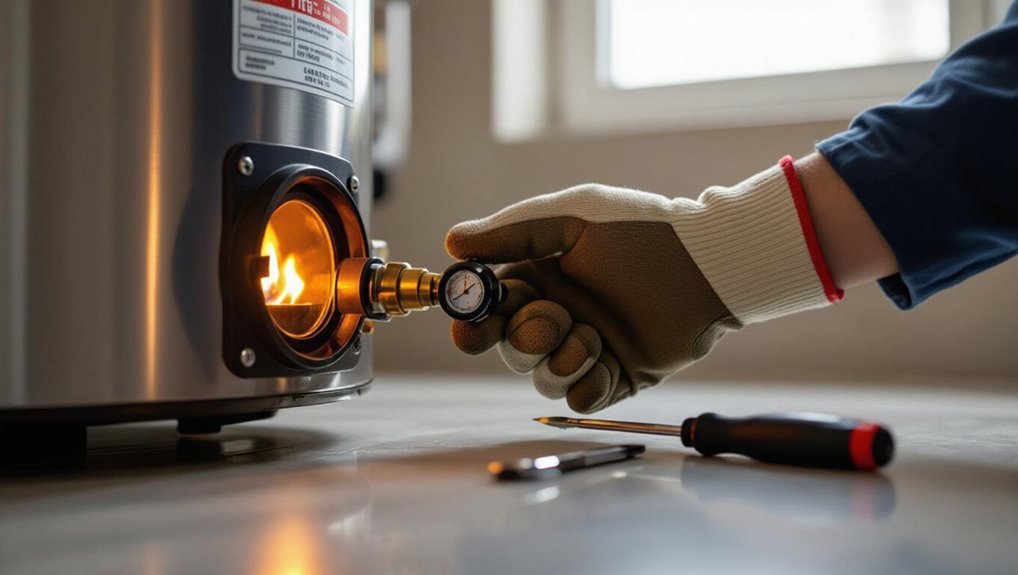
A water heater pilot or burner may need relighting after maintenance, a power outage, or if the pilot has gone out unexpectedly.
Before attempting any ignition, the person should check for the smell of gas and, if detected, leave the area immediately, avoid switches or flames, and call the gas company or emergency services.
If no gas odor is present, the person can follow the manufacturer’s relighting steps while keeping ventilation and basic precautions in mind.
When and why you might need to relight the pilot or burner
Occasionally the pilot light or main burner of a gas water heater will need relighting due to routine maintenance, interruptions in fuel supply, or safety shutoffs triggered by flame failure or a detected gas leak.
Relighting becomes necessary after power outages, appliance servicing, or when the thermocouple fails to sense flame.
Understanding how to ignite gas water heater informs proper timing and avoids unnecessary attempts.
Safety first immediate actions if you smell gas
If any smell of gas is detected, immediate precautions must be taken: stop using electrical switches, avoid open flames, open windows and doors to ventilate, and evacuate all occupants to a safe distance upwind.
Notify the gas company from a safe location and call emergency services if concentrations are strong.
Do not attempt repairs; wait for qualified technicians to confirm safety before returning or relighting equipment.
Tools and Supplies You Need Before You Start
Before attempting to light a gas water heater, one should prepare the necessary safety gear, basic tools, and model-specific materials to guarantee a smooth, hazard-free process.
The text will outline appropriate personal protective equipment, common tools and replacement parts for typical heater models, and clear signs that warrant calling a licensed technician. Proper preparation minimizes risk and avoids unnecessary repairs.
- Safety glasses and work gloves
- Adjustable wrench, flashlight, and long-reach lighter
- Replacement thermocouple or pilot assembly for common models
- Leak detector solution or soapy water and a gas shutoff tool
- Contact information for a qualified gas technician and warranty details
Personal protective equipment
Personal protective equipment (PPE) is essential when relighting a gas water heater to protect against burns, eye injury, and inhalation of combustion gases.
Recommended PPE includes heat-resistant gloves, safety glasses or goggles, long sleeves, and an N95 or respirator if ventilation is poor.
Foot protection and a flame-resistant apron are optional.
Inspect PPE for damage before use and replace as needed.
Tools and materials for common models
With protective gear in place, attention shifts to the specific tools and materials required for relighting different gas water heater models.
A flashlight, adjustable wrench, screwdriver set, long-reach lighter or pilot relight tool, gas leak detector spray or soapy water, replacement thermocouple (if applicable), and manufacturer’s manual are recommended.
Keep a fire extinguisher nearby and guarantee spare batteries for electronic igniters.
When to call a professional instead
When should a homeowner stop and call a professional?
A technician is recommended if there is persistent gas odor, pilot assembly damage, unusual burner behavior, repeated pilot outages, thermocouple or valve failure, rusted or corroded components, or complex gas line issues.
Also call for installations, code compliance checks, or when the homeowner lacks proper tools, confidence, or clear diagnostic results.
Identify Your Water Heater Type and Components
Before attempting ignition, the reader should identify the specific gas water heater model and its ignition method—standing pilot, electronic spark, or hot surface.
They should locate the pilot light, burner assembly, control valve, and gas shutoff on the appliance.
Finally, consulting the manufacturer label and any model-specific warnings will clarify safe operating and lighting procedures.
Common gas water heater models and ignition methods
Identify the specific water heater model and its ignition system before attempting any lighting procedure.
Common models include conventional tank heaters and tankless units; ignition methods vary: standing pilot, intermittent pilot (spark or hot surface), and electronic ignition.
Each method has distinct controls, power needs, and safety interlocks.
Refer to the manufacturer label or manual to confirm model type and ignition style prior to any work.
Locating the pilot light, burner, control valve, and gas shutoff
Having confirmed the heater model and ignition type, the next step is to locate the key components: the pilot light assembly, main burner, gas control valve, and manual gas shutoff.
Inspect the lower access panel for the pilot and burner, trace the gas line to the control valve, and find the manual shutoff near the supply.
Note labels, orientation, and clearances for safe access.
Reading the manufacturer label and model-specific warnings
A clear reading of the manufacturer label provides essential information for safe operation and maintenance: model and serial numbers, fuel type, input BTU rating, ignition instructions, and specific warnings or restrictions that apply to that unit.
The technician should record these details, follow model-specific startup steps, heed clearance and venting warnings, and consult the manual for replacement parts, service intervals, and any prohibitions before attempting ignition.
Preparatory Safety Checks
Before attempting ignition, the operator should confirm the gas supply is on and inspect fittings and connections for the odor of gas or signs of leakage.
They must verify proper venting and adequate combustion air, check electrical power and wiring for electronic ignition systems, and guarantee the surrounding area is free of flammable materials.
Any abnormalities or uncertainties should be addressed or a qualified technician consulted before proceeding.
Confirm gas supply is on and check for leaks
Confirm the gas supply is active and inspect all accessible fittings for leaks before attempting ignition.
The technician visually confirms the shutoff valve position, then applies a scented soap solution or approved leak detector to joints, flex lines, and connections.
Bubbles indicate leaks; any detected leak prompts immediate shutoff and professional service.
No ignition occurs until repairs are completed and rechecked for integrity.
Venting and combustion air requirements
When preparing to ignite the water heater, the technician verifies that venting is unobstructed and that the installation provides adequate combustion air per the manufacturer’s specifications and local codes.
They inspect flues, chimneys, and vent connectors for blockages, corrosion, or improper slopes. They confirm clearances and guarantee required vents, louvers, or ducts supply sufficient fresh air to support complete combustion and safe exhaust.
Electrical considerations for electronic ignition systems
Having verified venting and combustion air, the technician shifts attention to electrical systems that power electronic ignition.
They confirm power is disconnected, inspect wiring for damage, verify correct voltage and proper grounding, and check connections and fuse or circuit protection.
Sensors, control modules, and ignitors are examined for corrosion or loose terminals.
Any deficiencies are documented and corrected before proceeding.
Ensuring the area is clear of flammable materials
Before any ignition procedures begin, the technician clears the immediate work area of combustible materials and potential ignition sources to reduce fire risk.
They remove rags, solvents, cardboard, and aerosol cans; relocate flammable liquids and guarantee adequate ventilation.
Nearby pilot lights, open flames, and electrical sparks are extinguished or isolated.
A quick inspection confirms a safe, unobstructed workspace before ignition proceeds.
Step-by-Step Guide to Relighting a Standing Pilot Light
Before attempting relighting, the gas supply must be shut off and the system allowed to sit long enough for any residual gas to disperse, typically several minutes.
The technician then accesses the pilot assembly, sets the control knob to the proper pilot position, and uses a match or lighter with a steady motion to ignite the pilot.
Once lit, the pilot should be held as specified to guarantee it remains steady, after which the gas is turned back on and the main burner tested for proper operation.
Shut off gas and wait why and how long
Because residual gas can accumulate and create a hazardous atmosphere, the pilot circuit and main gas valve should be turned off and the area ventilated before attempting to relight a standing pilot.
Wait at least five minutes, longer if odor persists, to allow fumes to disperse. During this period, avoid sparks, open windows, and do not operate electrical switches until the gas smell is gone.
Accessing the pilot assembly and control knob positions
After confirming the gas supply is off and the area has been ventilated for the recommended time, the next step is to access the water heater’s pilot assembly and identify the control knob positions.
Remove the access panel and any protective cover.
Locate the pilot tube, thermocouple, and control knob labeled OFF, PILOT, and ON.
Confirm knobs move smoothly and note position for relighting.
Lighting the pilot with a match or lighter exact motions
Light the pilot by first setting the control knob to PILOT, depressing it to allow gas flow, then bringing a lit match or lighter tip close to the pilot opening while keeping the knob held until the flame establishes and the thermocouple heats.
Position the flame beside the pilot orifice, avoid covering it, and use steady, controlled motions to ignite promptly without prolonged gas accumulation.
Holding the pilot and verifying it stays lit
Hold the control knob depressed for 20 to 30 seconds after ignition to allow the thermocouple to warm and the safety valve to sense a steady flame.
Release slowly while watching the pilot; it should remain steady, blue, and centered.
If it extinguishes, repeat ignition sequence.
If it fails repeatedly, shut off gas and consult a qualified technician—do not attempt further repairs.
Turning the gas back on and testing the burner
Once the pilot remains steady and the thermocouple has warmed, the operator can restore the main gas supply and bring the burner online.
Open the gas valve fully, set the thermostat to demand, then observe the burner ignition.
Confirm an even, blue flame across the burner surface, listen for steady combustion, and check for unusual smells or noise.
Shut off immediately if abnormalities appear.
Step-by-Step Guide to Igniting Electronic or Automatic Ignition Systems
The procedure for electronic or automatic ignition systems begins with confirmed power and gas supply and a manufacturer-recommended reset of the spark ignition module.
Proper sequencing—power on, gas valve open, then control panel start—ensures the igniter and gas timing align for safe lighting.
If sparks appear without a flame, common causes include clogged burners, weak igniters, or faulty control modules.
Repeated failures warrant replacement of the igniter or control board.
Reset procedures for spark ignition systems
Begin by locating the ignition control panel and turning the gas valve to the “off” position to stop fuel flow before any reset attempt.
Wait five minutes for residual gas to dissipate.
Inspect for visible damage, then restore power.
Press and hold the reset or pilot button per manufacturer timing, observe for spark or ignition sequence, and if unsuccessful, stop and consult a qualified technician.
Sequencing power, gas, and control panel operations
Power, gas, and control-panel sequences must be coordinated precisely to guarantee safe ignition of electronic or automatic systems; following a strict order prevents premature fuel flow or electrical arcing.
The operator should verify electrical supply, confirm gas valve closed, power control panel, enable ignition mode, open gas valve briefly when prompted, and monitor for confirmed pilot or main burner lock-in before normal operation.
Troubleshooting failed ignitions (sparks but no flame)
When sparks are visible but no flame appears, technicians should methodically isolate common causes—insufficient gas supply, clogged or misaligned burners/pilot, faulty ignition electrodes, or improper timing in the control sequence—and proceed with systematic checks to identify the fault.
Inspect gas pressure and valve operation, clean and realign burner ports and pilot, verify electrode gap and grounding, and confirm correct ignition timing before restoring service.
When to replace control modules or igniters
A clear decision framework helps determine whether a malfunctioning control module or igniter requires replacement: technicians should weigh symptom patterns, diagnostic readings, service history, and cost-effectiveness before removing components.
Replace when diagnostics show failed outputs, intermittent operation persists after cleaning and wiring checks, visible damage or corrosion exists, or repair costs approach replacement.
Always verify compatibility and retest after installation.
Troubleshooting Common Problems
The troubleshooting section outlines common issues encountered when igniting a gas water heater and practical diagnostic steps.
It covers causes and fixes for a pilot that will not stay lit, procedures to follow when there is no gas flow despite an open valve, and how to distinguish weak or yellow flames from a proper strong blue flame.
It also addresses frequent shutdowns or safety lockouts and the checks needed before calling a professional.
Pilot won’t stay lit causes and fixes
Check the pilot light and surrounding components first, since a pilot that won’t stay lit usually stems from simple issues like a dirty pilot tube, a weak thermocouple, or drafts interfering with the flame.
Clean the pilot orifice, reposition shielding to prevent drafts, and test thermocouple continuity; replace a failing thermocouple.
If problems persist, consult a qualified technician to inspect valves and safety controls.
No gas flow despite open valve diagnostic steps
Several straightforward causes can stop gas flow even when the shutoff valve appears open, so systematic diagnostics are essential.
Verify upstream supply by checking other gas appliances and meter.
Inspect valve orientation and handwheel fully open.
Examine flexible connector for kinks or debris.
Confirm appliance inlet filter and regulator are clear.
If uncertainty remains, contact a qualified gas technician for safe pressure testing and repair.
Weak or yellow flame vs. strong blue flame combustion issues
Sometimes a water heater’s flame appears weak or yellow instead of strong and blue, signaling incomplete combustion or improper air-gas mixture.
A yellow or sooty flame indicates insufficient oxygen, clogged burners, or dirty pilot assemblies.
Recommended actions include cleaning burner ports, checking for debris or spider webs, confirming proper venting and air supply, and scheduling professional inspection if soot or gas odors persist.
Frequent shutdowns or safety lockouts
Frequent shutdowns or safety lockouts occur when a gas water heater detects conditions it interprets as dangerous—such as overheating, flame failure, or blocked vents—and automatically cuts fuel flow to prevent fire or carbon monoxide hazards.
Technicians should inspect venting, pilot assembly, thermocouple/FLame sensor, and high-limit switch. Clear obstructions, replace faulty sensors, verify proper gas pressure, and reset per manufacturer instructions; call a professional if unresolved.
Maintenance to Prevent Ignition Problems
A regular maintenance routine helps prevent ignition failures before they occur.
Inspections should follow a checklist and schedule that includes cleaning the pilot assembly and burner ports, testing and replacing thermocouples and sensors, and verifying proper venting with draft tests.
Consistent attention to these items reduces safety risks and prolongs reliable operation.
Regular inspection checklist and schedule
Because regular inspections catch wear and faults before they cause ignition failures, a clear checklist and schedule are essential for safe gas water heater operation.
Inspect monthly for gas odors and visible leaks; check venting and combustion air; test thermostat and safety valves; verify pilot light reliability; document findings and schedule repairs.
Maintain a quarterly and annual inspection calendar.
- Gas odor and leak check
- Venting and airflow
- Thermostat and controls
- Pilot reliability logs
- Document and schedule repairs
Cleaning the pilot assembly and burner ports
After inspections identify issues with pilot reliability or soot buildup, attention should turn to cleaning the pilot assembly and burner ports to restore proper ignition and combustion.
With the gas supply off and power disconnected, a technician brushes and gently vacuums debris, clears port openings with compressed air or a soft wire, and guarantees flame paths are unobstructed before reassembly and controlled relight.
Testing and replacing thermocouples and sensors
Technicians verify thermocouple and sensor operation next, since these components provide essential feedback that allows the gas valve to remain open and the ignition sequence to proceed safely.
They measure millivolt output, inspect for corrosion or breaks, and confirm proper positioning.
Faulty parts are replaced with OEM-equivalent units, connections tightened, and the system retested for stable pilot signal before reassembling panels.
Proper vent maintenance and draft testing
Inspecting and maintaining the venting system is essential to guarantee reliable draft and prevent combustion gases from backing up into the water heater or living space.
Periodically clear obstructions, secure joints, and check for corrosion or loose connections.
Perform a draft test using a smoke pencil or manometer at startup; verify consistent upward flow and correct draft values.
Repair or replace faulty venting promptly.
Safety Risks and How to Mitigate Them
The section outlines key safety risks associated with gas water heaters and practical measures to reduce them.
It covers carbon monoxide hazards and recommended detector placement, recognition of gas leak indicators and emergency steps, the need for adequate ventilation and clearance, and adherence to legal and code requirements for installation.
Readers are urged to follow these precautions and consult qualified professionals when in doubt.
Carbon monoxide risk and detector placement
Recognize that a gas water heater can produce carbon monoxide (CO) when combustion is incomplete or venting is blocked, creating a colorless, odorless hazard that can be fatal at high concentrations.
Install battery- or hardwired CO detectors on each floor, outside sleeping areas and near the heater per manufacturer guidelines.
Test detectors monthly, replace batteries annually, and replace units according to expiration dates.
Gas leak signs and emergency procedures
A faint rotten-egg smell, hissing near fittings, dead or discolored vegetation around outdoor lines, or a sudden loss of pilot light are common indicators of a natural gas leak and should prompt immediate action; occupants must leave the premises without operating electrical switches, phones, or appliances and call the gas utility or emergency services from a safe location.
Trained responders should shut supply, ventilate, and inspect before reentry.
Proper ventilation and clearances
Following detection and safe shutdown procedures, attention shifts to proper ventilation and clearance requirements to prevent buildup of combustion gases and reduce fire risk.
Guarantee intake and exhaust vents are unobstructed, maintain manufacturer-specified clearances from combustibles, and provide adequate room for servicing.
Verify flue drafts and fresh-air supply, install carbon monoxide alarms nearby, and routinely inspect ventilation paths for corrosion, blockages, or damage.
Legal and code requirements for installations
When installing a gas water heater, compliance with local building codes and manufacturer specifications is essential to minimize risks of fire, explosion, and carbon monoxide poisoning.
Installations must follow permit, inspection, venting, clearance, seismic strapping, and combustion air requirements.
Licensed professionals should perform gas connections and pressure testing.
Documentation and adherence to national and local codes reduce liability and enhance occupant safety.
When to Call a Professional and What to Expect
Visible gas leaks, persistent pilot light failures, unusual noises, or carbon monoxide alarm activation warrant immediate professional service.
Homeowners should be prepared to ask about the technician’s certifications, diagnostic steps, estimated timeline, and provide model number, age of the unit, and service history.
The technician can outline likely repair versus replacement options, typical cost ranges, and any applicable warranty or extended-service considerations.
Signs that require immediate professional service
Several clear warning signs indicate that a gas water heater needs immediate professional attention.
Persistent gas smell, hissing or popping noises, visible flames outside the combustion chamber, carbon monoxide alarm activation, unexplained pilot light outages, rusty or discolored water combined with leaks, and sudden loss of hot water despite correct settings.
These signs warrant immediate shutdown and qualified technician service for safety and repair.
Questions to ask a technician and information to provide
How should a homeowner approach a technician visit to guarantee efficient, safe repairs?
A homeowner should describe symptoms, appliance model, age, maintenance history, recent gas smells, and any error codes.
Ask about diagnostic steps, safety checks performed, recommended repairs, timelines, and required permits.
Request written estimates, parts details, and warranty coverage.
Confirm technician licensing and insurance before work begins.
Typical repair or replacement costs and warranty considerations
Repair and replacement costs for a gas water heater vary widely depending on the issue, unit type, and local labor rates. Homeowners should prepare for a modest repair fee up to several hundred dollars or a full replacement that can range from roughly $700 to $3,500 including installation.
Warranties often cover tanks 3–12 years; labor usually excluded.
- Diagnose vs replace decision
- Parts cost examples
- Labor rate influence
- Warranty transfer rules
- Emergency service premiums
Quick Reference Checklist for Relighting a Gas Water Heater
A concise checklist helps guarantee relighting a gas water heater is performed safely and correctly. It should cover pre-ignition safety checks, a clear step-by-step ignition sequence, and post-ignition verifications to confirm proper operation. The following quick-reference items summarize those essential actions for immediate use.
- Confirm gas is off and area is ventilated; smell-check for leaks before starting.
- Shut power off and follow the manufacturer’s pre-ignition safety steps.
- Follow the ignition sequence: pilot lighting procedure, control knob settings, and timing.
- Observe flame characteristics and listen for abnormal sounds during ignition.
- Verify pilot stays lit, burner operates steadily, and monitor for leaks or irregularities.
Pre-ignition safety checklist
Before attempting to relight the pilot, the operator should complete a concise safety checklist to confirm the area, appliance, and controls are safe for ignition.
Verify no gas odor; ventilate if suspected.
Ascertain power to electronic components is off.
Clear combustible materials and open access panels.
Confirm venting is unobstructed and flame arrestors are clean.
Keep a fire extinguisher nearby.
Step-by-step ignition checklist
Follow the numbered steps below in order to relight the pilot safely, pausing at each point to confirm the expected condition before proceeding.
1) Verify gas is off and area ventilated.
2) Locate pilot assembly and controls.
3) Set control to “Pilot.”
4) Depress and hold pilot knob.
5) Ignite per manufacturer instructions.
6) Hold for specified time.
7) Release and set to “On.”
Post-ignition verification items
Checklist items confirm that the pilot remains lit, the burner ignites reliably, and no gas odors or leaks are present.
Verify stable flame color and size, check for continuous hot water flow, inspect venting for proper exhaust, guarantee temperature settings match desired output, and confirm all access panels and controls are secure.
Record time and observations; schedule follow-up if abnormalities occur.
Useful Comparison of Ignition Types and Their Pros/Cons
A concise comparison of standing pilot, intermittent pilot, and electronic ignition highlights key differences in safety, efficiency, and maintenance. The table below summarizes primary trade-offs to guide selection based on usage and priorities. Readers can use these points to match ignition type to their household needs.
| Ignition Type | Key Pros / Cons |
|---|---|
| Standing pilot | Pros: simple, reliable in power outages; Cons: continuous gas use, higher heat loss |
| Intermittent pilot | Pros: lower fuel use than standing pilot; Cons: more complex, occasional restart issues |
| Electronic ignition | Pros: highest efficiency, no continuous pilot; Cons: relies on power/electronics, higher upfront cost |
| Summary | Choice depends on priorities: reliability vs. efficiency vs. cost |
Standing pilot vs. intermittent pilot vs. electronic ignition
Ignition systems for gas water heaters fall into three main types—standing pilot, intermittent pilot (IPI), and electronic ignition—each offering distinct trade-offs in reliability, energy use, maintenance, and safety.
Standing pilots are simple and reliable but waste gas.
IPIs save fuel and reduce pilot failures but add electronics.
Electronic ignition maximizes efficiency and safety, requires power, and may need more complex repairs.
Visuals and Diagrams to Follow During the Process
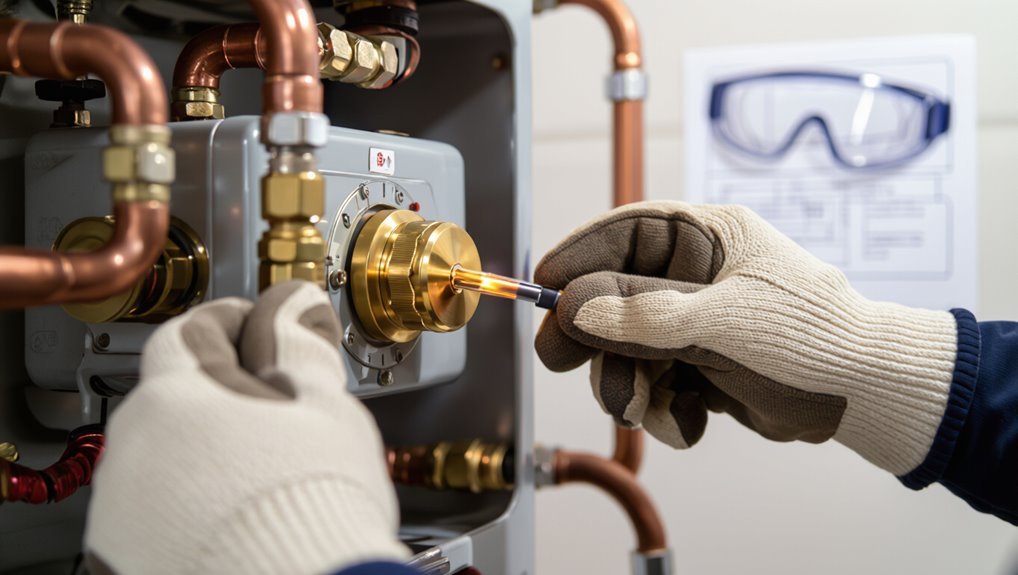
The article presents clear visuals to guide each step: a labeled pilot assembly diagram shows burner, thermocouple, and pilot orifice locations.
A separate control knob position diagram illustrates the OFF, PILOT, and ON settings and the correct sequence to follow.
Annotations point out common fault indicator locations so readers can quickly recognize signs of blockage or sensor failure.
Typical pilot assembly diagram
This section presents a clear, labeled overview of a typical gas water heater pilot assembly so readers can identify key components before following the visual walkthrough.
The diagram highlights pilot light, thermocouple, pilot tubing, burner orifice, igniter/ignition button, mounting bracket, and adjustment screw.
Labels indicate gas flow direction, connection points, and safety sensor placement for easier identification during inspection.
Control knob position diagram
A simple diagram showing the control knob positions—typically labeled OFF, PILOT, and ON—helps users visualize the sequence needed to light the pilot and operate the burner safely.
The illustration should mark knob orientation for each mode, indicate press-and-hold duration at PILOT, and show arrowed steps from OFF→PILOT→ON.
Clear labels minimize confusion during ignition and routine checks.
Common fault indicator locations
Common fault indicators on a gas water heater typically cluster around the control panel, pilot assembly, and combustion chamber access, where visible signs and labeled indicators quickly reveal issues.
Technicians check error LEDs, temperature/pressure relief valve markings, pilot flame visibility, burner soot, gas odor points, loose wiring, and corrosion at fittings.
Diagram callouts will highlight these locations for easy reference during inspection.
Conclusion
Properly relighting a gas water heater minimizes danger and extends appliance life when performed methodically. Studies indicate unintentional residential gas incidents dropped about 30% after public safety campaigns improved homeowner adherence to manufacturer relighting procedures, underscoring the value of informed, cautious action. If any step feels uncertain—odor of gas, pilot instability, or malfunctioning controls—cease attempts and contact a licensed technician to guarantee safe resolution and compliance with local codes and warranty terms.

