How to Convert an Electric Stove to Gas: Step-by-Step Guide, Costs & Safety Tips
Converting an electric stove to gas is technically feasible but often impractical for most homeowners due to the complexity and costs involved. It requires a compatible appliance, a dedicated gas supply, permits, certified installers, and potential ventilation upgrades. While costs can range from a few hundred to several thousand dollars, replacing the stove may be a more sensible option. Safety inspections and leak checks are also necessary. For a detailed process, cost breakdown, and safety checklist, continue reading.
Can you convert an electric stove to gas? Quick answer and overview
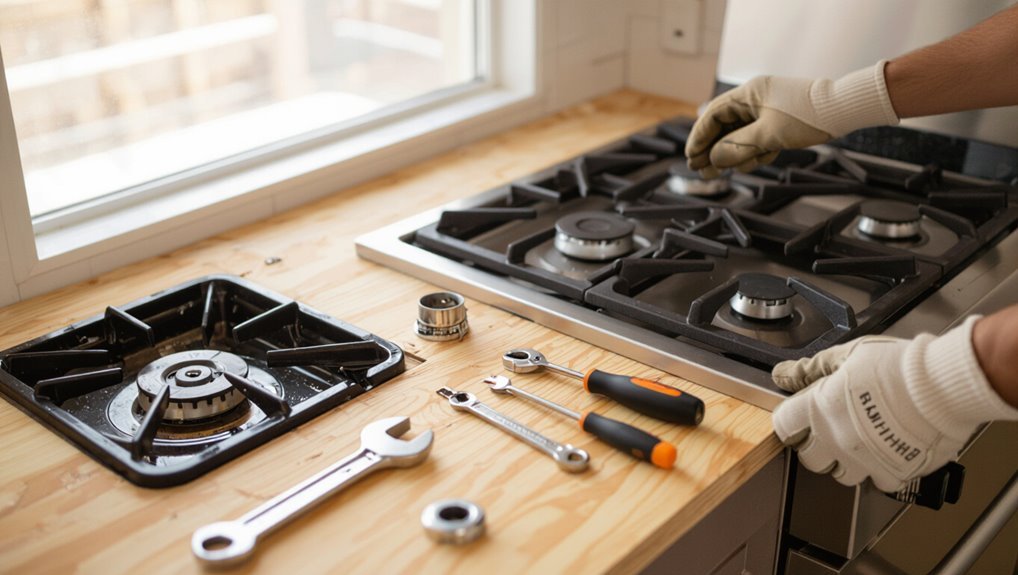
Converting an electric stove to gas is technically possible in some cases but often impractical.
Factors such as appliance design, available gas lines, local codes, and cost determine feasibility.
Conversion is more reasonable for range tops with convertible components or when a trained technician can retrofit controls; replacement is usually recommended for built-in units or when extensive modifications are required.
Summary of feasibility and typical scenarios
Although it is technically possible in some situations, converting an electric stove to gas is rarely simple or advisable for most homeowners.
Feasibility depends on gas supply access, ventilation, countertop configuration and local codes. Contractors usually advise replacement over retrofit.
Those researching how to convert electric stove to gas should expect significant cost, permits and safety upgrades; practical only in limited, well‑planned scenarios.
When conversion is practical vs when replacement is recommended
If a home already has accessible natural gas or propane lines, adequate ventilation and a countertop/cabinet opening that matches standard gas range dimensions, converting to gas can be practical; otherwise, replacement is generally the safer, more cost‑effective choice.
Conversion suits homes with compatible hookups, minor cabinetry tweaks and willing professional labor.
Replacement is advised when infrastructure, safety upgrades or resale value favor a new gas range installation.
Key differences between electric and gas stoves that affect conversion
The discussion highlights several practical differences that determine whether and how an electric range can be replaced with a gas unit.
Key factors include fuel supply and gas fittings, burner, grate and cooktop component compatibility, and the oven’s ignition and venting requirements, plus required clearances and safety measures.
Compliance with local codes, permit processes, and appliance certification further governs the feasibility and scope of any conversion.
Fuel supply and connections
Converting from electric to gas requires replacing an electrical feed with a dedicated gas supply and new fittings, a shift that affects appliance placement, ventilation, and safety systems.
A licensed plumber must install properly sized piping, shutoff valves, pressure regulators, and flexible connectors.
Leak testing, code-compliant materials, clearances, and possible meter or line upgrades are required to guarantee safe, reliable operation.
Burners, grates and cooktop components
Many visible components differ between electric and gas cooktops, and these differences determine what must be replaced or modified during a conversion.
Electric coil or smooth-top elements, solid trivets, and wiring give way to gas burners, removable burner heads, sealed drip pans, cast-iron grates, burner valves and mounting brackets.
Ventilation and clearance requirements also change to accommodate open flames.
Oven and ignition systems
Beyond surface components like burners and grates, the oven and ignition systems present a fundamentally different set of mechanics and safety considerations when moving from electric to gas.
Gas ovens use pilot or electronic ignition, gas valves, and thermocouples rather than electric heating elements and thermostats.
Conversion requires replacing oven cavities, installing burners and ignition modules, and ensuring reliable flame sensing and sealed combustion integrity.
Clearances, ventilation and safety requirements
Evaluating clearances, ventilation, and safety requirements is critical because gas appliances demand different spacing, airflow, and protective measures than electric stoves.
Installers must guarantee proper clearance from combustible materials, adequate room for gas connections, and unobstructed exhaust or range-hood ventilation.
Carbon monoxide detection, automatic shutoff features, and verified combustion air supply are essential to minimize leak, fire, and asphyxiation risks during and after conversion.
Local codes, permits and appliance certification
Because gas appliances pose different combustion, ventilation, and safety risks than electric ranges, local building codes and permits treat conversions as distinct undertakings that often require formal inspection, certified installers, and appliance listings for gas use.
Authorities often mandate permits, pressure tests, and proof of gas-compatible certification; noncompliance can void warranties, insurance, and create legal liabilities, so professional compliance is essential.
Cost breakdown: What to expect for a conversion
A conversion from electric to gas can vary widely in cost, with DIY projects often limited to parts and adapters while professional conversions add labor and permit fees.
Itemized expenses typically include the new gas range or burner kit, gas line installation or extension, fittings and shutoffs, hood or ventilation upgrades if required, and any inspection or permit charges.
Homeowners should also weigh long-term factors—energy savings, routine maintenance, and potential effects on resale value—when estimating overall expense.
Typical cost ranges (DIY vs professional)
When planning a switch from electric to gas, homeowners should expect a wide cost range that depends on parts, labor, and site-specific work.
DIY conversions commonly cost several hundred to a few thousand dollars for fittings, vents, and a gas-ready range, while professional jobs typically run higher—often $1,000–$5,000 or more—reflecting permit fees, certified labor, gas line installation, and safety testing.
Itemized costs
Moving from broad cost ranges to a line-by-line accounting helps homeowners see where money is spent and why totals vary. Typical items include conversion kit, fittings, labor, testing, and disposal. Example breakdown:
| Item | Typical cost |
|---|---|
| Conversion kit | $30–$200 |
| Gas fittings | $50–$150 |
| Labor (per hour) | $70–$120 |
| Safety testing | $50–$150 |
| Appliance disposal | $20–$100 |
Factors that increase cost (gas line distance, permits, hood/ventilation)
Extend costs beyond the basic conversion by accounting for site-specific factors that materially raise time and materials: longer gas line runs, required permits and inspections, and upgrades to ventilation or hoods all add measurable expense and scheduling complexity.
Longer runs increase piping, labor and potential trenching; permits and inspections incur fees and delays; hood upgrades require electrical, ductwork and installer charges, possibly structural modifications.
Long-term cost considerations (energy bills, maintenance, resale value)
Beyond upfront site costs, long-term financial impacts shape the true value of converting an electric stove to gas.
Over time, gas often lowers cooking energy bills depending on local fuel rates and efficiency.
Maintenance costs can rise modestly—annual inspections, occasional burner servicing—but major repairs are infrequent.
Resale value may increase in markets favoring gas, partially offsetting conversion expenses.
Required tools, materials and professional services
A clear list of materials and parts—flexible gas line, shutoff valve, fittings, and appropriate venting components—frames the conversion requirements.
Basic tools for DIY work include adjustable wrenches, pipe thread sealant, a gas leak detector, and safe shutoff tools, while specific tasks may require bending or cutting equipment.
Decisions about hiring a licensed plumber or gas fitter, and whether an electrician or HVAC contractor is needed, depend on local code, gas line complexity, and any electrical or ventilation changes.
Materials list for a conversion
Converting an electric stove to gas requires specific tools, materials, and licensed professional services to guarantee safety and code compliance.
Materials typically include a gas range or conversion kit, approved flexible gas connector, shutoff valve, pipe and fittings, thread sealant rated for gas, extinguishing and carbon monoxide detectors, and certified gas regulator.
Permit fees and inspection costs should be anticipated.
Tools needed for DIY tasks
Tools and equipment necessary for the DIY portions of a stove conversion include plumbing and gas-specific hand tools, safety gear, and diagnostic devices; these complement the materials and professional services already noted.
Required items include pipe wrenches, adjustable wrenches, tubing cutters, thread sealant rated for gas, leak detector solution, gas pressure gauge, flame safeguard equipment, safety goggles, gloves, and a carbon monoxide monitor.
When to hire a licensed plumber or gas fitter
After outlining the hand tools, safety gear, and diagnostic devices required for DIY work, the discussion shifts to when professional help is necessary.
A licensed plumber or gas fitter should be hired for gas line installation, pressure testing, leak detection, permitting, and appliance conversions requiring code compliance.
Complex rerouting, natural gas meter changes, or any uncertainty about connections demand certified professionals to guarantee safety and legal conformity.
When an electrician or HVAC contractor is required
Assess whether an electrician or HVAC contractor is required before altering any electrical or ventilation systems tied to the stove.
An electrician is needed for disconnecting or repurposing circuits, ensuring code-compliant wiring and breakers.
An HVAC contractor handles venting, exhaust fans, and combustion-air requirements.
Both provide permits, inspections, and proper tools—multimeter, conduit, ductwork materials—ensuring safety and regulatory compliance during conversion.
Step-by-step conversion process (high-level)
The conversion begins with verifying that the appliance and documentation support a gas installation, then evaluating the home’s gas supply and planning the route.
Next steps include installing or extending the gas line with a shutoff valve, removing the electric stove and preparing the space, and either installing a new gas range or converting a compatible unit.
Each phase should follow code requirements and, where required, be performed or inspected by a licensed professional.
Step 1 Evaluate appliance compatibility and obtain documentation
Begin by confirming whether the electric range is designed for conversion and by gathering the manufacturer’s documentation, model number, and parts list.
Next, verify availability of a conversion kit, required fittings, and certified instructions.
Record serial numbers and take clear photos.
Check warranty and recall status.
If documentation or kit is unavailable, conversion should not proceed without manufacturer or licensed professional approval.
Step 2 Inspect home gas supply and plan routing
Verify that a safe, code-compliant gas supply is available and map a clear route from the mains to the appliance location.
Assess meter capacity, pressure requirements, and any utility restrictions.
Identify ideal routing to minimize bends, avoid electrical lines and heat sources, and preserve access.
Note locations for future shutoff, regulators, and ventilation.
Document measurements and code-relevant clearances for contractor review.
Step 3 Install or extend gas line and shutoff valve
Install or extend the gas line and attach a dedicated shutoff valve according to the planned routing, applicable codes, and manufacturer specifications.
A qualified plumber or licensed gas technician should cut, thread, or solder fittings; pressure-test the run; and install a readily accessible shutoff.
Use approved materials, maintain proper clearances, and document connections for inspection.
Obtain permits and schedule municipal inspection before appliance hookup.
Step 4 Remove electric stove and prepare space
Clear the work area and disconnect power to the electric stove at the breaker panel before any physical removal begins.
The appliance is unbolted, disconnected from wiring by a qualified electrician, and carefully moved away.
Flooring and cabinet clearances are inspected; dimensions, ventilation, and combustible clearances are measured.
Debris and exposed wiring are secured; the space is left ready for gas appliance installation.
Step 5 Install gas range or convert existing unit (if convertible)
Proceeding with the gas installation requires deciding whether to fit a new gas range or convert the existing electric unit, then following a clear, safety-focused sequence.
If replacing, position and secure the new appliance to manufacturer specs and local codes.
If converting, install required gas conversion kit components, swap burners and regulators per instructions, and verify fittings, venting, and clearances before proceeding.
Step 6 Connect gas appliance and test for leaks
Begin by shutting off the main gas supply and ensuring all valves and fittings are accessible; then position the range so the connector can reach the inlet without strain.
Attach a flexible, approved gas connector, tighten fittings to manufacturer torque, apply soapy water or approved leak detector to joints, slowly restore gas, observe for bubbles, and retighten or repair any leaks before finalizing installation and powering burners.
Step 7 Install ventilation/hood and meet clearance requirements
Install a range hood or verify existing ventilation meets local codes and manufacturer recommendations before finalizing the conversion, since proper exhaust and clearance reduce combustion byproducts and fire risk.
Confirm hood CFM, duct material, and termination meet code; maintain required clearances above burners and to combustible cabinets.
Position hood height per manufacturer specs, secure mounting, and use proper backdraft prevention and sealing.
Step 8 Final inspections, permits, and certification
With ventilation confirmed and clearances secured, the conversion process moves to final inspections, permits, and certification to confirm legal compliance and safe operation.
A licensed inspector verifies gas line integrity, ventilation, and appliance installation. Required permits are closed out and any municipality-specific certification obtained.
Maintain records of inspections and receipts; schedule a follow-up if required. This guarantees warranty validity and occupant safety.
Detailed how-to substeps and safety checks
The next section outlines the concrete tasks and safety checks required to convert an electric range to gas, beginning with evaluating whether the appliance and home gas connections are suitable for conversion.
It will cover pressure testing and leak detection procedures, electrical disconnection and grounding, ventilation sizing to prevent carbon monoxide buildup, and final post-installation testing and operation checks.
Readers are advised that compliance with local codes and use of qualified professionals are essential for safe, legal work.
How to determine if an electric range is convertible to gas
Determining whether an electric range can be converted to gas begins with identifying the model, examining its construction, and confirming compatibility with available conversion kits and local codes.
Inspect the oven cavity, burner ports, and mounting for gas components; check manufacturer documentation for conversion allowance; verify clearance, ventilation, and gas line access; consult local code and a licensed technician before proceeding.
Proper procedure for pressure testing and leak detection
After confirming that the range is physically convertible and permitted by manufacturer and code, attention shifts to pressure testing and leak detection to guarantee safe gas operation.
Technicians isolate supply, attach calibrated manometer, pressurize to specified psi, monitor for drop per code time.
Apply approved soap solution at fittings, observe bubbles, correct leaks, retest.
Document results and obtain required inspections before use.
Electrical disconnection and grounding considerations
Before any gas connections are made, a qualified technician must fully disconnect electrical power to the range and verify isolation using a calibrated voltage tester at the appliance terminals.
Grounding continuity and bond integrity should then be inspected, and any required corrective actions performed to meet local electrical code and manufacturer instructions.
Confirm ground conductor size, secure bonding to chassis, replace damaged wiring, and document tests with photos and readings.
Ventilation sizing and carbon monoxide prevention
When converting a stove to gas, proper ventilation sizing and carbon monoxide (CO) prevention are critical to occupant safety.
The installer should calculate ventilation requirements, verify appliance combustion air needs, and plan exhaust and fresh-air pathways according to code and manufacturer data.
Measure room volume, determine required air changes, size range hood or venting, install carbon monoxide detectors per code, and seal unintended drafts.
Post-installation testing and operation checks
With ventilation and CO safeguards confirmed, the installer proceeds to systematic post-installation testing and operation checks to verify safe, correct performance.
They inspect connections for leaks using soapy water and electronic detectors, confirm proper burner ignition and flame characteristics, verify thermostat and safety valve function, measure manifold pressure, test exhaust flow, and document results.
Any anomalies prompt immediate shutdown and corrective action by a qualified technician.
Common problems, risks and how to avoid them
Common problems during an electric-to-gas conversion include gas leaks and missed leak detection, improper venting that can lead to carbon monoxide buildup, and code violations that cause failed inspections.
Fitment and clearance issues with surrounding cabinetry often create safety and performance compromises, while post-conversion performance problems can signal incorrect installation or regulator issues.
Each risk requires specific checks—tightness testing, proper venting and CO monitoring, adherence to local codes, clearance verification, and functional testing—to prevent hazards and guarantee reliable operation.
Gas leaks and detection mistakes
Detecting and responding to gas leaks demands vigilance because small mistakes can quickly escalate into serious hazards.
Technicians must inspect fittings, hoses, and valves for odor, hissing, or corrosion. Reliance on scent alone, delayed shutoff, or DIY testing increases risk.
Install and regularly test certified gas detectors, perform pressure tests, and follow shutoff and evacuation procedures to minimize danger.
Improper venting and carbon monoxide risks
Beyond leaks, another major hazard arises from improper venting and the resulting buildup of carbon monoxide (CO).
Inadequate range hoods, blocked ducts, or wrong oven connections can allow CO accumulation, causing headache, dizziness, or death.
Regularly inspect and maintain exhaust systems, install certified CO detectors, guarantee proper ventilation sizing, and hire qualified technicians to verify flue integrity and combustion air supply.
Code violations and failed inspections
Failing to comply with local building, plumbing, and gas codes is a frequent cause of rejected conversions and costly rework.
Inspectors commonly flag improper gas line materials, unsupported piping, lack of shutoff valves, incorrect pressure regulators, and missing permits.
To avoid failed inspections, engage licensed trades, obtain permits, follow code specs, keep documentation, and schedule pre-inspection reviews to address deficiencies before final approval.
Fitment and clearance issues with cabinetry
When replacing an electric range with a gas model, installers often confront tight cabinet clearances, inadequate venting space, and mismatched cutouts that can prevent proper fitment or create safety hazards.
These issues include insufficient clearance from combustible surfaces, blocked access to the gas shutoff, and cabinets that impede burner ventilation.
Installers should measure clearances, modify or replace cabinetry, provide heat shields, guarantee shutoff access, and follow manufacturer and code requirements.
Performance problems after conversion
Addressing fitment and clearance issues does not assure trouble-free operation; performance problems can emerge after a conversion that affect safety, efficiency, and longevity.
Common issues include uneven flame, pilot outages, regulator leaks, and improper burner calibration.
Risks: carbon monoxide, gas leaks, and inefficient combustion.
Prevention requires certified tuning, pressure testing, proper venting, and routine inspection to guarantee safe, efficient operation.
When to choose replacement instead of conversion
If an appliance shows structural damage, incompatible connections, or lacks certification for conversion, replacement is often the safer option.
Purchasing a new gas range can improve efficiency, provide a manufacturer’s warranty, and guarantee proper fit and ventilation.
A straightforward cost comparison—including labor, parts, and expected lifespan—helps determine whether converting or replacing offers better value.
Signs the existing stove cannot be converted safely
Although some electric ranges lend themselves to retrofit kits, certain physical, regulatory, and safety conditions make conversion impractical or unsafe; in those cases replacement is the prudent choice.
Signs include incompatible burner housings, sealed or integrated electric elements, damaged frames, lack of ventilation or clearance for gas appliances, missing certification or noncompliant local codes, and irreparable wiring or structural corrosion.
Benefits of buying a new gas range (efficiency, warranty, fit)
When replacement offers a clearer path than retrofit, purchasing a new gas range delivers measurable advantages: modern models are more energy-efficient, provide consistent burners and heat control, and often include sealed cooktops that simplify cleaning.
Manufacturer warranties reduce repair risk, and proper sizing and venting guarantee a correct fit.
Replacement also avoids hidden compatibility issues that complicate conversions.
Cost comparison: convert vs replace
After outlining the advantages of purchasing a new gas range, the comparison shifts to costs: converting an existing electric stove versus buying and installing a new gas unit. Conversion saves on appliance cost but may incur gas line, labor, and safety upgrades. Replacement offers warranty, efficiency, and predictable pricing; choose replacement when conversion approaches 50–70% of new unit cost.
| Option | Typical costs |
|---|---|
| Conversion | $300–$1,200 |
| Replacement | $800–$3,500 |
Permits, codes and hiring professionals
Local regulations typically require permits and inspections for gas stove installations, and understanding that process helps guarantee safety and code compliance.
Homeowners should seek licensed gas fitters or plumbers by checking credentials, reviews, and trade association listings.
Key contractor questions and a clear scope-of-work checklist — including permit handling, gas line testing, appliance hookup, and final inspections — protect both schedule and budget.
Typical permits required and inspection process
Converting an electric stove to gas typically triggers a series of permits and inspections to guarantee compliance with building, plumbing, and gas safety codes.
Required permits often include gas line installation, plumbing, and mechanical permits; local utility notification may be mandatory.
Inspectors verify proper piping, fittings, pressure testing, venting and appliance installation.
Final approval or certificate of occupancy confirms code compliance before use.
How to find and vet licensed gas fitters and plumbers
Once permits are secured and inspectors have outlined required corrections, the next priority is identifying qualified gas fitters and plumbers who can perform the work to code.
Search state licensing boards, utility-approved contractor lists and trade associations. Verify licenses, insurance, bonding, recent local references and experience with appliance conversions.
Confirm familiarity with relevant codes and willingness to obtain permits and coordinate inspections.
Questions to ask contractors and scope-of-work checklist
What key questions should be asked to guarantee the contractor will meet permit, code and safety requirements?
A homeowner should verify licensing, insurance, permit responsibility, inspection procedures and written scope.
Confirm timelines, materials, gas line sizing, venting, and warranty.
Request itemized bid and permit copies.
- Verify license, insurance, and permit holder
- Itemized scope and timeline
- Code-compliant materials and sizing
- Inspection, testing, and warranty records
Safety checklist before, during and after conversion
A concise safety checklist frames the essential steps before, during, and after converting an electric stove to gas.
It highlights pre-conversion inspections, on-site precautions while work is underway, and post-conversion monitoring plus emergency responses. This guarantees risks are minimized and compliance maintained throughout the process.
- Verify permits, gas line integrity, ventilation, and appliance compatibility before work begins
- Use shutoff valves, gas detectors, proper tools, and personal protective equipment during installation
- Perform pressure tests, leak checks, and functional burners checks immediately after conversion
- Establish routine monitoring, know emergency shutoff procedures, and have contact info for gas professionals and emergency services
Pre-conversion safety items
Before any work begins, a strict safety checklist should be completed to minimize risks associated with converting an electric stove to gas.
Verify local permits and code requirements, confirm appliance compatibility, inspect gas line condition, schedule a qualified technician, obtain necessary parts and shutoff tools, guarantee functioning detectors, review emergency shutoff procedures, and document insurance and warranty implications before proceeding.
On-site safety practices during installation
Having completed pre-conversion preparations, on-site safety practices guide actions immediately before, during, and after the physical work to control hazards and verify system integrity.
Technicians confirm gas shutoff, ventilation, spark-free tools, and PPE. During work they monitor for leaks, secure connections, and document pressure tests.
After completion they perform final leak checks, restore power sequence, label modifications, and record compliance for inspection.
Post-conversion monitoring and emergency steps
Complete a concise monitoring regimen and emergency protocol immediately after conversion to guarantee occupant safety and system integrity.
Inspect all connections for leaks using approved detectors, verify flame stability and proper ventilation, and confirm appliance shutoff function.
Log readings, notify occupants of warning signs, and provide clear shutdown and evacuation steps.
Arrange professional follow-up inspection and retain documentation for regulatory compliance and warranty.
Maintenance and troubleshooting after switching to gas
Post-conversion care focuses on routine maintenance—cleaning burners, checking gas connections, and following a simple schedule to prevent buildup and wear.
Common issues such as weak flames, clogged ports, or failed igniters can often be resolved with cleaning, adjustment, or replacement of small parts.
If persistent leaks, irregular combustion, or repeated ignition failures occur, a certified technician should be contacted.
Routine maintenance tasks and schedule
Establish a simple, regular maintenance schedule to keep the converted gas stove safe and functioning.
Inspect connections and hose monthly for wear or leaks.
Clean burner ports and grates weekly, and wipe controls after use.
Schedule professional gas line and valve inspection annually.
Replace any damaged parts immediately.
Keep ventilation filters cleaned quarterly and document maintenance dates for safety and warranty records.
Troubleshooting common burner and ignition issues
Troubleshooting common burner and ignition issues focuses on identifying and resolving the small, frequent problems that can affect performance and safety after switching to gas.
Technicians and homeowners should inspect ignition sparks, burner flame quality, and gas odor first. Then proceed methodically from simplest fixes—cleaning ports and realigning igniters—to checking connections and calling a professional for persistent leaks or electrical faults.
Burners may need drying, realignment, or replacement of worn caps.
When to call a professional
Recognize the limits of DIY diagnostics and call a professional when issues involve gas leaks, persistent odor, repeated ignition failure after basic cleaning, unusual carbon monoxide readings, or any suspected damage to valves, regulators, or gas lines.
Professionals should also be engaged for persistent pilot or thermostat faults, pressure irregularities, conversion verification, or whenever certification, permit compliance, or safe shutoff and repair require specialized tools and trained judgment.
Real-world examples and cost scenarios
The section presents three practical scenarios: a typical DIY conversion with an estimated timeline, a professional conversion including permit steps, and a full replacement with comparative timing.
Each example outlines likely costs, required skills, and permitting or inspection milestones.
Readers are encouraged to compare these scenarios to gauge time, expense, and regulatory implications.
Typical DIY conversion scenario and estimated timeline
A typical DIY conversion from an electric to a gas stove unfolds over a weekend for a homeowner with basic plumbing and appliance experience:
initial assessment and parts ordering (1–2 hours),
removing the old electric range and preparing the cabinet and floor (1–3 hours),
installing a gas line or connecting to an existing stub with a licensed inspection where required (2–6 hours, often needing a pro),
converting or replacing the range and testing for leaks and proper operation (1–3 hours),
and final code inspection or certification if local regulations demand it (time varies).
Costs typically range from modest DIY parts ($100–$500) to higher if professional gas work is required ($300–$1,200+),
with most projects completing within one to two weekends.
Professional conversion example with permit process
Illustrating a professional conversion, a homeowner hired a licensed contractor to replace an electric range with a gas unit, obtain permits, and coordinate municipal inspections over a two-week period.
Costs totaled $2,200–$3,800 for labor, permit fees, and materials.
The contractor handled gas line installation, pressure testing, appliance hookup, and final inspection approval, ensuring code compliance and a documented warranty.
Replacement scenario and comparative timeline
Following the professional example, several homeowners pursued replacement scenarios that varied in scope, timeline, and cost depending on whether they reused existing infrastructure or required new gas service.
One reused a ready gas line, completing conversion in a day for minimal labor and permit fees.
Another needed new mains and inspections, extending to weeks with higher contractor, piping, and inspection costs, and temporary cooking alternatives.
Resources, checklists and printable steps for homeowners
The homeowner is provided with clear, printable resources to guide each stage of converting an electric stove to gas.
These include checklists for tasks to complete before work begins, a contractor handoff and inspection checklist for on-site verification, and an emergency contact and gas safety card for quick reference.
The materials are designed for easy printing and placement near the appliance for ongoing safety.
- Pre-conversion homeowner checklist (permits, shutoffs, appliance specs)
- Contractor handoff and inspection checklist (connections, venting, leak test)
- Emergency contact and gas safety card (utility, plumber, emergency services)
- Printable step-by-step summary for post-installation care and recordkeeping
Pre-conversion homeowner checklist
Before beginning any work, a homeowner should assemble key resources: local building and gas codes, a list of licensed plumbers or gas-fitters, appliance specifications, and documentation of home gas supply capacity.
Also include proof of permits, budget estimates, timeline expectations, photos of existing electrical hook-up, utility shutoff locations, and emergency contacts.
Retain receipts and correspondence for contractor coordination and permit verification.
Contractor handoff and inspection checklist
At handoff, homeowners should provide the contractor with a complete packet—permit copies, appliance specifications, documented gas supply capacity, photos of the existing electrical hookup, and a clear list of emergency shutoff locations—so the contractor can verify compliance and schedule required inspections.
The contractor should confirm gas line sizing, venting, appliance clearances, leak testing, carbon monoxide mitigation, and inspector appointments, then sign and date the checklist.
Emergency contact and gas safety card
An emergency contact and gas safety card consolidates essential information—utility and contractor phone numbers, appliance model and serial numbers, emergency shutoff locations, local gas supply capacity, and step-by-step immediate actions—into a single, wallet-sized or fridge-ready reference for homeowners and first responders.
It lists priorities, quick actions, and verification points to reduce response time and avoid mistakes during leaks or malfunctions.
- Utility and contractor contacts
- Appliance IDs
- Shutoff locations
- Immediate action steps
Conclusion
Converting an electric stove to gas is not a casual weekend hobby—it’s practically a theatrical metamorphosis, transforming appliances from timid, buttoned-up rectangles into pan-flinging, flame-wrangling showstoppers. While costs, permits, and pros temper the drama, the payoff is culinary prowess and instant heat that feels slightly magical. With safety, inspections, and routine maintenance respected, homeowners gain a gloriously combustible upgrade—just don’t invite dragons to dinner.