How to Use a Sewage Submersible Pump: Step-by-Step Guide for Safe Installation, Operation & Maintenance
To effectively use a sewage submersible pump, follow these steps for installation, operation, and maintenance. First, select a pump with the appropriate solids-handling capacity and ensure the pit is designed correctly. Install the pump in a suitably sized wet well or sump, with secure discharge piping, check valves, and isolation valves. When handling electrical components, ensure that rated starters, proper grounding, GFCI protection, and lockout/tagout procedures are in place.
During start-up, perform alignment checks, seal inspections, and initial performance testing. To prevent failures, conduct routine inspections, clean the impeller, lubricate as needed, and schedule annual maintenance for seals and motor. Follow these step-by-step procedures, adhere to safety protocols, and utilize troubleshooting tips to ensure safe and effective operation of your sewage submersible pump.
Overview of Sewage Submersible Pumps and When to Use Them
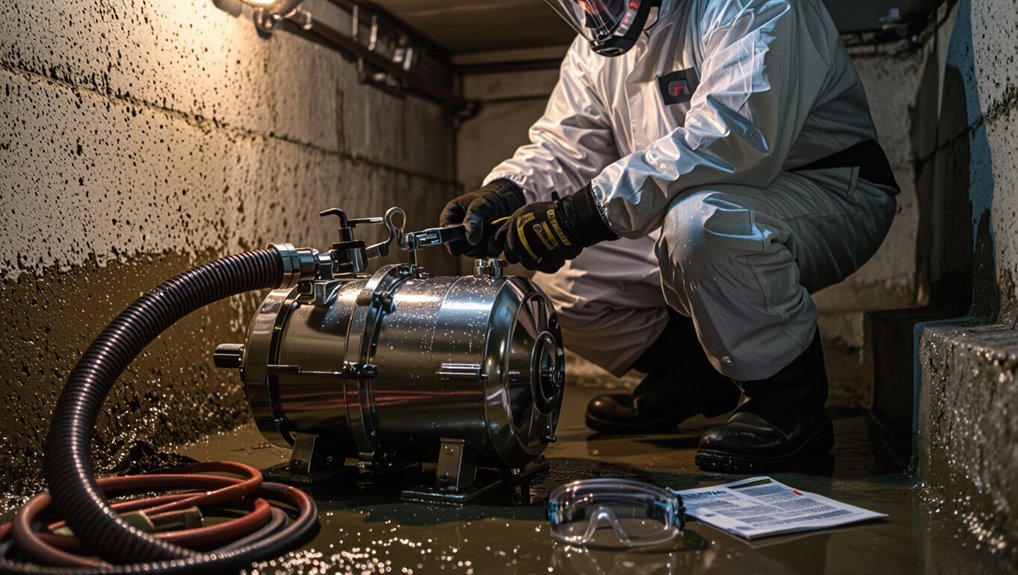
A sewage submersible pump is a watertight, submerged unit designed to handle solids and wastewater, distinguishing it from centrifugal or sump pumps that are not built for sewage.
Typical uses include basement sewage removal, municipal lift stations, and on-site septic systems, with installations varying by depth, inlet size, and discharge routing.
Prior to use, users must confirm applicable local codes, verify proper electrical protection and backflow prevention, and follow safety procedures for confined-space and biohazard exposure.
What a sewage submersible pump is and how it differs from other pumps
Sewage submersible pumps are electrically driven units designed to operate fully submerged, moving wastewater and solids from basins or pits to sewer lines or treatment systems.
They differ from centrifugal or sump pumps by sealed motors, solids-handling impellers, and corrosion-resistant casings.
Selection focuses on solids size, head, and duty cycle.
Instructions for how to use sewage submersible pump emphasize safe wiring, float controls, and maintenance.
Common applications and typical installation scenarios
Used in a variety of settings where wastewater and solids must be moved reliably, sewage submersible pumps are common in residential basements, commercial buildings, municipal lift stations, construction dewatering, and industrial process pits.
They handle raw sewage, greywater, storm runoff, and solids-laden effluent.
Typical installations include wet wells, sump basins, grinder pits, and portable dewatering setups, chosen by flow, head, and solids size.
Safety and regulatory considerations before starting
Following common applications and installation scenarios, attention to safety protocols and regulatory requirements must precede any operation of a submersible sewage pump.
Inspect local codes, permits, and discharge limits; confirm electrical compliance, grounding, and GFCI protection.
Implement confined-space procedures, PPE, lockout/tagout, and spill containment.
Verify hazardous-material handling and documentation, and schedule inspections to guarantee ongoing regulatory and safety adherence.
Quick Summary: Steps to Install, Operate, and Maintain a Sewage Submersible Pump
A concise, action-focused summary outlines the key installation, operation, and maintenance steps for an experienced user, emphasizing safety checks, correct mounting, electrical connections, and routine inspection intervals.
A compact checklist of essential tools and replacement parts—including gaskets, impeller kit, motor oil (if applicable), vibration-isolating mounts, appropriate wrenches, multimeter, and PPE—supports efficient work and rapid troubleshooting.
Clear sequencing and reference to manufacturer specifications guarantee tasks are performed correctly and safely.
One-paragraph actionable summary for experienced users
Begin by confirming the pump model, horsepower, and required discharge size match site specifications.
Then set the unit on a stable base in the wet well, connect a non-kinking discharge hose or rigid piping with a properly rated check valve and gate valve, and wire the motor to a GFCI-protected circuit and automatic control panel according to local code.
Prime or fill if required, set float switches or level sensor thresholds, and cycle the pump to verify correct rotation and flow while monitoring current draw and vibration.
After initial run, record baseline amp draw, inspect seals, tighten fittings, verify alarm functions, and schedule periodic debris checks, bearing lubrication, and impeller inspections per manufacturer intervals.
Essential tools and parts checklist
Tools and parts must be gathered before installation to avoid delays and guarantee safety:
essential hand tools (wrenches, pliers, screwdrivers, pipe cutter),
electrical tools (multimeter, insulation stripper, torque wrench),
lifting gear (hoist, straps, shackles rated for the pump weight),
piping and fittings (discharge hose or rigid pipe of specified diameter, flanges/adapters, gaskets, stainless clamps),
valves and check devices (gate or ball valve, spring-loaded or swing check valve sized to match discharge),
electrical components (motor starter or control panel, GFCI or ground-fault protection, properly sized cable and conduit, terminal lugs),
sealing and mounting items (mechanical seal kit, O-rings, base plate or guide rail assembly, anchor bolts),
monitoring and safety gear (float switches or level sensors, alarm module, vibration/current sensors),
consumables and maintenance parts (impeller spare, bearing grease or lubrication kit, replacement seals, pipe sealant/Teflon tape),
and PPE (gloves, eye protection, lockout/tagout supplies).
Pre-Installation Preparation
Before installation, the site must be evaluated for pit depth, access, discharge route, and available power to guarantee the chosen equipment will fit and function.
The correct pump model, horsepower, and solids-handling capacity should be selected to match the wastewater characteristics and anticipated flow.
Required permits, local codes, utility notifications, and appropriate personal protective equipment and safety procedures must be confirmed and arranged.
Assessing site conditions: depth, access, discharge route, and power availability
A thorough site assessment identifies the pump pit depth, means of access, discharge routing, and available power so the installation matches operational and safety requirements.
The inspector documents pit measurements, access clearance for lowering and servicing, pipe route to the discharge point with slopes and supports, and power source capacity, voltage, conduit routing, and breaker protection.
Hazards and required permits are noted.
Selecting the right pump size, horsepower, and solids-handling capacity
Proper pump selection balances flow requirements, lift, and debris size so the unit performs reliably without overload.
The installer calculates required flow (GPM), total dynamic head, and selects horsepower ensuring operation near the pump’s best efficiency point.
Solids-handling must match maximum particle diameter and stringy material.
Allow safety margin for future demand, intermittent peaks, and motor cooling.
Required permits, codes, and local utility notifications
When local regulations and utility infrastructure are involved, obtaining the correct permits and notifications is essential to a compliant and safe sewage submersible pump installation.
Verify municipal plumbing and electrical codes, septic or sewer connection requirements, and any environmental discharge permits.
Notify gas, water, and buried-utility locators before excavation.
Retain inspection schedules and documentation; noncompliance can delay installation or incur fines.
Personal protective equipment and safety measures
Don appropriate personal protective equipment and follow established safety procedures before any work begins to minimize exposure to biological hazards, electrical risks, and confined-space dangers.
Workers should wear chemical-resistant gloves, impermeable coveralls, face shields or goggles, and NIOSH-rated respirators when aerosols or odours are present.
Use insulated tools, lockout-tagout, ventilation, gas detection, and an attendant for confined-space entries to guarantee safety.
Detailed Step-by-Step Installation Procedure
The installation procedure covers preparing the pit or basin to specified dimensions with a stable base and anchor points, selecting and positioning check and gate valves and an efficient piping layout.
It also addresses electrical connections—correct cable sizing, conduit, control panel setup, and grounding—and choosing a mounting method (guide rail, free‑standing, or permanent anchor).
Final steps include testing alignment, seals, and mechanical integrity before startup.
Preparing the pit, basin, or sump (dimensions, base, and anchors)
A correctly sized and prepared pit, basin, or sump is essential for reliable operation of a sewage submersible pump; it must provide adequate capacity, stable support, and secure anchoring to prevent vibration, buoyancy, and clogging.
Determine dimensions per pump and inflow, install a level concrete or compacted gravel base, slope for drainage, embed anchor bolts or pads, and guarantee access for maintenance and float clearance.
Installing check valves, gate valves, and piping layout best practices
Begin by laying out the discharge piping schematic and valve locations to guarantee proper flow control, backflow prevention, and service access before any fittings are installed.
- Install a swing or spring check valve vertically above the pump discharge with accessible service space and correct flow direction.
- Fit a gate or isolation valve upstream for maintenance, ensuring full-bore type and alignment.
- Use supported, slope-correct, corrosion-resistant piping with accessible unions and anchors.
Electrical connections: choosing cable, conduit, control panel, and grounding
When selecting electrical components for a sewage submersible pump, prioritize cable sizing, conduit routing, control panel features, and grounding to meet load, environment, and code requirements.
These choices determine operational safety, reliability, and serviceability.
Specify cable type and ampacity, use corrosion-resistant conduit and seals, install a pump-rated starter with overload and phase-loss protection, and guarantee continuous equipment grounding with accessible junctions and clear labeling.
Mounting the pump: guide rail vs. free-standing vs. permanent anchor methods
Mounting method selection—guide rail, free-standing, or permanently anchored—dictates the installation sequence, required hardware, and access procedures for a sewage submersible pump.
Guide rails enable rapid removal and precise positioning using a baseplate and guide bracket.
Free-standing setups require stable bedding and vibration isolation.
Permanent anchors use corrosion-resistant bolts and leveling to resist hydraulic and operational forces; select per site constraints.
Testing for proper alignment, seals, and mechanical integrity before startup
After the pump is secured by the chosen mounting method—guide rail, free-standing bedding, or permanent anchor—the installer performs systematic checks for alignment, seal integrity, and mechanical soundness before energizing the unit.
Verify shaft and coupling alignment, confirm impeller spins freely, inspect mechanical seals and O-rings for damage, check cable entries and glands, confirm fasteners torque, and confirm no rubbing, leaks, or foreign debris remain.
First-time startup checklist and initial discharge test
Before energizing the system, the installer follows a concise first-time startup checklist and conducts an initial discharge test to confirm safe, correct operation and to identify any immediate issues.
The checklist verifies electrical connections, float switches, seals, pump rotation, impeller clearance, and discharge piping.
During the test, flow, pressure, vibration, and leakage are monitored; corrective actions are documented and implemented before final commissioning.
Operating the Pump Safely and Efficiently
The operator should monitor normal operating parameters—flow, head, run cycles—and understand basic pump-curve interpretation to confirm the unit is working within design limits.
Control strategies such as float switches, level sensors, and automatic controls help maintain proper cycling and prevent dry-run or overrun conditions.
Attention to energy-saving and noise-reduction measures, plus early recognition of unusual vibrations, temperature rises, or changes in discharge performance, enables timely corrective action.
Normal operating parameters: flow, head, run cycles, and pump curve basics
Many residential and commercial submersible sewage pumps are designed to operate within specific flow and head ranges. Understanding these parameters—along with typical run cycles and the pump curve—ensures safe, efficient performance.
Operators should verify pump curve to match required flow versus total dynamic head. They should also monitor run times to avoid short-cycling or overheating, and maintain operation near best-efficiency point for longevity.
Control strategies: float switches, level sensors, and automatic controls
Matching pump operation to the system’s flow and head is only part of reliable performance; effective control strategies manage when and how the pump runs to prevent damage, reduce energy use, and maintain acceptable wastewater levels.
- Float switches: simple on/off staging; position for hysteresis and debris avoidance.
- Level sensors: continuous monitoring for alarm and proportional control.
- Automatic controllers: integrate timers, alternation, dry-run protection, and remote telemetry.
Energy-saving and noise-reduction tips
Conserve energy and reduce noise by operating the sewage submersible pump within its ideal duty range and minimizing unnecessary starts.
Use variable frequency drives or soft starters, maintain correct impeller and volute clearances, and guarantee seals and bearings are lubricated.
Install vibration isolators, secure piping to prevent water hammer, and enclose the unit with ventilated sound-damping panels for quieter, more efficient operation.
How to recognize early signs of malfunction during operation
Reducing energy use and noise can also extend service life, but operators must remain alert for early malfunction indicators during operation.
Unusual vibrations, increased current draw, reduced flow, intermittent cycling, overheating, unusual odors, or abnormal noise signal issues.
Monitor gauges and alarms, record trends, inspect seals and cables, and stop the pump for investigation if anomalies persist.
Prompt response prevents damage and costly repairs.
Routine Maintenance and Inspection Schedule
A clear maintenance and inspection schedule helps guarantee reliable operation and prevents costly failures.
Tasks are grouped by frequency—daily and weekly checks for obvious clogs and performance, monthly cleaning and impeller inspection, and annual service for lubrication, seal replacement, and motor care.
The guide also explains debris removal procedures and criteria for when to perform full service versus minor repairs.
Daily, weekly, monthly, and annual inspection tasks
Routine vigilance guarantees reliable operation of a sewage submersible pump and prevents minor issues from becoming failures.
Inspectors should follow a concise schedule to monitor performance, seals, electrical connections, and alarms without performing cleaning or impeller work here.
- Daily: check operation, alarm indicators, and discharge flow.
- Weekly: verify power, control panel readings, and float switches.
- Monthly/Annual: test motor insulation, bearings, and record vibration trends.
Cleaning, debris removal, and impeller inspection procedures
Begin by isolating power and confirming the pump is fully de-energized before any cleaning or inspection begins.
Remove pump from wet well if required, drain residual fluid, and wear PPE.
Clear inlet screens and suction grates of rags, sludge, and solids.
Inspect impeller for wear, corrosion, or blockage; rotate shaft manually to detect binding.
Reassemble and test after flushing debris pathways.
Lubrication, seal replacement, and motor care
After cleaning and confirming free rotation of the impeller, attention shifts to lubrication, mechanical seal replacement, and motor care to guarantee long-term reliability.
Apply manufacturer-specified grease to bearings at recommended intervals; inspect and replace mechanical seals when wear, leakage, or shaft scoring is detected.
Verify motor insulation resistance, cooling passages, and cable integrity.
Record maintenance dates, parts replaced, and operational notes for trend monitoring.
When to perform full service vs. minor repairs
When should a technician opt for a full service rather than a minor repair?
A full service is required for repeated failures, bearing or seal damage, motor overheating, significant vibration, or when inspections reveal corrosion, clogging, or electrical faults.
Minor repairs suffice for routine wear, small seal leaks, or impeller clearing.
Service intervals should follow manufacturer guidelines and recorded performance trends.
Troubleshooting Common Problems
When a sewage submersible pump fails to start, produces low flow, runs erratically, or shows signs of overheating, the operator should follow a systematic troubleshooting process.
Common checks include motor supply and control panel diagnostics, inspection for clogs or damaged impellers, and assessment of mounting and cooling conditions to isolate vibration or noise sources.
Addressing electrical faults, tripped breakers, and recurring cycling requires verifying wiring, float or level controls, and protective devices before replacing components.
No-start or motor not running: causes and fixes
Diagnosing a sewage pump that fails to start begins with systematic checks of power, controls, and mechanical impediments. The technician isolates electrical faults, verifies control panel and float switch operation, and inspects the motor and impeller for seizure or debris.
Typical actions include:
- Verify supply voltage, fuses, and starter contactor.
- Test float/level switch continuity and relay function.
- Check motor windings, bearings, and free rotation.
Low flow, clogging, or frequent cycling: diagnosis and remedies
Low flow, recurrent clogs, and frequent cycling are common symptoms that indicate hydraulic restriction, improper system sizing, or control malfunctions in sewage submersible pumps.
Technicians should inspect impeller and intake for debris, verify discharge pipe and check valve integrity, confirm float or level sensor settings, and measure pump curve against system head.
Remedies include cleaning, replacing worn components, correcting piping, and resizing or adjusting controls.
Overheating, vibration, and unusual noises: steps to isolate issues
After addressing flow and obstruction issues, attention turns to thermal, mechanical, and acoustic symptoms that can indicate electrical faults, bearing wear, misalignment, or cavitation.
Inspect mounting, fasteners, and coupling for looseness; check shaft play and impeller condition; verify adequate lubrication and cooling water flow.
Run brief test cycles while isolating components to localize heat sources and noise origins before proceeding to repairs.
Electrical faults, tripping breakers, and control panel errors
Begin by checking the pump’s electrical system methodically, since tripped breakers and control-panel errors often stem from overloads, short circuits, loose connections, or faulty protective devices.
Inspect wiring, terminals, and conduit for damage or corrosion. Verify motor insulation resistance, correct phase rotation, and voltage balance.
Test overload relays, breakers, fuses, and control relays. Replace faulty components and tighten connections before retesting operation.
Replacement, Upgrade, and End-of-Life Considerations
Assessment of repair versus replacement should be based on age, frequency of failures, repair cost relative to replacement, and whether performance needs have changed.
Consider upgrades when higher capacity, better energy efficiency, or improved solids-handling can reduce operating costs or prevent recurring clogs.
When retiring a unit, follow proper decommissioning procedures and local disposal or recycling regulations to manage environmental and safety risks.
When to repair versus when to replace the pump
Decide whether to repair or replace a sewage submersible pump by weighing repair costs, remaining service life, and the frequency of failures against the benefits of a new unit—considering efficiency gains, warranty coverage, and compatibility with current system demands.
Choose replacement when repairs approach or exceed 50–70% of new equipment cost, failures recur, or critical components are obsolete.
Repair if issues are isolated and life expectancy remains acceptable.
Upgrading for capacity, efficiency, or solids-handling improvements
Consider upgrading a sewage submersible pump when system demands exceed current capacity, efficiency lags, or solids-handling requirements change.
Such upgrades should balance performance gains against installation complexity and lifecycle costs. Assess flow and head requirements, solids size and concentration, energy consumption, and control compatibility.
Select pumps or impellers rated for required solids, confirm power and piping adequacy, and plan commissioning, monitoring, and warranty coverage.
Proper decommissioning and disposal of old pumps
Begin by safely isolating the pump from electrical and hydraulic systems. Document serial numbers, model, and service history.
Drain, clean, and decontaminate per regulations. Remove and tag hazardous components (batteries, oils).
Assess salvageable parts for reuse; recycle metals and polymers through certified facilities. Dispose of non-recyclables via licensed waste handlers.
File decommissioning records and notify authorities if required.
Safety, Compliance, and Environmental Best Practices
The section outlines required confined-space entry procedures and emergency response plans to protect personnel during pump inspection and maintenance.
It also covers safe handling and disposal of sewage-soiled components to minimize infection and cross-contamination risks.
Finally, regulatory discharge limits and backflow prevention measures are summarized to guarantee environmental compliance and protect downstream systems.
Confined-space entry procedures and emergency response planning
Entering confined spaces for sewage submersible pump work requires strict, documented procedures to protect personnel and guarantee regulatory compliance.
Personnel must follow permit-required entry, atmospheric testing, continuous ventilation, and use appropriate PPE and retrieval systems.
A trained attendant remains outside; communication and rescue plans are predefined.
Emergency response includes rescue training, rapid medical access, incident reporting, and coordination with local emergency services.
Handling sewage and contaminated components safely
Following confined-space protocols, personnel must also adopt strict measures for handling sewage and contaminated components to prevent exposure, cross-contamination, and environmental release.
Use PPE (resistant gloves, boots, suits, respirators), decontaminate tools and pump parts, contain and bag waste for licensed disposal, disinfect surfaces, monitor for pathogens and hazardous gases, document chain-of-custody, and train staff in contamination control and incident reporting.
Environmental discharge limits and backflow prevention measures
When regulatory limits dictate effluent quality and local ordinances restrict discharge points, operators must design pump systems to meet specific chemical, biological, and solids criteria while preventing reverse flows that could contaminate potable supplies or upstream sewage lines.
Compliance requires monitoring, permits, approved discharge outlets, and treatment or screening to meet limits.
Backflow prevention uses check valves, air gaps, and tested assemblies with regular inspection and documentation.
Cost Estimates and Resource Planning
A clear budget outline should list typical costs for the pump, control equipment, installation labor, and required permits.
Time estimates for a DIY installation versus hiring professionals help assess feasibility and scheduling.
Guidance should specify when a licensed plumber or electrician is necessary to meet code and guarantee safe operation.
Typical cost breakdown: pump, controls, installation, and permits
Cost estimates for a sewage submersible pump system typically divide into four primary categories: the pump unit, control equipment, installation labor and materials, and local permits or inspections. Typical ranges: pump $500–$3,000, controls $200–$800, installation $400–$2,500, permits $50–$300; site specifics alter totals.
| Item | Typical cost range |
|---|---|
| Pump | $500–$3,000 |
| Controls | $200–$800 |
| Installation | $400–$2,500 |
| Permits | $50–$300 |
Time estimates for DIY vs. professional installation
Several factors determine whether a DIY installation or hiring a professional will be faster, including the installer’s experience, site accessibility, required plumbing and electrical connections, and local inspection scheduling.
DIY projects typically take 6–16 hours over a weekend for competent homeowners; professionals often complete work in 2–8 hours but may require scheduling lead time.
Complex sites or permits extend timelines for either option.
When to hire a licensed plumber or electrician
Determine hiring needs by weighing technical complexity, local code requirements, and the homeowner’s skill level.
Hire a licensed plumber for pipe fitting, sewage connections, and sump pit modifications; engage an electrician for wiring, control panels, and GFCI-protected circuits.
Prioritize permits, inspections, and warranty compliance.
Obtain written estimates, verify licenses and insurance, and budget contingencies for unexpected repairs or upgrades.
Useful Accessories, Tools, and Spare Parts to Keep on Hand
A concise kit of diagnostic tools, common replacement parts, and simple documentation aids supports reliable sewage pump operation and faster repairs.
Recommended items include a multimeter, spare seals and impellers, and a flexible coupling, while templates for maintenance logs and inspection checklists guarantee consistent record-keeping.
Keeping these on hand reduces downtime and simplifies troubleshooting.
- Multimeter, clamp meter, and portable continuity tester
- Spare mechanical seals, impellers, gaskets, and impeller-fastening hardware
- Maintenance log template, inspection checklist, and parts inventory sheet
Recommended diagnostic tools and replacement parts
Keeping a small, well-chosen kit of diagnostic tools and common replacement parts saves time and prevents minor pump issues from escalating.
Include a multimeter, clamp meter, portable pressure gauge, continuity tester, hose clamp pliers, gasket scraper, and flashlight.
Spare seals, O-rings, impeller, shaft couplings, mechanical seal, bearings, and a compatible float switch reduce downtime and simplify on-site repairs.
Suggested documentation and log templates for maintenance records
Several concise templates and a standardized filing system help guarantee maintenance records are consistent, accessible, and actionable.
Include inspection checklist, pump runtime and service log, parts replacement register, vibration and electrical test sheet, and corrective action form.
Provide digital and printed copies, unique asset IDs, timestamps, technician initials, and photo attachments.
Retain records per regulatory and warranty schedules for trend analysis and compliance.
Real-World Examples and Short Case Scenarios
The section presents concise real-world examples: a residential basement sewage pump installation, a small commercial lift station upgrade, and an emergency failure requiring rapid-response repair.
Each scenario highlights decision points, common complications, and appropriate equipment choices.
Readers are invited to compare these cases to their own situations to identify applicable lessons.
Residential basement sewage pump installation scenario
A typical residential basement sewage pump installation involves placing a submersible grinder or sewage pump in a dedicated sump basin, connecting it to the home’s sanitary line, and routing a discharge pipe with a check valve and proper venting to the municipal sewer or septic system.
Technicians verify correct basin depth, electrical GFCI protection, accessible cleanouts, reliable float switches, and pressure-tested discharge plumbing before commissioning.
Small commercial lift station upgrade example
When an aging small commercial lift station serving a cluster of storefronts required greater capacity and reliability, engineers replaced two single-speed submersible pumps with duplex variable-frequency-drive units.
They upgraded the control panel with remote telemetry and reconfigured the wetwell to improve pipe inflow patterns.
The retrofit included stainless guide rails, larger discharge piping, duplex float logic testing, and a scheduled maintenance plan to reduce downtime and extend equipment life.
Emergency failure and rapid-response repair case
Responding quickly to a sudden submersible pump failure, maintenance teams prioritized isolation of the wetwell and verification of electrical hazards before diagnosing root cause.
They confirmed clogging from rags and greases, swapped in a standby pump, and flushed the basin.
Parts were reordered, records updated, and a revised maintenance schedule implemented to prevent recurrence and restore reliable service within hours.
Summary Checklist for Safe Installation, Operation, and Maintenance
Several core checks guarantee safe installation, operation, and maintenance of a sewage submersible pump: confirm correct pump sizing and materials for the application, verify electrical connections and grounding meet local code, maintain proper sealing and float-switch clearances, establish a routine inspection and cleaning schedule, and guarantee personnel use appropriate PPE and lockout/tagout procedures.
- Verify installation and electrical safety.
- Schedule inspections, cleaning, and seal checks.
- Train staff on PPE, LOTO, and emergency procedures.
Conclusion
Like a lighthouse guiding ships through fog, the sewage submersible pump stands as a steady sentinel amid messy tides. When installed, operated, and tended with care it turns chaos into order—channels the unseen currents, prevents floods, and keeps life’s routines afloat. Practical preparation, disciplined maintenance, and mindful operation are the keeper’s lamp: small, consistent acts that transform potential disaster into dependable service, reassuring homes and systems alike.