How to Use a Flexible Gas Line Safely: Step-by-Step Guide for Homeowners
To ensure the safe use of flexible gas lines in your home, treat them as critical components by following these essential guidelines: always turn off the gas supply before beginning work, utilize proper connectors and gas-rated sealant, avoid kinks in the line, and secure all connections. After installation, test each joint with a soapy solution and a gas detector. Wear appropriate personal protective equipment (PPE) and ensure proper ventilation in your workspace. For any complex installations or changes to the system, it’s best to hire a licensed professional. Continue reading for a comprehensive overview of tools, inspection routines, emergency responses, and guidelines for replacement.
What Flexible Gas Lines Are and When Homeowners Use Them
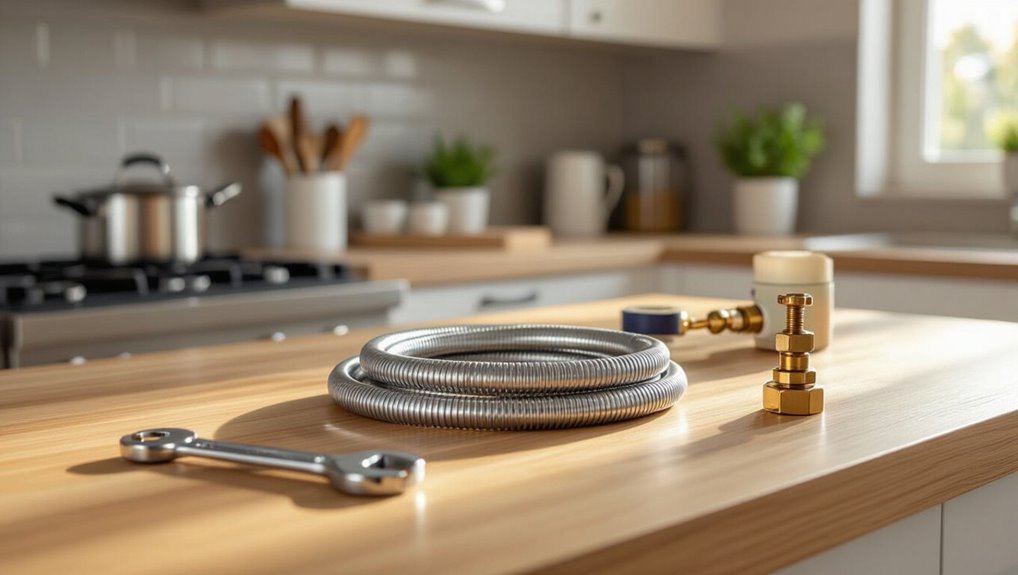
Flexible gas lines are specialized connectors, including CSST, corrugated stainless steel tubing, and stainless steel braided hoses, designed to carry natural gas or propane.
Homeowners commonly use them to connect appliances such as stoves, dryers, water heaters, and fireplaces where some flexibility is needed.
Compared with rigid piping, these lines simplify installation, accommodate movement, and often reduce labor and fitting requirements.
Definition and types (CSST, corrugated stainless steel, stainless steel braided)
A flexible gas line is a pliable conduit used to deliver natural gas or propane from a supply point to appliances where rigid piping would be impractical.
Types include CSST (corrugated stainless steel tubing), corrugated stainless steel flexible connectors, and stainless steel braided hoses.
Homeowners learning how to use flexible gas line should recognize differences in construction, fittings, pressure ratings, and applicable codes.
Common applications in homes (stoves, dryers, water heaters, fireplaces)
Home gas connections commonly employ pliable tubing to link supply lines to appliances where movement, vibration, or alignment issues make rigid piping impractical.
Typical uses include residential ranges and cooktops, gas dryers, tank and tankless water heaters, and direct-vent or decorative gas fireplaces.
Flexible connectors facilitate installation and service access while isolating minor appliance movement from the main gas system.
Advantages over rigid piping
Because they combine pliability with approved gas-tight fittings, flexible gas lines offer practical advantages where rigid piping would be awkward or costly to install.
They simplify alignment, reduce joint count and leak risk, permit vibration isolation, and shorten installation time.
For retrofit work or confined spaces, they minimize demolition, lower labor costs, and facilitate appliance replacement while meeting code when installed per manufacturer instructions and local regulations.
Quick Safety Summary Can You Install or Repair a Flexible Gas Line Yourself?
A brief assessment helps determine whether a homeowner can handle a flexible gas line task or must hire a licensed professional.
Applicable laws and local codes often dictate which jobs are permitted for DIY work and which require permits and certified installers.
Improper installation can cause leaks, fire or explosion hazards, and carbon monoxide risks, so safety and compliance should guide the decision.
When DIY is acceptable and when to hire a licensed professional
Who should tackle a flexible gas line job depends on the task’s complexity, local regulations, and the person’s skills.
Homeowners may handle simple appliance connections, visual inspections, and tightening accessible fittings if confident and using proper tools.
Hire a licensed professional for system alterations, detecting persistent leaks, installing new lines, work in confined or hidden spaces, or when uncertainty exists—safety and correct pressure testing require expertise.
Legal and code considerations by location
Local laws and building codes determine whether a homeowner may install or repair a flexible gas line, and they vary widely between municipalities, counties, and countries.
Homeowners must consult local code, utility providers, and permit offices before starting work. Many jurisdictions require licensed plumbers or gasfitters, inspections, approved materials, and specific installation methods.
Failure to comply can void insurance and violate regulations.
Key safety risks of improper installation
Recognize that improper installation of a flexible gas line can produce immediate and long-term hazards: leaks that cause fires or explosions, accumulation of toxic gases like carbon monoxide, and degraded connections that fail under pressure or vibration.
Additional risks include ignition from nearby appliances, hidden slow leaks causing chronic exposure, corrosion from inappropriate materials, unsecured fittings loosening over time, and voided insurance or code violations increasing liability.
Required Tools, Materials, and Protective Gear
The following section outlines the specific tools, materials, and protective measures required for safe flexible gas line work.
It lists a concise tools checklist, the necessary fittings and materials, and recommended personal protective equipment plus ventilation practices.
Readers are advised to confirm compatibility and local code requirements before beginning any work.
Tools checklist ()
A concise tools checklist guarantees work proceeds safely and efficiently when installing or servicing a flexible gas line. The technician should assemble calibrated, purpose-specific tools and inspect them before use.
- Adjustable wrench and pipe wrench for secure connections.
- Tubing cutter or utility knife for clean cuts.
- Leak detector solution and gas sniffer for testing.
- Torque wrench and thread sealant tools for proper sealing.
Materials and fittings checklist ()
One set of properly specified materials and fittings guarantees a safe, code-compliant flexible gas line installation.
The homeowner should verify compatibility, pressure rating, and local code approval before purchasing.
Required items include approved CSST or corrugated stainless flex, brass adapters, pipe sealant rated for gas, and accessible shutoff valves.
- CSST or corrugated stainless flex
- Brass adapters
- Gas-rated pipe sealant
- Accessible shutoff valve
Personal protective equipment and ventilation requirements
With materials and fittings confirmed, attention shifts to personal protective equipment (PPE) and ventilation to protect installers from gas exposure, sparks, and debris.
Installers should wear flame-resistant gloves, safety glasses, long sleeves, and respiratory protection if fumes are present.
Confirm work areas have cross-ventilation or use exhaust fans.
Keep ignition sources distant and monitor for leaks with a gas detector during and after installation.
Step-by-Step Installation Guide for a Flexible Gas Line
The installation sequence begins with planning the route and measuring the flexible line to guarantee proper length and clearance.
Next, the technician shuts off the gas, verifies zero pressure, cleans and prepares connection threads, and applies the appropriate thread sealant or gas-rated tape.
Finally, the flexible line is attached securely to the appliance and gas supply, then checked for leaks before restoring service.
Planning the route and measuring for proper length
Careful planning of the route and precise measurement of the required length are essential before cutting or connecting a flexible gas line.
The installer maps a straight, unobstructed path avoiding heat sources, sharp edges, and excessive bends.
Measure along the chosen route, include allowance for fittings and gentle curves, then select a tube length that preserves manufacturer minimum bend radii and leaves slack for vibration isolation.
Shutting off the gas and verifying zero pressure
Shut off the gas at the appliance’s service valve or the building’s main supply and post a clear notice to prevent accidental restoration.
Verify zero pressure with a calibrated manometer or gauge at the downstream fitting. Observe gauge for several minutes to confirm no rise.
If pressure is present, re-check upstream valves and contact a qualified professional before proceeding.
Preparing connection points and cleaning threads
With the supply confirmed at zero pressure and tagged out, attention shifts to preparing connection points and cleaning threads to verify a secure, leak-free joint.
Inspect fittings for damage, burrs, or old sealant. Remove debris, corrosion, and paint with a wire brush or rag. Ascertain threads are straight and undamaged.
Lightly oil any required components per manufacturer instructions before final assembly.
Proper use of thread sealant and gas-rated tape
A single correct application of thread sealant or gas-rated tape is essential to guarantee a gas-tight joint without obstructing the flow or contaminating the line.
Apply approved gas-rated PTFE tape clockwise to male threads, two to three wraps, avoiding end of fitting.
Liquid pipe thread sealant rated for gas may be used sparingly.
Remove excess; allow cure time per manufacturer before pressure testing.
Attaching the flexible line to appliance and gas supply
Begin by verifying that gas is fully turned off at the meter or service valve and that both the appliance and supply fittings are clean, undamaged, and correctly sized for the flexible line.
Then position the line so it reaches both connections without strain or sharp bends, ensuring proper alignment before making any threaded or compression joints.
Tighten connections to manufacturer torque, apply approved sealant where specified, and test for leaks.
Supporting and securing the line to prevent strain or kinking
Secure the flexible gas line at regular intervals to prevent strain, sagging, or kinking that can weaken connectors or impede flow.
Use approved clamps or straps sized for the line, avoiding overtightening. Anchor near fittings and where the line changes direction.
Maintain gentle curves, provide support under runs longer than manufacturer recommendations, and keep the line clear of heat sources, sharp edges, or high-traffic areas.
Performing a leak test with soapy solution and gas leak detector
Before restoring gas flow, the installer verifies every connection for leaks using a soapy solution and an electronic gas detector; this confirms joint integrity and guarantees safe operation.
The installer brushes or sprays a mild soap solution on fittings, watches for bubbles, and concurrently scans joints with the detector.
Any indication prompts tightening or disassembly, reapplication, and retesting until no leaks are found.
Restoring gas service and monitoring initial appliance operation
With all fittings confirmed leak-free, the installer slowly restores the gas supply and observes pressure recovery at the appliance. This controlled reintroduction prevents sudden surges and allows immediate detection of anomalies.
The installer then lights burners or pilots per manufacturer instructions, watches flame characteristics, checks ignition cycles, listens for unusual sounds, and rechecks for odor or leaks. Shutting off service if any irregularity appears.
How to Inspect and Maintain Flexible Gas Lines
A routine visual inspection checklist helps identify loose fittings, external damage, improper routing, and signs of leakage.
Any visible wear, corrosion, kinks, fraying, or other damage should prompt immediate replacement of the flexible gas line.
Professional inspection or pressure testing is recommended after installation, after any suspected damage, or on a regular schedule per local code and manufacturer guidance.
Routine visual inspection checklist ()
A simple, consistent checklist directs visual inspections of flexible gas lines to detect wear, damage, or improper installation before issues escalate.
The inspector notes secure fittings, proper routing and support, absence of visible abrasions or bends, and clear labeling. Record date, location, and any corrective actions. Follow manufacturer and local code intervals for periodic review.
- Check fittings and connections
- Verify routing/support
- Inspect outer covering
- Log findings and actions
Signs of wear, corrosion, kinks, or damage that require replacement
Several clear signs indicate a flexible gas line needs replacement: visible corrosion, fraying or broken outer braid, kinks that deform the tubing, exposed inner material, and persistent leaks detected by smell or soapy-water testing.
Additional indicators include brittle or cracked connectors, discoloration from heat, loose fittings, and evidence of abrasion from contact with sharp edges or moving parts; any of these warrant prompt replacement.
When to schedule professional inspection or pressure testing
Visible damage or signs of deterioration warrant immediate replacement, but professional inspection and pressure testing are recommended at regular intervals and after certain events to confirm system integrity.
Schedule inspections every 3–5 years, after appliance replacement, renovations, suspected leaks, unusual odors, seismic activity, or flooding.
Licensed technicians should perform leak testing, pressure verification, and document results for safety and insurance records.
Common Installation Errors and How to Avoid Them
Common installation errors with flexible gas lines include over-tightening or cross-threading fittings and using incorrect sealant or tape, both of which can compromise joints.
Poor routing that permits kinks, heat exposure, or mechanical damage, along with improper support spacing and unsecured lines, increases the risk of leaks and premature failure.
Identifying and correcting these mistakes through proper techniques and materials prevents hazards and extends service life.
Over-tightening or cross-threading fittings
Over-tightening or cross-threading fittings can strip threads, deform sealing surfaces, and create leaks that may not appear until under pressure.
Installers should hand-start connections, align threads carefully, and use appropriate tools with torque limits.
Inspect threads for damage before assembly, replace compromised fittings, and test joints under low pressure before full service to detect slow leaks and prevent failures.
Using incorrect sealant or tape
Many installers rely on sealants or tapes without verifying compatibility, which can cause degraded seals, blocked fittings, or chemical reactions that compromise a flexible gas line.
Use only manufacturer-recommended thread sealants or approved gas-rated PTFE tape. Apply sparingly to male threads, avoid excess that can shed into the line, and replace any sealant when refitting.
Inspect joints for proper mating and leaks.
Routing that allows kinks, heat exposure, or mechanical damage
Several installation errors stem from routing a flexible gas line in ways that permit kinks, prolonged heat exposure, or mechanical damage.
Lines should follow smooth curves, avoid tight bends, and be kept clear of hot surfaces, sharp edges, and moving parts.
Protect with shields where contact is unavoidable, maintain manufacturer minimum bend radii, and plan routing to minimize exposure to potential abrasion or impact.
Improper support spacing and unsecured lines
Failing to properly support and secure flexible gas lines can lead to sagging, undue stress at fittings, chafing, and vibration-induced fatigue that shorten service life or cause leaks.
Install supports at manufacturer-specified intervals, anchor near connections, and use approved clamps or brackets.
Prevent movement by securing lines away from sharp edges and heat sources.
Inspect supports periodically and replace damaged hardware promptly.
Safety Tests and Verification Methods
Safety tests include simple on-site checks and professional pressure verification to confirm a flexible gas line’s integrity.
Visual and soap bubble inspections can reveal leaks but have limitations, while electronic gas detectors offer sensitivity and require correct placement and calibration.
When uncertainty remains or for appliance connections and whole-system assurance, a licensed technician should perform a pressure test.
Soap bubble test procedure and limitations
Perform the soap bubble test by applying a non-corrosive soap solution to all fittings, connections, and the flexible gas line.
Then pressurizing the system to the required test pressure and observing for persistent bubbles that indicate leaks.
Limitations include reduced sensitivity for very small leaks, false positives from dirt or movement, unsuitability for buried lines, and reliance on correct pressure and visual inspection.
Electronic gas detector use and interpretation
Use an electronic gas detector to quickly identify combustible gas presence and concentration around flexible gas lines and fittings.
The device should be calibrated, warmed up, and swept slowly along joints, valves, and connections.
Note audible/visual alarms and ppm readings; low readings near zero indicate no leak, rising ppm or sustained alarm warrants shutoff and professional evaluation.
Record readings and conditions for reference.
When to request a pressure test from a licensed technician
After electronic detector readings indicate a possible leak or when visual inspection reveals damage, a licensed technician should be called to conduct a pressure test to confirm system integrity.
A pressure test is also warranted after installation, major repairs, appliance replacement, or suspected corrosion.
The technician verifies tightness, identifies leaks, documents results, and advises corrective actions.
Homeowners should retain certification records for safety and compliance.
Local Codes, Permits, and When Professional Licensing Is Required
Local building and gas codes typically specify approved materials, maximum run lengths, connector types, and required clearances for flexible gas lines.
Homeowners are usually required to obtain permits and pass inspections at key checkpoints—connection integrity, pressure testing, and ventilation—before the system can be approved.
Attempting unlicensed DIY work can void warranties, expose the owner to liability and insurance denial, and in many jurisdictions legal requirements mandate licensed professionals for certain gas installations.
Typical code requirements for flexible gas line installations
Because gas work affects safety and property, jurisdictions impose specific code requirements for flexible gas line installations that govern materials, routing, connections, and inspections.
Codes typically specify approved connector types, maximum unsupported lengths, required fittings, bonding and grounding, clearance from heat sources, protection through walls, and labeling.
Licensed professionals must perform or certify many installations; homeowners often need permits and final inspection compliance.
Permit process overview and inspection checkpoints
Following the code requirements for materials and routing, the permit process outlines the administrative and inspection steps that guarantee installations meet those standards and public-safety objectives.
Homeowners must obtain permits before work, submit plans or scope, and schedule rough and final inspections. Inspectors verify correct fittings, secure anchoring, leak testing, and clearances.
Licensure requirements depend on jurisdiction and project complexity.
Liability, insurance, and warranty implications of DIY work
Often homeowners underestimate how DIY gas work affects liability, insurance, and warranty coverage; performing unpermitted or unlicensed installations can shift legal responsibility to the property owner, void homeowner or contractor insurance for related damage, and nullify manufacturer warranties or appliance service agreements.
Local codes often require permits, licensed contractors, and inspections; failure can result in fines, denied claims, and increased exposure to litigation and repair costs.
Emergency Procedures for Gas Leaks and Malfunctions
If a gas odor is detected, occupants are instructed to refrain from creating sparks, ventilate the area by opening windows and doors, and leave immediately.
The procedure includes locating and turning off the appliance valve and, if trained and able, shutting the main gas shutoff, using only non-sparking tools and following manufacturer or utility guidance.
Evacuation should occur without delay if the smell is strong or concentrations are suspected, and emergency services and the gas supplier must be contacted from a safe location.
Immediate steps to take if you smell gas
Act immediately upon detecting the smell of gas: evacuate people and pets from the area, avoid using any electrical switches or open flames, and move to a safe location upwind before calling emergency services or the utility company.
Report the leak’s location, describe symptoms, and follow dispatcher instructions.
Do not re-enter the premises until responders confirm it is safe; warn neighbors if appropriate.
How to safely shut off the gas supply at the appliance and main
After evacuating and contacting emergency services as described above, the next priority is to stop the gas flow at the appliance and, if necessary, at the main supply to reduce ignition risk and limit leak volume.
Locate the appliance shutoff valve, turn clockwise to close, then verify by trying appliance ignition (off).
If leak persists or valve inaccessible, close the main gas shutoff and await professionals.
When to evacuate and call emergency services
Recognize signs of a dangerous gas leak—strong rotten-egg odor, hissing sounds near piping, rising dizziness or nausea, visible standing gas—then evacuate immediately and call emergency services from a safe distance.
The occupant should warn others, avoid switches or open flames, leave doors closed, move upwind, and report location and symptoms.
Wait at a safe distance until professionals declare the area secure.
Comparison of Flexible Gas Line Options and When to Choose Each
A concise comparison of corrugated stainless steel tubing (CSST), braided stainless steel, and traditional steel pipe highlights trade-offs in cost, durability, installation ease, and appliance compatibility.
CSST often offers easier routing and lower labor costs but requires proper bonding and may be more costly per foot than basic braided stainless options.
Braided stainless provides robust durability and broad appliance compatibility, while choice should be guided by budget, local code, and the specific appliance connection needs.
Corrugated stainless steel tubing vs braided stainless steel vs CSST
Homeowners and professionals evaluating flexible gas lines must weigh the differences between corrugated stainless steel tubing (CSST), braided stainless steel, and other corrugated options based on flexibility, installation ease, corrosion resistance, and approved use cases. Each option suits different layouts and code constraints; selection depends on grounding, fittings, and specific appliance approvals.
| Type | Flexibility | Typical Use |
|---|---|---|
| CSST | High | Long runs |
| Braided | Medium | Appliance connectors |
| Corrugated | Variable | Tight bends |
Cost, durability, ease of installation, and compatibility with appliances
Several factors—cost, durability, ease of installation, and appliance compatibility—determine which flexible gas line is the best fit for a project.
CSST often costs more but offers long runs and corrosion resistance.
Braided stainless and corrugated tubing are cheaper; braided is robust for appliance connections, while corrugated suits tight spaces.
Choose based on budget, expected lifespan, installer skill, and manufacturer appliance approvals.
Replacement and Upgrade Scenarios
Guidance is provided for deciding when a flexible gas line requires full replacement versus when repairing fittings is sufficient, emphasizing safety and leak risk.
The text outlines reasons to upgrade older materials to modern, code-compliant options and the benefits of doing so.
Typical timelines and cost factors for replacement projects are summarized to help prioritize and plan work.
When to replace flexible lines vs repair fittings
Evaluate each situation based on damage, age, and compatibility before deciding between replacing a flexible gas line or repairing a fitting.
If corrosion, multiple leaks, bent or kinked tubing, or age exceeds manufacturer life, full replacement is prudent.
For isolated, accessible fitting failures with intact tubing and compatible materials, qualified technicians may repair or replace fittings.
Prioritize safety, pressure testing, and code compliance.
Upgrading older materials to modern, code-compliant options
When older flexible gas lines or fittings show materials, connections, or installation methods that no longer meet current codes, homeowners and technicians should plan upgrades to modern, approved systems.
Assess existing components, document noncompliant items, and select certified replacement parts (CSST, corrugated stainless steel, approved connectors) per local code.
Coordinate permits and use qualified installers to guarantee proper sealing, support, and inspection for long-term safety.
Timeline and cost factors for replacement projects
Timing and cost for replacing flexible gas lines depend on scope, access, and required permits.
Typical residential projects take half a day to two days; complex jobs or mains upgrades can span several days with inspections.
Labor, materials, permit fees, and potential wall or flooring repairs drive costs.
Homeowners should obtain multiple quotes, confirm licensing and inspection timelines, and budget contingencies.
Practical Tips to Maximize Safety and Longevity
The section outlines practical measures for routing and supporting flexible gas lines, including clear guidance on keeping them away from heat sources and abrasive edges.
It also recommends a regular inspection schedule with concise record-keeping to track condition and maintenance.
Finally, it explains how to document installations for permits and future property transfers so compliance and history are easily verified.
Best practices for routing, support, and avoiding heat sources
Proper routing and secure support keep flexible gas lines accessible, strain-free, and clear of heat sources that can degrade materials or fittings.
Lines should follow the shortest practical path, avoid sharp bends, and be anchored with approved clamps at regular intervals.
Maintain clearance from flues, stovetops, and HVAC units; insulate where near moderate heat and reroute away from direct radiant or open flame exposure.
Recommended inspection frequency and record-keeping
Following secure routing and heat-avoidance measures, a routine inspection schedule and careful record-keeping preserve flexible gas line integrity and simplify problem detection.
Inspect visible fittings and supports quarterly, perform a thorough check annually, and after any appliance service or impact.
Log dates, findings, photos, corrective actions, and inspector credentials. Retain records for several years to track trends and justify repairs.
How to document installations for permits and future buyers
Documenting flexible gas line installations thoroughly guarantees permits are approved, future buyers understand system condition, and liability is minimized.
Include dated permits, contractor licenses, material specifications, photos of routing and connections, test pressure results, and compliance certificates.
Store digital and physical copies, annotate changes or repairs, and provide a clear contact for installers.
Maintain a concise log for inspections and warranty details.
Resource List for Homeowners
The section directs homeowners to manufacturer instructions and certification labels on flexible gas lines to confirm proper use and compatibility.
It also explains how to find licensed gas fitters and verify their credentials through local licensing boards.
Finally, it lists useful online guides, local code offices, and emergency contact numbers for prompt assistance.
Where to find manufacturer instructions and certification labels
Homeowners can locate manufacturer instructions and certification labels for flexible gas lines on several reliable sources: the product’s packaging and included manuals, the manufacturer’s website (often under support or product pages), and on labels directly affixed to the hose or its fittings.
Additional places include retailer product listings, downloadable PDF spec sheets, third‑party certification bodies (e.g., CSA/UL) databases, and installer documentation.
How to locate licensed gas fitters and verify credentials
After checking manufacturer instructions and certification labels, locating a licensed gas fitter is the next practical step to guarantee correct installation and safe use of flexible gas lines.
Homeowners should consult state licensing boards, utility-approved contractor lists, and trade association directories.
Verify license number, insurance, bonding, and recent reviews.
Request written estimates, proof of continuing education, and references before hiring.
Useful online guides, local code offices, and emergency contacts
A concise resource list helps owners find reliable online guides, contact local code offices, and identify emergency numbers for gas-related incidents.
It directs homeowners to authoritative guidance, regulatory contacts, and immediate help for leaks or failures.
- National safety agency websites and manufacturer manuals.
- Local building/code office contact and permit info.
- Licensed fitter directories.
- Emergency gas utility and fire department numbers.
Conclusion
In closing, homeowners are gently reminded that flexible gas lines, though designed to make life easier, deserve respectful handling and occasional pampering. When uncertain, it’s wiser to invite a trained professional to the scene rather than attempt uncertain remedies. Regular check-ins, modest upkeep, and timely upgrades help prevent untimely surprises. Treating these connections with steady, careful attention guarantees household comfort continues with minimal fuss and maximum peace of mind.