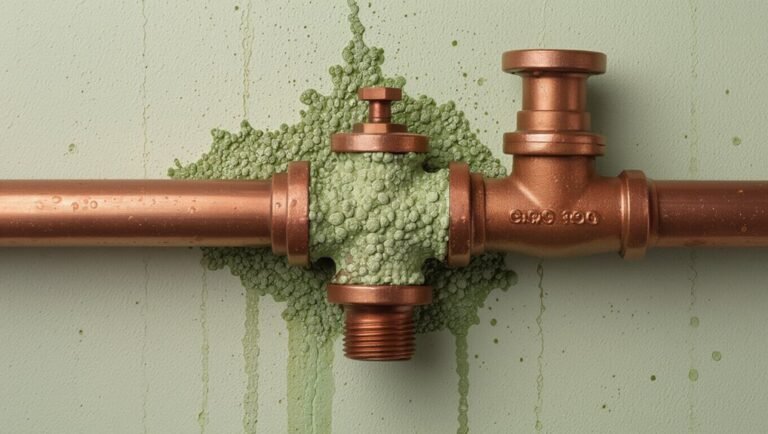
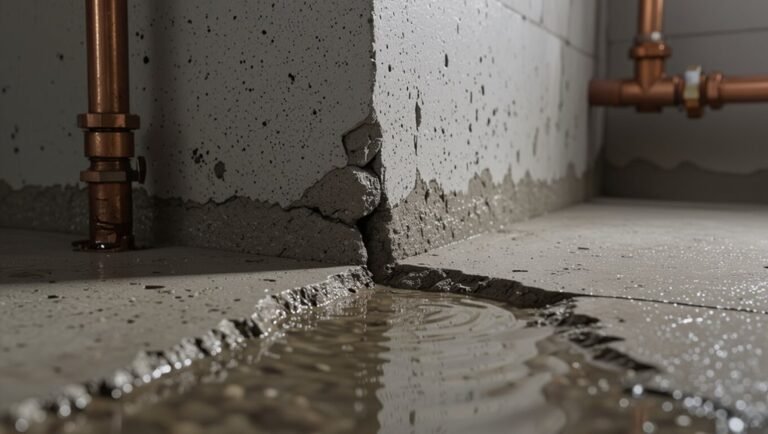
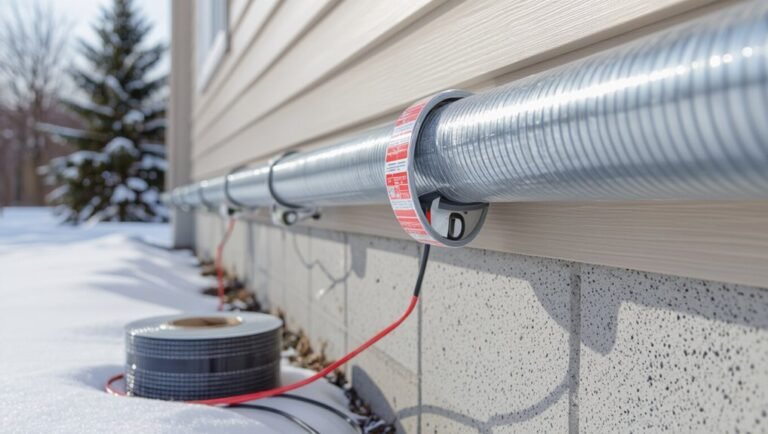
How to Keep Ductwork From Sweating: 7 Proven Fixes to Prevent Condensation
Ductwork sweats due to warm, humid air coming into contact with cold metal, leading to condensation, energy loss, and potential mold growth. To prevent this, seal leaks with mastic or HVAC foil tape, insulate ducts with closed-cell insulation or foil wrap, and improve airflow. Additionally, reduce indoor humidity using dehumidifiers or proper ventilation, and install condensate drains and vapor barriers as needed. Regular inspections and prompt repairs are crucial for ongoing prevention. If issues persist, consider relocating or replacing ducts. Below, you’ll find step-by-step fixes and maintenance tips to keep your ductwork dry.
Can Ductwork Sweat and How to Stop It Fast
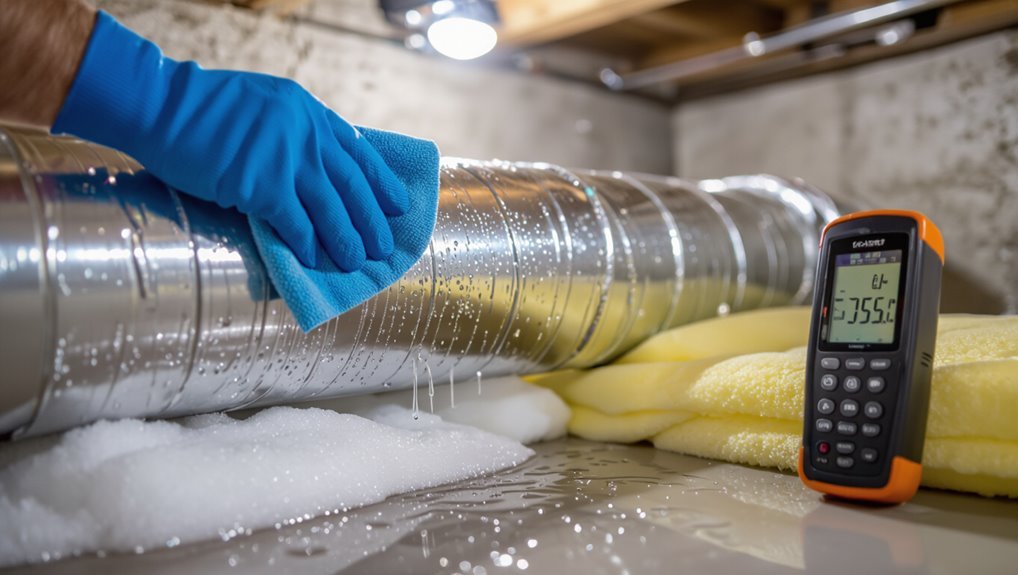
Ductwork can sweat when warm, humid air meets cold duct surfaces, typically from poor insulation, leaks, or high indoor humidity.
The three fastest fixes are adding or repairing insulation, sealing visible joints and gaps, and lowering indoor humidity with ventilation or a dehumidifier.
A professional should be called immediately if there is persistent condensation, signs of mold, or water damage that could indicate major leaks or system failure.
One-sentence summary of causes and 3 fastest fixes
When warm, humid air contacts cooler metal or uninsulated ducts, condensation forms because the metal surface drops below the air’s dew point.
The three fastest fixes are to seal and insulate the ducts, increase surrounding airflow or ventilation, and reduce indoor humidity with dehumidification or improved ventilation.
For clear guidance on how to keep ductwork from sweating, implement airtight sealing, thermal insulation, and immediate humidity control.
When to call a pro immediately
How quickly a professional should be contacted depends on the severity and persistence of the sweating:
Immediate service is advised if condensation causes water damage, mold growth, ceiling stains, or pooling.
Rapid response is also warranted for inaccessible ducts, recurring sweating despite DIY fixes, or suspicious odors indicating mold.
A pro assesses insulation, airflow, and moisture source, then implements targeted repairs or system adjustments.
What Is Duct Sweating? Basic Explanation
Duct sweating occurs when cold duct surfaces meet warm, humid air and the air’s moisture condenses as it cools below the dew point.
Typical signs include visible moisture or dripping on ducts, rust or corroded seams, and a persistent musty smell in adjacent spaces.
Identifying these symptoms early helps pinpoint high indoor humidity or insulation failures that need correction.
How condensation forms on ducts (temperature, humidity, dew point)
Cold metal surfaces and warm, moisture-laden air meeting in confined spaces create condensation: when the temperature of a duct’s exterior falls below the surrounding air’s dew point, water vapor in the air condenses into liquid on the duct.
Higher indoor humidity raises dew point; cooler ducts (from air conditioning or cold supply) increase risk.
Reduced airflow, poor insulation, and thermal bridging worsen formation.
Common signs of sweating ducts (visible moisture, dripping, rust, musty smell)
When warm, humid air meets a chilled metal surface and causes condensation, it often leaves clear, observable traces on the ductwork.
Common signs include beads or streaks of moisture, occasional dripping, brownish rust spots where metal corrodes, and a persistent musty or mildew odor indicating mold growth.
Early detection prevents structural damage and indoor air quality problems.
Why Sweating Ducts Are a Problem
Sweating ducts reduce HVAC efficiency and raise energy costs by forcing systems to run longer and work harder.
Persistent moisture promotes mold and mildew growth, degrading indoor air quality and posing health risks.
Over time, water can damage duct materials and insulation, leading to structural problems and loss of thermal performance.
Risks to HVAC performance and energy efficiency
Duct condensation undermines HVAC performance and raises energy costs by reducing airflow, forcing systems to run longer, and promoting heat transfer inefficiencies.
Accumulated moisture also corrodes ducts and damages insulation, further degrading system effectiveness and increasing utility bills.
Reduced airflow causes uneven heating or cooling, higher compressor and fan strain shortens component life, and thermal losses increase runtime, all raising maintenance and energy expenses.
Mold, mildew, and indoor air quality impacts
Because persistent condensation creates a consistently damp environment, microbial growth such as mold and mildew readily establishes on duct surfaces and nearby building materials.
These microbes release spores and volatile organic compounds that circulate through HVAC systems, degrading indoor air quality and triggering allergic reactions, respiratory irritation, and asthma exacerbations.
Occupant health risks rise, and odors and visible staining signal contamination requiring professional remediation and air-quality control.
Structural damage and insulation degradation
Beyond microbial risks, persistent condensation can physically harm building components and the HVAC system itself.
Continuous moisture soaks insulation, reducing R-value and causing sagging or collapse. Metal duct seams corrode, joints loosen, and fasteners rust, leading to leaks and airflow loss.
Surrounding drywall, framing, and finishes warp or deteriorate, increasing repair costs and shortening system lifespan without timely remediation.
7 Proven Fixes to Prevent Duct Condensation
The following section outlines seven practical measures to stop duct condensation.
It covers improving duct insulation, sealing leaks and joints, lowering indoor humidity, increasing airflow, and installing condensate drains or traps.
Each fix is presented with concise guidance for implementation and expected effect.
Fix 1 Improve Insulation on Ducts
Improve insulation on ducts to stop warm, humid air from contacting cold metal surfaces and forming condensation.
Install closed-cell foam or insulation wrap sized to duct dimensions, ensuring continuous coverage without gaps.
Maintain recommended R-value for climate and space.
Protect insulation with a vapor barrier and secure seams with appropriate tape or adhesive.
Inspect periodically for compression, moisture, or damage and replace as needed.
Fix 2 Seal Air Leaks and Joints
Seal air leaks and joints to prevent warm, humid air from entering cold duct surfaces and causing condensation.
Inspect seams, connections, and register boots for gaps or detached sections. Use mastic or HVAC-rated foil tape for permanent seals; avoid cloth-backed duct tape.
Tighten screws, replace torn flexible duct collars, and guarantee that transition pieces fit snugly.
Proper sealing minimizes moisture-driven corrosion and energy loss.
Fix 3 Lower Indoor Humidity Levels
Lowering indoor humidity is one of the most effective ways to stop duct sweating because condensation forms when moist room air contacts cold duct surfaces.
Reducing moisture sources, using dehumidifiers, ensuring proper ventilation in bathrooms and kitchens, and maintaining balanced HVAC drainage and drip pans lower dew point near ducts.
Consistent humidity control prevents persistent condensation and associated mold, corrosion, and insulation damage.
Fix 4 Increase Airflow Through Ducts
Boosting airflow through ductwork reduces the temperature differential that drives condensation by keeping duct surfaces closer to room air temperature.
Increasing fan speed, balancing dampers, removing blockages, and ensuring return vents operate effectively raises volume and circulation.
Improved airflow minimizes cold spots, speeds moisture evaporation, and stabilizes temperatures so condensation is less likely.
Regular HVAC tuning maintains consistent, adequate duct airflow.
Fix 5 Install a Condensate Drain or Traps
Install a condensate drain or traps to give accumulated moisture a controlled path away from duct surfaces and surrounding spaces.
Implementing drains at low points and traps under drip pans prevents water pooling and migration.
Guarantee proper slope, corrosion-resistant fittings, and accessible cleanouts.
Connect to safe disposal or a condensate pump where gravity drainage isn’t possible.
Regular inspection prevents clogs and microbial growth.
Fix 6 Use Vapor Barriers and Proper Wrap Materials
Apply continuous vapor barriers and select proper wrap materials to block moisture migration and maintain thermal performance of ductwork.
Use closed-cell insulation with factory-applied vapor retarder or polyethylene-faced fiberglass designed for HVAC.
Seal all seams, joints, and penetrations with compatible tapes or mastics.
Confirm wrap thickness matches local dew point calculations and code requirements to prevent condensation and preserve energy efficiency and indoor air quality.
Fix 7 Re-route or Relocate Ducts Away from Cold Surfaces
When ducts run alongside or through cold surfaces—such as uninsulated exterior walls, concrete slabs, or attic rafters—they become prime sites for condensation; re-routing or relocating those runs reduces exposure to chilled contact points and lowers the risk of sweating.
Strategic relocation moves ducts into conditioned spaces, shortens exposed lengths, avoids thermal bridges, and simplifies insulation.
Professional planning minimizes airflow loss and installation cost.
Step-by-Step DIY Guide to Fix Sweating Ducts
The guide outlines a practical sequence for diagnosing and correcting sweating ducts, starting with simple measurements using a thermometer and hygrometer.
It then covers locating vulnerable duct runs and access points, sealing leaks with mastic or foil tape, and applying insulation with appropriate R-value and wrapping technique.
Finally, it addresses humidity control through proper dehumidifier sizing and placement.
Step 1 Diagnose the problem: tools and measurements (thermometer, hygrometer)
Begin by confirming that condensation is occurring and gathering the small set of tools needed for accurate measurement: a digital thermometer and a hygrometer (or a combined thermo-hygrometer).
Measure surface and air temperatures, record relative humidity, compare dew point, and note times of occurrence.
Typical quick checklist:
- Surface temperature readings
- Ambient air temperature
- Relative humidity levels
- Calculated dew point
- Time and location logs
Step 2 Identify high-risk duct sections and access points
After confirming condensation locations and recording temperatures and humidity, attention shifts to locating the duct sections most likely to sweat and the access points needed to inspect and repair them.
Focus on uninsulated runs in attics, crawlspaces, basements, and exterior walls, plus supply trunks near return plenum.
Mark joints, seams, and register boots; note attic hatches, access panels, and nearby insulation gaps for targeted intervention.
Step 3 Seal leaks: materials and technique (mastic vs foil tape)
Several common sealing methods are effective for stopping duct leaks, but choosing the right material and applying it correctly determines long-term performance.
Mastic sealant provides durable, flexible coverage for seams and holes; apply with a brush, smoothing edges.
Foil-backed HVAC tape bonds quickly for small gaps but may fail if surface is dirty or temperatures vary.
Clean, dry surfaces and overlap joints for best adhesion.
Step 4 Insulate properly: R-value, thickness, and wrapping method
With leaks sealed, attention turns to insulating the ductwork to stop condensation by keeping the metal surface above the dew point of the surrounding air.
Proper insulation balances R-value, thickness, and installation technique to prevent sweating and energy loss.
- Choose insulation rated for HVAC use
- Match R-value to climate and duct location
- Use closed-cell or foil-faced options
- Maintain continuous coverage
- Seal seams and edges tightly
Step 5 Reduce humidity: dehumidifier sizing and placement
If indoor air remains humid despite sealed and insulated ducts, installing a dehumidifier can be the most effective way to prevent condensation on metal surfaces.
Choose capacity based on square footage and local climate (pints/day), account for air changes, and position the unit near the return duct or in the humid zone for uniform reduction.
Guarantee proper drainage and service access.
Step 6 Test and verify: recheck temps and humidity after fixes
Begin by rechecking duct surface temperatures and surrounding relative humidity to confirm that the repairs and insulation have stopped condensation.
Measure at multiple spots, comparing readings to outdoor and indoor baselines.
Inspect seams and insulation for new wetness or cold spots.
Run the system under typical loads and monitor periodically over 24–72 hours.
Record results and adjust insulation, sealing, or dehumidification as needed.
Materials, Tools, and Costs Comparison
A concise checklist of required materials and tools is presented to guide homeowners through common DIY repairs and insulation upgrades.
A clear cost comparison contrasts typical DIY expenses with professional quotes to help assess value.
Guidance is offered on indicators that warrant a professional inspection or contractor rather than a do‑it‑yourself approach.
Materials and tools checklist
One clear inventory of materials and tools helps confirm a condensation-control project proceeds smoothly and stays on budget.
A concise checklist prevents omissions and guarantees proper fit, insulation, and sealing.
Typical items include:
- Closed-cell insulation (rubber or foil-faced)
- HVAC foil tape and mastic
- Foil-faced vapor barrier
- Gloves, utility knife, straightedge
- Caulk gun and silicone sealant
Cost comparison table: DIY vs professional options
Cost clarity matters when choosing between DIY and professional duct condensation control: a side-by-side comparison of materials, required tools, labor hours, and typical price ranges helps homeowners weigh upfront expenses against long-term performance and warranty value. A concise cost table follows to compare typical options.
| Option | Materials/Tools | Typical Cost Range |
|---|---|---|
| DIY basic | Insulation, tape, sealant, hand tools | $40–$150 |
| DIY advanced | Foam, adhesive, vapor barrier, meter | $150–$400 |
| Professional | Materials + labor, warranty | $300–$1,200 |
When a professional inspection or contractor is worth it
The cost table helps frame when a hands-on approach makes sense and when professional assessment becomes the more practical choice.
A contractor is justified for complex insulation replacement, inaccessible ducts, persistent condensation despite DIY fixes, or suspected HVAC malfunction.
Professionals provide diagnostic tools, code-compliant materials, and labor warranties.
Choose based on risk, time, required equipment, and the comparative total cost of DIY versus hired services.
Common Mistakes to Avoid
Common errors frequently contribute to persistent condensation problems and reduced system efficiency.
These include using improper tapes or adhesives, under-insulating or leaving gaps, neglecting whole-house humidity and ventilation, and blocking airflow during insulation work.
Recognizing and avoiding these mistakes prevents recurring sweat and costly repairs.
Using the wrong tape or adhesive
Many homeowners and installers underestimate how much the choice of tape or adhesive affects vapor sealing and long-term durability.
Using ordinary duct tape, non-adhesive cloth tape, or incompatible mastics leads to failures: seals peel, moisture migrates, and insulation degrades.
Specified foil tape, butyl-based sealants, or manufacturer-recommended adhesives maintain a continuous vapor barrier and resist temperature cycling for reliable condensation prevention.
Under-insulating or leaving gaps
One frequent installation error is leaving sections of ductwork under-insulated or with small gaps at seams and fittings, which creates cold spots where condensation can form.
These voids reduce thermal continuity, allowing warm, humid air to meet chilled surfaces.
Properly sized insulation, continuous coverage, sealed seams and careful changes at joints prevent sweating and maintain system efficiency.
Ignoring ventilation and whole-house humidity sources
Overlooking whole-house humidity sources and inadequate ventilation often undermines even well-insulated ducts, because excess indoor moisture raises the dew point and promotes condensation on cooled surfaces.
Failure to address humidifiers, drying indoors, plumbing leaks, or poor exhaust ventilation lets moisture accumulate.
Effective solutions target source control and balanced ventilation to lower indoor relative humidity, preventing persistent duct sweating despite proper insulation.
Blocking airflow while insulating
Seal insulation around ducts without blocking required airflow openings or access panels; obstructing return grilles, plenums, or manufacturer-designated clearances can impair system performance, create pressure imbalances, and trap moisture.
Installers should trim and secure insulation to preserve vents, maintain access for service, and avoid compressing ductwork.
Proper sealing and routing prevent reduced airflow, uneven temperatures, and condensation caused by stalled or redirected air.
Prevention and Best Practices for Long-Term Control
A regular inspection schedule and a concise maintenance checklist help identify early signs of sweating and keep corrective actions consistent.
Adjustments to the HVAC system—such as balancing airflow, calibrating thermostats, and maintaining proper refrigerant levels—reduce condensation risk.
Seasonal measures, including extra insulation and dehumidification in summer and air-sealing in winter, support long-term control.
Routine inspection schedule and maintenance checklist
Monthly and seasonal inspections form the backbone of a long-term strategy to prevent ductwork sweating, ensuring issues are caught early and corrective measures applied promptly.
A concise checklist guides technicians and homeowners through routine tasks:
- Inspect insulation integrity and seams
- Check for visible condensation or corrosion
- Verify duct support and alignment
- Clear nearby moisture sources and drainage
- Document findings and schedule repairs
HVAC system adjustments to reduce condensation risk
Optimize HVAC operation to lower indoor humidity and keep duct surfaces above dew point.
Adjust fan runtime, increase air exchanges, and set sensible thermostat differentials to prevent excessive cooling.
Calibrate humidistats and integrate dehumidification or ventilation controls.
Balance supply and return pressures to avoid cold spots.
Confirm refrigerant charge and airflow meet manufacturer specs to maintain coil efficiency and stable duct temperatures.
Seasonal actions (summer vs winter considerations)
After adjusting HVAC runtime, airflow, and humidity controls, seasonal strategies refine those measures to match summer cooling and winter heating demands.
In summer, prioritize higher insulation, continuous dehumidification, and sealed vents to limit cold-surface condensation.
In winter, reduce ventilation of humid outdoor air, maintain consistent duct temperatures, and inspect seals for heat loss.
Schedule seasonal tune-ups to adapt settings and repair insulation.
When to Upgrade or Replace Ductwork
Assessment should focus on whether recurring condensation, corrosion, or repeated repairs make replacement more cost-effective than patching.
Upgrading offers modern materials and designs—such as insulated flexible ducts, sealed metal with internal insulation, and improved joint seals—that better resist sweating.
Replacing poorly performing ductwork can also improve energy efficiency and indoor comfort, often offsetting upfront costs through lower utility bills and fewer service calls.
Signs replacement is more cost-effective than repair
When do the costs and risks of continual duct repairs outweigh the value of a full replacement?
Frequent leaks, recurring insulation failure, pervasive mold, or chronic sweating despite fixes indicate diminishing returns.
If repair costs approach replacement estimates, energy bills remain high, or indoor air quality is compromised, replacement is usually more cost-effective and reliable than ongoing patchwork.
Modern duct materials and designs that resist sweating
Several contemporary duct materials and construction approaches greatly reduce condensation risk by combining improved thermal resistance with tighter seams and vapor control.
Fiberglass-lined metal with factory-applied foil vapor barriers, insulated flexible ducts with high R-value wraps, and double-walled spiral metal with internal insulation minimize thermal bridging.
Seamless polymer ducts and pre-insulated ductboard offer durable, low-permeability options.
Proper fittings and sealed joints complete effective condensation prevention.
Energy efficiency and comfort benefits of upgrading
Upgrading or replacing ductwork can yield measurable gains in energy efficiency and indoor comfort by reducing air leakage, improving airflow balance, and lowering thermal losses through better insulation and tighter joints. Properly sized, sealed, and insulated systems cut utility costs, reduce humidity, and improve temperature consistency, justifying replacement when repairs fail or efficiency goals demand it.
| Benefit | Effect |
|---|---|
| Reduced leakage | Lower energy use |
| Better balance | Consistent temperatures |
| Improved insulation | Less condensation |
| Lower maintenance | Longer system life |
Troubleshooting Scenarios and Quick Solutions
Typical troubleshooting starts with categorizing symptoms into scenarios: an isolated cold spot in attic ducts, a whole-house humid smell with widespread sweating, or intermittent dripping after heavy AC use.
Each scenario points to different causes—localized insulation gaps, systemic airflow or condensation control failures, or transient condensate issues—and guides specific quick fixes.
The following section summarizes practical, prioritized steps for each situation.
Scenario A Isolated cold spot in attic ducts
When a single section of attic ductwork runs noticeably colder than the rest, it often indicates a localized insulation failure, a small gap in the vapor barrier, or an area of excessive air leakage.
Inspect for damaged insulation, lost sealant at joints, and compressed wrapping.
Patch vapor barrier tears, reseal seams with mastic or foil tape, and add targeted insulation to restore thermal continuity and stop condensation.
Scenario B Whole-house humid smell and widespread sweating
In many homes a pervasive musty, humid odor combined with widespread condensation on ducts signals systemic insulation or moisture-control failures rather than an isolated defect.
The remedy targets whole-house causes: inspect attic and crawlspace vapor barriers, upgrade duct insulation to appropriate R-value, seal duct and building envelope leaks, guarantee proper ventilation and attic exhaust, and verify HVAC sizing and condensate drainage to restore balanced humidity control.
Scenario C Intermittent dripping after heavy AC use
Although intermittent dripping after prolonged air‑conditioning runs often appears localized, it usually stems from transient conditions such as temporarily overwhelmed condensate pans, partially clogged drain lines, or brief thermal bridging at poorly insulated duct joints.
Inspect pans and drains for standing water, clear blockages, verify slope and trap function, and add or repair insulation at suspect joints.
Monitor after fixes; escalate to technician if recurring.
Additional Resources and Next Steps
The article concludes by pointing readers to practical resources: printable pre-job checklists to use before a DIY ductwork inspection, a concise list of questions to ask an HVAC contractor, and recommended apps and tools for monitoring humidity and temperature.
These items help prioritize tasks and decide when professional help is needed. Links and brief descriptions for each resource follow.
Checklists you can print before a DIY job
Preparation improves outcomes: a printable checklist organizes tools, safety steps, materials, and measurements so a homeowner can tackle duct insulation, sealing, or drip-tray installation with fewer surprises.
A concise, stepwise list reduces errors and speeds work. Recommended checklist items:
- Tools and PPE inventory
- Material quantities and sizes
- Measurement and access notes
- Safety and lockout steps
- Waste and disposal plan
Questions to ask an HVAC contractor
Why ask specific questions before hiring an HVAC contractor? Homeowners should verify licensing, insurance, and local code knowledge.
Ask about experience with duct insulation, condensation control, and moisture barriers. Request written estimates, timelines, and warranties.
Inquire about diagnostic methods, proposed materials, and post-installation testing. Confirm references and maintenance plans to guarantee lasting condensation prevention and accountability.
Useful apps and tools for humidity and temperature monitoring
A handful of reliable apps and compact sensors can help homeowners monitor temperature and relative humidity around ductwork to catch condensation risks early.
Recommended tools include Bluetooth/Zigbee hygrometers, Wi‑Fi smart thermostats with humidity readouts, and data‑logging USB sensors.
Users should choose devices with alerts, historical graphs, and calibration options.
Integrating sensors with home automation enables timely dehumidifier or fan activation to prevent sweating.
Conclusion
Like a kettle releasing unseen steam, ductwork that sweats signals imbalance between inside and out. The fixes act as towels and insulation, wiping moisture and restoring calm so air glides dry through channels. Routine care becomes a lighthouse, steering systems away from corrosion and mold. When addressed promptly, condensation fades into memory; neglected, it creeps back like fog. Thoughtful maintenance keeps the home’s breath clear and its hidden veins resilient.