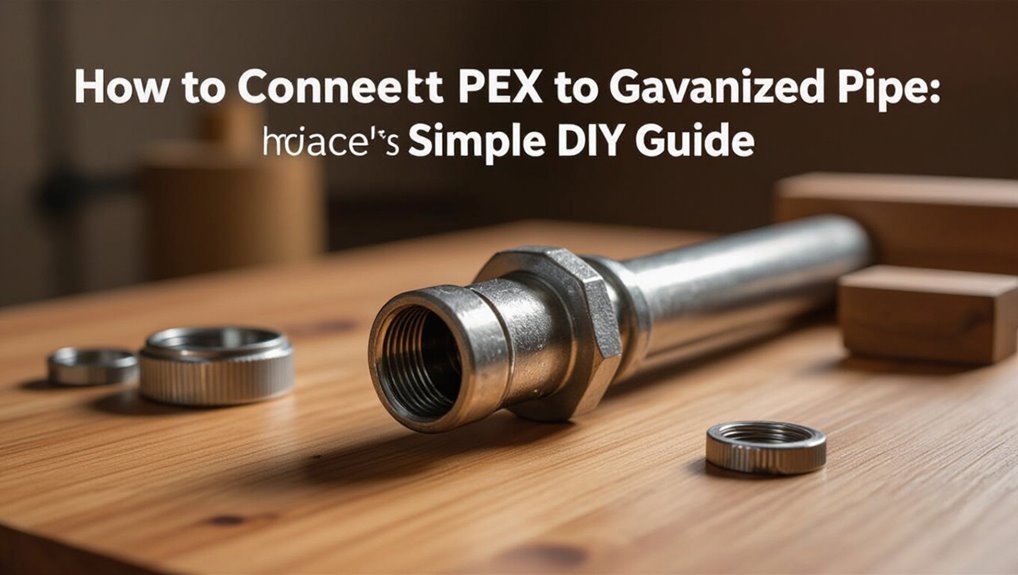
How to Connect PEX to Galvanized Pipe: Simple DIY Guide
To successfully connect PEX to galvanized pipe, follow these key steps:
- Shut Off Water Supply: Start by shutting off the water supply and draining the line to prevent any spills.
- Prepare the Galvanized Pipe: Cut and clean the galvanized threads. Ensure the ends are free from debris and burrs.
- Install an Adapter: Use a code-listed brass or stainless steel adapter to create a connection point.
- Attach PEX: Connect the PEX tubing using a compatible crimp, clamp, or press fitting.
- Seal Threads: Apply PTFE tape or pipe dope to the threads of the adapter for a watertight seal.
- Test for Leaks: After the connection is made, pressure-test the system to ensure there are no leaks.
- Use Dielectric Union: If required for corrosion control, isolate dissimilar metals by incorporating a dielectric union.
For detailed options, tools, and safety steps, continue reading.
Why Connect PEX to Galvanized Pipe?
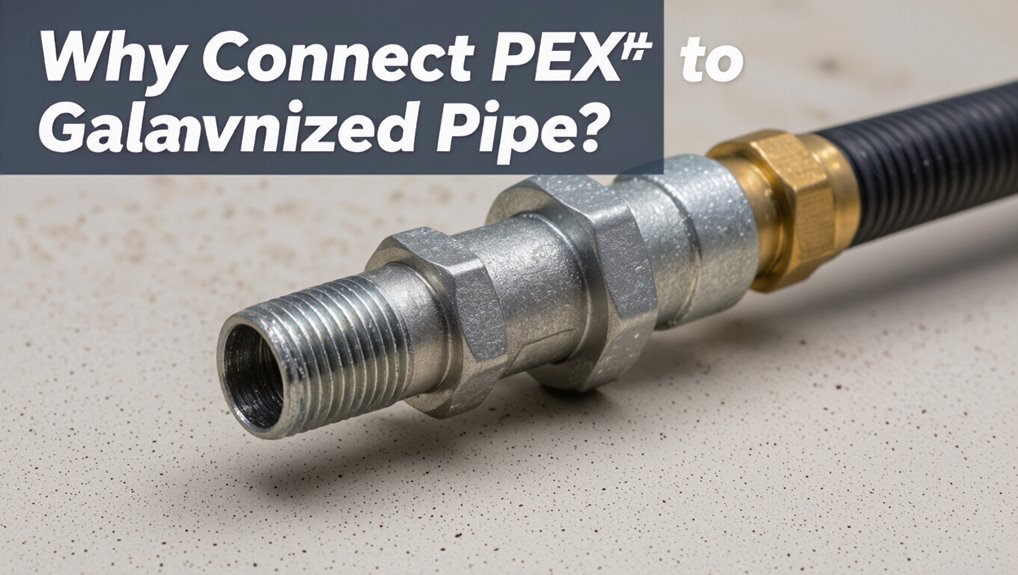
When remodeling older homes or repairing sections of worn water lines, homeowners and plumbers often need to join new PEX tubing to existing galvanized pipe runs; this connection preserves usable portions of the existing plumbing while upgrading remaining sections to more corrosion-resistant, flexible PEX.
Reasons include cost savings by limiting replacement, minimizing disturbance to walls and finishes, and faster installation. PEX offers improved flow and reduced leakage risk compared with corroded galvanized lines. Adapters enable reliable joints between dissimilar materials.
The practice supports phased upgrades, extends service life of mixed systems, and accommodates modern fixture requirements without full system replacement.
Should You Adapt or Replace Galvanized Pipe?
The decision to adapt or replace galvanized pipe begins with a clear assessment of its physical condition, including corrosion, flow restriction, and leak history.
Long-term costs—repair frequency, expected lifespan, and energy or water loss—should be weighed against the upfront expense of replacement with PEX.
Potential health risks from rust, scale, or lead solder must factor into whether a temporary adapter or full repiping is the prudent choice.
Assess Pipe Condition
Homeowners should inspect galvanized supply lines carefully before deciding whether to adapt them to PEX or replace them outright. Visual checks for pitting, flaking, heavy rust, and reduced flow signal replacement; sound tests and localized leaks may allow adaptation. Measure wall thickness, note age, and document past repairs. If interior corrosion threatens fittings or water quality, replacement is safer. Safety and long-term reliability guide the choice; temporary adapters suit otherwise-sound runs. A concise checklist helps decide.
| Condition | Emotion | Action |
|---|---|---|
| Pitting | Concern | Replace |
| Surface rust | Worry | Monitor |
| Leaks | Alarm | Replace |
| Good flow | Relief | Adapt |
Consider Long-Term Costs
Cost considerations often determine whether to adapt galvanized piping to PEX or replace it entirely: short-term savings from adapters can be appealing, but long-term costs — including ongoing maintenance, reduced water quality, potential for hidden corrosion, and future retrofit work — must be weighed against the one-time expense of full replacement that restores reliability and compatibility with modern plumbing.
Owners should compare material, labor, and expected lifespan costs for adapters versus full repipe. Factor in future access difficulty, likelihood of leaks, and resale value. A clear cost-per-year and risk assessment helps decide whether adaptation is a stopgap or an avoidable expense.
Evaluate Health Risks
Health concerns often drive the decision to adapt or replace galvanized piping because corrosion and scale can release lead, iron, and other contaminants into drinking water.
The homeowner evaluates pipe age, water clarity, taste, and staining; older systems or those with visible rust deposits pose higher risk.
Water testing for lead, iron, and bacteria gives objective data.
If contaminants exceed health guidelines, replacement with PEX eliminates galvanized-related leaching and reduces corrosion risk.
In low-risk cases, internal lining or targeted replacement combined with periodic testing may suffice.
Decisions should weigh health data, cost, and long-term maintenance.
Quick Step‑by‑Step: PEX → Galvanized in 6 Steps
A clear six‑step sequence simplifies converting a PEX line to an existing galvanized pipe, covering inspection, preparation, fitting selection, connection, leak testing, and finishing.
First, inspect galvanized for corrosion, threads, and pressure compatibility.
Second, shut water, drain the line, and clean pipe ends.
Third, choose an appropriate adapter fitting type and size compatible with both materials.
Fourth, prepare PEX and galvanized ends per fitting instructions, apply sealant where required, and assemble securely.
Fifth, restore water and perform a pressure/leak test, checking all joints.
Sixth, address any leaks, secure lines, and restore insulation or access panels.
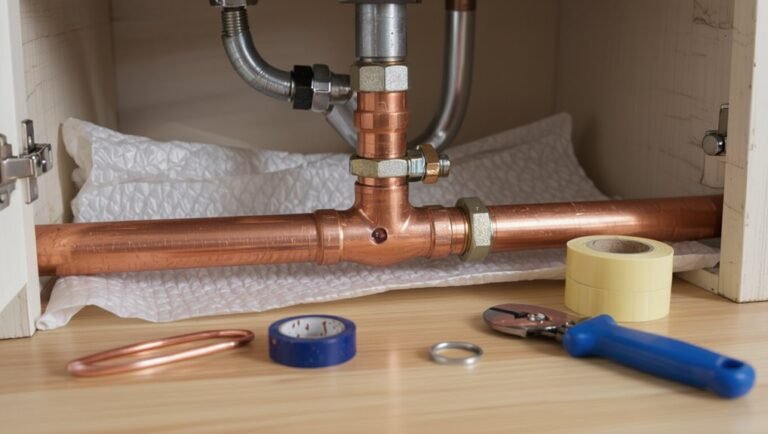
Tools & Materials for PEX‑to‑Galvanized Work
A concise list of tools and a materials checklist is essential before beginning a PEX-to-galvanized connection.
Typical tools include pipe cutters, adjustable wrenches, thread sealant tools, and a roll-thread die or adapters; materials include PEX tubing, appropriate fittings or changeover connectors, and thread sealant or tape.
Confirming tool compatibility and quantities prevents delays and guarantees a proper, leak-free joint.
Tools Needed
For a reliable PEX‑to‑galvanized connection, the right set of tools and materials is essential: a PEX cutter, crimp or clamp tool (depending on fitting type), stainless steel or copper adapters rated for dissimilar metals, thread sealant or PTFE tape, emery cloth or wire brush for cleaning, and appropriate safety gear. The technician should also have a pipe wrench for galvanized fittings, deburring tool, measuring tape, and marker. Proper selection reduces leaks and galvanic corrosion risk. Below is a compact tool summary.
| Tool/Item | Purpose |
|---|---|
| PEX cutter | Clean, square cuts |
| Crimp/clamp tool | Secure PEX fittings |
| Emery cloth/brush | Clean threads and remove corrosion |
Materials Checklist
Following the tool summary, the materials checklist enumerates everything required to complete a safe, code‑compliant PEX‑to‑galvanized connection.
Required items: PEX tubing (correct type and size), matching PEX fittings (crimp, clamp, or expansion style), brass or copper adaptor couplings rated for PEX-to-galvanized conversions, stainless steel or brass threaded nipples, appropriate pipe dope or PTFE tape for metal threads, dielectric unions if dissimilar metals remain, corrosion‑resistant clamps or crimp rings, backup washers or ferrules as specified, pipe cutters, emery cloth or wire brush for cleaning galvanized ends, and thread sealant per local code.
Verify materials match system pressure and temperature ratings.
Code, Permits, and Potable‑Water Requirements
Why check local codes before connecting PEX to galvanized pipe? Local plumbing codes, permit requirements, and potable‑water rules dictate acceptable materials, connection methods, and inspection steps. Installers must verify permit necessity, approved PEX types, and backflow or isolation requirements to safeguard drinking water and meet warranty conditions.
| Requirement | Typical Purpose | Action |
|---|---|---|
| Permits | Safeguard inspections | Obtain before work |
| Approved materials | Protect potable water | Use code-listed PEX |
| Connection methods | Prevent leaks/corrosion | Follow manufacturer |
| Inspections | Verify compliance | Schedule final check |
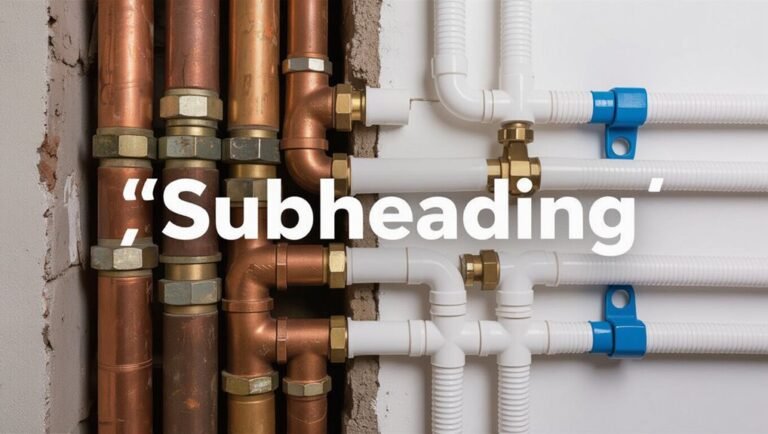
Choose PEX Type and Size for Galvanized Systems
Selecting the appropriate PEX type for use with existing galvanized piping influences corrosion resistance and connection method.
Equally important is matching the PEX nominal size to the galvanized pipe so fittings maintain flow capacity and seal properly.
The following section compares common PEX variants and explains how to size and adapt them to galvanized systems.
PEX Type Selection
Several factors determine the appropriate PEX type and size when replacing or tying into galvanized systems, including pressure requirements, water chemistry, and the chosen connection method. The selection favors PEX-A for flexibility and freeze resistance; PEX-B offers cost efficiency and rigidity for longer runs; PEX-C is less common. Consider system pressure rating, chlorine exposure, and compatibility with brass or stainless fittings to avoid dezincification. Choose oxygen-barrier PEX for hydronic systems only. Installation method (crimp, clamp, expansion) guides fitting choice; use certified fittings rated for potable water and galvanized conversion.
| Attribute | Recommendation |
|---|---|
| Flexibility | PEX-A |
| Cost | PEX-B |
| Corrosion resistance | PEX-A/Barrier |
| Fitting types | Crimp/Expansion |
| Application | Potable/Hydronic |
Matching Pipe Size
After choosing the PEX type and fitting method, attention turns to matching pipe size so flow rates and pressure losses remain acceptable when tying into existing galvanized lines.
The installer measures existing galvanized nominal diameter and notes internal corrosion, which can reduce effective bore. Choose PEX nominal size that equals or exceeds the galvanized internal diameter to avoid bottlenecks; commonly 3/4-inch galvanized pairs with 3/4-inch PEX, though 1-inch PEX may be preferable if corrosion has narrowed the old pipe.
Confirm pressure drop using basic charts for velocity and head loss, and follow local code for minimum diameters and fixture units.
Matching Flow: Sizing Adapters and Fittings
When matching PEX to existing galvanized pipe, correct adapter and fitting sizing preserves flow capacity and minimizes pressure loss.
The installer assesses nominal diameters and internal diameters, noting that PEX ID may be larger than galvanized ID for the same nominal size.
Choose adapters rated for the measured IDs to avoid bottlenecks.
Prefer straight-through fittings over abrupt changes; use full‑bore brass or stainless adapters when possible.
Account for cumulative fitting loss by limiting unnecessary elbows and reducers.
Verify manufacturer flow coefficients (Cv) for chosen fittings and, when required, select next larger size to maintain desired flow and pressure.
Identify Threaded vs. Non‑Threaded Galvanized Ends
To determine whether an existing galvanized pipe end is threaded or smooth, inspect the exterior for visible helical ridges and measure for concentric grooves; threaded ends will show continuous spiral threads and often a chamfered lead-in, while non‑threaded (cut or plain) ends are uniformly smooth and may have a machined or saw-cut face.
The inspector should compare the end to known fittings, note any taper consistent with NPT threads, and use a thread gauge if available.
Corrosion can obscure threads, so clean lightly.
Record the result and photograph the end to select the correct adapter or coupling.
Safely Shut Off and Drain the Line Before Starting
Begin by isolating the affected section: locate and close the appropriate shutoff valves for both the supply and any branch lines, then relieve downstream pressure by opening a nearby faucet or drain valve. The worker confirms the system is depressurized, wears gloves and eye protection, and collects any residual water in a bucket. Verify hot and cold lines separately and tag valves if needed. Check for backflow that could refill the line. Proceed only when flow has stopped and fittings are dry. Record valve positions to restore later and keep towels ready for minor drips.
| Step | Action | Note |
|---|---|---|
| 1 | Close main/branch valves | Tag positions |
| 2 | Open faucet/drain | Relieve pressure |
| 3 | Collect water | Use bucket/towels |
| 4 | Verify dryness | Inspect fittings |
| 5 | Record status | Ready to proceed |
Cutting and Preparing Galvanized Pipe Correctly
Before cutting, measurements are verified and a clear mark is scribed to guarantee proper fit.
The author outlines appropriate cutting tools and methods—from tubing cutters to reciprocating saws—matched to pipe size and access.
After cutting, threads and edges are deburred and cleaned to guarantee a leak-free connection and proper thread engagement.
Measure And Mark Accurately
With a tape measure and marker in hand, the technician measures twice and marks clearly at the planned cut point, accounting for threading or fitting depth so the final length matches the connection requirements.
Measurements are taken from a fixed reference, noting whether fittings add or subtract usable pipe length.
Marks are made perpendicular to the pipe axis to guarantee a square cut and easy seating of fittings.
If threads remain, the mark allows space for complete engagement without gaps.
The technician verifies alignment with adjacent runs and rechecks dimensions before proceeding, documenting critical lengths for consistent repeats on multiple pipes.
Cutting Methods And Tools
When preparing galvanized pipe for connection, the choice of cutting method and the condition of the tools determine the quality of the cut and the safety of the operation. The installer selects a suitable cutter—pipe cutter for clean square cuts, reciprocating saw for tight spaces, or angle grinder for thick or corroded sections—and inspects blades and wheels for wear.
Secure clamping prevents vibration and uneven edges. Cutting should be steady, perpendicular to the pipe axis, and done with safety gear. Proper tool choice reduces rework and risk, and preserves threads and fittings for the next preparation steps.
- Choose the right tool for access and material condition
- Inspect and replace worn blades or wheels
- Clamp securely and cut perpendicular to the axis
Deburring And Thread Prep
After cutting, the freshly exposed edges of galvanized pipe require careful deburring and thread preparation to guarantee leak-free, mechanically sound connections. Use a round file or carbide reamer to remove burrs from the inside, then a flat file or emery cloth to smooth outer edges.
For threaded joints, chase threads with a proper tap and die set sized to the pipe, removing paint, rust, and galvanizing buildup. Clean surfaces with a wire brush and solvent. Inspect threads for nicks or deformation; replace damaged sections. Apply PTFE tape or pipe dope correctly, wrapping clockwise and avoiding excess that could contaminate the line.
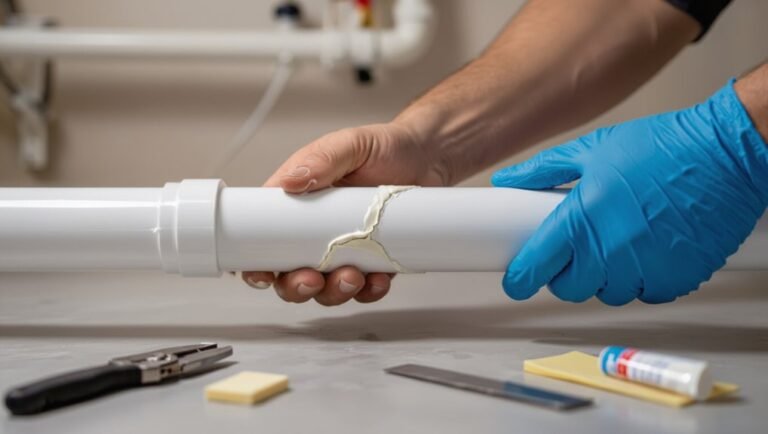
Cleaning and De‑Rusting Galvanized Pipe
Begin by removing loose scale and surface corrosion from the exposed ends and fittings of the galvanized pipe using a wire brush, emery cloth, or a rotary tool with a grinding wheel; this prepares a clean metal surface for inspection and for any subsequent sealing or conversion connection to PEX.
After abrasion, wipe with a clean cloth and apply a mild acid cleaner or vinegar solution to dissolve remaining rust, then neutralize and rinse thoroughly.
Inspect threads and seating surfaces for pitting; replace severely damaged sections.
Dry completely before applying thread sealant or compression fittings to assure proper seating and long-term integrity.
- Remove contaminants to reveal true condition
- Neutralize acids and rinse fully
- Replace instead of forcing damaged parts
Preventing Galvanic Corrosion at Transitions
Frequently, electrochemical reactions at the junction between PEX and galvanized pipe create a risk of galvanic corrosion that can rapidly degrade metallic components. To prevent this, isolate dissimilar metals with nonconductive fittings, sleeves, or short sections of similar metal to the galvanized pipe.
Apply approved thread sealants and corrosion-inhibiting compounds to exposed threads. Make sure connections remain dry and free of debris; moisture accelerates corrosion.
Maintain electrical continuity only where intentional bonding is required by code, using insulated bonding jumpers if necessary. Inspect changeovers periodically for signs of pitting, discoloration, or leaks, and replace compromised parts promptly to avoid system failure.
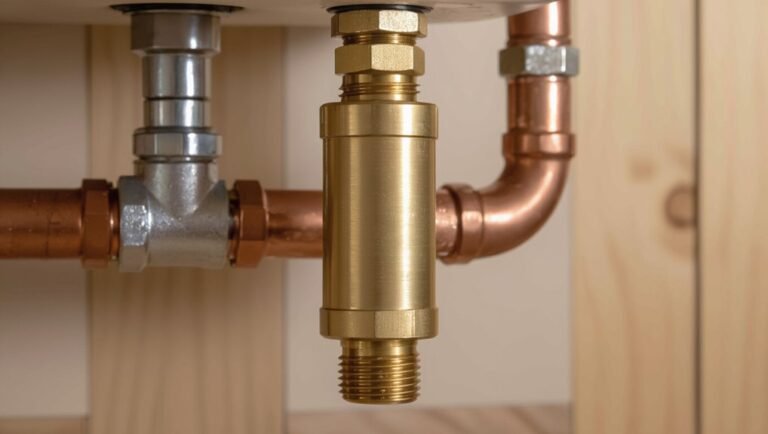
Use a Dielectric Union Between Dissimilar Metals
A dielectric union isolates dissimilar metals to prevent galvanic current and subsequent corrosion at the transition between PEX fittings and galvanized pipe.
Correct orientation and tightening—following the manufacturer’s marking for which side faces the galvanized metal—ensures the insulating gasket and sleeve function as designed.
When installed properly, a dielectric union provides long-term corrosion prevention and reduces the need for future repairs.
Why Use A Dielectric Union
When joining PEX to galvanized pipe, a dielectric union prevents direct metal-to-metal contact that leads to galvanic corrosion, which can rapidly degrade the galvanized fitting and contaminate the water supply; by electrically isolating the two metals, the union preserves pipe integrity and extends service life.
A dielectric union provides a nonconductive barrier and a threaded mechanical connection, reducing electrochemical reactions between copper or brass components and steel. It also simplifies maintenance by allowing separation without damaging threads. Selection should match pipe sizes and pressure ratings. Proper use minimizes leaks, prolongs system life, and protects water quality.
- Prevents galvanic corrosion
- Preserves water quality
- Facilitates maintenance
Proper Installation Orientation
For reliable connections between PEX and galvanized pipe, the dielectric union must be installed with its insulating barrier aligned between the dissimilar metals so that no metal-to-metal contact occurs.
The union’s insulating component should face the junction where galvanized meets the PEX adapter or changeover fitting.
Tighten only to manufacturer torque specifications to preserve the barrier and avoid crushing insulating parts.
Orient sealing surfaces per instructions so gaskets and threads remain isolated.
Confirm alignment visually before final tightening and test for leaks under low pressure first.
Proper orientation prevents electrical continuity and guarantees the union functions as intended.
Long-Term Corrosion Prevention
Regularly installing a dielectric union between galvanized pipe and PEX adapters prevents galvanic corrosion by electrically isolating the dissimilar metals.
The connector limits electrochemical reaction, extends service life, and reduces maintenance. Proper selection, compatible thread sealing, and correct torque make certain the isolation remains effective. Periodic inspection verifies integrity and detects leaks or degradation before failure.
- Choose a dielectric union rated for potable water and matching pipe sizes.
- Use appropriate sealant on threads and avoid conductive materials bridging the joint.
- Inspect annually for signs of leakage, corrosion, or loosened fittings and replace if compromised.
Convert Threaded Galvanized to PEX With a Brass Adapter
Using a threaded brass adapter offers a straightforward way to convert from old galvanized iron fittings to modern PEX tubing. The process requires cutting the galvanized thread clean, applying pipe thread sealant or PTFE tape, and tightening a brass male or female adapter into the galvanized fitting. A PEX connection (crimp, clamp, or press) attaches to the adapter’s other end. Brass resists corrosion and creates a reliable junction when properly sealed and supported. Torque carefully to avoid damaging threads. Inspect for leaks and secure PEX with straps to prevent stress at the joint.
| Step | Note |
|---|---|
| Cut | Clean threads |
| Seal | Use PTFE or sealant |
| Tighten | Avoid over-torque |
| Connect | Crimp/clamp/press PEX |
Use Push‑Fit (SharkBite) Adapters for Fast Transitions
Push-fit (SharkBite) adapters offer a quick, reliable way to connect PEX to galvanized pipe without soldering or special tools.
The appeal lies in speed, reusability, and compatibility with mixed materials, making them a practical choice for repairs or tight timelines.
Installation typically requires cutting and deburring the pipe, marking insertion depth, and pushing the fitting on until it seats.
Why Choose Push‑Fit
When speed and reliability matter, push‑fit (SharkBite) adapters offer a quick, solder‑free method to join PEX to galvanized pipe without specialized tools.
They simplify junctions, reduce leak risk, and permit immediate system testing, making them valuable for repairs and retrofit work.
Their corrosion‑resistant internal components and standardized sealing mechanism guarantee consistent performance across mixed materials.
Removability also allows repositioning or future upgrades without cutting pipe.
For DIYers, the reduced learning curve and minimal equipment lower time and cost while maintaining code‑compliant connections when used per manufacturer instructions.
- Fast, tool‑free connections
- Reliable seals across materials
- Easy removal and reuse
Installation Step Overview
Having chosen push‑fit (SharkBite) adapters for their speed and reliability, the installer prepares a concise sequence of steps to join PEX to existing galvanized pipe. The procedure emphasizes inspection, cutting, deburring, fitting, and pressure testing. Tools and safety are noted; measurements are confirmed before final push‑fit engagement. Each action minimizes risk of leaks and preserves system integrity. A checklist with task, tip, and outcome clarifies responsibilities and expected results.
| Task | Tip | Outcome |
|---|---|---|
| Inspect pipe | Look for corrosion | Determine suitability |
| Cut | Square, clean cut | Proper seal surface |
| Deburr | Remove sharp edges | Protect O‑ring |
| Push‑fit | Full insertion mark | Secure connection |
| Test | Pressurize system | Verify leak‑free |
Use Press‑Fit Adapters to Join PEX and Galvanized
For changes between PEX and galvanized pipe where access and speed matter, press‑fit adapters provide a reliable, tool‑light solution.
The adapter mates a stainless steel or brass press sleeve to the existing galvanized thread or slip connection, then connects to PEX via a crimp, clamp, or push‑fit end.
Installation is fast, minimizes hot work, and reduces leak points when properly sized and pressed.
Corrosion-resistant materials and correct press tooling are essential; adapters rated for potable water and compatible with PEX type should be selected.
Follow manufacturer instructions and inspect every joint after pressing.
- Use certified press fittings
- Verify material compatibility
- Inspect and pressure test connections
Install a Copper or CPVC Stub‑Out as a Transition
A short length of copper or CPVC can serve as a reliable stub‑out when shifting between PEX and galvanized pipe.
The installer should select the material based on compatibility, local code, and expected service conditions.
Properly prepare both ends and use the correct fittings and cleaning methods to guarantee leak‑free joins.
Choose Copper Or CPVC
When direct fittings between PEX and galvanized pipe are impractical, installing a short copper or CPVC stub‑out provides a reliable, code‑compliant adapter piece. Copper offers durability and heat tolerance; CPVC is lighter, easier to cut, and resists corrosion. Choice depends on local code, water temperature, existing materials, and soldering comfort. Both accept standard transition fittings to PEX or galvanized nipples. Consider longevity, cost, and join method compatibility when selecting the stub‑out material to guarantee a secure changeover.
- Copper: long service life, suitable for high temperatures.
- CPVC: cost‑effective, simple to work with.
- Code/local inspection: dictates allowable material.
Proper Joiner Preparation
Before cutting into the existing line, the installer measures and marks the stub‑out location, confirming adequate clearance and access for tools, fittings, and future service.
The galvanized section is cut squarely, deburred, and internally cleaned to remove scale.
A short copper or CPVC stub is fitted, trimmed to proper length, and secured with appropriate coupling—soldered for copper, solvent‑cemented for CPVC—ensuring joints meet code.
Threaded adapters are avoided unless sealed with suitable compound and tape.
After installation, the connection end is smoothed and supported; the PEX connection is then prepared per manufacturer instructions, with clamps or crimp rings inspected before pressure testing.
Soldering a Copper Stub‑Out (When Code Allows)
In situations where local code permits, soldering a copper stub‑out provides a durable, leak‑resistant conversion from galvanized pipe to PEX by creating a solid copper termination for fittings or adapters.
The process requires cutting back the galvanized to clean metal, installing a dielectric union or adapter, and brazing or sweating a short copper nipple or stub.
Flux, proper cleaning, and correct solder technique guarantee a reliable joint; ventilation and fire protection are essential.
After cooling and leak testing, the copper stub accepts a PEX coupling fitting or compression adapter, restoring service with minimal risk of corrosion or galvanic action.
- Clean, flux, and heat properly.
- Use dielectric fitting where metals meet.
- Test and inspect for leaks before finishing.
Choose Between Crimp, Clamp, and Expansion PEX Fittings
Having established a copper stub‑out or adapter as the metal interface, the next decision is which PEX connection method to use: crimp (copper ring), clamp (stainless steel cinch), or expansion (expansion ring and fitting).
Each offers distinct tradeoffs. Crimp rings are simple, inexpensive, and widely accepted, requiring a calibrated crimper and inspection gauge.
Clamp systems use stainless steel bands and a ratchet tool; they are forgiving and reversible for adjustments.
Expansion (e.g., Uponor) forms a permanent, smooth joint with stored elasticity, but uses specialized tooling and demands precise timing.
Choice depends on local code, tool availability, installer familiarity, and long‑term serviceability.
Securing PEX Where It Joins Galvanized Pipe
When PEX meets galvanized pipe, a secure handoff combines mechanical strength, corrosion resistance, and leak-tight sealing.
The installer guarantees clean, deburred galvanized ends, chooses a compatible adaptor fitting (dielectric or brass rated for PEX), and secures connections with proper tool‑specific compression, crimp, or threaded adapters.
Attention to alignment prevents stress on joints; dielectric fittings reduce galvanic corrosion risk.
Thread sealant or PTFE tape is applied to threaded adapters per manufacturer guidance.
Final securing includes supporting both pipes within the first few inches to avoid movement.
- Use rated adaptor fittings only.
- Prevent torsion and misalignment.
- Isolate dissimilar metals.
Pressure‑Testing the New PEX→Galvanized Connection
After securing and supporting the new PEX-to-galvanized joint and confirming proper fittings and alignment, pressure-testing verifies integrity before restoring service.
The installer isolates the section, attaches a test pump or pressure gauge, and fills the line with water, expelling air. Gradually raise pressure to the system’s normal operating value or the code-specified test pressure, typically 1.5 times operating pressure, and monitor for a set period (commonly 15–30 minutes). Observe gauges and visually inspect fittings and connections for drops or seepage.
If pressure holds steady with no visible leak, relieve test pressure slowly and return the system to service.
Troubleshooting Common Leaks After Connecting PEX
When leaks appear after joining PEX to galvanized pipe, the first actions are to verify connection tightness and confirm fittings are seated correctly.
The condition of O-rings and seals should be inspected for cuts, deformation, or hardening that compromise the seal.
If fittings show damage or corrosion, they should be replaced with compatible components to restore a reliable joint.
Check Connection Tightness
Check connection tightness by inspecting each PEX fitting and galvanized joint for visible gaps, cross-threading, or misaligned ferrules; even a hairline separation can cause persistent leaks.
The inspector should hand-tighten fittings, then apply the manufacturer’s torque spec with appropriate tools.
After pressurizing the line, observe joints under steady pressure for several minutes and feel for moisture or vibration indicating seepage.
If movement occurs, isolate the section and retighten or redo the joint.
Document which couplings required adjustment to identify recurring problem areas and inform future material or technique changes.
- Verify alignment before final torque
- Re-torque after initial pressurization
- Replace damaged ferrules or fittings
Inspect O-Rings And Seals
How should an inspector approach O-rings and seals to quickly isolate leak causes? An inspector visually checks seals for cracks, nicks, or deformation, then feels for moisture or residue. Compression and seating are verified without overtightening. Lubricant compatibility and correct O-ring size are confirmed; incompatible grease can swell or degrade seals. Minor misalignment is corrected by reseating components; persistent seepage signals seal fatigue rather than fittings. Record observations and location for follow-up.
| Condition | Likely cause | Quick action |
|---|---|---|
| Cracked | Age/heat | Replace O-ring |
| Deformed | Misalignment | Reseat component |
Replace Damaged Fittings
After verifying seals and ruling out O-ring fatigue or misalignment, the inspector moves on to assess fittings for physical damage that can cause persistent leaks. Corrosion, cracks, or worn threads compromise connections between PEX and galvanized pipe; damaged fittings require replacement rather than repair.
The inspector isolates the section, depressurizes the line, and removes the faulty fitting, noting thread type and size. Compatible replacement parts—brass or approved adapter pieces—are selected to prevent galvanic corrosion. Proper torque and sealing method are applied during reassembly, then the system is slowly repressurized and checked for leaks.
- Identify damage type precisely
- Match material and thread standards
- Test under working pressure
Fixing Common Connection Mistakes Quickly
Recognizing and correcting common mistakes when joining PEX to galvanized pipe prevents leaks and corrosion that can compromise a system.
Inspect each joint for improper alignment, crushed PEX, or incomplete insertion into fittings.
Replace deformed tubing and re-cut ends squarely.
Make certain ferrules or crimp rings sit evenly and are the proper size; re-seat or swap them if gaps or uneven crimps appear.
Remove excess thread sealant or damaged tape and apply appropriate PTFE tape to male threads only.
Confirm adapters are rated for dissimilar metals or use dielectric unions.
Test the repair under pressure and recheck after several hours.
Removing a Stuck Galvanized Nipple Safely
Loosen seized galvanized nipples by first evaluating their condition and the surrounding fittings to choose the least invasive removal method.
The technician applies penetrating oil, allows dwell time, then uses proper wrenches, heat, or backing tools to avoid damage.
If threads remain stuck, cutting the nipple flush and extracting with internal grips or a nipple extractor minimizes risk.
Safety goggles and gloves are worn; water and gas supplies are isolated before work.
- Preserve adjacent fittings to reduce replacement scope.
- Use gradual force to prevent pipe fracture.
- Replace corroded sections rather than forcing compromised metal.
Replacing a Long Run of Galvanized With PEX Trunk Lines
When replacing a long run of galvanized pipe with PEX trunk lines, technicians plan the layout to maintain proper flow, avoid unnecessary joints, and accommodate expansion and support requirements.
They isolate and drain the system, remove the galvanized section, and measure for continuous PEX runs to minimize fittings. Appropriate fittings and changeover adapters are selected for galvanic compatibility.
Proper pipe supports and clamps are spaced according to code to prevent sagging and noise. Thermal expansion loops or offsets are incorporated where runs are long.
Pressure-test procedures verify integrity before restoring service, and documentation records the new routing and materials used.
Working in Tight or Hidden Spaces: Tips and Tricks
In cramped or concealed areas, planning and tool selection determine whether a PEX installation proceeds efficiently or stalls. The installer assesses access, measures twice, and maps pipe runs before cutting. Compact tools, right-angle adapters, and flexible connectors reduce strain. Lighting, temporary support, and patience prevent mistakes when maneuvering behind walls or under floors.
- Prioritize low-profile crimpers and swivels to reach awkward joints.
- Use inspection mirrors, headlamps, and magnetic pickup tools for visibility and dropped parts.
- Employ temporary supports and labels to maintain orientation and simplify later inspections or repairs.
Materials That Meet Potable Water and Corrosion Standards
Safety and longevity guide the selection of materials for potable water and corrosion resistance. Materials must meet NSF/ANSI 61 and local codes; approved PEX, brass, and stainless components minimize leaching and galvanic corrosion when joining dissimilar metals. Dielectric unions, proper fittings, and approved pipe dope or tape prevent contamination and leaks. Selection favors dezincification‑resistant alloys where brass contacts galvanized steel. Epoxy‑coated or zinc‑free connectors further reduce corrosion risk. Installers should verify certification marks and compatibility charts before use.
| Material | Benefit |
|---|---|
| PEX (NSF‑61) | Flexible, inert |
| Brass (DZR) | Dezincification resistant |
| Stainless | Corrosion resistant |
| Dielectric union | Prevents galvanic corrosion |
Long‑Term Maintenance for Mixed PEX/Galvanized Systems
Having selected certified materials and proper connectors, attention must shift to routine care and monitoring to preserve performance where PEX meets galvanized pipe.
Periodic inspection identifies corrosion, leaks, or joint movement; water chemistry should be checked for pH and dissolved oxygen that accelerate galvanic action.
Flush systems after stagnant periods and maintain proper pressure to reduce stress on fittings.
Replace sacrificial anodes in nearby water heaters when present and document interventions for trends.
- Inspect joints quarterly for moisture, discoloration, or odor.
- Test water annually for pH, hardness, and chloride levels.
- Keep accessible shutoffs labeled and exercised regularly.
Job Planning: Time, Cost, and Parts Checklist
How long will the job take and what will it cost are the two primary questions to resolve before work begins.
Estimate time: minor adapter swaps often require 1–2 hours; replacing a short galvanized section and installing PEX can take 2–4 hours.
Cost factors: fittings (adapters, couplings), PEX tubing, clamps/crimps, flux/primer for copper conversions, pipe cutter, wrench, possible dielectric unions.
Include small extras: Teflon tape, sandpaper, replacement valves.
Prepare a parts checklist and local price check.
Allow contingency time and budget for unexpected corrosion, stuck fittings, or additional sealing materials.
When to Call a Professional and How to Document the Repair
When should a homeowner defer to a licensed plumber? A homeowner should call a professional for complex corrosion, multiple failing joints, unknown pipe materials, or if local code compliance and permits are required. A plumber guarantees safe shutdowns, proper fittings, pressure testing, and reliable long-term connections.
Document the repair with dated photos, part numbers, and a short written log noting who performed work and any permits or inspections. Keep receipts and warranty information.
- Photograph before, during, and after work for condition and progress.
- Record materials, sizes, and serials for future maintenance.
- Save invoices, permits, and tester results for resale or warranty.
Conclusion
Like a weathered bridge joining old stone to a new steel span, the fitting between PEX and galvanized asks for care, respect and a steady hand. When the connection is sound — correct parts, clean threads, and patient tightening — water flows without quarrel. When doubt or corrosion appears, replace the old arch rather than patch cracks. With thoughtful planning and timely maintenance, the plumbing passage stays safe and strong, carrying life quietly onward.