How to Connect PEX Pipe: Easy DIY Guide for Plumbing Beginners
Key Takeaway: How to Connect PEX Pipe
Connecting PEX pipe is straightforward and beginner-friendly. Here’s a concise guide to ensure you get it right:
- Choose the Right PEX Type: Use PEX‑A for expansion fittings or PEX‑B for crimp/clamp fittings.
- Gather Your Tools: Ensure you have the appropriate cutter, deburrer, and crimp or expansion tool for your PEX type.
- Match Tubing Size: Ensure the tubing size matches the fixture’s demand to prevent pressure issues.
- Avoid UV Exposure: Keep PEX tubing away from direct sunlight to prevent degradation.
- Account for Thermal Expansion: Allow for thermal expansion in your installation to avoid damage.
- Check Local Codes: Verify local plumbing codes for any necessary permits or regulations.
By following these steps, you can effectively connect PEX pipe in your home plumbing system. Continue reading for detailed tips, tool recommendations, and common mistakes to avoid.
What Is PEX Pipe and Why Choose It for DIY Plumbing
As a flexible, cross-linked polyethylene tubing, PEX pipe combines durability with ease of installation, making it a popular choice for residential plumbing projects.
It resists corrosion, scales, and freeze-related bursting better than metal alternatives, while maintaining water quality.
Lightweight coils simplify routing through walls and floors, reducing fittings and labor.
Compatibility with common joining methods—crimp, clamp, and push-fit—makes it accessible for DIYers with basic tools.
Thermal expansion requires consideration during installation, and UV exposure must be avoided.
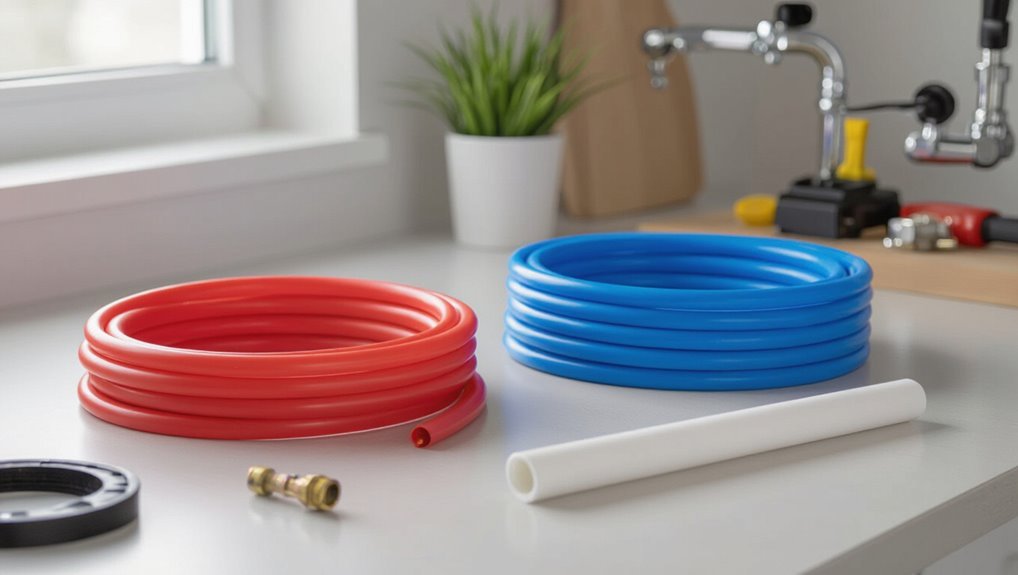
PEX-A vs PEX-B vs PEX-C: Quick Comparison
Frequently, homeowners and installers choose among PEX-A, PEX-B, and PEX-C based on differences in manufacturing, flexibility, and connection methods. PEX-A (hose-expansion) offers highest flexibility and kinking recovery, suits expansion fittings. PEX-B (silane/tubing) is stiffer, resists chlorine, often joined with crimp or clamp rings. PEX-C (electron-beam) sits between in properties and cost. Selection depends on installation style, fitting preference, and budget; compatibility with chosen connectors matters. The table summarizes key contrasts for quick reference.
| Type | Flexibility | Typical Connection |
|---|---|---|
| PEX-A | High | Expansion |
| PEX-B | Low-Med | Crimp/Clamp |
| PEX-C | Medium | Various |
Common PEX Sizes and How to Pick the Right One
Choosing the correct PEX size depends on the fixture demand, run length, and local code; common diameters are 1/2″, 3/4″, and 1″ for residential systems, with 3/8″ used for some fixtures and 1 1/4″ or larger for mains or commercial runs.
Selection follows flow requirements: smaller branches to individual fixtures, larger trunks to minimize pressure loss.
Consider simultaneous use, calculated fixture units, and distance to avoid undersizing.
Match fittings and manifolds to pipe OD or CTS type. Confirm local code for approved sizes and temperature/pressure ratings.
When in doubt, upsize rather than restrict flow.
Essential Tools to Cut, Crimp, and Expand PEX
Once the proper PEX size is chosen to meet fixture demand and run length, the next step is selecting the tools that will make clean cuts and secure connections.
A quality PEX tubing cutter produces straight, burr-free ends; straight cuts prevent leaks and simplify fitting. A crimp tool for copper rings or a cinch tool for stainless clamps guarantees consistent compression. For expansion systems, an expansion tool with correct-sized heads and calibration prevents overexpansion. A deburring tool or reamer readies ends. A tape measure, marker, and needle-nose pliers aid accuracy and manipulation.
Proper maintenance and correct tool choice reduce failures and rework.
PEX Fittings Overview: Crimp, Clamp, Push-Fit, Expansion
Installers evaluate four common PEX connection methods—crimp, clamp (cinch), push-fit, and expansion—based on reliability, required tools, installation speed, and suitability for the pipe material.
Crimp uses copper rings and a ratcheting crimper for secure, proven joints; visual inspection of ring deformation confirms the connection.
Clamp employs stainless-steel cinch rings and a simple cinch tool, favored for quick work and reusability of fittings.
Push-fit requires no special tools, relies on internal O-rings and teeth, and suits repairs or tight spaces.
Expansion stretches PEX-A with a specialized expander, creating a cold-fit joint that reverts to seal tightly as the pipe contracts.
How to Read PEX Markings, Temp, and Pressure Ratings
The section explains how to read the stamped and printed codes found on PEX tubing, starting with common marking formats and what each element represents.
It then covers temperature rating codes to show allowable service temperatures and any seasonal or material-specific limits.
Finally, it interprets pressure ratings so the reader can match tubing to system pressure and code requirements.
PEX Marking Basics
PEX tubing carries stamped markings that convey its material type, size, certification marks, and the temperature and pressure limits that define safe operating conditions.
Markings include PEX type (A, B, C), nominal diameter (e.g., 1/2″, 3/4″), and standards logos (ASTM, NSF). A date or batch code aids traceability. Pressure-temperature information appears as paired values (psi at specific °F) or charts; these establish maximum allowable working conditions.
Color coding (red, blue, white) indicates intended purpose but not ratings. Read all imprint lines before installation and compare them to project requirements and local code.
Temperature Rating Codes
When reading PEX markings, attention to the temperature-rating codes is essential because they define the maximum temperature at which the pipe may safely carry a specified pressure; these codes typically appear as paired values (psi @ °F) or as a table reference stamped on the tubing.
The codes indicate performance at common temperatures (73°F, 180°F, 200°F) or reference ASTM/CSA tables.
Users should verify the code matches planned service conditions—domestic hot water, radiant heating, or potable cold supply—and confirm material type (PEX-A/B/C) and certification marks.
Interpreting the temperature code guarantees compatible selection without relying solely on generic labels.
Pressure Rating Interpretation
How should one interpret the pressure ratings stamped on PEX tubing to make sure safe, code-compliant use? The reader checks markings showing pressure at a specified temperature, e.g., 160 psi at 73°F or 80 psi at 180°F. These indicate maximum allowable working pressure under those conditions.
Higher temperatures reduce allowable pressure; manufacturers publish temperature-pressure charts. Local plumbing codes and application (potable water, radiant, booster pressure) dictate required ratings.
Installers must select PEX with ratings exceeding system maximum temperature and pressure, account for thermal expansion and surge, and follow manufacturer installation limits to maintain warranty and code compliance.
When to Choose PEX Over Copper or CPVC
When choosing between PEX, copper, or CPVC, cost and budget often drive the decision since PEX typically offers lower material and labor expenses.
Installation difficulty favors PEX for many contractors and DIYers because its flexibility and fewer fittings speed the process.
Longevity and corrosion resistance also influence choice, as PEX resists corrosion that can affect copper and often outlasts CPVC in certain conditions.
Cost And Budget
Why choose PEX over copper or CPVC for a project where budget matters? PEX typically lowers material and labor costs: cheaper tubing, fewer fittings, and faster assembly reduce total expense. For remodels or new builds with tight budgets, PEX often yields the best value without sacrificing durability. Consider lifecycle costs—energy savings from insulated runs and lower repair complexity. Compare local prices, fixture compatibility, and long-term warranty terms before deciding. Visualize choices:
| Material | Avg. Material Cost | Typical Labor Time |
|---|---|---|
| PEX | Low | Short |
| Copper | High | Long |
| CPVC | Medium | Medium |
Installation Difficulty
In projects constrained by skill, time, or access, PEX often presents a simpler installation path than copper or CPVC.
Its flexibility reduces fittings and joints, enabling straighter runs through framing and fewer solder or solvent-weld connections.
Tools required are minimal: a cutter and crimp or push-fit system, with clear learning curves for novices.
Copper demands brazing skills or pricey press tools; CPVC needs careful solvent welding and clean, square cuts.
For retrofit work in confined spaces or for homeowners with limited plumbing experience, PEX lowers labor intensity and error risk, making it a practical choice for many DIY installations.
Longevity And Corrosion Resistance
Against corrosive water or acidic soil conditions, PEX offers clear advantages over copper and CPVC due to its resistance to electrochemical corrosion and scale buildup. It typically endures longer in aggressive environments, resists pinhole leaks, and tolerates thermal cycling without brittle failure. Maintenance needs decline, and fittings remain secure when installed correctly. Consider PEX when municipal water chemistry, soil acidity, or galvanic potential threaten metal piping.
- A buried copper run greened by soil, replaced by flexible PEX.
- A heater coil free from mineral encrustation after switching to PEX.
- A long service life with fewer joint failures compared to metal.
Local Codes, Permits, and Inspections for PEX Work
When planning PEX installations, homeowners and contractors must account for local building codes, permit requirements, and inspection procedures that govern plumbing work. Compliance starts with checking municipal code, obtaining required permits, and scheduling rough-in and final inspections. Documentation and approved materials lists speed approval; licensed professionals may be required for certain work. Records of fittings, tubing type, and installation methods help inspectors verify conformity. Failure to comply can lead to fines or required rework.
| Task | Who | Timing |
|---|---|---|
| Code check | Owner/Pro | Before start |
| Permits | Authority | Pre-construction |
| Inspections | Inspector | Rough/final |
Safety Gear and Safe Practices for PEX Projects
After confirming code compliance and inspection schedules, attention shifts to safety gear and safe practices for PEX projects. Workers should wear gloves to prevent cuts from sharp tubing and fittings, safety glasses against flying debris when cutting or crimping, and knee pads when working in confined crawlspaces. Proper tool handling, secure ladders, and ventilation when using adhesives reduce risk.
Situational awareness prevents accidental shutoff valve damage or nicking nearby wiring. Emergency readiness includes knowing shutoff locations and keeping a first-aid kit nearby.
- Gloves, snug but flexible, protecting hands during cuts
- Clear safety glasses, resisting shavings and dust
- Sturdy knee pads for prolonged floor work
Planning Your PEX Run: Layout, Access, and Clearances
Before cutting or fitting any tubing, the planner maps the route and identifies access points for fittings and future service.
They verify clearances and note potential obstructions such as beams, HVAC ducts, and electrical runs that could interfere with bends or clamps.
Proper layout prevents unnecessary joints and guarantees the system remains accessible for repairs.
Route And Access Points
In planning a PEX run, the layout should prioritize direct routes, accessible service points, and required clearances to simplify installation and future maintenance.
The route and access points define how pipes travel, where fittings sit, and where shutoffs or manifolds will be reachable. Map a continuous path avoiding unnecessary bends, place access panels at junctions and manifolds, and plan stub-outsfor fixtures.
Consider entry/exit through walls and floors, and align with studs and joists for secure fastening.
- A basement manifold accessible behind a removable panel
- A crawlspace run following joist bays
- Wall stub-outs aligned with fixture centers
Clearance And Obstructions
When planning clearances for a PEX run, allowance must be made for pipe movement, insulation, and access around obstacles so fittings and shutoffs remain serviceable.
Consider thermal expansion: leave recommended spacing at bends and from fixed surfaces.
Keep PEX clear of electrical wiring, HVAC ducts, and sharp edges; protect with sleeves where penetration occurs.
Maintain access panels and sufficient room around manifolds, valves, and crimp rings for future service.
Avoid routing through tight cavities where freezing or abrasion risk increases.
Verify local codes for required clearances from combustibles and fixtures.
Document clearances on the plan for installers and inspectors.
Calculate PEX Lengths and Required Fittings
For an accurate materials list and efficient installation, calculate run lengths and fitting counts by mapping each branch, measuring along the planned routing, and adding allowances for bends and service loops. The planner notes each fixture, totals straight lengths, and adds 6–12 inches per bend or 12–24 inches for service loops.
Account for fittings at every junction, supply riser, and manifold connection. Select connectors compatible with PEX type and system pressure. Round up slightly to accommodate mistakes. Record lengths and quantities on a materials sheet to streamline ordering and reduce on-site delays.
- long runs along walls and joists
- tight bends around studs
- manifold with multiple outlets
Cutting PEX Correctly: Tools and Clean Cuts
After lengths and fittings are finalized, attention turns to cutting PEX to the recorded dimensions with clean, square ends.
Proper cutting requires the right tool: a sharp PEX tubing cutter or ratcheting cutter designed for plastic. Husky scissors or hacksaws are discouraged. The cutter should be perpendicular to the pipe; a single smooth squeeze produces a burr-free edge.
For larger diameter tubing, a reinforced cutter reduces deformation. Inspect each cut for squareness and absence of tears. Replace dull blades promptly.
Cutting on a stable surface and supporting the pipe prevents crushing. Accurate, clean cuts simplify joining and guarantee reliable connections.
Prep Pipe Ends: Deburring, Measuring, and Marking
Before joining, each PEX end must be prepared so fittings seat fully and seals form reliably.
The installer inspects the cut: remove burrs with a deburring tool or utility knife, ensuring a smooth, square face.
Measure insertion depth using the fitting’s stop or a marked template; transfer that measurement to the pipe and mark it clearly.
Clean the pipe end of debris and oils so seals contact fresh material.
Visualize the steps:
- A clean, square pipe end against a fitting shoulder
- A measured line showing exact insertion depth
- A deburred edge free of ragged plastic fibers
Accuracy prevents leaks and poor seating.
Install Crimp Rings With a Crimp Tool (Step-by-Step)
Using the crimp tool, the installer positions the prepped PEX and fitting, slides the crimp ring evenly over the joint, and aligns the tool’s jaws with the ring marks to guarantee a proper compression. The tool is squeezed fully until its ratchet releases; release secures consistent pressure. Inspect the ring for even deformation and confirm the fitting stops at the pipe shoulder. Measure pull-off distance with a go/no-go gauge and re-crimp if needed. Repeat for each connection, keeping tool calibration current.
| Step | Key Check |
|---|---|
| Crimp | Even deformation |
| Inspect | Fitting seated |
| Test | Gauge pass/fail |
Install Stainless-Steel Clamp (Cinch) Rings Properly
Installers secure stainless-steel clamp (cinch) rings by sliding the ring over the prepped PEX and fitting, seating the fitting to the pipe shoulder, and compressing the ring with a compatible cinch tool until its locking mechanism engages.
The technician verifies ring position—just behind the fitting barb—then checks alignment and tool calibration.
After compression, the joint is inspected for uniform bite and absence of gaps; excess ring tail is trimmed if needed. Pressure testing completes validation.
Imagery helps recall key steps:
- A shiny ring snugged against a ribbed fitting barb
- Cinch tool jaws closing evenly around the band
- A smooth, gap-free connection under light inspection
Install Push-to-Connect Fittings for PEX
The section on push-to-connect fittings begins by outlining how to select the correct fitting type and size for the job and water system.
It then covers preparing PEX—cutting square, deburring, and marking insertion depth—to guarantee proper seating.
Finally it explains verification of a secure connection through pull checks and pressure testing.
Choosing The Right Fitting
When selecting fittings for PEX systems, compatibility, reliability, and ease of service should guide the decision.
The installer considers material type (brass, plastic), connection style (crimp, clamp, push-to-connect), and manufacturer ratings for pressure and temperature.
Choosing certified fittings avoids leaks and code issues.
Visualize system layout and service access to pick unions or push fittings where future disassembly may be needed.
- a compact push-to-connect elbow tucked behind an appliance
- a brass crimp tee joining branches under a sink
- a straight coupling accessible in a crawlspace
Select fittings that match PEX type and local code.
Preparing The PEX Pipe
Before making connections, the PEX pipe must be clean, squarely cut, and free of nicked or deformed ends so push-to-connect fittings can seat properly. The installer deburrs the cut, removes any debris, and checks for ovality. Marking insertion depth assures correct engagement. Lubrication is rarely needed; use only manufacturer-approved lubricants if specified. Inspect the fitting’s O-ring and grab ring for damage before assembly. Align the pipe straight into the fitting until the depth mark is reached, avoiding twisting. Final visual check confirms full insertion and alignment prior to testing the system.
| Step | Visual cue |
|---|---|
| Cut | Square end |
| Deburr | Smooth edge |
| Mark | Insertion line |
| Inspect | Intact O-ring |
Ensuring A Secure Connection
With a properly prepared pipe and checked fitting, the installer pushes the PEX into the push-to-connect fitting firmly and evenly until the insertion mark is flush with the fitting shoulder, guaranteeing the O-ring seats and the grab ring engages without twisting.
The connection is then tug-tested gently to confirm retention. Visual inspection verifies the insertion depth and absence of damage. After system pressurization, monitor for leaks at the joint for several minutes. If disassembly is needed, use the manufacturer’s release tool to avoid deforming the fitting. Proper alignment and cleanliness prevent failures and guarantee long-term reliability.
- Smooth pipe end meeting the fitting
- O-ring compressing uniformly
- Grab ring biting evenly into tubing
Use PEX Expansion Fittings (EXP Method)
In the EXP method, PEX pipe is expanded with a specialized tool so a flange-style fitting can be inserted and the pipe contracts to form a watertight seal. This technique requires the correct expansion head, a matching PEX-A fitting, and patience to let the pipe return to size. It creates smooth, flow-friendly joints without crimp rings. Proper training prevents over-expansion and guarantees uniform seating. Suitable for new installations and hidden runs, the method yields durable, low-profile connections favored by professionals. Inspect each joint for full insertion and allow recommended recovery time before pressurizing the system.
| Tool | Purpose |
|---|---|
| Expansion head | Expands pipe |
| Fitting | Inserts into expanded pipe |
| Recovery time | Guarantees seal |
Connect PEX to Copper and Brass Fittings Reliably
Connection fittings bridge PEX piping to copper and brass components by combining compatible connectors, proper tubing preparation, and secure joining methods. The installer selects connection fittings (crimp, clamp, or press) rated for PEX-to-metal joins, cuts squarely, deburrs, and measures insertion depth.
Cleanliness and correct ring or ferrule placement guarantee reliability. After joining, visually inspect and pressure-test per code to confirm integrity.
- A copper stub-out with a brass adapter snugly fitted
- A PEX pipe slid fully onto a barbed connection, crimp ring in place
- A press tool engaging a brass sleeve for a watertight seal
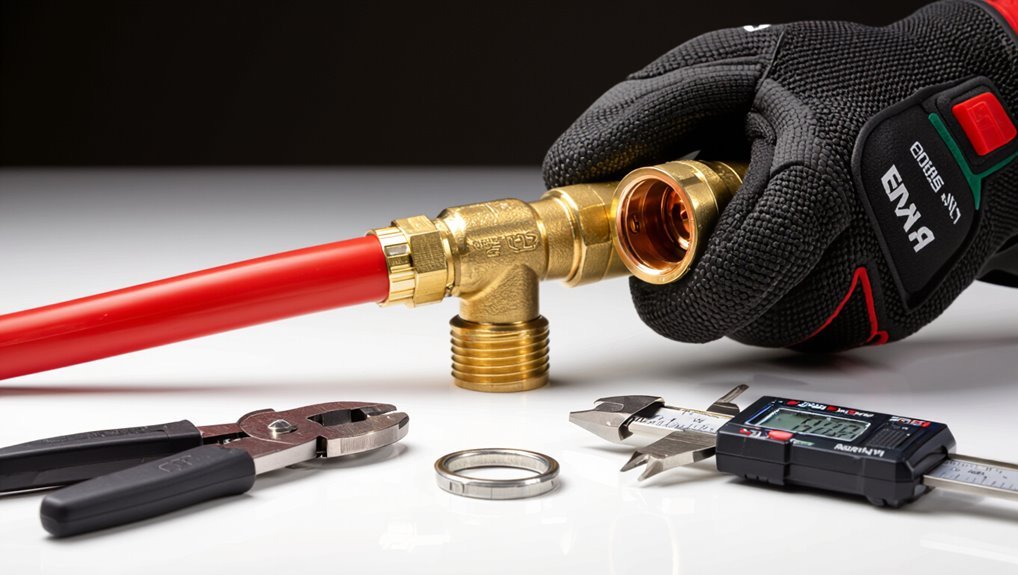
Threaded Fittings and Valves: Tips for Leak-Free Joints
Offering a reliable mechanical connection, threaded fittings and valves require careful preparation and proper sealing to prevent leaks when joining PEX to threaded metal components.
Threaded ends must be clean, undamaged, and compatible with the PEX adaptor type. Use appropriate thread sealant: PTFE tape wrapped clockwise or a pipe joint compound rated for potable water; avoid both simultaneously.
Do not overtighten—hand-tighten then apply specified wrench turns to compress seals without stressing PEX. Support and align pipes to prevent torsion on joints.
Inspect for leaks under pressure and retighten cautiously or replace damaged sealing surfaces to guarantee longevity.
Transition PEX to PVC/CPVC Safely and When to Use It
Shifting from PEX to PVC or CPVC is recommended when system design, temperature limits, or local code require rigid plastic lines for runs, branches, or connections to existing plumbing.
Proper methods include using approved shift fittings such as mechanical adapters, solvent-welded CPVC-to-PVC couplers with a compatible adapter, or PEX-to-PVC shift fittings rated for the pressure and temperature involved.
Installers should follow manufacturer instructions, use the correct materials for the specific plastics, and guarantee joint integrity with appropriate clamps, thread sealant, or solvent welding as specified.
When To Transition
When is it appropriate to join PEX to PVC or CPVC, and what precautions guarantee a durable, code-compliant connection? The decision rests on system needs: use adapters when material-specific fittings, solvent-weld sections, or pressure/temperature requirements dictate.
Ensure compatibility with local code and select adapter points for accessibility, minimal movement, and isolation from buried or exterior sections. Consider galvanic or chemical concerns and avoid unnecessary adapters.
- A visible indoor junction near the fixture for maintenance
- A short rigid run where solvent-weld or threaded components are required
- An accessible union or shutoff location for future repairs
Proper Transition Methods
In a mixed-material plumbing run, joining PEX to PVC or CPVC requires methods that preserve pressure integrity, chemical compatibility, and ease of future service.
Proper connection methods use approved fittings: mechanical crimp or clamp adapters with a PVC/CPVC solvent-weld or threaded adapter provide reliable joins. Use dielectric unions where dissimilar metals are present.
Ensure pipe ends are square, clean, and deburred; apply primer and solvent for CPVC/PVC solvent-welds per manufacturer instructions.
Avoid using PEX barb fittings directly into PVC without an approved adapter.
Pressure-test the assembly and follow local code and manufacturer limits for temperature and solvent compatibility.
Route PEX Around Joists and Studs Without Stress
Around joists and studs, PEX should be routed to maintain gentle bends and avoid tight turns that introduce stress or kinking.
The installer plans paths that follow framing, keeping loops smooth and changes gradual.
When negotiating corners, wide arcs reduce internal strain and preserve flow.
Protective sleeves where PEX passes through holes prevent abrasion from rough edges.
Visualize routing with simple images to aid choice of path:
- A soft S-curve weaving between joists, clear of sharp edges.
- A broad 90-degree arc around a stud, not a sharp corner.
- A neat loop following the plane of the framing, tension-free and unobstructed.
Secure and Support PEX: Clip Types and Spacing Rules
Secure PEX runs with appropriate clips and supports to prevent sagging, reduce strain at fittings, and maintain alignment. Clips designed for PEX—staple straps, cushioned plastic clamps, and metal hanger straps—anchor tubing without kinks.
Use insulated or cushioned supports where vibration or movement occurs. Space supports per manufacturer recommendations: typically 32 inches horizontally for cold water, 16–24 inches for hot runs near fixtures, and closer at vertical drops and long spans.
Secure within 6 inches of fittings. Avoid over-tightening clips that deform tubing. Anchor at directional changes and unions to limit movement and preserve joint integrity throughout the system.
Protect PEX From UV, Heat Sources, and Freezing
The text next addresses protection of PEX from environmental and mechanical risks. It recommends shielding PEX from UV exposure, keeping lines away from high-temperature sources, and insulating or routing lines to prevent freezing.
Specific measures and materials for each hazard are then outlined.
Shield From UV
When installed outdoors or near heat sources, PEX requires protection from ultraviolet light, excessive heat, and freezing to maintain flexibility and prevent premature degradation; shielding can be achieved with insulation, UV-resistant jacketing, or locating runs within conditioned spaces.
The installer should cover exposed runs with UV-rated conduit or wrap and use foam or fiberglass insulation where cold threatens.
Paints and tapes labeled UV-resistant extend life in exposed areas.
Fasteners and supports must avoid chafing the jacket.
Regular inspections catch wear before leaks occur.
- A sun-faded pipe under a porch
- Foam wrapped around a winter line
- Jacketed conduit along a wall
Keep Away From Heat
Near heat sources, PEX must be routed and protected to prevent softening, distortion, or accelerated aging that can lead to leaks.
Install thermal barriers or maintain clearance from furnaces, water heaters, boiler flues, heat ducts, and radiant panels. Use metal conduits, insulation sleeves, or heat-resistant shields where proximity is unavoidable. Avoid direct contact with hot surfaces and secure piping to prevent sagging into heated zones.
Keep PEX away from prolonged sun exposure; where sunlight is possible, use opaque covering or UV-rated wrap.
Follow manufacturer temperature limits and local codes to make certain long-term performance and warranty compliance.
Prevent Freezing Damage
Following guidance on keeping PEX clear of heat sources and sunlight, attention must also be paid to protecting piping from freezing temperatures. PEX resists bursting but expands when frozen; insulation, heat tape, and proper routing reduce risk.
Recommended measures include insulating exposed runs, maintaining ambient warmth in crawlspaces, and shutting off/draining lines during prolonged cold.
Visualize simple steps:
- A foam sleeve snug around a wall run, like a coat for the pipe.
- Electric heat tape applied along a basement line, glowing faintly in winter.
- A raised, interior route avoiding exterior sheathing, keeping warmth flowing.
Reduce Water Hammer and Vibration in PEX Systems
To minimize water hammer and vibration in PEX systems, designers and installers should prioritize proper support, soft-start valves, and strategic placement of arrestors or expansion chambers. PEX benefits from secure clamps every 32–39 inches, isolation straps near fixtures, and avoiding long unsupported runs. Install pressure-reducing valves and soft-start or slow-closing fixtures to cut transient spikes. Use mechanical arrestors or air chambers sized for PEX flexibility, placed close to quick-closing valves. Inspect joints for movement and add insulation where pipes contact framing to dampen vibration. Regularly test system pressure and address hammer sources at fixtures promptly.
| Measure | Benefit |
|---|---|
| Support spacing | Reduces movement |
| Soft valves | Limits spikes |
| Arrestors placement | Dampens hammer |
Create Branch Lines With Tees and Manifolds
Selection between tees and manifolds influences flow control and accessibility for future maintenance.
Proper sizing and careful layout planning guarantee balanced pressure and minimize material waste.
Connections must follow manufacturer techniques and use correct fittings to prevent leaks and maintain system integrity.
Choosing Tees Or Manifolds
When creating branch lines from a main PEX run, the choice between tees and a manifold determines system layout, ease of maintenance, and balancing needs.
The decision hinges on accessibility, number of fixtures, and preference for centralized control versus simple fittings.
Tees suit short, straightforward splits; manifolds favor dedicated runs and easy shutoffs.
Consider installation space, future servicing, and visible routing.
Visualize options:
- A compact tee tucked behind a fixture with minimal piping.
- A wall-mounted manifold with labeled ports and individual shutoffs.
- A series of tees along a crawlspace creating branching spaghetti of tubing.
Select the method that aligns with serviceability and convenience.
Sizing And Layout Planning
In planning branch lines with tees or a manifold, precise sizing and thoughtful layout guarantee adequate flow, balanced pressure, and serviceability across fixtures.
The planner calculates fixture unit demand, selects main and branch diameters to prevent velocity loss, and minimizes length and bends to reduce head loss.
Group nearby fixtures on single manifolds or short tee runs to simplify isolation and future service.
Allow accessibility for manifolds and shutoffs; label lines for identification.
Maintain proper slope where required and avoid shared long runs that cause pressure drop.
Verify local code for minimum sizes and spacing before finalizing the layout.
Proper Connection Techniques
After sizing and laying out branch lines, the installer proceeds to form connections using tees and manifolds that preserve flow balance and allow service access.
The installer chooses tees for compact offsets and manifolds for distribution, verifying material compatibility, correct orientation, and adequate support.
Crimp, clamp, or push-fit methods are selected per system, with careful insertion depth and tool calibration.
Pressure-tested assemblies reveal leaks before concealment.
Manifolds simplify isolation; tees economize fittings.
Visual checks confirm straight runs and proper strain relief.
Typical scenes include:
- a compact tee tucked into a stud bay
- a wall-mounted manifold with labeled ports
- a neat looped branch with secured clamps
Install a PEX Manifold for Multi-Room Distribution
For centralized control and balanced flow, a PEX manifold delivers individual lines from a single supply so each room receives consistent pressure and temperature. The installer mounts the manifold near the main supply, labels ports, and routes dedicated PEX runs to fixtures. Valved ports simplify isolation and future maintenance. Proper support prevents strain; gentle bends preserve flow. Balanced layouts reduce pressure drop and simplify troubleshooting. Manifold materials should match system compatibility and local code. Use crimped or push-fit connections per manufacturer instructions, then pressure-test the entire assembly before concealment to verify leak-free performance.
| Feature | Benefit |
|---|---|
| Valved ports | Isolation |
| Centralized layout | Easier maintenance |
| Labeled ports | Quick identification |
| Pressure testing | Leak verification |
Size and Place Shut-Off Valves in PEX Systems
Proper shut-off valve placement in a PEX system balances accessibility and isolation, with valves typically installed at fixtures, branch lines, and the main supply.
Valve sizing should match the PEX run and expected flow rates to prevent pressure loss and guarantee effective shutoff.
Attention to both location and diameter simplifies future maintenance and minimizes service disruptions.
Shut-Off Valve Placement
When planning shut-off valve placement in a PEX system, consider both flow capacity and access: valves must match pipe size to preserve hydraulic performance and be located where isolation, maintenance, and emergency shutoff are quickest and simplest to perform.
The installer locates valves at branch origins, near fixtures, and at main supply entries so sections can be isolated without draining large areas.
Valves should remain accessible, labeled, and protected from freezing or obstruction. Mounting supports prevent stress on fittings.
Accessibility improves response time during leaks and simplifies repairs, minimizing downtime while preserving system integrity.
- Valve at main entry by manifold
- Serviceable under-sink valve
- Accessible exterior isolation valve
Choosing Valve Sizes
Select valve sizes that match the pipe diameter and expected flow to maintain hydraulic balance and guarantee reliable isolation.
The installer evaluates main lines, branches, and fixture risers to determine nominal sizes—typically 1/2″, 3/4″, or 1″ for residential PEX.
Choose valves with equal or larger bore than the pipe to avoid restrictions; use reducing valves only where necessary.
Consider pressure drop, future fixture additions, and code requirements.
For manifold systems, use individual quarter-turn shut-offs sized to each run.
Verify compatibility with PEX fittings and tubing type, and label valves for quick identification during maintenance.
Considerations for PEX Under-Slab Installations
For installations beneath concrete slabs, PEX piping requires careful planning of routing, protection, and joint placement to prevent damage from soil movement, load stresses, and moisture.
The installer selects tubing rated for buried use, lays conduit or protective sleeves, and locates fittings where future access or slab cuts are feasible.
Attention to bedding, minimal joints, and tested pressure before pour reduces repair risk.
Proper marking on slab and as-built drawings aids future work.
- A shallow trench with compacted sand cradle and conduit protecting the tube.
- Sleeves terminating at accessible chase boxes near the foundation.
- Clearly painted slab markings and recorded drawings.
Running PEX in Walls: Concealment and Access Panels
In wall installations, routing PEX requires balancing concealment with future access: tubing should be secured and protected within stud bays, kept away from electrical wiring and heat sources, and run with the fewest joints practical while leaving serviceable access points or removable panels at fixtures and shutoffs.
Install protective nail plates where pipes cross studs, maintain required clearance from insulation batts, and fasten runs with appropriate clamps to prevent movement and noise. Label shutoff valves and route manifolds to accessible locations.
When planning access panels, size them for tool clearance and replacement of fittings without removing large wall sections.
Insulate PEX for Hot-Water Efficiency and Freeze Protection
For hot-water efficiency and freeze protection, the practitioner selects insulation rated for PEX, such as closed-cell foam or fiberglass with a suitable vapor barrier.
Attention is given to sealing joints and fittings with foam sleeves or pipe wrap and appropriate tape to eliminate thermal bridging.
Properly insulated and sealed runs reduce heat loss and lower the risk of freezing without compromising pipe access for service.
Choose Appropriate Insulation
When installed correctly, insulation preserves hot-water temperature and reduces the risk of freeze-related damage to PEX runs by limiting heat loss and exposure to cold air. The installer selects closed-cell foam sleeves or rubber insulation sized for the pipe diameter, prioritizing R-value, moisture resistance, and ease of installation.
In exposed or unheated spaces, thicker insulation or heat-tracing-compatible products are chosen. Attention is given to bends, tees, and junctions to maintain continuous coverage.
Visualize options:
- A snug foam sleeve sliding over straight runs like a protective blanket
- Dense rubber wrapping curved sections without gaps
- Split insulation clamped around hard-to-reach fittings
Seal Joints And Fittings
Along junctions and terminations, sealing joints and fittings prevents heat loss and stops moisture or air infiltration that can undermine insulation performance.
The installer selects compatible sealing materials—closed-cell foam, silicone, or specialized PEX-compatible tape—matching temperature and chemical exposure.
Each fitting is cleaned and dried before application; compression zones receive foam collars or pre-formed boots, while threaded adaptors use appropriate PTFE tape and corrosion-resistant sealants.
Seals are snug but not over-compressed to allow thermal expansion.
Exposed areas get weatherproof jackets and UV-resistant wrap.
Periodic inspection and prompt repair of compromised seals preserve hot-water efficiency and minimize freeze risk.
Pressure-Testing PEX Systems: Procedure and Checklist
Begin by isolating the PEX system and filling it with clean water or an inert test medium, then pressurize to the specified test pressure and hold while inspecting all connections and fittings for leaks.
The technician records pressure, watches gauges for drops, and visually checks joints for weeping.
Hold duration follows code or manufacturer guidance.
Release test pressure slowly and document results.
If pressure loss occurs, recheck clamps, crimps, and manifolds; repair and retest.
Complete a checklist noting date, tester, pressure applied, hold time, and outcomes for each zone.
- a steady gauge needle
- droplets at a joint
- a labeled inspection checklist
Common PEX Connection Mistakes (And How to Avoid Them)
After a thorough pressure test confirms system integrity, attention shifts to common connection mistakes that can undermine long-term performance.
Installers often fail to deburr or square tubing ends, causing poor seals.
Incorrect insertion depth or skipping depth markings leaves fittings exposed.
Using wrong tool jaws, worn crimp rings, or improper crimp spacing produces weak joints.
Contaminants—dirt, oil, or plastic shavings—prevent reliable seals.
Overbending or kinking PEX near fittings stresses connections.
Mixing incompatible fitting types or materials creates corrosion or seal failure.
Following manufacturer instructions, verifying insert depth, keeping parts clean, and using proper tools prevents these errors.
Troubleshooting Leaks at PEX Joints and Fittings
Identify the leak source systematically before replacing parts: start by isolating affected runs, depressurizing the line, and visually inspecting fittings for hairline cracks, loose crimps, or visible gaps where the tubing meets the fitting.
Then observe while repressurizing to locate seepage points. Check tool marks, misaligned sleeves, and corrosion on metal fittings.
Confirm water type and temperature for stress-related failures. Consider vibration or movement that may loosen joints over time.
- A tiny spray at a crimp ring edge
- A wet bead forming where tubing meets a fitting shoulder
- A faint damp trail along a press sleeve
Repairing Damaged PEX: Couplers, Patches, and Swaps
When PEX sustains damage, options include cutting out the affected section and replacing it with a new length.
A slip coupler can restore continuity quickly without moving adjacent fittings, while temporary leak patches provide a short-term fix until a proper repair is made.
The choice between replacement, coupler installation, or a patch depends on access, pipe condition, and whether a permanent solution is required.
Cut Out And Replace
In the event of a damaged section of PEX, cutting out and replacing the affected length is often the most reliable fix; this method restores integrity without relying on temporary patches. The technician measures and marks the damaged span, shuts water, cuts squarely, and deburrs.
New PEX of matching type and length is fitted, couplers or crimp rings are prepared, and connections are made per manufacturer specs. After reinstallation, pressure is restored and inspected for leaks.
Visualize the process:
- a neat, clean cut showing fresh PEX ends
- a replacement length aligned between fittings
- a pressure test revealing zero drips
Slip Coupler Installation
For a quick, reliable repair of a short damaged run, a slip coupler allows a new section of PEX to be inserted between existing fittings without rotating pipes or disassembling downstream connections. The technician measures, deburrs, slides the coupler onto one end, inserts new PEX fully, then secures both ends with the chosen method (crimp, clamp, or expansion). Proper insertion depth and clean cuts prevent leaks. After installation, pressure testing verifies integrity. Use matching material and size; avoid reuse of damaged couplers.
| Step | Note |
|---|---|
| Measure | Cut square |
| Deburr | Remove burrs |
| Insert | Full depth |
Temporary Leak Patches
Apply a temporary leak patch to contain a PEX breach until a permanent repair can be made. The technique isolates the failure, limits water damage, and buys time for proper coupler replacement or section swap.
A rubber patch with stainless hose clamps or specialized PEX repair tape can seal small pinholes; make certain the surface is dry and clean before applying. For larger cuts, a compression sleeve or emergency clamp offers stronger hold but still requires follow-up.
Monitor pressure, avoid heat near the patch, and schedule a permanent repair promptly.
- Rubber patch wrapped tight, clamps cinched
- Repair tape smoothed over the cut
- Emergency clamp bridging a nick
When to Call a Pro: Scope Limits for DIY PEX
Occasionally homeowners hit projects well within DIY reach, but certain PEX tasks quickly cross into professional territory.
Complex plumbing system redesigns, work requiring shutoff of main water supply for extended periods, or installations tied into gas appliances or hydronic heating should prompt a pro.
Permits, code compliance, and inspections create legal obligations best handled by licensed plumbers.
Repeated leaks despite correct fittings, hidden pipe damage inside walls or slabs, and projects involving sewer or pressure irregularities exceed typical DIY troubleshooting.
When safety, liability, or long-term reliability are at stake, hiring a qualified plumber minimizes risk and guarantees proper documentation.
Cost Breakdown: Materials, Tools, and Time Estimates
After identifying when professional help is warranted, attention turns to the practical costs of a PEX project: materials, tools, and the time required.
A clear estimate helps set realistic budgets: rolls of PEX and fittings, basic clamps or crimp rings, and a fitting tool are primary purchases.
Small projects may use existing hand tools; larger jobs justify buying or renting specialized crimpers.
Labor time varies by scope—simple runs take hours; full repipes take days.
Consider spare fittings and tape.
Typical budget ranges from modest DIY spend to several hundred dollars for extensive work.
- a spool of PEX, fittings, rings
- a crimping tool and cutter
- an afternoon to multiple days
Speed Tips: Work Faster Without Cutting Quality
Several practical habits shave hours off a PEX installation without sacrificing workmanship: plan the routing and lay out all fittings before cutting, stage one-piece tool kits at each work zone, and use consistent marking for lengths and bend points.
Workers organize parts by run, pre-cut common lengths, and group fittings to minimize trips. Use quick-connect fittings where appropriate and compatible with code to reduce assembly time. Keep a reliable caliper and marker for repeatable measurements. Practice crimping technique on scrap to speed consistent joints. Maintain clean, well-lit work areas and label lines as installed to prevent rework and inspection delays.
Build a PEX Repair Kit for Emergencies
A compact emergency PEX repair kit contains the fewest parts and tools needed to stop leaks and restore flow until permanent repairs can be made.
It should be portable, organized, and focused on immediate containment and temporary routing.
Essentials include a cutting tool sized for PEX, a selection of push-to-connect couplings and sleeves, and a roll of spare PEX with clamps.
A small wrench and marker help with quick adjustments.
Examples to visualize a kit:
- coiled spare PEX, zip-tied for space-saving
- clear plastic box with labeled fittings and clamps
- compact cutter and adjustable wrench secured with elastic straps
Seasonal Maintenance for PEX Systems
Having a compact PEX repair kit on hand reduces downtime from sudden leaks and also supports routine seasonal checks of a system’s integrity. Seasonal maintenance includes inspecting fittings for corrosion, checking for visible kinks, testing pressure, and insulating exposed runs before freezing weather. Flushing rarely used lines and verifying valve operation prevents stagnation and surprise failures. Replace damaged clamps or sleeves promptly and document dates of checks. Professional inspection every few years is recommended for complex systems.
| Task | Frequency |
|---|---|
| Inspect fittings | Every 6 months |
| Insulate exposed lines | Annually |
| Flush unused lines | Seasonally |
Step-by-Step: Upgrading Older Plumbing to PEX
Before beginning an upgrade to PEX, the existing pipe condition should be assessed for corrosion, scale, and joint integrity.
Compatible fittings must be selected to match the system material and pressure requirements.
Conversions to PEX require proper adapters and secure connections to guarantee a leak-free conversion.
Assess Existing Pipe Condition
How old is the existing plumbing and what condition is it in? A visual and tactile inspection identifies corrosion, pinholes, rigidness, and prior repairs; documenting findings guides decisions about partial replacement versus full conversion. Check joints, valves, and visible runs for leaks, mineral buildup, and brittle sections. Note materials — copper, galvanized steel, or lead — and accessibility for cutting and removal. Photograph problem areas and mark measurements for new PEX routing. Consider water quality tests if discoloration appears.
- Greenish corrosion on fittings
- Flaky scale inside cut ends
- Hard, kink-prone pipe sections
Choose Compatible Fittings
Select fittings that match both the existing materials and the chosen PEX system to guarantee reliable, code-compliant connections. The installer evaluates pipe type, diameter, and the PEX connection method (crimp, clamp, push-fit, or expansion) before buying parts. Choose corrosion-resistant materials—brass or lead-free bronze—for longevity.
Match diameter and wall thickness; use fittings rated for potable water and local codes. Prefer union-style or accessible fittings at joints for future maintenance.
Verify manufacturer compatibility lists and pressure/temperature ratings. Keep a modest spare supply of common fittings and replacement rings or sleeves to streamline installation and reduce callbacks.
Transition With Proper Adapters
With compatible fittings chosen, the installer moves on to adaptors that join PEX to existing materials—copper, galvanized steel, CPVC, or threaded iron—ensuring a secure, code-compliant interface.
The technician measures, cuts, and deburrs old pipe ends, selecting threaded, compression, or solder-type adapters as required.
Proper sealing methods—thread tape, sealant, or solder—are applied, and conversions are tightened or crimped per manufacturer specs.
A pressure test checks for leaks before insulation and concealment.
Visualize common scenarios:
- copper stub-out converted to PEX via a sweat-to-PEX adapter
- galvanized pipe replaced using threaded adapters
- CPVC joined with solvent-compatible fittings
PEX Safety, Certifications, and Environmental Notes
Addressing safety, certifications, and environmental considerations for PEX pipe requires evaluating material composition, approved listings, and local code acceptance to guarantee both performance and compliance.
Inspect manufacturer data for chlorine resistance, working temperature, and pressure ratings.
Verify listings such as NSF/ANSI 61 for potable water and ASTM or CSA standards; confirm fitting compatibility with listed systems.
Follow local plumbing codes and permit requirements; use products from reputable suppliers.
Consider potential off-gassing, UV sensitivity, and recyclability; avoid prolonged sunlight exposure and separate hot and cold runs where required.
Retain documentation and label installations for future inspection and maintenance.
Connection Methods Compared: Pros, Cons, and Use Cases
Having confirmed material ratings, listings, and code acceptance, the next step compares the common PEX connection methods—crimp, clamp (cinch), expansion, push-to-connect, and threaded/soldered adapters—by their installation mechanics, reliability, tooling needs, and typical applications.
Each method suits different skill levels and service conditions: crimp and clamp require simple hand tools and are economical for permanent runs; expansion yields secure, code-approved joints for expansion-rated PEX but needs a specialized head; push-to-connect offers fastest repairs without tools; threaded/soldered adapters bridge PEX to fittings and metal.
Visualize common scenarios:
- a long looped run with crimped tees
- a compact repair using a push-fit coupling
- a manifold tied in with expansion fittings
Buying Guide: Trusted PEX Brands and Where to Shop
A focused buying guide helps plumbers and DIYers choose reputable PEX brands, compare product lines (PEX-A, -B, -C), and match fittings and tools to project scope and local code.
Recommended manufacturers include Viega, Uponor, Zurn, SharkBite, and Watts for consistent quality, with each offering distinct fitting systems and warranties.
Evaluate material compatibility, available fittings, expansion versus crimp tools, and pressure/temperature ratings.
Purchase from licensed plumbing suppliers, big-box stores with return policies, or certified online distributors to guarantee genuine products and compliance documentation.
Prioritize suppliers that provide technical support, clear labeling, and warranty registration to reduce installation risk.
Quick Checklist: Connect a Single Fixture With PEX
For a single fixture hookup, follow a concise step sequence: verify local code and shut off water, select correct PEX type and compatible fittings, measure and cut supply lines to allow gentle bends, deburr and square the tube ends, slide on the appropriate rings or position expansion fittings, secure connections with the manufacturer-approved crimp/expansion tool or push-to-connect fitting, pressure-test the run for leaks at operating pressure, and restore insulation or protection where the pipe passes through framing.
A compact checklist keeps the task controlled and safe. Visualize the workflow:
- A straight, clean tube end ready for a fitting.
- A snug crimp ring or expanded sleeve aligned.
- A pressure gauge showing steady, leak-free holding.
After the Job: Labeling, Documentation, and Permits
Upon completion of the PEX installation, the contractor documents the work, labels lines, and secures any required permits to guarantee code compliance and future serviceability.
Photos of manifolds, connections, and routing are saved with date stamps; a simple schematic shows source, fixture, pipe type, and size.
Each PEX run is labeled near terminations and at accessible intervals with durable tags indicating destination and supply (hot/cold).
Permit paperwork, inspection reports, and warranty information are filed physically and digitally for homeowner access.
Clear documentation and visible labels reduce troubleshooting time, simplify future alterations, and demonstrate compliance during resale or inspection.
Conclusion
In a gleefully realistic basement, a DIY plumber in safety goggles shakes hands with a flexible PEX snake, both grinning like conspirators. The pipes promise fewer leaks, the fittings fewer phone calls to a stranger with a van. Tools sit upright like obedient soldiers. The permit clerk, invisible but ever-present, winks from a paperwork pile. In short: choose wisely, crimp confidently, and accept the quiet smug of a job that actually holds water.