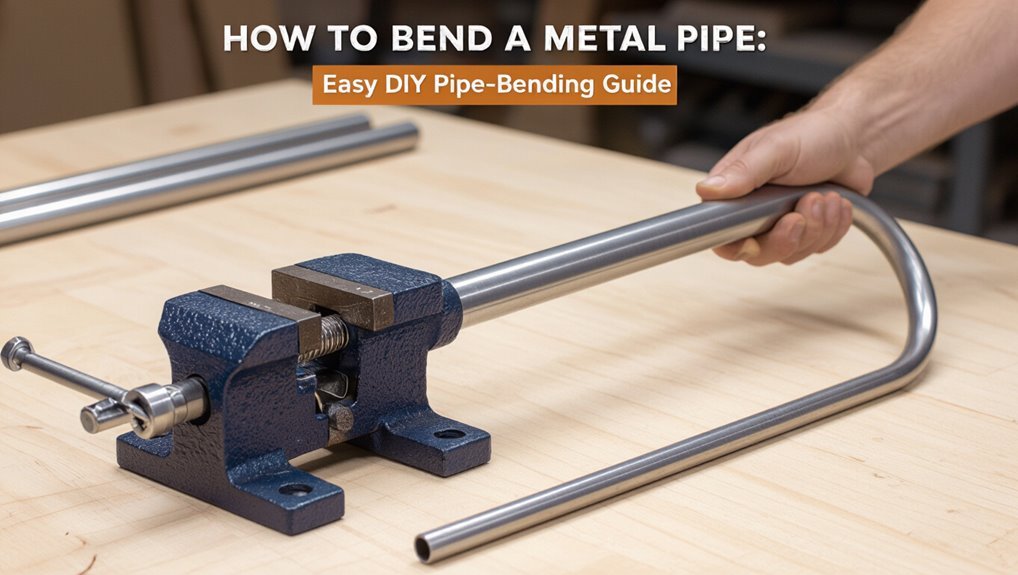
How to Bend a Metal Pipe: Easy DIY Pipe-Bending Guide
To successfully bend a metal pipe, start by evaluating the pipe’s material, wall thickness, diameter, and temper to determine if a DIY bend is suitable. Here are the key takeaways for bending metal pipes effectively:
- Choose the Right Tools: Use hand benders or internal springs for soft metals and thin tubing; opt for mandrel, hydraulic, or roller benders for tight radii, thick walls, or stainless steel.
- Prepare for the Bend: Mark the bend centers and secure your workpiece properly.
- Safety First: Always wear appropriate personal protective equipment (PPE).
- Practice Makes Perfect: Test your technique on scrap material before the final bend.
- Inspect Your Work: After bending, check for issues like ovality, cracks, or wrinkling.
For further detailed methods and safety guidelines, continue reading.
Quick: Should You Bend Pipe Yourself?
Deciding whether to bend a metal pipe oneself depends on the pipe material, the required accuracy, available tools, and safety considerations.
One assesses wall thickness, alloy, and temper: thin-walled copper or soft aluminum often bends easily; hardened steel or stainless may need specialized equipment.
Small, simple bends for noncritical applications suit DIYers; complex shapes, tight radii, or pressurized systems favor professionals.
Time, skill, and access to proper benders, formers, or mandrels influence the decision.
Budget and potential cost of mistakes — leaks, weakened joints, or ruined material — should weigh heavily before proceeding.
Safety First: Gear and Precautions for Bending Pipe
Before beginning any pipe-bending task, the writer recommends proper personal protective equipment—gloves, eye protection, and hearing protection—be selected and fitted.
The work area should be cleared, well-lit, and arranged with secure supports and adequate ventilation.
Safe bending techniques, including correct tool selection, controlled force, and preventing pinch points, should be followed to reduce risk of injury and material damage.
Personal Protective Equipment
Wearing appropriate personal protective equipment (PPE) reduces the risk of injury when bending metal pipe. The guide states that PPE protects eyes, hands, ears, lungs, and feet from sparks, sharp edges, noise, dust, and dropped materials. Each item should fit properly and be inspected before use. Combine items based on the method: hand bending, hydraulic, or torch-assisted work. Replace damaged gear immediately. Training on correct use minimizes complacency and misuse. Store PPE cleanly between tasks to maintain effectiveness and hygiene.
- Safety glasses or face shield
- Cut-resistant gloves
- Hearing protection
- Respiratory mask (if heated or dusty)
Work Area Preparation
With PPE selected and inspected, the work area must be arranged to minimize hazards and allow unobstructed movement around the pipe and equipment.
Clear floor space of debris, cords, and trip risks.
Position lighting to eliminate shadows on bending lines.
Assure stable, level supports or workbench rated for expected loads; lock vises and stands.
Ventilate if heating, welding, or lubricants will be used.
Keep fire extinguisher and first-aid kit within reach.
Store tools and fittings in organized trays to avoid reaching across the pipe during operations.
Mark a safety perimeter to keep bystanders at a safe distance.
Safe Bending Techniques
Begin by confirming that all personal protective equipment fits correctly and is in good condition: impact-rated safety glasses, face shield when using heat or grinders, cut-resistant gloves, hearing protection for powered benders, and steel-toe footwear.
The operator assesses pipe material, wall thickness, and required bend radius, selecting appropriate tools and lubrication. Stable clamping and clear communication prevent sudden movement.
For heat-assisted bends, monitor temperature and allow controlled cooling. Inspect bent sections for cracks, ovality, and stress risers; correct or scrap compromised parts. Emergency procedures and first-aid supplies should be accessible.
- Check tool condition before use
- Secure workpiece firmly
- Use proper bending speed
- Maintain clear workspace
Which Pipe Materials Bend Easily : And Which Don’t
Different metals respond to bending forces according to their inherent softness or hardness.
Soft metals like copper and aluminum typically bend with less force and lower risk of cracking, while harder metals such as stainless steel and hardened carbon steel resist deformation and require more force or specialized tooling.
Understanding these material differences guides choice of method, tools, and allowable bend radius.
Soft Metals Bend Easily
Although ductility varies by alloy and temper, soft metals like copper, aluminum, and annealed mild steel bend much more readily than hardened or work-hardened materials. They require lower force, produce smoother curves, and are less prone to cracking when formed with appropriate tooling. Workpiece preparation—cleaning, proper support, and gradual bending—reduces wrinkling and ovaling.
Heat can aid thicker sections, while annealed tubing recovers from minor deformation more predictably. Selection of tube diameter, wall thickness, and bend radius governs success. Common applications include plumbing, HVAC, and light structural framing where ease of forming is prioritized.
- Lower required force
- Smoother curves
- Reduced cracking risk
- Predictable deformation
Hard Metals Resist Bending
When subjected to bending, hard metals such as hardened steels, some stainless alloys, and certain heat-treated aluminum grades require substantially higher forces and specialized tooling than softer materials. The guide notes increased springback, risk of cracking, and necessity for dies, mandrels, or hydraulic benders. Proper heat treatment or annealing can improve formability but alters mechanical properties. Selection depends on application priorities: strength versus ease of shaping. Inspect for surface defects and consider professional services for critical jobs. Safety protocols and correct tooling extend tool life and reduce waste.
| Metal | Difficulty | Recommended Tool |
|---|---|---|
| Hardened steel | High | Hydraulic bender |
| Stainless (work-hardened) | High | Mandrel bender |
| Heat-treated aluminum | Medium-High | Die bender |
| Mild steel | Low | Hand bender |
| Copper/brass | Low | Tube bender |
How Pipe Wall Thickness (Schedule) Affects Bending
Pipe wall thickness, expressed by schedule, directly influences bending behavior by controlling stiffness, local buckling resistance, and the amount of springback.
Thicker walls raise bending stiffness, reduce ovalization risk, and demand greater force; thinner walls flex more, are prone to wrinkling on the intrados, and spring back less predictably.
Selection balances required strength, achievable bend radius, and tooling capacity.
Wall thickness also changes workhardening sensitivity and heat input effects when heating is used.
Practical bending relies on matching schedule to material and method to avoid collapse, excessive thinning, or cracking during forming.
- Thicker = higher force, less ovalization
- Thinner = easier bend, more wrinkling risk
- Schedule affects springback magnitude
- Tooling must match wall thickness
Choosing Pipe Diameter for Bending Projects
Diameter selection is a primary determinant of bendability and final fit, because it sets the neutral axis location, required bend radius, and tooling scale. Smaller diameters need tighter tooling and can display more ovalization; larger diameters resist collapse but require larger bend radii and greater force.
Material type and wall thickness interact with diameter to influence springback, wrinkle risk, and mandrel necessity. Choose a diameter that matches application clearance, flow capacity, and available benders.
When precise geometry is required, test-bend samples and measure springback. Document chosen diameter, tooling, and sample results for consistent reproduction across the project.
When to Bend Pipe and When to Use Pre‑Bent Fittings?
How should one decide between bending straight tubing on-site and using pre‑bent fittings? The choice hinges on project scale, precision, access, and cost. Bending on-site suits custom runs, tight spaces, and reduced fittings but requires skill and setup.
Pre‑bent fittings speed installation, assure consistent radii, and minimize field errors, though they may limit layout flexibility and increase parts.
Consider material springback, joint count, and lead time. Choose bending when customization and fewer leak points matter; choose pre‑bent fittings when repeatability, speed, and guaranteed geometry are priorities.
- Customization vs standardization
- Skill and equipment availability
- Leak points and joints
- Time and cost constraints
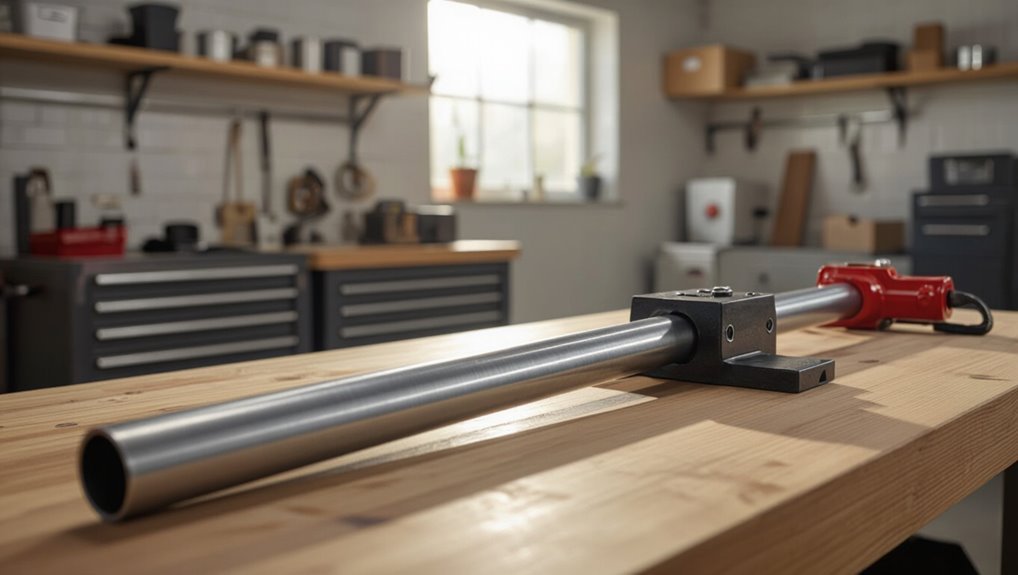
Tools Overview: Hand, Spring, Mandrel, Hydraulic Benders
Across job sites and workshops, four common bending tools — hand benders, spring benders, mandrel benders, and hydraulic benders — cover the range from quick, low-cost bends to high-precision, production-level work.
Hand benders are simple, portable, and suited to soft metals and small diameters, offering low setup cost. Spring benders are inexpensive for thin-wall tubing and immediate field repairs but limit radius control. Mandrel benders preserve internal profile and prevent collapse, ideal for tight-radius, thin-walled pipes in professional fabrication. Hydraulic benders deliver high force and repeatable accuracy for large-diameter or thick-walled pipes and production runs.
How Manual Pipe Benders Work (Simple)
Using leverage and a shaped die, a manual pipe bender bends tubing by applying controlled force that guarantees the pipe around a curved form while supporting it to prevent collapse.
The operator places the tube in the die, aligns the mark for bend location, then pulls or pushes the handle so the tube conforms to the die radius.
Reaction arms and pads hold the tube to maintain shape and reduce wrinkling.
Manual benders suit single bends, small radii, and moderate wall thicknesses.
Proper technique and incremental movement yield accurate results without specialized machinery.
- Die shapes determine bend radius
- Alignment guarantees accuracy
- Support prevents flattening
- Slow, steady force avoids damage
How Spring Benders Prevent Kinks in Soft Tubing
By fitting a spring inside or around the tubing, a spring bender distributes bending forces so the wall resists local collapse and folds uniformly along the curve.
The spring supports internal and external surfaces, maintaining cross-sectional shape and preventing sharp creases.
As the tube is bent, the spring compresses on the inside radius and stretches on the outside, smoothing stress concentration.
This action permits tighter radii with flexible materials like copper, vinyl, or polyethylene without crimping.
Removal after bending restores flow passage.
Spring benders are simple, reusable, and require no heat, making them ideal for on‑site, low‑risk tubing work.
When and How to Heat Steel to Aid Bending
When bending steel pipe, determining whether to apply heat depends on wall thickness, alloy, bend radius and the risk of cracking.
If heating is required, controlled methods such as an oxy-acetylene torch, propane torch with even motion, or induction heater should be used to achieve uniform, moderate temperatures while avoiding overheating.
Appropriate PPE, clearances, and a staged cooling plan—air cooling for most steels, gentle quenching only when specified—reduce hazards and metallurgical damage.
When To Heat
Typically, steel is heated to aid bending when its thickness, grade, or required bend radius would otherwise cause cracking, excessive springback, or tool overload. The decision hinges on material composition, wall thickness, bend severity, and tooling limits. Heat is considered for high-carbon steels, thick-walled pipe, tight radii, or when mechanical methods risk work hardening.
Timing matters: apply heat selectively to the neutral axis zone and avoid whole-part heating unless necessary. Monitor for scale and overheating that alter metallurgy. Use controlled, incremental bending with inspection between passes to confirm ductility gains and prevent overheating damage.
- Material carbon content
- Wall thickness
- Bend radius severity
- Tooling capacity
How To Heat
For effective hot-assisted bending, heat should be applied locally and controllably to the section of pipe that will undergo the greatest tensile strain so that ductility increases without degrading the surrounding metal.
Use a torch or induction heater to concentrate heat; aim for even color or measured temperature appropriate to the alloy and thickness.
Move the heat source steadily to avoid hotspots.
Pre-mark the bend zone and monitor temperature with an infrared thermometer or thermocouple.
Limit the heated length to the bend plus small relief zones.
Maintain moderate, uniform heat until forming begins, then proceed with steady bending to avoid cracking.
Safety And Cooling
In planning heat-assisted bending, operators must prioritize safety and controlled cooling to prevent burns, fire, material damage, and hazardous metallurgical changes.
Protective gear, fire-resistant barriers, and proper ventilation reduce risk; heat should be limited to the minimum effective zone and monitored with temperature crayons or infrared thermometers.
After bending, controlled cooling preserves toughness—avoid quenching unless specified for the alloy.
Inspect for scaling and unwanted microstructural change, and neutralize hot slag.
Emergency procedures and a fire extinguisher must be on hand.
- Use PPE and keep a clear workspace
- Monitor temperature precisely
- Cool gradually unless alloy requires rapid quench
- Inspect for scale and defects
How to Anneal Copper and Brass Before Bending
Annealing copper and brass softens the metal, restores ductility lost during work hardening, and reduces the risk of cracking when bending.
Workpieces are cleaned, heated evenly with a torch to a dull red for copper or a straw-yellow for brass, held briefly, then cooled slowly.
For small tubing, heat until color change spans the bend area; for larger sections, use an annealing furnace if available.
Quenching in water is optional for copper but avoided for brass to prevent brittleness.
After cooling, wipe away scale, inspect for uniform softness, and proceed with bending using appropriate supports.
When to Use Roller or Mandrel Benders for Smooth Curves
The choice between roller and mandrel benders depends on the desired curve quality and the pipe’s material and wall thickness.
Roller benders suit gentle, large-radius bends and thicker-walled or more rigid materials, while mandrel benders are preferred for tight radii and thin-walled or easily collapsed tubing to maintain internal support.
Consider material type and wall thickness first, then match the bender that prevents wrinkling, flattening, or excessive springback.
When To Use
When should a roller bender be chosen over a mandrel bender for producing smooth curves? The decision depends on pipe material, desired curvature, wall support, and production speed. Roller benders suit gentle radius bends, thicker-walled tubing, and applications tolerating minor ovality. Mandrel benders excel when internal support prevents collapse, for tight radii, thin walls, or visible plumbing and exhaust where appearance and flow matter. Choose based on bend radius relative to diameter, acceptable deformation, and quantity. Consider equipment availability and operator skill; simpler projects favor rollers, precision or critical assemblies favor mandrels.
- Bend radius vs. tube diameter
- Wall thickness and support needs
- Surface appearance and flow
- Production volume and consistency
Roller Vs. Mandrel
Which method better suits a given job depends largely on bend radius, wall thickness, and the tolerance for deformation. Roller benders flex pipe around external dies, offering speed and minimal tooling for gradual radii; they may flatten or ovalize thin-walled tubing under tight bends.
Mandrel benders insert internal support during bending, preserving cross-section and preventing wrinkling, making them preferable for tight radii and finished appearance.
Choice balances required bend tightness, acceptable cosmetic outcomes, production volume, and equipment cost. For prototypes or light-duty work, rollers suffice; for precise, wrinkle-free bends or critical assemblies, mandrels are the safer option.
Material And Wall Thickness
For pipes and tubing, material type and wall thickness largely determine whether roller or mandrel bending will produce smooth, acceptable curves. Harder alloys and thin-walled tubes tend to wrinkle or collapse with simple roller bending; mandrel bending supports the internal wall, maintaining shape and preventing ovality.
Thicker-walled or ductile materials can tolerate roller bending with controlled radius and lubrication. Selection depends on desired radius, appearance, and structural integrity. Consider process cost versus quality needs when choosing.
- Thin walls or tight radii: mandrel required
- Thick walls, gentle bends: roller acceptable
- High-strength alloys: prefer mandrel
- Cosmetic finishes: mandrel recommended
Choosing the Right Bending Radius for Your Project
In selecting a bending radius, the designer balances strength, material limits, and the required fit to guarantee the pipe performs as planned; too tight a radius risks wall thinning, wrinkling, or cracking, while an overly large radius can compromise layout constraints and system efficiency. The appropriate radius depends on pipe material, wall thickness, and application pressure; standardized minimums exist for common metals. Practical testing and vendor charts guide safe limits. Fabrication methods (mandrel vs. compression) influence achievable radii and finish. Select the largest radius that meets spatial needs to preserve integrity and flow.
| Factor | Effect |
|---|---|
| Material | Ductility limits |
| Thickness | Resistance to collapse |
| Method | Quality of bend |
How to Calculate Bend Allowance and Developed Length
The discussion now turns to bend allowance basics, defining the material length required to form a bend and the role of neutral axis shift.
It then outlines the formulas and inputs needed to calculate developed length for a pipe, including bend angle, radius, and material factors.
Practical examples and quick checks are suggested to guarantee accurate flat lengths before bending.
Bend Allowance Basics
When a straight metal strip is formed around a curve, the material along the bend stretches and compresses, so calculating the bend allowance quantifies the arc length that must be added to the flat pattern to achieve the correct finished dimensions; this value, together with leg lengths and bend radii, is used to compute the developed length required before bending.
Bend allowance depends on radius, angle, material thickness and the chosen neutral axis factor. Accurate estimation prevents under- or over-bending and guarantees fit. Practical tables or formulas provide quick values, while testing validates assumptions.
- Radius affects arc length
- Angle scales allowance
- Thickness shifts neutral axis
- Testing confirms results
Calculating Developed Length
For accurate pipe fabrication, calculating the developed length combines straight leg measurements with a calculated bend allowance that accounts for bend angle, material thickness, and bend radius.
The process begins by measuring centerline to end distances for straight sections, then adding the bend allowance (BA) to compensate for metal displacement through the arc.
BA can be computed with BA = (π/180) × (bend angle) × (R + K×T), where R is bend radius, T is thickness, and K is the neutral axis factor (commonly 0.3–0.5).
Developed length equals sum of straight lengths plus each BA.
Verify with a test piece and adjust K for material behavior.
How to Mark and Measure Pipe for Accurate Bends
With careful measurement and clear marking, accurate pipe bends become predictable rather than guesswork.
The writer outlines a concise workflow: verify developed length, determine bend centerlines, and note material allowances.
Measurements use calipers, tape, and a square; markings use a scribe or fine permanent marker.
Align referenced dimensions from a fixed pipe end, transfer centerline locations, and mark neutral axis where required.
Check cumulative tolerances before bending.
Use temporary reference bands for consistent positioning during multiple bends.
- Measure twice, mark once
- Mark bend start and centerline
- Note neutral axis offset
- Record reference distances
Setting Up Your Work Area for Precise Bending
Preparing an organized, well-lit workstation guarantees precise bends and reduces rework.
The area should be level, stable, and free of trip hazards.
Arrange tools—pipe bender, clamps, vise, measuring tape, marker, deburring tool—within easy reach on a cleared surface.
Make certain adequate lighting and, if needed, a task lamp aligned with the bend point.
Use a stable workbench with protective padding to prevent pipe damage.
Secure the pipe with a vise or clamp to prevent movement.
Keep measurements and templates nearby for reference.
Maintain a clean floor and accessible waste container for cuttings and debris.
Step‑by‑Step: Bending Copper With a Handheld Bender
The section outlines how to select a handheld bender suited to the copper tube size and wall thickness.
It then describes necessary tube preparation steps, including cleaning and marking bend locations.
Finally, it explains techniques for producing smooth bend radii to prevent kinking and maintain flow.
Choosing The Right Bender
For bending copper with a handheld bender, selecting the correct tool is essential to achieving accurate, clean bends without kinking or work-hardening the tube. The right bender matches tube diameter, bend radius, and user strength. Material quality and die shape affect the finish and consistency. Portability versus leverage trade-offs guide choice: compact spring benders suit soft copper and light work; ratcheting or lever types provide smoother control for thicker wall tubing. Consider handle ergonomics and durable markings for repeatable angles. Regular inspection prevents damage that can mar tubing.
- Match bender die to tube size
- Choose appropriate bend radius
- Prefer smooth contoured dies
- Check leverage and ergonomics
Preparing The Copper Tube
Before any bending begins, the copper tube must be cleaned, measured, and supported to guarantee accurate, kink-free bends.
The technician removes corrosion and oil with a cloth and suitable cleaner, then deburrs cut ends to prevent deformation.
Measurements are marked with a fine-tip marker, noting centerline and bend start points, and allowance for fittings and overlap is calculated.
The tube is secured in place with clamps or a vise padded to avoid marring, leaving enough free length for the bender.
Internal support, such as a sand fill or plug, may be installed when required to maintain section integrity during bending.
Making Smooth Bend Radii
With the tube cleaned, measured, and secured, attention turns to forming smooth bend radii using the handheld bender. The operator aligns the mark with the bender’s pivot, applies steady pressure, and watches curvature progress.
Small, controlled increments prevent kinks; release and reposition if warping appears. Maintaining consistent speed and firm support guarantees even wall thickness. Inspect the outside for stretching and the inside for compression.
If the radius seems tight, rehearse on scrap. Finalize the bend by easing back slightly to relieve stress and check fit against the layout before trimming or joining.
- Align marks precisely
- Bend slowly, evenly
- Support throughout
- Inspect frequently
Step‑by‑Step: Bending Thin‑Walled Steel With a Mandrel Bender
Using a mandrel bender, the process of forming thin-walled steel into smooth, wrinkle-free bends relies on precise setup, controlled feed, and correct mandrel selection to prevent collapse and maintain dimensional accuracy. The operator secures the tube, selects a mandrel matching wall thickness, and sets die radius. Feeding proceeds steadily while the mandrel supports the interior; bending speed is moderate to avoid stretch marks. After bending, the part is inspected for ovality and springback; minor corrections use heat or re-bending. Proper lubrication and mandrel position reduce tooling wear and guarantee repeatable results.
| Step | Key Action |
|---|---|
| 1 | Measure and mark |
| 2 | Choose mandrel |
| 3 | Set die radius |
| 4 | Feed and bend |
| 5 | Inspect finish |
Form Large‑Radius Bends With a Hydraulic Bender
For long, gentle curves in structural tubing, a hydraulic bender provides the high force and steady control necessary to form large‑radius bends without kinking or excessive ovality.
The operator selects appropriate dies, secures the tube, and advances the ram at a controlled rate, monitoring alignment and die seating.
Support and rotation prevent localized collapse; back‑up blocks or internal supports can be used for thin walls.
Cooling and lubrication reduce surface scoring.
Final measurement confirms radius and springback; minor corrections are made with the bender rather than hammering.
- Use matched die radius
- Maintain steady ram speed
- Support throughout bend
- Measure and adjust for springback
How to Make a Tight 90° Bend Without Kinking
When bending a tight 90° in metal tubing without kinking, precise control of material movement and support is essential: the section must be restrained against ovalization, the neutral axis preserved, and bend progression kept slow and uniform.
Use a die matching tube profile, backing support (wiper die or mandrel) and internal mandrel sized to prevent collapse.
Clamp ends firmly, apply gradual, even force, and advance bend in small increments while monitoring wall thinning.
For thin‑wall or softer alloys, fill with sand or use a plug to support interior.
Finish with light springback compensation and inspect for wrinkles or cracks before use.
How to Make Compound and Multi‑Plane Bends
After mastering tight single‑plane 90° bends with proper mandrels and dies, attention turns to compound and multi‑plane bends where tubing must change direction in more than one axis.
The process requires layout of centerlines in both planes, gradual bending to relieve torsion, and frequent checking against templates or fixtures.
Rotary draw benders with multi‑axis heads or careful manual sequencing produce smooth shifts.
Key practices include pre-marking tangents, controlling rotation between bends, and using supports to prevent ovality.
Precision measuring and slow, incremental forming minimize springback and distortion while preserving flow and wall thickness.
- Pre-mark all tangent points and angles
- Rotate tube incrementally between bends
- Use multi‑axis tooling when possible
- Check alignment with templates frequently
Using Filler (Sand or Wood) to Support Pipe While Bending
Using sand or wooden fillers to support pipe during bending provides internal backing that prevents collapse and reduces wrinkling, particularly in thin‑walled or small‑diameter tubing.
The pipe is filled, ends sealed, and filler compacted to eliminate voids; sand conforms to irregularities, wood dowels offer rigid support.
Filling improves uniformity of wall thickness through bends and allows tighter radii with less deformation.
Care is taken to avoid overfilling that impedes desired shape and to secure closures to prevent leakage.
After bending, filler is removed, and internal surfaces inspected for scoring or residual material before finishing or joining operations.
How to Check and Correct Springback After Bending
After bending, the operator measures the bend angle precisely with a protractor or digital inclinometer to determine the amount of springback.
If the measured angle falls short of the target, a calculated overbend is applied or the die setting adjusted to compensate. The process is repeated until the final angle meets specifications.
Measure Bend Angle
When checking a recently formed bend, measure the angle immediately and again after a short springback interval to determine the true final geometry. The inspector uses a protractor, angle gauge, or digital inclinometer aligned to the leg faces.
Measurements are recorded, compared to the target angle, and any deviation quantified as springback. Make certain the pipe is free from clamps that alter reading; measure at multiple points along the bend to detect uneven recovery.
Note ambient temperature and material type, as both affect springback magnitude. Accurate measurement informs whether further controlled adjustment is needed or the bend meets specification.
- Use calibrated tools
- Record both readings
- Measure at several locations
- Note conditions
Apply Springback Correction
Having measured the immediate and short-interval angles and quantified springback, the inspector proceeds to apply corrective measures to achieve the target geometry. The inspector selects one of three strategies: increase bend angle, adjust tooling radius, or preload the pipe. If springback is consistent, a calculated overbend is applied equal to measured springback plus a small safety margin.
For variable results, tooling or material conditioning is revised—use tighter mandrels, reduce bend speed, or heat the section. After correction, the pipe is remeasured; iterative minor adjustments continue until the bend matches specifications within tolerance.
Preventing Inside Flattening and Wrinkling on Bends
On tight-radius bends, the inner wall of a metal pipe is prone to compressive deformation that causes flattening and axial wrinkling; to prevent these defects, the bending process must control compressive stresses, support the cross-section, and manage material flow.
Proper techniques include internal support, controlled mandrel use, incremental bends, and appropriate lubrication.
Selection of pipe material and wall thickness reduces susceptibility.
Monitoring bend speed and die conformity helps maintain shape.
When needed, use backing plugs or low-pressure internal media to sustain the neutral axis and avoid localized buckling.
Inspect bends for early signs and adjust parameters promptly.
- Internal mandrel support
- Gradual, incremental bending
- Correct die radius and fit
- Internal backing or pressure
Common DIY Mistakes When Bending Pipe : And Fixes
Many DIYers make predictable errors while bending pipe that lead to kinks, ovaling, or cracked coatings; recognizing these mistakes and their fixes shortens learning curves and prevents wasted materials.
Common faults include using incorrect tooling—mandrel or die sizes mismatched to pipe gauge—resulting in collapse or wrinkling; remedy by matching tooling and backing supports.
Overheating thin-walled tubing weakens metal and coating—use controlled heat or cold-bend techniques appropriate to alloy.
Insufficient lubrication or improper fill leads to surface damage—apply proper medium and internal supports.
Rushing bends without measuring causes misalignment—mark, clamp, and bend slowly to maintain geometry and finish.
How to Join and Fit Bent Pipe Into Plumbing and Frames
Attention to alignment and proper joint type guarantees bent pipe mates cleanly with existing plumbing and frame mounts.
Appropriate sealing—thread tape, pipe dope, or solder—and secure fastenings prevent leaks and movement under load.
The next section covers matching fittings, preparing ends, and testing connections for a durable installation.
Aligning Pipe Connections
When fitting a bent pipe into an existing plumbing run or frame, precise alignment of the ends and joints guarantees a leak-free, structurally sound connection. The installer measures twice, dry-fits components, and adjusts bends or coupling positions to maintain centerline continuity and correct pitch.
Support spacing and bracket placement are checked to prevent stress at joints. Threaded, slip, or compression fittings are inspected for seating and concentricity before final assembly. Angular misalignment is corrected with small shims or minor re-bending rather than forcing fittings.
- Verify center-to-center distances
- Dry-fit and mark positions
- Check support locations
- Correct angular offsets
Sealing And Securing
In joining a bent pipe into an existing plumbing run or frame, proper sealing and secure fastening guarantee both leak resistance and mechanical stability.
The installer selects compatible fittings, applies thread sealant or PTFE tape to male threads, and seats compression or push-fit joints per manufacturer torque specs.
For soldered copper, flux and clean surfaces assure capillary flow; for welded joints, proper penetration and cleaning prevent corrosion.
Support straps, clamps, or hangers are placed near bends and at periodic intervals to control vibration and stress.
Final testing includes pressure or leak tests, inspection of fasteners, and retightening after initial operation.
When Welding or Brazing Is Better Than Bending
Evaluating whether to weld or braze instead of bending hinges on part geometry, material limits, and required joint strength. Welding or brazing is preferable when bends would thin walls, introduce springback, or create unacceptable stress concentrations. Fabrication with joints can preserve tube cross-section, allow complex assemblies, and accommodate dissimilar metals (brazing).
Consider thermal effects, filler compatibility, and post‑joint strength requirements. Skilled operators and appropriate equipment are necessary.
Typical cases favoring joining over bending include:
- Thin‑walled tubing vulnerable to collapse
- Tight radii impractical for bending tools
- Assemblies needing precise alignment
- Dissimilar metals or repair scenarios
How to Finish Bent Metal: Debur, Paint, and Seal
After bending, the metal pipe requires careful finishing to remove sharp edges and burrs that can compromise fit and safety.
Surfaces should be smoothed with files, grinders, or sanding tools before any coating is applied.
Finally, a suitable paint or protective sealant should be used to prevent corrosion and extend the part’s service life.
Deburr And Smooth Edges
Remove sharp burrs and rough edges promptly to guarantee safety and prepare the surface for coating.
The worker uses files, deburring tools, or a rotary abrasive to remove lip and slag, following the bend and inspecting inside and out.
Light sanding blends junctions; progressive grits refine the finish.
Clean metal with solvent to remove grit and oil before next steps.
Edge radii should be even to prevent stress concentrations.
Protective gloves and eye protection are required throughout.
- File or hand deburr for coarse material removal
- Rotary tool for tight curves
- Sand progressively with finer abrasives
- Clean thoroughly before coating
Paint And Protective Seal
Once edges are smooth and the surface is solvent-clean, the finishing stage begins with paint selection and proper sealing to protect the bend from corrosion and wear.
Primer compatible with the metal and designed environment prevents adhesion failure; apply thin, even coats and allow full cure between layers.
Choose paint formulated for metal exposure—epoxy, enamel, or polyurethane—for durability.
After painting, inspect for missed spots and touch up as needed.
Finally, apply a clear protective sealer or corrosion inhibitor for additional moisture resistance and UV protection.
Proper drying times and ambient conditions guarantee a long-lasting, serviceable finish on the bent pipe.
How to Pressure‑Test Bent Pipe for Leaks and Strength
Before any system returns to service, the bent pipe must undergo a controlled pressure test to verify joint integrity and wall strength.
The technician isolates the section, fills it with water or inert gas, and slowly raises pressure to the design or test value while monitoring gauges.
Maintain the test pressure for the specified hold time, inspect visible seams and supports, and record any pressure decay.
Safety relief devices and signage must be in place.
Any leak requires repair and retest.
Documentation should note test medium, peak pressure, hold duration, and observer.
- Confirm isolation and venting
- Use calibrated gauges
- Hold at test pressure
- Log results and actions
Troubleshooting: Pipes That Won’t Bend or That Kink Under Load
When a pipe resists bending, common causes include insufficient heat, inappropriate tooling, or material that is harder than specified.
If a pipe kinks under load, the issue is often inadequate internal support, overly sharp bend radius, or thinning from prior work.
Addressing these problems requires identifying the root cause and selecting the correct heat, tooling, and support techniques.
Pipe Won’t Bend
Diagnose the cause quickly: a pipe that refuses to bend or that kinks under load usually indicates improper material selection, insufficient wall annealing, or inadequate tooling and support.
Inspect alloy and temper; some steels and hardened tubing resist bending. Check for cold work—anneal thicker-walled sections to restore ductility. Verify tooling: wrong die radius or absent mandrel increases resistance.
Make certain internal support and even clamping to prevent uneven stress.
- Confirm material grade and temper before bending
- Perform proper annealing when specified
- Use correct bend radius and mandrel support
- Secure uniform clamping and controlled bending speed
Pipe Kinking Under Load
If a pipe begins to kink under load after initial resistance was addressed, the problem shifts from gross material refusal to localized instability and uneven deformation. Causes include insufficient internal support, wall thinning, sharp bend radius, or asymmetric tool pressure. Inspect for dents, corrosion, or prior workhardening.
Remedy by increasing internal mandrel support, using a tighter-fitting plug, reducing bend angle per pass, or selecting a larger-radius die. Apply even, gradual pressure and monitor cross-section during bending. Replace compromised sections when wall integrity is doubtful. Testing on scrap of identical material helps determine safe parameters before committing to the final piece.
Rent vs Buy a Bender: Cost and Break‑Even for DIYers
For a homeowner deciding whether to rent or buy a pipe bender, the choice hinges on project frequency, tool cost, and the break‑even point where purchase becomes cheaper than repeated rentals. Annual usage, rental rates, depreciation, and storage factor into the calculation. Short-term, renting minimizes expense and avoids maintenance; long-term, buying reduces per‑use cost and offers immediate availability. A simple payback calculation guides the decision: divide purchase price by rental cost per use to find the number of uses to break even.
- Compare hourly/daily rental fees versus purchase price
- Include accessories and maintenance
- Estimate realistic number of future projects
- Factor storage and resale value
Best Budget Tools for Occasional Pipe‑Bending Projects
When tackling occasional pipe-bending tasks on a budget, homeowners can rely on a handful of compact, low-cost tools that balance ease of use with acceptable accuracy and minimal setup.
Essential picks include a manual pipe bender for small-diameter copper or thin-walled steel, a spring bender for soft tubing, and a conduit bender for EMT.
Complementary items: a tube cutter, deburring tool, adjustable wrench, and a small protractor or angle finder for repeatable bends.
Sandbags or wooden forms protect finishes; a heat gun addresses brief annealing needs on tougher metals.
Together these tools support safe, reliable occasional bending without heavy investment.
When to Call a Pro Pipe Bender or Metal Fabricator
Why bring in a professional rather than bend the pipe oneself? A pro offers precision, appropriate tooling, and experience for complex or high-stakes jobs.
They assess material limits, tolerances, and safety codes; avoid costly mistakes; and deliver consistent, repeatable results.
Hiring also saves time on setup, finishing, and corrections that inexperienced operators often face.
Consider professional help when risks, required accuracy, or production scale exceed DIY capability.
- Tight radii or multiple bends with exact centers
- Structural or code-regulated installations
- Exotic alloys or thick-wall tubing
- Large quantities or commercial timelines
Project Recipes: Handrails, Guardrails, and Furniture Bends
In projects such as handrails, guardrails, and furniture, precise pipe bending shapes function as both structural elements and aesthetic details, so planning must balance strength, code requirements, and visual lines. Designers select material, diameter, and wall thickness to meet load and spacing rules.
Templates and jigs ensure repeatable radii for continuous runs, returns, and passages. Consider mounting points, weld or flange locations, and clearances to prevent interference.
For furniture, graceful sweeps and tight offsets create style without compromising stability. Test-fit with scrap pieces, adjust spring-back, and finish bends with deburring and protective coating before final assembly.
Project Recipes: Plumbing and HVAC Pipe Bending Plans
For plumbing and HVAC installations, accurate pipe bending plans translate system requirements into repeatable geometry that preserves flow, access, and code compliance. The guide outlines common routing scenarios, specifying bend radii, offsets, and changeover fittings to minimize turbulence and facilitate maintenance. It highlights material selection, joint types, and thermal expansion considerations relevant to residential and light commercial systems.
Diagrams show sequence of bends, measuring points, and clearance checks without providing printable templates. Conservatively, allowances for future modifications and service access are recommended to avoid rework and guarantee longevity.
- Maintain minimum bend radii
- Allow service access
- Specify compatible fittings
- Account for thermal expansion
Printable Templates, Measurements, and Cheat Sheets
Three compact templates — a bend-radius chart, an offset calculator, and a clearance locator — give technicians quick, on-job references that convert system plans into measured, repeatable cuts and bends.
Printable sheets list common tube diameters, bend allowances, and spring-back factors for steel, copper, and aluminum.
Scaled templates for 90°, 45°, and compound bends speed layout; an offset calculator converts leg distances to center-to-center bend angles.
A cheat sheet summarizes measurement steps, marking tips, and safety clearances for fittings and supports.
Files provided as PDF and SVG enable printing to scale or plotting for direct transfer onto stock.
Maintenance Tips for Your Pipe‑Bending Tools
Keeping tools clean, calibrated, and inspected regularly preserves bend accuracy and extends service life. The guide emphasizes routine maintenance: wipe machines after use, remove metal shavings, and check dies and mandrels for wear.
Lubricate moving parts with manufacturer‑recommended products and tighten fasteners to spec. Record service dates and any replacements to track tool health.
Replace worn rollers or pads promptly to avoid poor bends and pipe damage. Store tools in dry, organized spaces to prevent corrosion and accidental impact.
- Clean surfaces and remove debris after each use
- Lubricate pivot points per manual
- Inspect dies/mandrels for wear
- Log inspections and repairs
Quick Safety Checklist to Follow Every Time You Bend
After making sure tools are clean, lubricated, and inspected, operators should run a brief safety checklist before every bending operation to prevent injury and material damage.
Confirm personal protective equipment fits and is worn: gloves, eye protection, hearing protection, and steel-toe shoes.
Verify the work area is clear of trip hazards and bystanders.
Secure the pipe and tooling; check clamps, dies, and supports.
Inspect the pipe for defects, correct material grade, and appropriate wall thickness.
Review the bending plan: angle, radius, and springback allowance.
Make certain emergency stop access and ventilation for fumes.
Log completion and any anomalies.
Conclusion
In closing, the guide shows that with proper precautions and the right tools, bending pipe need not be a shot in the dark. Readers should weigh material, wall thickness, and diameter before attempting bends, follow safety protocols to the letter, and use templates to avoid guesswork. Routine tool maintenance keeps results consistent, and, when in doubt, calling a pro saves time and trouble—better safe than sorry when metal and pressure meet.