How Much to Replace an Exhaust Pipe? Cost Guide & Tips for Savings
Key Takeaway:
Replacing an exhaust pipe typically costs between $150 to $450 for most passenger cars, while SUVs and trucks can range from $300 to $800. Additional factors such as the need for catalytic converters, sensors, or OEM parts can increase costs.
Cost Breakdown:
- Compact Cars: $150 – $250
- Midsize Sedans: $200 – $400
- SUVs and Trucks: $300 – $800
- Additional Costs: Replacement of catalytic converters, sensors, or rusted fasteners may increase labor time and overall expense.
DIY Considerations:
Choosing to replace the exhaust pipe yourself can save on labor costs, but it comes with risks.
Continue reading for practical tips to help you cut costs even further.
Who This Guide Helps And How To Use It
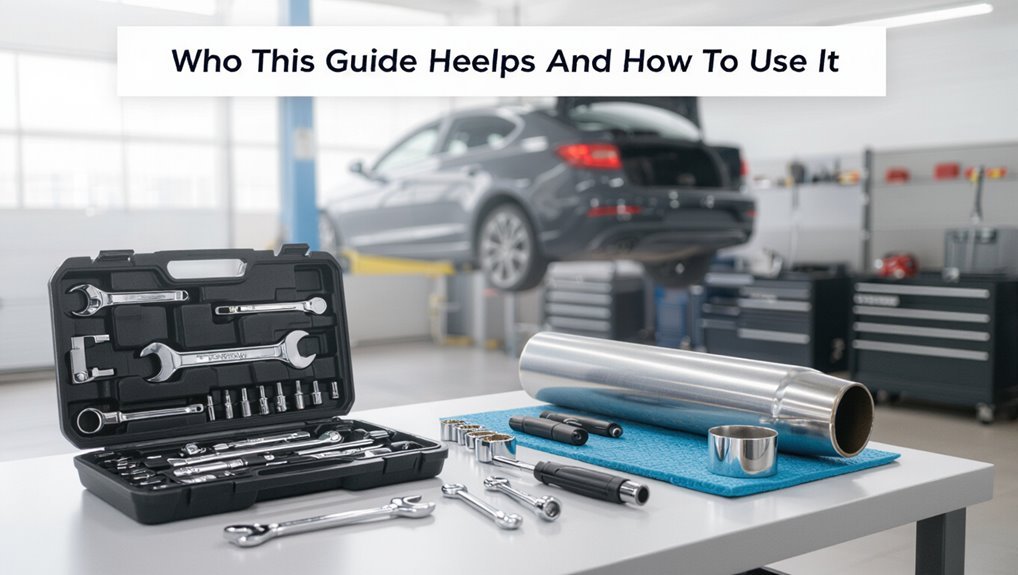
For vehicle owners facing a noisy, leaking, or rusted exhaust system, this guide provides clear cost estimates and decision-making criteria; it is aimed at drivers, DIYers, and fleet managers who need to budget for repairs or weigh replacement versus patching.
It explains how vehicle type, part quality, and labor influence cost, and outlines risk factors: safety, emissions compliance, and long-term value.
Readers learn which diagnostics to prioritize, when temporary fixes are reasonable, and when replacement avoids repeated expenses.
Practical tips include documenting damage, comparing OEM versus aftermarket parts, and planning for seasonal promotions or bulk-service discounts.
Quick Answer: Average Exhaust Pipe Replacement Cost
Typical replacement costs for an exhaust pipe usually range from a modest parts-only price to several hundred dollars when labor is included.
Price variation depends on vehicle make and model, pipe material, damage extent, and regional labor rates.
Home repair can lower expenses for mechanically skilled owners, while professional service guarantees proper fit and emissions compliance.
Typical Replacement Costs
Average exhaust pipe replacement costs usually fall between $150 and $450 for most passenger vehicles, including parts and labor.
Typical jobs on compact cars trend toward the lower end, while midsize sedans and small SUVs often occupy the middle range.
Sportier models or vehicles with dual exhausts may push costs higher due to additional tubing and fittings.
Independent shops frequently charge less than dealerships, offering savings on labor rates.
Parts quality—aftermarket versus OEM—affects price but can still fit within this bracket.
Occasional promotions or bundled services reduce outlay, keeping most replacements economical and predictable.
Factors Affecting Price
Moving from general cost ranges to what drives those numbers, several key factors determine the final price of an exhaust pipe replacement.
Vehicle make and model affect part complexity and availability; luxury or performance cars typically incur higher costs. Pipe material—aluminum, mild steel, or stainless steel—alters price and longevity. Extent of damage dictates whether section repair, full pipe, or system replacement is needed. Labor rates vary by region and shop expertise. Additional components like clamps, hangers, gaskets, and catalytic converters increase parts and labor. Accessibility and rusted bolts can raise labor time, influencing the final invoice.
DIY vs. Professional
How much a homeowner can save by tackling an exhaust pipe replacement depends on skill level, tools, and the vehicle’s complexity. A DIY approach can cut labor costs but requires proper tools, safety precautions, and time; mistakes risk leaks or costly damage. Professional service guarantees correct fitment, warranty, and faster turnaround, typically adding labor costs but reducing rework risk. Vehicle age, rust, and custom exhausts influence the decision. Below is a quick comparison to aid choice:
| Option | Considerations |
|---|---|
| DIY | Lower cost, requires tools |
| Professional | Higher cost, warranty |
| Time | DIY longer |
| Risk | DIY higher |
Exhaust Pipe Parts That Affect Replacement Cost
Several individual components within an exhaust system—pipes, mufflers, catalytic converters, resonators, and clamps—directly influence replacement cost by varying in material, complexity, and labor required.
Material choices like stainless steel, aluminized steel, or mild steel change part prices and longevity.
Catalytic converters are costly due to precious metals and emissions compliance.
Muffler design and resonator tuning affect both price and fitment complexity.
Mounting hardware, gaskets, and hangers are low-cost but necessary.
OEM parts typically cost more than aftermarket alternatives.
Repairers often price out individual components versus full-section replacement to balance immediate expense and long-term durability.
How Labor Rates Change Your Total Bill
Labor rates substantially influence the final cost of an exhaust pipe replacement because they multiply the hours required for diagnosis, disassembly, fabrication, and reassembly.
Shops charge hourly rates that vary by region, certification, and facility overhead; higher rates raise the invoice even when labor time is identical.
Complexity of the job—rusted fasteners, custom bends, welded joints—extends hours and compounds rate effects.
Independent garages often bill less than dealerships or specialty shops.
Mobile technicians may charge premium convenience fees.
Requesting itemized estimates, comparing labor rates, and asking whether time includes testing or road checks helps predict and control the total bill.
Typical Replacement Cost Ranges: Compacts, Sedans, SUVs, Trucks
After labor rates are considered, the next cost driver is vehicle type: compact cars, sedans, SUVs, and trucks each have typical price bands for exhaust pipe replacement based on part size, access difficulty, and required materials.
Compacts often incur the lowest parts and labor costs, commonly $150–$350 for a simple pipe section. Sedans typically fall in a moderate range, about $200–$450, reflecting slightly larger components.
SUVs usually cost more, roughly $300–$700, due to larger pipes and firmer mounting. Trucks can reach $350–$800 or higher for heavy-duty tubing. Prices vary by region and parts quality.
Why Trucks And SUVs Usually Cost More To Repair
Larger exhaust components on trucks and SUVs raise material and replacement costs compared with smaller passenger cars.
Heavier assemblies and higher ride heights also increase labor time and may require additional equipment or helpers. As a result, parts for these vehicles tend to be more expensive and repairs more time-consuming.
Larger Exhaust Components
Because trucks and SUVs have longer wheelbases and higher ground clearance, their exhaust systems use bigger and heavier components that cost more to replace. Larger pipes, reinforced hangers, and oversized mufflers increase material costs and often require specialty parts. Parts availability and aftermarket options can vary, pushing prices higher for OEM-grade replacements. The weight and size also influence shipping and part handling, adding indirect expense. Owners should compare quotes and consider durable aftermarket alternatives when appropriate to balance cost and longevity.
| Component | Typical impact |
|---|---|
| Pipes | Higher material cost |
| Mufflers | Larger, pricier units |
| Hangers | Reinforced designs |
| Shipping | Increased fees |
Heavier Labor Requirements
Servicing trucks and SUVs typically guarantees more labor hours due to their size, weight, and component placement. Technicians often need extra time to access exhaust sections mounted under higher ground clearance, within strengthened frames, or behind protective shields.
Heavier vehicle weight complicates jacking and secure support, requiring specialized lifts or additional personnel. Longer exhaust runs and multiple attachment points increase disassembly and reassembly steps.
Rusted fasteners on older utility vehicles add effort for removal. Alignment and fit checks take longer to guarantee proper clearance and vibration control.
These factors translate directly into higher labor charges compared with smaller passenger cars.
Higher Parts Costs
A significant reason trucks and SUVs cost more to repair is that their replacement parts are typically larger, heavier, and built to higher strength specifications than those for passenger cars. Manufacturers use thicker-gauge steel, reinforced mounting brackets, and larger-diameter tubing to withstand towing, off-road use, and heavier loads.
These materials increase raw costs and shipping expenses. Aftermarket options are fewer, and OEM components often command premium pricing.
Additionally, sensors, catalytic converters, and exhaust tips are frequently vehicle-specific, reducing interchangeability. As a result, parts procurement alone raises the total repair bill for exhaust systems on trucks and SUVs.
How Age And Mileage Raise Exhaust Costs
With increasing years and accumulated miles, exhaust systems face progressive wear that raises replacement costs: metal corrodes, joints loosen, and heat cycles weaken pipes and components.
Rusted sections often require larger repairs or full assemblies rather than simple patching, increasing parts and labor. Higher mileage vehicles frequently show flange damage, seized bolts, and catalytic converter degradation, all of which add expense.
Diagnostic time rises when intermittent leaks mimic other faults. Labor escalates when underbody access is impeded by rusted fasteners or previous repairs.
Consequently, age and mileage correlate with more extensive, costlier interventions and shorter remaining service life.
OEM Vs Aftermarket Exhaust Pipe Pricing Compared
The comparison between OEM and aftermarket exhaust pipes hinges on price variations across brands, with name-brand OEM parts typically costing more than many aftermarket alternatives.
Fitment and compatibility differences can affect installation complexity and potentially add labor costs if modifications are required.
Warranty length and perceived durability also influence long-term cost considerations when choosing between OEM and aftermarket options.
Cost Differences Per Brand
Cost differences between OEM and aftermarket exhaust pipes hinge on brand reputation, material quality, and warranty coverage.
Premium OEM brands typically command higher prices due to original-spec design, certified materials, and longer warranties.
Reputable aftermarket manufacturers can match or exceed OEM quality at varying price points, often offering stainless steel options, performance tuning, or corrosion-resistant coatings that justify mid-to-high price tiers.
Budget aftermarket parts undercut both with lower-cost metals and limited guarantees, reducing upfront cost but increasing long-term risk.
Buyers evaluate brand track records, material grade, and warranty terms to balance initial expense against anticipated durability and replacement frequency.
Fitment And Compatibility
In evaluating fitment and compatibility, OEM exhaust pipes generally offer guaranteed exact matches to a vehicle’s factory dimensions, mounting points, and emissions components. Aftermarket options vary: some are direct-fit, others require modifications or adapters. Compatibility affects installation time, parts needed, and potential tuning.
- OEM: precise fit, straightforward installation, plug-and-play for sensors.
- Direct-fit aftermarket: lower cost, similar mounting with minor adjustments possible.
- Universal aftermarket: flexible routing, often requires cutting, welding, or brackets.
Buyers should confirm part numbers, sensor locations, and emissions gear alignment before purchase to avoid unexpected labor or additional parts.
Warranty And Durability
Frequently, warranty length and materials quality are the primary differentiators between OEM and aftermarket exhaust pipes. OEM units typically carry longer, manufacturer-backed warranties and use grade-specific steels or aluminized coatings matched to original specifications, supporting predictable longevity.
Aftermarket options vary: budget parts often offer shorter warranties and thinner metals prone to corrosion, while premium aftermarket brands may match or exceed OEM durability with stainless steel and multi-year guarantees. Buyers should compare warranty terms, corrosion coverage, and stated material grades rather than price alone.
Proper installation and local climate also affect lifespan, so warranty exclusions and transferability merit careful review.
Single Vs Dual Exhaust: How System Type Affects Price
Choosing between a single and dual exhaust system markedly influences overall replacement expenses because each configuration differs in components, labor, and materials required.
A single exhaust typically costs less due to fewer pipes, hangers, and a single muffler; installation is quicker. Dual systems double many parts, increase muffler and tip counts, and often require more complex manifolding and alignment, raising labor time and shop rates.
Vehicle performance goals and space constraints also affect choices. Consider these cost-driving differences:
- Parts count: dual systems require more pipes, clamps, and hangers.
- Labor: routing and welding take longer for dual setups.
- Complexity: fitment and tuning can increase shop time.
Material Choices: Steel, Aluminized, Stainless – Cost Differences
After comparing single and dual systems, attention turns to the materials that make up an exhaust: plain steel, aluminized steel, and stainless steel each bring distinct cost and durability profiles.
Plain steel is cheapest upfront but corrodes fastest, suiting low-cost short-term fixes.
Aluminized steel costs moderately more, offers better corrosion resistance via an aluminum-silicon coating, and balances price with longevity for many vehicles.
Stainless steel demands the highest initial investment yet resists rust best, often paying off through extended service life and lower replacement frequency.
Material choice affects parts cost, expected lifespan, and long-term value; selection depends on budget and longevity priorities.
Repairing A Section Vs Replacing The Whole Exhaust Pipe
Weigh repair against replacement by comparing the extent of damage, cost, and expected remaining life of the system.
A localized hole or corrosion near a hanger often favors section repair: lower immediate cost and faster turnaround.
Extensive rust, multiple weak points, or failed flanges usually justify full-pipe replacement for durability and fewer recurring repairs.
Labor access, part compatibility, and emissions compliance influence the decision.
Consider warranty differences—section repairs may not extend overall system life.
- Repair: cheaper short-term, quicker fix.
- Replace: higher upfront, longer service life.
- Decision: balance inspection findings, costs, and longevity.
Typical Exhaust Pipe Parts List And Unit Prices
Deciding between a localized repair and full-pipe replacement often leads owners to compare parts and prices; a clear parts list helps quantify those options.
Common items include tailpipes ($30–$120), mid-pipes ($50–$200), and resonators ($40–$180).
Mufflers range widely, typically $60–$300 depending on material and performance.
Clamps and hangers cost $5–$25 each; gaskets and flanges run $8–$45.
Flexible joints (flex pipes) are $40–$250.
Catalytic converters are the most expensive, from $150 to over $2,000.
Stainless components command premiums; aftermarket parts undercut OEM prices but may vary in fit and longevity.
Average Shop Labor Hours For Exhaust Pipe Work
Estimate labor times for exhaust work by breaking jobs into common tasks: remove and replace a tailpipe (0.5–1.0 hour), replace a muffler or resonator (0.8–1.5 hours), swap a mid-pipe or flex joint (1.0–2.5 hours), and install a catalytic converter (1.5–3.5 hours).
Typical totals depend on vehicle access, rust, and technician experience. Shops quote flat hours based on these ranges; diagnostic time may add a small increment. Customers should compare labor rates and ask for estimated hours.
Common scenarios include:
- Simple tailpipe or muffler replacement
- Mid-pipe assemblies on compact cars
- Converter swaps on SUVs and trucks
How Welds, Clamps, And Hangers Add To Cost
Weld quality influences both labor time and the likelihood of future repairs, with stainless or precision TIG welds costing more than quick patch jobs.
Clamp selection ranges from inexpensive band clamps to heavier-duty V-band or OEM-style clamps that raise parts cost.
Worn or damaged hangers increase labor for replacement or fabrication and can necessitate additional parts.
Weld Quality Impact
Often, the quality of welds, clamps, and hangers directly affects both the upfront labor costs and long-term reliability of an exhaust repair. Poor welds increase rework and leaks, raising labor hours; superior welds require skilled technicians and specialized equipment, increasing hourly rates but reducing future failures. Material choice and access complexity influence time and cost. Inspection and corrective welding add diagnostic and labor charges yet extend service life, lowering total ownership expense.
- Durable welds reduce repeat visits and warranty claims.
- Sloppy joints cause exhaust leaks and noise, prompting replacements.
- Professional welding minimizes rust-prone gaps and stress points.
Clamp Types And Costs
How do clamp selection and quality influence total exhaust repair costs? Different clamp types—band, U-bolt, V-band, and spring—vary in price and suitability.
Band and U-bolt clamps are inexpensive but may need replacement sooner, increasing lifetime cost. V-band clamps cost more up front yet simplify future disassembly and reduce leak risk.
Heavy-gauge stainless clamps resist corrosion, raising parts expense but lowering repeat repairs. Labor rises with hard-to-access or specialty clamps due to fitting time. Proper clamp choice balances initial outlay against durability and serviceability, affecting both immediate invoice and longer-term maintenance expenses.
Hanger Condition Effects
Exposed to heat, vibration, and road debris, exhaust hangers and their attachment points markedly affect repair scope and cost. Corroded hangers often require replacement; broken rubber mounts may be inexpensive but time-consuming. Welded hangers raise labor and welding-supply costs, while seized clamps can necessitate cutting and new hardware. Mechanics factor hanger accessibility and bracket condition into estimates, increasing prices when brackets are rusted to the chassis.
- Replacement hangers: low parts cost, moderate labor if accessible
- Weld repairs: higher labor, welding materials, and safety time
- Seized clamps/brackets: cutting, new clamps, potential bracket fabrication
How Rust And Corrosion Drive Up Repair Time
When corrosion sets into an exhaust system, it bonds components together and obscures fasteners, increasing the time technicians need to access and remove parts. Rusted joints require penetrating oils, extra heating, cutting, or grinding to separate sections. Seized bolts and flanges often necessitate replacement hardware or custom fabrication, adding labor.
Corrosion weakens mounting points, so hangers and brackets may fail during disassembly, requiring additional repair steps. Inspections take longer to identify hidden deterioration and leaks. Overall, technicians allocate more diagnostic and hands-on time for corroded systems, translating directly into higher labor costs and longer shop stays.
Geographic Price Variations And Why They Matter
Across regions, exhaust pipe replacement costs can vary substantially due to differences in labor rates, parts availability, and local taxes or environmental fees.
Geographic factors influence total price and choices for repair providers; urban areas often charge more labor while rural areas may face limited parts supply.
Consumers benefit from comparing local quotes and considering mobile mechanics or independent shops.
- Urban vs. rural labor rate differences affect hourly totals.
- Local parts availability can lengthen wait time and raise markup.
- State or municipal environmental fees and taxes alter final invoices.
Understanding location-based variance helps plan budget and select cost-effective options.
Seasonal Factors That Affect Shop Availability And Price
Seasonally, demand for exhaust repairs spikes at predictable times—cold months bring corrosion-related failures while spring and fall see increases after long road trips—so shop schedules and prices shift accordingly.
Winter increases labor and part costs as garages handle salt-related rust and emergency fixes; limited bay availability can extend wait times.
Summer vacation periods and inspection seasons produce booking surges that may prompt higher quotes or expedited-service fees.
Off-peak months often yield discounts, promotions, and greater technician availability.
Vehicle owners who plan replacements during slower periods can access better pricing and scheduling flexibility, reducing total out-of-pocket expense.
Get An Accurate Local Quote Fast
How quickly can a vehicle owner secure a reliable, localized estimate for exhaust replacement? A concise approach speeds accuracy: gather vehicle year, make, model, VIN and describe symptoms or visible damage. Contact nearby shops with this info to get targeted quotes and ask about parts brand, labor rate, and warranty terms. Use photos to clarify issues.
- Provide VIN, engine size, and recent repair history.
- Share clear photos of the exhaust and any rust or holes.
- Request a written estimate with parts breakdown and expected turnaround.
This method yields fast, comparable local quotes without unnecessary back-and-forth.
How To Read And Compare Exhaust Repair Estimates
When comparing exhaust repair estimates, the vehicle owner should focus on three core elements: parts, labor, and warranty.
Each estimate should list part types (OEM or aftermarket), unit costs, and whether catalytic converters or sensors are included.
Labor should show hours and hourly rate, plus diagnostic or shop fees.
Warranties must specify duration, coverage limits, and transferability.
Taxes and disposal fees belong as separate line items.
Comparing totals alongside itemized details clarifies value differences.
Choosing the lowest total without matching components or warranty often leads to unexpected expenses; accuracy in line-item comparison prevents surprises.
Red Flags On Estimates That Signal Overcharging
Unexplained high labor charges, vague part descriptions, and pressure to decide quickly are common warning signs that an estimate may be inflated.
A clear estimate should itemize labor hours and rates, identify parts by name or part number, and allow time for comparison.
When any of these elements are missing or rushed, seeking a second opinion is advisable.
Unexplained High Labor
Why does a labor line sometimes dwarf parts costs without clear justification? A technician-neutral review reveals estimates that list high hours with little task breakdown. This can signal padding, inefficiency, or unfamiliarity with the vehicle. Consumers should question unclear labor totals and seek itemized explanations before authorizing work.
- Ask for specific tasks and hourly rate to verify billed hours.
- Compare quoted labor time to factory labor guides or multiple shops.
- Request technician notes or a walk-through to confirm complexity.
Transparent estimates protect budgets; unexplained labor inflation is a practical red flag worth challenging promptly.
Vague Part Descriptions
A vague parts line—labeled simply as “exhaust component” or “hardware kit” without part numbers, brand, or quantity—is a clear warning sign on an estimate.
Estimates lacking specifics prevent verification of part quality, reuse of existing pieces, or appropriate pricing comparisons.
A precise estimate lists part numbers, OEM or aftermarket designation, brand, unit cost, and quantity.
This detail enables the vehicle owner to check warranty coverage, search for lower-cost alternatives, or authorize specific replacements.
When descriptions remain generic, request clarification or a written parts list before approving work to avoid unexpected upcharges and guarantee transparent, fair billing.
Pressure To Decide Quickly
After noting vague part descriptions, attention should turn to the timeline pressure often applied when estimates are presented. A rushed deadline can be a tactic to prevent comparison shopping or to hide alternative solutions. The detached reader should watch for firm deadlines, limited-time discounts, or insistence on immediate approval.
Clear signs include inconsistent explanations for urgency and refusal to provide written estimates to take away. To summarize common pressure tactics:
- “Must approve now” claims tied to fleeting discounts
- Deadlines based on shop convenience rather than vehicle safety
- Reluctance to supply a plain, itemized written estimate
Pause, verify, and seek alternatives.
When A Muffler Shop Is Cheaper Than A Dealership
Independent muffler shops often charge less than dealerships for exhaust work because lower overhead, simpler labor structures, and flexible parts sourcing allow them to undercut factory prices while still providing competent repairs.
They focus on exhaust systems, enabling faster diagnosis and targeted labor rates.
Parts may be aftermarket or salvaged, reducing cost while maintaining function; warranties differ, often shorter or more limited than dealer coverage.
Turnaround times can be quicker, and estimates more transparent.
For routine repairs or non-warranty vehicles, shoppers can save substantially at a specialty shop, though high-tech diagnostics or warranty-protected work may still favor a dealership.
How To Negotiate Price With A Repair Shop
When cost differences between a muffler shop and a dealership are under consideration, customers should prepare to negotiate to secure the best value for exhaust work.
A detached approach: get multiple written estimates, ask which parts are new versus refurbished, and request a clear labor breakdown. Mention warranties and potential price-matching politely. Use timing—weekday slow periods—for leverage. Remain ready to walk away if terms are unsatisfactory.
- Request itemized estimates and compare parts/labor.
- Ask for discounts, coupons, or bundled service savings.
- Confirm warranty terms and shop credentials before agreeing.
DIY Replacement: Costs And Tools You’ll Need
Tackle a DIY exhaust replacement only if the vehicle owner has basic mechanical skills, a safe workspace, and the right tools; otherwise professional service is usually cheaper than the cost of mistakes. DIY cost varies: parts (pipe, clamps, gaskets) typically $50–$300; tools and consumables (jack stands, wrenches, penetrating oil, sealant) $50–$200 if not owned. Time and safety risks should be weighed. Below is a quick tool and cost reference.
| Item | Typical Cost | Notes |
|---|---|---|
| Exhaust pipe | $40–$250 | OEM vs aftermarket |
| Clamps/gaskets | $10–$60 | Replace old hardware |
| Tools/safety | $50–$200 | One-time purchase |
| Labor (self) | Free–$0 | Time cost and risk |
Step-By-Step Overview For DIY Exhaust Pipe Replacement
The section outlines the essential tools and safety gear needed to work beneath a vehicle. It then describes the steps for removing the old exhaust, including loosening clamps and addressing rusted hangers.
Finally, it covers installing new components, ensuring proper fitment and secure mounting before test-running the system.
Tools And Safety Gear
Which tools and safety gear are essential depends on the vehicle and job complexity; however, a concise, reliable kit typically includes jack stands, a hydraulic jack, safety glasses, mechanix-style gloves, a pry bar, a ratchet set with metric and SAE sockets, penetrating lubricant, exhaust clamps or replacement hangers, and a reciprocating saw or exhaust pipe cutter for rusted sections.
Protective clothing, a face shield for cutting, and ear protection reduce injury risk. A fire extinguisher and adequate ventilation are prudent. Proper illumination and a magnetic tray prevent lost fasteners. Recommended essentials:
- Jack stands, jack, and wheel chocks
- Safety glasses, face shield, gloves, ear protection
- Ratchet set, penetrating oil, pipe cutter
Removing Old Exhaust
Begin by securing the vehicle on level ground, raising it with the jack, and placing it on jack stands; this guarantees stable access to the exhaust system before any work begins.
Inspect hangers, clamps, and flange connections to determine which fasteners need penetrating oil and heat.
Support the exhaust with a secondary jack or stand.
Loosen and remove bolts, cut rusted sections with a reciprocating saw if necessary, and detach hangers using pry tools or hanger pliers.
Label removed parts and retain nuts, bolts, and clamps if reusable.
Clean mating surfaces and inspect for damage before proceeding to replacement.
Installing New Components
With the vehicle securely supported and old components removed, the installer aligns new sections starting at the forwardmost connection and works rearward, fitting pipes, mufflers, and clamps in sequence to guarantee proper fit and clearance.
The process emphasizes hand-tightening fasteners initially, verifying hanger alignment, and adjusting joint locations to prevent contact with chassis or heat-sensitive parts.
After tentative assembly, all joints receive final torque and any necessary sealant or gasket material.
The system is then lowered to road height for a final clearance check before test-starting.
- Verify hanger positions and rubber isolators
- Torque clamps to spec
- Inspect for leaks and rattles
Safety Precautions For DIY Exhaust Work
Always prioritize safety when performing DIY exhaust work, since the job involves heat, sharp metal, heavy components, and toxic fumes.
The technician should work on a cooled vehicle, use jack stands on level ground, and block wheels. Gloves, eye protection, and a respirator rated for particulates and fumes reduce injury and inhalation risk. Use proper tools to avoid slips; inspect lifting equipment and follow torque specifications.
Ventilate enclosed spaces and avoid running the engine in unventilated areas. Dispose of old components and fluids per local regulations.
If tasks exceed skill or require cutting near fuel lines, seek professional help.
Common DIY Mistakes That Increase Cost Later
Attempting exhaust repairs without proper preparation often creates avoidable expenses down the road. Common DIY errors accelerate wear, cause leaks, or require part replacement, increasing total cost. Neglecting correct tools or torque specs can strip bolts, while improper sealants or misaligned pipes stress connections. Skipping inspection of related components masks hidden damage that later demands more work.
- Using wrong tools or overtightening fasteners, leading to broken hardware and extra parts.
- Applying incompatible sealants or clamps, resulting in leaks and premature replacement.
- Failing to check hangers, mounts, or adjacent systems, hiding future failures and costs.
When To Hire A Pro Instead Of Doing It Yourself
When rust has eaten through multiple sections or hidden damage is suspected, professional assessment is recommended.
Tasks requiring welding or replacement of structural components typically need shop-grade tools and experienced technicians.
Additionally, compliance with emissions rules and safety standards often makes professional service the safer, legally sound choice.
Complex Rust Damage
Severe rust can undermine more than the visible section of an exhaust system, attacking internal flanges, hanger mounts, and neighboring structural members in ways that are not obvious until disassembly. Such complex corrosion often requires diagnosis beyond visual inspection; technicians assess frame integrity, fastener seizure, and hidden perforations.
DIY attempts risk incomplete repairs or unintended damage.
- Recommend professional inspection when rust spans multiple components or attachment points.
- Consider replacement of corroded sections rather than patching when structural parts are compromised.
- Factor in labor for safe removal, corrosion treatment, and proper reinstallation to avoid recurring failures.
Exhaust System Welding
Rust that penetrates welds, flanges, or mounting points often exposes the limits of amateur repairs and leads into decisions about welding versus replacement. A professional is advisable when structural integrity, alignment, or hidden corrosion affect multiple components. Professionals assess stress points, use proper filler metals and techniques, and guarantee lasting seals. DIY welding suits surface cracks on accessible sections but risks poor penetration, leaks, and accelerated failure. Cost versus longevity, tool access, and warranty considerations favor hiring a shop when exhaust supports, catalytic housing, or complex bends are involved.
| DIY indicators | Pro indicators |
|---|---|
| Surface cracks | Multiple failed welds |
| Single section | Flange or hanger damage |
| Easy access | Structural corrosion |
Safety And Regulations
Evaluating local safety codes and emissions regulations determines whether a professional is necessary for exhaust work. A trained technician guarantees compliance with inspections, prevents dangerous fumes, and avoids costly fines. DIY may suit simple clamp replacements, but legal and safety risks rise with structural repairs, catalytic converter issues, or custom fabrications.
- Hire a pro when inspections or emissions testing are required by law.
- Seek professional help for welding, structural mounts, or proximity to fuel lines.
- Consult a certified shop if rust, major leaks, or compromised catalytic components are present to guarantee safe, compliant repairs.
How To Salvage Usable Parts To Lower Cost
Inspect the removed exhaust assembly carefully to identify sound sections—such as mufflers, resonators, clamps, hangers, and short straight pipe segments—that can be cleaned, tested, and reused. Components should be inspected for corrosion, cracks, and internal damage; clamp threads and hanger rubber integrity matter.
Clean metal parts, remove carbon buildup, and pressure-test for leaks where applicable. Match dimensions and flange types to confirm compatibility before reuse.
Salvaged parts reduce material and labor costs when integrated into a partial repair or temporary fix. Record provenance and condition of each item to inform buyers or future maintenance and avoid unsafe reinstallation.
How Warranties On Parts And Labor Affect Value
Warranties on parts and labor often change the effective cost of an exhaust repair by shifting risk from the vehicle owner to the provider. They influence perceived value, repair choices, and long‑term expenses.
Short, clear warranty terms can justify higher upfront prices; generous coverage reduces lifecycle cost and uncertainty.
Exclusions, prorated terms, and transferability matter when evaluating offers. Customers should compare warranty lengths and claim processes before deciding.
- Parts warranty length versus expected part lifespan
- Labor coverage scope, including rework and diagnostics
- Transferability and prorated repairs affecting resale value
Insurance Coverage And Exhaust Pipe Replacement Claims
When an exhaust pipe requires replacement, the vehicle owner may consider filing an insurance claim to recover repair costs. Policyholders should review coverage limits and exclusions to determine what portion, if any, the insurer will pay.
Insurers typically require detailed repair documentation—estimates, invoices, and photos—to process and approve claims.
Filing A Claim
Filing an insurance claim for exhaust pipe replacement requires understanding policy coverage, deductible implications, and documentation needs. The claimant should promptly notify the insurer, gather repair estimates, and document damage with photos and receipts. Timely communication and accurate records streamline approval or denial determinations.
- Provide an itemized repair estimate and mechanic statement.
- Submit photos, invoices, and any police or incident reports if applicable.
- Note deductible amount and whether wear, corrosion, or collision caused damage.
The insurer will assess cause and applicability; the claimant may appeal denials or request clarification on excluded causes to pursue payment options.
Coverage Limits Explained
In evaluating insurance coverage for exhaust pipe replacement, limits define the maximum the insurer will pay and determine how much the policyholder must cover out of pocket. Coverage may be full replacement, partial, or limited to damage from covered perils. Deductibles, policy maximums, and sub-limits for parts or labor influence claim outcomes. Policyholders should verify whether aftermarket parts are allowed and if depreciation applies. Understanding aggregate limits and per-incident caps helps predict liability exposure and avoid surprise expenses.
| Limit type | Effect |
|---|---|
| Deductible | Out-of-pocket before payout |
| Per-incident cap | Max per claim |
| Aggregate limit | Annual total cap |
| Parts sub-limit | Restricts replacement cost |
Repair Documentation Required
For an exhaust pipe replacement claim, insurers require clear, contemporaneous repair documentation to validate the loss and calculate reimbursement.
Documentation should establish cause, extent, and cost, and must be dated and itemized. Photographs before and after, technician notes, and parts invoices strengthen a claim.
Timely submission avoids denials and speeds payment. Policyholders are advised to obtain written estimates from licensed shops and keep all receipts.
- Detailed invoice with labor and parts breakdown
- Photographic evidence showing damage and completed work
- Technicians’ diagnostic notes and estimate comparisons
Accurate records minimize disputes and guarantee fair settlement.
Emissions Regulations That Can Affect What You Must Replace
How do emissions regulations shape what parts of an exhaust system must be replaced?
Local and national emissions rules determine minimum functioning components: catalytic converters, oxygen sensors, and sealed sections often must meet standards.
Inspections can require replacement of any part causing excess emissions or failed tests.
Tamper‑proofing laws may forbid deleted components or aftermarket parts that reduce control effectiveness.
Certified parts and documented repairs are sometimes mandated to pass emissions checks.
Consequently, replacement decisions hinge on regulatory requirements, inspection findings, and vehicle age, not solely on visible damage, ensuring legal compliance and avoiding fines or failed inspections.
How Catalytic Converter Problems Affect Exhaust Pipe Cost
Catalytic converter failures often reduce exhaust flow, which can necessitate additional exhaust work to restore proper performance.
Such failures typically increase repair complexity by requiring diagnostics, possible cutting or welding near the converter, and coordination with emission-control components.
As a result, converter problems can materially raise the overall cost of exhaust pipe repair or replacement.
Reduced Exhaust Flow
A clogged converter creates reduced exhaust flow, which can increase backpressure and strain the engine’s breathing; this change often reveals itself through decreased performance, poorer fuel economy, and unusual exhaust sounds.
Reduced flow forces the exhaust pipe to contend with higher pressures and temperatures, accelerating corrosion and warping sections that otherwise would last longer. Replacement decisions hinge on whether the pipe sustained damage from chronic restriction or sudden failure. Consider inspection results, part condition, and mileage when estimating costs.
- Higher backpressure shortens pipe lifespan.
- Heat escalation promotes rust and joint failure.
- Performance loss can mask pipe issues.
Increased Repair Complexity
Addressing catalytic converter problems often increases exhaust system repair complexity because technicians must evaluate and sometimes replace interconnected components rather than just the pipe itself.
Diagnostic steps expand to include backpressure testing, sensor checks, and inspection for heat or contamination damage that can spread to the muffler, oxygen sensors, or manifold.
Accessibility issues arise when converters are welded or rusted, requiring cutting, fabrication, or replacement of flanges and hangers.
Coordinating parts, welding expertise, and emissions compliance checks lengthen labor and procedural steps.
This layered work elevates logistical and technical demands separate from the direct cost implications discussed later.
Replacement Cost Impact
When converter issues expand the scope of work, the dollar figure for replacing an exhaust pipe can rise markedly. Catalytic converter problems add parts, labor, and diagnostic time, shifting a simple pipe replacement into a multi-component repair. Costs vary with converter condition, vehicle make, and emissions controls.
The shop may recommend replacement or repair, each affecting final price. Consider warranty coverage, aftermarket options, and local labor rates when estimating total expense.
- Parts: converter replacement or repair increases parts costs markedly
- Labor: additional disassembly, welding, and diagnostics add hours
- Emissions: stricter systems often mean higher-priced components
How Performance Upgrades Change Replacement Decisions
If owners pursue performance upgrades, exhaust replacement decisions shift from purely restorative choices to strategic investments that balance power gains, sound characteristics, and durability.
Choices hinge on desired outcomes: improved flow for horsepower, reduced backpressure for torque, or altered acoustics for a sportier note.
Material selection, pipe diameter, and muffler type affect weight, longevity, and engine tuning needs.
Compatibility with forced induction or ECU mapping can demand custom fabrication or upgraded manifolds.
Warranty, emissions compliance, and cost-benefit of marginal gains inform decisions.
Professionals recommend evaluating measurable performance objectives before selecting components to avoid unnecessary expense or compromised reliability.
Budget-Friendly Aftermarket Options That Still Last
Several reliable aftermarket exhaust options deliver lasting performance without premium pricing by focusing on proven materials and straightforward designs.
Choices prioritize corrosion-resistant coatings, simple bends, and replaceable sections to extend life while keeping costs down.
Buyers should match fitment, verify weld quality, and prefer modular pieces that ease future repairs.
- Coated mild-steel systems: lower cost, protective finishes, straightforward replacement parts.
- aluminized pipes and mufflers: balanced durability and affordability for many daily drivers.
- Universal-fit modular kits: adaptable sections, easier installs, and lower long-term maintenance expenses.
When Stainless Steel Is Worth The Extra Cost
Aftermarket aluminized and coated systems can serve most drivers well, but there are clear situations where upgrading to stainless steel justifies the higher price.
Stainless resists corrosion far longer, making it sensible for coastal climates, salted roads, or vehicles kept for many years.
Performance builds benefit from stainless’s strength under higher temperatures and from smoother interiors that marginally improve flow.
Welding and fitment durability reduce long-term repair frequency, offsetting initial expense.
For owners prioritizing longevity, resale value, or frequent spirited driving, stainless steel becomes a cost-effective choice despite steeper upfront cost.
How To Spot Quality Parts Without Overspending
A practical assessment of exhaust parts starts with material and construction, favoring thicker-gauge steel and clean welds that resist corrosion without unnecessary premium features.
Proper fitment—OEM-equivalent dimensions and mounting points—prevents costly adjustments or premature failure.
A clear warranty and transparent return policy offer protection and indicate manufacturer confidence, helping buyers avoid overspending on unproven components.
Material And Construction
Frequently, discerning buyers focus on material and construction first, because these factors determine corrosion resistance, fit, and longevity without necessarily driving up cost.
Quality is signaled by thicker wall tubing, welded joints rather than clamps in stress points, and stainless or aluminized steel appropriate to climate.
Cheaper options use thin mild steel and spot welds prone to failure.
Inspect visible weld consistency and backing plates; prefer mandrel-bent tubing for smooth flow.
Consider cost-effective upgrades that extend life without premium badges.
- Stainless or aluminized steel for corrosion resistance
- Mandrel bends for performance and durability
- Consistent, full welds rather than tack welds
Fitment And Warranty
Material and construction set the baseline, but proper fitment and a clear warranty protect that investment by preventing installation headaches and covering premature failures.
Fitment means precise dimensions, flange types, and hanger locations that match the vehicle; universal parts may need adapters, raising labor and leak risks. Warranty terms signal manufacturer confidence—look for multi-year coverage, corrosion protection, and transferability. Verify part numbers against OEM references, read user reviews for real-world fit, and prefer sellers who offer return policies and installation support. Balancing accurate fit and solid warranty reduces long-term costs and avoids repeated replacements or unexpected shop bills.
How To Extend Exhaust Pipe Life To Save Money
Regularly inspecting the exhaust system and addressing minor issues promptly can markedly extend pipe life and reduce long-term costs.
Corrosion, loose hangers, and small leaks accelerate wear; timely repairs and targeted upgrades mitigate these risks.
Using higher-grade materials for vulnerable sections, applying protective coatings where salt or moisture exposure is common, and ensuring secure mounting reduce stress and degradation.
Improved drainage of condensation and avoiding prolonged short trips that trap moisture also help. Consider these actions:
- Replace worn hangers and clamps with corrosion-resistant parts
- Apply heat-resistant, rust-inhibiting coatings to exposed areas
- Upgrade sections to stainless or aluminized steel when practical
Preventive Maintenance Tips That Reduce Replacement Frequency
Routine visual inspections help identify cracks, loose hangers, and early corrosion before they necessitate a full exhaust pipe replacement.
Applying rust-prevention treatments and undercoatings slows corrosion in vulnerable areas, especially in regions with road salt or high humidity.
Together, these actions reduce replacement frequency and lower long-term repair costs.
Regular Visual Inspections
Often overlooked, a quick visual check of an exhaust system can reveal corrosion, loose clamps, holes, and detached hangers before they worsen; performing these inspections at predictable intervals helps owners catch small issues early and extend component life.
Inspections focus on junctions, bends, and suspension points for leaks or movement.
A flashlight and mirror suffice; note any soot, misalignment, or rattles.
Schedule checks after winter, long trips, and before emissions testing. Promptly tighten or mark parts needing attention to avoid accelerated wear.
- Look for visible holes, cracks, or black soot.
- Verify hangers and clamps are secure.
- Check joints for looseness or leaks.
Rust Prevention Treatments
Visual inspections will often reveal early corrosion or damage that can be halted with rust prevention treatments aimed at prolonging exhaust life.
Treatments include applying high-temperature rust-inhibiting paints, ceramic coatings, and underbody sealants to vulnerable sections and joints.
Professional catalytic-friendly sprays and zinc-rich primers reduce electrochemical corrosion; regular reapplication is advised after winter or salt exposure.
Drain plugs, heat shields, and mounting brackets benefit from targeted protection.
Combining treatments with routine cleaning and prompt repair of chips or holes minimizes moisture trapping.
Properly applied rust prevention delays replacement, lowers lifetime costs, and preserves exhaust performance without compromising emissions components.
Best Practices For Winter Care To Avoid Rust Damage
During winter, drivers should take proactive steps to minimize rust on exhaust systems by addressing salt exposure, moisture accumulation, and thermal cycling. Regular rinsing of the undercarriage removes road salt; drying after washes prevents trapped moisture.
Short trips that leave pipes cold encourage condensation, so occasional longer runs help evaporate moisture. Inspections reveal early corrosion at joints and hangers; treat minor rust promptly with appropriate sealants or high-temp coatings.
Store the vehicle in a dry, ventilated area when possible and use splash guards to reduce direct salt impact.
- Rinse undercarriage after salted roads
- Inspect hangers and seams monthly
- Apply high-temp rust inhibitors
How Driving Habits Affect Exhaust Wear And Cost
Regular driving patterns directly influence how quickly an exhaust system wears and how much replacement will cost, because factors like trip length, engine load, and throttle behavior determine exposure to corrosive moisture, heat cycles, and mechanical stress.
Short trips prevent full exhaust heating, promoting condensation and rust. Frequent high-load driving and hard accelerations increase thermal cycling and vibration, stressing joints and hangers. Off-road or salted-road use accelerates corrosion and physical damage. Consistent highway driving at moderate speeds tends to reduce moisture buildup and extend life. Adapting habits—longer warm-ups, gentler acceleration, and avoiding rough surfaces—lowers wear and replacement frequency.
How To Find Trustworthy Shops And Get The Best Value
Readers are advised to verify shop reputation through online reviews, certifications, and word‑of‑mouth recommendations.
They should obtain and compare several local estimates to identify reasonable pricing and scope of work.
Combining reputation checks with written quotes helps guarantee trustworthy service and the best value.
Shop Reputation Check
How can a vehicle owner quickly separate reliable exhaust shops from ones that cut corners? A concise reputation check helps find trustworthy service and fair value.
Focus on verifiable signals: certifications, recent customer feedback, and transparent policies. Verify ASE or manufacturer credentials, read multiple recent reviews for patterns, and confirm written guarantees on parts and labor.
Beware of shops with inconsistent ratings or evasive answers. Use the checklist below when vetting options to save time and reduce risk:
- Certifications and affiliations (ASE, manufacturer)
- Recent customer reviews highlighting consistency
- Clear, written warranties and estimate practices
Compare Estimates Locally
After narrowing options by certifications, recent reviews, and written guarantees, the next step is to compare local estimates to assure fair pricing and proper parts.
The consumer should request itemized quotes from multiple shops, specifying OEM versus aftermarket components, labor rates, and warranty terms.
Inspect shop facilities when possible and verify technician credentials and insurance.
Ask for timelines and for parts return policies.
Watch for unusually low bids that omit critical work.
Balance cost against documented experience and warranty coverage rather than choosing solely on price.
A clear, written agreement prevents surprises and assures the chosen shop delivers the promised repairs.
Questions To Ask Your Mechanic Before Work Begins
Before authorizing work, a vehicle owner should compile a concise list of questions to guarantee the repair scope, costs, timeline, and warranty terms are clear; this minimizes surprises and helps compare estimates from different shops.
The mechanic should be asked to clarify diagnosis details, parts vs. labor breakdowns, expected completion time, and warranty coverage.
Request written estimates and confirm whether OEM or aftermarket parts will be used.
Verify disposal of old parts and any potential additional fees.
Use direct, specific questions to avoid misunderstandings and assure informed consent before work begins.
- Ask for a written parts/labor estimate.
- Confirm warranty length and coverage.
- Request expected completion date and contingency costs.
How To Document Repairs For Resale Value
A clear, organized repair record enhances a vehicle’s resale appeal by proving maintenance history and repair quality.
The owner should keep dated invoices, parts receipts (showing OEM or aftermarket details), and technician notes describing work performed and mileage.
Photographs before, during, and after exhaust work provide visual proof of condition and replacement quality.
Retain warranties and alignment or emissions test results linked to the repair.
Store records both physically and digitally (scanned PDFs, cloud backup) and assemble a concise summary sheet for prospective buyers.
Clear documentation builds trust, justifies asking price, and differentiates the vehicle in the used market.
Cost Examples: Real-World Case Studies By Vehicle Model
Documented repairs not only aid resale but also create a reliable dataset for estimating real-world exhaust replacement costs by make and model. Case studies compiled from independent shops and owner reports show variation driven by part complexity, labor rates, and aftermarket choices. Presented examples illustrate typical ranges and common failure points without prescribing repairs.
- Compact car (e.g., Honda Civic): $250–$450 — mid-pipe rust and gasket replacement.
- Midsize sedan (e.g., Toyota Camry): $350–$700 — catalytic converter and hanger costs dominate.
- SUV/truck (e.g., Ford F-150): $500–$1,200 — longer systems, dual exhausts, and OEM parts increase price.
Quick Checklist To Prepare For An Exhaust Pipe Replacement
When preparing for an exhaust pipe replacement, the owner should assemble the vehicle’s service history, parts preferences (OEM vs. aftermarket), and local labor estimates to set realistic expectations.
Next, verify VIN, engine size, and emissions requirements to match parts.
Inspect the exhaust for visible damage, leaks, and mounting condition; photograph problem areas for technician reference.
Gather necessary documents: warranty, recall notices, and prior repair invoices.
Decide on pickup/drop-off logistics and estimate downtime.
Obtain at least two written quotes and confirm included services and parts warranties.
Prepare payment method and contingency funds for unexpected repairs.
Short-Term Fixes And When They’re Appropriate
Frequently, short-term fixes serve as stopgap measures to restore basic exhaust function until proper replacement can be scheduled. Temporary repairs are appropriate for minor holes, loose clamps, or while awaiting parts, provided they improve safety and emissions enough for short-term driving. They are not a substitute for full replacement when corrosion, structural damage, or failed catalytic components exist.
Typical short-term options include:
- Exhaust tape or high-temperature patch for small perforations.
- Clamp-and-sleeve repairs to reconnect separated sections.
- Rubber hanger replacements to prevent dragging and further damage.
These measures reduce noise and leaks but require follow-up with a permanent solution.
Long-Term Solutions That Minimize Lifetime Cost
Across a vehicle’s service life, choosing exhaust components and repair strategies that prioritize corrosion resistance, durable joints, and proper fitment yields the lowest total ownership cost.
Long-term solutions include stainless or aluminized steel piping, OEM or high-quality aftermarket assemblies matched to vehicle specifications, and welded or high-grade clamp joints to reduce repeat labor.
Proper hangers and heat shielding prevent stress corrosion and premature failure.
Investing in professional installation and periodic inspections catches early wear before escalation. While upfront expenses rise, extended service intervals, reduced leakage, and avoided catalytic converter damage produce measurable lifetime savings and greater reliability.
Smartphone Apps And Tools To Estimate Repair Costs
Compare available smartphone apps and online tools to quickly estimate exhaust repair costs by entering vehicle details, fault symptoms, and local labor rates. These tools provide instant ballpark figures, parts price ranges, and labor-hour estimates, helping owners compare quotes and decide on DIY versus shop service. Reliability varies; cross-check multiple sources and read user reviews. Some platforms link to parts suppliers or independent mechanics for quotes.
- Use apps that allow VIN input for precise parts fitment.
- Prefer tools showing local labor rates and tax estimates.
- Save or screenshot estimates to compare with shop invoices.
Action Plan: Next Steps To Replace An Exhaust Pipe Affordably
When preparing to replace an exhaust pipe affordably, a clear sequence of steps helps balance cost, safety, and reliability.
First, inspect the system to pinpoint damage and determine if patching, a section replacement, or full pipe swap is needed.
Second, collect OEM part numbers, measure lengths, and compare aftermarket options for price versus longevity.
Third, solicit at least three quotes from shops and consider a trusted independent mechanic.
Fourth, evaluate DIY feasibility, required tools, and safety gear.
Finally, schedule work during promotions, join loyalty programs, and retain receipts for warranty or resale documentation.
Conclusion
Replacing an exhaust pipe can be straightforward or costly, depending on parts and labor. For example, a commuter’s 2010 sedan suffered a rusted midpipe; an affordable aftermarket section plus a weekend DIY saved $250 versus a shop quote, restoring quiet and fuel efficiency. With informed choices—comparing parts, labor rates, warranties, and short‑ versus long‑term fixes—drivers can minimize expense while keeping their vehicle safe and compliant.