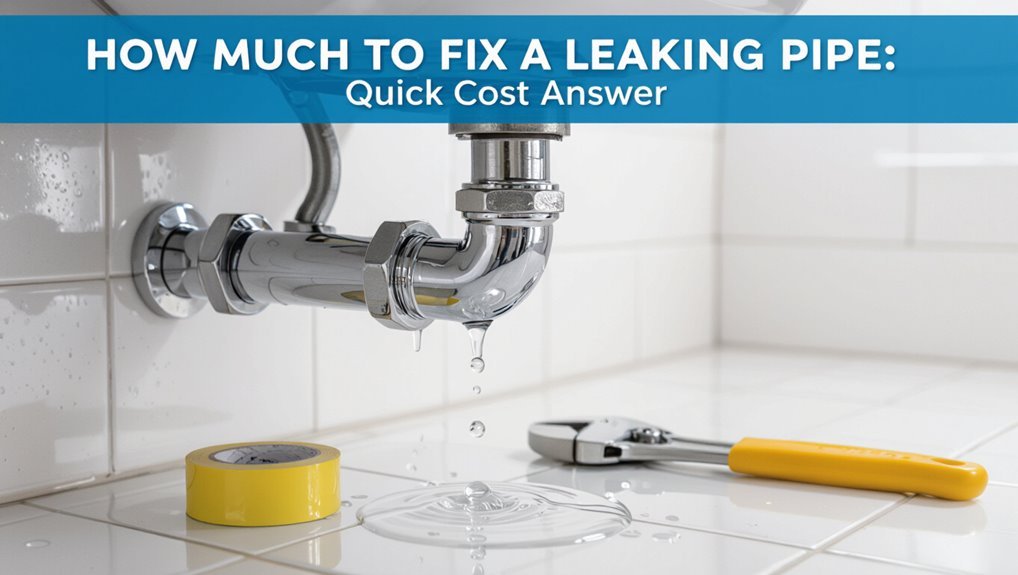
How Much Does It Cost to Fix a Leaking Pipe? Budget Guide & Tips
When it comes to fixing a leaking pipe, the average repair cost ranges from $150 to $1,200. This price varies based on the complexity of the job, with simpler repairs costing less and more challenging ones, such as those involving copper pipes or hard-to-reach areas, costing more. Additional factors like emergency services, permits, and necessary repairs to drywall or flooring can also increase the total cost. Plumbers typically estimate expenses by assessing access, materials, and the extent of damage, providing quotes that include both labor and parts.
Key Takeaways:
- Average repair costs: $150 – $1,200
- Simple fixes are cheaper; complex jobs are more expensive
- Costs can increase due to emergency calls, permits, and additional repairs
- Plumbers evaluate access, materials, and damage to provide quotes
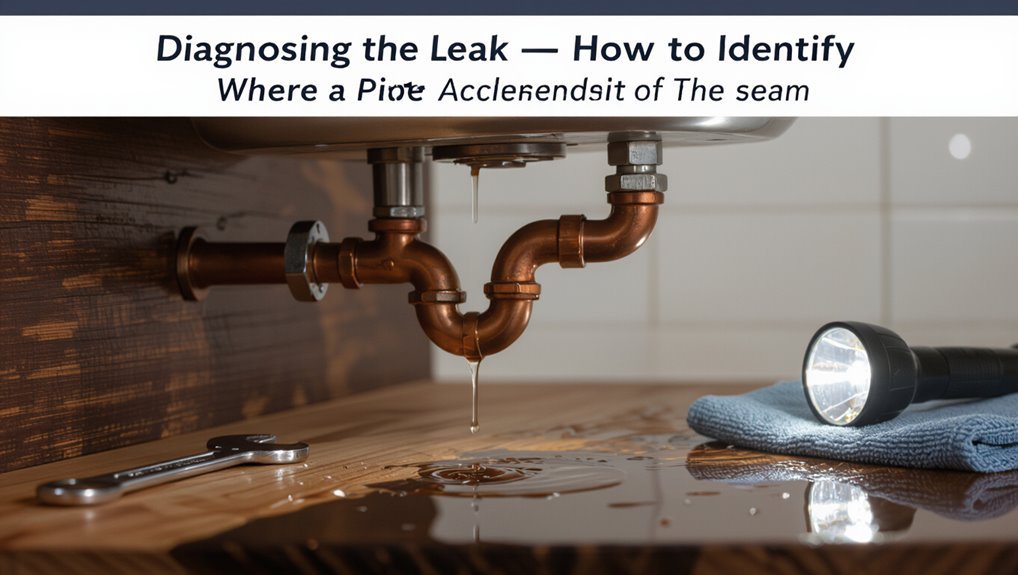
How Much to Fix a Leaking Pipe : Quick Cost Answer
Repairing a leaking pipe typically costs between $150 and $1,200, depending on the leak’s size, location, pipe material, and whether surrounding fixtures or finishes require removal.
The quick answer varies: small accessible pinhole repairs run toward the low end, midline repairs for joints or short sections fall in the middle, and extensive replacements or hard-to-reach plumbing push costs higher. Labor, emergency service charges, and necessary permits influence totals.
Homeowners should obtain an on-site estimate, confirm whether dry wall or flooring must be opened, and ask for itemized pricing to compare options before approving work.
Leaking-Pipe Repair: Typical U.S. Price Range
Typical U.S. repair costs for a leaking pipe commonly range from about $150 for a simple patch to $1,200 or more for extensive repairs or replacement.
Price varies with factors such as pipe material, access difficulty, extent of damage, labor rates, and any required permits or drywall repair.
The following section outlines typical cost brackets and the key variables that drive those differences.
Typical Repair Costs
Across the United States, costs to fix a leaking pipe vary widely depending on factors such as pipe location, damage extent, material, and labor rates.
Typical repairs range from simple patching at $100–$300 to localized pipe replacement costing $300–$1,000.
More involved jobs—sectional repiping, soldering copper, or replacing challenging runs—commonly fall between $1,000 and $3,000.
Major repairs that require wall or floor demolition, rerouting, or full-system repiping can reach $3,000–$10,000 or more.
Most homeowners encounter mid-range expenses around $250–$1,200.
Estimates often include parts, labor, and basic cleanup but exclude remodeling.
Factors Affecting Price
Several key factors determine how much a leaking-pipe repair will cost, including the pipe’s location, material, extent of damage, accessibility, and local labor rates.
Location matters because pipes in walls, under slabs, or in crawlspaces require more labor and possible reconstruction than exposed pipes.
Material influences parts cost: copper, galvanized steel, PEX, and PVC have different prices and repair methods.
Extent of damage ranges from small pinholes to burst sections needing replacement.
Accessibility affects time and equipment; confined or buried pipes raise costs.
Local labor rates, emergency service fees, permits, and required inspections also alter final estimates.
How Plumbers Estimate a Leaking-Pipe Repair Cost
When estimating the cost to repair a leaking pipe, a plumber evaluates the leak’s location, severity, access difficulty, and the pipe material to determine labor, parts, and time required.
They inspect visible damage, test water pressure, and trace hidden leaks using cameras or moisture meters.
Estimates factor emergency vs. scheduled service, required permits, and disposal.
Plumbers separate costs into diagnostic fees, labor hours, replacement parts, and incidental supplies.
They also consider potential collateral repairs (drywall, flooring) and warranty offerings.
A clear written estimate outlines scope, exclusions, timeline, and payment terms so homeowners can compare options.
Common Repair Types and Their Average Costs
Many common leaking-pipe repairs fall into a few predictable categories—pipe patching, section replacement, joint resealing, valve replacement, and fixture repairs—each with typical labor and parts costs that homeowners can expect to see on an estimate.
Section replacement (short copper or PEX runs) often ranges moderately due to material and access.
Joint resealing or soldering is lower cost but depends on joint count and accessibility.
Valve replacement costs vary by valve type and location.
Fixture repairs (faucets, toilet connections) are generally affordable unless concealed behind walls.
Emergency or confined-space work increases labor charges substantially.
Patch Repairs: Cost and When They Work
After outlining typical repair categories, attention turns to patch repairs, a targeted fix for localized leaks. Patch repairs address small holes, pinhole corrosion, or joint seepage without full pipe replacement. Costs are generally low: parts and labor vary by material and access, often a modest flat fee.
Effectiveness depends on pipe condition, age, and pressure; patches are temporary if corrosion is widespread. Professionals assess viability quickly, advising when patching delays larger failures versus when it buys time.
- Relief — immediate leak stop.
- Caution — can be short-term.
- Savings — lower upfront cost.
- Risk — potential recurrence.
Pipe Replacement Segments: Price Per Foot
When replacing pipe segments, costs are most directly influenced by the material selected—copper, PEX, PVC, and steel vary markedly in price per foot.
Labor is typically charged by the foot or hour and can increase with access difficulty or required fittings.
Additional expenses such as disposal, permits, and unforeseen damage should be factored into the per-foot estimate.
Pipe Material Costs
Pipe material cost per foot varies widely based on material, diameter, and designed use. The homeowner should expect PVC to be cheapest, CPVC and PEX midrange, and copper or stainless steel at the high end. Specialty coatings, insulation, and pressure ratings increase price. Quantity discounts, regional supply, and availability also shift per-foot figures. Choosing the right material balances upfront expense against longevity, corrosion resistance, and code compliance. Consider expected lifespan and risk of future leaks when selecting pipe.
- PVC — relief for tight budgets.
- PEX — flexible, modern confidence.
- Copper — durable, reassuring investment.
- Stainless — premium, steadfast security.
Labor Cost Per Foot
Material choice affects labor requirements as much as material cost: installers charge differently for rigid copper runs than for flexible PEX, and accessing damaged sections or working around obstacles raises time on the job.
Labor cost per foot typically reflects hourly rates, route complexity, and required fittings; simpler straight runs require less time and lower per-foot labor than curved or concealed segments.
Urban installations often carry higher labor premiums than rural jobs.
Estimates commonly range by local wage scales and permit needs, so homeowners should obtain line-item quotes showing labor per linear foot, minimum charges, and expected total footage.
Additional Repair Expenses
Although replacement segment pricing is often quoted per foot, actual cost depends on pipe type, diameter, and any specialty fittings required.
The homeowner should account for material variation — copper, PEX, PVC — which shifts price dramatically.
Accessibility, wall or floor cutting, and local code mandates add labor and permit fees.
Small installations may carry minimum charges; long runs can reduce per-foot pricing but increase total expense.
Unexpected corrosion or joint failure often necessitates broader replacement.
Clear upfront estimates and contingency funds mitigate surprise costs and emotional stress during repairs.
- Fear of unknown bills
- Relief from transparent quotes
- Frustration with delays
- Confidence after fixes
Whole-Pipe Replacement Costs by Material
When replacing an entire run, costs vary substantially based on the type of piping chosen — copper, PEX, CPVC, galvanized steel, and PVC each carry different unit prices, labor requirements, and installation complexities.
Copper is costly per foot and requires soldering or compression fittings, raising labor expenses. PEX is economical, flexible, and faster to install, lowering labor costs. CPVC sits between PEX and copper in price and needs solvent welding. Galvanized steel is heavy, prone to corrosion, and expensive to labor-install. PVC is inexpensive for drainage but unsuitable for hot-water lines.
Material choice affects longevity, code compliance, and total project cost.
Hidden Leaking-Pipe Repair Costs (Behind Walls & Under Floors)
How much does a hidden leak really cost? Repairing leaks behind walls or under floors often multiplies expenses: detection, removal of finishes, specialized tools, and restoration. Mold remediation and structural repairs raise stakes. Insurance may cover part, but deductibles and limits apply. Time and disruption add intangible costs.
- Detection: costly acoustic or infrared scans, anxiety over unknown damage.
- Access: cutting drywall or lifting flooring, mess and inconvenience.
- Repair: plumbing, framing, mold treatment—surprising scope and bills.
- Restoration: drywall, paint, flooring replacement—expense and loss of use.
Emergency Leak Repair Pricing and After-Hours Rates
Hidden leaks that require fast intervention often escalate costs further because repairs outside normal business hours carry premium pricing. Emergency call-out fees, higher hourly rates, and haste-related surcharges typically apply to nights, weekends, and holidays.
Rapid-response teams may add travel and priority service charges; diagnostics like thermal imaging or immediate shutdowns can add to the bill. Homeowners receive estimates reflecting urgency and availability; some contractors cap after-hours markup, others double standard rates.
Clear communication about expected arrival time, scope, and temporary fixes helps control expenses. Comparing quoted emergency fees before hiring reduces surprise costs.
Labor vs. Parts: Fair Cost Breakdown
Distinguishing labor from parts creates a transparent foundation for fair pricing on pipe repairs: labor covers the technician’s time, expertise, and overhead while parts cover the physical components replaced or installed.
A clear invoice separates hourly or flat labor rates from part costs, enabling homeowners to compare quotes, spot markups, and authorize necessary work. Labor can fluctuate with complexity or access; parts vary by brand and warranty. Fair pricing reflects reasonable labor rates and honest part markups, not hidden fees.
- Relief — knowing charges are itemized.
- Confidence — comparing line items.
- Trust — fair technician practices.
- Control — informed authorization.
How Pipe Material Affects Repair Cost (Copper, PVC, PEX)
Why does pipe material matter for repair costs? Different materials bring distinct price drivers.
Copper often costs more to replace due to higher material price and soldering labor; corrosion or hard-to-access runs raise expenses.
PVC is inexpensive and quick to cut-and-glue, lowering parts and labor, but solvent-weld fittings and pressure ratings influence choices.
PEX combines moderate material cost with faster installation using crimp or push-fit connectors, reducing labor time; however, specialized tools or fittings can add expense.
Material compatibility, availability of matching parts, and longevity considerations affect total cost estimates and decisions during leak repairs.
Repair Costs by Pipe Location (Kitchen, Bathroom, Basement)
Costs vary significantly by location: kitchen pipe repairs often involve supply lines and appliance connections, bathroom leaks may require work on fixtures and concealed waste lines, and basement pipe fixes can include main line or sump-related repairs.
Each location carries different access challenges and potential for secondary damage that affect labor and materials. Estimating expenses requires considering the specific fixture, pipe type, and extent of any water damage.
Kitchen Pipe Repairs
Kitchen pipe repairs typically involve leaks under the sink, supply line failures behind appliances, or damage to drain and vent lines, each presenting different access challenges and material needs.
Costs vary with pipe type, cabinet removal, appliance disconnects, and whether corrosion or joint failure is found.
Quick fixes like replacing a section of supply line are inexpensive; corroded drain stacks or hidden leaks that require cutting cabinetry increase costs.
Emergency calls raise labor rates.
Homeowners should get an itemized estimate and consider preventive replacement when fittings show wear.
- Panic at discovery
- Relief with a clear quote
- Frustration over hidden damage
- Satisfaction after repair
Bathroom Leak Costs
Bathroom leaks often appear in predictable spots—under sinks, behind toilets, around tubs and showers, and within walls where supply or drain lines run—each location driving different repair approaches and price ranges. Typical costs vary by access, material, and extent of water damage. Simple connector or cartridge replacements run low; hidden wall leaks require demolition and drywall repair, increasing labor. Mold remediation or tile repair raises totals. Homeowners should get itemized estimates and prioritize stopping the source before cosmetic fixes.
| Location | Typical Range | Notes |
|---|---|---|
| Sink | $75–$350 | Quick access |
| Toilet | $100–$500 | Flange/seal issues |
| Shower/tub | $200–$1,200 | May need grout/tile repair |
Basement Pipe Fixes
Basement pipe repairs vary widely depending on whether the issue is in an exposed utility area, within a finished space, or buried under a concrete slab, with each setting affecting access, labor, and materials.
Costs rise when demolition, concrete cutting, or restoration is required; simple visible leaks often demand only replacement fittings and modest labor.
Moisture mitigation and mold remediation add expense.
Homeowners should expect quoted ranges rather than fixed prices and prioritize licensed plumbers for buried or structural concerns.
Timely intervention reduces overall damage and cost.
- Fear of hidden damage
- Relief when fixes are simple
- Frustration over disruptive repairs
- Satisfaction after restoration
How Leak Size and Severity Change the Bill
Leak size and severity directly determine repair complexity and cost: small, slow drips often require simple sealant or a short pipe section replacement, while large ruptures or hidden systemic corrosion need extensive excavation, parts, and labor.
Minor leaks typically incur low parts and labor costs and can be resolved quickly with patching, clamps, or soldering.
Moderate leaks may need section replacement, fittings, or valve work, raising material and hourly charges.
Severe damage involving multiple fittings, pressure-bearing mains, or structural access multiplies time, specialized labor, and disposal expenses.
Emergency calls, after-hours work, and required permits further elevate final invoices.
Diagnostic Tools That Add Cost: Camera Inspections & Pressure Tests
When locating the source and extent of water intrusion, plumbers often rely on diagnostic tools whose costs can add substantially to a repair bill.
Camera inspections reveal hidden pipe damage, guiding targeted fixes but adding equipment and labor charges. Pressure tests confirm leaks and quantify severity; they take time and sometimes repeat passes. Thermal imaging quickly spots temperature differentials tied to moisture but may not pinpoint small breaches. Acoustic listening narrows locations when others fail, useful in complex systems.
Clients face added expense for accuracy, yet these diagnostics can reduce unnecessary demolition and prevent missed leaks.
- Camera inspections
- Pressure tests
- Thermal imaging
- Acoustic listening
When Repairs Require Drywall or Floor Work
When a leak is uncovered behind walls or under floors, professionals assess the extent of hidden damage to framing, insulation, and finishes.
Drywall repair costs vary with patch size and texture matching, while floor work can range from localized subfloor repairs to full replacement depending on material and moisture exposure.
Homeowners should weigh repair scope and material choices when estimating total restoration expenses.
Identifying Hidden Damage
In evaluating hidden damage that necessitates drywall or floor work, a technician looks beyond visible stains to evaluate structural integrity, mold growth, and compromised insulation or subflooring.
Moisture meters, infrared scans, and probe tests reveal decay or rot; documented findings guide scope decisions.
Containment and remediation priorities are set to prevent spread, protect occupants, and prioritize safety.
Estimates reflect access work, removal, and potential replacement of load-bearing components.
- Fear: discovering extensive rot under finished surfaces.
- Relief: confirming damage is localized and repairable.
- Frustration: unexpected mold requiring remediation.
- Assurance: clear scope reduces surprises and costs.
Drywall Repair Costs
Following confirmation of hidden damage, attention shifts to estimating drywall and flooring repairs required to restore affected rooms.
Drywall repair costs depend on hole size, mold remediation necessity, and finishing level; small patching runs low, full-sheet replacement and texture matching increase labor and materials. Contractors often charge by square foot or per panel; accessible areas cost less than ceiling or closet work. Paint matching and priming add modest expense. If moisture led to mold or insulation replacement, remediation and removal raise total. Homeowners should obtain detailed quotes specifying scope, materials, permit needs, and warranty to compare value accurately.
Flooring Replacement Options
Evaluating flooring options becomes essential once drywall or subfloor repairs are underway, because the choice affects moisture resistance, installation method, and total project cost.
Decision-makers weigh durability, cost per square foot, drying time, and resale impact.
Waterproof vinyl or tile lowers future risk; engineered hardwood balances aesthetics and stability; carpet may be quickest but risks mold; concrete resurfacing suits basements.
Contractors should factor labor and disposal into estimates and allow drying buffers to avoid rework.
- Waterproof vinyl — relief from moisture anxiety.
- Tile — confidence in longevity.
- Engineered hardwood — pride in appearance.
- Carpet — comfort with caution.
Slab Leaks and Foundation Repair Cost Differences
Compared with typical foundation repairs, slab leaks present a different scope of work and cost drivers: they often require localized plumbing excavation, concrete cutting and patching, and sometimes complete rerouting of water lines beneath the slab. Slab leak costs concentrate on plumbing labor, concrete restoration, and moisture mitigation rather than large-scale structural stabilization.
Foundation repairs focus on underpinning, wall straightening, and drainage correction, which involve heavier equipment and longer timelines. Insurance coverage and accessibility affect both, yet slab leaks can be quicker but still costly if access is limited or multiple lines are involved. Accurate diagnosis prevents unnecessary foundation work and reduces overall expense.
Typical Permit and Inspection Fees to Budget For
When slab leak repairs or foundation work proceed, permitting and inspections often add a predictable line item to the bill. Municipal permit fees typically range from modest flat rates to several hundred dollars depending on scope. Plan on separate inspection charges—initial, final, and possible re‑inspections—that can accumulate. Specialized permits for sewer or structural changes raise costs further.
Contractors sometimes include permit handling as a service fee.
- Surprise: unexpected municipal surcharges that sting the budget.
- Frustration: repeated re‑inspection fees for missed items.
- Relief: bundled permit handling reduces stress.
- Caution: budget extra for specialty permits.
Average Timeline for Common Leak Repairs
Typical timelines vary by repair type: minor drip repairs often take under an hour, pipe section replacements can require several hours to a day depending on access, and hidden leak remediation may span multiple days due to detection and restoration.
Homeowners should expect longer durations when walls or flooring must be opened and when permits or inspections are required. Scheduling and contractor availability also influence the overall timeline.
Minor Drip Repairs
Often, minor drip repairs require only a short visit from a plumber and can be completed within 30 minutes to 2 hours, depending on access and part availability.
A professional assesses the leak, tightens fittings, replaces washers or valve seats, and tests for residual seepage. Labor is brief; parts are inexpensive.
Unexpected corrosion or hard-to-reach locations can extend time.
Homeowners are advised to provide clear access and shutoff details to speed service.
Typical appointments minimize disruption and prevent escalation. Clear communication reduces anxiety and cost surprises.
- Relief at quick fixes
- Frustration when access is poor
- Confidence after testing
- Urgency to prevent worsening
Pipe Section Replacements
Minor drip fixes may be quick, but replacing a damaged pipe section requires more time and coordination.
Typical timelines vary: a straightforward exposed copper or PVC section swap often finishes in 1–3 hours.
More involved jobs—such as replacing corroded runs, rerouting to access valves, or working around fixtures—typically take half a day.
Multi-story stacks or pipe segments within walls can extend to a full day when access, isolation, and drying are required.
Scheduling, part availability, and permit needs can add days.
Clear communication about scope, materials, and contingencies helps set realistic expectations for completion.
Hidden Leak Remediation
How long will it take to find and fix a hidden leak? A typical assessment and remediation range depends on location and complexity.
Small slab or wall leaks often require 4–8 hours: inspection, targeted access, repair, and drying.
Larger slab, multi-penetration, or corroded systems can span 1–3 days with exploratory cutting, pipe replacement, and restoration.
Extreme cases involving mold or structural work may extend to a week.
- Anxiety: discovery disrupts routine, triggers urgency.
- Frustration: invasive access and noise increase stress.
- Relief: clear diagnosis and repair restore safety.
- Cost-consciousness: time multiplies labor and expenses.
How to Get an Accurate Quote : What to Ask Your Plumber
What specific details should homeowners provide to guarantee a precise repair estimate? Homeowners should describe leak location, pipe material (copper, PVC, galvanized), visible damage, water pressure issues, and when the leak began.
Include photos or videos, access constraints (crawlspace, wall), appliance or fixture affected, and recent plumbing work.
Ask the plumber to confirm needed diagnostics (camera, moisture meter), parts and labor breakdown, permit requirements, and warranty terms.
Request timeline for start and completion, cleanup responsibilities, and disposal of removed materials.
Clarify whether the quote covers ancillary repairs like drywall or flooring to avoid surprises.
Comparing Fixed-Price vs. Hourly Quotes
When evaluating repair estimates, the homeowner should weigh fixed-price bids against hourly charges.
Fixed-price offers provide cost certainty but may include higher contingencies, while hourly rates can be lower upfront yet unpredictable if the job reveals complications.
Attention to what each quote covers and how time is tracked helps compare true value.
Fixed-Price Pros And Cons
Although both pricing methods cover the same job, fixed-price and hourly quotes create different incentives and risk allocations for homeowners and plumbers; a fixed-price quote promises a set total cost for specified work, shifting cost risk to the contractor while offering the homeowner budget certainty.
Fixed pricing rewards clear scopes and efficiency but can lead to conservative bids or dispute over unforeseen conditions.
Homeowners gain predictability; contractors accept variability.
Choosing fixed price requires detailed estimates and written scope to avoid conflict.
Emotional reactions often hinge on trust, fairness, and perceived value.
- Relief at certainty
- Anxiety over hidden exclusions
- Frustration with disputes
- Satisfaction when expectations match results
Hourly Rate Considerations
Often overlooked in conversations about repair pricing, hourly rates shift cost uncertainty onto the homeowner by charging for time and materials rather than a predetermined outcome. Hourly quotes suit unpredictable jobs where access, hidden damage, or diagnostic work affect duration. They can reward efficiency but penalize delays, subcontracting, or slow crews.
Homeowners should request clear hourly, travel, and minimum-charge terms, and ask for regular time logs and material receipts. Comparing an hourly estimate to a fixed-price offer requires factoring in risk tolerance: fixed prices provide predictability; hourly can be cheaper for small, quick repairs but costlier if complications arise.
When a Free Estimate Is Realistic Versus Paid Diagnostics
How can a homeowner tell if an on-site free estimate will suffice or if paid diagnostics are warranted? A clear visible leak, accessible piping, and straightforward repair often justify a free estimate; simple fixes can be accurately quoted on arrival. Paid diagnostics become realistic when leaks are intermittent, concealed, or involve potential structural or system-wide issues requiring camera inspection, pressure testing, or time monitoring. The decision balances cost, risk, and urgency.
- Fear: hidden damage discovered later.
- Relief: quick visible fix resolved immediately.
- Anxiety: unknown source needs specialized tools.
- Confidence: paid testing prevents costly surprises.
How Insurance Handles Leaking-Pipe Repairs and Coverage Limits
Who pays for a leaking-pipe repair depends on the policy’s terms, the leak’s cause, and timely homeowner action. Insurers typically cover sudden, accidental water damage but exclude wear-and-tear, poor maintenance, and gradual leaks.
Coverage may split between structural repairs, appliance replacement, and resulting damage like ruined flooring; limits, deductibles, and sublimits apply. Flood and sewer backups require specific endorsements.
Liability policies differ for rental properties. Claim approval hinges on cause determination and policy language; denied claims can be appealed or reviewed by an independent adjuster.
Owners should be aware of exclusions, limits, and endorsement options when evaluating coverage.
What Homeowners Should Document for Insurance Claims
The guide recommends that homeowners record the date and time of discovery and any actions taken to stop the leak.
Photographs and videos of damage and the leaking area should be captured before repairs begin.
Keep receipts and contractor estimates to support the claim and document repair costs.
Date And Time
When a leak is discovered, homeowners should record the exact date and time of first observation and of any subsequent developments, such as worsening flow, temporary fixes, or professional inspections.
Precise timestamps establish a clear timeline for insurers and contractors, showing prompt action or escalation.
Note times for calls to plumbers, arrival of technicians, and any attempts to shut off water.
Include clock times and dates in logs, emails, and written notes kept with the claim.
- 03/14 07:22 — initial drip noticed; heart sinks.
- 03/14 08:05 — shutoff valve engaged; relief.
- 03/14 09:40 — plumber called; anxiety rises.
- 03/14 12:10 — technician arrived; cautious hope.
Photos And Videos
Alongside timestamps, visual records provide concrete evidence of damage and repairs for insurers. Homeowners should photograph impacted areas from multiple angles, close-ups of leaks, water lines on walls, and affected belongings. Short videos showing active leaks, surrounding conditions, and movement of water add context. Make sure images include identifiable landmarks (room features, meter labels) and scale references (ruler, coin). Store files with filenames indicating date, location, and brief description. Backup to cloud storage and preserve originals. The table below summarizes recommended captures and purpose.
| Capture Type | Purpose | Tip |
|---|---|---|
| Wide room shot | Scope of damage | Include doorway |
| Close-up leak | Proof of source | Use ruler |
| Video of flow | Demonstrate activity | Record duration |
Receipts And Estimates
Why document every receipt and estimate related to a leak? Clear records validate losses, speed claims, and protect homeowners from disputes.
Receipts prove payments for emergency repairs, materials, and temporary lodging.
Estimates show anticipated work, contractor responsibility, and scope changes.
Consistent documentation reduces denials and supports reimbursement for depreciation, labor, and replacement costs.
- Emergency repair receipts — immediate outlays that justify urgency and expense.
- Material invoices — proof of quality and cost for replacements.
- Contractor estimates — scope, timeline, and liability for future disagreements.
- Payment records — tracing funds, partial payments, and final settlements.
When to Call a Plumber vs. DIY: Cost Trade-Offs
Deciding whether to call a plumber or tackle a leaking pipe as a DIY project hinges on risk, skill, and cost: minor drips or accessible fixture leaks may be economical for a competent homeowner to fix, while hidden leaks, corroded pipes, sewage issues, or any situation involving structural damage, gas lines, or complex fittings typically justify professional intervention to avoid higher repair bills and liability.
| Scenario | DIY Viability | Cost Risk |
|---|---|---|
| Visible faucet drip | High | Low |
| Burst pipe behind wall | None | Very high |
| Rusted joint | Low | High |
| Sewage backup | None | Very high |
Safe DIY Fixes That Can Temporarily Stop Leaks
Before attempting any repair, the homeowner should shut off the water supply to prevent further damage.
A pipe repair clamp can provide a quick mechanical seal for small leaks.
For temporary fixes on metal or PVC pipes, epoxy putty can be molded over the breach to stop dripping until a permanent repair is arranged.
Turn Off Water Supply
Shut off the water supply to halt flow and limit damage while preparing a temporary repair. The homeowner locates the main shutoff or a localized valve, turns it clockwise until tight, and checks faucets to confirm water stops. Draining residual pressure reduces spraying when accessing the pipe. Noting valve type and condition helps decide next steps or whether professional help is needed. Communicating the action to household members prevents accidental reopening. Remaining calm and systematic minimizes panic and property loss.
- Relief at immediate control
- Anxiety about unseen damage
- Urgency to act wisely
- Confidence in cautious steps
Use Pipe Repair Clamp
With the water off and pressure relieved, a homeowner can apply a pipe repair clamp to stop or slow a leak as a temporary measure.
Clamps fit over the damaged section, using a rubber gasket and a metal band tightened with bolts to create a seal.
Selection depends on pipe diameter, material and leak location; stainless clamps resist corrosion and are common for copper or PVC.
Surface must be clean and dry for effective contact.
Clamps are meant as interim solutions until a permanent repair or replacement is performed by a qualified plumber, especially for high-pressure or concealed pipes.
Apply Epoxy Putty
Epoxy putty offers a quick, hands-on way to temporarily seal small to moderate pipe leaks by forming a hard, water-resistant patch when cured. It adheres to clean, dry metal, PVC, or copper and cures within minutes to hours, depending on the product.
Users knead until uniform, press over the defect, and smooth edges for watertight contact. It’s a stopgap: long-term reliability varies with pressure, temperature, and movement.
Proper surface prep and following manufacturer cure times improve success. Epoxy putty can restore calm while arranging professional repair, avoiding immediate water damage.
- Relief
- Confidence
- Urgency
- Caution
Tools and Materials for DIY Leak Stops and Their Cost
For a homeowner tackling a minor pipe leak, the right selection of tools and materials determines both effectiveness and cost.
Essential items include epoxy putty ($5–$20), silicone or plumber’s tape ($3–$10), pipe repair clamps ($10–$40), and rubber repair sleeves ($8–$30).
Basic tools—adjustable wrench, pipe cutter, utility knife, and sandpaper—add $20–$60 if not already owned.
Specialized sealants or copper soldering kits raise expenses to $15–$50.
Purchasing quality pieces reduces repeat purchases; many repairs can be completed for $30–$100 total. Prices vary by brand, material type, and local availability.
Cost Risks of Failed DIY Repairs
Failed DIY repairs can mask hidden structural damage such as compromised joists, mold behind drywall, or warped subfloors.
These unnoticed problems often lead to escalating repair expenses when professional intervention becomes necessary. The initial savings from a DIY fix can be wiped out by more extensive remediation and reconstruction costs.
Hidden Structural Damage
Hidden moisture from an improperly repaired leak can quietly weaken framing, joists, and subflooring, turning a minor drip into extensive structural deterioration that is costly to diagnose and remediate.
Unseen rot spreads, fasteners corrode, and load paths shift, compromising safety and resale value. Inspections often reveal staggered damage beyond the repair site; temporary fixes can leave hidden cavities and trapped humidity that promote mold and insect infestation.
Accurate assessment requires invasive probing and structural repairs, increasing costs dramatically compared with prompt professional repairs.
- Loss of home safety
- Sudden collapse risk
- Escalating mold hazards
- Diminished property value
Escalating Repair Expenses
Several homeowners who attempt DIY fixes underestimate how quickly small mistakes compound into far higher costs. When temporary patches fail, water migrates into walls, floors, and insulation, creating hidden damage that demands demolition and replacement rather than simple spot repairs.
Incorrect fittings or improper sealing can force plumbers to undo amateur work before performing correct repairs, increasing labor hours. Delays allow mold and structural rot to spread, raising remediation and insurance deductibles.
Replacing damaged appliances, cabinets, and finishes multiplies material expenses. Ultimately, initial savings dissolve into emergency calls, extended contractor time, and higher-than-expected invoices.
How to Choose a Plumber Who Offers Fair Pricing
When comparing plumbers for a leaking pipe repair, homeowners should prioritize transparent pricing, clear written estimates, and a demonstrated willingness to explain charges; these indicators reduce the risk of surprise fees and guarantee the quote reflects the actual scope of work.
A fair plumber provides itemized estimates, explains labor versus parts, and offers a reasonable timeline. Reputation and documented licenses matter, as do clear payment terms and cancellation policies. Comparing multiple bids prevents overpaying.
Emotional trust grows from professionalism, prompt communication, and visible respect for the home.
- Relief
- Confidence
- Frustration avoided
- Security
Questions to Screen Contractors on Experience and Warranties
Readers are advised to ask contractors about their specific experience with leak repairs, including years in business and examples of similar jobs.
They should request clear explanations of warranty coverage, duration, and any conditions or exclusions.
Comparing documented experience and written warranty terms helps determine reliability and long-term protection.
Contractor Experience Level
Homeowners should screen a contractor’s experience and warranty practices to guarantee the repair will be reliable and properly backed.
Evaluating years in business, frequency of similar repairs, licensing, and insurance clarifies capability. Request references, before-and-after photos, and ask about handling unexpected damage.
Confirm who performs the work — owner, journeyman, or apprentice — and whether subcontractors are used.
Verify responsiveness for follow-up and documented service guarantees without delving into specific warranty language.
- Longevity builds trust and reduces anxiety.
- Proven similar repairs inspire confidence.
- Clear responsibility avoids post-repair disputes.
- Prompt follow-up eases lingering worry.
Warranty Terms Explained
After confirming a contractor’s experience and who will perform the work, attention should turn to warranty terms that define protection after the repair. The reader should evaluate duration, coverage scope, and exclusions. Ask whether labor and materials are covered, if workmanship guarantees exist, and what triggers voiding. Request written terms, claim procedures, and transferability for future owners. Verify manufacturer warranties for replaced parts. Compare contractor promises to industry standards and prefer written, signed agreements. Keep records of estimates, invoices, and communications to support claims.
| Item | Covers | Typical Length |
|---|---|---|
| Labor | Yes/No | 30–365 days |
| Materials | Limited | 1–10 years |
Understanding Warranties and Guarantees for Repairs
A clear understanding of warranties and guarantees helps guarantee that repair work on a leaking pipe provides long-term protection and predictable costs. The homeowner should review scope, duration, and exclusions, confirm whether parts and labor are covered, and get written documentation.
Transferability, workmanship standards, and claim procedures affect future resale and peace of mind. Comparing contractor policies reduces risk of surprise expenses.
- Loss of confidence if coverage is vague.
- Relief when parts and labor are fully covered.
- Frustration when exclusions force unexpected payments.
- Reassurance when claims are simple and prompt.
How Seasonal Demand Raises Plumbing Rates
Understanding warranty terms helps homeowners plan repairs, but seasonal demand can still change what those repairs cost.
Plumbers face peak periods—freezing winters, spring thaws, and holiday months—when call volume spikes and emergency work increases. Higher demand accelerates labor shortages and overtime pay, which firms pass to customers through surge pricing or expedited service fees. Materials may also rise in price when suppliers are strained.
Conversely, off-peak seasons often bring discounts or flexible scheduling. Homeowners who time nonurgent repairs for slower periods or request quotes in advance can minimize exposure to seasonal rate increases.
Regional Price Differences and Why They Happen
Regional price differences for fixing a leaking pipe often reflect variations in local labor rates, with urban areas and regions facing trade shortages typically charging more.
Material costs also vary by location due to supply chains and local supplier markups.
Additionally, permit requirements and building code stringency can increase time and fees, further widening regional cost gaps.
Labor Rate Differences
Often, labor rates for fixing a leaking pipe vary markedly from one area to another due to differences in local wage levels, cost of living, licensing requirements, and competition among contractors.
Labor pricing reflects travel time, emergency availability, union presence, and firm overhead; customers encounter higher hourly charges where skilled technicians are scarce or regulations demand costly certification.
Seasonal demand and rapid urban growth also push rates upward, while rural areas may offer lower nominal wages but longer response times.
Understanding these drivers helps homeowners set realistic budgets and prioritize repairs versus temporary fixes.
- Frustration
- Relief
- Urgency
- Confidence
Local Material Costs
Labor charges are only part of the bill; material costs for pipes, fittings, valves, and sealants can differ widely by location and shape final repair prices. Regional variations reflect supply chains, local demand, and distributor markup. Remote areas often pay more for specialty fittings; urban centers face higher retail premiums but better availability. Seasonal demand, trade tariffs, and local supplier competition also shift prices. Homeowners should compare quotes and source common items themselves when feasible. Anticipating these differences prevents surprises during estimates and helps prioritize parts vs. labor in budgeting.
| Region | Typical Premium | Common Impact |
|---|---|---|
| Urban | Low–Medium | Quick availability |
| Rural | Medium–High | Shipping adds cost |
| Coastal | Medium | Corrosion-resistant parts needed |
Permit And Code Variance
Because local building codes and permitting processes differ across jurisdictions, the cost to fix a leaking pipe can vary considerably beyond parts and labor. Inspectors, permit fees, mandatory upgrades, and inspection schedules influence total expense.
Older homes often trigger stricter compliance or required replacement of adjacent components, raising costs. Emergency permits may cost more; rural areas sometimes require travel premiums.
Homeowners face uncertainty when rules change between neighborhoods or municipalities. Understanding local requirements before hiring helps avoid surprise bills and delays. Emotional responses—frustration, relief, anxiety, or empowerment—often accompany permit interactions.
- Frustration
- Relief
- Anxiety
- Empowerment
Ways to Save: Negotiated Rates, Bundled Jobs, and Off-Peak Scheduling
When homeowners negotiate rates, combine multiple plumbing tasks into a single visit, or schedule work during slower hours, they can reduce overall repair costs without sacrificing quality.
Contractors often offer discounts for bundled work—fixing a leak, replacing valves, and addressing related fittings together lowers labor markup and travel fees. Requesting a written quote that itemizes labor and parts enables targeted negotiation.
Off-peak scheduling, such as weekday mornings or slow seasons, may yield lower hourly rates or priority discounts. Clear communication about scope, timing flexibility, and willingness to accept a firm quote can secure better terms while maintaining professional standards.
Low-Cost Alternatives: Water Shutoff, Temporary Clamps, Epoxy
A homeowner can stop water flow quickly by shutting off the main valve to minimize damage and buy time for repair.
Temporary clamps or rubber patches provide short-term sealing for small leaks until a professional replacement is arranged.
Epoxy putty offers a hand-applied, short-term fix for cracks but is not a substitute for permanent pipe repair.
Shut Off Main Valve
Before attempting any repairs, the homeowner should shut off the main water supply to stop flow and limit damage. This straightforward action reduces flooding risk, preserves belongings, and gives time to evaluate options.
Locating the valve, typically near the meter or where the line enters the home, is urgent. Turning clockwise usually closes it; use pliers if stiff. After shutting off, drain faucets to relieve pressure and confirm stoppage. Communicate with household members to prevent accidental reopening.
Remaining calm and decisive can avert greater expense and stress until a professional or chosen temporary solution is implemented.
- Panic subsides
- Control restored
- Loss minimized
- Decisions clearer
Temporary Pipe Repairs
With the main valve closed and pressure relieved, attention can shift to short-term fixes that allow time to arrange permanent repairs. Temporary pipe repairs offer low-cost, immediate relief: rubber patches or sleeves secured with hose clamps stop leaks on copper, PVC, or PEX for days to weeks.
Epoxy putty and resin tapes bond to dry surfaces, sealing pinholes and hairline cracks when cured per instructions. Pipe wrap kits provide structural support around damaged sections.
These measures are stopgaps only; prolonged reliance risks failure and water damage. A licensed plumber should assess and perform permanent replacement to guarantee safety and code compliance.
When Replacement Is More Cost-Effective Than Repair
When multiple leaks recur, corrosion is widespread, or repairs would require extensive re-routing, replacement often becomes the more economical choice; it reduces long-term maintenance, eliminates repeated service calls, and restores full system integrity compared with piecemeal fixes that only delay failure.
Decision factors include pipe age, material degradation, hidden damage, and cumulative labor costs.
A full replacement can lower insurance risks and improve property value, while also providing predictable budgeting.
Homeowners should weigh upfront expense against ongoing repair likelihood and potential water damage consequences.
- Relief — no constant worry
- Security — fewer emergency calls
- Confidence — predictable performance
- Value — long-term savings
Cost of Ignoring a Leak
Although a small drip might seem innocuous at first, ignoring a leak quickly multiplies costs through escalating water damage, mold remediation, structural repairs, and higher utility bills.
Left unattended, a minor leak can warp floors, rot joists, and compromise drywall, requiring extensive replacement rather than simple patching. Persistent moisture promotes mold growth, triggering expensive remediation and potential health-related liability.
Undetected leaks inflate water bills and can corrode pipes and appliances, shortening their lifespan. Insurance claims may be denied for neglect, shifting full financial responsibility to the homeowner. Prompt attention minimizes cumulative damages and reduces the likelihood of costly emergency repairs.
Preventive Maintenance Steps That Lower Future Repair Costs
Regularly scheduled inspections and simple upkeep markedly reduce the likelihood of costly pipe failures. A concise preventive plan preserves system integrity and reduces emergency repairs.
Promptly addressing minor drips, insulating exposed pipes, clearing slow drains, and monitoring water pressure prevent escalation. Routine checks catch corrosion, loose fittings, and early leaks before they flood floors or spoil belongings.
Homeowners save on replacement parts, labor surcharges, and secondary damage claims. Consistent maintenance offers peace of mind and predictable budgeting for plumbing needs.
- Fix small drips immediately to avoid escalating damage.
- Insulate pipes to prevent freezing bursts.
- Keep drains clear to reduce pressure buildup.
- Monitor pressure and service valves routinely.
Cost vs. Lifespan: Pipe Material Comparison (Short Summary)
After outlining preventive steps, attention shifts to choosing pipe materials that balance upfront cost against expected service life.
Copper offers long life and corrosion resistance but higher initial expense.
PEX is affordable, flexible, and resists freezing damage, with a solid mid-range lifespan.
PVC/CPVC present very low material costs for drain and cold-water lines, though they can become brittle over decades and are unsuitable for some hot-water or external applications.
Galvanized steel is inexpensive initially but prone to corrosion and shorter functional life.
Selection should weigh replacement frequency, local water chemistry, and budget to optimize total lifecycle cost.
Upgrading Plumbing During a Repair: Pros, Cons, and Costs
When a leaking pipe is being repaired, homeowners often consider upgrading portions of the plumbing to improve performance, extend service life, or address code compliance; this decision requires weighing immediate costs against long-term benefits.
Upgrades can reduce future failures, raise property value, and improve water quality, but they increase current expense and may reveal hidden issues.
Typical upgrades include replacing old materials, rerouting lines, or adding shutoffs.
Costs vary by scope, materials, and labor; getting multiple quotes and prioritizing critical sections helps manage budget.
- Relief: fewer future leaks brings peace of mind.
- Anxiety: sticker shock from unexpected findings.
- Pride: modernized systems feel satisfying.
- Regret: over-improvement can waste funds.
Financing for Major Leaking-Pipe Repairs
Upgrading plumbing during a repair can materially raise the bill, so homeowners who face major leaking-pipe work often need to weigh financing options to cover immediate costs without depleting savings.
Common choices include home equity lines, personal loans, contractor payment plans, and credit cards; each carries different rates, term lengths, and qualification criteria. HELOCs and home equity loans usually offer lower interest but use the house as collateral. Personal loans and cards are unsecured but may cost more. Contractor financing can be convenient yet include markup.
Decisions should consider interest, repayment flexibility, fees, and the repair’s urgency to minimize long-term expense.
How to Estimate Your Out-of-Pocket Total Quickly
Estimate the likely out-of-pocket total by quickly breaking the job into three numbers: the contractor’s repair estimate, applicable permits and material markups, and any temporary fixes or secondary damages the homeowner will absorb.
The homeowner then tallies the contractor quote, adds permit fees and a 10–20% materials contingency, and includes likely short-term fixes (tarps, dehumidifiers) plus an allowance for hidden damage.
Compare this subtotal to insurance deductibles and emergency funds to see immediate exposure.
Use conservative rounding to avoid surprises and document assumptions for later revision when firm bids arrive.
- Shock at the unexpected cost
- Relief from clarity
- Urgency to act
- Control through preparation
Sample Budgets: Small, Medium, and Major Leak Scenarios
Having tallied contractor quotes, permits, and contingencies, the next step is to translate those numbers into concrete sample budgets for small, medium, and major leaks.
A small leak budget covers minor pipe patching, a plumber’s one- to two-hour visit, basic materials, and minimal cleanup — typically low labor and parts, plus a 10–15% contingency.
A medium leak budget includes partial pipe replacement, drywall repair, possible permit fees, longer labor, and a 15–25% contingency.
A major leak budget anticipates full section replacement, structural or floor repairs, significant labor, permits, inspections, and a 25–40% contingency to avoid shortfalls.
Real Cost Examples From Homeowners and Tradespeople
Real-world accounts from homeowners and tradespeople illustrate how scope, access, and timing drive final costs: a homeowner who caught a pinhole leak early paid under $300 for a quick repair and minor drywall touch-up, while another who delayed discovery faced a $6,000 bill after water damage required partial floor replacement and mold remediation.
Tradespeople report similar spread: a straightforward under-sink repair often finishes in under an hour; hidden slab leaks demand excavation and testing.
Emotional impacts—stress, relief, frustration, gratitude—track closely with bills and outcomes.
- Stress from sudden, extensive damage
- Relief after a low-cost fix
- Frustration at preventable escalation
- Gratitude toward skilled, timely tradespeople
Red Flags: Overpriced Bids and Lowball Scams
Why does a simple leak repair sometimes carry a shockingly high or suspiciously low price? Consumers should watch for several red flags.
Excessive bids may include unnecessary parts, vague line items, or pressure to approve immediate work without written estimates. Conversely, lowball offers can mask inexperience, use substandard materials, or add hidden charges later.
Unwillingness to provide references, licenses, or itemized quotes signals risk. Reliable professionals explain diagnostics, present clear scopes, and offer warranties.
Comparing multiple written estimates and checking reviews reduces exposure to inflated or deceptive proposals, protecting budget and ensuring proper repairs.
Checklist to Prepare Your Home Before the Plumber Arrives
Before the plumber arrives, homeowners should complete a brief checklist to speed diagnosis, limit disruptions, and reduce labor time.
A concise, prioritized prep routine helps protect belongings, clarifies access, and reduces anxiety during repairs.
Clear the immediate area around the leak, secure pets and children, and gather any paperwork about past plumbing work or warranties.
Turn off water at the main if safe to do so and note visible damage locations.
Communicate arrival instructions and preferred contact method so the technician can begin promptly.
- Clear work area and remove valuables
- Secure pets and children
- Gather previous plumbing records
- Turn off main water and note leak locations
How to Negotiate Price Without Sacrificing Quality
With the work area prepared and records on hand, homeowners are better positioned to negotiate repair costs without sacrificing quality. They should request itemized estimates, compare at least three reputable contractors, and ask about warranty coverage and parts brands.
Clear priorities—safety, longevity, cost—help guide concessions. Proposals can be adjusted by selecting mid-range materials or scheduling during off-peak times to lower labor rates.
Insist on written guarantees and avoid unusually low bids that lack detail. Communication remains professional and focused on specifics; decisions rest on documented comparisons rather than pressure, preserving workmanship while controlling expenses.
Tools and Apps to Track Quotes, Invoices, and Warranties
Among the practical steps homeowners can take to keep a repair project organized is using dedicated tools and apps to track quotes, invoices, and warranties. These platforms centralize documents, set reminders for warranty expirations, compare contractor bids, and store receipts for insurance claims. Clear records reduce stress, prevent disputes, and support budgeting decisions.
Selection criteria include cross-device sync, secure backups, simple invoice tagging, and exportable reports. Integrating photos and contact details saves time when following up with pros.
Recommended features: automated reminders, search, attachment support, and sharing options to streamline post-repair administration and preserve peace of mind.
- Reduce anxiety
- Gain control
- Avoid surprises
- Protect investment
Quick Decision Flow: Fix Now, Delay With Precautions, or Replace
When a leak is discovered, homeowners must quickly decide whether to fix it immediately, delay while taking precautions, or replace the affected component entirely; that decision hinges on leak severity, safety risks, cost estimates, and long-term consequences.
A clear decision flow assesses location, leak rate, and materials: stop supply if flooding or contamination risk exists; apply temporary patching for slow, nonhazardous drips while scheduling repairs; prioritize replacement for recurrent failures, corroded piping, or failed joints where repairs are unlikely to last.
Include cost comparisons, warranty status, and professional inspection when uncertainty persists to avoid higher future expenses.
Conclusion
Water seeps like time through the house’s bones, a quiet reminder that small cracks can become rivers. A prompt, informed repair—guided by realistic estimates, clear comparisons, and simple precautions—stops the slow undoing. Homeowners who prepare paperwork, ask targeted questions, and weigh patch versus replace keep control of costs and outcomes. With the right choices, the leak becomes a closed chapter and the home steadies again, dry and restored.