How Long Do Copper Pipes Last? Lifespan, Care & Replacement Tips
Copper plumbing typically lasts several decades, with longevity influenced by factors such as pipe type, water chemistry, and installation quality.
Key Takeaways:
- Type K Pipes: 70–100+ years when installed underground.
- Type L Pipes: 50–80 years for interior applications.
- Type M Pipes: 30–50 years for light branch lines.
- Factors that can shorten lifespan include corrosive water, high chloride levels, mechanical damage, poor support, and improper joining techniques.
- To maximize the lifespan of copper pipes, conduct regular inspections, perform water testing, and address repairs promptly.
For further insights on practical signs of deterioration, treatment options, and replacement advice, continue reading.
How Long Do Copper Pipes Last : And When to Replace Them
Most copper plumbing reliably lasts 50 to 70 years under normal water conditions, though factors such as water chemistry, installation quality, and mechanical damage can shorten that span.
Aging shows as greenish or bluish corrosion, pinhole leaks, reduced water pressure, or discolored water.
Regular inspections for visible corrosion, damp spots, and mineral buildup help detect deterioration early.
Replacement becomes advisable when leaks recur, repairs outnumber service life remaining, or when corrosion compromises structural integrity.
Homes with aggressive water chemistry or frequent freeze-thaw cycles should prioritize earlier replacement.
Professional assessments guide timing, balancing repair costs against long-term reliability and safety.
Copper Pipe Types: K, L, and M Explained
After outlining how long copper piping typically lasts and when replacement is warranted, attention shifts to the three common copper tubing types—K, L, and M—which differ in wall thickness, strength, and typical uses.
Type K has the thickest walls, industrial and underground service, and greater resistance to physical damage.
Type L is medium-thickness, widely used for interior plumbing and water distribution, balancing durability and cost.
Type M is thinnest, economical for light-duty applications, often found in residential supply where codes permit.
Identification relies on markings and diameter; fittings and approved applications should follow local plumbing codes and manufacturer guidance.
Lifespan Ranges by Pipe Type and Use
Lifespan for copper piping varies primarily by pipe type and application, with Type K generally lasting longest, followed by Type L, then Type M.
Type K used underground or in high-pressure systems commonly endures 70–100+ years. Type L, typical for residential water lines and radiant heating, often lasts 50–80 years depending on installation stress and mechanical wear. Type M, thinner-walled and used for interior branch lines, typically endures 30–50 years.
Specialty fittings, brazed joints, and thicker-wall variants extend service life. Mechanical damage, improper installation, and external corrosion accelerate failure; proper support and correct sizing preserve expected ranges.
How Water Quality Shortens Pipe Life
Water chemistry directly influences copper pipe degradation, with factors like acidity, dissolved oxygen, chloride content, and mineral hardness accelerating corrosive processes.
Low pH (acidic) water promotes uniform corrosion and pinhole leaks, while high dissolved oxygen fosters pitting and crevice corrosion.
Elevated chloride and sulfate concentrations increase localized attack and stress corrosion cracking risk.
Hard water deposits scale that hides corrosion sites, alters flow, and promotes under-deposit corrosion.
Softened or aggressive waters can leach copper, discoloring water and thinning walls.
Regular water testing, appropriate treatment (pH adjustment, corrosion inhibitors, filtration), and monitoring reduce accelerated deterioration and extend service life.
How Pipe Diameter and Installation Affect Durability
Pipe diameter influences flow velocity and corrosion rates, with undersized lines prone to higher velocities and erosion while oversized lines may encourage stagnation.
Installation quality—soldered joints, proper supports, and correct routing—determines stress points and leak risk over time.
Both factors interact to shape overall durability and maintenance needs.
Pipe Diameter Impact
Several factors influence how diameter affects copper piping durability, with the most significant being flow velocity and the installation practices that accompany different sizes. Larger diameters lower velocity, reducing erosion-corrosion and scale detachment, while smaller diameters raise velocity, increasing wear and localized pitting risk.
Diameter also influences pressure distribution and thermal expansion effects: thin-walled small tubes heat and cool more rapidly, stressing joints. Compatibility with fittings and proper sizing for system demand prevents turbulence and cavitation.
Selecting appropriate diameter for anticipated flow rates, water quality, and system layout optimizes longevity by minimizing mechanical and chemical stressors on the copper.
Installation Quality Effects
In evaluating installation quality effects, attention to joint integrity, support spacing, and alignment determines how diameter-related stresses translate into long-term damage. Properly soldered or brazed joints reduce microleak risk; poorly executed connections concentrate stress and accelerate fatigue, especially in larger-diameter runs.
Correct hanger spacing prevents sagging that stresses fittings and promotes water pooling, which can increase corrosion. Alignment that avoids unnecessary bends minimizes flow turbulence and erosion, particularly at smaller diameters with higher velocities.
Thermal expansion loops or slips accommodate movement to prevent loosened joints. Overall, meticulous installation practices markedly extend service life regardless of pipe diameter.
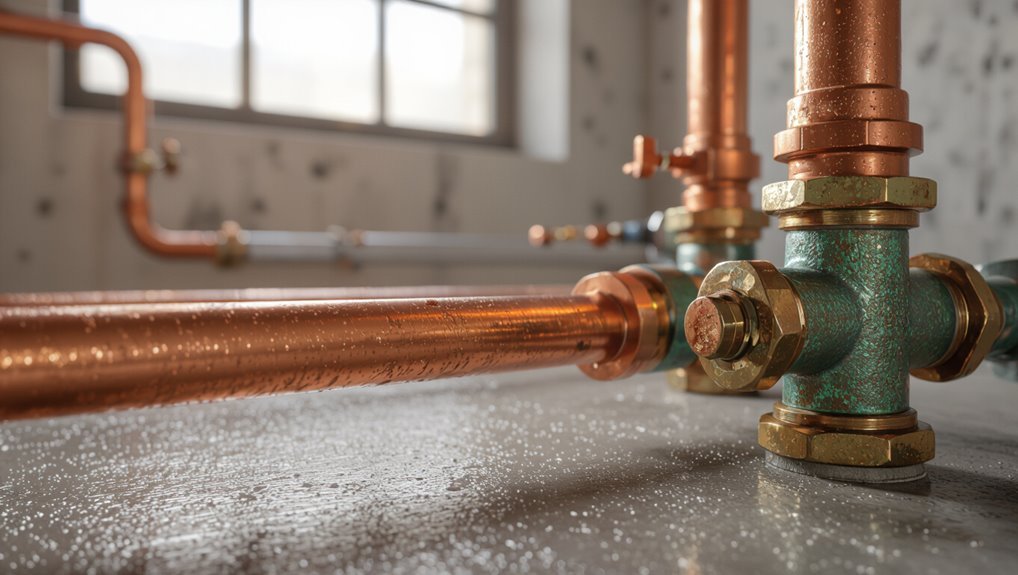
How Corrosion Develops on Copper Plumbing
Corrosion on copper plumbing begins when the metal’s protective surface reacts with water, dissolved gases, minerals, or chemical contaminants, creating localized deterioration that progresses over time.
Electrochemical reactions form cuprous and cupric compounds, accelerated by oxygen, chlorides, ammonia, or acidic conditions.
Galvanic corrosion occurs where copper contacts dissimilar metals, producing anodic dissolution.
Stagnant water, high flow turbulence, or abrasive particulates expose fresh metal, increasing attack.
Water chemistry—pH, hardness, dissolved oxygen, and conductivity—determines corrosion type and rate.
Protective scales may slow advance but can break, shifting uniform to pitting corrosion.
Understanding causes aids targeted prevention and material selection.
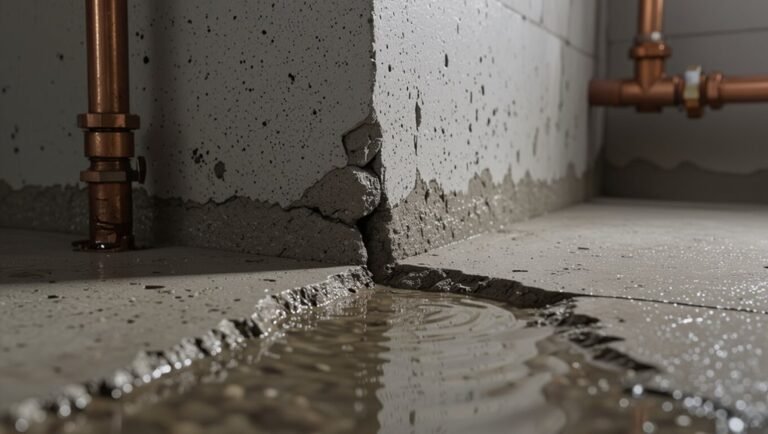
Signs Your Copper Pipes Are Failing
After outlining how corrosion initiates and progresses, attention turns to the practical indicators that copper plumbing is failing. Discolored water, persistent green or blue stains, reduced water pressure, and frequent pinhole leaks signal deterioration. Sudden loud banging or rattling can indicate internal erosion or loose fittings. Increased hematite-like sediment or metallic taste also warns of pipe degradation. Visible corrosion at joints and mounting points often precedes failure. Immediate evaluation by a professional is recommended when multiple signs appear simultaneously.
| Sign | Typical cause |
|---|---|
| Discolored water | Internal corrosion |
| Low pressure | Partial blockage or leak |
| Stains/leaks | External corrosion or pinholes |
Inspect Copper Pipes Yourself (No Plumber)
Before calling a plumber, a homeowner can perform a basic visual and tactile inspection of copper piping to identify obvious signs of wear and leaks. They should scan accessible lines—under sinks, in basements, and crawlspaces—for greenish or bluish corrosion, pinhole leaks, bulging, or discoloration.
Gentle wiping with a cloth reveals active moisture. Joints, soldered seams, and valve connections deserve close attention for drips or mineral deposits.
Listen near fixtures for running water when systems are off. Note any unusual odors.
Photograph findings and record locations; these concise notes assist later professional diagnosis if repairs become necessary.
Routine Maintenance to Extend Pipe Life
Routine maintenance plays a key role in prolonging copper pipe lifespan by catching small issues before they escalate.
Regular leak inspections identify corrosion or joint failures early, while monitoring and treating water quality reduces corrosive agents that accelerate wear. Together these practices minimize repair needs and preserve plumbing performance.
Regular Leak Inspections
Regularly inspecting for leaks helps detect small problems before they escalate into major corrosion or water damage. The homeowner or technician should examine joints, fittings, and exposed runs periodically, noting dampness, verdigris, or sound of dripping. Promptly addressing pinhole leaks and loose connections preserves system integrity and delays replacement. Inspections after temperature swings and following minor shocks (renovations, impacts) are prudent. Documentation of findings guides maintenance priorities and budget planning.
| Inspection Focus | What to Look For |
|---|---|
| Joints & Fittings | Dampness, mineral buildup |
| Runs & Supports | Movement, rubbing, corrosion |
Water Quality Management
Monitoring and managing water quality is essential to slow copper pipe corrosion and prevent deposits that reduce flow and create stress points. Regular testing for pH, hardness, chloride, sulfate, and dissolved oxygen identifies aggressive conditions.
Water softeners, pH adjustment, and corrosion inhibitors correct problematic chemistry; installers should choose methods compatible with plumbing materials and local regulations. Flushing systems after construction or stagnation removes particulates and reduces galvanic risk.
Filtration protects against sediments that abrade pipe interiors. Homeowners and property managers should document treatments, test results, and service intervals to verify effectiveness and adjust maintenance before deterioration accelerates.
Stop and Slow Copper Corrosion: Immediate Fixes
Addressing active copper corrosion quickly can prevent leaks and extend pipe life; immediate fixes focus on stopping chemical attack, sealing compromised areas, and reducing factors that accelerate deterioration.
Technicians first isolate affected sections and flush systems to remove corrosive particulates.
Apply corrosion inhibitors compatible with copper to neutralize aggressive water chemistry temporarily.
Small pinholes or greenish pitting receive epoxy or silicone-based patch kits as a short-term seal until proper service occurs.
Reduce oxygen exposure by tightening fittings and checking for aeration sources.
Monitor repaired areas for recurrence and maintain water chemistry adjustments to slow further corrosion while arranging definitive corrective measures.
When to Repair vs. Fully Re-Pipe
Decisions between repairing sections of copper piping and undertaking a full re-pipe hinge on the extent of damage and the system’s age.
Localized leaks, minor pinhole corrosion, or isolated joint failures typically merit targeted repairs. Widespread corrosion, recurrent leaks, or pipes nearing the end of expected service life generally indicate that a complete re-pipe is the more reliable long-term solution.
When To Repair
Decide to repair individual copper pipes when damage is localized, the remaining system is in good condition, and repair offers a clear short- to mid-term cost advantage over full replacement.
Repair is appropriate for isolated pinhole leaks, singular joint failures, minor corrosion confined to accessible sections, or mechanical damage from renovation.
Technicians should assess pipe age, water chemistry, and adjacent fittings to make certain repairs won’t quickly recur.
Temporary patches, section replacements, or relining can restore function with minimal disruption.
Choose repair when it prolongs reliable service, maintains warranty conditions, and when inspection shows no widespread deterioration or systemic risk.
When To Re-Pipe
When localized faults have been ruled out or repaired but problems persist, consideration shifts to full re-piping. Re-piping is recommended when multiple leaks occur, corrosion is widespread, water quality is compromised, or repairs would be frequent and costly.
Age is a factor: copper systems near or beyond expected lifespan with advancing failure signs justify replacement. Structural changes, renovations, or code compliance needs also prompt re-piping.
A cost-benefit assessment compares aggregate repair expenses, disruption, and long-term reliability against replacement cost. A licensed plumber should inspect, document damage, and provide options, timelines, and estimates to inform the decision.
Cost Factors for Replacing Copper Pipes
Replacing copper pipes involves several cost drivers that determine the total project price.
Labor rates, influenced by local market and complexity of access, often represent the largest expense.
Pipe length and diameter affect material costs; thicker or specialty copper increases price.
Fittings, valves, and soldering supplies add incremental fees.
Permits, inspections, and code compliance vary by jurisdiction and can raise total cost.
Wall, floor, or slab access methods—open-up, chase, or trenching—change labor and repair charges.
Emergency or after-hours work carries premiums.
Disposal of old pipes and warranty or contractor overhead complete the typical cost components.
Compare Replacement Materials: Copper vs. PEX vs. CPVC
After outlining the cost drivers for replacing copper pipes, consideration turns to alternative materials—copper, PEX, and CPVC—each offering distinct performance, installation, and long-term cost profiles.
Copper remains durable, corrosion-resistant in many conditions, and recyclable, but typically costs more and requires soldering skilled labor.
PEX is flexible, easier and faster to install, resists scale and freeze damage, and lowers labor expenses, though it can be vulnerable to UV and certain chemical exposures.
CPVC offers rigidity and higher temperature tolerance than standard PVC, is less expensive than copper, but is more brittle than PEX and requires solvent welding for joints.
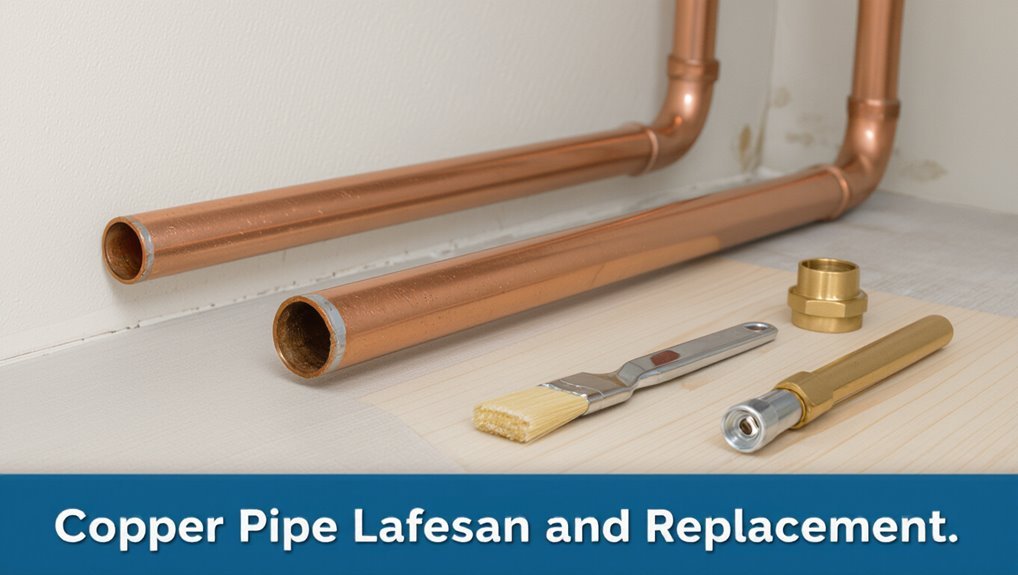
Prepare for a Copper Re-Pipe (Timeline and Access)
For a copper re-pipe, planning for access and shutoff points is essential to minimize disruption and protect finished areas.
The homeowner should understand which walls or ceilings may need openings and confirm main and branch shutoff locations before work begins.
A typical repipe can range from one to several days depending on home size and complexity, so scheduling and clear access greatly affect the timeline.
Access And Shutoff Planning
Begin by mapping the home’s plumbing layout and identifying all shutoff valves, access panels, crawlspaces, and walls that must be opened to reach copper lines.
A clear plan reduces surprises: label shutoffs, note water meter location, and mark areas needing temporary water service.
Coordinate with occupants about timing and safety.
Make certain tools, replacement fittings, and protective coverings are staged.
Confirm power to pumps or heaters can be isolated.
- Anxiety eased when valves are labeled.
- Relief follows a clear access path.
- Frustration drops with staged tools.
- Confidence grows from confirmed isolation.
- Satisfaction comes with minimal disruption.
Typical Repipe Timeline
A typical copper repipe spans several days and follows a predictable sequence: initial inspection and planning, selective demolition to expose lines, removal and replacement of copper piping, pressure testing and repairs, and final restoration of walls and fixtures.
The process begins with mapping existing plumbing, confirming shutoffs and access points, and ordering materials.
Demolition may take a day, depending on wall and ceiling access.
Replacing lines proceeds methodically to maintain water to critical fixtures where possible.
After pressure testing and leak correction, crews restore finishes, reinstall fixtures, and perform a final inspection.
Total time varies with home size and complexity.
Find and Vet a Qualified Copper Plumber
Locate a licensed plumber who specializes in copper work and verifies their credentials before hiring. The homeowner should confirm license, insurance, and specialty experience. Request written estimates, references, and examples of past copper repipes. Vetting reduces surprises and protects the property.
- Relief: knowing paperwork is in order
- Confidence: seeing proven copper projects
- Trust: reliable references who vouch for quality
- Safety: insured professionals minimize liability
- Assurance: clear, written warranties on work
Compare bids for scope and materials, interview candidates briefly, and choose the plumber who demonstrates technical knowledge and transparent communication.
Prevent Future Failures After Re-Piping
After selecting a vetted copper plumber and completing the repipe, homeowners should focus on measures that prevent future failures and extend system life.
Regularly inspect visible piping for corrosion, leaks, and loose fittings; address minor issues promptly to avoid escalation.
Maintain water quality by controlling pH and hardness—install a softener or neutralizer if recommended.
Protect pipes from freezing with insulation and keep ambient temperatures above critical thresholds.
Schedule periodic professional inspections and flush systems to remove sediment.
Use gentle cleaners and avoid chemical drain treatments.
Keep accurate records of work, materials, and warranties for future reference.
Replacement Decision Checklist: Repair, Maintain, Replace
When should a homeowner repair, maintain, or replace copper piping? A clear checklist helps decide: assess leak frequency, water quality, pipe age, repair history, and risk to structure. Prioritize safety, budget, and disruption. Choose repair for isolated pinholes or fittings; maintenance for aging but intact systems; replacement for widespread corrosion, recurring leaks, or incompatible water chemistry. Consider professional inspection and long-term cost comparisons.
- Fear of burst pipes keeps waking them at night.
- Relief when a simple solder fixes a drip.
- Frustration after repeated patches drain savings.
- Confidence returning with a full re-pipe.
- Peace knowing the home is protected.
Conclusion
Copper pipes can outlive their owners—or fail the instant a drop of bad water shows up—so evaluating age, type, and water quality is urgent, not optional. K, L, and M exhibit different stamina; diameter and installation add or subtract decades. A swift, practical re-pipe plan, a vetted plumber, and preventive water treatment stop drama before it starts. When leaks, corrosion, or low pressure mount, replacement becomes inevitable and sensible.