How to Winterize Pipes: Easy Steps to Prevent Freezing & Bursts
To winterize your pipes effectively, follow these essential steps:
- Locate Exposed Lines: Identify pipes in attics, crawlspaces, garages, and exterior walls.
- Insulate: Wrap exposed pipes with foam or closed-cell insulation to prevent freezing.
- Seal Gaps: Close any cold-air gaps around the pipes to minimize exposure to frigid temperatures.
- Disconnect Outdoor Hoses: Remove hoses, shut off outdoor valves, and drain any remaining water from faucets.
- Prepare Irrigation Systems: Follow manufacturer guidelines to blow out or drain your irrigation system.
- Use Heat Sources Safely: If needed, apply heat tape or use portable heaters according to safety instructions.
- Warm Vulnerable Areas: Open cabinet doors to allow warm air to circulate around plumbing in colder areas.
- Monitor for Issues: Check for signs of leaks or ice buildup, and know when to contact a plumber for repairs.
By taking these proactive measures, you can prevent freezing and bursting of your pipes during winter.
Quick Winterize Checklist for Pipes
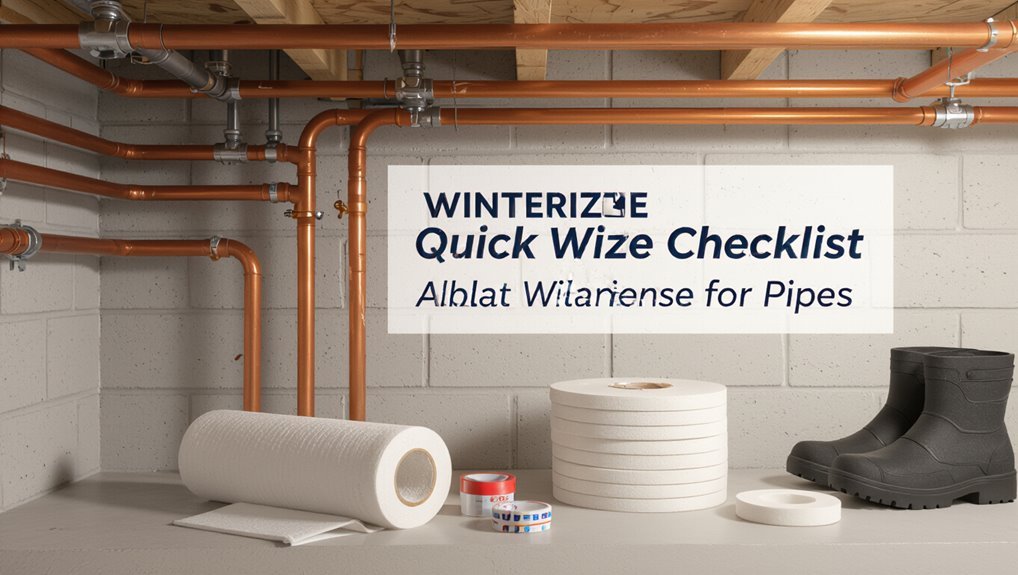
As temperatures drop, a concise checklist helps homeowners protect plumbing from freezing: locate and insulate exposed pipes, shut off and drain outdoor faucets and irrigation lines, open cabinet doors to warm interior pipes, set the thermostat to a safe minimum, and consider leaving a slow drip on vulnerable fixtures; verify shutoff valve accessibility and stock basic repair supplies in case of emergency.
The checklist prioritizes actions by ease and impact: add foam insulation or heat tape to accessible lines, disconnect and drain hoses, protect foundation and crawlspace vents, maintain consistent indoor heat, label shutoffs, and keep contact info for a licensed plumber readily available for rapid response.
Check Which Pipes Are Most at Risk and Where to Inspect
When identifying which pipes are most vulnerable to freezing, focus on location, exposure, and water flow: exterior-facing lines, uninsulated runs in attics, crawlspaces, basements and garages, and any sections that pass through unheated walls or near vents are highest risk.
Inspect systematically, tracing supply and return runs, noting exposed fittings, bends, and joints that cool faster.
Prioritize inspection points:
- Attic and roofline pipes: check insulation gaps and proximity to soffits.
- Crawlspaces and basements: look for uninsulated spans and cold air leaks.
- Exterior walls and garage penetrations: examine seals, insulation continuity, and visible frost signs.
Shut Off and Drain Outdoor Faucets and Irrigation Lines
Outdoor water supplies should be shut off at the exterior valve to prevent line freezing.
Hose bibs must be fully drained and left open to release trapped water.
Irrigation systems require a blowout or professional service to remove remaining moisture from underground lines.
Turn Off Outdoor Valve
Shut the outdoor shutoff valve and fully drain any attached faucets and irrigation lines to prevent freeze damage. The homeowner locates the valve—often in a basement, crawlspace, or exterior box—then closes it clockwise until snug. After shutting, any residual water is purged to avoid trapped pockets that expand when frozen.
- Open each exterior faucet briefly to verify flow stops and pressure releases.
- Operate inline irrigation valves and run controllers to evacuate remaining water.
- Inspect valve packing and consider a light wrench-tightening; replace faulty valves before freezing temperatures arrive.
Drain Hose Bibs Completely
Close the interior shutoff for each hose bib and open the exterior spigot to release trapped water, then drain connected irrigation lines and backflow devices to prevent freeze damage.
After flow stops, leave exterior spigots open slightly to allow expansion and confirm internal valves are fully closed.
Disconnect hoses and store them indoors to prevent residual moisture and cracking.
Inspect vacuum breakers and backflow assemblies for pockets that hold water and follow manufacturer drainage steps; remove or drain attached timers and low-point drains.
Cap unused outlets and document locations of shutoffs for spring reactivation.
Perform a final walkaround to verify all outdoor fixtures are dry.
Blow Out Irrigation Lines
Prepare to evacuate all water from irrigation lines by first locating and turning off the system’s main supply valves and internal shutoffs.
Next, select the appropriate method—manual drain, automatic drain, or compressed air blowout—matching pipe material and pressure limits. Follow safety and manufacturer guidelines to avoid damage.
- Attach an air compressor with regulator to the blowout port and set pressure to the system’s safe maximum (typically 30–50 psi for PVC).
- Clear zones one at a time, running each controller cycle until only mist appears.
- Close valves, insulate exposed components, and document completed zones.
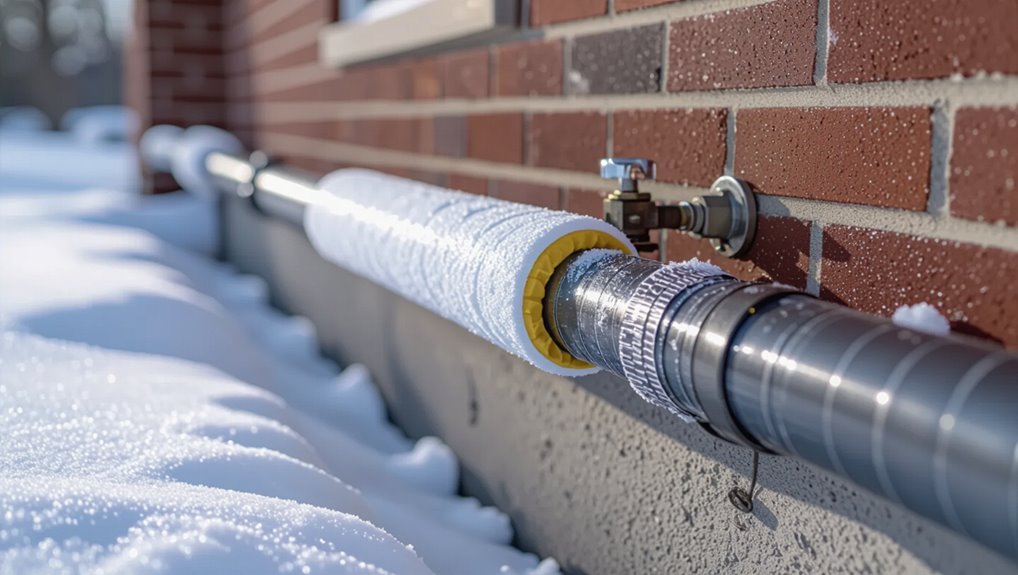
Insulate Exposed Pipes: Materials and How to Wrap Them
The homeowner should select appropriate insulation materials — foam sleeves, fiberglass wrap, or self-sealing tape — based on pipe type and exposure.
They should then apply insulation with overlapping seams and secure it with PVC tape or clamps to eliminate gaps.
Proper wrapping technique includes covering joints and valves and maintaining a continuous thermal barrier to prevent heat loss.
Choose Insulation Materials
When selecting insulation for exposed pipes, homeowners should weigh material R‑value, moisture resistance, ease of installation, and pipe diameter to match performance with the installation context.
Common options include foam sleeve, fiberglass, and rubber; each balances thermal protection and durability.
Consider service conditions: damp basements favor closed‑cell materials; outdoor or drafty spaces need higher R‑value.
Cost, availability, and expected lifespan influence choice.
Match thickness to pipe size and required thermal resistance.
If rodents or abrasion are concerns, choose tougher jacketing.
Professional-grade materials may justify higher initial cost through reduced freezing risk.
- Foam sleeve
- Fiberglass
- Rubber
Proper Pipe Wrapping Technique
For exposed plumbing, correct wrapping technique combines chosen insulation with careful seam sealing and secure fastening to prevent gaps that allow heat loss or moisture intrusion.
Measure pipe length, cut insulation to fit, and slide or wrap material snugly without compressing its R-value. Overlap seams by at least one inch for tubular foam; for fiberglass, wrap with vapor barrier facing outward.
Tape seams with HVAC or waterproof tape, then secure with zip ties or clamps every foot and at fittings. Insulate valves and joints separately using preformed covers.
Inspect regularly for compression, moisture, or gaps and replace damaged sections promptly.
Protect Indoor Pipes Inside Cabinets, Crawlspaces, and Attics
Inside cabinets, crawlspaces, and attics, indoor pipes are especially vulnerable to freezing because confined areas often lack adequate heat and airflow.
Inspect and seal gaps where cold air enters; add insulation around pipes and cavity walls to reduce temperature swings. Keep cabinet doors open when practical to allow warmer house air to circulate.
- Identify exposed runs and insulate with foam or fiberglass sleeves sized to fit snugly.
- Ventilate crawlspaces and attics to prevent cold pockets, addressing moisture before insulating.
- Regularly check for drafts, rodent damage, and settled insulation, repairing promptly to maintain protection.
Use Heat Safely: Thermostats, Heat Tape, and Heaters
Guidance on thermostat settings, proper heat tape installation, and safe use of portable heaters helps prevent frozen pipes without creating fire hazards.
Recommended thermostat ranges and setback practices maintain baseline warmth in vulnerable areas.
Clear instructions for applying heat tape and placing heaters reduce risk while preserving pipe integrity.
Thermostat Settings Guide
How should thermostat settings be managed to protect pipes without wasting energy? A steady, modestly elevated temperature prevents freezing in vulnerable areas while avoiding excessive energy use. Recommended actions focus on consistent warmth, targeted exceptions, and monitoring.
- Set thermostats to at least 55–60°F (13–16°C) when away; maintain slightly higher in rooms with plumbing.
- Use programmable schedules to avoid wide temperature swings overnight and during absences; prioritize continuous low heat over deep setbacks.
- Monitor indoor temperatures in basements and crawlspaces; adjust zoning or vents to keep pipes above freezing while minimizing overall heating demand.
Heat Tape Application
When applied correctly, heat tape provides localized protection for pipes at risk of freezing by supplying controlled warmth along their length.
Install only manufacturer-approved tape for pipe type and voltage, inspecting for damage before use.
Secure the tape in direct contact with the pipe, following the specified spacing and overlap instructions; do not wrap tape back on itself.
Use a ground-fault circuit interrupter (GFCI) and avoid running tape under insulation that could trap heat.
Route power cords to prevent moisture exposure and mechanical damage.
Periodically test and replace aging tape to maintain reliable freeze prevention and reduce fire risk.
Safe Portable Heaters
Use portable heaters only as a temporary measure to protect vulnerable pipes and occupied spaces, selecting models with built-in safety features such as tip-over shutoff, overheat protection, and certified electrical ratings.
Heaters should be placed on stable, noncombustible surfaces away from insulation, drapery, and flammable materials.
Extension cords are discouraged; connect directly to grounded outlets and observe amperage limits.
Monitor units when in use and restore power only after inspecting for damage following storms.
- Maintain clearance and never leave units unattended.
- Use thermostatic controls or timers to avoid continuous operation.
- Combine with insulation and heat tape for reliable protection.
Prevent Frozen Pipes When You’re Away From Home
Leaving a home for extended cold snaps requires specific steps to prevent pipes from freezing and bursting while unoccupied. The homeowner should shut off the main water supply and drain indoor lines by opening faucets and flushing toilets.
Close garage doors and interior access to unheated areas; leave cabinet doors beneath sinks open to allow warmer air circulation. Set the thermostat no lower than 55°F (13°C) and consider installing a smart thermostat for remote monitoring.
Add insulation to exposed pipes and anchor heat tape where necessary. Notify a neighbor or property manager to check the home periodically during extreme cold.
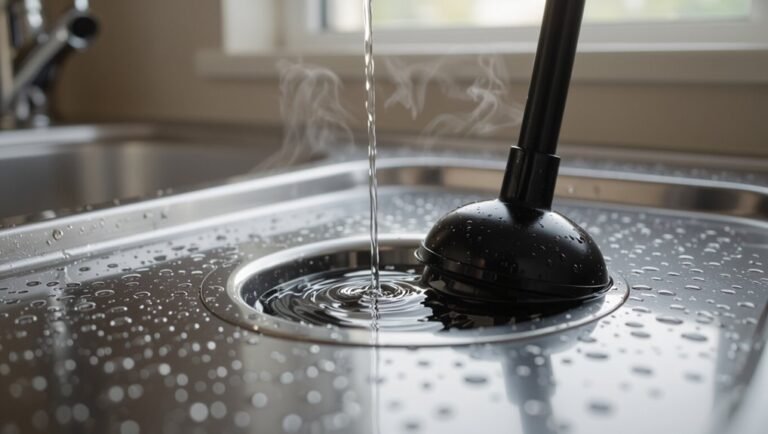
How to Thaw a Frozen Pipe Safely and Quickly
Act quickly but calmly when a pipe is suspected to be frozen: locate the affected section, shut off the water at the main if a burst is possible, and open nearby faucets to relieve pressure and provide an outlet for melted water.
Then follow safe thawing steps to restore flow without causing damage.
- Apply gentle heat: use a hair dryer, heat gun on low, or electric space heater; move heat along the pipe toward the faucet to melt progressively.
- Insulate exposed areas as thaw progresses to retain warmth and prevent refreezing.
- Monitor for leaks; once water flows steadily, keep faucets slightly open for a while.
Signs of Pipe Damage and When to Call a Plumber
How can a homeowner tell when a winterized pipe has suffered damage rather than a temporary freeze? Visible signs include persistent leaks, discolored water, reduced pressure, or unexplained dampness after thawing. Buckled drywall, frost lines, or sound of running water when fixtures are off also indicate breaks. Immediate professional assessment is warranted if leaks are steady, flooding occurs, or structural compromise appears.
| Observable Sign | Likely Meaning |
|---|---|
| Persistent leak | Crack or burst |
| Discolored water | Corrosion or contamination |
| Low pressure | Partial rupture/ice remains |
| New damp spots | Hidden leak/insulation failure |
Cost Estimates, Time, and DIY vs. Hire a Pro
After identifying signs that a winterized pipe may be damaged, the next consideration is how much repair will cost, how long it will take, and whether a homeowner can handle the work or should hire a professional.
Estimates vary by scope: minor leaks often cost under $200 and take an hour; major bursts can exceed $1,500 and require days. Complexity, access, and materials drive time and price. Risk tolerance and skill level determine DIY suitability; permit or insurance issues may mandate a pro.
Consider warranties, emergency availability, and comparative quotes before deciding.
- Assess scope and materials.
- Compare time versus cost.
- Evaluate skills and liabilities.
Conclusion
Preparedness for winter chores quietly pays off: taking modest steps to shield vulnerable pipes spares households the disruptive shock of hidden water damage and costly repairs. By tending outdoor faucets, insulating exposed runs, and checking vulnerable spaces before cold sets in, homeowners gently steer clear of calamity. Even modest effort now preserves comfort and financial peace later. When uncertainty or damage appears, seeking professional help steadies outcomes and restores normalcy with minimal fuss.