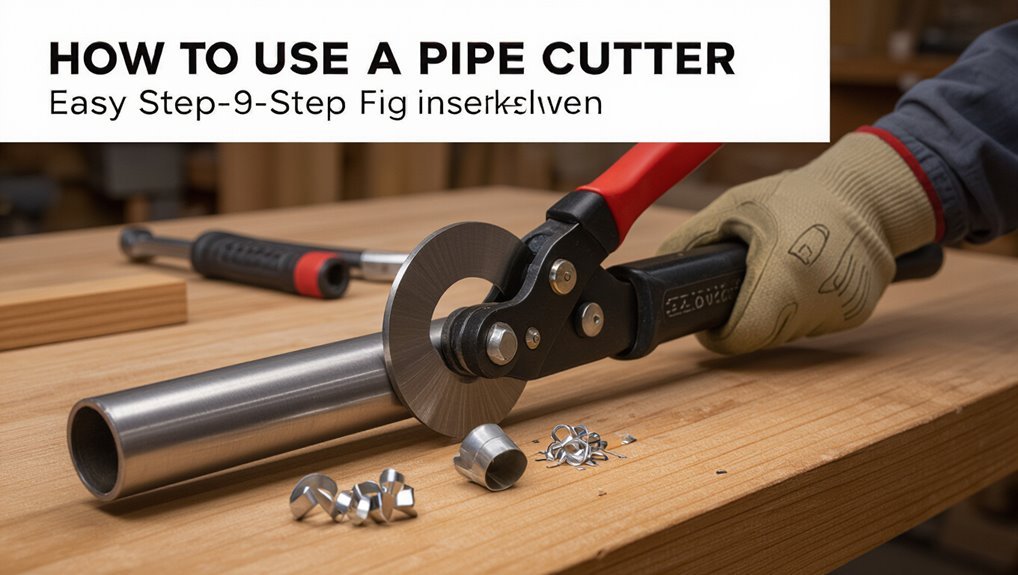
How to Use a Pipe Cutter: Easy Step-by-Step Guide for Clean Cuts
To use a pipe cutter effectively for clean cuts, follow these essential steps:
- Select the Right Cutter: Choose a cutter that is compatible with the pipe’s material and size.
- Safety First: Always wear safety glasses and gloves to protect yourself during the cutting process.
- Prepare Your Workspace: Ensure you have a stable workspace by clearing any clutter and securing the pipe in a vise or clamp, using padding to prevent damage.
- Measure and Mark: Measure the desired length, mark a square line on the pipe, and double-check your measurements.
- Position the Cutter: Place the cutter squarely on the marked line.
- Initial Tightening: Tighten the cutter until the wheel just makes contact with the pipe.
- Cutting Action: Rotate the cutter smoothly while applying slight pressure, tightening it a bit after several turns until the pipe separates.
- Finish Up: Deburr the cut edge, test-fit the end, and clean any chips from the workspace.
By following these steps, you can achieve precise and clean cuts on your pipes. For additional tips specific to your pipe material or troubleshooting advice, refer to material-specific guidelines.
Choose the Right Pipe Cutter
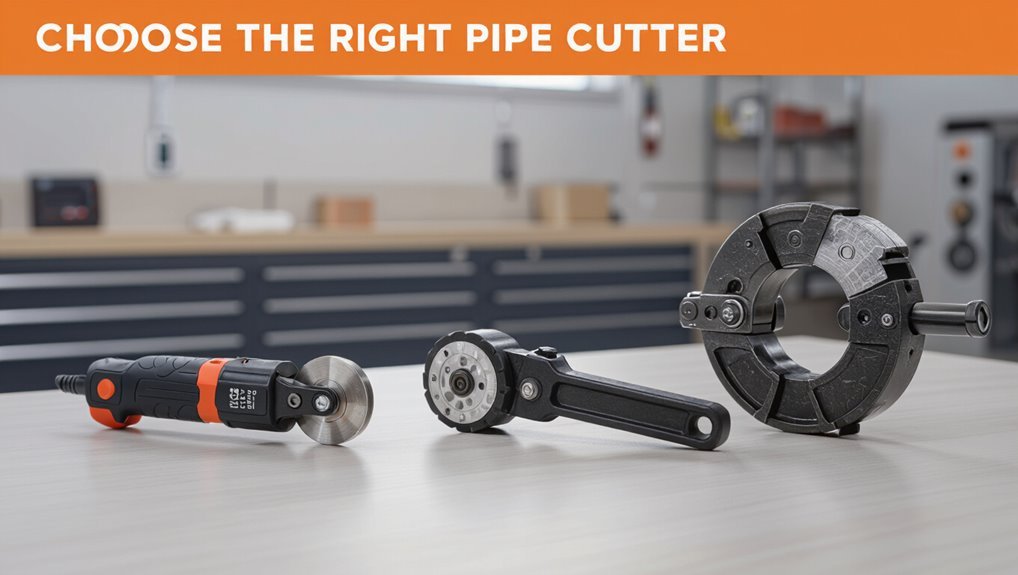
Selecting the right pipe cutter begins with matching the tool to the pipe material and diameter; different cutters are engineered for copper, PVC, steel, or stainless, and for small versus large diameters.
The user should consider cutter type: wheel cutters for copper and thin-walled tubes, ratcheting cutters for thicker tubing, PVC-specific shears for plastic, and rotary pipe cutters or saws for larger steel pipes.
Blade quality and replaceability matter for consistent cuts.
For tight spaces, compact or mini cutters enable access.
Choosing a cutter that fits pipe size, material, and workspace minimizes effort and yields straighter, cleaner cuts.
Safety Gear and Pre-Cut Checklist
Before cutting, the user should confirm appropriate personal protective equipment is worn, including safety glasses, gloves, and hearing protection as needed.
The work area must be cleared of hazards, well-lit, and a stable support set up for the pipe.
A quick checklist guarantees tools are ready, the pipe is secured, and nearby bystanders are kept at a safe distance.
Personal Protective Equipment
Although the cutter itself is simple, proper personal protective equipment (PPE) is crucial to prevent eye, hand, and respiratory injuries; users should verify goggles, gloves, and a dust mask fit correctly and are in good condition before any cutting begins.
Protective eyewear must be impact-rated to block flying metal or plastic shards.
Cut-resistant gloves reduce laceration risk while preserving dexterity for secure handling.
A respirator or N95 protects against dust and metal particles when cutting generates fine debris. Hearing protection is recommended for noisy environments.
Inspect PPE for defects, replace damaged items, and confirm correct sizing for effective protection during every cut.
Work Area Preparation
In a well-prepared workspace, the operator confirms that the cutting area is clean, well-lit, and free of trip hazards, with stable surfaces and sufficient clearance to maneuver the pipe and cutter safely.
Safety gear is checked: gloves, eye protection, hearing protection if needed, and appropriate clothing. Emergency access and a fire extinguisher are nearby when cutting metal.
Tools are organized and rated for the pipe material. Pipe supports or vises are secured to prevent movement.
Marking and measurement tools are verified.
Debris containment and ventilation are arranged for dust or metal shavings.
A final pre-cut checklist is completed before proceeding.
Measure and Mark for a Precise Cut
Before cutting, the technician measures twice to confirm the required length and avoid errors.
A clear centerline is marked around the pipe to guide the cutter and guarantee a square end.
Accurate measuring and a visible mark reduce rework and improve fit-up.
Measure Twice, Cut Once
A careful measurement is the foundation of a clean pipe cut: the fitter measures the run twice, marks the cut line clearly with a fine-tip marker or scribe, and verifies alignment against fittings or a layout square.
Before cutting, dimensions are rechecked to account for wall thickness, coupling depth, or bending allowances.
The fitter guarantees the pipe is supported and rotates it to confirm the mark is continuous around the circumference.
Any discrepancy prompts a repeat measurement rather than a guess. This disciplined approach minimizes waste, prevents rework, and guarantees joints meet spec, saving time and preserving system integrity.
Mark With A Centerline
Having verified measurements and confirmed the cut location, the fitter establishes a clear centerline around the pipe to guarantee a straight, square cut. Using a marker or scribe, the fitter marks the pipe at the measured point, then rotates the pipe while aligning the tool tip to form a continuous line.
For larger pipes, a tape and straightedge confirm alignment; for small pipes, a caliper or wrapped paper template works. The centerline should be visible, thin, and perpendicular to the pipe axis when viewed end-on. This guide line prevents off-center cuts and aids accurate cutter placement and final fitment.
Secure the Pipe So It Won’t Move
To prevent slips and ensure an accurate cut, the pipe must be held firmly in place using a vise, pipe stand, or clamped jig. The installer checks alignment with the centerline, pads jaws to avoid marring, and confirms the setup resists rotation and axial movement. Support long runs with stands or straps to prevent sag. For fragile materials, use soft jaws or plywood blocks. Recheck tightness after any final adjustment and before cutting begins.
| Tool | Purpose | Tip |
|---|---|---|
| Vise | Firm grip | Use soft jaws |
| Pipe stand | Support | Adjust height |
| Clamped jig | Repeatable hold | Verify alignment |
Step-by-Step: Cut a Pipe With a Pipe Cutter
Begin by positioning the pipe cutter squarely on the marked line, guaranteeing the cutting wheel aligns precisely with the center mark; then tighten the tool until the wheel contacts the pipe without deforming it.
Rotate the cutter around the pipe smoothly, maintaining even pressure.
After several full rotations, incrementally tighten the knob a small fraction to deepen the score.
Continue rotating and tightening in short, consistent steps until the pipe separates cleanly.
Inspect the cut for burrs and irregularities.
Use a deburring tool or fine file to remove sharp edges and guarantee a uniform, square face ready for fitting or joining.
Position the Cutter and Make the First Turns
With the cutter seated squarely on the marked line and the wheel centered over the score, the user tightens the knob just until the wheel makes contact without compressing the pipe. The tool is rotated smoothly around the pipe, maintaining even pressure.
After a few full revolutions, the knob is tightened slightly, progressing the cut incrementally. Attention to rhythm prevents slippage and uneven grooves. Visual checks confirm a consistent, shallow score rather than a deep gouge. The process is patient and deliberate, building toward a controlled separation.
- Calm focus
- Quiet satisfaction
- Suppressed relief
- Quiet confidence
Finish the Cut and Remove Burrs
After the cutter severs the pipe, the operator inspects the cut edge for debris and unevenness.
Any remaining burrs are removed with a deburring tool or file to guarantee a smooth, safe finish. A clean edge promotes proper fitting and prevents leaks or injury.
Clean The Cut Edge
Once the pipe has been separated, the cut edge must be cleaned and deburred to guarantee a proper fit and prevent injury; this step removes sharp edges, burrs, and material deformation left by the cutter.
The technician inspects the rim for nicks, unevenness, or residual chips. A file or deburring tool smooths the exterior and interior briefly, preserving diameter and alignment.
Final wiping removes metal dust and lubricants, ensuring a secure joint and safe handling. Attention here prevents leaks and cuts, and gives confidence before assembly.
- Relief from anxiety
- Satisfaction of precision
- Confidence in safety
- Pride in workmanship
Remove And Deburr
Remove burrs and restore the cut face to a true, safe profile before assembly.
The operator uses a deburring tool, file, or chamfering blade to remove inward and outward burrs. For copper, brass, and plastic, rotate the tool inside the pipe once or twice; for steel, use a round file or grinder with controlled passes.
Verify the end is square and free of sharp edges that could impede fittings or cause leaks.
Remove chips and dust with a brush or compressed air.
Recheck dimensions and fit before soldering, threading, or joining to make certain reliable, leak‑free connections.
Cutting Tips by Material: Copper, PVC, Steel
Frequently, choosing the correct cutting approach depends on the pipe material: copper requires clean scoring and minimal burrs, PVC benefits from a straight, supported cut and deburring, and steel demands a blade or wheel rated for metal and steady pressure to avoid jagged edges.
For copper, rotate a sharp cutter, remove slight burrs with a reamer, and check fit.
For PVC, secure the pipe, cut squarely, and chamfer the end.
For steel, use cutting wheels or pipe saws, cool when needed, and file edges.
Emotional cues help motivate careful work:
- Relief at a perfect fit
- Pride in a smooth finish
- Confidence using proper tools
- Satisfaction from safe technique
Common Cutting Problems and Fixes
After selecting the proper cutting method for copper, PVC, or steel, users often encounter predictable problems that affect fit, flow, and safety. Common issues include uneven bevels, burrs, crushed ends, and misaligned cuts. Uneven bevels cause poor joints; remedy by re-cutting or filing a clean chamfer.
Burrs and shavings restrict flow; remove with a deburring tool or reamer. Crushed ends from excessive pressure require trimming and gentler technique.
Misalignment results from loose clamping or incorrect guide placement; realign and retighten before recutting. Always inspect cut faces and test-fit fittings to confirm corrective actions succeeded.
Maintain and Store Your Pipe Cutter
Regularly maintaining and properly storing a pipe cutter preserves cutting accuracy and extends tool life.
Routine cleaning removes debris and metal shavings; a light oiling prevents rust and keeps the screw smooth.
Inspect the wheel for nicks and replace when dull.
Store the cutter in a dry, padded case or hang it to avoid knocks.
- Relief: knowing the tool is ready when needed
- Confidence: sharp, reliable cuts every time
- Frustration avoided: no unexpected failures mid-job
- Pride: a well-cared-for tool reflects professionalism
Simple checks after each use guarantee longevity and consistent performance.
Conclusion
The guide distills pipe cutting into clear, reliable steps, verifying that measured marking, secure clamping, and steady cutter rotation produce clean results across materials. Visualizing the workflow—measure, mark, secure, rotate, deburr—confirms the theory that controlled, incremental cutting yields precision and safety. By applying material-specific tips and addressing common problems, users can reproduce predictable outcomes. Regular cutter maintenance sustains accuracy, illustrating how methodical practice transforms theory into repeatable, visible success.