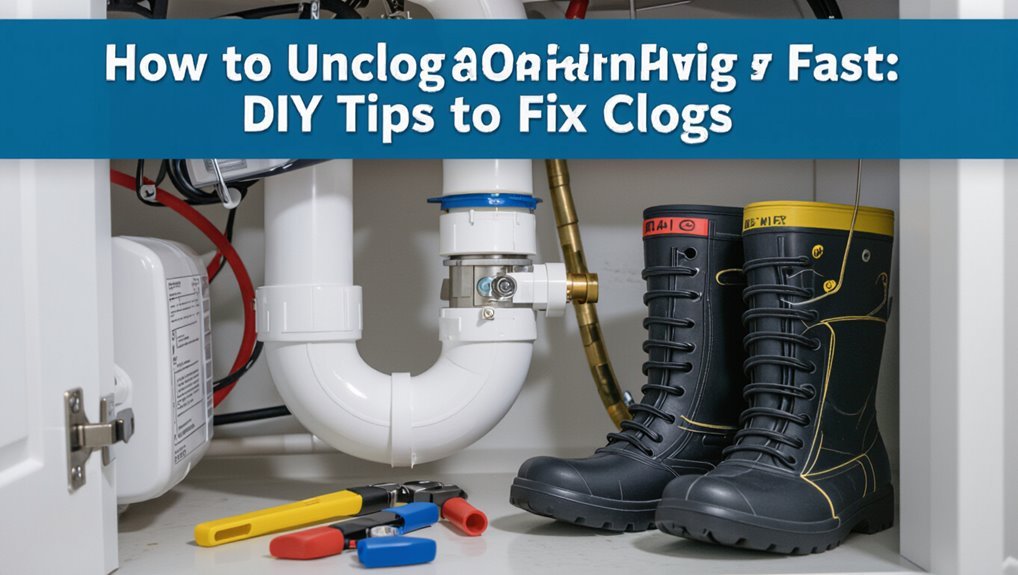
How to Unclog AC Drain Pipe Fast: DIY Tips to Fix Clogs
Key Takeaway: To quickly unclog your AC drain pipe, turn off the power, wear gloves, and follow these steps:
- Seal a wet/dry vacuum over the drain outlet for 30–60 seconds.
- Pour a cup of white vinegar into the access point and let it sit for 30–60 minutes.
- Flush the system with water.
- Use a flexible brush for any stubborn sludge and inspect the condensate pan.
Act promptly to prevent water damage, mold growth, and reduced cooling efficiency.
Why a Clogged AC Drain Is a Problem
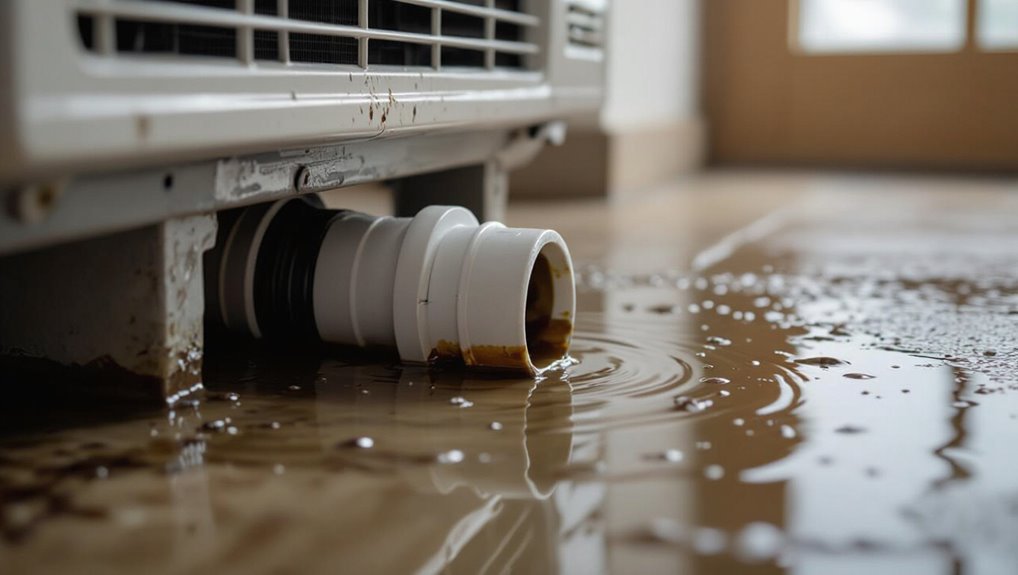
A clogged air conditioner drain can quickly escalate from a minor inconvenience to a costly repair by preventing condensate from leaving the system.
Water buildup promotes corrosion of coils, electrical components, and metal housings, shortening equipment life. Excess moisture encourages mold and bacterial growth, degrading indoor air quality and creating health risks.
Overflow can damage ceilings, walls, insulation, and belongings, generating expensive structural repairs and potential mold remediation.
Blockages force the unit to work harder, reducing efficiency and raising energy bills.
Timely attention prevents these cascading effects and preserves performance, safety, and long-term operating costs.
How to Tell If Your AC Drain Is Clogged
Signs of a clogged AC drain include visible water backing up around the indoor unit or drip pan.
A persistent moldy or mildew smell near vents or the air handler can indicate trapped moisture.
Reduced cooling performance or frequent cycling may also signal drainage problems that need inspection.
Water Backing Up
Water pooling around the indoor unit or slow drainage from the condensate pan indicates the drain is likely clogged. Observations of backup should be noted promptly to prevent water damage.
Common signs include visible overflow, dripping near the air handler, or a puddle below the service panel.
- Water rising in the condensate pan instead of flowing out
- Intermittent dripping from the drain line exit
- Ceiling or floor stains near the unit
- Air handler shutting off on float switch or safety switch activation
- Reduced cooling efficiency correlated with moisture buildup
Prompt inspection and clearing of the drain line is advised.
Mold Or Mildew Smell
When a musty odor emerges from vents or around the air handler, it often indicates mold or mildew growth in the condensate drain or pan caused by a clog. The scent is typically damp, earthy, and persistent, stronger when the system runs.
Technicians note odors concentrate near return vents, floor grilles, or the furnace room. Visual signs include black or green film on the pan, slimy residue along the drain line, or visible spores around access panels.
Immediate action—inspection, cleaning the pan, flushing the drain with water or a mild disinfectant, and removing blockages—prevents spread and restores indoor air quality.
Reduced Cooling Performance
Although a clogged condensate drain is primarily associated with leaks and odors, it can also reduce an air conditioner’s cooling effectiveness by disrupting normal condensate removal and airflow.
Signs indicate reduced performance when condensate backs up or coils ice over, forcing the system to work harder. Technology and inspection reveal problems quickly.
- Higher indoor temperatures despite running AC
- Longer run cycles and reduced cycling off
- Increased energy bills without usage change
- Frost or ice accumulation on evaporator coils
- Warm air blowing from vents even with cool settings
Prompt diagnosis and clearing of the drain restore efficiency and prevent compressor strain.
Complete Safety Checklist Before DIY
Before attempting any work on an air conditioner’s drain pipe, a homeowner should verify power is disconnected, gas lines (if present) are secured, and the work area is well-lit and free of trip hazards.
A concise safety checklist follows:
- wear eye and hand protection;
- guarantee stable ladder placement for access;
- confirm circuit breakers and disconnect switches remain off;
- ventilate enclosed spaces to avoid mold spores;
- keep a phone nearby for emergencies;
- avoid standing water while handling electrical components;
- document and label disconnected parts;
- inspect for sharp edges and insulation hazards;
- know when to stop and call a qualified HVAC technician for complex issues.
Tools and Materials for Fast Unclogging
A concise list of tools and materials helps streamline a quick AC drain pipe unclogging.
Essential items include basic hand tools (screwdrivers, pliers), cleaning supplies (wet/dry vacuum, pipe brush, distilled vinegar), and safety gear (gloves, goggles, a mask).
Having these on hand reduces downtime and prevents damage during the procedure.
Basic Hand Tools
Basic hand tools form the foundation of a quick, effective AC drain pipe unclogging job by enabling precise access, clearing, and testing without specialized equipment.
A small, focused kit speeds work and reduces risk. Essentials cover inspection, access, mechanical clearing, and simple leak checks. Select sturdy, appropriately sized items and keep them organized for fast response.
- Flathead and Phillips screwdrivers for access panels and drain fittings
- Needle-nose pliers for gripping debris and removing clips
- Long-reach flexible pick or coat-hanger for pushing blockages gently
- Hand auger (manual drain snake) for dislodging deeper clogs
- Flashlight and small mirror for visual inspection
Cleaning Supplies
Several compact cleaning supplies make fast unclogging more effective and safer: mild household bleach or enzyme cleaner for organic buildup, distilled white vinegar for mineral deposits, a spray bottle for targeted application, disposable nitrile gloves, adjustable funnel or turkey baster for flushing, lint-free rags, and a small stiff-bristled brush for scouring accessible drain lines and pans.
Additional useful items include a compact wet/dry vacuum adapter for suctioning debris, pipe-safe enzymatic tablets for ongoing maintenance, a narrow flexible bottle brush for deep reach, and clear tubing to inspect flow.
Select noncorrosive cleaners and disposable items to minimize contamination and residue.
Safety Gear
Proper personal protective equipment and purpose-built tools reduce injury risk and prevent damage when unclogging an AC drain pipe.
The following essential safety gear and tools enable safe, efficient DIY work while protecting the unit and installer.
- Nitrile gloves to avoid chemical and biofilm exposure
- Safety goggles to shield eyes from splashes and debris
- A mask (N95 or better) for dust and mold spores
- Bucket and absorbent towels to control spills and condensate
- Insulated screwdriver and nonconductive tools for electrical safety
Each item minimizes hazards; use them consistently and inspect gear before starting any unclogging task.
Locate the AC Condensate Drain and Access Point
Before any cleaning begins, identify the condensate drain line and its nearest access point so maintenance can proceed safely and efficiently.
The drain is typically a PVC or flexible vinyl pipe running from the indoor evaporator pan toward an exterior wall or floor drain. Inspect near the air handler, furnace cabinet, or ceiling-mounted unit for a capped inspection tee, cleanout, or condensate pump access.
Note pipe orientation, fittings, and any traps. Confirm clear pathways to reach the access point without forcing components.
Document locations and take photos; this speeds later steps and helps communicate issues to a professional if needed.
Quick Check: Cup of Water to Test Drainage
A cup of water is poured slowly into the condensate drain access to check basic flow.
Immediate, steady flow indicates the line is clear, while slow movement or backing up signals a partial clog.
Observations determine whether simple flushing will suffice or further cleaning is needed.
Pour Water Into Drain
Pouring a cup of water into the condensate drain provides a quick, reliable check of whether the line is flowing or blocked. The tester watches the drain opening and notes how the water behaves, then records observations.
If water disappears smoothly, the path is likely clear. If pooling or slow descent occurs, further action is warranted. Safety and gentle technique are emphasized.
- Use a measured cup for consistency.
- Pour steadily, avoiding splashing.
- Observe for bubbling or gurgling sounds.
- Repeat once to confirm results.
- Note any debris visible at the access point.
Watch For Immediate Flow
How quickly does the water disappear when a measured cup is added to the condensate drain opening?
Observe the speed and note whether water flows freely through the visible drain or evaporator pan. Immediate, steady drainage indicates the line is clear; slow trickling suggests partial obstruction.
Time the cup’s emptying if possible and listen for gurgles that signal air pockets. Record this quick test before further intervention to gauge clog severity and decide next steps.
Repeat once after any attempted clearing to confirm improvement. Keep the area dry and avoid forcing large volumes that could mask true flow behavior.
Note Slow Or Backing
When water drains slowly or backs up during the cup test, it indicates a partial or developing blockage in the condensate line or pan.
The technician or homeowner should interpret slow drainage as an early warning sign and act before overflow or system shutdown occurs. Immediate steps clarify the issue and reduce risk.
- Observe rate: note seconds for a cup to empty.
- Inspect visible trap and pan for debris or algae.
- Use a wet/dry vacuum at the drain end to pull obstructions.
- Flush with distilled vinegar to dissolve organic buildup.
- Schedule professional service if flow fails to improve.
Clear Minor AC Drain Clogs With a Wet/Dry Vacuum
A wet/dry vacuum provides a quick, effective method for removing small blockages from an AC condensate drain line by creating strong suction to pull out accumulated debris and buildup.
The technician seals the vacuum hose over the outdoor drain outlet or the indoor drain stub using a rag or adaptor, then runs the vacuum for 30–60 seconds to extract water, leaves, and loose sediment.
Afterward, the line is tested by pouring a small amount of water through the overflow pan to confirm flow.
Caution includes wearing gloves, avoiding excessive force that could damage fittings, and disconnecting power when accessing unit components.
Use a Flexible Brush to Remove Sludge and Algae
A flexible brush is recommended for reaching bends and loosening sludge and algae without damaging the drain.
The correct brush is narrow enough to pass through the pipe and has soft, bendable bristles to scrub buildup effectively.
The brush should be fed and rotated gently to clear deposits while avoiding force that could harm the drain.
Choose The Right Brush
Choosing the right brush matters because flexible bristles navigate turns and reach into the narrow trap where sludge and algae collect. The person selects a brush sized to the drain diameter, avoiding overly stiff wire that can damage PVC.
Nylon or silicone brushes resist corrosion and scrub organic buildup effectively. A long, bendable shaft improves access without disassembly. Replace worn bristles to maintain performance and hygiene.
- Match brush diameter to the pipe
- Prefer soft-but-springy nylon or silicone
- Choose a length that reaches the trap
- Opt for a bendable shaft or segmented design
- Replace when bristles fray
Brush Through Gently
With the properly sized, flexible brush in hand, the technician feeds the tool into the drain and advances it slowly to the U-trap where sludge and algae tend to collect.
The brush is rotated gently while moving back and forth to break slimy buildup without damaging PVC or rubber seals. Periodic withdrawal clears debris from bristles, preventing redepositing. If resistance increases, pausing and inspecting avoids forcing the brush past fragile connections.
After brushing, a flush with water confirms improved flow and dislodged material. The method complements chemical or vacuum approaches, offering controlled mechanical removal and reducing recurrence when combined with routine maintenance.
Flush the Drain Line With Vinegar
Vinegar offers a simple, non-toxic method to dissolve algae and mineral buildup in the AC drain line: pour about a cup of white distilled vinegar into the access point or condensate pan, let it sit for 30–60 minutes, then flush with water to clear loosened debris.
The technique is safe for most systems and avoids harsh chemicals.
Recommended steps and cautions:
- Use white distilled vinegar, not scented varieties.
- Shut the unit off before pouring.
- Pour slowly to avoid splashing.
- Rinse with a cup or two of water after soaking.
- Repeat monthly or as needed for maintenance.
When and How to Use Bleach Safely on the Drain
Consider bleach as a last-resort disinfectant for stubborn mold or algae in an AC drain when vinegar and flushing fail; it effectively kills biological growth but can damage components and plumbing if misused.
The technician should dilute household bleach (1 part bleach to 10 parts water), wear gloves and eye protection, and guarantee good ventilation.
Apply sparingly into the drain pan or accessible line, let sit 10–15 minutes, then flush thoroughly with water to remove residue.
Avoid mixing bleach with other chemicals and never pour concentrated bleach onto plastic fittings or near metal that can corrode.
Dispose of leftover solution responsibly.
Use a Plumbing Snake for Stubborn Blockages
Use a plumbing snake when flushing and chemical treatments fail to clear a persistent clog in the AC drain line. The technician or homeowner feeds the flexible auger into the drain, rotating gently to break or retrieve the obstruction. Care avoids damaging plastic fittings or the condensate pan.
- Choose a snake sized for 3/4–1 inch drain tubing
- Disconnect access fitting before insertion
- Feed slowly; rotate clockwise to engage debris
- Withdraw debris and flush with water
- Reassemble and test for proper flow
Proper use restores drainage without harsh chemicals; stop if resistance feels unusual and consult a pro.
Use Compressed Air Safely to Clear Blockages
After a plumbing snake fails to fully clear a stubborn clog or when debris is loosened but not draining, compressed air can be used to push the obstruction through the condensate line.
The technician should wear eye and ear protection, seal the line opening with a short adapter or mating nozzle, and apply air in short bursts at low pressure (20–40 psi) to avoid pipe damage.
Back-pressure should be monitored; if resistance persists, stop and reassess. Use a regulator and moisture trap on the compressor.
Compressed air is a targeted, quick method when used cautiously and only as a follow-up measure.
Clean the Condensate Pan to Prevent Recurring Clogs
The condensate pan should be inspected regularly and emptied of standing water to stop immediate overflow risks.
After draining, it can be scrubbed with a vinegar solution to remove algae and mineral residues.
Regular cleaning and removing debris will help prevent future buildup and recurring clogs.
Inspect And Empty Pan
Inspect the condensate pan for standing water, rust, or visible debris that can harbor algae and block the drain. The technician or homeowner should then remove accumulated water and solids, noting corrosion or cracks that require replacement.
After emptying, flush loose residue and confirm the drain outlet is clear. Regular inspection prevents overflow and microbial growth.
- Wear gloves and eye protection before handling the pan
- Use a wet/dry vacuum or cup to remove water
- Scrape away loose sludge with a soft brush
- Check pan slope toward the drain
- Record condition and maintenance date
Clean With Vinegar
Pour white vinegar into the condensate pan and let it sit for 30–60 minutes to dissolve mineral deposits and inhibit algae growth.
After soaking, scrub the pan gently with a soft brush or cloth to remove loosened residue, paying attention to corners and drain openings.
Rinse thoroughly with clean water and wipe dry to remove remaining vinegar and debris.
If buildup persists, repeat the soak or use a plastic scraper carefully to avoid damage. Dispose of rinse water properly.
Regular vinegar cleaning reduces clog sources in the pan and keeps drainage paths clearer between more intensive maintenance.
Prevent Future Buildup
Why prevent buildup now? Regular condensate pan care stops algae and debris from reblocking the drain, extending system life and avoiding water damage.
The following concise steps guide routine prevention.
- Empty and wipe the pan monthly to remove standing water and sludge.
- Scrub with a mild bleach solution (1:10) or vinegar to kill mold and algae.
- Inspect and clear the pan’s outlet and trap for unobstructed flow.
- Install a PVC or float switch to detect overflow and trigger alerts.
- Schedule annual HVAC service to check pan level, slope, and drain integrity for long-term prevention.
Clear the Drain at the Wall Spout (Outlet)
When clearing the drain at the wall spout, the technician first checks the exterior outlet for visible obstructions, damage, or standing water; this determines whether a simple manual removal or a more involved snake or flush is required.
They remove debris with gloves and a soft tool, avoiding sharp objects that could widen cracks. If accessible, a garden hose with low pressure or a wet/dry vacuum clears residual blockages while protecting surrounding siding.
After flow restoration, the technician inspects the spout seal and nearby tubing for leaks, tightens fittings if needed, and documents condition for preventive maintenance.
Clean the AC Condensate PVC Trap and P‑Trap
Next, attention turns to the condensate PVC trap and the P‑trap where debris and algae commonly collect.
The technician locates the trap under or near the evaporator coil, disconnects it as needed, and inspects for blockages.
After clearing visible buildup, the trap is flushed with water (or a mild bleach solution) to remove residual sludge and restore proper drainage.
Locate The Condensate Trap
A condensate trap (P‑trap) is a short length of PVC or ABS piping located near the indoor air handler that prevents sewer gases from entering the home and helps maintain proper drainage.
The technician locates it by following the condensate line from the drain pan toward the wall or floor. Visibility varies by installation; it may sit under the air handler or just outside the cabinet.
Identification cues and access tips:
- Trace the small 3/4″–1″ drain tubing from the evaporator pan
- Look for a U‑shaped PVC or ABS section
- Check near the air handler base
- Inspect service access panels
- Note any nearby cleanout fittings
Clean And Flush Trap
Begin by preparing the work area and shutting off power to the air handler to prevent the condensate pump or fan from running during service.
Remove the trap cap or unthread the fittings; catch water in a small bucket.
Inspect the PVC P‑trap for sludge, algae, or debris.
Flush the trap with distilled white vinegar or a 1:1 vinegar‑water solution, followed by clean water, using a funnel or syringe for force.
For stubborn buildup, gently scrub with a bottle brush sized to the trap.
Reassemble fittings, restore power, and run the system while observing the drain for steady, unobstructed flow.
Reassemble and Test the AC Drain After Cleaning
Reassemble the drain components in the reverse order of disassembly, ensuring each joint and seal seats fully and the condensate pan and drain line are secured to prevent sagging.
After reassembly, perform a controlled fill and observe flow and connections for leaks or slow drainage. Verify the float switch, trap orientation, and venting remain correct.
- Pour water slowly into the drain pan
- Watch for steady flow through the trap and line
- Inspect all joints for drips during and after filling
- Run the AC briefly to confirm condensate removal
- Note any residual odors or sluggish drainage and retest
Short-Term Fixes vs. Permanent AC Drain Repairs
Distinguish between short-term fixes and permanent repairs by their purpose, durability, and risk:
Temporary measures such as flushing the line with vinegar, using a wet/dry vacuum, or installing a temporary P-trap can restore drainage quickly but may not address underlying issues like corroded pipes, biofilm buildup deep in the system, or misaligned condensate pans.
Short-term fixes prioritize speed and low cost but often require repetition and carry residual leak or mold risk.
Permanent repairs—pipe replacement, proper trap installation, professional biofilm removal, or condensate pan replacement—offer lasting reliability, higher upfront cost, and reduced maintenance when correctly executed by qualified personnel.
Inspect and Fix Sagging or Damaged Drain Pipe
When sagging or physical damage interrupts condensate flow, it can cause frequent clogs, leaks, and water damage if not corrected promptly.
The technician inspects the line visually and by touch, noting low spots, cracks, or detached sections. Minor sags are supported; crushed or cracked pipe sections are replaced. Secure fittings and correct slope (1/4 inch per foot) restore gravity drainage.
Recommended actions include:
- Raise sagging sections with hangers or straps
- Replace split or brittle PVC segments
- Re-glue solvent-weld joints or use proper couplings
- Re-route to eliminate tight bends
- Test flow after repairs for proper drainage
Prevent Algae and Mold in the Condensate Line
To prevent algae and mold from forming in the condensate line, routine maintenance is essential.
Recommended steps include periodic vinegar flushes, installing an algae-resistant trap, and routing the drain line so it remains exposed to light and airflow.
These measures reduce biological growth and lower the risk of future clogs.
Regular Vinegar Flushes
A simple, inexpensive routine is to flush the condensate line with household white vinegar every 1–3 months; the vinegar’s mild acidity inhibits algae and mold growth, keeping the drain clear and reducing the chance of clogs and overflow.
The procedure is straightforward and safe when performed carefully.
- Turn off the AC system before accessing the drain.
- Locate the service port or access point on the condensate line.
- Pour 1 cup of white vinegar slowly into the line; let sit 30 minutes.
- Rinse with water to remove loosened debris.
- Repeat quarterly or as needed based on humidity and buildup.
Install Algae-Resistant Trap
Following regular vinegar flushes, installers can further reduce algae and mold buildup by fitting an algae-resistant trap in the condensate line. This small device uses antimicrobial materials or a built-in biocide cartridge to inhibit growth where standing water collects.
The trap replaces a standard P-trap or adds inline treatment, creating a controlled reservoir that prevents biofilm formation. Installation requires proper slope, tight seals, and periodic cartridge replacement per manufacturer guidelines.
Selection depends on pipe diameter and chemical compatibility. While not a substitute for routine maintenance, an algae-resistant trap lowers clog frequency, extends condensate drain lifespan, and reduces emergency service calls.
Keep Drain Line Exposed
Because sunlight and air circulation inhibit the damp, stagnant conditions that foster algae and mold, keeping sections of the condensate drain line exposed helps reduce biological growth and makes inspections easier.
Visible piping discourages buildup and simplifies maintenance checks. Careful placement avoids physical damage and preserves aesthetics. Routine visual inspection catches early slime, leaks, or cracks before clogs form.
Recommended practices include:
- Position accessible straight runs where feasible
- Avoid burying line in insulation or wall cavities
- Use short exposed segments near the unit and traps
- Secure piping to prevent sagging and standing water
- Inspect monthly and clean at first signs of growth
Best Condensate Line Treatments and How to Use Them
When condensate lines become obstructed by algae, mold, or mineral buildup, targeted treatments restore flow and prevent recurring clogs. Professionals recommend enzyme cleaners, bleach solutions, vinegar, compressed air, and wet/dry vacuums. Use enzyme packets monthly, flush with diluted bleach sparingly, pour white vinegar for mild deposits, blow out debris with low-pressure air, or extract with a wet/dry vacuum. Follow product directions, protect surrounding surfaces, and verify power is off when servicing near the unit.
| Treatment | Best Use | Application |
|---|---|---|
| Enzyme cleaner | Biological growth | Monthly flush |
| Bleach solution | Heavy mold | Single cautious use |
| White vinegar | Mineral buildup | Soak and flush |
| Compressed air | Loose debris | Low-pressure blowout |
| Wet/dry vacuum | Stubborn clogs | Vacuum from access point |
How Often to Inspect and Maintain the AC Drain
Routine visual checks of the condensate drain and trap should be performed monthly during the cooling season to catch clogs early.
Simple homeowner tasks include clearing visible debris and ensuring the drain line is flowing.
A professional inspection and maintenance of the drain system once a year helps prevent buildup and verifies safe operation.
Inspect Monthly During Cooling
Although the AC drain often functions without attention, inspecting it monthly during the cooling season prevents small clogs from becoming system-stopping blockages.
Regular checks catch early buildup, guarantee proper condensation flow, and reduce mildew or overflow risks. A quick routine takes minutes and keeps performance steady.
- Visually inspect the condensate pan and drain line for standing water.
- Run a cup of distilled vinegar or mild bleach solution through the drain to dissolve light residue.
- Confirm the condensate pump (if present) activates and drains.
- Clear accessible debris from the drain opening with a soft brush or pipe cleaner.
- Note odors or slow drainage for targeted cleaning.
Annual Professional Maintenance
Schedule annual professional maintenance for the AC drain to guarantee thorough inspection, deep cleaning, and early detection of issues that could lead to clogs or overflow.
Technicians verify drain line condition, condensate pan integrity, and proper slope, removing biofilm and debris with tools professionals prefer. They test float switches and condensate pumps, apply safe biocides when appropriate, and document any corrosion or blockages requiring repair.
Annual service reduces emergency calls, extends equipment life, and preserves indoor air quality. Homeowners receive a clear report and recommended interval adjustments based on system age, usage intensity, and local humidity conditions.
Seasonal Maintenance Checklist to Avoid Clogs
1 practical seasonal checklist can help prevent most AC drain pipe clogs before they start.
A concise routine reduces debris, mold, and overflow risks while extending system life. Recommended tasks focus on simple inspections and maintenance anyone can perform or schedule.
- Clear nearby debris and trim vegetation around outdoor units.
- Inspect and clean condensate pan; remove visible sludge.
- Flush the drain with a vinegar solution to inhibit algae.
- Check and replace disposable air filters every 1–3 months.
- Verify condensate drain line slope and unobstructed drain outlet.
Following these seasonal steps minimizes clogs and costly emergency repairs.
When to Replace the Drain Line Instead of Cleaning
When is cleaning no longer enough and replacement becomes necessary? Evidence favors replacement when pipes are cracked, severely corroded, repeatedly clog despite cleaning, warped from heat, or when mold/biofilm recurs immediately. Safety and system integrity guide the decision: persistent leaks risk water damage and coil issues.
| Condition | Replacement Indicator |
|---|---|
| Cracks or splits | Visible leaks or damp spots |
| Corrosion | Flaking or thin walls |
| Recurrent clogs | Clogs return after proper cleaning |
| Deformation | Warped or collapsed tubing |
| Mold saturation | Persistent microbial growth after treatment |
Professional inspection is advised when multiple indicators appear.
DIY Cost & Time Estimates for Unclogging Methods
Several common DIY methods for unclogging an AC drain pipe vary widely in cost and time, from a few dollars and minutes for a wet/dry vacuum attempt to a modest investment of $20–$50 and an hour or two for a manual plumbing snake or compressed-air cleaning.
Typical estimates include:
- Wet/dry vacuum: $0–$20 (rental or household), 10–30 minutes.
- Vinegar/bleach flush: under $10, 15–30 minutes plus soak time.
- Flexible plumbing snake: $15–$40, 30–90 minutes depending on blockage.
- Compressed air kit: $20–$50, 20–60 minutes.
- Chemical drain cleaners: $5–$20, 15–30 minutes.
Signs You Should Call a Professional HVAC Tech
How can a homeowner tell when a clogged AC drain pipe needs professional attention?
Persistent water pooling despite basic clearing, recurring clogs within days, foul sewage-like odors, visible mold growth, or frequent system shutdowns indicate escalation.
If condensate backs up into living spaces, electrical components trip, or ceiling/wall stains appear, immediate expert evaluation is warranted.
Homeowners should also call a technician when they lack tools, encounter unfamiliar fittings, or suspect refrigerant or HVAC coil damage.
Timely professional service prevents structural water damage and system failure; avoid prolonged DIY attempts once these clear, safety-related or recurrent signs appear.
How Technicians Diagnose Complex Drain Problems
Technicians begin diagnosing complex AC drain problems by systematically isolating the condensate pathway and inspecting each component for blockages, damage, or faults.
They gather system history, verify symptoms, and use targeted tests to pinpoint causes rather than guessing. Common methods combine visual inspection, airflow and pressure checks, and liquid tracing.
- Use of inspection cameras to view interior obstructions
- Condensate flow tests with measured water volumes
- Wet/dry vacuation to confirm drain line integrity
- Multimeter and sensor checks on float switches and condensate pumps
- Thermal imaging to detect icing or drainage-related cooling anomalies
Findings guide precise repairs or part replacements.
Common Mistakes That Make Drain Problems Worse
Failing to follow systematic diagnostics or using quick fixes often turns minor condensate issues into larger, recurring problems.
Homeowners frequently pour harsh chemicals, force probes, or ignore proper safety, which damages PVC, traps debris, or corrodes fittings.
Skipping regular maintenance and relying on makeshift slopes or temporary plugs promotes standing water and mold.
Disconnecting or misrouting lines to avoid visible leaks can create hidden backups.
Overtightening connections or replacing parts with incorrect sizes causes stress and future failure.
Proper tools, gentle inspection, correct parts, and routine cleaning prevent escalation; impulsive repairs tend to compound the original clogging causes.
Troubleshooting if the AC Still Leaks After Cleaning
If leaks persist after cleaning the condensate drain, the next step is a systematic troubleshooting sequence to identify hidden causes rather than repeating the same remedies.
Inspect visible fittings, check the float switch, and confirm proper slope and trap configuration. Evaluate airflow issues and refrigerant signs that cause excessive condensation. Consider blockages beyond the primary trap or secondary pan problems.
- Verify the drain line slope and clear low spots
- Test the float switch and safety shutoff operation
- Inspect the secondary drain pan for cracks or overflow
- Check coil condition and airflow restrictions
- Look for refrigerant-related icing or excess moisture
Document and Monitor Drain Performance Over Time
A simple log sheet and periodic checks let a homeowner or maintainer track condensate drain performance and spot trends before failures occur.
Record date, time, ambient conditions, observed flow (clear, slow, blocked), water level in the drain pan, and any corrective actions taken. Note recurring symptoms, timing, and after which procedures problems resolved.
Use photos for reference and timestamp entries. Review entries monthly to identify gradual declines or patterns tied to seasonal humidity.
Retain records for at least a year to inform maintenance intervals and technician diagnostics. Consistent documentation reduces unexpected failures and guides targeted interventions.
Eco-Friendly Drain Cleaning and Treatment Options
Several effective eco-friendly methods exist for keeping AC drain lines clear without harsh chemicals. The following approaches prioritize biodegradable, low-impact solutions suitable for routine maintenance and prevention.
Regular use reduces biofilm, algae, and clogs while protecting indoor air and plumbing.
- Flush with warm water periodically to dislodge slimy buildup.
- Use a vinegar and baking soda treatment to break down organic residue.
- Install a simple condensate trap or drain pan cleaner containing enzyme-based formulations.
- Place a small, removable mesh screen at the drain inlet to catch debris.
- Schedule seasonal inspections and physical soft-bristle brushing to remove settled deposits.
How to Handle an Emergency Condensate Overflow
Act quickly when a condensate overflow occurs to minimize water damage and restore safe operation: shut off the HVAC system at the thermostat, locate and contain standing water with towels or a wet/dry vacuum, and check the condensate pan, drain line, and nearby outlets for leaks.
Next, remove debris from the pan and clear visible blockages in the drain line using a wet/dry vacuum or flexible brush. If a condensate safety switch is tripped, reset it after confirming the area is dry.
Document damage, photograph affected areas, and call a licensed technician immediately if leaks persist, electrical components were exposed, or mold is suspected.
Choose the Right Replacement Parts for the Drain
After addressing an overflow and ensuring the system is dry and safe, attention shifts to selecting replacement parts that will prevent future clogs and leaks.
The technician evaluates pipe diameter, material compatibility, and trap condition. Preferred choices resist corrosion, inhibit algae, and fit existing fittings to avoid extra joints.
Recommended items include:
- PVC or CPVC drain lines sized to match the unit
- A properly pitched condensate trap with removable cleanout
- Corrosion-resistant float switches or safety switches
- Inline access valves or service ports for flushing
- Antimicrobial drain pans or inserts
Correct selection reduces maintenance and extends system reliability.
Conclusion
A clogged AC drain can quietly undermine comfort and system health, yet many fixes are straightforward with care and the right tools. By identifying symptoms, following safety steps, and using eco‑friendly treatments, one can restore proper drainage and prevent recurrence. Routine monitoring and timely part replacement extend equipment life and avoid costly emergencies. Who wants to learn these simple habits now to protect comfort, save money, and reduce environmental impact?