How to Thread a Pipe: Easy Step-by-Step Guide for Beginners
Key Takeaway: How to Thread a Pipe
Threading a pipe involves cutting helical grooves to ensure fittings seal and join securely. Here’s a concise step-by-step guide:
- Cut and Prepare the Pipe: Begin by cutting the pipe square and deburring both ends.
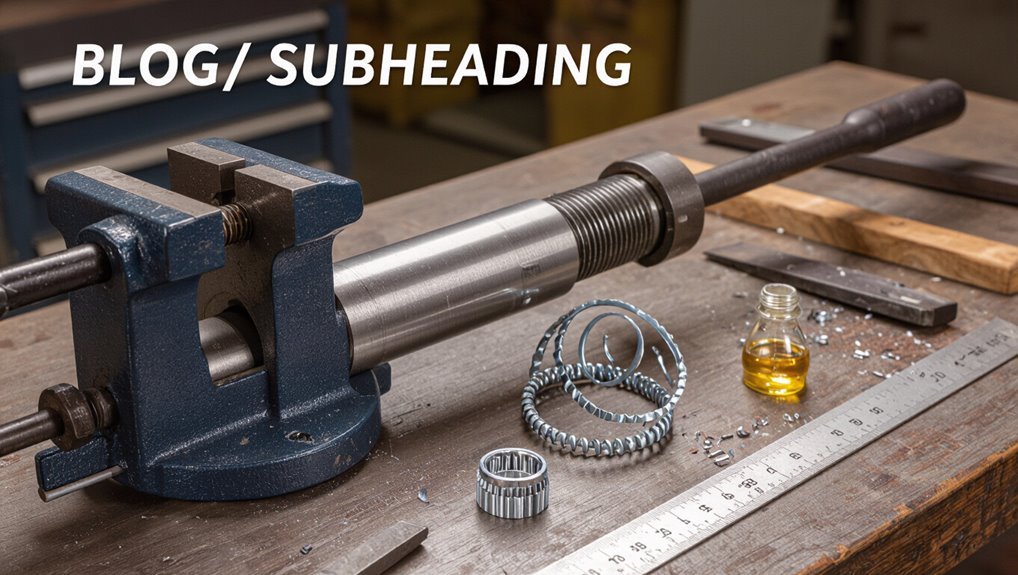
- Secure the Pipe: Place the pipe in a vise to keep it steady while you work.
- Choose the Right Die: Select the correct die based on the pipe’s material and size.
- Apply Cutting Oil: Use cutting oil to facilitate the threading process.
- Threading Process: Turn the die steadily, backing off periodically to clear any chips.
- Precautions for Thin-Walled or Plastic Pipes: Use backing or inserts to prevent collapse during threading.
- Safety and Maintenance: Adhere to safety practices and maintain your tools properly.
By following these steps, you can successfully thread a pipe for secure fittings.
What This Guide Covers
Although threading a pipe can seem technical, this guide outlines the essential steps, tools, and safety precautions needed to thread metal pipe correctly.
It focuses on practical, sequential instruction for beginners: choosing materials, measuring and marking, cutting, reaming, threading with a die or die head, cleaning, and applying sealant.
Required tools and protective equipment are specified, plus recommendations for common pipe sizes and materials.
Safety warnings emphasize secure clamping, eye and hand protection, and avoiding damaged tools.
Excluded are advanced industrial techniques, specialized machine threading, and theoretical metallurgy, keeping the content accessible and directly usable.
What Threading a Pipe Means
Threading a pipe refers to cutting helical grooves on the pipe’s end so it can screw into fittings or other pipes.
Different thread forms—such as tapered versus straight and varied pitch and profile standards—determine compatibility and sealing method.
Proper thread selection and execution are critical for mechanical strength and leak prevention.
Definition Of Threading
A threaded pipe is one with helical grooves cut or rolled into its end so it can mate with a corresponding internally or externally threaded fitting. This process—threading a pipe—creates standardized ridges and valleys that allow pipes to be joined securely, resist leakage when paired with appropriate sealant, and transmit torque for assembly.
Threading refers to forming those grooves to specified dimensions and pitch so components align and seal reliably. It transforms plain pipe ends into connection points compatible with fittings, valves, or couplings.
Proper threading preserves pipe strength, guarantees repeatable assembly, and facilitates disassembly for maintenance or reconfiguration.
Thread Types Explained
When selecting a thread for a pipe connection, engineers consider profile, direction, pitch, and sealing method to guarantee compatibility and performance.
Thread types define how pipes mate, seal, and resist pressure. Common categories vary by shape and purpose:
- Parallel (straight) threads: maintain alignment, require separate gasket or O-ring for sealing.
- Tapered threads: compress to form a pressure-tight joint as tightened.
- Buttress threads: designed for high axial loads and one-directional strength.
- Acme threads: used when strength and easier assembly are needed.
- Metric and unified threads: standardized sizes for general mechanical compatibility across fittings and tools.
Why Threads Matter
Selecting the correct thread type informs not only how parts fit together but also how they perform under pressure, vibration, and thermal changes.
Threading a pipe creates a mechanical joint that transmits load, seals fluid paths, and aligns components. Proper thread profile, pitch, and tolerance prevent leaks, galling, and loosening. Matching male and female threads guarantees even load distribution and correct engagement depth.
Material compatibility and surface finish influence corrosion and wear at the interface. Incorrect threads cause failure modes: cross-threading, stripping, or fatigue.
Understanding these functions guides thread selection, machining technique, and inspection to ascertain reliable piping systems.
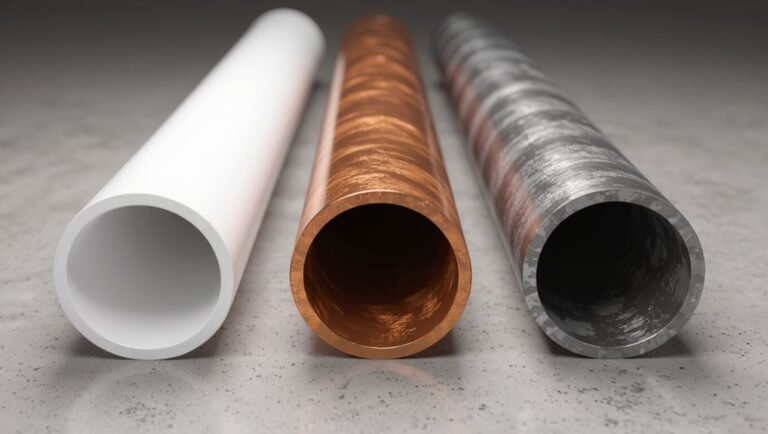
Which Pipe Materials You Can Thread (Steel, Brass, PVC?)
The article now examines which pipe materials are suitable for threading, focusing on steel and black iron, brass and copper, and PVC/CPVC.
Each material presents different cutting characteristics, tool requirements, and joint-performance considerations.
Practical limits and best-practice tips for achieving reliable threads on each type will be compared.
Steel And Black Iron
Steel and black iron pipes are commonly threadable because their ductile ferrous composition holds cutting threads reliably without cracking. The material suits manual and machine threading for plumbing, gas, and structural uses.
Proper support, sharp dies, and cutting oil reduce burrs and tool wear. Thread standards (NPT, BSP) apply; verification with gauges guarantees seal integrity. Safety gear is essential due to metal shavings.
- Common sizes: 1/8″–2″ frequently threaded
- Use cutting oil to prevent galling
- Clamp securely to avoid movement
- Check threads with go/no-go gauges
- Deburr and clean before assembly
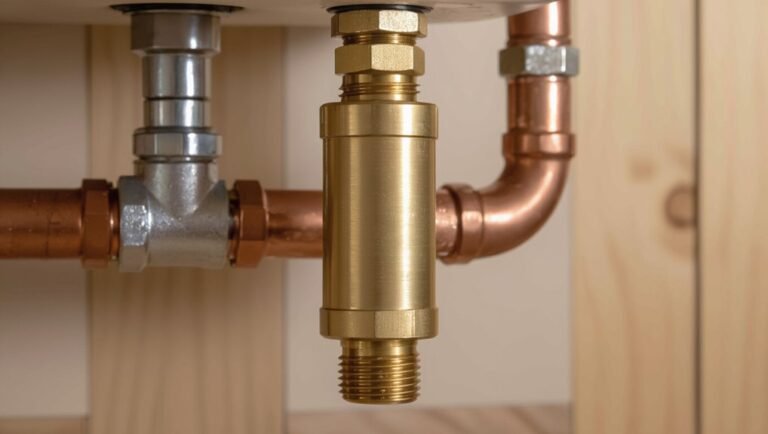
Brass And Copper
Brass and copper pipes thread well because their softer, non-ferrous compositions allow clean, consistent cuts without cracking when using appropriate dies and moderate pressure.
Threading requires secure clamping, correct die size, and steady feed to prevent burrs and ovalization. Lubrication specific to copper/brass reduces galling and improves finish.
After cutting, chamfering the pipe end eases die engagement and preserves thread form. Inspect threads for uniform depth and remove debris before assembly.
These metals suit fittings that seal with thread tape or compound; overtightening should be avoided to prevent deformation and compromised sealing surfaces.
PVC And CPVC
PVC and CPVC pipe present different challenges than metal: their thermoplastic composition is softer and more brittle, so threading is possible but requires care to prevent cracking, ovalization, and uneven threads.
Practitioners assess suitability, choose hand threading tools, and limit torque. Preparation includes square cuts, chamfering, and support to avoid collapse. Solvent-weld fittings or mechanical adapters are often preferred over cut threads.
Threading should be limited to serviceable lengths and low-pressure applications.
Key considerations:
- Use high-quality plastics-rated dies and gentle feed
- Secure pipe with soft jaws or cradle
- Cooling and lubricant compatible with PVC/CPVC
- Avoid power threading tools
- Inspect threads for hairline fractures
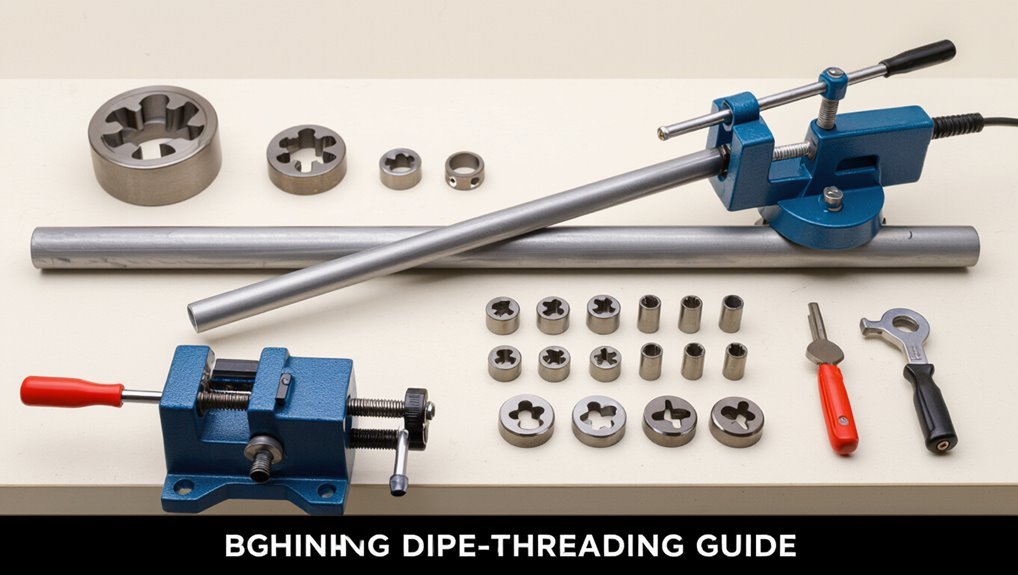
Tools You Need
A few essential tools and a couple of optional aids are required before threading a pipe to guarantee clean threads and safe work.
A quality pipe cutter or hacksaw guarantees square, burr-free ends; a deburring tool or round file removes internal and external burs. A pipe vise or clamp secures the workpiece.
Threading requires a ratcheting die handle or bench-mounted die head and hardened dies sized appropriately (details on selection follow later). Cutting oil reduces heat and eases cutting.
Safety gear includes gloves and eye protection. A wire brush cleans debris; a caliper or tape measures length and verifies thread engagement.
Pick the Right Die for Your Pipe Size
Several factors determine which die fits a pipe: nominal pipe size, thread standard (NPT, BSP, etc.), and material thickness.
The correct die matches the pipe’s nominal diameter and thread form; pitch and taper must align with fittings. Material affects die selection—softer metals need different cutting geometry than steel.
Inspect die markings and use gauges to confirm pitch. For interchangeable dies, choose the size insert corresponding to pipe schedule.
Consider die holder compatibility and whether a taper or parallel die is required.
- Verify nominal pipe size marking
- Confirm thread standard (NPT/BSP)
- Check thread pitch
- Match die material to pipe alloy
- Ascertain holder compatibility
Safety Gear and Shop Setup Before You Start Threading
With the correct die selected and inspected, attention shifts to safety gear and workshop arrangement to prevent injury and guarantee accurate threads.
Workers don safety glasses, cut-resistant gloves, and hearing protection; avoid loose clothing and secure long hair.
Ascertain a sturdy bench or vise firmly clamps the pipe at comfortable height, leaving enough overhang for threading.
Position adequate lighting and keep the work area clear of tripping hazards and flammable materials.
Have cutting oil, a cleanup rag, and a small brush within reach.
Confirm power tool cords are routed safely and that a fire extinguisher and first-aid kit are accessible.
Measure and Mark Thread Length
Measure the required thread length from the pipe end to the pipe fitting’s stop or to the specified engagement depth, then mark that point clearly. A precise mark guarantees correct fit and avoids over- or under-threading.
The technician verifies dimensions against fitting specs and accounts for thread type (NPT or BSP) and taper. Use a square, durable scribe or fine-tip marker, and inspect the pipe circumference for uniformity. Record the measurement for repeatability.
- Confirm fitting engagement depth
- Compare thread standards and pitch
- Mark around the circumference evenly
- Recheck measurement before cutting
- Note measurements for future reference
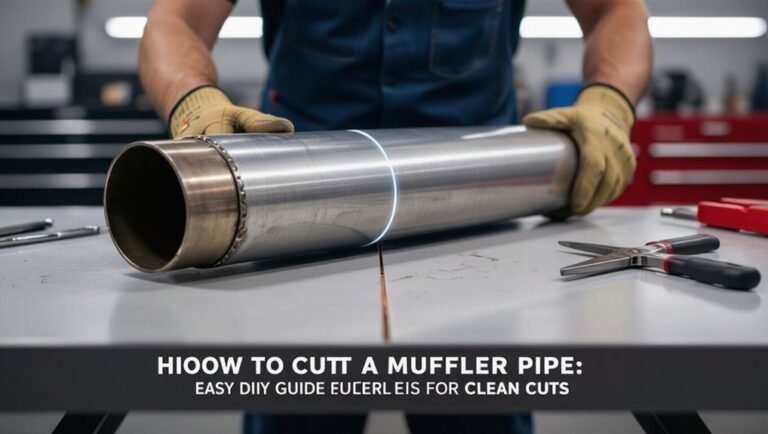
Prepare the Pipe: Cutting, Deburring, and Facing the End
After verifying and marking the thread length, preparation of the pipe begins with cutting, deburring, and facing the end to guarantee square, smooth surfaces for accurate threading and leak-free joints.
The pipe is cut using a proper saw or tubing cutter at the marked point, ensuring a straight cut. The cut end is deburred inside and out with a file or deburring tool to remove sharp edges and metal shavings.
Facing the end with a flat file or lathe removes any burr-induced unevenness, producing a square face perpendicular to the pipe axis. Cleanliness is checked before threading.
Secure the Pipe in a Vise Without Damaging It
Several simple precautions protect the pipe when clamping it in a vise for threading. Protective measures prevent marring and guarantee secure, straight work.
Use soft jaws or padding to distribute pressure and avoid direct metal-to-metal contact. Center the pipe horizontally and clamp near the work area but leave enough exposed length for tooling. Avoid over-tightening, which can deform thin-walled pipe.
- Wrap jaws with leather, rubber, or duct tape
- Use pipe vise or V-block for round stock
- Support long sections with a steadying prop
- Check alignment with a square or straight edge
- Tighten incrementally, testing grip after each turn
Thread With a Hand Die
Begin by selecting the correct hand die for the pipe material and thread standard, then mount it in a matching die stock so the orientation and cutting edges are secure.
Position the pipe in the vise with protected jaws, exposing the uncut end. Apply cutting oil liberally to the pipe and die.
Start the die square to the pipe, turn the die stock clockwise with steady pressure to engage teeth, and advance a quarter turn to half turn at a time.
Back the die periodically to clear chips and reapply oil. Continue until required thread length is reached, then deburr the thread and inspect for smooth, consistent grooves.
Thread With a Ratcheting Die Head or Threading Machine
When using a ratcheting die head or threading machine, the operator selects the correct die size to match the pipe diameter and thread pitch.
The pipe must be firmly clamped and aligned with the die head to guarantee straight, even threads. Proper setup minimizes cross-threading and reduces the need for rework.
Choose Proper Die Size
Selecting the correct die size is critical to producing accurate, durable threads and preventing damage to both the pipe and tooling.
The operator verifies pipe nominal diameter and wall thickness, matches thread standard (NPT, BSP, etc.), and chooses a die with compatible pitch and taper.
Use measurement tools to confirm dimensions before mounting the ratcheting die head or threading machine.
If uncertain, consult manufacturer charts or a calibrated gauge.
Incorrect dies cause leaks, cross-threading, and rapid tool wear.
- Match nominal pipe size
- Confirm thread standard
- Verify pitch and taper
- Check die condition
- Consult manufacturer’s chart
Secure And Align Pipe
With the correct die selected and inspected, the pipe must be firmly secured and precisely aligned before threading with a ratcheting die head or threading machine.
The operator places the pipe in a vise or machine clamp, using soft jaws or protective material to prevent marring. The pipe is leveled so its axis matches the die head, checking alignment visually and with a square.
Confirm sufficient overhang for the desired thread length and clear access for the die. Lock the clamp tightly, confirm rotational clearance, and test-run the die head without cutting pressure.
Proper securing and alignment reduce chatter, uneven threads, and tool damage.
Cutting the Thread
Before cutting the thread, the pipe must be secured and marked to verify the die engages squarely and advances the correct distance; improper alignment or movement will produce uneven threads that leak or fail to mate.
The operator applies cutting oil, positions the die squarely, and begins turning the die stock evenly. Moderate, steady pressure creates full-profile threads; backing off periodically clears chips.
Attention to die orientation prevents cross-threading. Final passes verify correct pitch and length without overcutting.
- Use quality cutting oil
- Keep die perpendicular to pipe
- Turn with steady, even strokes
- Back off to break chips
- Stop at marked depth
Chasing and Cleaning Threads
After cutting, the threads should be chased and cleaned to remove burrs, chips, and cutting oil that could prevent a proper seal.
A thread chaser or die cleans and realigns damaged threads; it is used with steady pressure, turning evenly to follow the original pitch.
After chasing, compressed air or a brush removes loose debris. A solvent or water-based cleaner removes oil and metal filings, followed by drying with a lint-free cloth.
Inspect threads visually and with a finger for snags. Repeat chasing if imperfections remain.
Properly cleaned threads guarantee accurate engagement and reduce the risk of leaks or cross-threading during assembly.
Apply Thread Sealant: Tape vs. Compound
One of the final steps in preparing threaded pipe joints is applying a sealant, and the choice typically comes down to PTFE tape or pipe thread compound.
The writer explains pros and cons objectively: tape is clean, quick, and best for parallel threads; compound fills gaps, resists high pressure, and suits tapered threads.
Application tips include wrapping tape clockwise and applying compound sparingly.
Consider compatibility with pipe material and fluid. When unsure, follow manufacturer guidance or local codes.
- PTFE tape: clean, non-messy
- Pipe compound: gap-filling, durable
- Wrap direction matters
- Use appropriate compatibility
- Apply sparingly to avoid excess
Test the Threaded Connection for Leaks and Fit
A dry fit test is performed first to confirm alignment and thread engagement without sealant.
Next, a controlled pressure water check reveals any leaks under operating conditions.
Finally, the connection is inspected for sealant faults or gaps and retightened or resealed as needed.
Dry Fit Test
Before permanent sealing, the dry fit test verifies that the threaded pipe and fitting align, seat fully, and rotate without undue resistance.
The installer assembles components by hand, checks thread engagement depth, and guarantees ends meet flush. Misalignment, cross-threading, or binding are corrected before applying sealant. The process confirms correct part selection and thread type compatibility.
Observe thread condition and clean debris, then disassemble for final sealing if satisfactory.
- Hand-thread components to feel for smooth engagement
- Inspect for cross-threads or damaged crests
- Verify alignment and seating depth
- Confirm thread type and size match
- Clean mating surfaces thoroughly
Pressure Water Check
With the dry fit confirmed, the installer proceeds to a pressure water check to verify the threaded connection holds under operating conditions and to detect any leaks or improper seating. The assembly is pressurized gradually, observing joints and fittings for visible seepage, bulging, or movement. Notes are taken on pressure stability and time to drop if any. Any change prompts isolation and re-inspection of seating and alignment. The procedure documents acceptable pressure, test duration, and corrective action required. Results guide whether the joint passes or needs reassembly before final sealing and commissioning.
| Parameter | Observed | Action |
|---|---|---|
| Pressure | 60 psi | Monitor |
| Duration | 10 min | Pass/Fail |
| Leak | None | Continue |
Sealant Leak Inspection
How thoroughly does the threaded joint hold when coated with sealant and exposed to operational conditions? A concise inspection confirms fit, seal integrity, and readiness.
The inspector observes threads, applies test pressure, and notes signs of seepage or movement. Immediate corrective steps follow any defect.
- Visually inspect for uneven sealant coverage and thread gaps.
- Apply recommended test pressure and monitor for steady drops.
- Use soapy water or electronic detectors to locate micro-leaks.
- Check joint torque matches specifications; adjust if necessary.
- Re-seal and retest when leakage, loose fit, or contamination is detected.
Common Mistakes That Ruin Threads and How to Avoid Them
Thread damage often results from a few predictable mistakes that compromise fit and seal; recognizing these errors early prevents costly rework and leaks.
Common faults include cross-threading by misalignment, over-tightening that strips threads, and using dull or incorrect cutting tools that create burrs or uneven profiles.
Contamination with dirt, metal chips, or old sealant deforms mating surfaces and prevents proper engagement.
Inadequate lubrication increases friction and tool wear, while improper clamping allows workpiece movement.
To avoid these issues, guarantee precise alignment, use sharp, appropriate tools, clean parts thoroughly, apply correct lubricant or cutting compound, and tighten to specified torque.
Thread Standards: NPT vs. BSP vs. Metric
Mistakes that damage threads are especially problematic when mating parts follow different standards, because similar-looking profiles can be incompatible.
The section contrasts common thread systems so readers pick correct fittings and avoid leaks or cross‑threading.
- NPT: tapered, sealed by wedging; common in North America.
- BSP: includes BSPP (parallel) and BSPT (tapered); widely used in UK/Europe.
- Metric: ISO metric threads; measured by pitch and diameter.
- Identification: measure pitch, diameter, and thread angle (60° vs. 55° for BSP).
- Adapters: use certified adapters or remanufactured fittings to switch standards safely.
Threading Soft or Thin‑Walled Pipes Without Collapsing Them
Soft or thin-walled pipes require special handling when cutting and threading because excessive clamping pressure, aggressive dies, or unsupported sections easily deform the tube, ruining the seal and fit.
To prevent collapse, use a mandrel or internal support plug sized to the bore, and clamp in a soft-jaw vise or padded fixture to distribute pressure.
Select fine-pitch dies and advance slowly with cutting oil to reduce cutting forces. Back off frequently to clear chips and inspect threads.
If hand-threading, apply steady, light torque; for powered tools, use low speed and minimal feed.
Deburr gently and verify fit with a trial coupling.
When to Use Fittings or Adapters Instead of Threading
When pipes of different materials must be joined, fittings or adapters are often preferred to avoid incompatible threading and seal issues.
In confined or awkward spaces, compact adapters can save time and preserve structural integrity where cutting and threading would be difficult.
For temporary connections or systems expected to be disassembled, removable fittings simplify later work and reduce the risk of damage from repeated threading.
Use When Materials Differ
If two pipe sections are made from different materials—such as copper to galvanized steel, PVC to brass, or plastic to cast iron—threading directly into the dissimilar metal is often inadvisable; instead, use purpose-built fittings or adapters to guarantee a secure, leak-free joint and to prevent galvanic corrosion or material damage.
Select adapters designed for the specific materials, matching threads and pressure ratings. Consider dielectric unions, connection couplings, or flared/swaged fittings when appropriate.
- Dielectric unions prevent electrochemical reaction
- Threaded brass-to-plastic adapters avoid cracking
- Compression fittings suit thin-walled pipes
- Flared joints work for soft metals
- Verify pressure and temperature ratings
Choose For Space Constraints
Because confined spaces limit access for tooling and pipe rotation, fittings or adapters are often the practical choice over cutting and threading on-site.
Tight clearances around walls, ceilings, or equipment impede use of dies, vises, and leverage required for accurate threads. Prefabricated fittings, compression connectors, or push-fit adapters permit secure joints without altering pipe length or risking misaligned threads.
Selection depends on pressure ratings, material compatibility, and permanence required; installers should verify seal types and torque limitations.
Using adapters reduces labor, avoids cutting hazards, and preserves existing installations where space prevents safe, reliable on-site threading.
Prefer For Temporary Joins
Although temporary service calls or test setups often require quick, reversible connections, fittings and adapters are usually preferred over cutting and threading.
The technician assesses duration, access, materials, and leak risk, opting for detachable components when permanence isn’t required. Quick-connects, unions, and compression fittings save time and preserve pipe integrity.
Consider corrosion, pressure, and tool availability before committing to permanent threads.
- Quick-connect couplings for rapid assembly
- Unions when disassembly is anticipated
- Compression fittings for moderate pressure
- Threaded adapters when matching sizes only
- Temporary hose or barbed fittings for testing purposes
Maintain Dies and Threading Tools
Regular inspection and prompt maintenance of dies and threading tools preserve thread quality and extend tool life.
Users should clean cutting surfaces after each use, removing metal shavings and old lubricant with a brush and solvent.
Sharpen or replace dull dies to prevent inconsistent threads; follow manufacturer specifications for grit and angles.
Lubricate moving parts and threads with appropriate cutting oil to reduce heat and wear.
Store tools in dry, organized cases to avoid impacts and corrosion.
Record usage and service intervals, and perform periodic calibration checks on die heads and chasers to guarantee accurate, repeatable threads.
Troubleshooting: Cross-Threading, Rough Threads, and Stripped Threads
When threads form poorly or fail altogether, diagnosing the cause quickly prevents wasted parts and repeated work. Common problems include cross-threading, rough threads, and stripped threads; each has distinct causes and remedies. Inspect dies, lube, and alignment before continuing.
Use corrective techniques only when threads remain serviceable; replace components when damage is severe. Follow safety practices and verify fit with gauges.
- Check alignment: misaligned dies cause cross-threading.
- Clean and lubricate: debris yields rough threads.
- Re-cut lightly: minor imperfections can be chased out.
- Replace stripped fittings: threads beyond repair.
- Use thread gauges to confirm correct pitch and fit.
Conclusion
Threading a pipe requires proper tools, technique, and material knowledge to guarantee secure, leak-free joints. The guide demonstrates that with correct dies, steady alignment, and liberal cutting oil, steel and brass thread well while PVC often needs fittings; thin-walled pipes demand backing or supportive mandrels to avoid collapse. Investigating the theory that careful preparation prevents most failures reveals it holds: most cross-threading, rough cuts, and stripped threads trace to haste, wrong dies, or neglected maintenance.