How to Paint PVC Pipe: Easy Steps for a Smooth, Long-Lasting Finish
Key Takeaway: How to Paint PVC Pipe for a Lasting Finish
To effectively paint PVC pipe, follow these steps for optimal results:
- Clean and Degrease: Start by thoroughly cleaning the pipe to remove any dirt or oils.
- Scuff the Surface: Lightly sand the PVC with 220–400 grit sandpaper to create a better surface for the paint to adhere to, then remove any dust.
- Apply a Primer: Use a plastic-bonding primer specifically formulated for PVC to ensure strong adhesion.
- Paint: Apply two thin coats of acrylic or vinyl-specific paint, allowing adequate drying time and lightly sanding between coats for a smooth finish.
- Cure Conditions: For the best results, paint in moderate temperatures and low humidity.
- Topcoat: Consider adding a clear topcoat for UV protection to enhance durability.
This method guarantees a smooth, long-lasting finish on your PVC pipe.
Why Paint PVC Pipe: Durability and Appearance
Although PVC resists rust and rot, painting it improves both appearance and long-term performance by protecting the surface from UV degradation, abrasion, and staining.
The finish conceals discoloration and blends pipework with surroundings, creating a professional look for visible installations. Proper coatings block sunlight-driven chalking and reduce micro-cracking that leads to brittleness over time.
Paint also eases cleaning and resists adherence of dirt and algae on outdoor runs. Selecting compatible primers and topcoats guarantees adhesion and preserves dimensional stability.
When You Should : and Shouldn’t : Paint PVC Pipe
When is painting PVC pipe appropriate, and when should it be avoided?
Painting suits visible, non-pressurized installations needing UV protection, color matching, or corrosion resistance in outdoor or decorative settings. It is appropriate when surfaces are clean, accessible, and not subject to high heat or chemical exposure that could degrade coatings.
Painting should be avoided on pipes carrying potable water where coatings might contaminate contents, on joints requiring solvent welding access, or on pipes in concealed locations where maintenance or inspections are frequent.
If pipe function, safety, or regulatory compliance could be compromised, do not paint without consulting relevant codes or a professional.
What Paint Types Bond Best to PVC Pipe
After deciding whether a PVC run should be painted, the next consideration is which types of paint will actually bond to its slick, nonporous surface.
Proper adhesion depends on chemistry and surface prep; certain formulations adhere better without excessive priming.
Common successful choices include acrylic latex with a recommended PVC primer, oil-based enamels for durability in exposed areas, and specialty PVC or vinyl-specific paints formulated to flex with the pipe.
Two-component epoxy coatings offer the strongest bond and chemical resistance for demanding applications.
Selection should match exposure, flexibility needs, and compatibility with any required primer.
- Acrylic latex (with primer)
- Oil-based enamel
- PVC/vinyl-specific paints
- Two-component epoxy
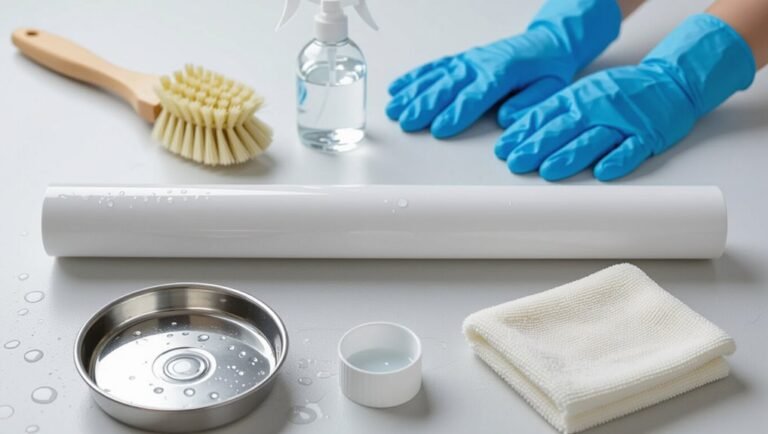
Tools and Materials You Need to Paint PVC Pipe
Preparation begins with assembling a concise set of tools and materials tailored to PVC’s smooth surface and the chosen paint type.
Essential items include fine-grit sandpaper (220–400), clean lint-free cloths, isopropyl alcohol or mild detergent, and a tack cloth for dust removal.
A quality brush or foam roller suited to the paint (or spray equipment if chosen) guarantees even application.
Painter’s tape and drop cloths protect surrounding areas.
Gloves and safety glasses protect the user.
Optional items: a respirator for solvent-based products, a small stirring stick, and disposable trays.
All components should be compatible and clean before starting.
How to Choose a Primer for PVC: Solvent vs. Adhesion Primers
With surface cleaning and sanding complete, selecting the right primer determines paint adhesion and long-term durability on PVC.
The choice is between solvent-based primers, which slightly soften PVC for molecular bonding, and adhesion (or bonding) primers formulated to mechanically grip without aggressive solvents.
Consider PVC type, indoor/outdoor exposure, and paint chemistry compatibility.
Solvent primers provide robust bond but require ventilation and careful application; adhesion primers are safer for delicate fittings and confined spaces.
Test a small area when unsure.
Choose a primer rated for plastics and follow manufacturer cure times before topcoating.
- Evaluate PVC and environment
- Match primer to paint
- Weigh solvent risks
- Test before full application
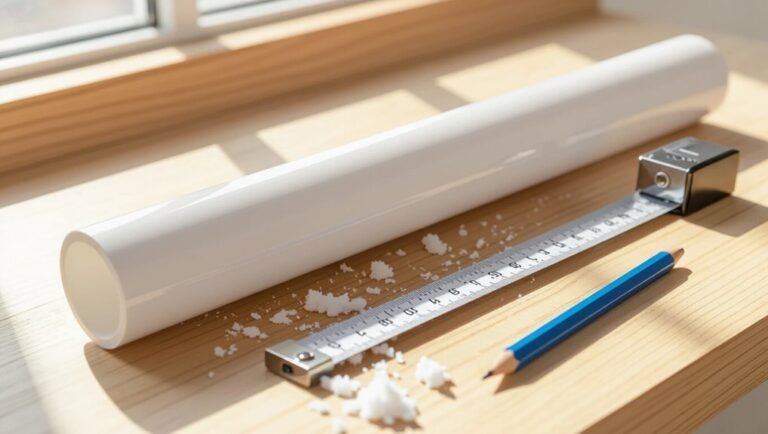
How to Measure and Plan Paint Coverage for PVC Pipe
When planning paint coverage for PVC pipe, the painter should calculate surface area, account for primer and topcoat layers, and factor in application method losses so materials and time are estimated accurately.
Measure pipe length and outside diameter; compute lateral area with 3.1416 × diameter × length. Include fittings by estimating equivalent length or adding small percentage.
Check paint and primer coverage rates on labels (sq ft per gallon) and divide total area by coverage per coat, then multiply by number of coats plus 10–20% for overspray or waste.
Convert gallons to practical container sizes and allow extra time for drying between coats.
How to Prepare PVC Pipe Surface for Painting
Before painting, the PVC surface should be cleaned thoroughly to remove grease, dirt, and any release agents.
Lightly scuffing the pipe with fine sandpaper improves primer and paint adhesion.
All dust must then be wiped or blown away so the coating bonds to a clean surface.
Clean Surface Thoroughly
Start by removing dust, grease, and loose residue from the PVC pipe to guarantee paint adhesion and a smooth finish.
The surface should be inspected, and contaminants eliminated with appropriate cleaners. Use mild detergent or isopropyl alcohol for oils; rinse thoroughly and dry. Avoid solvent damage.
For stubborn deposits, gently scrub with a nonabrasive pad. Confirm the pipe is fully dry and free of lint before priming or painting to prevent peeling and irregular texture.
- Inspect for dirt and stains.
- Wipe with detergent or alcohol.
- Rinse and air-dry completely.
- Remove lint with a clean cloth.
Scuff For Better Adhesion
A light scuffing of the PVC surface creates the microscopic texture necessary for primer and paint to grip, improving adhesion and reducing the risk of flaking.
Using fine-grit sandpaper (220–320) or a scuff pad, work evenly along the pipe’s length with moderate pressure to dull the glossy finish without gouging.
Rotate the pipe for consistent abrasion, addressing seams and curves carefully. For small areas, a sanding sponge conforms to contours.
After scuffing, inspect for scratches or shiny spots and rework as needed. Proper scuffing guarantees primer wets the surface uniformly, forming a reliable bond for subsequent coats.
Remove Dust Completely
Once scuffing is complete, remove all dust so primer and paint can bond without interference. The surface must be spotless; particles cause fisheyes, poor adhesion, and uneven texture.
Use compressed air to blow loose grit from seams and sockets. Wipe with a lint-free cloth dampened with isopropyl alcohol to lift fine residue, then follow with a dry cloth. Allow full evaporation before priming.
Inspect under good light and repeat if needed. Store cleaned pieces in a dust-free area until painting to prevent recontamination.
- Blow out dust with compressed air
- Wipe with lint-free cloth and alcohol
- Dry thoroughly and inspect
- Store in clean area
How to Clean PVC Pipe: Dirt, Grease, and Mold Removal
Several common contaminants—dirt, grease, and mold—can degrade PVC pipe appearance and performance if left untreated. The procedure begins with a dry brush and soapy water to remove surface grime. Grease needs a degreaser or diluted trisodium phosphate; rinse thoroughly. For mold, apply a bleach solution (1:10) or a commercial mildew remover, wait briefly, then rinse and dry outdoors. Wear gloves and eye protection. Allow full drying before painting. Lightly inspect for residues; repeat if needed. Proper cleaning guarantees paint adhesion and longevity.
| Emotion | Action | Outcome |
|---|---|---|
| Relief | Clean thoroughly | Confidence |
| Concern | Treat mold | Safety |
| Satisfaction | Rinse well | Readiness |
| Calm | Dry completely | Durability |
| Pride | Inspect | Success |
How to Sand PVC Pipe for a Smooth, Paintable Surface
With the PVC clean and fully dry, sanding prepares the surface to accept primer and paint by removing gloss and creating a slight texture for better adhesion.
The process uses progressively finer abrasives, gentle pressure, and consistent strokes to avoid gouging. After sanding, wipe away dust with a tack cloth and inspect for smoothness.
Recommended steps:
- Start with 120–180 grit sandpaper or a sanding sponge for initial dulling.
- Follow with 220 grit for a finer finish and uniform texture.
- Sand along the length, rotating the pipe for even coverage.
- Clean thoroughly before priming and painting.
How to Repair Scratches, Gouges, and Seams on PVC Pipe
Repairing scratches, gouges, and seams on PVC pipe restores both appearance and surface integrity before priming and painting.
Minor scratches are cleaned, abraded lightly with fine-grit sandpaper, and wiped free of dust.
Deeper gouges require cleaning, filling with a PVC-compatible filler or solvent-welded patch, smoothing with a putty knife, then curing fully.
Seams and mold lines are sanded flat or trimmed with a utility knife, then feathered with sandpaper.
After repairs, the area is sanded flush, dust removed, and inspected for smoothness.
Proper repair guarantees paint adhesion and an even final finish.
How to Mask and Protect Fittings, Threads, and Nearby Surfaces
Before painting, fittings, threaded ends, and surrounding surfaces must be carefully masked and shielded to prevent paint intrusion, protect functional finishes, and keep mating parts clean.
Use low-tack painter’s tape on threads, wrapping lightly to avoid deformation; remove and replace tape between coats. Cover flanges and valves with plastic sheeting secured by tape or elastic bands to block overspray.
Slip foam caps or cling-wrap over open pipe ends to stop paint buildup while maintaining easy removal. Clean tape edges before priming to guarantee adhesion and remove all masking promptly after final cure to avoid tearing or residue.
- Tape threads lightly
- Cap open ends
- Shield valves/flanges
- Remove masking after cure
How to Choose a Paint Finish for PVC: Matte, Satin, or Gloss
When selecting a finish for painted PVC, the choice between matte, satin, and gloss should be driven by the desired appearance, durability, and ease of maintenance. Matte hides imperfections and offers a low-reflective, subtle look but is less washable. Satin balances sheen and washability, making it suitable for exposed pipes needing moderate cleaning. Gloss provides high durability and easy cleaning, highlighting surface flaws and requiring excellent preparation. Consider location, contact frequency, and aesthetic goals when choosing.
| Finish | Best use |
|---|---|
| Matte | Low visibility areas |
| Satin | General-purpose |
| Gloss | High-contact areas |
| Notes | Prep-dependent |
How to Thin Paint for Brush, Roller, or Spray Application
Choosing the right finish sets expectations for appearance and cleanability, but achieving a smooth, even coat on PVC also depends on properly thinning the paint for the chosen application method.
For brush work, add small amounts of solvent (water for latex, manufacturer-recommended thinner for solvent-based) to improve flow without reducing hiding power; test on scrap.
Rollers benefit from slightly thinner paint to reduce stipple—mix incrementally until nap pattern smooths.
For spraying, follow spray equipment guidelines and thin more aggressively for atomization. Avoid over-thinning to prevent runs and poor adhesion.
- Start small, stir thoroughly.
- Test spray or stroke.
- Maintain manufacturer ratios.
- Re-mix before use.
How to Apply Primer to PVC Pipe for Best Adhesion
A clean, properly prepared surface is essential for primer to bond to PVC; begin by sanding the pipe lightly with fine-grit sandpaper, wiping away dust with a lint-free cloth, and degreasing with a solvent recommended by the primer manufacturer.
Apply a primer formulated for PVC using a quality brush, foam brush, or spray, maintaining even, thin coats to avoid runs and pooling. Work in a well-ventilated area and follow manufacturer instructions regarding temperature and humidity.
Feather edges to guarantee uniform coverage. Inspect for missed spots and recoat those areas. Clean tools promptly and dispose of waste per local regulations.
How Long to Wait Between Primer and Paint Coats
After primer has been applied and allowed to set, determining the correct wait time before painting hinges on the primer type, ambient conditions, and manufacturer guidance.
Typical wait ranges guarantee adhesion without trapping solvents. Fast-dry primers may accept paint in 30–60 minutes; standard primers often require 2–4 hours; solvent-rich or low-temperature applications can need 24 hours.
Always perform a tack test in an inconspicuous spot. Excessive delay risks dust contamination; painting too soon can cause lifting or blistering.
When in doubt, follow label instructions and favor longer curing when humidity or cool temperatures prevail.
- Fast-dry: 30–60 minutes
- Standard: 2–4 hours
- Slow/low-temp: up to 24 hours
- Tack test before painting
How to Brush-Paint PVC Pipe Without Leaving Streaks
Start with a clean, primed surface and use a high-quality synthetic-bristle brush sized to the pipe diameter to minimize visible brush marks. Apply thin, even strokes along the pipe’s length, keeping a wet edge and avoiding overworking. Lightly load the brush, remove excess, and pull paint smoothly; finish each pass in one direction. Allow correct drying time between coats. Sand very lightly with fine grit if needed and remove dust before recoating. Maintain consistent pressure and tempo to prevent ridges.
| Brush Load | Stroke Length | Finish Tip |
|---|---|---|
| Light | Full-length | One-direction |
| Moderate | Overlap 10% | Smooth finish |
| Heavy | Multiple pass | Avoid rework |
How to Roll-Paint PVC Pipe for Even Coverage on Long Runs
For long runs of PVC pipe, proper surface preparation—cleaning, sanding, and priming—ensures paint adhesion and a smooth finish.
Selecting an appropriate paint and primer formulated for PVC and outdoor use prevents cracking and promotes durability.
Using a small-diameter foam roller, working in consistent strokes along the pipe’s length, and applying thin, even coats reduces drips and provides uniform coverage.
Surface Preparation Steps
Before any roller touches the surface, the PVC must be cleaned, abraded, and inspected so paint will adhere consistently along the entire run. The operator removes dust, grease, and labels with a mild solvent, then scuffs using fine-grit sandpaper to create uniform tooth.
Joints and fittings receive attention to eliminate gaps and shadowed spots. Visual inspection under good light catches hairline cracks and warpage; repairs or supports are applied before painting.
- Degrease and wipe with lint-free cloth.
- Sand uniformly with 220–320 grit.
- Inspect seams, cut out defects.
- Clean residue and allow full drying time.
Choose The Right Paint
With the surface prepared, attention turns to selecting a paint formulated to bond to PVC and withstand the demands of long runs and rolling application.
Choose a solvent- or acrylic-based PVC-compatible paint labeled for plastics; these offer adhesion and flexibility. Opt for fast-drying formulas to reduce sagging on vertical stretches and low-VOC options for indoor work.
Match sheen to use—satin or semi-gloss improves washability and hides roller marks better than flat. Buy slightly more than calculated to maintain consistent batch color across the run.
Test a small section to confirm adhesion and final appearance before committing to the entire length.
Roll Technique And Tips
Begin by loading a high-density foam roller evenly—too much paint causes drips, too little yields streaks—then work in manageable sections, maintaining a consistent overlap of about one-third of the previous pass to guarantee uniform coverage along the pipe’s length.
The practitioner rolls steadily, applying light pressure to avoid pooling on seams and fittings. Rotating the pipe or using a cradle keeps the contact surface level. Allow flash drying between coats to prevent sagging.
Edge work is completed with a small brush for end caps and joints, blending immediately to avoid lap marks.
- Use thin, even coats
- Keep roller nap minimal
- Roll along grain/direction
- Inspect under good light
How to Spray-Paint PVC Pipe for a Factory-Like Finish
Achieving a factory-like finish on PVC pipe requires careful surface preparation, the right primer and paint system, and controlled spraying technique to avoid runs and orange peel.
Professionals clean and sand the PVC, apply a plastic-bonding primer, and use thin, even passes with a compatible spray paint or HVLP gun to build smooth, durable coats.
Spraying occurs in a ventilated area with consistent distance and overlapping strokes for uniform coverage. Multiple light coats are preferred to heavy single coats, allowing proper flash time.
After drying, a clear polyurethane or acrylic topcoat adds UV and abrasion resistance, producing a professional, long-lasting appearance.
How to Paint Inside PVC Pipe Bends and Elbows
When addressing bends and elbows, attention to the inner surface condition is crucial.
The interior should be cleaned, sanded lightly, and wiped to guarantee adhesion.
Careful application with a narrow brush or angled spray keeps coverage even around curves.
Preparing Inner Surfaces
Painting the inside of PVC bends and elbows requires extra attention because curved interiors collect dust, solvent residue, and mold-release agents that inhibit adhesion.
The preparatory process focuses on cleaning, deglossing, and ensuring a dry, grit-free surface. A small-diameter nylon brush accesses tight radii; solvent wipes remove oils, followed by a light scuff with fine abrasive to promote mechanical keying.
Masking exterior edges prevents overspray. Primers compatible with PVC should be applied sparingly and allowed full flash time before topcoat.
- Clean: solvent wipes, brush debris away
- Degloss: 220–320 grit scuff
- Dry: compressed air or absorbent cloth
- Prime: thin, PVC-specific application
Painting Bends Evenly
Start by positioning the elbow so the interior curves are accessible and well-lit; consistent access angles minimize missed spots and pooling. The painter uses a small angled brush or foam brush, working from the crown toward each leg, applying thin coats and rotating the piece to maintain uniform coverage. Slow, controlled strokes prevent drips. Allow tack time between coats; inspect under light for thin areas. For tight radii, a sponge-wrapped dowel eases access and smooths enamel. Clean excess at the throat immediately to avoid buildup.
| Tool | Purpose |
|---|---|
| Angled brush | Precise coverage |
| Foam brush | Smooth finish |
| Dowel + sponge | Reach tight radius |
| Light source | Reveal flaws |
How Many Coats of Paint Do PVC Pipes Need?
How many coats of paint does PVC typically require depends on the type of paint, the pipe’s exposure, and surface preparation.
Generally, two to three thin coats deliver uniform coverage and durability, with primer counted separately. One coat of primer plus two finish coats suits most situations; high-traffic or outdoor exposures may justify an extra finish coat.
Allow proper drying and light sanding between coats for adhesion. Avoid heavy single coats that run or peel. Recommended sequencing balances protection and economy while ensuring color fidelity and weather resistance on smooth PVC surfaces.
- Primer
- Base coat
- Second finish coat
- Optional third finish coat
How to Avoid Drips, Runs, and Sags When Painting Pipe
Work deliberately to prevent drips, runs, and sags by controlling paint thickness, application speed, and drying conditions; thin, even coats applied with steady, overlapping strokes reduce excess buildup, while proper thinning, brush choice, and holding the pipe so gravity works with the stroke help maintain a smooth, uniform finish.
Allow each coat to tack up before applying the next. Inspect edges and ends immediately, smoothing any small runs with a clean brush. Rotate the pipe when possible to keep application consistent.
Maintain moderate temperature and humidity, avoid heavy loading on the brush or sprayer, and wipe away starting beads before they travel.
How to Paint PVC Pipe That Is Already Installed
Painting PVC pipe that is already installed requires careful preparation and access planning to avoid damaging surrounding surfaces or disrupting the plumbing.
The technician masks adjacent areas, shuts off water if necessary, and cleans the pipe with degreaser and fine sandpaper to promote adhesion.
Small brushes and foam rollers allow controlled application in tight spaces; multiple thin coats dry between passes.
Joints and fittings receive extra attention to avoid buildup.
After painting, masking is removed and the area inspected for missed spots or runs, with touch-ups performed promptly to guarantee a uniform, durable finish.
- Assess access and protect surroundings
- Clean and sand thoroughly
- Apply thin, even coats with appropriate tools
- Inspect and touch up immediately
How to Paint PVC Pipe Outdoors for UV Resistance
When PVC pipe is exposed to sunlight, ultraviolet radiation degrades the polymer surface, causing chalking, brittleness, and color loss.
So outdoor painting focuses on surface preparation, UV-stable primers and topcoats, and proper application to extend service life.
Clean thoroughly of dirt, oils, and chalk with detergent and light abrasion; rinse and dry.
Apply a PVC-specific or adhesion-promoting primer designed for exterior use.
Choose a UV-resistant acrylic or polyurethane topcoat rated for plastic and exterior exposure.
Spray or brush evenly, avoiding runs.
Allow full cure between coats and follow manufacturer recoat intervals.
Inspect periodically and touch up damaged areas to maintain protection.
How to Paint PVC Pipe for Plumbing vs. Decorative Use
The distinction between painting PVC used in plumbing and PVC used for decorative purposes often hinges on code compliance and planned appearance.
Plumbing applications must adhere to local building codes and may restrict paint types or require markings to remain visible.
Decorative projects prioritize finish options—color, sheen, and texture—while still recommending compatible primers and paints.
Plumbing Code Considerations
Although painting PVC can be straightforward for aesthetic projects, regulatory requirements change the approach for pipes used in plumbing systems. Codes often restrict coatings on pressure-carrying or exposed drain, waste, and vent (DWV) lines, require fire-resistant finishes in certain locations, and mandate that markings such as size and flow direction remain visible.
Professionals must consult local code and manufacturer instructions before painting. Considerations include listed materials, inspection access, and chemical compatibility.
Typical code-related actions:
- Verify that the piping and coating are listed for the designated use.
- Preserve factory stamps and flow markings.
- Avoid coatings that impede joint inspections.
- Comply with fire-rating requirements where specified.
Decorative Finish Choices
Because decorative PVC rarely carries pressure or requires code-mandated markings, finish choices prioritize appearance and durability over regulatory compliance; by contrast, plumbing applications demand low-profile, inspection-friendly coatings that do not obscure stamps or interfere with fittings.
For decorative projects, options include spray paint for smooth coverage, acrylic-base paints for easy touch-ups, and specialty metallic or faux finishes for texture. Sealers such as clear polyurethane or marine-grade varnish add abrasion and UV resistance. Preparation—cleaning, light sanding, and appropriate primer—remains essential.
Plumbing-use finishes stay conservative: thin coats of primer-compatible paint that preserve readability and maintain material compatibility.
How to Match Painted PVC to Surrounding Materials
How can a painted PVC pipe blend seamlessly with its surroundings? A detached assessment favors color, texture, scale and placement.
Matching hue involves sampling paint against adjacent materials under natural light. Texture adjustments—matte, satin or faux finishes—reduce visual contrast. Scale considerations guarantee trim, fittings and pipe diameter respect surrounding proportions. Placement and alignment respect architectural lines and sightlines to minimize attention.
- Test paint swatches next to walls, trim, and flooring.
- Mimic nearby textures with appropriate primer and finish.
- Choose colors by value and saturation, not only hue.
- Align pipes with existing architectural rhythms and sightlines.
How to Create a Durable Finish With Topcoats and Sealers
Selecting the correct topcoat—compatible with the primer and paint—ensures adhesion and long-term durability.
Proper application techniques, including thin even coats, adequate curing time, and light sanding between layers, prevent runs and promote a hard finish.
Finally, using sealers rated for UV and moisture protection helps shield PVC surfaces from weathering and color fade.
Choose The Right Topcoat
When durability and appearance both matter, choosing the right topcoat is the final step that determines how well painted PVC will resist abrasion, UV exposure, and moisture.
Selection depends on location, desired sheen, and compatibility with primer and paint. Exterior projects favor UV-stable acrylic or polyurethane; indoor uses may employ water-based polycrylic for low odor.
Consider flexibility to accommodate PVC expansion, chemical resistance for exposed pipes, and ease of maintenance. Test adhesion on scrap PVC. Warranties and manufacturer guidance inform choices.
Balance performance, appearance, and application constraints to maximize longevity without compromising the finish.
- UV-stable acrylic
- Oil-based polyurethane
- Water-based polycrylic
- Marine-grade varnish
Proper Application Techniques
Apply topcoats and sealers with steady, overlapping strokes to achieve an even, durable finish; proper technique minimizes drips, guarantees full coverage, and preserves adhesion over time.
Work in thin, multiple coats rather than one heavy layer, allowing recommended flash times between coats. Maintain a consistent distance and angle to avoid pooling at seams and fittings.
Lightly sand between coats with fine grit when instructed to promote mechanical bonding. Use a high-quality brush, foam applicator, or sprayer suited to the product.
Inspect under good light, touch up missed spots promptly, and follow cure times before handling to ascertain lasting protection.
Protect Against Weathering
Because PVC is sensitive to UV, moisture, and temperature swings, a durable topcoat and appropriate sealer are crucial to prevent chalking, cracking, and color fade.
A compatible exterior acrylic or polyurethane topcoat bonds to primed PVC, adding UV inhibitors and abrasion resistance. Sealers with flexible formulations accommodate thermal expansion without delamination.
Application in thin, even layers guarantees proper curing; multiple light coats outperform one heavy coat.
Maintenance involves periodic inspection and recoat every few years depending on exposure. Proper surface prep and recommended drying times maximize longevity, producing a resilient finish that preserves both appearance and structural integrity.
- Choose UV-stable topcoat
- Use flexible sealer
- Apply several thin coats
- Inspect and recoat regularly
How Temperature and Humidity Affect PVC Paint Jobs
Although often overlooked, temperature and humidity have a direct impact on paint adhesion, drying time, and final finish on PVC pipe.
Ideal conditions—moderate temperatures (50–85°F / 10–29°C) and relative humidity below 70%—promote proper solvent evaporation and film formation.
High humidity slows drying, risks cloudiness or blushing, and traps moisture under the film; extreme heat accelerates skin formation, causing poor flow and potential cracking.
Cold temperatures hamper cure and increase brittleness.
Air movement matters: gentle ventilation aids solvent release without causing dust contamination.
Painters should monitor weather, schedule work within recommended ranges, and allow longer drying when conditions are marginal.
How to Cure Painted PVC Pipe for Long-Lasting Adhesion
Environmental conditions influence not only drying but the subsequent cure that determines how well paint bonds to PVC.
Curing is a time-dependent chemical process; adequate ventilation, moderate temperature, and low humidity accelerate proper film formation.
Allow sufficient undisturbed time before handling, and avoid rapid temperature swings or condensation that can weaken adhesion.
- Follow manufacturer cure-time recommendations for primer and topcoat.
- Maintain steady ambient temperature (50–85°F) and humidity under 70% during cure.
- Provide gentle airflow without direct drafts to remove solvents.
- Wait full cure period before stress, immersion, or painting additional coats to guarantee durable adhesion.
How to Repair Flaking, Peeling, or Bubbled Paint on PVC
When paint on PVC begins to flake, peel, or form bubbles, the coating’s bond to the substrate has been compromised and prompt, systematic repair is needed to prevent further deterioration.
Remove loose paint with a plastic scraper and lightly sand affected areas with fine-grit sandpaper to feather edges. Clean thoroughly with a mild detergent or isopropyl alcohol; rinse and dry.
Apply a primer formulated for plastics to the prepared area, then repaint using a compatible paint in thin, even coats, allowing full cure between layers.
Inspect after curing; repeat spot-sanding and recoating if adhesion issues persist to guarantee a durable finish.
How to Prevent Chemical Damage to Painted PVC Pipes
After repairing and refinishing compromised areas, attention should turn to preventing chemical damage that can undermine paint adhesion and PVC integrity.
The guide emphasizes identification of harmful substances, barrier selection, and maintenance routines. Preventive measures reduce solvent swelling, discoloration, and premature coating failure.
- Eliminate exposure to strong solvents and harsh cleaners; use labeled-safe products.
- Apply a chemically resistant primer and topcoat rated for PVC and anticipated chemicals.
- Install physical barriers or routing to keep pipes away from spill zones and drips.
- Inspect periodically; touch up damaged coatings immediately and replace sections showing chemical degradation.
How to Paint PVC Pipe for Safe Contact With Potable Water
When painting PVC designed for potable water systems, the author recommends selecting materials specifically rated safe for contact with drinking water.
Approved coating methods and application practices that prevent leaching and preserve pipe integrity should be used.
Finally, finished work should be verified through testing and certification to meet local plumbing and health standards.
Safe Material Selection
Several factors determine whether painted PVC pipe remains safe for potable water use, chief among them the choice of primer, paint, and any solvents or additives.
The material selection prioritizes low-toxicity, certified products and avoids volatile or plasticizing compounds that can leach. Compatibility with PVC prevents substrate breakdown and reduces particulate release.
Manufacturers’ data sheets and NSF/ANSI 61 compliance guide appropriate choices; testing or consultation is recommended for atypical formulations.
- Choose NSF/ANSI 61-listed primers and paints.
- Prefer water-based, low-VOC formulations.
- Avoid solvents that soften PVC (e.g., strong ketones).
- Verify pigment and additive inertness.
Approved Coating Methods
Describe approved coating methods that maintain potable-water safety by specifying surface preparation, compatible primers and paints, application techniques, and curing protocols. The process requires cleaning with mild detergent, scuffing with fine abrasive, and rinsing thoroughly. Use FDA‑compliant or NSF‑61‑listed primers and paints formulated for potable-water contact. Apply thin, even coats by brush, roller, or spray, allowing recommended flash times. Maintain ventilation and temperature per product data. Cure fully to manufacturer specifications before service. Inspect for pinholes and recoat only with compatible materials.
| Step | Visual |
|---|---|
| Clean | cloth, water |
| Scuff | fine abrasive |
| Prime | thin coat |
| Paint/Cure | even layers, dry |
Testing And Certification
Testing and certification guarantee coatings applied to PVC pipe meet safety standards for potable water by verifying material composition, adherence, and performance under service conditions.
Third parties evaluate coatings for extractables, leaching, and toxicological risk. Applicants submit formulations and test reports demonstrating resistance to chlorinated water, temperature cycling, and mechanical stress.
Regulatory agencies reference ANSI/NSF protocols and local plumbing codes when approving products. Traceable labeling and batch documentation enable field verification.
Periodic retesting guarantees continuing compliance as formulations change.
- Laboratory extractables and leachate analysis
- Adhesion and abrasion testing
- Accelerated aging and temperature cycling
- Certification documentation and labeling
How to Use Color-Coding on PVC Pipe for Identification
Apply standardized color bands to PVC pipe to convey contents, flow direction, or hazard level at a glance.
Technicians should select industry or facility color standards, clean and prime the surface, then apply durable, UV-resistant paint or adhesive bands. Use stencils or tape for consistent widths and include directional arrows where flow matters.
Label bands with text or symbols for ambiguous fluids. Allow proper curing and inspect for adhesion. Maintain records of the coding scheme and update schematics.
Periodically recheck and touch up worn markings to guarantee ongoing clarity for maintenance, safety, and emergency response.
How to Achieve Faux Finishes and Textures on PVC Pipe
Transforming plain PVC pipe into convincing wood grain, metal, stone, or textured architectural elements starts with selecting compatible paints, primers, and surface-prep techniques that bond to smooth plastic.
The process uses layering, faux tools, and sealers to mimic materials without adding bulk. Light sanding and plastic primer guarantee adhesion; base coats establish hue. Glazes, dry-brushing, stippling, and dragging create grain, patina, or mottling. Protective clear coats preserve texture and resist handling.
- Sand and prime for adhesion.
- Apply opaque base coat.
- Build texture with glazes and tools.
- Seal with appropriate clear coat.
How to Paint PVC Pipe in Tight or Awkward Spaces
Working in tight or awkward spaces requires planning and compact tools to guarantee even adhesion and finish on PVC pipe where access is limited.
Preparation includes cleaning and sanding reachable areas, masking adjacent surfaces, and choosing low-VOC spray paints or thin brushes.
Use telescoping extension poles with small roller covers for constrained runs, angled mini-brushes for seams, and handheld portable airbrushes for controlled coats.
Apply multiple light coats rather than one heavy coat to avoid runs. Allow recommended drying time between coats.
Inspect with a mirror or flashlight to catch missed spots. Remove masking after final cure to avoid edge lift.
How to Estimate Cost and Time for a PVC Paint Project
Estimating cost and time for a PVC paint project requires breaking the job into measurable tasks—surface prep, priming, painting, drying, and cleanup—and assigning material quantities, labor hours, and contingency to each.
The planner calculates surface area, estimates primer and paint volume based on coverage, and adds supplies (sandpaper, tape, masks). Labor is timed per task with skill-level adjustments; drying adds fixed wait periods.
A contingency of 10–20% covers errors or extra coats. The result is a task sheet with costs and a timeline that supports bidding, scheduling, and material procurement.
- Measure surfaces and compute material needs
- Time tasks and assign labor rates
- Add supplies and contingency
- Compile cost and timeline summary
How to Choose Eco-Friendly Paints for PVC Projects
Choosing eco-friendly paints for PVC projects requires evaluating both environmental impact and technical compatibility: the ideal product balances low-VOC or zero-VOC formulations, durable adhesion to smooth plastic surfaces, and resistance to cracking or peeling.
Select paints labeled for plastics or with adhesion promoters formulated for PVC. Prefer water‑based acrylics certified by reputable eco-labels (Green Seal, EU Ecolabel) and check solvent content and pigment safety.
Test adhesion on a scrap piece after recommended priming. Consider longevity to reduce repainting frequency. Avoid heavy metal pigments and strong solvents.
Read technical data sheets for cure times, temperature limits, and recommended topcoats.
How to Dispose of Leftover Paint and Cleanup Materials Safely
After selecting low-VOC or water‑based paints for PVC projects, attention should turn to proper disposal and cleanup to minimize environmental and health risks.
The practitioner should segregate unusable paint, allow small amounts to harden with kitty litter or commercial hardener, and transport liquids to a local hazardous waste facility.
Rags and brushes contaminated with solvent-based products require sealed containers and hazardous-waste disposal; water‑cleaned tools may be rinsed into sanitary sewers only where local regulations permit.
Empty cans and plastic trays should be recycled if clean.
Always consult municipal guidelines and wear gloves to limit chemical exposure.
- Harden small quantities
- Use hazardous-waste drop-offs
- Contain contaminated rags
- Recycle clean containers
How to Test Adhesion Before Committing to a Full Paint Job
Begin with a small, representative trial to verify that the chosen primer and paint will bond to the PVC under the project’s conditions.
Clean and sand a scrap piece or hidden section, apply primer per instructions, then paint a single coat.
Allow full cure time, then perform a tape test: press high-quality painter’s tape, smooth, and remove sharply.
Inspect for lift or peeling. Optionally perform a cross-hatch adhesion test and a solvent rub to check chemical resistance.
Record results and note surface prep steps.
If adhesion fails, try alternative primer, increased abrasion, or a different paint formulation before proceeding with the full job.
How to Plan Maintenance and Touch-Ups for Painted PVC
A simple, documented maintenance plan helps preserve painted PVC’s appearance and performance: schedule routine inspections every 6–12 months, note locations prone to abrasion or UV exposure, and keep a small touch-up kit (matching paint, primer, sandpaper, and cleaner) on hand.
The plan should record findings, materials used, and dates of repairs to track longevity and color matches. For minor damage, sand, clean, prime, and apply thin coats, allowing full cure between layers. For larger areas, assess whether repainting is more effective.
- Inspect and document condition
- Prepare a labeled touch-up kit
- Follow consistent repair steps
- Log dates and materials
How to Avoid Common Mistakes People Make When Painting PVC
Common failures often stem from inadequate surface preparation, such as leaving oil, dirt, or glossy sheen on the PVC.
Selecting the wrong paint or skipping a primer can lead to poor adhesion, peeling, or uneven finish.
Addressing both prep and paint choice up front reduces rework and extends the life of the coating.
Surface Preparation Matters
Surface preparation determines whether paint will bond to PVC or peel away after a short time. Proper cleaning, degreasing, and light abrasion create a receptive surface. Dust, oil, and factory release agents prevent adhesion and cause premature flaking.
Scuffing with fine sandpaper or a Scotch-Brite pad increases surface area without damaging the part. Rinse thoroughly and allow complete drying; trapped moisture undermines bonding. Mask adjacent areas and support parts to avoid contaminating the prepared surface.
Test a small, inconspicuous area before committing. Follow recommended curing intervals after primer application to guarantee a durable, long-lasting finish.
- Clean thoroughly
- Degrease
- Lightly abrade
- Dry completely
Choose Proper Paint
Once the PVC is clean, dry, and lightly abraded, the next decision is selecting paint and primer formulated for plastic—using the wrong product is the most frequent cause of peeling and poor coverage.
Choose a high-quality plastic primer or a bonding primer specifically labeled for PVC; skip latex or water-based primers unless specified.
Use acrylic enamel or spray paints designed for plastic for topcoats, matching indoor or outdoor formulas to exposure.
Check adhesion tests on a scrap piece before full application.
Allow recommended flash times between coats, follow manufacturer cure times, and avoid oil-based paints that can crack or yellow on PVC.
How to Tell When PVC Pipe Needs Repainting or Replacement
How can one determine whether PVC pipe requires repainting or full replacement?
Visual inspection, surface adhesion, and functional integrity guide the decision. Minor fading, chalking, or peeling limited to the coating usually indicates repainting; cracks, deep gouges, or deformation signal replacement.
Consider age, exposure, and performance symptoms such as leaks or brittle texture. If repairs recur or structural compromise is evident, replacement is prudent.
- Assess surface condition: flaking paint vs. underlying cracks.
- Test adhesion: light sanding reveals sound substrate.
- Check for leaks, soft spots, or warping.
- Factor age, exposure, and maintenance history.
Conclusion
A homeowner remembered painting a warped garden trellis—each careful stroke transformed brittle slats into a neat, weatherproof border—so painting PVC can likewise extend life and improve looks. Studies show properly primed PVC retains coatings far longer than unprimed surfaces, much like sealing wood prevents rot. With the right primer, paint and prep, routine checks and small touch-ups keep lines crisp; treat PVC like any exterior asset, and it rewards with dependable, longer-lasting performance.