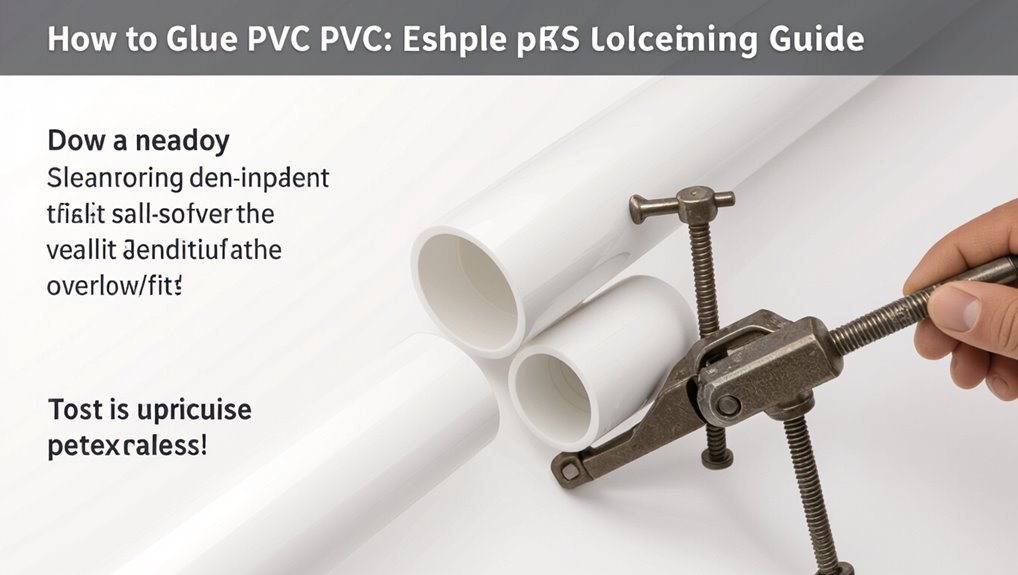
How to Glue PVC Pipe: Simple Step-by-Step PVC Cement Guide
To effectively glue PVC pipe, follow these essential steps:
- Preparation: Measure and square-cut the pipe. Deburr and clean the ends thoroughly.
- Applying Primer: If required, apply primer to the surfaces.
- Cement Application: Brush a thin, even coat of solvent cement onto both the socket and the pipe.
- Joining: Insert the pipe into the socket with a quarter turn to distribute the adhesive evenly.
- Setting: Hold the joint until it sets, then wipe away any excess cement.
- Curing: Follow the manufacturer’s recommended cure times before pressurizing the system.
Key Takeaway: Proper preparation and application are crucial for a strong bond when gluing PVC pipe. Always consult safety guidelines and local codes for compliance.
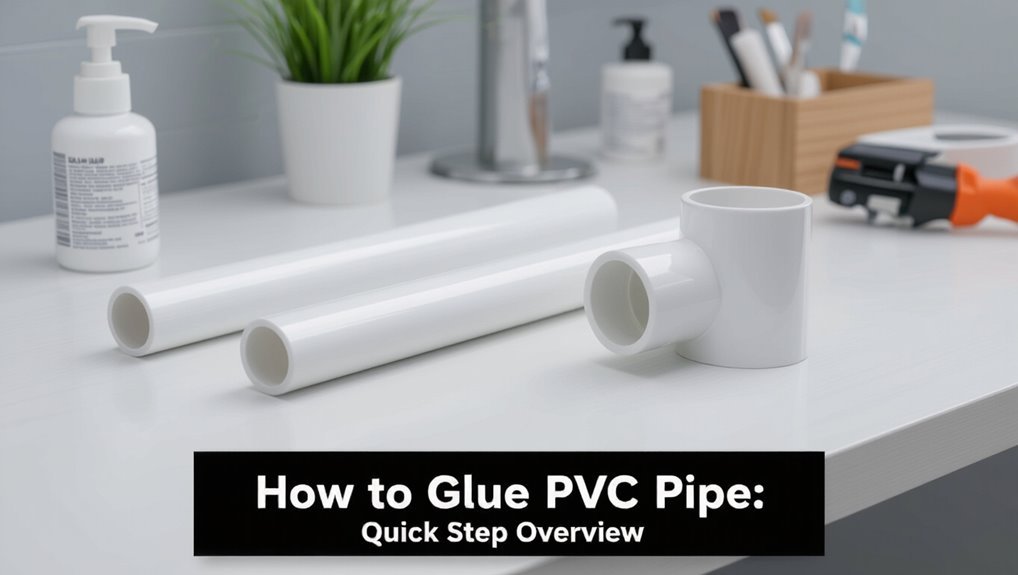
How to Glue PVC Pipe: Quick Step Overview
Begin by gathering the necessary materials—PVC pipe and fittings, PVC primer and cement, a clean rag, and a measuring tool—then confirm the pipe ends are cut square and deburred.
Next, mark insertion depth on the pipe and dry-fit components to verify alignment. Clean mating surfaces with a rag, remove dust and grease.
Apply primer where appropriate, then apply an even coat of cement to pipe exterior and fitting interior.
Immediately push and twist the pipe into the fitting until the depth mark aligns, holding for the specified set time. Wipe away excess cement and allow curing before testing the joint.
Why PVC Solvent Cement Works
Understanding is rooted in chemistry: PVC solvent cement works by softening and fusing the mating surfaces so they become a single, continuous piece. The solvent in the cement temporarily dissolves the PVC polymer chains at the interface.
When assembled and allowed to cure, those chains interdiffuse and re-solidify, producing a joint with mechanical integrity similar to the parent material. Proper fit, adequate application, and curing time determine joint strength.
Failure usually stems from contamination, insufficient solvent, or movement before cure. Benefits include leak-resistant seals and uniform stress distribution across the joint.
- Surface activation
- Chain interdiffusion
- Re-solidification
- Structural continuity
When to Glue PVC Pipe Versus Mechanical Fittings
When is solvent-weld preferred over mechanical fittings depends on the application’s permanence, pressure requirements, accessibility, and material compatibility.
Solvent-weld joints provide permanent, leak-resistant bonds ideal for buried lines, pressurized water, and systems where disassembly is unlikely.
Mechanical fittings suit temporary setups, areas requiring periodic maintenance, or mismatched materials where adhesives aren’t compatible.
Consider vibration, thermal expansion, and code requirements: some jurisdictions mandate solvent-weld for potable water or certain pressures.
Also weigh installation speed and skilled labor availability.
Ultimately choose based on long-term reliability versus serviceability, ensuring selected method meets pressure ratings and local regulations.
Tools & Materials You’ll Need
Before beginning, the writer lists required safety gear, the basic tools, and the specific materials so readers know what to have on hand.
Protective gloves and eye protection are recommended, while a pipe cutter, deburring tool, and applicator brush cover the tool needs.
PVC primer, cement, and clean rags complete the materials and supplies.
Safety Gear Needed
Personal protective equipment is essential for safe PVC gluing: chemical-resistant gloves, eye protection, and a respirator or mask designed for organic vapors protect against solvent cement fumes and accidental skin contact.
The worker should choose gloves rated for solvents, splash goggles or safety glasses with side shields, and a respirator with organic vapor cartridges when ventilation is inadequate.
Long sleeves and a lab coat prevent skin exposure and contamination of clothing.
A well-ventilated workspace and a simple first-aid kit complete precautions.
Proper PPE selection reduces acute and chronic risks associated with PVC solvent cements.
- Gloves
- Eye protection
- Respirator
- Protective clothing
Necessary Tools List
A concise inventory of tools and materials helps secure a smooth PVC gluing job: essentials include solvent cement formulated for PVC, a compatible primer, clean rag or paper towels, a fine-tooth saw or pipe cutter, a deburring tool or utility knife, a file or sandpaper, measuring tape and marker, and appropriate-size clamps or support straps for alignment.
Additional useful tools include a square or chamfer tool to guarantee straight cuts, gloves to protect hands, safety glasses, and a small brush or dauber for applying primer and cement.
A workbench or stable surface and disposable mixing surface complete the practical toolkit for efficient assembly.
Materials And Supplies
Successful PVC bonding depends as much on the right materials as on proper technique.
The writer lists essential supplies: PVC pipe and fittings matched by schedule and diameter; a suitable PVC primer and cement rated for the appropriate application (pressure, DWV, solvent type); clean, lint-free cloths and a deburring tool or file to remove burrs and chamfer edges; and safety gear—nitrile gloves, eye protection, and adequate ventilation or a respirator.
Proper selection prevents leaks and chemical incompatibility. Quality materials plus correct storage and handling guarantee consistent joints and long-term performance.
- PVC pipe and fittings
- Primer and cement
- Cleaning/deburring tools
- Safety gear
Choosing PVC Cement: Pressure Versus Drain Lines
Different jobs call for different cements: pressure systems (water supply) require formulations rated for working pressure and often include a primer-compatible or all-weather solvent, while drain, waste, and vent (DWV) lines use lower-strength, non-pressurized cements designed for easier flow and gap fill.
Pressure-grade cements bond tightly and cure to withstand internal pressure cycles; they match pipe and fitting schedules. DWV cements prioritize handling and tolerance to misalignment, offering longer working time and thicker paste.
Selecting the correct type prevents failures, preserves system integrity, and guarantees code compliance; misuse risks leaks, joint failure, and costly repairs.
Reading Cement and Primer Labels Safely
Before using any cement or primer, the reader should read label warnings to understand hazards and required precautions.
They should check compatibility charts to confirm the product matches the pipe type and application.
They must follow ventilation instructions to reduce inhalation risks and guarantee a safe working environment.
Read Label Warnings
When handling PVC cement and primer, the label is the primary source of safety and usage instructions; it lists required personal protective equipment, ventilation recommendations, and first-aid steps.
The reader should scan hazard statements, signal words (Danger/Warning), and pictograms to gauge acute risks.
Attention to storage, shelf life, and disposal prevents degradation and environmental harm.
Follow application temperature ranges and cure times for safe handling.
- Note required PPE and fitment instructions.
- Observe ventilation rates and avoid confined-space use.
- Record first-aid measures and emergency contacts.
- Respect storage, expiry, and disposal directions.
Check Compatibility Charts
How should one verify that a chosen cement and primer are appropriate for a given PVC type and service condition?
Reference manufacturer compatibility charts and product datasheets to confirm resin type (PVC, CPVC, ABS), pipe schedule, and pressure ratings.
Match chemical resistance and temperature limits to the appropriate service (potable water, drainage, industrial fluids).
Note listed application methods, cure times, and any banned combinations.
Cross-check primer recommendations and solvent-based variations.
When in doubt, contact technical support or consult industry standards (ASTM/NSF) cited on the chart.
Document the selected products and chart version before beginning assembly to guarantee traceability.
Follow Ventilation Instructions
Although often overlooked, ventilation instructions on PVC cement and primer labels are critical for safe use and must be read and followed carefully.
The labels specify required airflow, allowable exposure times, and when respirators are necessary. Users should position work outdoors or near open windows, avoid confined spaces, and remove ignition sources.
Proper ventilation reduces inhalation risk and prevents vapor buildup. Failure to follow directions can cause dizziness, respiratory irritation, or fire hazards.
Read labels before starting, follow any local regulations, and adjust methods for temperature and humidity to maintain recommended ventilation.
- Work location
- Airflow rate
- Respiratory protection
- Ignition control
Measuring, Marking, and Layout for Glued Runs
Before any solvent cement is applied, precise measuring, marking, and layout guarantee joints align correctly and the run functions as designed. Measure from fixed reference points, accounting for socket depth and insertion allowance so assembled lengths match plans.
Mark pipe ends and mating fittings with alignment arrows or witness marks to confirm rotational orientation. Dry-fit the entire assembly to verify clearances, slope for drainage, and accessibility of joints and valves.
Check for interference with structures and plan support spacing. Record cut locations and label segments if disassembly is required. Recheck measurements just before solvent application to avoid costly mistakes.
How to Cut PVC Pipe Straight and Deburr
Before cutting, the installer verifies measurements and transfers marks squarely around the pipe to guarantee accurate lengths.
A straight, clean cut is made with an appropriate saw or cutter, keeping the blade perpendicular to the mark.
The edge is then deburred and lightly chamfered to remove burrs and facilitate proper fit and glue flow.
Mark And Measure
Accurate marking and clean cuts are essential for reliable PVC joints, so measuring twice and cutting once prevents leaks and misfits.
The installer measures lengths from fixed reference points, allowing for socket depth and fitting tolerances. Marks are made with a fine-tip pencil or washable marker, aligned circumferentially to guide a square cut.
When fitting multiple pieces, dry-assemble to confirm lengths before final cuts. Measure and mark in a well-lit, flat workspace to avoid errors.
- Confirm reference points and account for fitting insertion depth.
- Use a consistent, visible marking method.
- Mark around the pipe for alignment.
- Dry-fit before final cutting.
Square Cut And Deburr
With measurements confirmed and dry fittings checked, attention turns to producing a square cut and cleaning the pipe ends to guarantee a proper bond.
The installer uses a fine-toothed hacksaw, PVC tubing cutter, or miter saw, keeping the blade perpendicular to the pipe to ascertain a flat face.
After cutting, chamfer the outside edge slightly and remove any burrs or shaving inside the socket with a deburring tool, utility knife, or round file.
Wipe away plastic dust and examine the end for cracks or deformation.
A true square, clean end assures full contact, correct insertion depth, and a reliable solvent-weld joint.
Chamfering Pipe Ends: Why and How
Although often overlooked, chamfering PVC pipe ends greatly improves joint fit and adhesive distribution by removing the sharp burr left from cutting.
Chamfering creates a small angled bevel on the outside edge, easing insertion and preventing the cement from being pushed aside. It reduces stress concentrations at the socket, helps solvent flow into the joint, and minimizes misalignment during assembly.
- Use a deburring tool, file, or 45° countersink for a consistent bevel.
- Remove only 1–2 mm to avoid altering pipe dimensions.
- Clean swarf and dust before application.
- Inspect edges for uniformity to guarantee reliable bonding.
Dry‑Fitting PVC Before You Glue
Before applying any solvent cement, the installer should fully dry-fit every component to confirm alignment, fit, and clearance. Each joint is assembled without adhesive to verify socket depth, rotation, and that pipes slide to proper stop.
Fittings and pipes are checked for burrs, obstructions, and correct orientation; any interference or misalignment is corrected by trimming or repositioning.
Dry-fitting also tests routing through tight spaces, access for future maintenance, and confirms part numbers before permanent bonding.
Marking alignment lines on both mating parts guarantees rapid, accurate assembly when solvent cement is applied. Final adjustments are made prior to gluing.
When and How to Use PVC Primer
When joining PVC for pressure or permanent non‑pressure applications, primer is applied any time the manufacturer or local code requires it or when the pipe and fittings show dirt, moisture, or a weathered surface that could prevent proper solvent action.
Primer softens and cleans the joint surfaces, guaranteeing solvent cement chemically welds the materials. It is used on mains, buried lines, and exposed piping when specified.
Apply primer to both male and female ends, allow brief dwell for softening, then assemble. Follow color and ventilation guidelines on the primer label to guarantee safety and compliance.
- Clean surfaces
- Apply primer
- Wait briefly
- Assemble immediately
How Much Cement to Apply: Brush Versus Dauber
The choice between brush and dauber affects cement coverage and the consistency of application across the joint.
Typical guidance specifies a thin, even coat on both socket and pipe with only enough cement to provide full coverage without globs, and recommended amounts vary by pipe diameter.
Any excess should be wiped away promptly with a rag before it skins over to prevent runs and guarantee a clean bond.
Brush Vs. Dauber Coverage
Although both brush and dauber applicators are designed to spread PVC cement, they deliver very different coverage patterns and amounts.
Brushes provide broader, more even coats suitable for larger diameters, while daubers concentrate cement into a smaller area, useful for tight fits or controlled applications.
Choice depends on joint size, access, and desired control. Brushes cover quickly and reduce missed spots; daubers limit excess and drip on small fittings.
Proper technique guarantees solvent-weld strength without waste.
- Brushes: even spread, faster for large pipes.
- Daubers: precision, minimal overflow.
- Accessibility: reach and visibility matter.
- Control: rate of application affects quality.
Amount Per Joint
Adequate cement per joint balances full solvent contact with minimal squeeze-out, varying by applicator and pipe size. The brush delivers thin, even coats on small diameters; the dauber supplies more volume for larger sockets. Apply enough to wet surfaces uniformly without puddling. For schedule 40, one light brush stroke or a single dauber twist often suffices; for larger fittings, increase passes rather than dwell time. Cure depends on joint thickness and ambient conditions; thicker beads do not speed set and can weaken the bond. Refer to typical amounts below.
| Pipe Size | Brush | Dauber |
|---|---|---|
| 1/2″ | light | small |
| 1″ | 1–2 strokes | single |
| 2″ | 2–3 strokes | larger |
Excess Removal Technique
Start by wiping immediately after assembly to prevent solvent puddles from setting and to control squeeze‑out without disturbing the bond.
The choice between brush and dauber affects application thickness and cleanup. Brushes spread thin, even coats for small diameters; daubers deposit more solvent, useful for larger pipes but prone to excess.
Excess removal should be deliberate: wipe radially away from the joint with a lint‑free cloth, check for voids, and reapply sparingly if needed.
Monitor set time; overworking wet cement weakens the joint. Proper technique minimizes waste and guarantees consistent penetration and a reliable seal.
- Brush: thin, controlled coating
- Dauber: faster, heavier deposit
- Wipe: radial removal from joint
- Reapply: minimal, only if voids appear
Glue PVC Pipe: Joining, Timing, and Alignment
Press the prepared PVC pieces together immediately after applying cement, because solvent welding creates a narrow window for proper fusion. The fitter guarantees full insertion, aligns reference marks, and avoids twisting beyond initial rotation. Timing matters: work within the cement’s open time and accommodate temperature effects. Alignment determines flow and structural integrity; verify straightness and required offset before set. Allow tack time without disturbance, then follow cure intervals before pressure testing. Use minimal pressure—enough to seat parts but not to squeeze out excessive solvent.
| Step | Action | Tip |
|---|---|---|
| 1 | Apply cement | Even coat |
| 2 | Insert | Full depth |
| 3 | Align | Match marks |
| 4 | Hold briefly | Avoid movement |
| 5 | Wait | Respect cure time |
Holding and Rotating Joints for a Strong Weld
After seating and aligning the joint, the fitter applies a steady hold while rotating the male part up to a quarter turn to evenly distribute cement and eliminate air pockets.
Consistent pressure prevents slippage and maintains alignment while solvent softens surfaces and wets both faces.
Rotation should be smooth, brief, and controlled to avoid excess squeeze-out. The fitter watches for uniform bead appearance and excess cement removal with a rag.
Proper handling minimizes misalignment and voids, improving joint integrity without stressing the bond during set.
- Prevents misalignment
- Distributes cement evenly
- Reduces air entrapment
- Controls squeeze-out
How Long to Hold a Joint Before Release
Timing is critical when curing a solvent-welded PVC joint: the fitter should hold the assembled pieces steadily until the initial set has taken place, typically 15–30 seconds for small-diameter pipe and up to 60 seconds for larger sizes or in cooler conditions. After release, care should be taken to avoid stress or movement during the full cure time. Short holds can cause loose joints; overly long pressure risks squeeze-out and misalignment. Use consistent contact and verify alignment before letting go. Environmental factors lengthen required hold. Refer to this quick guide for typical holds and conditions:
| Pipe Size | Hold Time | Note |
|---|---|---|
| 1/2″ | 15s | warm |
| 1″ | 30s | normal |
| 2″ | 45s | cool |
| 4″ | 60s | large |
When Glued PVC Is Safe to Handle
After the joint is pressed and the initial set occurs, a waiting period is required before the assembly can be handled to avoid disturbing the bond.
During this cure time the solvent in the cement continues to evaporate and chemically weld the pipe, and premature movement can weaken the joint or release hazardous fumes.
Temporary supports and clamps should remain until the recommended handling time has passed.
Cure Time Before Handling
Curing determines when a glued PVC joint can be handled without risking bond failure; it depends on solvent cement type, pipe size, temperature, and humidity.
Initial set often allows light handling in 15–30 minutes for small pipes at moderate temperature, but full handling strength requires longer. Manufacturer charts give specific waiting times; colder or larger assemblies extend cure periods.
Avoid stressing joints until rated time elapses. For pressurized systems, follow full pressure cure recommendations.
- Check cement label for initial and full handling times.
- Adjust times for temperature and humidity.
- Allow extra time for large-diameter pipe.
- Do not load before rated cure.
Solvent Evaporation Risks
Several factors determine when a glued PVC joint is safe to handle, but solvent evaporation is the primary risk to monitor: if solvents trapped at the interface have not evaporated sufficiently, the joint can be soft, prone to movement, or subject to delayed failure.
Evaporation rate depends on cement type, ambient temperature, humidity, and joint design. Heavy application or restricted clearance slows solvent escape and extends handling time.
Detect firmness by gentle pressure at multiple points; tacky, pliable, or depressible areas indicate incomplete evaporation.
Allow additional time under recommended conditions rather than forcing movement; premature stress risks weakened bonds and leaks.
Temporary Support Removal
Remove temporary supports only when the bonded PVC shows sufficient strength and solvent evaporation is complete: this typically means the joint is firm to touch, free of tackiness, and able to bear light, progressive loads without movement.
The installer inspects joints for consistent bead appearance, absence of gaps, and no solvent odor. If uncertainty remains, wait the full manufacturer’s cure window before applying full service loads.
Gradual load testing reduces stress on immature bonds. Proper support removal prevents joint misalignment and stress fractures, ensuring longevity and leak-free performance in plumbing or structural assemblies.
- Confirm tactile firmness
- Verify visual continuity
- Smell for residual solvent
- Apply staged loading
When to Pressurize a Newly Glued Joint
Although the solvent-weld bond forms quickly, the glued joint requires a specific wait period before pressurization to reach adequate strength; this waiting time depends on pipe size, temperature, and the type of cement used.
Industry guidance typically recommends allowing the joint to set at least the manufacturer’s minimum cure time before applying pressure. For small-diameter residential lines this often means 15–60 minutes for initial handling strength and 2–24 hours for full service pressure, while larger or higher-pressure systems require longer.
Pressure should be introduced gradually and monitored for leaks; if seepage appears, relieve pressure and re-evaluate the joint and cure interval.
How Temperature and Humidity Affect Curing
Because solvent-weld curing is a chemical process, ambient temperature and humidity directly affect how quickly the solvent softens the plastic and how fast the joint sets: warmer, drier conditions speed solvent evaporation and accelerate set times, while cold or very humid conditions slow diffusion and extend cure times.
Practitioners should adjust working time, joint alignment windows, and cure expectations accordingly. Lower temperatures increase required soak and handling times; high humidity can retard solvent escape and prolong tackiness.
Consult product instructions for temperature-specific cure charts and allow extra post-assembly dwell before testing.
- Warm/dry: faster set, shorter working time.
- Cold: slower cure, longer handling time.
- High humidity: extended tack and cure.
- Follow manufacturer cure tables.
Gluing PVC Outdoors Versus Indoors
Outdoor and indoor gluing of PVC require different preparations because environmental variables and access constraints change how solvent cement behaves and how joints must be handled.
Outdoors, wind, dust, and temperature swings demand faster work, wind shields, and often primer/cement rated for lower or higher temperatures; clamps or temporary supports help keep alignment while curing.
Indoors, ventilation and limited space are primary concerns: adequate airflow prevents fume buildup and prolonged tack times, and smaller work areas may allow more controlled curing conditions.
In both settings, cleaners, correct primer, proper application technique, and adherence to manufacturer cure times guarantee reliable, leak-free joints.
Gluing PVC in Tight or Awkward Spaces
When access is limited and visibility is poor, gluing PVC in tight or awkward spaces requires compact tools, careful planning, and steady technique to confirm proper solvent welds.
The technician prepares by measuring twice, marking alignment, and using short strokes with a small applicator. Debris and moisture are cleared; primer and cement are applied sparingly to avoid excess runoff.
A twisting insertion ensures full coverage while maintaining alignment; excess cement is wiped immediately. Allow full cure time without disturbance.
Work from easiest joints to hardest, keeping spare applicators and a flashlight close for consistent, safe results.
- Plan
- Prep
- Apply
- Cure
Joining Different PVC Schedules Together
When joining different PVC schedules, the installer must guarantee the socket size matches the hub of the adjoining piece to maintain a proper fit.
Where sizes or schedules differ, using the correct connection fittings provides a secure, code-compliant connection.
Proper preparation and alignment remain essential before applying solvent cement.
Matching Socket To Hub
Matching a socket to a hub requires attention to the differences between PVC schedules, since wall thickness and outside diameter can vary while nominal pipe sizes remain the same.
The fitter verifies outside diameters, measures wall thickness, and selects a socket or hub that matches the actual dimensions rather than the nominal label. Clean, chamfer, and dry-fit parts to confirm proper engagement depth and gap.
If tolerances differ, use an approved adapter or sleeve designed for the schedules in question.
- Measure OD and wall thickness precisely.
- Dry-fit for engagement and alignment.
- Use correct solvent and apply sparingly.
- Replace damaged or mismatched parts.
Using Transition Fittings
Changeover fittings bridge differences in wall thickness and outside diameter between PVC schedules, providing a reliable mechanical and solvent-welded connection when direct joining would be improper.
The installer selects a fitting rated for both schedules and cleans, deglazes, and primers each mating surface per manufacturer instructions. A thin, even coat of compatible primer readies the joint; solvent cement is applied to both socket and spigot where specified.
Insert with a quarter-turn to evenly distribute cement and fully seat the pipe. Hold position per recommended cure time to prevent movement. Pressure-testing only begins after the full adhesive cure has been achieved.
Gluing CPVC, ABS, and Other Plastics to PVC?
Joining different plastic pipe types to PVC requires careful selection of adhesives and surface preparation because chemical compatibility and thermal expansion differ among materials.
A few plastics bond well with PVC using specific primers and cements; others require connector fittings or solvent weld alternatives. Clean, dry surfaces and manufacturer-recommended primers improve joint strength.
When adhesives are unsuitable, mechanical couplings, flanges, or threaded adapters provide reliable joins. Temperature changes and chemical exposure influence long-term performance; choose materials rated for the service.
Consult product datasheets and local plumbing codes before proceeding to guarantee safety and compliance.
- Confirm material compatibility.
- Use approved primer/cement.
- Prefer connector fittings when unsure.
- Consider mechanical adapters.
Repairing a Leaking Glued PVC Joint
When a glued PVC joint begins to leak, evaluating the failure quickly helps determine whether the repair requires re-bonding, patching, or replacing the fitting.
The inspector should dry the area, remove loose debris, and trace the leak source—joint seam, crack, or adjacent component.
Small seam leaks sometimes respond to reapplication of solvent cement after light sanding and primer; allow full cure.
Hairline cracks merit reinforcement with a vinyl repair sleeve or epoxy putty rated for PVC.
If the fitting is fractured or joint alignment is compromised, replacing that section minimizes recurrence.
Pressure-test after repair and monitor for consistent integrity.
Removing Old Glued Fittings Without Damage
Removing old glued fittings without damaging pipe requires a careful sequence of steps.
First, controlled heat can soften the adhesive to reduce bond strength.
Next, mechanical separation techniques and subsequent cleaning and surface preparation restore the joint for a secure reconnection.
Heat And Soften Adhesive
Apply controlled heat to soften old PVC solvent cement so fittings can be separated without cracking the pipe. The process uses gradual warming to make the adhesive pliable, reducing stress on joints and preserving pipe integrity.
Heat sources must be low-temperature and applied evenly; excessive heat warps PVC and releases harmful fumes. Protective gloves and ventilation are essential. Monitor temperature and stop as soon as the adhesive yields.
- Use a low-temperature heat gun or warm water soak for even heating.
- Keep heat moving; avoid concentrated spots.
- Test joint flexibility frequently.
- Cool gradually before attempting removal.
Mechanical Separation Techniques
Separate glued PVC fittings using controlled mechanical techniques that minimize stress on the pipe and joint. The practitioner applies steady axial force, uses soft-faced mallets, and employs pipe wrenches with protective jaws. Scoring the socket edge with a utility knife reduces bond area; gradual twisting breaks adhesion without cracking. For stubborn fittings, a strap wrench or heat-assisted gentle rotation helps, avoiding concentrated impacts. Inspect for hairline fractures and discard damaged sections. Lubrication with water eases movement during separation. Safety gear—gloves and eye protection—is mandatory. The goal is removal while preserving pipe integrity for later re-bonding.
| Tool | Purpose |
|---|---|
| Strap wrench | Even torque |
| Utility knife | Score socket |
| Soft mallet | Controlled impact |
Cleaning And Surface Prep
After mechanical techniques have loosened or freed a glued fitting, attention shifts to cleaning and preparing the mating surfaces to avoid contamination and guarantee a reliable re-bond.
Remaining solvent cement, debris, and rough edges are removed with a utility knife, coarse cloth, and emery cloth; avoid gouging the pipe.
Solvent or acetone cleans oils and dust; dry thoroughly.
Lightly chamfer the pipe end to restore proper fit.
Inspect for cracks or warping; discard damaged parts.
Proper prep guarantees even cement flow and strong joints.
- Remove bulk cement and burrs
- Degrease with solvent
- Lightly sand and chamfer
- Inspect and replace if damaged
Common Mistakes That Weaken PVC Joints
Common errors during PVC assembly often stem from rushed preparation, improper fit, and misuse of solvent or primer; each can greatly reduce joint strength and lead to leaks or failures.
Inadequate cleaning leaves contaminants that block solvent action. Applying excess or insufficient cement prevents proper fusion; puddling weakens or clogs. Skipping primer on schedule or using wrong type weakens chemical bonding.
Forcing misfitting parts stresses the joint and creates uneven bonding surfaces. Allowing movement before full cure disturbs the solvent weld.
Reusing old, dried cement or solving poor storage conditions yields inconsistent results and brittle joints prone to cracking.
Preventing Misalignment and Offsets in Runs
Mistakes that weaken PVC joints often create or compound alignment problems when sections are pushed or twisted to fit; preventing misalignment and offsets in runs requires attention to layout, support, and handling from the start.
The installer should dry-fit every section, mark alignment, and verify slope before cement. Use proper clamps and saddles to hold pipe steady while curing.
Avoid forcing fittings; separate and reface if interference occurs. Control thermal expansion and allow access for adjustments.
- Dry-fit and mark
- Support at regular intervals
- Recut or reface misfits
- Respect thermal movement
Managing Solvent Cement Fumes Safely
How should installers manage solvent cement fumes to protect health and prevent fire hazards?
Installers should use solvent cement in well-ventilated areas, opening windows and using fans to direct vapors away from breathing zones.
Work outdoors when possible or localize ventilation with exhaust fans.
Store and open cans away from ignition sources; keep lids closed between uses.
Avoid creating sparks with tools or electrical equipment near fumes.
Allow joints to cure fully before entering confined spaces.
Dispose of rags and residues in metal containers with tight lids.
Monitor for strong odors and stop work if symptoms like dizziness occur, seeking fresh air immediately.
PPE You Should Wear When Gluing PVC
Because solvent cement and primer can irritate skin, eyes and lungs, installers should wear specific personal protective equipment when cutting, priming or gluing PVC.
Gloves resist solvents and protect skin from chemical burns; nitrile is common. Safety glasses or goggles shield eyes from splashes and flying debris. A respirator with organic vapor cartridges reduces inhalation of fumes in enclosed or poorly ventilated areas.
Long sleeves and pants protect exposed skin and reduce accidental contact; close-toed shoes complete basic protection. Proper PPE minimizes acute injuries and chronic exposure risks, improving safety and confidence during PVC joining tasks.
- Gloves (nitrile)
- Safety glasses/goggles
- Respirator (organic vapor cartridges)
- Long sleeves, pants, closed-toe shoes
Storing PVC Cement and Primer Correctly
Proper storage of PVC cement and primer preserves performance and reduces waste.
Containers should be kept within the manufacturer’s recommended temperature range and sealed tightly to prevent evaporation and contamination.
Users should monitor shelf life, practice first-in/first-out rotation, and discard products past their expiration.
Storage Temperature Range
When stored outside their recommended temperature range, PVC cement and primer can thicken, separate, or develop skin that reduces effectiveness and shortens shelf life.
Temperatures between 40°F and 90°F (4°C–32°C) are generally advised; extremes accelerate solvent loss or cause freezing. Containers should be kept sealed, upright, and insulated from direct heat or cold.
Rapid temperature swings increase risk of condensation inside cans, degrading chemistry.
- Store at stable, moderate temperatures to preserve viscosity and solvent balance.
- Avoid freezing; thawing can cause phase separation.
- Keep away from direct sunlight and heating sources.
- Use insulated storage for seasonal extremes.
Shelf Life And Rotation
Though often overlooked, shelf life and rotation are critical for maintaining the effectiveness of PVC cement and primer. Manufacturers typically specify expiration dates based on solvent balance and container integrity, and using products past those dates can result in poor solvent action, incomplete fusion, and weakened joints.
Stock should be rotated using first-in, first-out: place new cans behind older ones and label receipt dates. Store opened containers tightly closed upright to minimize solvent loss.
Discard cans showing separation that won’t re-emulsify, hardened residue, foul odor changes, or bulging lids. Regular inspection guarantees reliable bond strength and code-compliant installations.
How to Test Joints for Leaks and Strength
A visual and pressure check confirms a glued PVC joint is watertight and mechanically sound before it returns to service.
The joint is inspected for uniform cement fillets, gaps, and misalignment. After cure, a low-pressure water test is applied, observing fittings and seams for drips.
For systems requiring higher assurance, a pneumatic test at controlled low pressure with appropriate safety measures verifies integrity.
Mechanical load or torque checks ascertain the joint withstands expected stresses without rotation or loosening.
Document results and mark tested sections to facilitate future maintenance and warranty validation.
- Inspect visually
- Perform water test
- Conduct controlled pressure test
- Record and mark results
Preparing Glued PVC for Paint or Insulation
Prepare the glued PVC surface by ensuring it is fully cured, clean, and free of solvent cement residue that can interfere with paint or insulation adhesion.
Once cured per manufacturer time, wipe the joint with a lint-free cloth and isopropyl alcohol to remove oils and dust.
Lightly scuff glossy areas with fine-grit sandpaper to promote mechanical adhesion, then remove sanding dust.
For painting, apply a primer or PVC-compatible primer/paint system; for insulation, use vapor-retardant wrap or foam rated for PVC contact.
Allow recommended dry times between coats or before installing insulation to prevent trapping solvents or moisture.
Estimating How Much Cement You’ll Need
Estimating the amount of PVC solvent cement required depends on pipe diameter, joint type, and number of fittings to be joined; smaller diameters and simple slip-fit joints use only a few milliliters each, while large-diameter or multiple-socket assemblies consume noticeably more.
A practical estimate uses average consumption per joint multiplied by joint count, adding a small allowance for waste and misapplication. Consider different cement types and application methods, which change usage rates. Record actual consumption on the first few joints to refine estimates for larger projects.
- Count joints and fittings.
- Use per-joint consumption tables.
- Add 10–15% waste allowance.
- Track initial usage.
Gluing PVC for Pressurized Water (Code Notes)
When working with PVC on pressurized water lines, installers must follow applicable code requirements for materials and joint methods.
Approved, pressure-rated solvent cement and matching pipe/fittings are required to guarantee a watertight, durable bond.
Inspectors typically check for proper product labeling, correct application, and compatibility with the system’s pressure class.
Code Compliance Requirements
Several plumbing codes and standards govern the adhesive joining of PVC used for pressurized potable and nonpotable water systems, requiring approved solvent cements, specified joint preparation, and pressure-rated pipe and fittings to guarantee long-term integrity.
Inspectors and installers must follow local building codes, manufacturer instructions, and reference standards (ASTM, NSF) addressing materials, application, curing, and testing.
Permits and inspections may be required for alterations to pressurized systems. Documentation of listed products and adherence to listed pressure classes help assure compliance and insurance acceptance.
- Use only listed cements and fittings.
- Prepare joints per code.
- Maintain ambient and cure conditions.
- Keep product documentation.
Pressure-Rated Solvent Cement
Pressure-rated solvent cements are specially formulated and tested to create chemically welded joints that meet the mechanical and pressure requirements for potable and nonpotable water systems. They differ from general-purpose cements by viscosity, cure profile, and qualified listings against standards such as ASTM D2564 and NSF/ANSI 61.
Installers must match cement type to pipe material, pressure class, and ambient conditions. Certification markings and manufacturer instructions dictate allowable joint configurations, open time, and cure schedules.
Using non-pressure-rated or incorrectly sized cement risks leaks and code violations. Proper application, joint preparation, and adherence to listed cure times guarantee reliable, code-compliant pressure piping assemblies.
Gluing PVC for Drainage and Venting Systems
Gluing PVC for drainage and venting systems requires attention to joint fit, solvent selection, and proper curing to assure leak-free, code-compliant connections.
The installer guarantees pipes are clean, chamfered, and dry; uses a primer where required; and applies a PVC solvent cement rated for DWV systems.
Proper alignment and full insertion prevent sagging or back-pitch. Allow ample cure time before testing; cold or humid conditions extend set times.
Follow local plumbing codes for trap primer connections and roof vent termination.
- Clean and deburr
- Prime if code requires
- Use DWV-rated cement
- Respect cure times
Gluing PVC for Irrigation and Outdoor Plumbing
Outdoor PVC irrigation and plumbing jobs demand attention to sunlight, soil conditions, and system pressure because UV exposure and ground movement affect joint integrity over time.
Use ultraviolet-resistant pipe or wrap exposed sections. Select cement rated for outdoor use and appropriate primer where required. Clean and dry fittings; deburr and chamfer pipe ends to guarantee full contact.
Apply primer sparingly, then a uniform layer of cement to both socket and spigot, push together with a quarter-turn, and hold briefly. Allow extended cure times in cooler or wet soil.
Backfill carefully to avoid shifting joints and label buried lines for future maintenance.
Troubleshooting Curing and Joint Failures
Failures in PVC joints often become apparent after installation, especially when lines are exposed to sunlight, shifting soil, or variable temperatures that affect cure time and bond strength.
The inspector should document visible gaps, softened solvent, or brittle connections. Pressure-test sections before backfilling and after cure window; record leak locations and ambient conditions.
Common causes include insufficient cleaning, under-applied primer or cement, rapid movement during cure, and incompatible materials.
- Check for proper primer presence and even cement coverage.
- Verify correct assembly time and solvent set duration.
- Inspect for mechanical stress or misalignment at joints.
- Replace affected fittings and retest.
When to Call a Pro Instead of DIYing
When multiple fittings, buried lines, or integrated systems are affected, contacting a licensed plumber is advisable because the scope and interdependence of components can exceed typical DIY skills.
Situations involving permits, local building codes, or inspections should be handled by someone familiar with regulatory requirements to avoid violations or failed inspections.
A professional can also provide documented work and warranties that DIY repairs usually do not offer.
Complex System Repairs
Assess the scope and risk before attempting repairs that involve a building’s main plumbing, HVAC, or structural systems: these projects often require specialized tools, permits, and diagnostic skills beyond basic PVC gluing.
A professional should be contacted when failures affect system integrity, safety, or continuous operation. Complex leaks, concealed pipe fractures, pressure irregularities, or interactions with gas or electrical elements exceed routine PVC joint repair.
Trained technicians offer proper diagnosis, repair plans, warranty, and liability coverage. Homeowners should prioritize minimizing damage and ensuring code-compliant solutions by hiring qualified contractors for these high-risk scenarios.
- Hidden leaks
- Structural impact
- System-wide failures
- Safety hazards
Permit Or Code Issues
If local building codes, permit requirements, or HOA rules apply to a planned plumbing modification, a homeowner should consult a licensed professional rather than proceeding as a DIY project.
Permits, inspections, and code compliance vary widely; incorrect materials, joint methods, or venting can create hazards and fail inspections.
Licensed plumbers understand regional codes, obtain necessary permits, and provide documented work that preserves insurance and resale value.
For multi-unit buildings, sewer tie-ins, buried mains, or work affecting structural elements, hiring a pro avoids fines and rework.
When uncertainty exists about scope or compliance, engaging a qualified contractor is the prudent course.
Documenting Glued PVC Work for Permits
Many jurisdictions require clear documentation of glued PVC assemblies before issuing plumbing permits, so installers should prepare concise records that show materials, joint types, and adhesive specifications.
Records should include measured pipe sizes, fittings, solvent cement brand and type, cure times, and primer use where required. Photographs of completed joints and serial-numbered labels on assemblies aid inspection.
Accurate dates, installer name, and reference to applicable code sections complete the file.
- Materials list: pipe, fittings, solvent, primer
- Joint details: socket depth, alignment, technique
- Evidence: photos, labels, cure logs
- Compliance: codes cited, installer signature
Safer Disposal and Low‑VOC Cement Options
While documenting glued PVC work for permits addresses inspection and traceability, attention must also turn to how leftover solvent, rags, and partially used cement are handled and to alternatives that reduce volatile organic compound (VOC) exposure.
Disposal should follow local hazardous-waste rules: store contaminated rags in metal containers with tight lids, label partially used cans, and take waste to designated collection sites.
For reduced emissions, consider low-VOC or water-based PVC cements certified by recognized standards. Use minimal amounts, work outdoors or with ventilation, and wear appropriate respirators.
Proper procurement, storage, and disposal reduce health risks and environmental impact.
Pro Checklist for Perfect Glued PVC Joints
When preparing to glue PVC, a concise, ordered checklist guarantees consistent, leak‑free joints: verify pipe and fitting sizes and schedules, cut squarely and deburr ends, dry‑fit assemblies for alignment, clean and prime surfaces as required, apply the correct amount of cement evenly, assemble with the proper rotation and seating time, and secure joints until set.
A pro follows a disciplined routine: work in a ventilated area, use matching materials, measure twice, and mark insertion depth. Maintain tool cleanliness and replace old cement. Inspect cured joints for gaps or excess adhesive and test under pressure before regular use.
- Verify materials and fitment
- Prepare and clean surfaces
- Apply cement and assemble correctly
- Cure, inspect, and pressure‑test
Conclusion
A homeowner follows the simple steps, and by chance the first joint tested holds perfectly — a reminder that careful preparation and the right cement often coincide. The guide shows why solvent welding bonds chemically, when mechanical fittings are preferable, and which cements suit pressure or drain lines. Even so, if doubts or permit needs arise, a pro’s involvement coincidentally proves prudent. Safe disposal and low‑VOC choices complete the responsible approach.